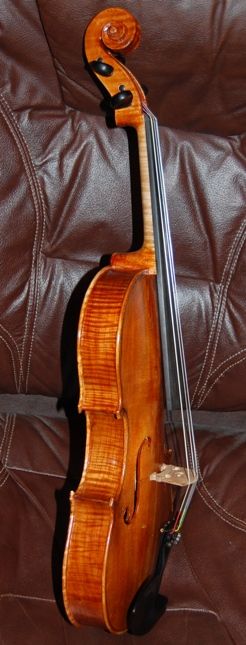
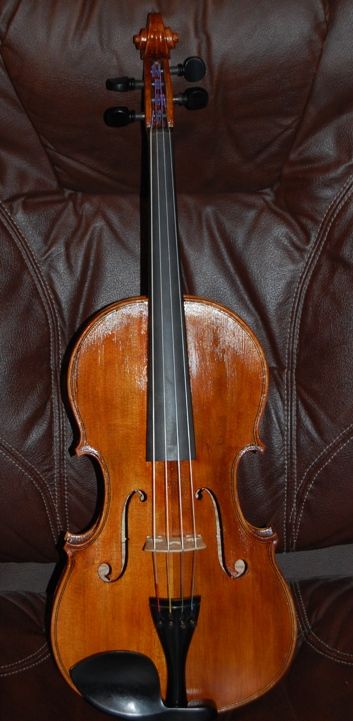
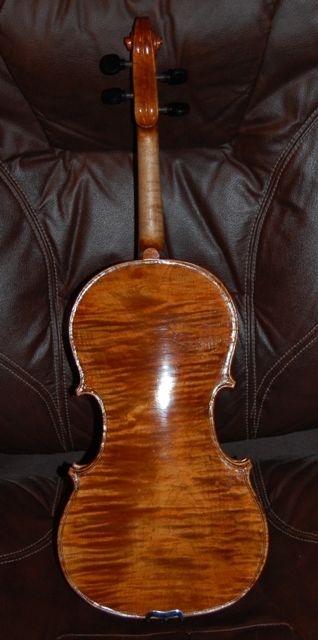
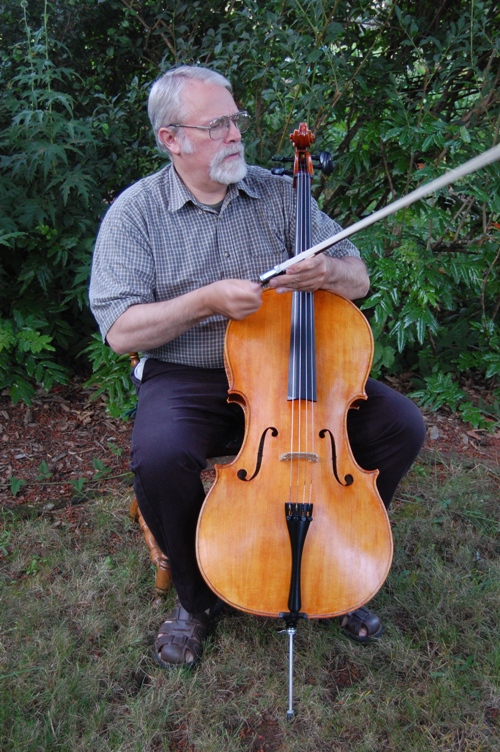
This viola is made of Sitka spruce with a Red-maple, one-piece back. It also has a Red Maple neck, and Big-leaf maple ribs, with willow linings and Sitka spruce blocks.
And…I just completed it this morning (November 30th, 2012), so it is “as new as new can be.”
The colors are a little brighter than reality, as I took this photo with a flash, but that’s the best I can do for now.
I will be participating in a violin-maker’s trade show at “Fairfield Inn & Suites” in Lake Oswego tomorrow afternoon (December 1st). I hope to exhibit six violas, three violins, a cello, and a five-string fiddle.
The show is open from One PM to Seven PM, and is free to all. I hope we get a lot of players attending…it is very encouraging to makers to have players test-driving their instruments.
Bowed instruments have an odd dependency on animal fiber…they depend on the force of a tight, well-rosined horse-hair ribbon driving a tight, carefully tuned string. The resulting friction produces a pattern of vibrations in the string, which is transferred to the bridge, and thus to the soundboard of the instrument. The soundboard and the rest of the instrument dissipate the energy by radiating sound.
Some players are not very aggressive with their bow-strokes. The hair on their bows may last for many years without apparent deterioration. Others need new hair every six months, while still others, very aggressive, may only get a few weeks out of a re-hair.
As long as the only service needed is the replacing of the horse-hair ribbon, the job of re-hairing a bow is not too time-consuming. Very experienced bow-repair craftspeople can rehair a bow in 30 minutes or less. I have known people who could do the job in 20 minutes, and watch television at the same time. I am not one of those people. It takes me an hour, if nothing goes wrong, and I don’t watch TV in the first place, let alone while working on someone else’s bow.
Basswood blocks
Usually, I have to replace the tiny basswood blocks (wedges) that hold the hair in the tip and frog mortises. Cutting a tiny block of wood whose six sides are not parallel, but which is trapezoidal in two directions. and a parallelogram in the third, is tricky, especially when it has to precisely fit a cavity in a very expensive piece of exotic wood. (Most violin-family bows are made of Pernambuco, an endangered species from Brazil. A growing number is made from Ipé or Bloodwood…still exotic, but less scarce.) If the wedge is too tight, it could split the bow-head. Too loose, and the hair will pull out. The same problems exist when cutting the wedge for the frog, but it is a little easier in my experience…there are less angles to worry about.
The hair
The hair itself is fractious, tangling easily, untangling with great difficulty. It expands longitudinally when wet, and shrinks as it dries. I buy the hair in bulk: a one-pound hank looks like a whole tail of a horse. I cut just the right amount of hair from the hank, using a gauge to measure the quantity (some people count the hairs), then tie one end of the hair as tightly as possible with a very strong nylon thread. I trim the hair back, close to the knot, then singe the cut ends of the hair, next to the knot, to swell the ends a little, and finally work superglue into the swollen hair-ends and the thread of the knot, to make sure it will not come loose later.
The Procedure
I fit the bow-tip end first, trimming the wedge to a snug (but not really tight) fit laterally, and a quite snug, but not excessively tight fit longitudinally. (Remember: too tight, and you split the bow-tip…that is catastrophe!) I press the wedge into place with a narrow piece of maple that I keep for that specific purpose. Then I comb and re-comb the horse hair until there are neither crossed hairs nor any tangles of any sort. If I find kinked or damaged hairs, I remove them.
I dampen the hair, being careful to not soak the portion near the tip—I do not want any water to get on that wedge, or wick up into it. If the wedge swells and cracks the bow, it is my fault. I comb out the hair again, and match it against the frog mortise, with the frog adjusted as far forward on the stick as it will go. I use a watercolor pencil marker to mark the hair ribbon where I want the frog-end knot, then grip the hair carefully and keep the ribbon from twisting or changing angles as I tie the frog end knot. I then treat it exactly as the tip-end.
Remember to put the ferrule back in place before wedging the hair into the frog! If I forget, then I have to remove the frog wedge, install the ferrule, and re-fit the hair into the mortise. Once all is correct, I install the frog on the bow, and partially tighten the screw, to tension the hair just a little. I re-install the slide and ferrule, then carefully spread the hair into a smooth, flat ribbon, and insert the comb into it from between the stick and the hair. I insert the hair spreader wedge between the frog and hair ribbon, with a tiny dab of hide-glue on the hair side of the wedge, forcing the hair tightly against the ferrule, and jam the wedge in place with the stainless steel comb.
If all went well, that is a finished bow re-hair. If there are stragglers—hairs that didn’t quite attain the same tension as those around them, it is possible to “flame” the ribbon. This is accomplished by re-dampening the hair, tensioning the bow, and very rapidly running the bow back and forth through the flame of an alcohol lamp. The heat of the flame will shrink the looser hairs to match the tighter hairs, and flatten the entire ribbon. Understand: if there are many loose hairs, or the ribbon has been twisted sideways or something, so that it will not properly tighten, then flaming will not make a good re-hair out of a bad job. For this reason, many bow-repair people will not admit to ever flaming the hair. But, done correctly, and under the right circumstances, I think it does no harm.
Rosin
I prefer to rosin the bow as soon as the hair is dry, and try it out on an instrument. Some customers, however, are very particular about which rosin is used, and prefer to rosin it themselves. It is good to ask ahead of time, and avoid misunderstandings.
Different strokes…
Not all hair is the same. Coarser hair is usually used for bass and cello bows than that which is ideal for violins. Different colors (natural, of course, not dyed) tend to have different characteristics, as well. Some players prefer black hair for bass bows. An experienced craftsman knows what hair is best for each job. An experienced player knows when the bow/hair/rosin combination is “just right.”
If you found this post helpful, please share with your friends!
Maple, Spruce, Willow, European, Domestic, Red maple, Big Leaf maple, Sitka spruce, Englemann spruce
Wood Selection: Where does it come from, what kind is it, and does it matter?
Treasure does grow on trees!
Traditionally, violin-family instruments have been made from maple and spruce, pretty much exclusively, though there are relatively rare counterexamples–a viola made of poplar, or willow; a bass made of willow, etc. A large number of scrolls were carved of pear-wood.
Usually, though, the scroll/neck, back plate, and ribs/sides are made of maple, and the belly, or front plate (soundboard) is made of spruce. The bassbar is also spruce, as is the soundpost, which is sometimes called the soul of the instrument. The fingerboard and other fittings are usually made of Ebony, which is an extremely hard, dense, jet-black, exotic hardwood. It is really only available through import. I would like to explore other options, but, for now, Ebony is the best choice. Linings and blocks are typically either spruce or willow, though there is no hard and fast rule on the wood for linings.
So…what do I use?
So far, I have used exclusively maple and spruce for the body of the instrument, but have experimented with a variety of maple species, and three different spruce species. I have a large billet of American Black Cherry from which I hope to make a cello (Back, neck and ribs), someday soon, as a friend, Oded Kishony, has made a very good cello of cherry. (He did warn me, however, that, though its tone was superior, it was difficult to sell; orchestra people are very serious about tradition…)
Paul Schuback and other master makers have taught me that, while domestic maples are fine for larger, deeper-toned instruments, European maple is superior for violins. No one denies that some very nice violins have been made of American maples…they simply recognize that European maple has the edge, as far as violin tone is concerned. I cheerfully bow to their wisdom, and will probably make most violins of European maple or Red maple, from now on. Red maple, from the eastern USA, seems to most closely match European maple.
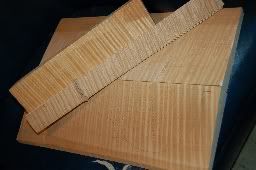
Here is the Red maple from which I made my #10 instrument (a violin):
This is Michigan Red Maple from Elon Howe. Pretty stuff.
Big Leaf Maple
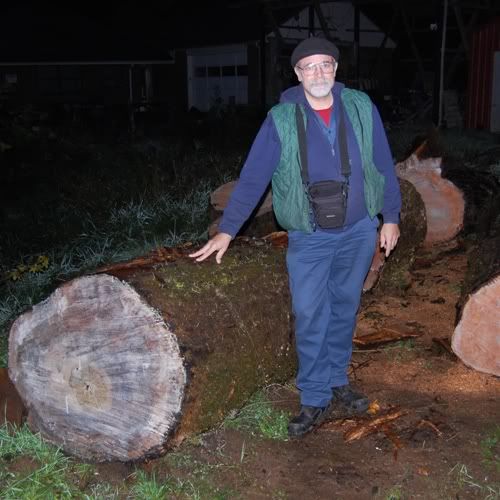
Violas, celli and double basses are another story. Big Leaf maple is somewhat softer, and lighter, but sometimes very beautiful. Evidently its different physical characteristics make it ideal for larger instruments and thicker graduations. Here is a Big Leaf maple log that was given to me, and which is destined to become violas, celli and basses:
This log was given to me by Terry Howell, a local land owner and logger. He graciously dragged it out of his woods, cut it into lengths that were manageable, and loaded it onto a trailer with his front-loader. Thanks, Terry!
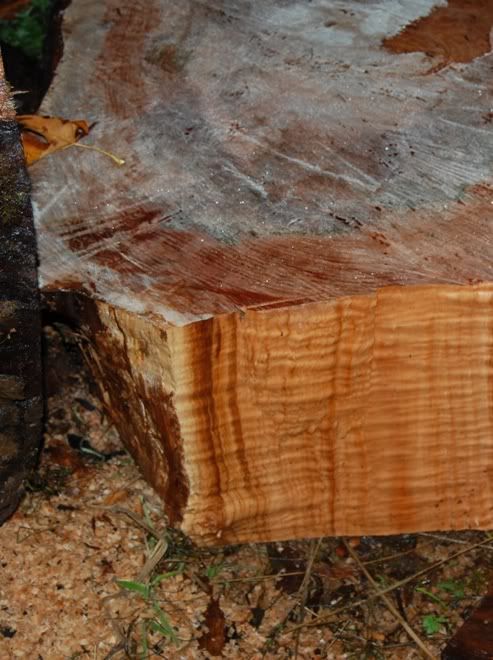
Here’s what a piece of it looked like, inside, when I split it:
I split some off, to look inside…this piece became neck billets. (The goop on the end surface is a wax sealer, so that the wood will not crack while drying.)
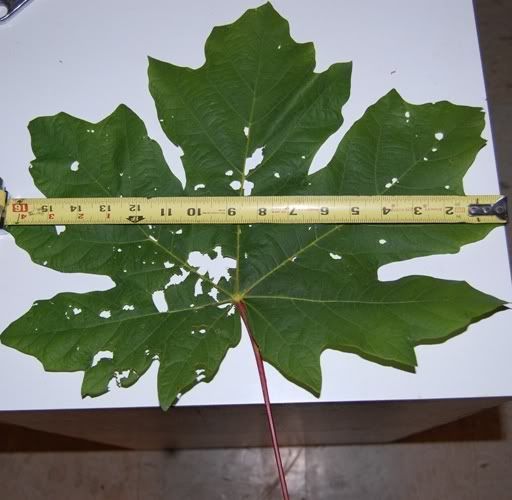
Incidentally; if you have wondered why it is called “Big Leaf” maple, take a look at this:
That is an honest 17″ wide Big Leaf maple leaf. They are not all this big, but no other maple comes close.
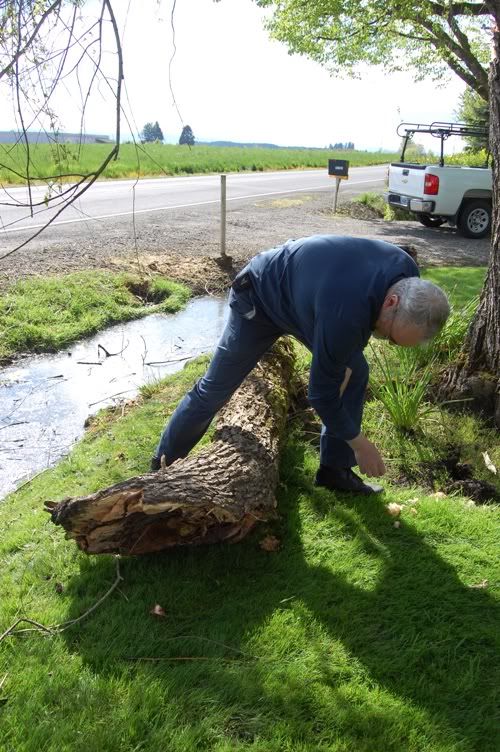
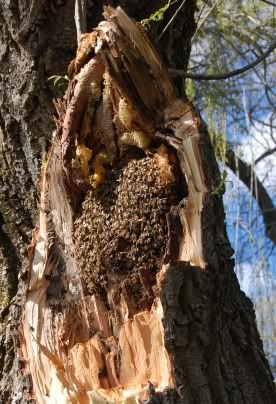
And here is where I get Willow for blocks and linings: I watch for when people lose large limbs in wind or snow storms, and ask if I can remove them. This one was full of a honey-bee nest, but it is good wood.
Willow log for linings. A limb fell during a windstorm..turned out to be hollow, and full of honeybees. They were gentle little folk, though, and did not offer to harm me.
Here’s what’s left of the nest, still in the tree.
The nest was pretty exposed after the limb fell– I hope they were able to rebuild elsewhere. Good little insects to have around.
Spruce
So far, I have had to purchase all the spruce I have used. There are some nice stands of Sitka and Englemann spruce here in the Northwest. I hope to go on a “Spruce Safari” someday, and bring home a prize log. 🙂 But I’m getting older, and logging isn’t easy. We’ll see.
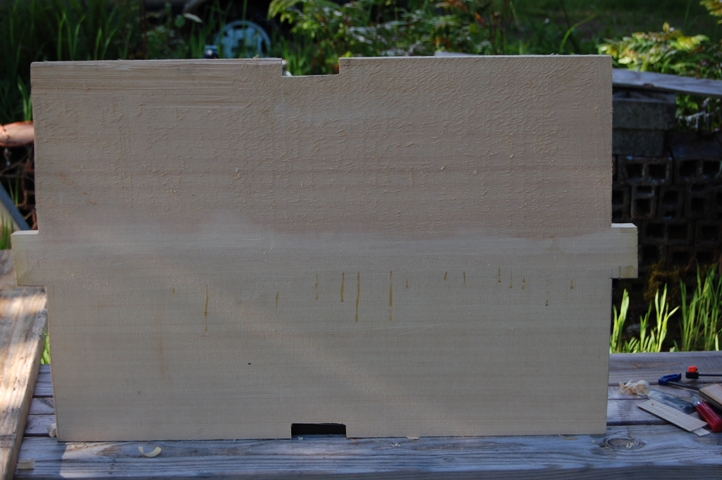
In some ways I almost prefer buying the spruce– I can ask for exactly the grain-count I want, and the age (since cutting) I want, and, if I care to drive to the warehouse, I can sort through the stacks and get the exact look I want. But I pay for those privileges, and it is tempting to just find a great log, cut it up myself, and save the money. 🙂 Spruce is nearly always the first choice for soundboards, from violins to pianos, because it has the stiff, lightweight characteristic that resonates best to produce the sound. (A vibrating string by itself makes very little noise…amplified by a spruce soundboard, it can fill a room, or even an auditorium.)
Other Tonewoods
There have been makers who have (quite successfully) used other woods to build instruments. The grip of tradition is strong, however, and makers frequently have a tough time selling instruments that are NOT made of Maple and Spruce. I am willing to try other woods, but if, for example, someone wanted a fiddle out of Zebra-wood, while the idea is intriguing, I can foresee problems, and I would probably want my money up front. The instrument would doubtless be beautiful, and might even play well, but I see it as a risk I am loath to take. The labor is my most costly investment, and it is the same whether I build the instrument of traditional woods, or non-traditional. If I can’t sell it, then I have lost my time and effort, not to mention the cost of the exotic wood. As I mentioned earlier, Oded Kishony made a Cherry cello, and, while the tone actually turned out to be superior, the cello was very difficult to sell. Tradition matters, even today. Pine has sometimes been used for soundboards…even Western Red cedar has occasionally been used. But there is a reason everyone comes back to spruce– it works the best, as a rule. Plenty of counter-examples, I know, but they are in the extreme minority.
There are makers who use Walnut, Western Red Cedar, Pine, Douglas Fir, Pacific Redwood, Cypress, and a host of exotic woods. No problem…but I am at an age where I can no longer afford to take unnecessary risks. I really prefer the traditional woods, anyway. However, I may do some experimentation on the five-string fiddles. Wandering outside the “orchestral sphere” sets one free to experiment a little more.
A friend (Cliff Stansell, of the Pistol River Trio) has recently suggested that I try a fiddle of Port Orford Cedar. It’s nice stuff, and I may give it a go, but it will be a five-string fiddle, whose target market is not nearly so attached to tradition. There are five-string fiddles made of many combinations of exotic or domestic woods. He also asked about a five-string fiddle with an Oregon Myrtle back, sides and neck, and Port Orford Cedar front: it could happen…it surely could. 🙂
What is a “Luthier” (definition)? What is “Lutherie”?
So…What IS a Luthier?
The old French word simply meant “a lute-maker”. And his business was called lutherie.
“Loot-yeh” is pretty close to the French pronunciation. We Americans have a cheerful disregard for the pronunciation rules of the languages from which we borrow our vocabulary, so we typically pronounce it “Loothy-er”. The work of a luthier, lutherie, is usually pronounced “looth-er-y”
What does it mean Today?
The meaning has shifted, over the years, to cover the builders of all stringed instruments. Lute-makers are still luthiers, but so are guitar-makers, ukulele-makers, mandolin makers, and, of course, violin-makers. Violas, basses, cellos, five-string fiddles and dulcimers are also made by luthiers. Banjos, pianos, violas da gamba and harps, among others, are also built by luthiers. And the process of building and/or repairing stringed instruments is also called “lutherie”.
Usually when one is looking for a luthier, they are not looking for someone who made one guitar for a summer project, or something of that sort– they are looking for someone who is at least a competent worker, and who can reliably repair an instrument, without further damage. That takes some training and experience.
Some people have the privilege of attending a full-time, extended training program, or serving a term as an apprentice, under a master maker. This last is still likely the best training, although some fine schools are now available. Some cannot take the time from their established responsibilities to go away to school for an extended period, and learn from books, and/or piecemeal from a variety of teachers.
Workshops are now available in many parts of the United States, wherein one can begin to learn the skills to make guitars, violins, bows, etc. (Incidentally, one who makes violin-family bows is called an “archetier”… another French word.)
Step #8–Trace the shape of the cello plates, and cut them out;
Tracing the plates is pretty easy, provided you did a good job of two things. Joining the plates and flattening the mating surfaces of both the garland and the plates. Place the garland on the flat side of the plates. If you can see gaps, then you need to address that first. Assuming you already flattened the garland, you now need to flatten the plates.
Flatten the Plates
This can be done using a hand plane, and a straight-edge. But, do you have a cabinet shop nearby? (The place where you found that wide sanding belt is perfect!) That is a really good place to get the plates dead-flat. Glue some blocks on the two sloped sides of the plates: The outside of the plates. Strips of 2 x 2 pine would be perfect. You want to produce a flat surface on the sloped side of the plates, parallel to the desired inside surface.
Turn the plates flat-side-up, on a table. The sloped side should sit flat on the strips of wood, with the center joint touching, as well. Plane the blocks until the “flat-side-up” orientation (on a level surface) results in a more-or-less level plate surface.
Then, go talk to the owner of the cabinet shop. Ask if you could pay him to run those two plates through his wide-sander. That machine will produce a dead-flat surface in an incredibly short time. 80-grit or even 60-grit, probably, is fine…the surface does not have to be polished: Just smooth and flat.
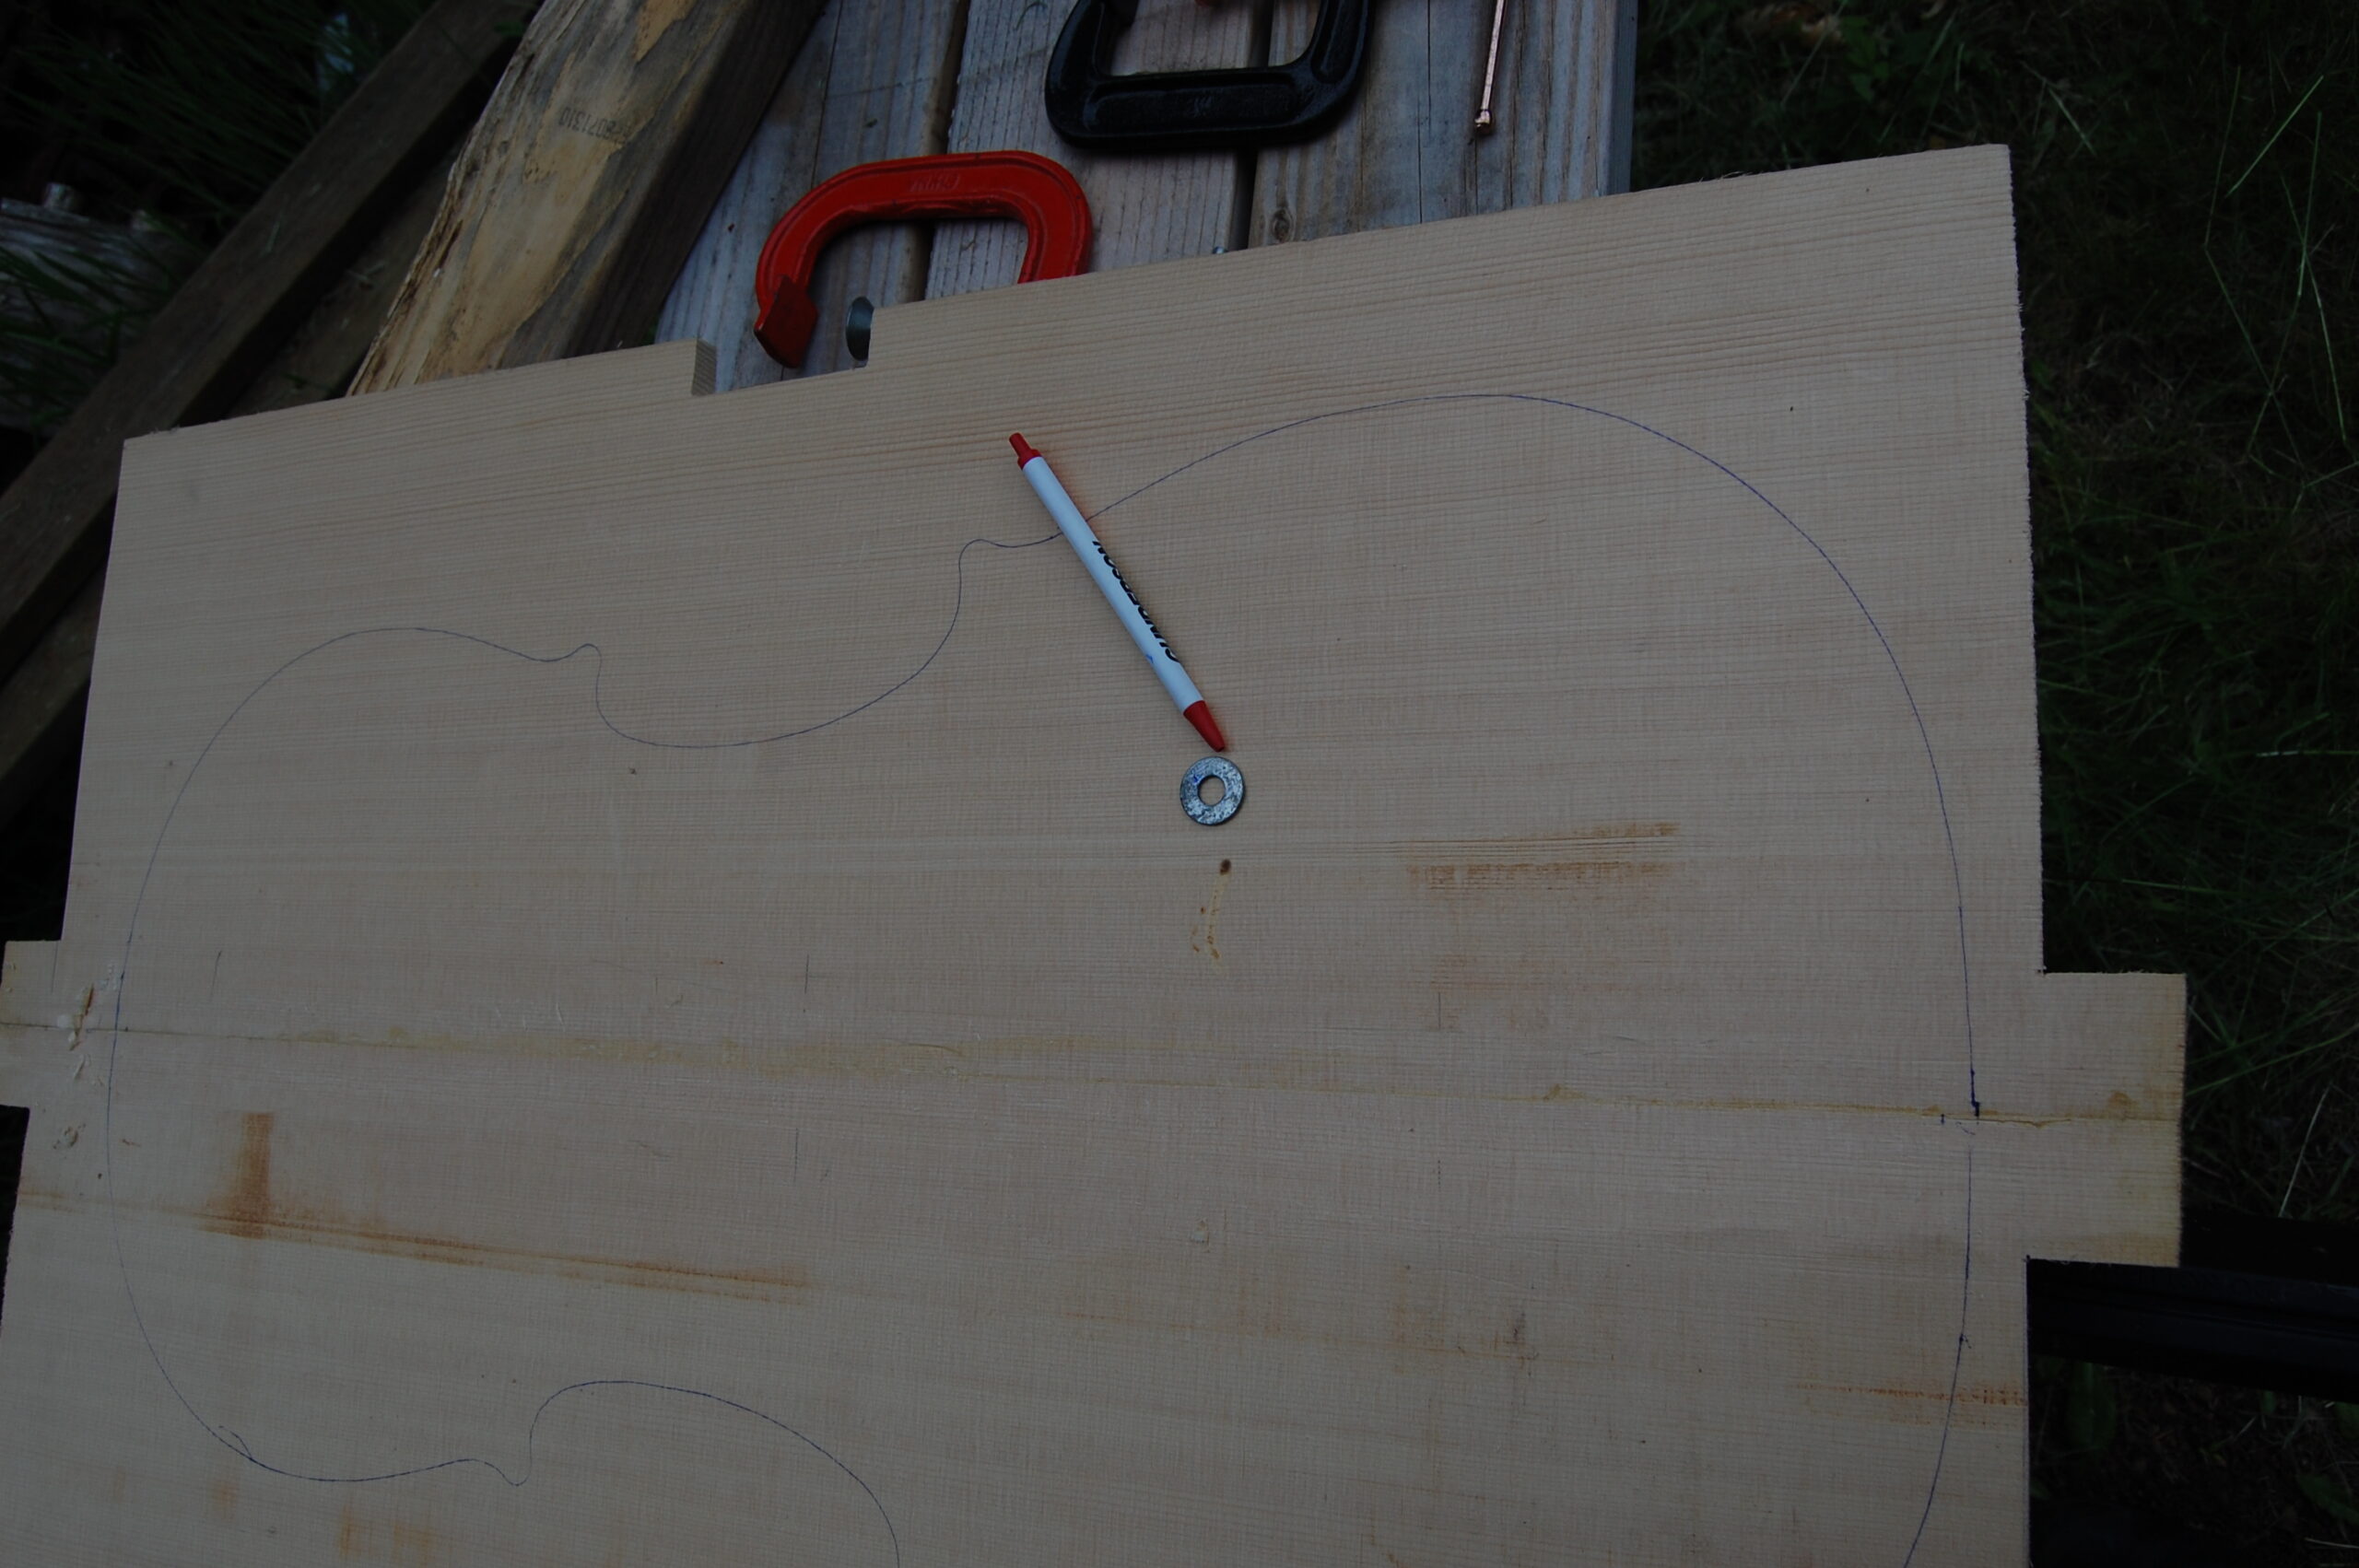
Once you have a flat surface, you can lay the garland on the plate, aligning the center line of the garland with the glue-seam on the plate. Trace around the garland, using a flat washer and a very sharp pencil. Choose the flat washer for the dimension of the “flat” portion. You want the width of one side of the washer to equal the desired width of your overhang. (The distance you want the top and bottom plates to extend beyond the ribs.)
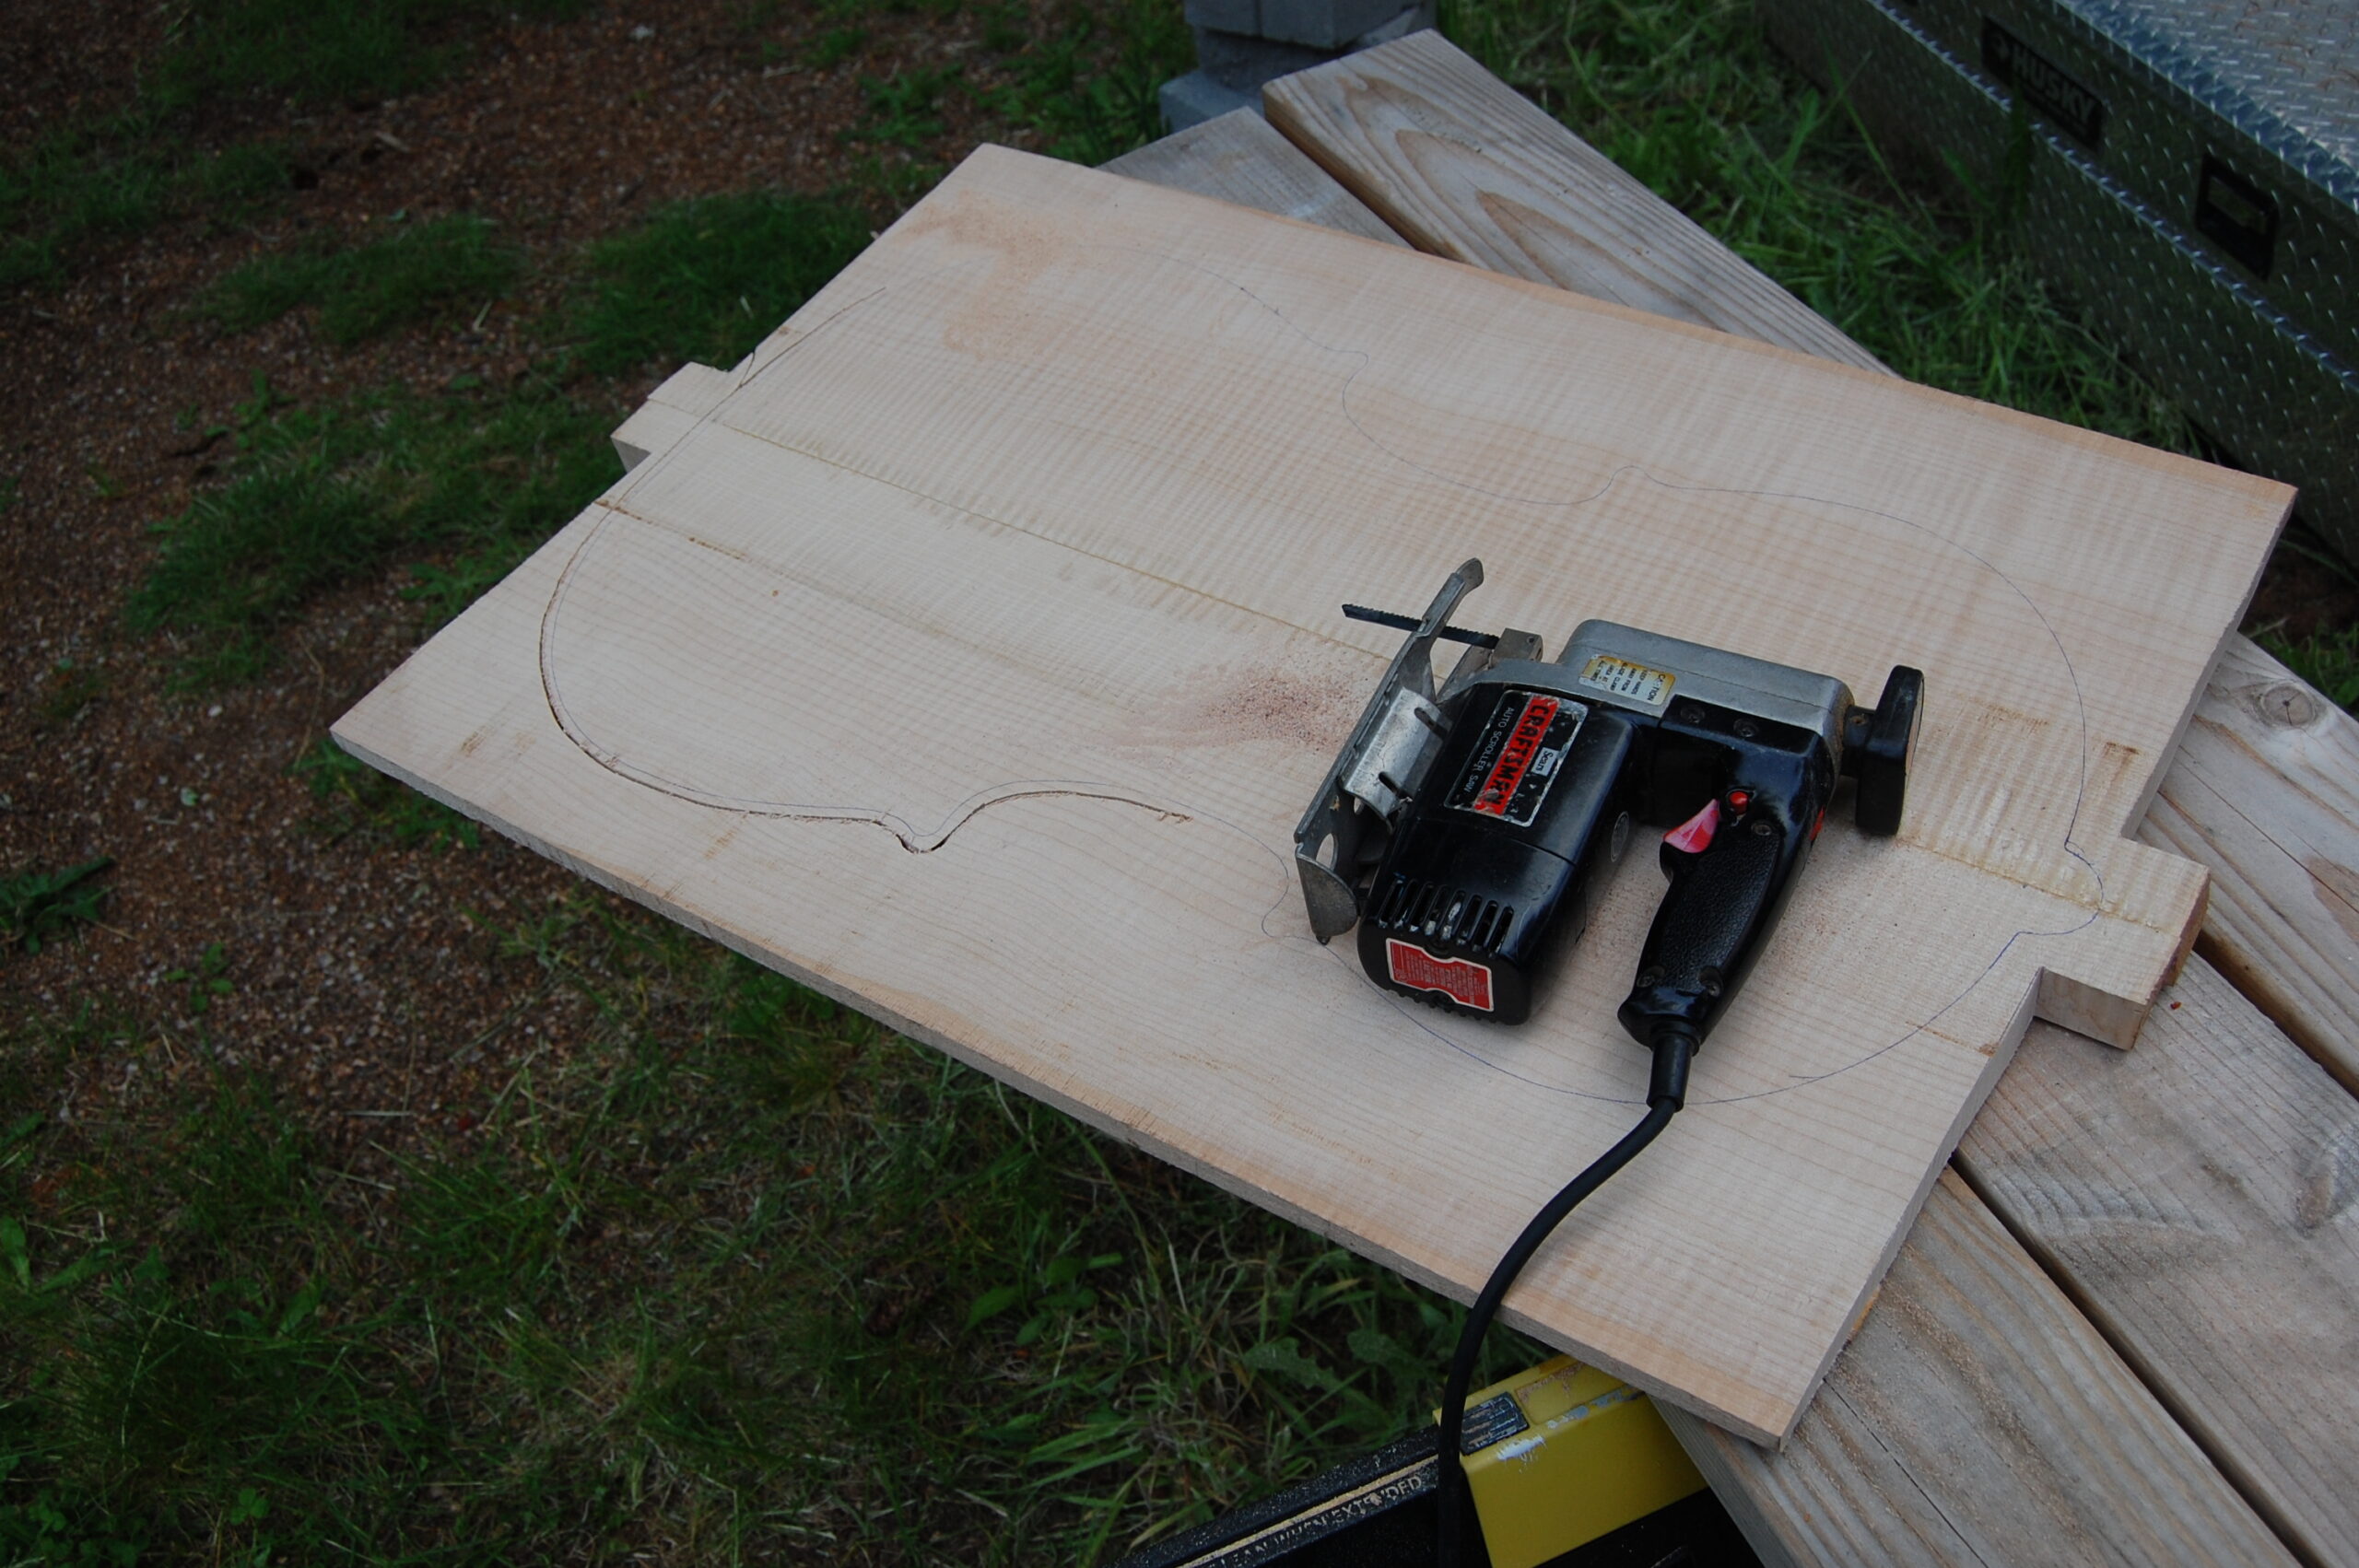
I used a large washer first, to produce a deliberately over-sized plate, to be sawn out using a hand-held saber-saw, or “jig-saw” as some call it. the only reason I did this is that the cello plates were too big to comfortably cut out on the bandsaw.
I used the large washer to trace an oversized perimeter for the plates so I could fit them into my bandsaw.
Cutting Out The Plates;
The maple was hard to cut with the small saw– I had to stop every so often, and let the motor and blade cool. Notice that I was cutting well outside even the oversized margin– I could not afford any mistakes at this point.
The Maple was very tough. I had to stop and allow the saw to cool, every so often.
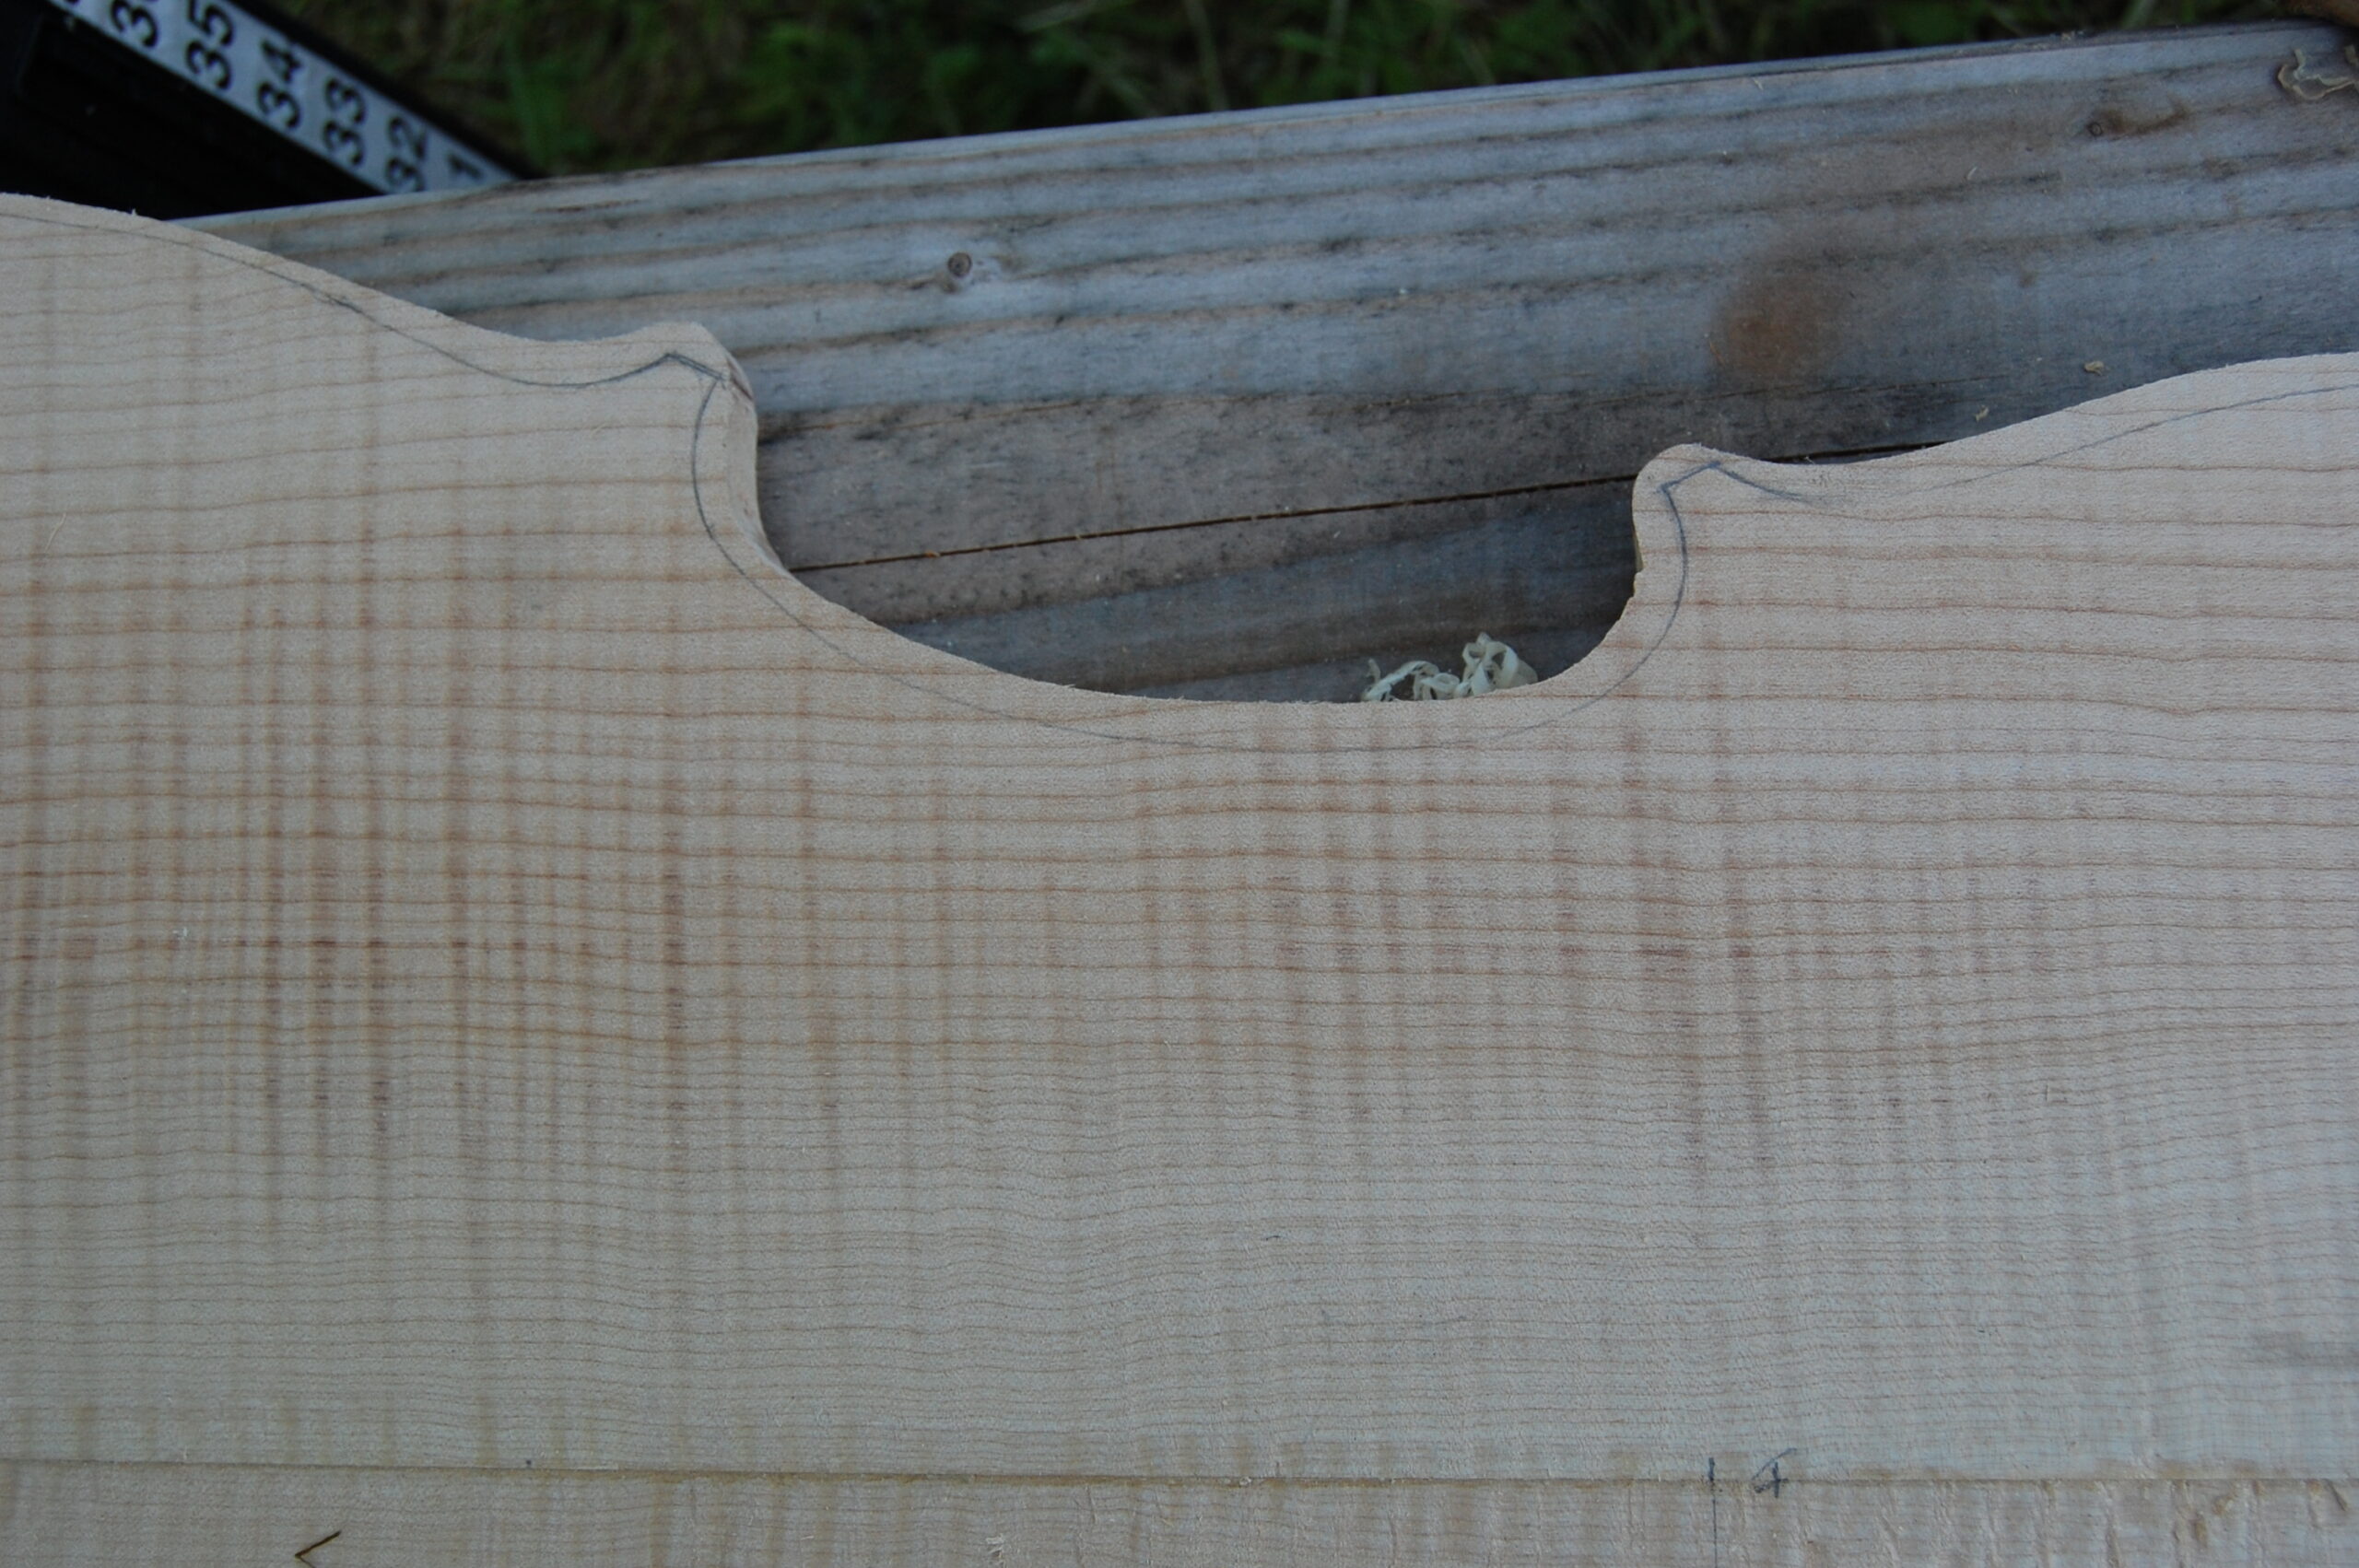
After cutting out the oversized plates, I retraced, using the correct sized washer (actually, a very short section of aluminum tube with the correct wall-thickness…the additional height made it easier to control.) This gave me a correct outline, except that the corners were round. So, using a straightedge, I established a line from about a millimeter inside each of those round corners, reaching to the glue-line at the opposite end of the plate. It is approximately a 30-degree angle off the center-line, I guess, but that is how I did it. This is what the corners look like, after the lines are drawn, the “dots connected” and the round corners erased:
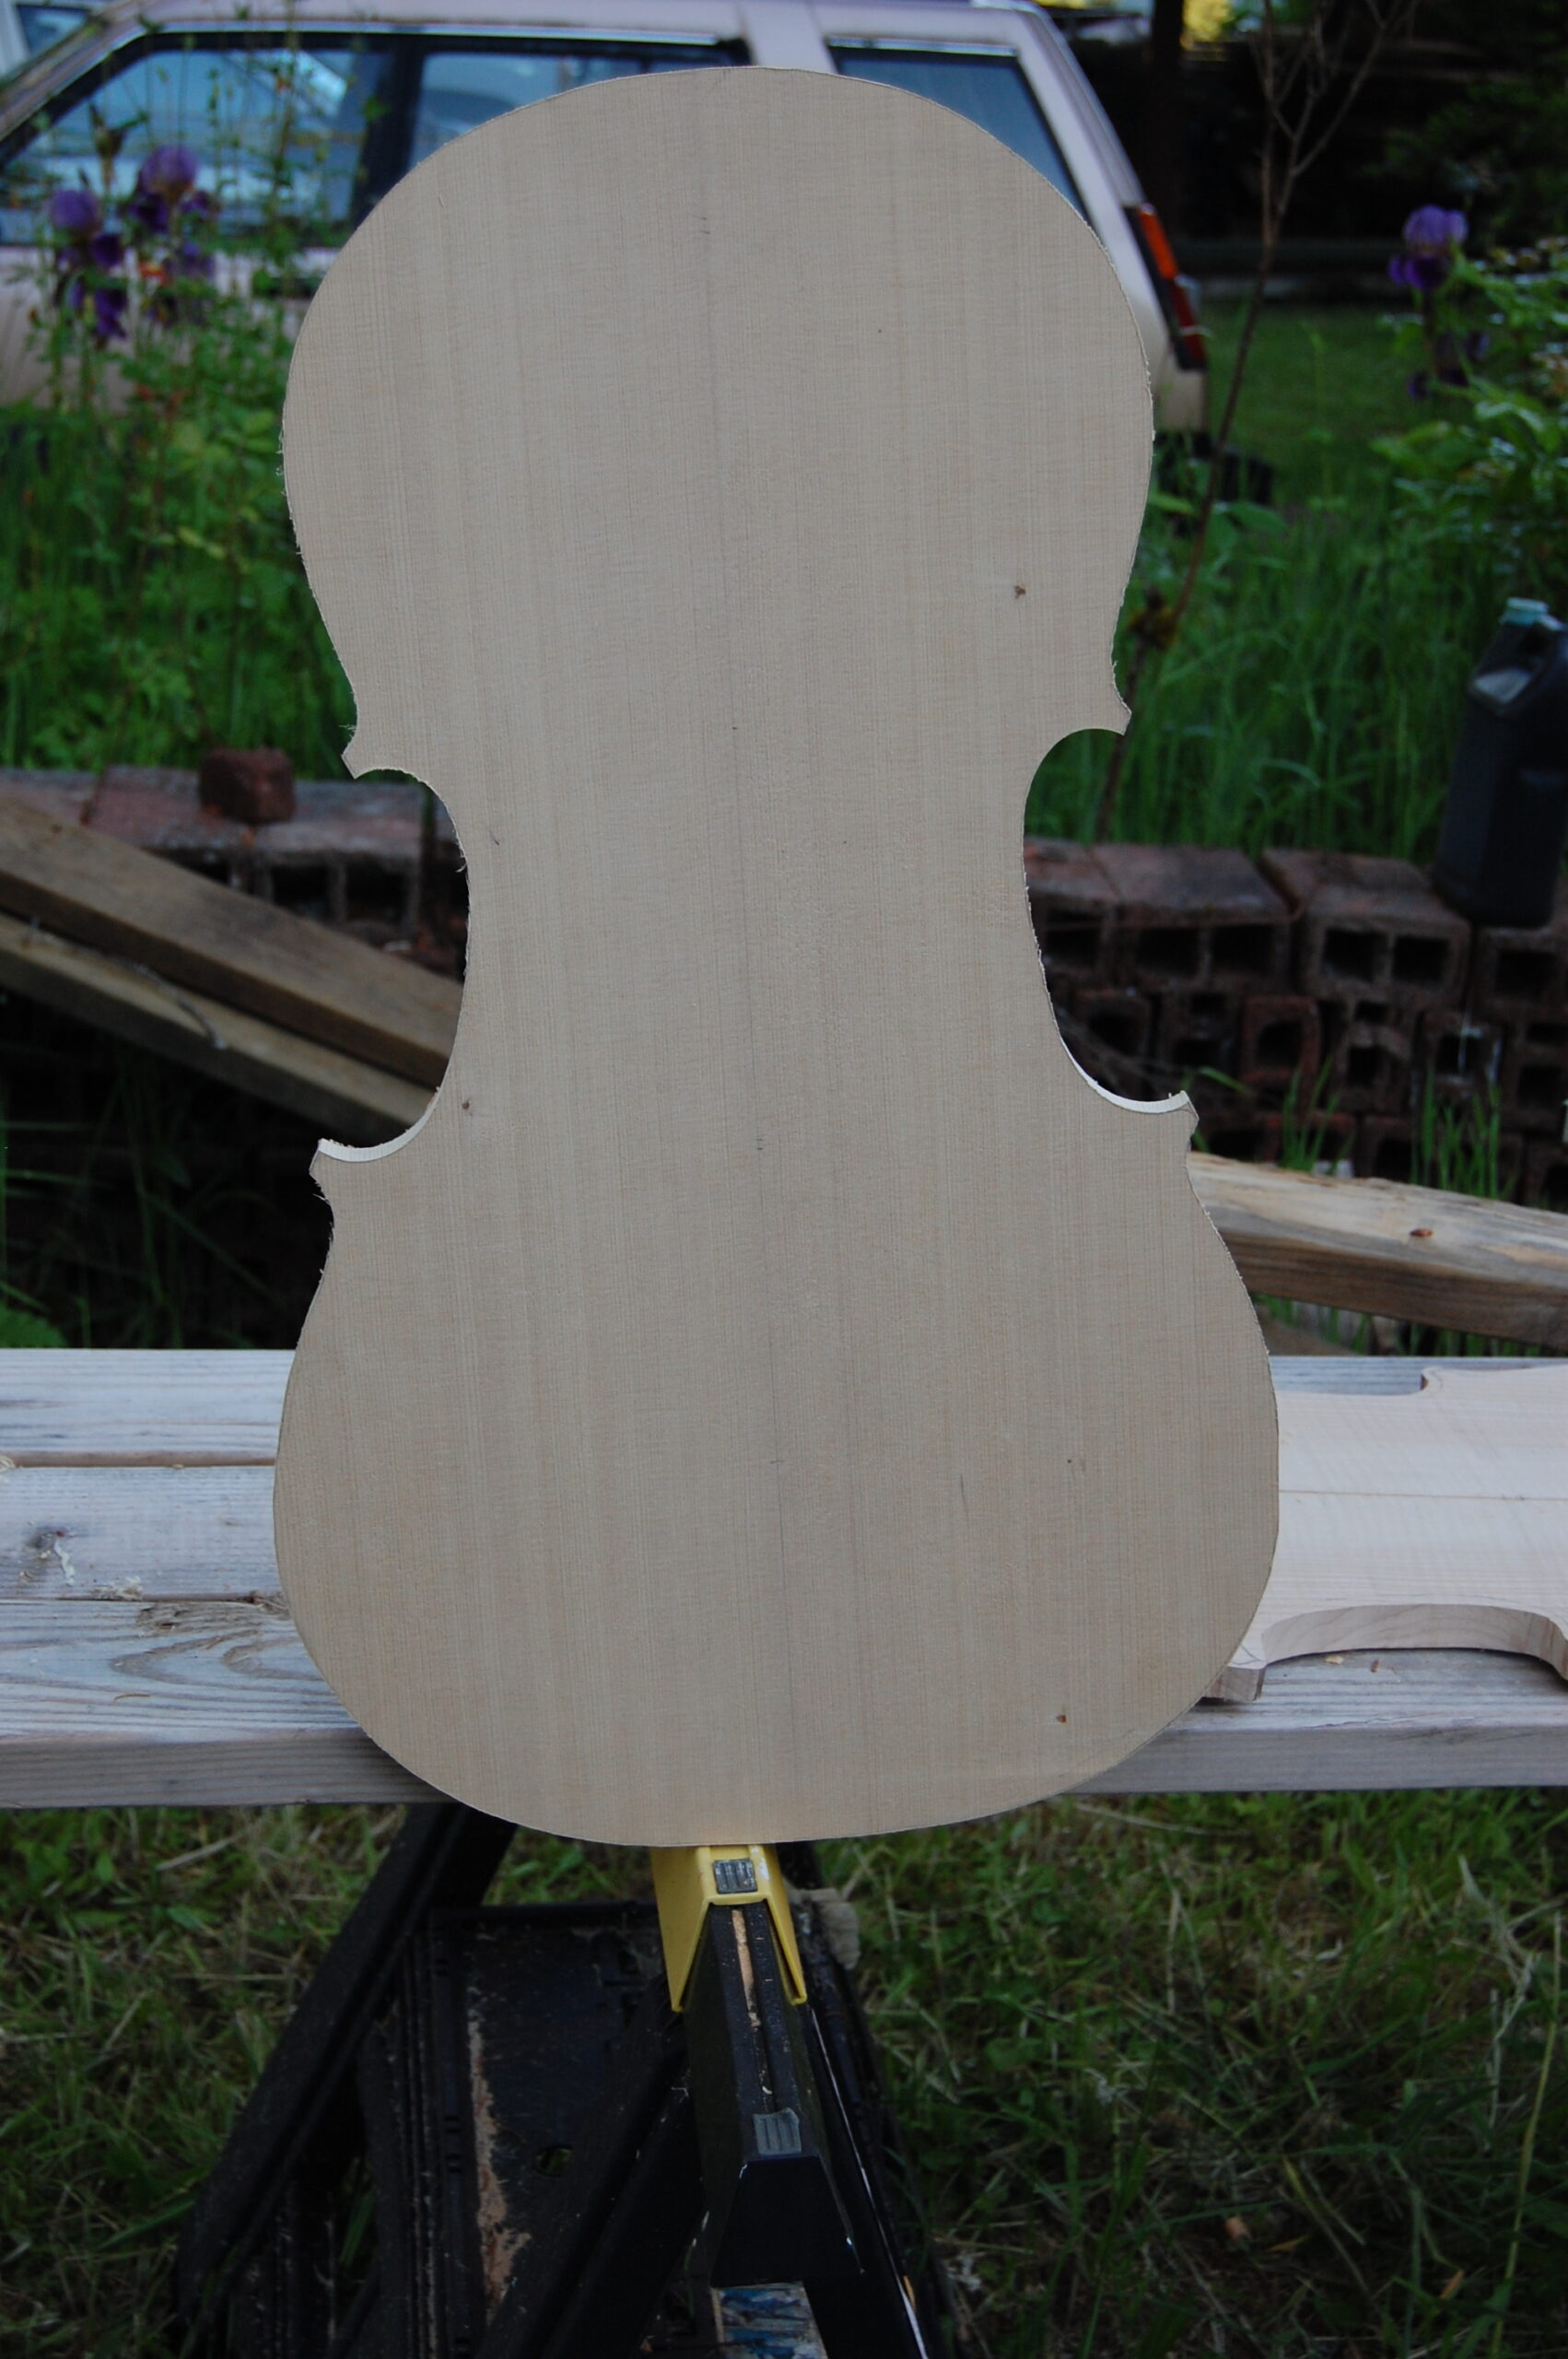
Final outline traced and ready to cut on the bandsaw.I cut out the final outline of the plates on the bandsaw, and perfected them with the Drum sander and files.
Perfecting The Edges;
I cut out the final outline on a bandsaw, then perfected the edges on an oscillating spindle sander. Here’s how the plates look, at this point:
The plates are ready for carving. (The black lines are just dirt, and they will be carved off immediately.
The black lines are just dirt– it went away when I began arching the plates…which is the next step, by the way.
If you found this post helpful, please share with your friends!
I don’t have many photos of this. I forgot about the camera when I was joining the plates for the cello. Not all instruments have a glue seam down the center of the plates, but most do: Especially most cello-sized instruments. It is simply too difficult to find good tonewood that is big enough for one-piece backs.
One-piece tops are available (especially if you use Sitka spruce, as the trees are huge.) But nearly everyone uses two-piece tops. We usually “book-match” the plates. (A pie-shaped wedge of a log is split lengthwise to make two very narrow pie-shapes. Then the wide edges are planed and joined in a hide-glue seam. It makes a cross-section similar to that of a low, double-pitched roof.) The grain begins tight on both sides of the glue-seam. It broadens fairly symmetrically as it extends toward the outer edges. I don’t know whether this really makes any difference, acoustically, but it looks nice.
Planing the Center Seam
I used to do all my center joints with a #8 Stanley Jointer Plane (hand-jointer). That was a lot of work, and difficult to get it really flat. Nowadays, on large instruments, I run the edges through a powered jointer first. In this way, I can get the glue-seam as close as possible to being perpendicular to the inside plate surface. The jointer is a fast, reliable way to get close to a good joint, but I have never gotten a good enough joint JUST using the jointer that I could go ahead and glue the pieces together.
I always end up using a good straightedge and a small, very sharp hand plane to fine-tune the joint faces until the fit is perfect– airtight. I check the full length of the face, at each edge and the center, then diagonally across the face, in both directions. If I have to, I use a scraper to remove very small humps.
Once I have one plate perfect, I put the second one in a vise, and use the first one as a “try” surface–I run through the same routine with the straightedge, but then put the first glue surface on top of the second, and rotate it, to see if there are “pivot points” which indicate high spots. I use a scraper to bring those down until there seems to be an even friction all over, and an absolutely airtight, light-tight joint everywhere the two plates touch. Some luthiers use a “shooting board” to get the same results. This is essentially a plane affixed at a 90 degree angle to a flat board, along which the instrument plate is pushed; the plane stays still, and the board moves.
Preparing to clamp the book-matched plates
Then I saw out notches at the ends and (usually) in the center, near where the C-bouts will be, so that I can get clamps in three places. I try the clamping first (quite tightly) while the plates are dry– if the notches where the clamps sit are at a bad angle, they may force the plates apart rather than hold them squarely together.
Ready to Glue
When I am ready to glue, and the hide glue is hot, a brush is ready to use, etc., I heat the gluing surfaces with a clothes-iron, until they are hot to the touch. Be careful on this step, as it is easy to scorch the plates–especially the spruce. Another way to do it is with a heat-gun or hair-dryer. I have one plate secured in a vise, and the other ready to match against it.
With the plates hot, and the glue hot, (and pretty runny– not water-thin, but not viscous like honey– maybe more like thin syrup) I brush the glue liberally on both plates, then quickly match up the plates, rubbing the top one hard against the bottom, so that glue seeps out all around the edges. I want it to squeeze out everywhere.
I only have a few seconds to get the joint tight, and lined up exactly right, because the glue quickly begins to gel, and then it will lock up. It seems best to line up the corners, then apply clamps at both ends. I take the plates out of the vise, and apply a bar-clamp to the center notch. Set it aside and allow it to dry overnight. It will actually be strong in much less time, but I REALLY don’t like to have center-joints fail, so I allow them to dry overnight.
Completed Plates
You will notice that in the two photos below, I did not center-notch the maple plates. I don’t recall why…sorry.
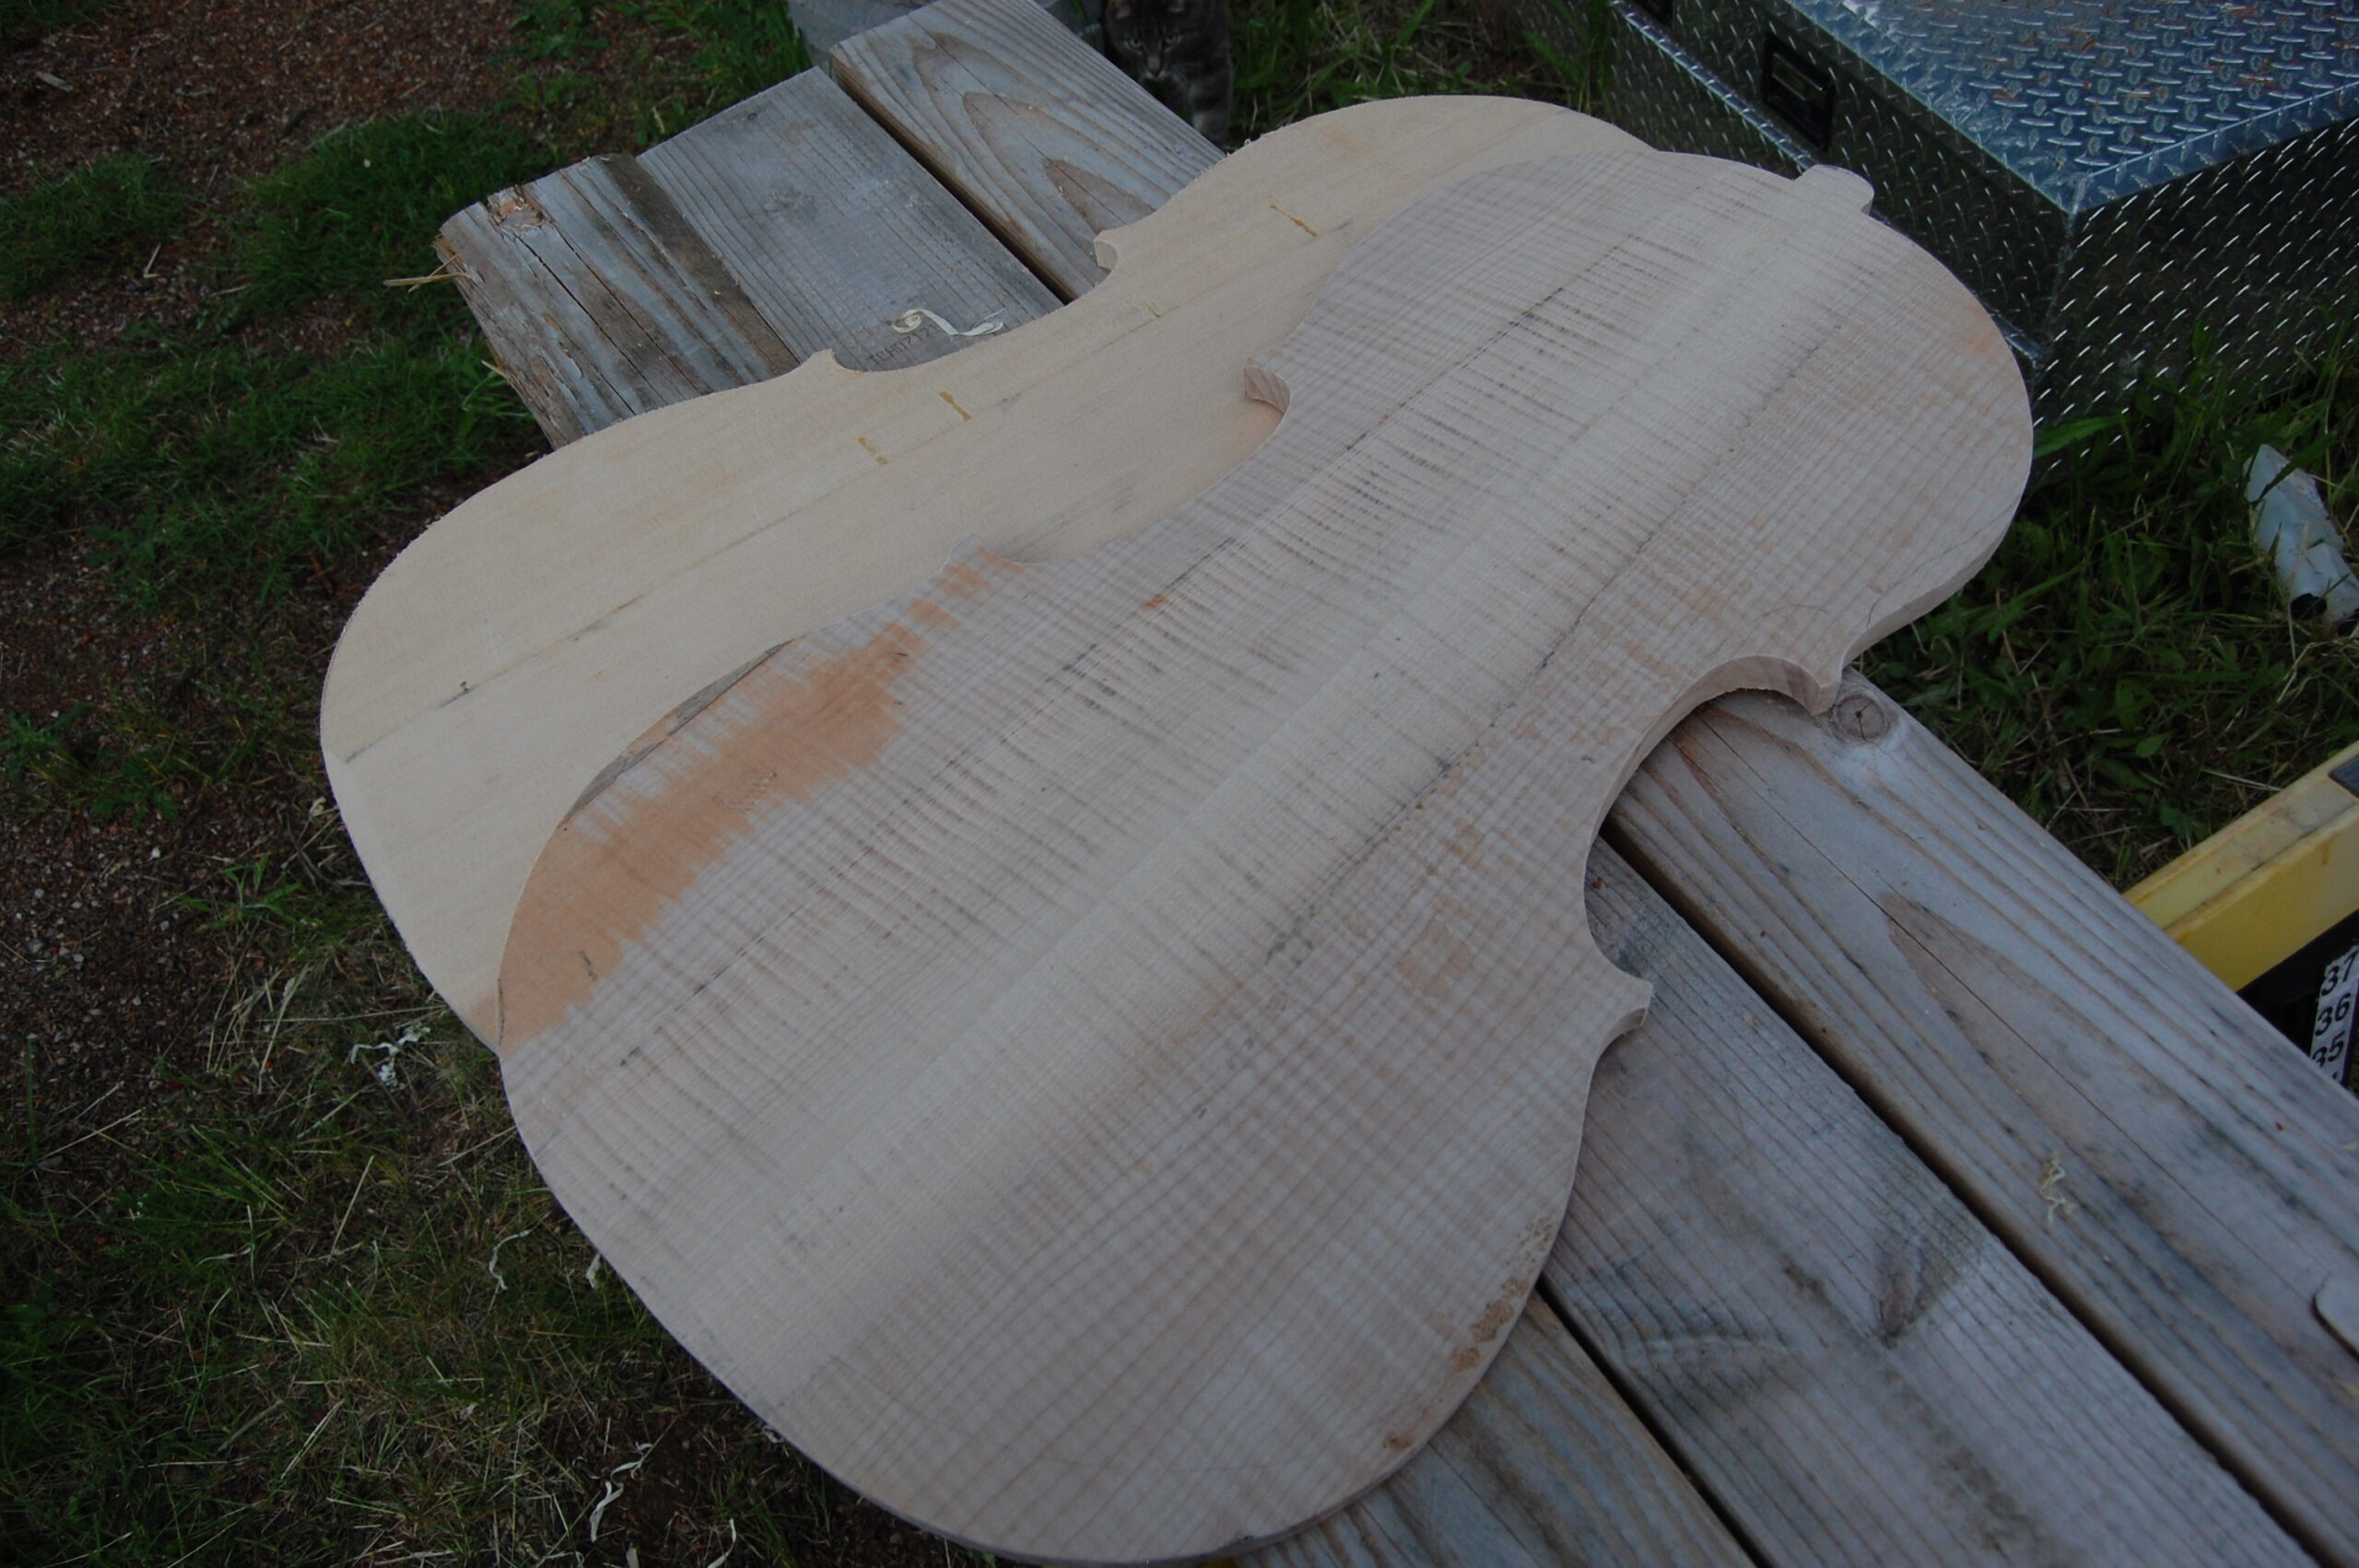
This is a completed, book-matched joint in a Sitka spruce cello top.
Sitka Spruce, from the Wood Well (tonewood dealers near Port Townsend, WA).
This is a Big Leaf maple cello back, from the Wood Well, in Port Townsend WA.
Big Leaf Maple, from the same source. On the Spruce plate, you can see the remnants of the glue that squeezed out during clamping. They are not visible on the maple, probably because they are camouflaged by the curl (flame) of the maple. (nice wood, huh?)
If you found this post helpful, please share with your friends!
I began leveling the edge of the garland by checking the garland against a flat surface (plywood with a Formica surface: It is probably not dead-flat, but it is close), marking the most obvious high spots, then going around and removing them with a sharp small hand-plane (Stanley Low-angle).
For final flattening, I used a “sanding board.” I made it from a wide sanding belt that I salvaged from a cabinet shop. (Such shops routinely use them once and throw them away) I glued the abrasive cloth to a doubled layer of plywood. (The plywood was 3/4″ thick, which is not stiff enough to stay flat. I doubled it, using glue and screws, so it is 1-1/2″ thick, and about 24″ x 48″ flat dimensions.) Then I used a spray contact adhesive to affix the abrasive fabric to the board. I think the grit is about 220, and pretty worn. A little coarser would have made the job go faster, but this does really smooth work.
The board looks like this after extended use.
This is the sanding board I made of plywood and abrasive cloth.
Using the Sanding Board
Sanding Board use is very simple: press the garland down firmly on the abrasive and rub back and forth vigorously. There was probably between a half-hour and an hour of hard work, rubbing the two sides completely flat. One thing I do, to ensure flatness, is to mark up the surfaces of the edges and ends of the blocks with a pencil. When all the marks wear off, it is flat. If you don’t use the pencil marks, it is hard to see the last few low spots.
This is how the sanding board is used: vigorously!
Good exercise, I suppose. Tires me out, anyway.
The next step is to trace the shape of the plates, but we haven’t talked about joining the plates, yet, so that (joining the plates) is next on the list.
If you found this post helpful, please share with your friends!
Strengthening the joint between the ribs and plates. Willow or Spruce.
After the ribs are exactly the way you want them, you will still need to add linings. The linings are strips of wood (usually spruce or willow.) They add thickness to the edges of the ribs and triple the gluing surface. Thus, they strengthen the joints between the rib garland and the plates.
In a violin, the linings are 7-9 mm wide and 2mm thick. On a cello, they are 12-15 mm wide and 4mm thick, or so. I happen to prefer willow for blocks and linings, but many well-known makers prefer spruce. Also, I like the way that willow behaves under the knife. I especially like the way it retains a bend after I form it to the shape of the rib.
Cutting the Linings
One very effective way to make linings is to use a bandsaw or table saw to cut “boards” a little thicker than your intended goal for thickness, but several inches wide, and as long as you can manage. Then plane or in some other way re-thickness the “board” to exactly the thickness you want for the linings, and use a wheel-type marking gauge (http://www.rockler.com/product.cfm?page=21921) to score the edge from both sides, deeply enough that you can simply break off each strip. The result is linings that are exactly the same, every time, and with minimum effort.
You can use the bending iron to pre-form the linings to approximately the same shape as the intended bouts. But if you use willow, as I do, You can easily form them by hand, especially with some dampening with water.
Willow linings, bent and ready to fit.
Fitting the Linings
I inlet the linings into the blocks at either end of the rib, and carefully fit the lining so that it will fit tightly when installed. Once I have them all cut, I go through and glue each one: I remove the lining, brush it thickly with fresh, hot, hide glue, and re-install it, clamping continuously, with the small spring-clamps. I try to keep the edge of the lining just proud of the edge of the rib. I want to remove lining wood, not rib wood, if possible, when leveling the garland.
Here are linings fitted into corner blocks, but not yet glued.
Gluing and Clamping the Linings
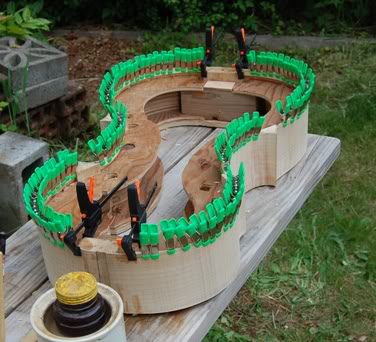
As I recall, it required about 108 or so of the small clamps to clamp all the way around one side of the cello garland. It is a good idea to have a few tiny c-clamps, as well, for stubborn spots where the spring clamps just aren’t providing enough pressure. The small f-clamps work well, too.
The linings have been glued and clamped in place. I place the clamps edge-to-edge, so there are no places left loose.
Using the Clamps; Warming the glue-joint.
The way I use the spring clamps: I pinch the lining to the rib with my left hand, tightly enough to see the glue squeezing out, then, while the joint is still under pressure between my thumb and forefinger, I apply the green clamp. Then I move over one space, and repeat for the next clamp. If I can’t get the joint tight that way, I use a tiny C-clamp, or one of the f-clamps in the photo. Also, I don’t hesitate to warm the ribs with a heat-gun, or my clothes-iron, to re-liquify the glue.
After both sides are complete and dry, I begin leveling the garland (next step).
If you found this post helpful, please share with your friends!
The best tool for this job is the traditional bending iron. You could make one that would be quite functional, for very little cash outlay. But the nice thing about the “traditional” ones is the variety of curves available. You can buy them at International Violin Co. and many other sources,
The Iron (by the way, they are no longer iron, but rather, aluminum. The name has stuck, though.) They usually have an “egg-shaped” cross-section. On the small end, they have a tight enough curve to form the tight bends at the corner blocks. But at the center, they are flat enough to gently curve the flatter areas. For instance, the portions of the ribs where they span the lower bouts of a large instrument such as a cello.
This is how we use a Bending Iron to bend a Cello rib to the correct shape.
The Bending Iron MUST be hot!
One key to successful cello rib-bending: You MUST heat the wood all the way through before commencing the bend. If you don’t do this, you can almost guarantee you will break the rib. How hot? Good question.
I used to use a clothes iron and wooden molds, around which I would bend my ribs. I rigidly fixed the clothes iron in position with the hot side up, and the thermostat control set on “linen”. At that temperature, if you are not careful, you can scorch the wood. Also, if you dribble water on the iron, it dances and bounces, as it boils away to nothing. It can’t just sit there and steam. So that is my test on the commercial bending iron as well. I want the water to dance and boil instantly, not just sit there and simmer. On the commercial bending iron, it takes 20 minutes or so to get hot enough…maybe longer. Be patient: this is critical. The iron has to be hot.
The bend has to be gradual, with constant, firm pressure on the bending strap.
Bending Strap
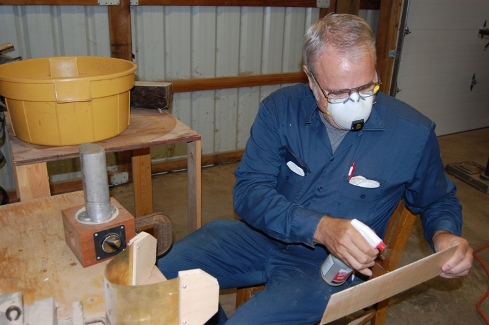
Of course, you can buy a bending strap, but if you can secure a thin strip of aluminum (aluminum roll roof-flashing is almost too thick, but it will work) you can affix wooden handles, and it will be fine. For small instruments (violins and violas,) I cut up a large beverage can in a spiral (similar to a cardboard tube.) This will produce a strip about 40mm wide, and long enough for a bending strap. But, for a cello, you need a strap that is more like 100-120 mm wide.
The bending strap accomplishes several things. The most important, in my mind, is that it supports the outside of the curve and prevents the wood from “stress-relieving” through fracture. Especially in heavily figured woods, it is very common for an unsupported rib to break along the curl. (Rats! Your beautiful rib just became beautiful firewood!)
The second thing is that handles allow you to put pressure on the whole part of the rib you are bending without endangering your fingers. The wood gets hot enough to really hurt you if you touch it. It is a good idea to put handles on the bending strap. (By the way, some people use cloth, instead of metal, for their bending straps. Brass or aluminum are the most common metals used, though.) Metal transfers heat pretty rapidly, so wooden handles are very helpful. Thin gloves aren’t a bad idea either, but I usually think of that after I am well into the bending process, and it is too late to stop and put them on.
You don’t want the rib saturated with water…that will result in a broken rib–just spray it all over, quickly, and immediately begin heating it for bending.
How Much Water?
Some folks bend their wood dry. Some soak their wood. I use just enough water to get the wood wet on the outside (spray it on; no soaking) and enough to produce a little steam while I am heating the wood. I want it completely dry when I remove it from the heat.
Bending the Ribs
Method
Press the wood against the flatter portion of the iron while it is heating (count off at least ten seconds.) Then slide it toward the end with the curve that most closely approximates the bend you need, and slowly, firmly press the wood into shape.
Use the bending strap to hold the rib tightly against the bending iron. Hold it another ten seconds or so, and then let off a little, to see if it will hold that curve. If it springs back, pull it tight again, and hold it some more.
Pay attention to smells, at this point. It should smell like something baking in an oven. You do not want to scorch the wood. (Try this with wood you can afford to lose, a few times, before using the nice, expensive rib-stock you bought.) I broke and/or burnt a number of ribs, while trying to learn this skill.
Bending Options
But I know a guy who uses an old piston from a diesel engine for his bending iron, and heats it with a propane torch. Others have used water pipes, curling irons, charcoal briquette lighters, and the like. I finally got a “real” bending iron only after I had made 15 instruments.
Specific to cellos: I made my thickness 2mm, and used a large bending strap, as shown. You can’t see the mold in the photos (I forgot about the camera until the real cello ribs were done and installed.) But, what I did was to set the cello mold nearby, and bend a rib, then check the bend against the actual mold, to see if it was close to correct. Then, back to the bending iron, to correct it. When a rib was satisfactory, I immediately clamped it in the mold, to hold that curve while it cooled. Once it was cool, it would hold that curve permanently.
Sequence
The reason we do the inner c-bout ribs first is that there is frequently a fair amount of pressure put on the ribs during the gluing/clamping process, and if the corner blocks were cut to their final shape, they could flex, and permanently change the shape of our corners.
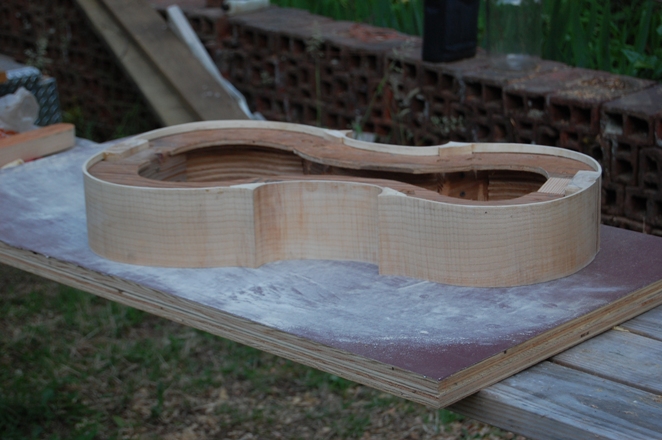
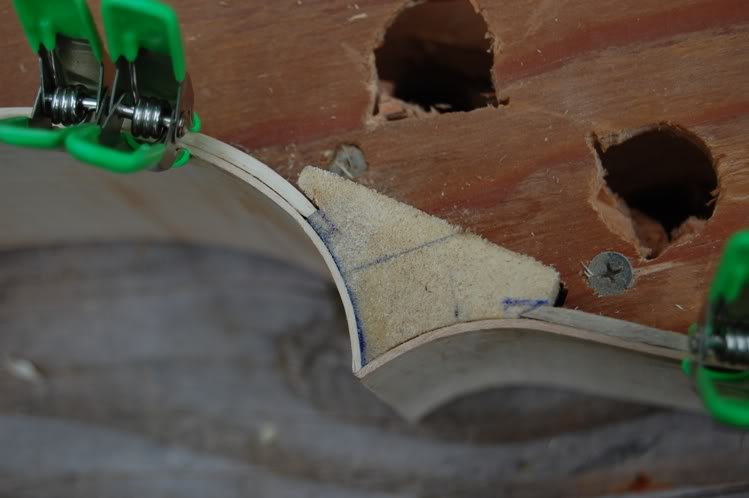
After the c-bout ribs are glued with hot hide glue, and thoroughly dried, I shape the outer sides of the corner blocks. The black lines you can see below are ink, where I accidentally allowed the template to move as I was marking the corner blocks. Those marks were removed when I leveled the garland, which we will talk about in a later article. The curve of the outer side of the blocks is extended through the C-bout rib, so that the upper and lower ribs overlap the C-bout ribs.
This is how the bent ribs are fitted into the mold and glued to the blocks.
Clamping and Gluing
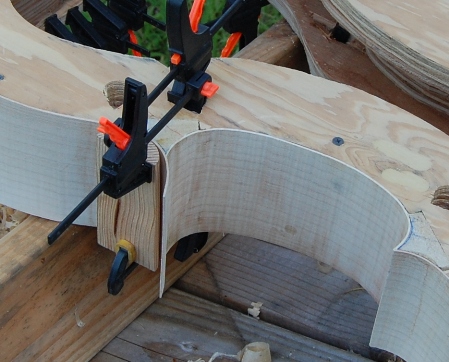
I cut clamping “cauls” (curved wooden blocks) to help hold the ribs tightly to the blocks while gluing. The holes in the mold are positioned in such a way that the clamps will be pointed the right direction to achieve maximum hold while gluing. Do four or five “dry-runs” before actually applying the hot glue. In fact, it is a really good idea to have things clamped in place, and just remove the clamps on one end long enough to apply the hot hide glue and re-clamp immediately.
Clean up around the joint, immediately, with hot water and a rag or brush. Let the glue dry overnight. If you have to re-work a joint, a teakettle’s steam, as close as possible to the spout, will un-glue a joint in about 20 seconds. Watch the fingers. Steam is hot. (Close to the spout, where the steam is invisible, is where you want to be.) You can get a serious burn if you are careless.
How I Do Things…
I use a $3 “potpourri heater” from the Goodwill store for my glue heater. Put an old yeast jar in it, and fill with water around the jar. I keep the lid on the jar when I am not actively using the glue, to keep it from drying out. It seems to work pretty well. I am told that 145 degrees F. is the correct temperature for hide glue. You can get good glue from a variety of places. I’ll talk more about glue, and the glue-pot, in a later article.
After the glue is completely dry, I cut off the excess upper and lower ribs at a right angle, exactly at their intersection with the C-bout ribs, so that the glue lines follow the inside corners of the upper and lower rib ends, and are essentially invisible. (I do NOT “miter” these corners–I hide the joints by putting them right on the corners of the squared-off ribs.)
If you found this post helpful, please share with your friends!


 Follow