How To Make Yourself A Great Classical Cello (3/30)

Please share with your friends!

Step #3 Build a collapsible mold :

(You Can Also UseThis Mold on Five-String Cellos.)

Interior Mold: Cheap, Plywood, Collapsible

The mold holds the shape of the ribs until the luthier installs the front and back plates. It also holds the blocks rigidly in position until the Luthier can finish assembling the entire corpus. The plates actually derive their respective shapes from that of the mold and ribs. Therefore, it is very important to get the mold as accurate as possible.

Planning Cello Block Attachment–and Removal

In small molds (violin, viola, etc.) we simply glue the end and corner blocks into the mold. We break the glue line later, in order to remove the mold from the body of the violin or viola. (Remember that the blocks are a permanent part of the instrument– the mold is temporary. It has to be right, but it can be “cheaply right,” or “expensively right.” I went with “cheaply right”.)  In larger instruments, it is possible to secure the blocks using screws from the inside of the mold. That way, it is not necessary to break any glued joints in order to remove the mold.

Collapsible Molds

Furthermore, it is desirable to be able to remove the mold piecemeal, so as not to stress the rib structure when trying to pry it free from the mold. (I have broken more than one rib, trying just a little too vigorously to remove the interior mold.)


Cello mold parts
I designed this mold to come out in pieces for easy removal.

As you can see above, I simply built up the main body shape with layers of plywood. I had a pile of scrap plywood in my shop, so I traced out individual sections from the mold template (from step #2), cut them all out, stacked them, and secured them with glue and drywall screws.

What you may not be able to tell from the photo is that the left and right sides of the main part of the mold can be released from the center blocks on each end. This is to facilitate mold removal. I attached them with screws, not glue. The front and back sections are one-piece each, but are easily removed before the linings are installed. (The linings are a part of what makes mold removal tricky. We will talk about linings later on.)

How the Collapsible Mold Works

Essentially, I made the whole mold in six pieces: left and right, top and bottom end blocks, and front and back sections. After they were all assembled, with extra room left around all edges, I checked one last time. I used the mold template to establish the final shape. Then I cut the mold out on a bandsaw, and smoothed the sides on an oscillating spindle sander (like a drum sander). The sander keeps the edges at a right angle to the front and back. It is a very handy tool, which has paid for itself many times over.


Partially assembled cello mold.
Here, the front of the cello mold is in place, but the back is still off.

Above, you can see that I secured the front and back sections of the mold with screws only. That way, I can easily remove them after I bend and install the ribs. That leaves sufficient space to install the linings. I used about eight screws each, front and back.
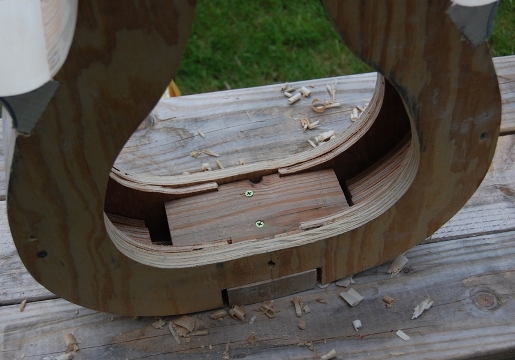
 

Mold construction detail.
Cello mold with end block screwed in place for easy removal.

See how the deck screws pass through the end block of the mold to secure the end block of the cello. You must use short enough screws that they will not protrude all the way through the block. You only want the screws to penetrate the blocks by 3/4″ or so, and right along the center line. (If you ever run into one of those screws with a cutting tool, you will be shocked at the damage it will do to your expensive tool.) Also, in reality, I installed the blocks in rectangular form and shaped them afterward. Notice that in this photo, I have already shaped the blocks. See the next picture.

Tracing the Template Shape Onto the Blocks

Tracing block shapes from mold template
This is how the block shapes are transferred from the mold template.

This is how you use the mold template to trace the shape of all six blocks. You trace one half, then flip the template over to trace the other half. Be very careful to do this step accurately, as the shape of the blocks will determine the final shape of the cello.

Shaping the Blocks

Using a bandsaw, I cut the inner curve of the center corner blocks very close to the traced line. Finally, I used the spindle sander again to bring the blocks exactly to my lines. I usually wait until after the C-bout ribs are installed to trim the outer part of the center blocks. I’ve never had a block fail, but I have been told that if you cut them too soon, they can be fragile and flexible, and you may end up either bending or breaking them.

Next, we’ll talk about bending ribs.

If you found this post helpful, please share with your friends!

How to Make Yourself A Great Classical Cello (2/30)

Please share with your friends!

How To Make Cello templates for molds, scroll, and arching

Step #2–Making Cello Templates

Cello Mold template, Cello scroll template, Cello arching templates

How do I transfer those Cello Mold lines?

Having chosen to use the 1712 Davidov Stradivarius cello as my pattern, I went to a copy shop, and had them make a photocopy of the drawing on the back of the poster. They made three copies, as I intended to cut the copies up in making the templates. I pasted the cut up photocopies to thin plywood (“door-skin”), and then cut out the shapes seen in the photos below. An even better material for templates, produced in exactly the same way, is 1.5mm Aluminum.

Still another way, which I use on smaller instruments, is to use clear, 3mm plastic (Lucite, Plexiglas, whatever you call it) and trace with a scribe directly over the original cello drawing. The resulting template is accurate, transparent, and does not warp with a change in humidity. Your choice… And, By the Way, all of these instructions also work for five-string cellos.

How Templates are used:

The idea behind the Cello templates is that I should have a flat pattern to trace around. This pattern will determine the shape of the mold and a curve to match the shape of the archings as I carve the topography of the plates. Photos below:

Continue reading “How to Make Yourself A Great Classical Cello (2/30)”
If you found this post helpful, please share with your friends!

How To Make Yourself A Great Classical Cello: (1/30)

Davidov model cello
Please share with your friends!

Choose a Model: Pick a Pattern!

Ruggieri, Montagnana, Stradivari, Amati, Maggini, Guarneri, Gofriller, Gasparo da Salo, Strobel, etc.

What Cello should I build?

There are almost as many different models of cello as there are of violins. Stradivari made them, as, apparently, did Giuseppe Guarneri, as well as those before and after them. Both Andreas Amati and his illustrious grandson, Nicolo Amati, made celli. Franscesco Ruggieri, Andrea Guarneri, Gasparo da Salo, Giovanni Maggini, Matteo Gofriller, and Domenico Montagnana are other makers famous for celli. But I really was going to choose between only three possibilities:

1. Someone had given me a plan for the Montagnana “Sleeping Beauty” Cello, which has a good reputation for a big sound.

2. There are two complete sets of plans in Henry Strobel’s book, Cello-Making, Step-by-Step–one a full-size model, and the other a 7/8 size.

3. I had bought a poster from The Strad Magazine, with a detailed drawing of the 1712 Stradivarius Cello known as The Davidov.

The Davidov cello was being played by Yo Yo Ma, a world-class cellist. I really liked the looks of it (the Sleeping beauty is kinda chunky), and it is a known entity (those in Henry Strobel’s book are lesser known). So, with all that (and the fact that Paul Schuback assured me it was a good choice) I settled on the Davidov. Nothing arcane about it– I just grabbed the one I liked, really.

One thing that had been a vote in favor of Henry Strobel’s cello plans is that the plans were already drawn, including the lines for the mold. The poster gave all the information for the original instrument, but I had to come up with the mold template myself. That was OK, but I ended up a few millimeters oversize. My fault.

Photo-Essay of my first cello-build

In case anyone wants to see this whole series at once, here is a link to the original blow-by-blow photo-essay on Maestronet. It took 13 weeks of spare-time work from start to finish–between 250 and 300 hours, I would guess.

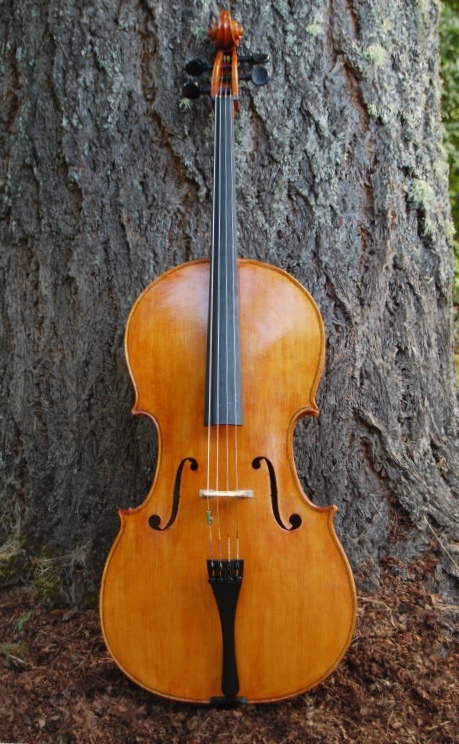
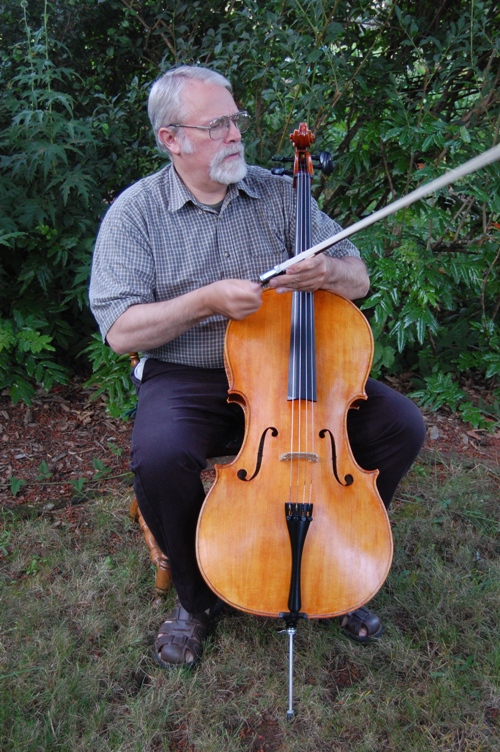
Davidov Model Cello by Chet Bishop, Luthier
My First Davidov Model Cello Build, Completed and Ready to Play

If you found this post helpful, please share with your friends!

Annnd… I’m Back. With a New Fiddle.

Please share with your friends!

Resurrected Website: Bluefiddle’s West Wind Strings

A couple of months ago, in my befuddled, well-meaning, bungling way, I killed my website entirely.

The host was able to save it, but I had been in the process of changing hosts, so that was a bit awkward. I have switched from Joomla, which I was just beginning to understand to WordPress, regarding which I understand nothing…and have bought the requisite book: “The Complete Idiot’s Guide…”  Sounds as though it was written for my kinda guy. A friend has reconstructed the site using WordPress, and has assured me that I will be able to master the new software.  I trust he is correct.

New Five-string fiddle

I did complete one new instrument since I last posted: a five-string fiddle (sometimes called a “bluegrass fiddle”), using the wood from the Big Leaf maple log I had been given a few years ago. This is the first instrument I have made using that wood, and I am delighted with the look, response and sound. Here are a few photos of the new, handmade in Oregon, bluegrass fiddle:

Continue reading “Annnd… I’m Back. With a New Fiddle.”

If you found this post helpful, please share with your friends!