A fellow approached me a few months back, asking whether I could build a five-string fiddle of some exotic wood which he had bought almost 33 years ago, and which he had hung onto all this time. Of course I am delighted to make an instrument that is special to a client, so I said “Sure!”
Wood
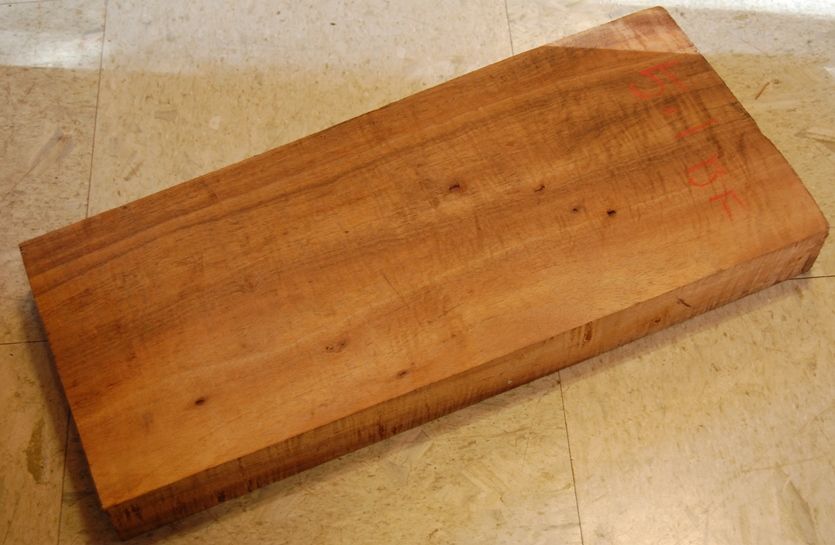
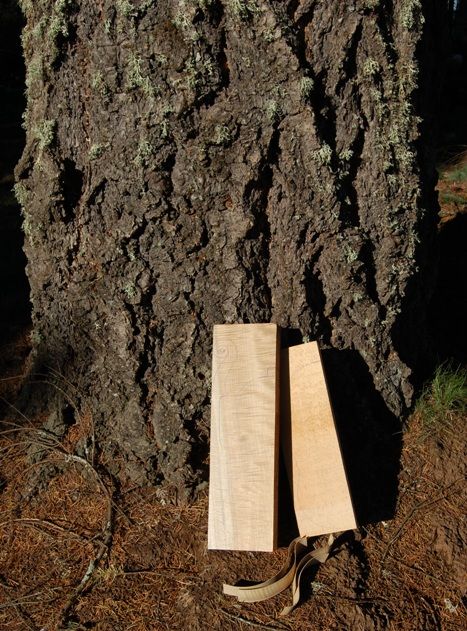
Here is the wood (Nice stuff! I can see why he hung onto it!):
The wood from which this fiddle will be built.
The neck, back and ribs will all be cut from this block. Actually there will be a fair amount left over, so I will try to use it in an efficient manner so that he can use the scraps for something nice, too. The front plate will be spruce. The blocks and linings are willow…not sure which specific variety.
Templates–Patterns
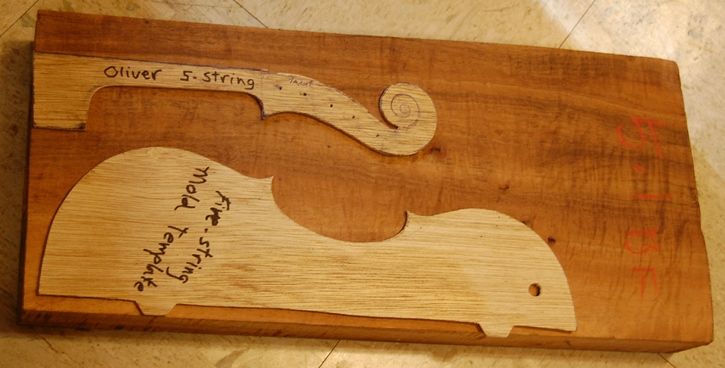
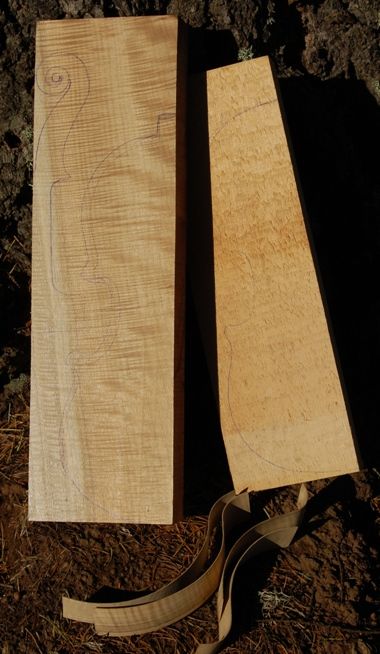
Here is how the pattern will fit–with lots of room left over:
Plenty of extra from which to cut rib-stock.
The section from which the back plate will be cut will be sawn into two pieces, each half the thickness of the original block. The two pieces will be glued edge to edge, so that they are “bookmatched”: that is to say that the straight edge of the mold template will become the centerline of the back plate. (I will show photos of how it is done when I get to that part.) The same thing will happen with the spruce for the front plate.
Progress and Plans
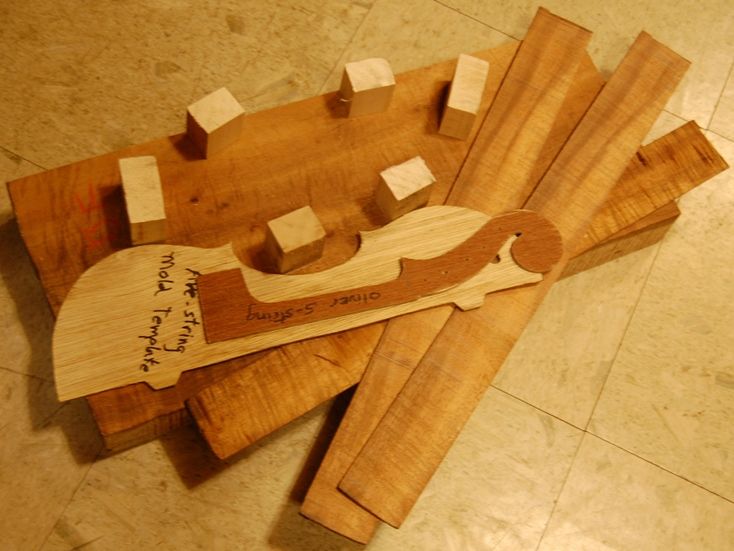
The five string fiddle will be built to my usual “Oliver 5-string” Pattern. So, the first thing I needed to do was to cut the ribstock using a band-saw. (I sliced them off at 2mm thick, later to be thinned to 1mm thick before bending to shape.) I also cut willow blocks for the four corners and the two ends.
Ribs and blocks with wood and patterns
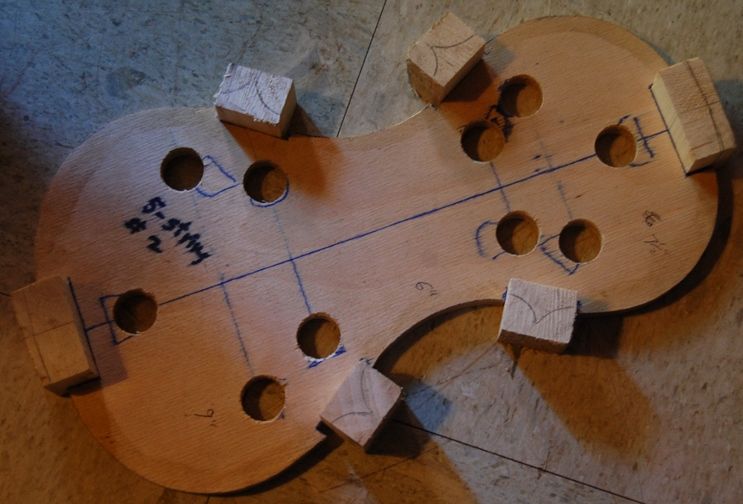
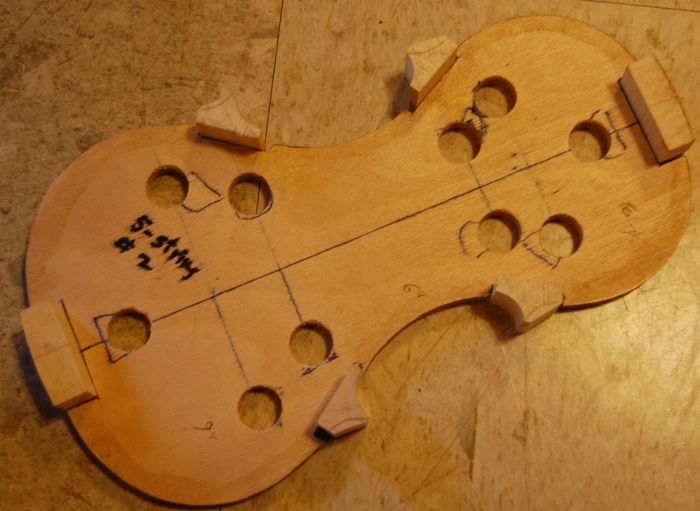
Then I needed to glue the blocks into the mold, and mark them for their outer shape. This shape will be the inside shape of the ribs, and the blocks will become a permanent portion of the finished instrument. The mold will be removed as soon as the rib structure is safely glued to the front plate (not pictured here.) Once the glue was dry, I laid the mold-template on the centerline of the blocks, and scribed around it with a pencil.
Blocks glued into the mold, and marked for shaping.
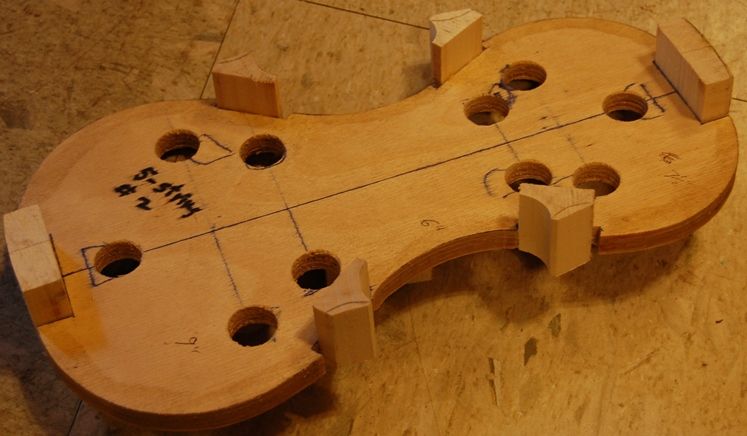
After the blocks were marked, I was ready to begin shaping them. I really only want the center curves shaped to their final profile: the rest of the corner blocks need to stay a little thick, so as to guarantee they will not deform when I am gluing and clamping the center ribs in place. I went ahead and shaped the end blocks as well, as that does not hurt anything.
C-bouts and end blocks shaped to receive ribs.
Here’s a side view of the same thing:
Blocks and Mold, side view.
Once the center ribs are bent to the correct shape, I will glue them to the center bout surfaces of the corner blocks, and after the glue is dry, I will shape the outer surfaces to receive the upper and lower ribs. From that point forward, it will begin to look more and more like a violin.
I will keep you posted.
Thanks for reading.
If you found this post helpful, please share with your friends!
This is the one I mentioned in an earlier post that I hoped to have completed before beginning the commissioned fiddle. It is nearly complete: only varnishing and set-up left to do.
Maple and Spruce
This wood was given to me by a friend, who, many years ago, had gotten the “gotta build a violin” bug, but it never developed into the real “disease” (as it did in my case.) I don’t know where the wood originated…all I can tell for sure is that it is Maple and Spruce. I believe he had bought a “kit” of wood from a company in Oklahoma, which is no longer in business. (Who knows where they got it….)
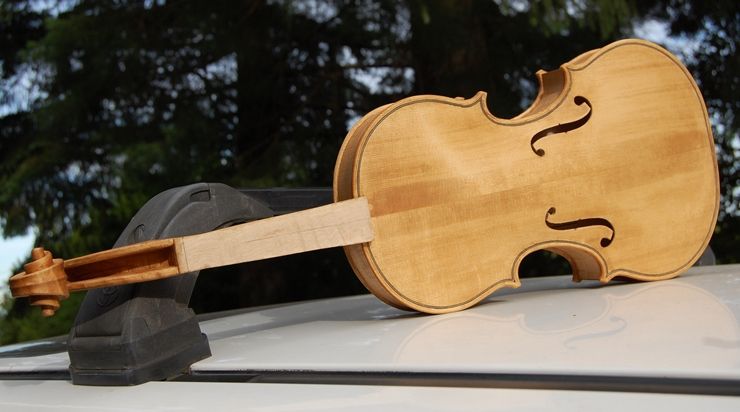
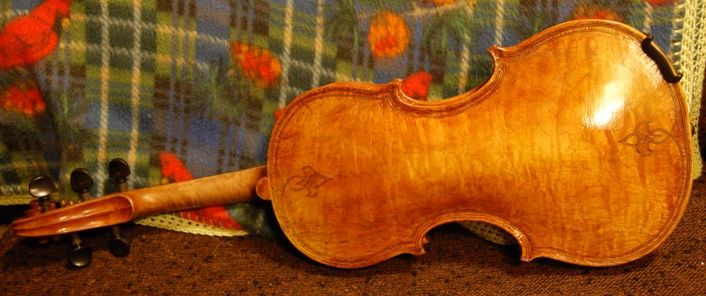
He finally donated the wood and other supplies to me, with the request that it actually would become a fiddle. So…here it is, with the first seal-coat on, and drying in the sun, on top of my car.
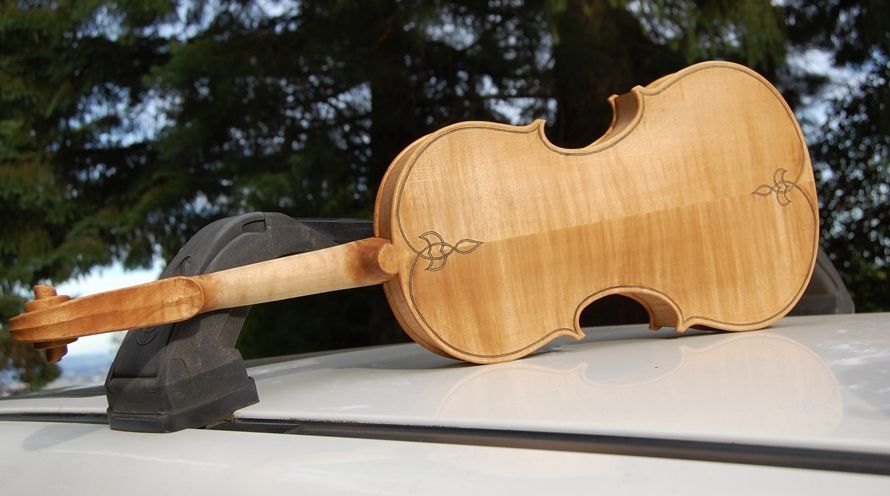
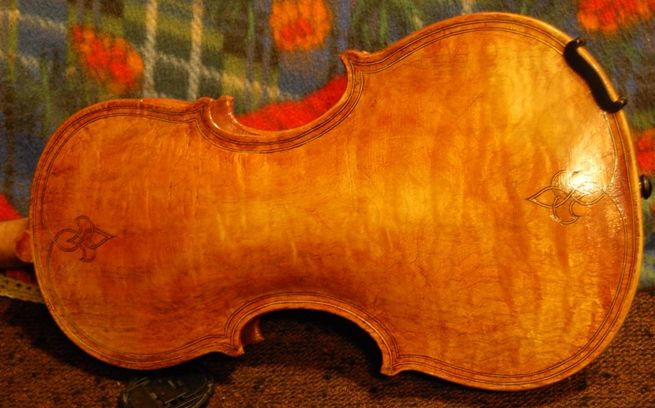
Five String Fiddle Front with first coat of sealer, drying in the sun.And the back…
I expect that the flame in the maple will be more pronounced with the varnish in place, but it is a pretty nice-looking fiddle anyway, so I am not really anxious about the moderate flame.
I wanted to get this done before my friend and his wife move away, later this month…but I am cutting it awfully close.
I will post more photos later.
Thanks for looking.
If you found this post helpful, please share with your friends!
One of the results of the Marylhurst Musical Instrument Makers’ show was that a fellow quietly approached me at my table, asking me about building him a five-string fiddle beginning in June (I don’t know why the delay…perhaps he is busy…).
Exotic woods
He had some exotic hardwood he had purchased 30-some years ago, and he asked whether I could build a five string fiddle from it. (Sure!) He asked about a deposit, and I told him that in general it is not needed; that I would rather just build the instrument, and see to it that he is really pleased with it before any money changes hands (see my “Commissions” page).
So…June 9th or soon thereafter, I will meet with him to discuss the particulars that he hopes for in his 5-string fiddle.
In this particular case, the exotic hardwood is one that is no longer legal to cut (or at least was protected for a long time), but he still has the receipt from having purchased it before the cutting-ban, so I am willing to work with it. There are some materials I would be afraid to use, simply because conservationists are essentially making it illegal to own such things, let alone use them in crafts.
Other Five-string Fiddles
I have two other five string fiddle projects in the works, both partly completed: one is a Maple/Spruce combination and the other a Myrtle/Port Orford Cedar combination. I hope to complete the Maple one before I begin the commissioned instrument. I will post pictures of it when it is complete.
Other Instruments
I recieved very good reviews on my newest violin, though it was less than 48 hours old. I know what the differences were in its construction, and can repeat them, so I have ordered more European wood specifically for classical violins, and will be turning out a pair, soon: one modeled after the “Plowden” (1735) Guarneri del Gesu, and the other modeled after the “Dolphin” (1715) Stradivarius. I expect them both to be top quality. 🙂
Cello
I also had reason to begin another “Davidov” model cello: this one will be Red Spruce top with Big-leaf Maple back, sides and neck. I have already begun it as well, but am not far along. I will post photos as it progresses.
So, that’s the news…details later!
Thanks for reading.
If you found this post helpful, please share with your friends!
Two Hand-carved Five String Fiddle Scrolls in Progress
First: Lay out the Side Profile
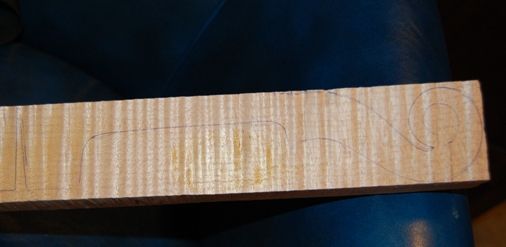
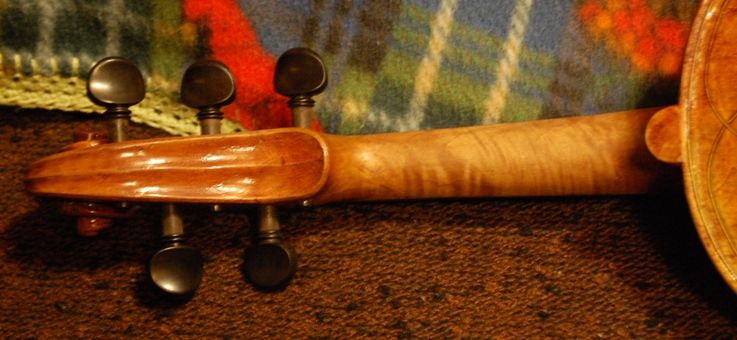
I created a template for a five-string fiddle neck and scroll when I made my first 5 string blue-grass fiddle. The template is fairly crude; just a cutout of thin plywood (door-skin material). I have other templates I have made of aluminum, and still others of plexiglass plastic. But that is the starting place, regardless of template materials. I know how thick the billet needs to be, and how long, so I simply place the template on the billet of curly maple, and trace around it with a ball-point pen. (I used to use a pencil, but the ink is easier to see against the wood.)
Violin neck billet with profile laid out. Notice that the pegbox is a little shorter, because it only has to accommodate four strings.
Next: Cut out the Profile
I use a band-saw to cut out the profile of plates and necks. I do have a bow-saw that I made for such work, and I can use it if need be. but I find the bandsaw so much easier to control and so much faster, and the results are so much better, that I quit using the bow-saw after about two instruments. It looks nice, hanging on the wall.
Power Tools vs. Hand Tools?
Some people are insistent that the “only right way” to make a hand-made instrument is to use nothing but hand-powered tools. I have built one instrument using only hand tools. I will probably never do so again. There is a reason that bandsaws, drill presses, etc were developed: they not only save wear and tear on your body, they do better work, as a rule. Can they cause damage? Absolutely. So can any tool.
I use a practiced eye and steady hand to guide the billets through a bandsaw. I complete all the carving of each hand-carved instrument using gouges, planes, chisels, and scrapers.
The vast majority of my work is done using hand tools, but there are certain tasks for which I use the appropriate power tool, and make no apology for doing so. (By the way, I live eight miles outside a small town, and when I go to town, I drive…I don’t have a horse, and my time is too valuable (and limited) to walk that far just to satisfy some atavistic “back in time” quirk. I use electric lamps, etc., too, unless we have a power outage.) (sigh… OK, rant over…)
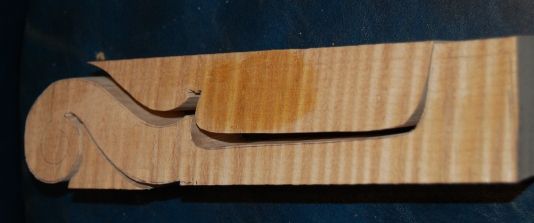
Here’s that same violin neck billet with the side profile cut out.
Lay out the Front and Back Shapes
I have a table of measurements I use, to lay out the front and back lines of the scroll and neck. The top of the neck is just over 24mm, the widest part of the pegbox front is 26mm, the distance from the leading edge of the nut to where the neck intersects the top plate is 130mm, and so forth.
I lay these out using a metric rule, a compass, and a flexible straightedge. The main straightedge is just a stainless steel ruler with a cork backing that I bought from a fabric store. But I need a very flexible straightedge when I am laying out the curly portion of the scroll, so I cut a spiral strip out of a large soft-drink can (actually it was one of those oversized “energy drink” cans. Someone at work had it, and was going to throw it out, so I snagged it and made good use of the thin aluminum sides.) It is about 40mm wide, and long enough to wrap around the scroll, giving me a clean, smooth curve to scribe in with the pen. Aluminum flashing would work, too, but this was free. You can see the layout lines in the next step.
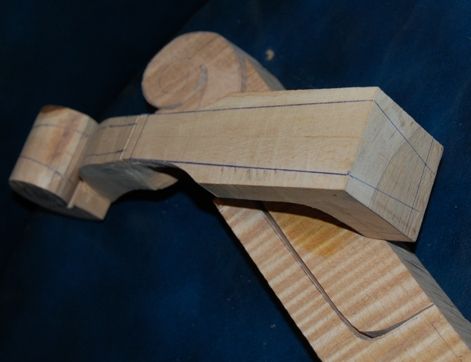
Cut off the Excess Wood from the Pegbox
I use the bandsaw, again, to trim all the waste wood from about two inches down the neck up to where the pegbox begins to disappear under the curve of the scroll. I leave the scroll and almost all of the neck full thickness, so that the billet will sit flat on the drill press table, and I can get the pilot holes for the pegs drilled parallel– perpendicular to the centerline of the neck.
Another nice thing about leaving the handle portion of the neck for last, is that it leaves me two parallel surfaces, so I can clamp the scroll in a vise, and use both hands to control the gouge, plane, saw, or other hand tool.
Front and back profiles laid out– excess wood trimmed form cheeks. You can see, too, that I already began carving the heel (or chin) of the pegbox. Just a personal preference.
Layout and Drill the Peg Pilot Holes
Some people wait until the whole violin is completed, including varnishing, to drill the peg holes, but I find it too difficult to get them parallel with one another that way. If I can drill a 1/8″ pilot hole for each of them, using a drill press, so that they are exactly perpendicular to the center of the neck, I find it much easier to complete the neck later, than if I have to try to get them right with no flat surface from which to reference the perpendicularity of the holes. You’ll see these holes in the next blog post. So long as they get done before I cut the excess wood from the neck and scroll, I will be OK, because the neck will still sit squarely on the drill press table.
Carve the Pegbox
There are several ways to do this. A lot of makers use a drill to hog out the waste wood from the hole, and then use chisels and gouges to smooth and complete the work. I usually just use the chsels and gouges right from the beginning…one mistake with the drill, and the scroll becomes firewood.
I use a narrow, flat chisel to begin the work, and develop some depth, then use a wider, flat chisel to flatten the inside of the pegbox “cheeks,” and to deepen the box floor. I have to be careful to not go too deep. I have (once) cut so deep that, later, when I cut the fluting (volute) from the outside, I cut through into the interior of the pegbox. That is another good way to transform a nice scroll into firewood. Pretty sad when that happens.
I tend to begin by carving the outside of the pegbox heel… it makes me feel better about the scroll, if something about it is already starting to look like a finished scroll.
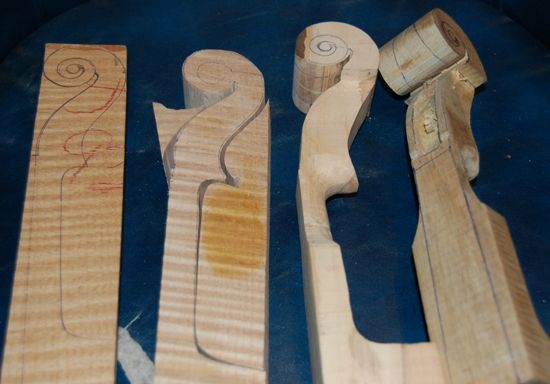
Here you can see all four of the preliminary steps, including the beginning of carving out the pegbox. You can see, too, the extra length in the five string fiddle pegboxes (on the right).
I will show photos of the succeeding steps in the next blog post. What you see above, though, is the beginning of all those nice violin, viola, cello, bass and five string fiddle scrolls you have enjoyed looking at.
Thanks for reading.
If you found this post helpful, please share with your friends!
My wife has been after me for some time to increase my output of 5 string bluegrass fiddles. (She’s probably right, but there are so many other things to do!) So…what to do? I made two new molds, a little broader in the middle bouts, which may improve the sound even more. I installed blocks in both molds and hope to build one five string fiddle of Oregon Myrtle-wood with a Port-Orford Cedar top, and another five-string fiddle of figured maple with a spruce top.
Improved Perspective
I had belly surgery last month (gall-bladder removal) and I am feeling much better. It makes me wonder whether that has been the main source of much of my “don’t feel good” problems for years. I feel so much more positive about work, lutherie and life in general, it is pretty amazing. (And, no, I am not on any “feel-good” meds, in case you are wondering… although, I’ve got to say, after the few days of Oxy-Codone, I can see why people get addicted to the stuff. But I got off it just a few days after the surgery, with just a few times going back for a day or two, to get over a hump, so to speak, when pain became a problem again.)
Progress Thus Far:
So: I have bent the ribs for the figured Oregon Mytrle-wood/Port Orford Cedar fiddle, but still have to join the plates both front and back. I installed the center bout ribs last night, and hope to get the upper and lower bout ribs installed today.
Wood for Myrtle/Port Orford Fiddle with Douglas Fir Tree. There was a hard East wind blowing, and the ribs kept blowing away.Close-up of wood for Myrtle/Port Orford Fiddle
The plates for the Maple/Spruce fiddle are already joined, but the ribs are only cut– they still need to be thinned down to 1mm and cut to 35mm width. If I can get that done today, I will heat up the bending iron and try to get the ribs bent, and the c-bout ribs installed. After that I can work on getting the willow linings cut, bent and installed.
Both fiddles need the neck-blocks cut to shape, to prepare for carving. Neither have any plate-carving done, nor purfling, f-holes, etc., of course.
Follow along as I complete the builds. If you decide you’d like a private look at one of them give me a call or an e-mail.
Goals:
The intent is to have two new five string fiddles ready in time for the Marylhurst University Musical Instrument Show in the Spring ( April 25th and 26th, 2015) My problem is that I also realllllly want to have a new hand-carved upright bass ready in time to attend the International Society of Bassists (ISB) competition in Fort Collins, Colorado, in the last week of May/first weekend of June. (Too many goals…need more energy and time!)
One drawback to the competition goal is that (I think) I will not be able to post progress reports, (photos, anyway) until after the competition. Ah, well… I’ll post other stuff, I guess.
Thanks for reading.
If you found this post helpful, please share with your friends!
Five String Fiddle completed…just in time for the Show!
The Maryhurst University Musical Instrument show is this weekend, Saturday and Sunday, the 3rd and 4th. Admission is only $3 … this is a really good deal, and a great “peek” at up-and-coming makers, as well as the more well-established ones.
Last year there were two banjo-makers, three or four mandolin makers, one double-bass maker, one maker of traditional Persian instruments, one maker of electric Kalimbas, one maker of traditional Mexican instruments, three or so Ukulele makers, possibly ten makers of violin-family instruments, a couple of cigar-box ukulele makers, one orchestral harp maker and probably fifty to sixty guitar makers, of all varieties.
Handmade Bluegrass fiddle took months to complete
I have had more discouraging setbacks on this instrument than in any instrument of the last ten years, probably. I got sick early in the making, and was very busy with work as well, so that slowed things down. Twice I made errors and had to scrap the neck and start over. (Boy, is that frustrating!) Then I somehow got a serious muscle spasm in my back, and could hardly walk for several weeks.
However, perseverance pays off, and I finally completed the five string fiddle last night. There are still some spots to touch up on the varnish, and some other cosmetic issues, but for purposes of practicality, it is complete– and playing very well.
Oregon Bigleaf Maple and Sitka Spruce
The maple wood is from the same log from which I made last year’s five string fiddle. The flame is not quite as spectacular, as it came from a different portion of the log, but still definite eye-candy–the back looks like a cloudy golden sunset in the right light.
If you’d like to try it out, please come to the Marylhurst show this weekend. Meanwhile, here are some photos:
Front of the fiddle– colors are close, but in person it is more brown/red…less yellow.
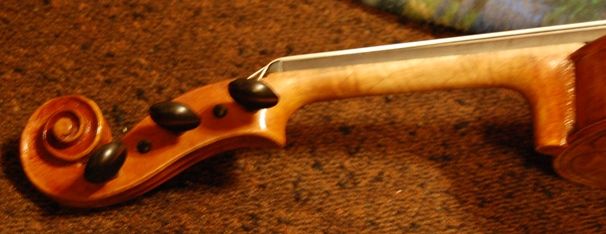
The back looks pretty good, but it is better, of course, in person…you can see the flame better.Here is a closer view of the grain of the back. It really requires the changing angle of the light, to get the best view of it.Here’s the back of the scroll. I really like the flame in the neck.And, finally, the side of the scroll itself. Not much flame in the wood, but I like the way it turned out, anyway.
Come and try it out at the show. I’ll hope to see you there.
If you found this post helpful, please share with your friends!
Life is what happens while you are making other plans, they tell me. This season has been loaded with distractions. I worked a lot of late hours at Gunderson, Inc. where I was teaching classes on Welding Supervision.
Two young fellows were coming to the house a couple of times per week to work on instruments they were building. One was working from a kit, but had zero experience with tools, so it required a great deal of personal attention; the other built from scratch, and is nearly finished with a very nice 15-5/8″ viola, a fairly faithful copy of the 1580 Gasparo da Salo viola. (Funny, when those young fellows are here, I don’t get a thing done on my own work.) I did begin three 5-string fiddles, months ago, but have only made measurable progress on one; the Spalted Maple 5 string fiddle.
I took two weeks vacation between Christmas and New Years, but ended up being sick nearly the whole time. Besides, my daughter was home from school for that two weeks, so I had reason to be distracted. 🙂 I did get a couple of work days in, but it has been a struggle.
Finally, I have several repair jobs going, each of which really needs to be done, so, to make a long story slightly shorter, things haven’t turned out as planned.
Double Purfling Complete, Including Purfling Weave on Back
The maple for the one-piece back is some Oregon Big Leaf Maple that was given to me by a local landowner and forester a few years ago. This is the third instrument I have made from that tree. It is a relatively soft maple, and has had a very nice tone, so far, in my experience. I have made one five string fiddle from it, so far, and one cello.
The Spruce is Sitka– a one-piece sitka front plate– only the second time I have ever seen one, and it is some of the toughest spruce I have ever worked with, which I think will make a good, thin, top plate for the instrument, as I have made one instrument before with very similar spruce, and it turned out a winner, as a bluegrass, celtic and country fiddle. But it was not fun cutting the double purfling by hand, as every “winter grain” was so hard it would catch the knife blade and try to turn it. However, here is the progress so far:
Progress on Five String Fiddle
Today I will make the final corrections on the front and back arching and cut in the f-holes (I hope), then begin graduating the front plate. Hopefully, by next week, I can have the corpus nearly completed. Maybe somewhere in there, I can get a good run at the other two fiddles, as well. I really need all three completed by the time of the show in April. There will be about 500 people per day, coming through that show, and some of them will be fiddlers. 🙂
We will see; I am feeling somewhat less than optimistic, however, after the experiences of the last three months.
I decided to make two new molds, so that I could have more than one handmade five-string fiddle in the works at any given time. The new molds are made from the same half-model template, so they are very similar in character, but I did notice that somehow my original mold had been a little narrower in the center bouts than I had intended (don’t know how it happened), so the new ones are wider there, which may make the sound even more deep and clear. The instruments from the first mold have all been very good, so I am hoping the ones off the new molds are even better.
Different Materials
The original Oliver 5-string mold has the ribs and linings in place, and the chosen material for ribs, back and neck is spalted maple. This is an unusual choice, from a classical perspective, but a five-string fiddle is an unusual instrument, and I think it will prove a good choice. I really like the looks, so far. The second and third Oliver Molds (essentially identical, otherwise) have higly figured Oregon Big-leaf maple and Oregon Myrtle, respectively, for the backs and ribs. The Myrtle is a two-piece back, and the neck on the Myrtle fiddle is Big leaf maple; otherwise all the fiddles have matching ribs, backs and necks. The other two are each a one-piece back, also.
I am planning to use Port Orford Cedar for the two-piece front plate on the Myrtlewood fiddle. This will be the first time I have used anything other than spruce for a violin top, but I have been told it is exceptionally good for other types of instruments, and a friend gave it to me to try in a fiddle. I plan to use Sitka Spruce for the on-piece top of the curly big-leaf maple fiddle, as well as for the spalted maple fiddle. I am hoping to experiment with front plates made of Alaskan Yellow Cedar sometime soon, too.
Different fittings
Depending on the way they look when completed, I may vary my fittings a little, too…haven’t decided yet. I tend to like simple fittings, but I have used fancier fittings, once, and they did look nice– I am just not sure they belong on a bluegrass five string fiddle. Perhaps I can get a set of Oregon Mountain Mahogany pegs, or something. Mountain Mahogany is a very hard wood native to Oregon, but much lighter in color than Ebony, so it adds a different look.
Same Workmanship
I intend to use the same methods as always, including the double purfling that adorned the previous five-string fiddles. I will still use a scraper for the final contour and texture, though perhaps I will leave a little less “corduroy” texture on these than on some others. Some people like less.
Same Varnish
I will use the same Spirit varnish that have always used on all three fiddles, as well as the same graduation scheme and internal arrangements (bass-bar shape and size, etc.), so the sound should be the same.
Same Strings
I will use the Helicore five-string sets, as usual, though I have found some other combinations that work remarkably well.
Progress reports to come
As things progress, I will post photos, so you can see each of the three fiddles grow from a small stack of wood to a completed instrument. Each will emerge as a brand-new, handmade bluegrass 5 string fiddle when complete.
Stay tuned… (no pun intended). 🙂
If you found this post helpful, please share with your friends!
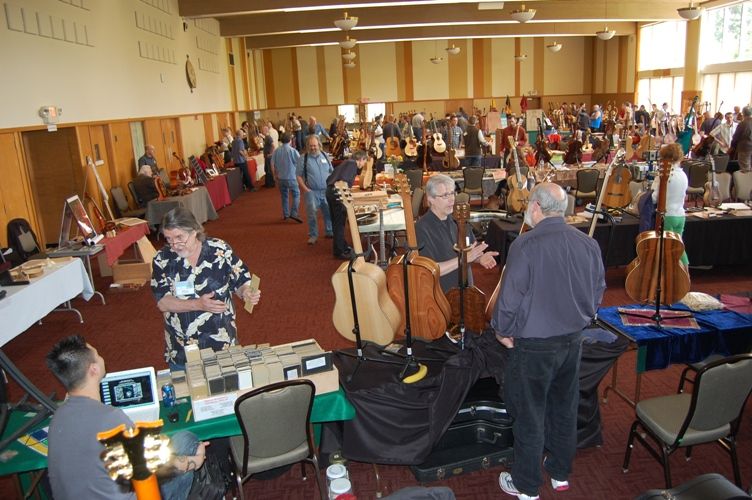
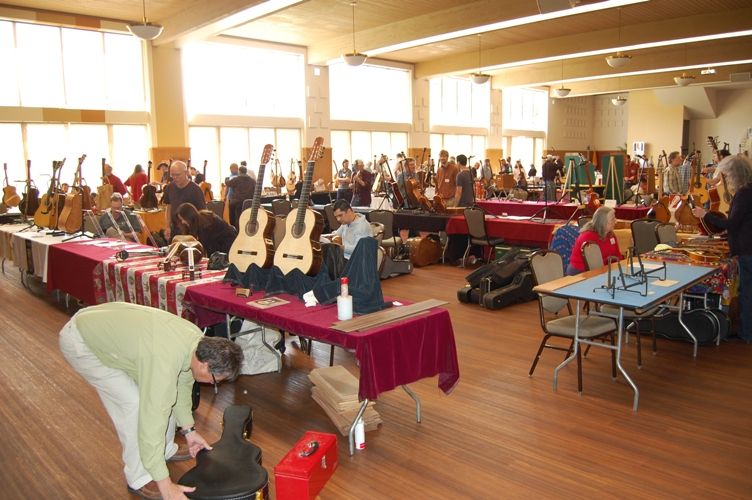
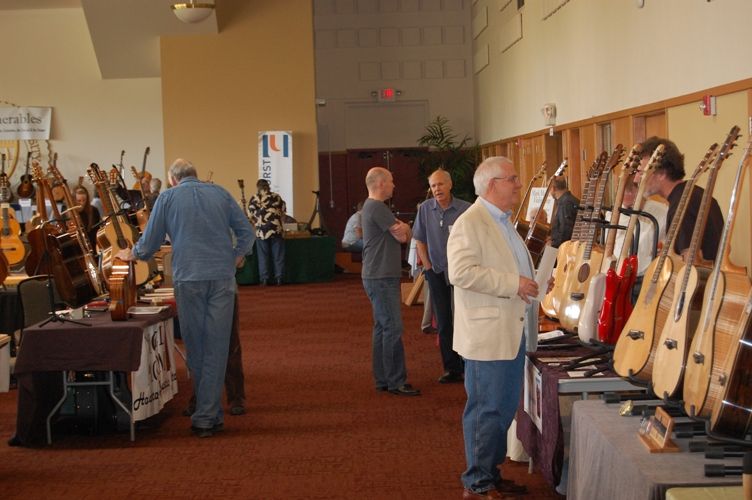
Here are some photos from the 2013 Marylhurst University Musical Instrument Makers’ Show: (Most were taken before the show was open to the public– these people are all the makers and vendors.)
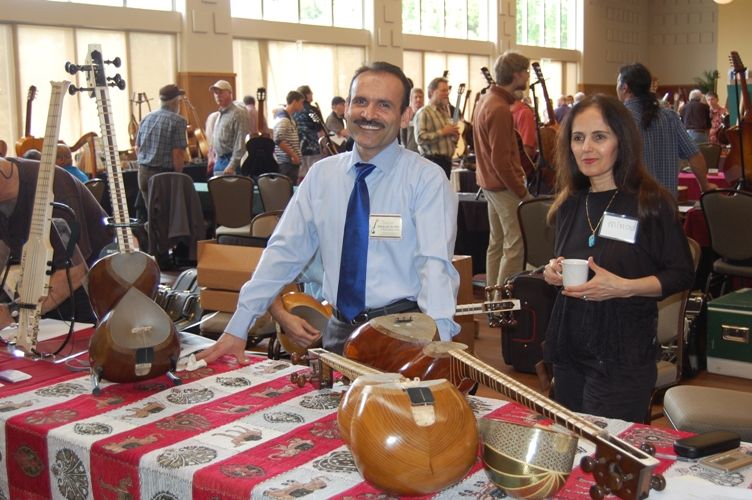
It wasn’t all guitars and fiddles, as you can see. This couple makes Persian instruments called “Tars” (the larger ones) and Setars, (not “Sitars”, which have 30 strings…traditionally, a Setar has three strings, but apparently about a century ago, a tradition of four-string setars began.) That little thing to the right of center is a setar.
There were also two banjo makers, several ukulele makers, mandolin makers, an orchestral harp maker, and, yes, even a few fiddle makers. And every kind of guitar imaginable.
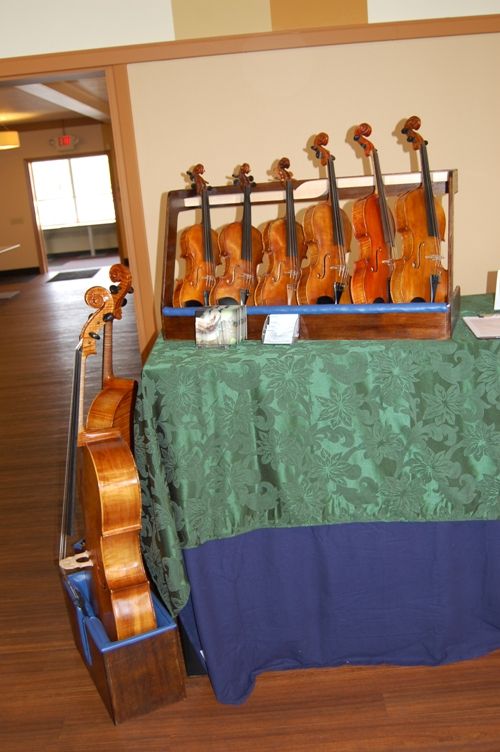
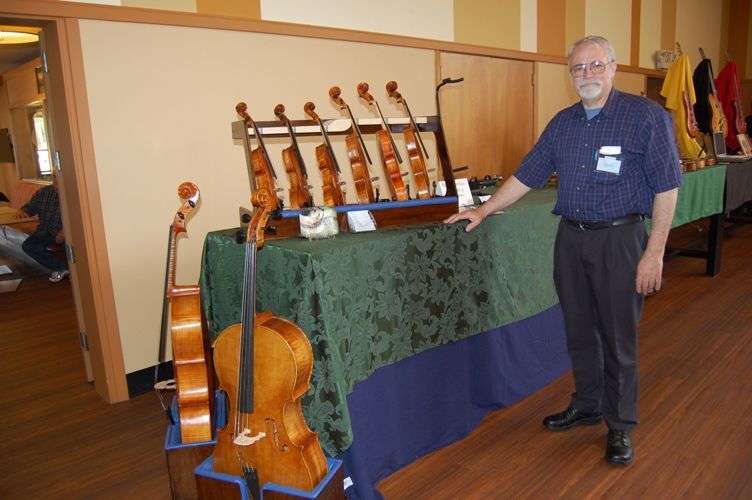
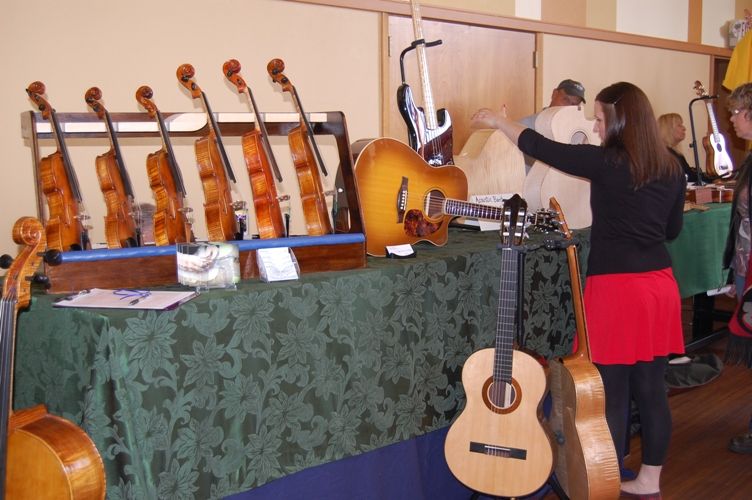
The table in the next photo was mine…I was sharing it with my son, who makes guitars. That worked out well. We had someone at our table nearly constantly.
In the picture above, Brian, my youngest son, had not yet arrived. In the one below, his girlfriend was helping set up his display.
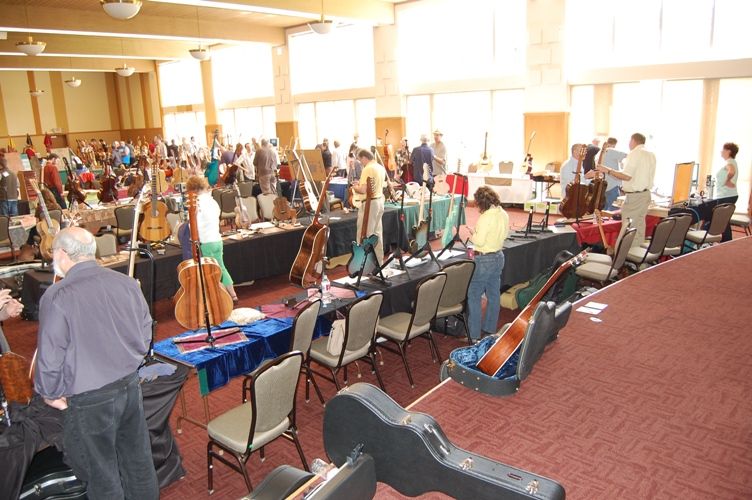
There were approximately 500 visitors each day…it was a pretty encouraging weekend.
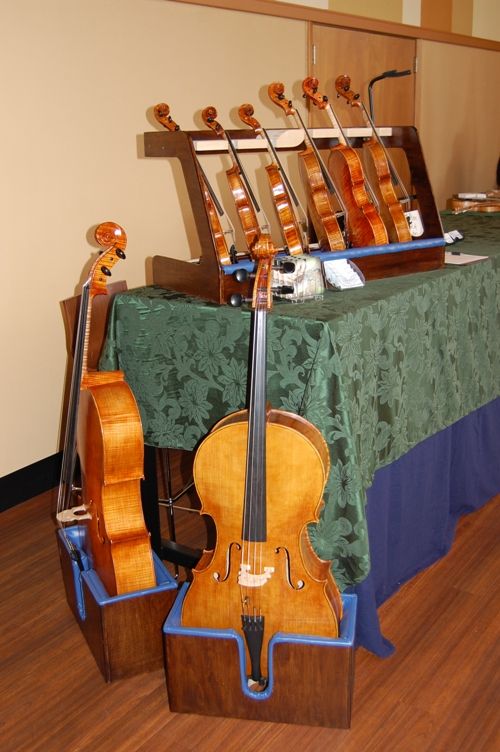
The five string fiddle (left-most in the rack) sold, so that was nice, but unfortunately there were not very many cellists in the mix…only two stopped and played the cellos, but they really liked both of them. The five-string was the real star. 🙂
If you found this post helpful, please share with your friends!

 Follow