
 Follow

5-string progress #3
Arching and F-holes
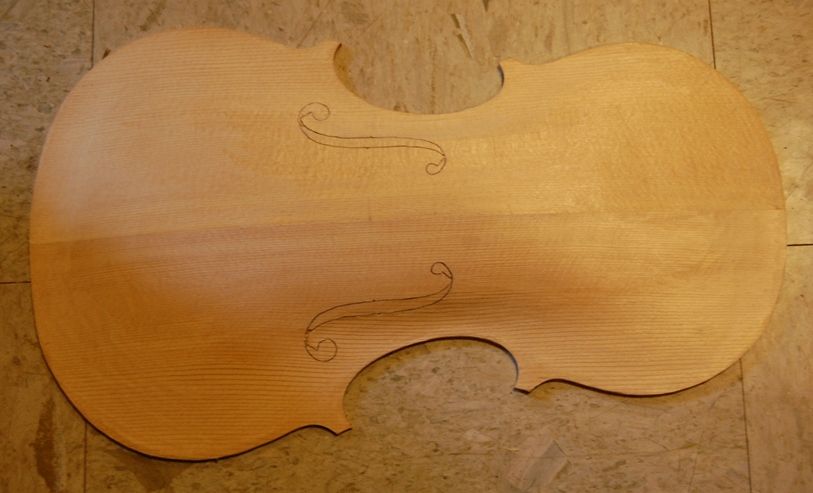
Last time, I had traced and cut out the top plate, and actually, I began the work on it, thinning the plate to the desired arching height– but that is when I discovererd that there was a bark inclusion that extended right through the upper bouts. So, for those “sharp-eyed” among you, who notice that the grain has changed; Yep. It surely has! Too bad…I liked the grain of the spruce in the plate I first chose, but it turns out it was just a little too interesting.
So, on this plate, all I have done is the outer arching and the layout and incision of the f-holes. After completing the arching, but before final scraping, I laid out the distance from the upper edge of the plate to the “stop” line (where the bridge will stand) at 195 mm, then laid out the distance between the upper eyes at 42 mm. I used a plastic template that I made years ago (cut out of an old flexible face-shield– the kind welders use when they are grinding steel) to lay out the shape of the holes, then incised them deeply with a thin knife. They would have been virtually invisible in the photos, so I traced them again with a sharp pencil after incising them, so that you could see them in these photos.
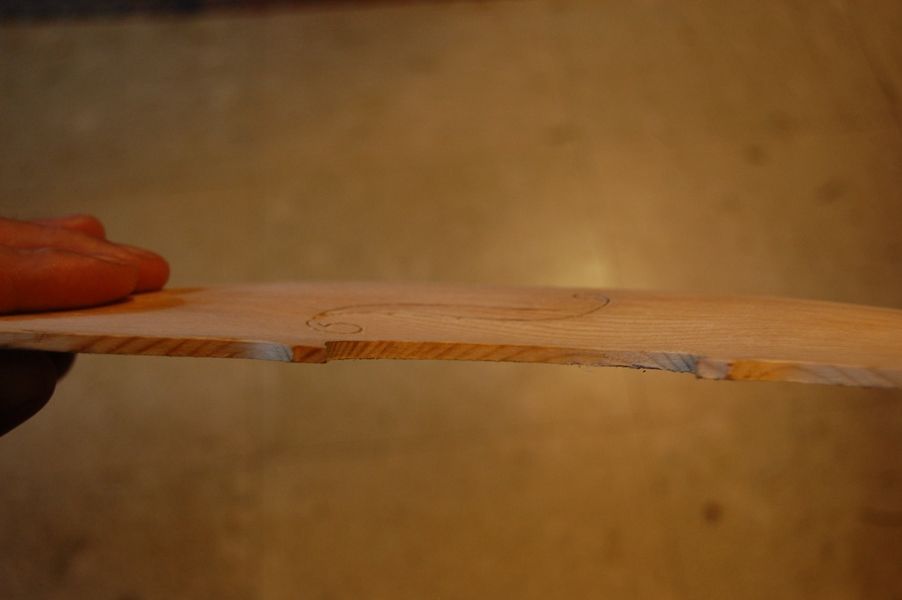
Arching: Final Check
Next I checked the arching by sighting edge-ways at the plate, to see whether the main stem of each f-hole is fairly parallel to the rib-plane. Usually I find that I have left the arching a little too “puffy” around the lower stem and lower eye area of the f-holes and need to plane away a few more strokes to get the stems lined up. I don’t think the looks of the f-holes are the main issue, here– the shape of the arching is fairly critical to the sound, as best I can understand, and this is just a “marker” for me to check.
Obviously, this alignment is something I have to do before I try to complete the inside carving, or there might not be sufficient thickness left to do the final adjustment. I try to estimate and get this area as close to correct as possible before laying out the f-holes, but I have had to adjust them at least a little, every time, so far.
After I am satisfied with the overall shape of the arching, I use scrapers to reduce all the lines and ridges left by the finger planes into a smooth continuum.
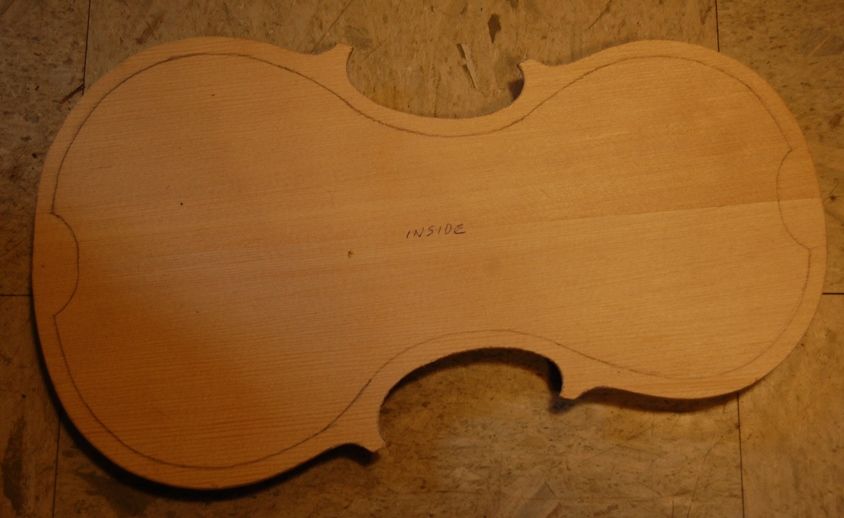
Graduation: Beginning the Interior
Once I have the outside arching the way I want it, I can start on the inside, and the final graduation of the plate. I hold a pencil in my fingers so that about 9 mm protrudes onto the plate, and then run my fingers around the edges…nothing precise about it: it is just a guideline for carving. I want to leave this area untouched until the last bit when I am scraping the inside, before installing the bassbar. I use the same template that I use for the final shape of the end blocks to scribe the shape of the area to be glued to the blocks. I scribe in the corner blocks with a curved scraper that just happens to fit the shape I want. All this outer perimeter area will be left flat until the last step before installing the bassbar, and/or installing the plate on the ribs. I want just the gluing surface flat when I am ready to install the plate.
Preparing for Graduation: Measure First!
It pays to use a caliper and check the thickness all over before beginning to carve. I do have a mental image of the desired shape of the interior, but I do not have a mental map of the thickness of the plate, so I measure at least the areas that already feel pretty thin to my fingers, and decide how much should come off in each area. As it turns out, this time, no areas are really borderline, but some are within 1.5 mm or so, so I will be careful around those places. I am aiming for about 3.5 mm down the middle, fairing down to 2.5 in the upper and lower flanks. and a few places 2 mm, very likely. I will try to leave some areas a little thick, where there is a likelihood of cracking, but in general, I expect this will be a pretty thin plate…the spruce is a little dense (which I have had good results with in the past), so it can stand to be a little thinner than usual.
After the inside is carved and scraped to my satisfaction, I will complete the cutting out and shaping of the f-holes, then chalk-fit and install the bassbar. I will post photos of all that.
Thanks for looking.
Looks good, Chet.
Thanks, my friend. Lotsa stuff going on right now, so the fiddle is coming along slowly.