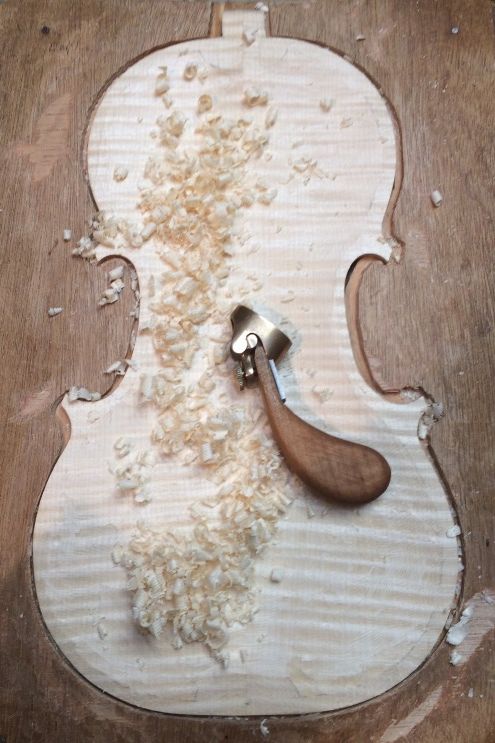
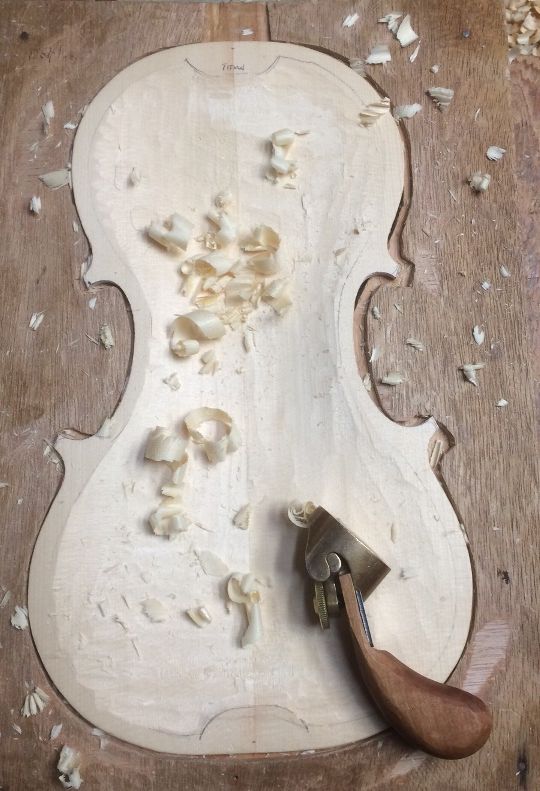
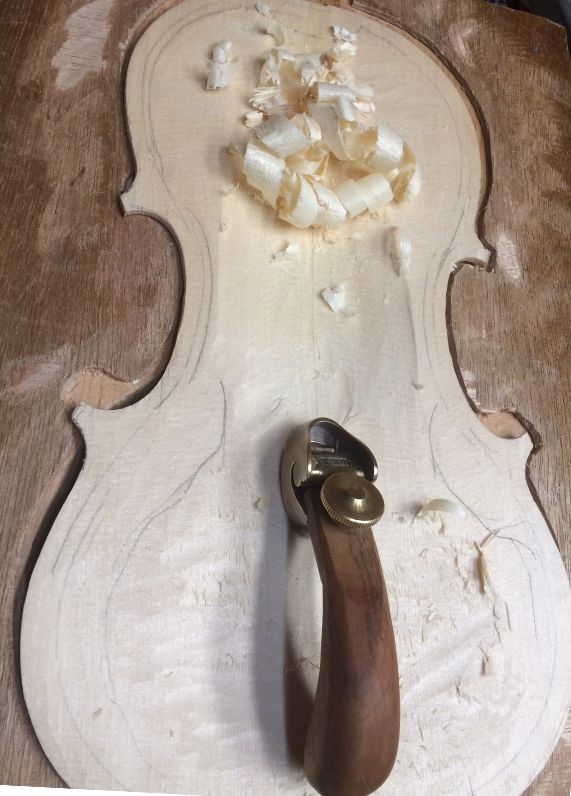
Graduating hard maple can be a tough, laborious job. Besides, there is always the possibility of carving too deeply and ruining the plate. So, I try to cut the risks by creating a “map” by marking the thickness every few centimeters, and then carving the “dots” until each “dot” is about the thickness I want. Finally, I connect the “dots”, using planes and scrapers, checking for thickness as I progress.
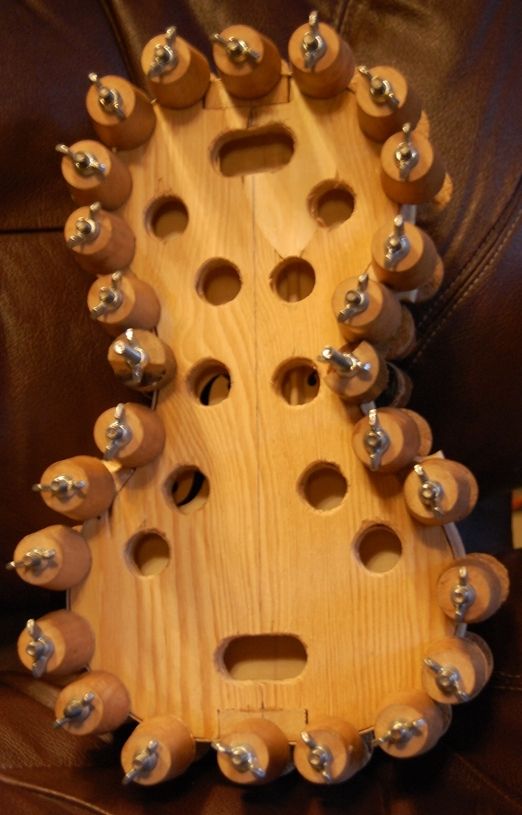
Creating the dots. The circled numbers are already the correct thicknesses.
Checking thickness. Pretty thin plate!
Connecting the dots.
Getting there!
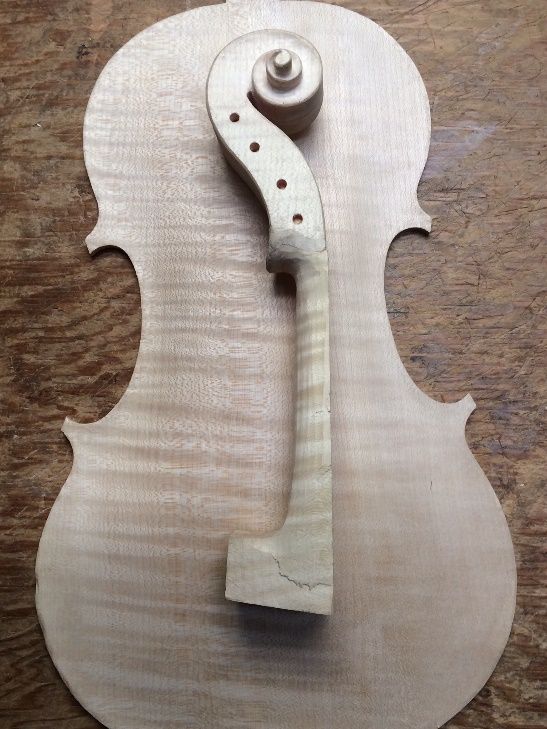
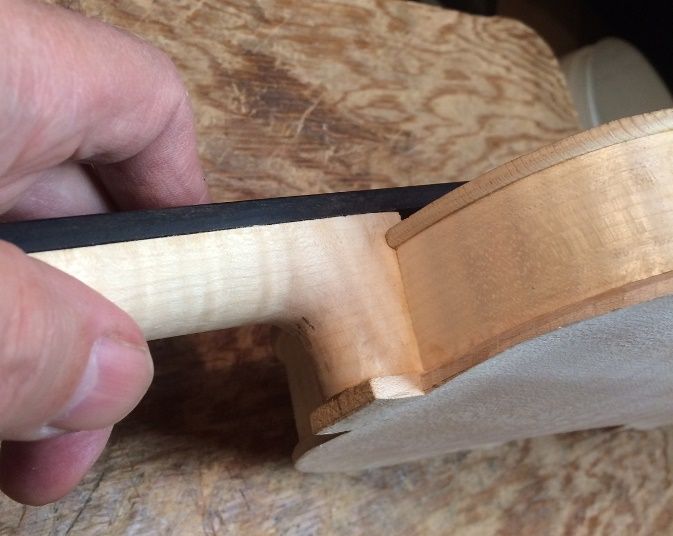
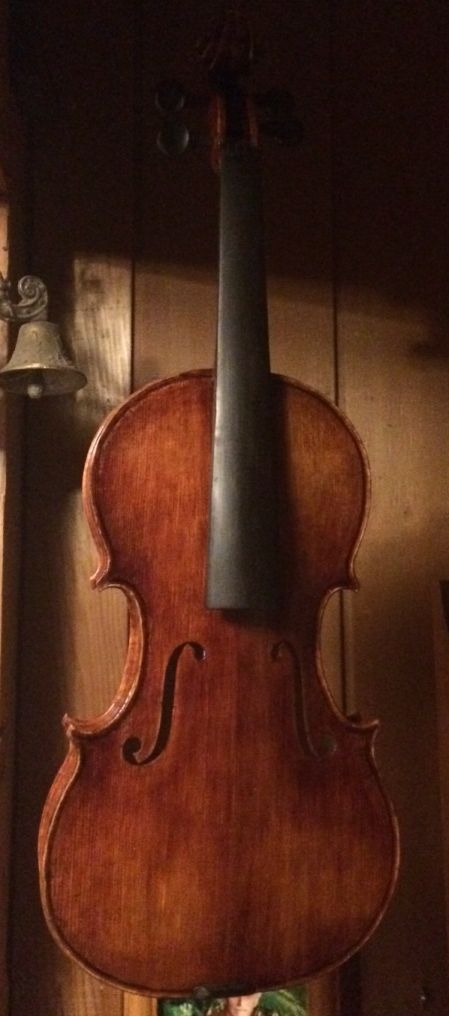
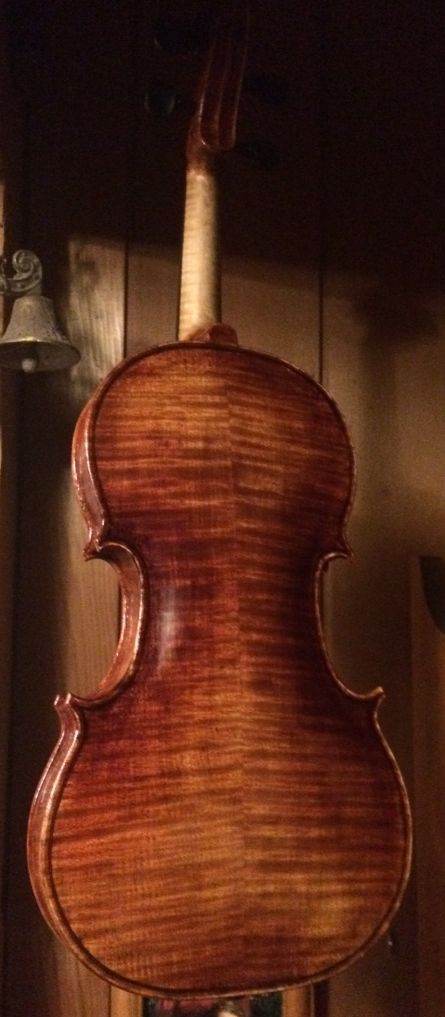
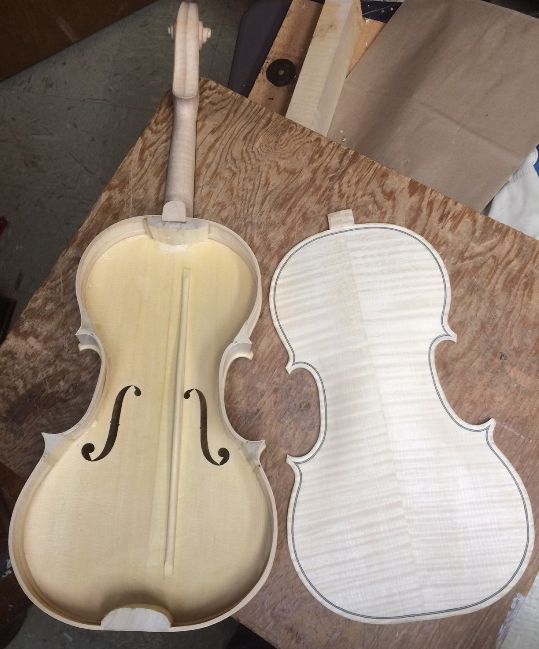
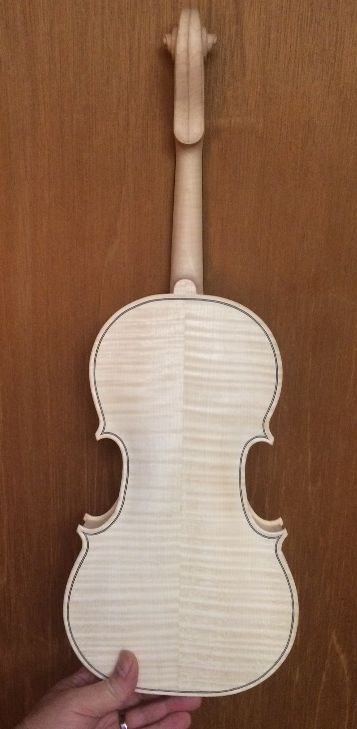
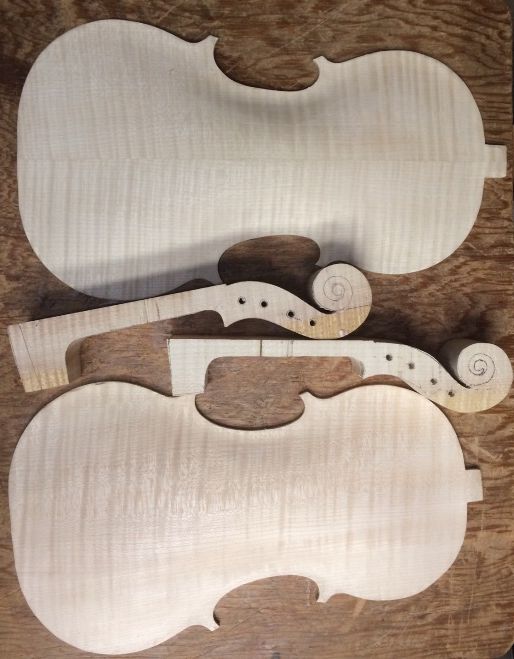
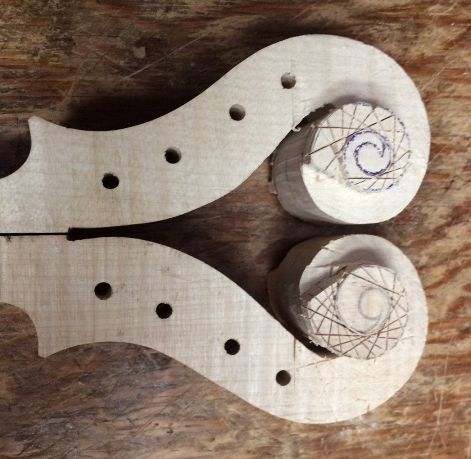
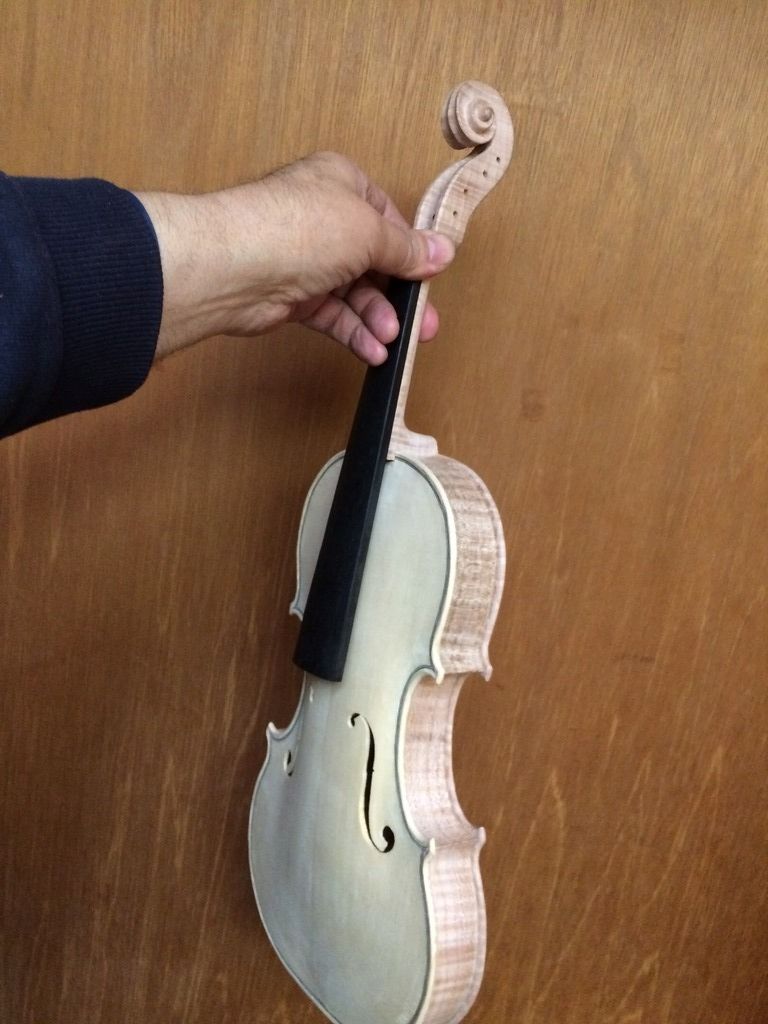
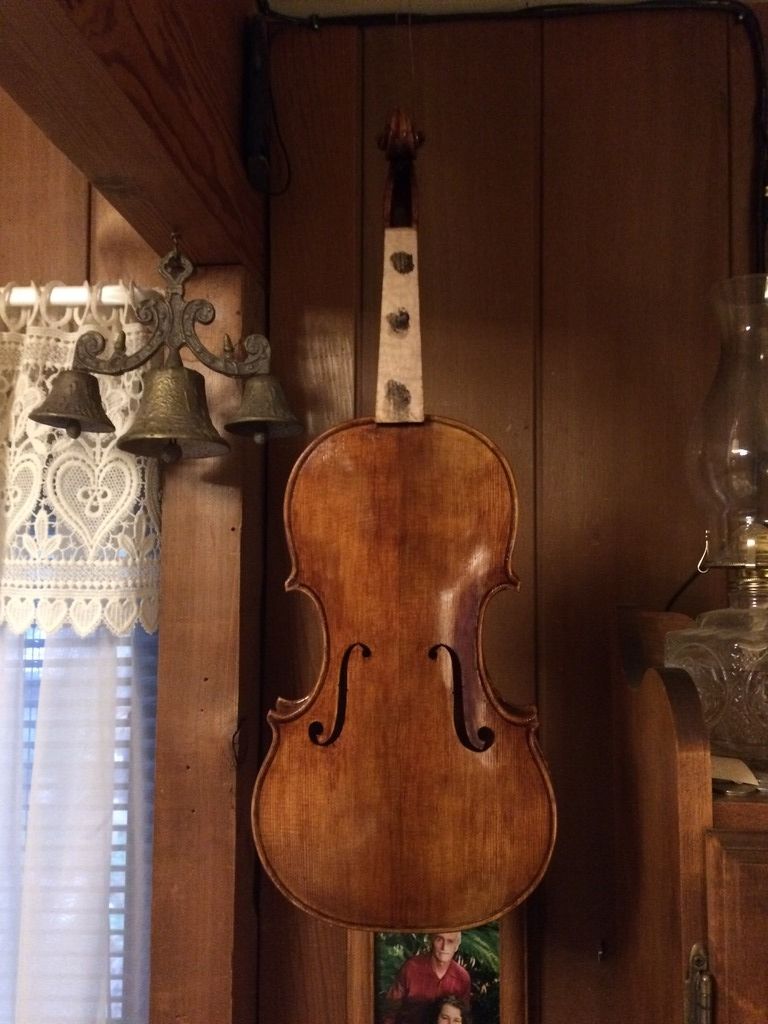
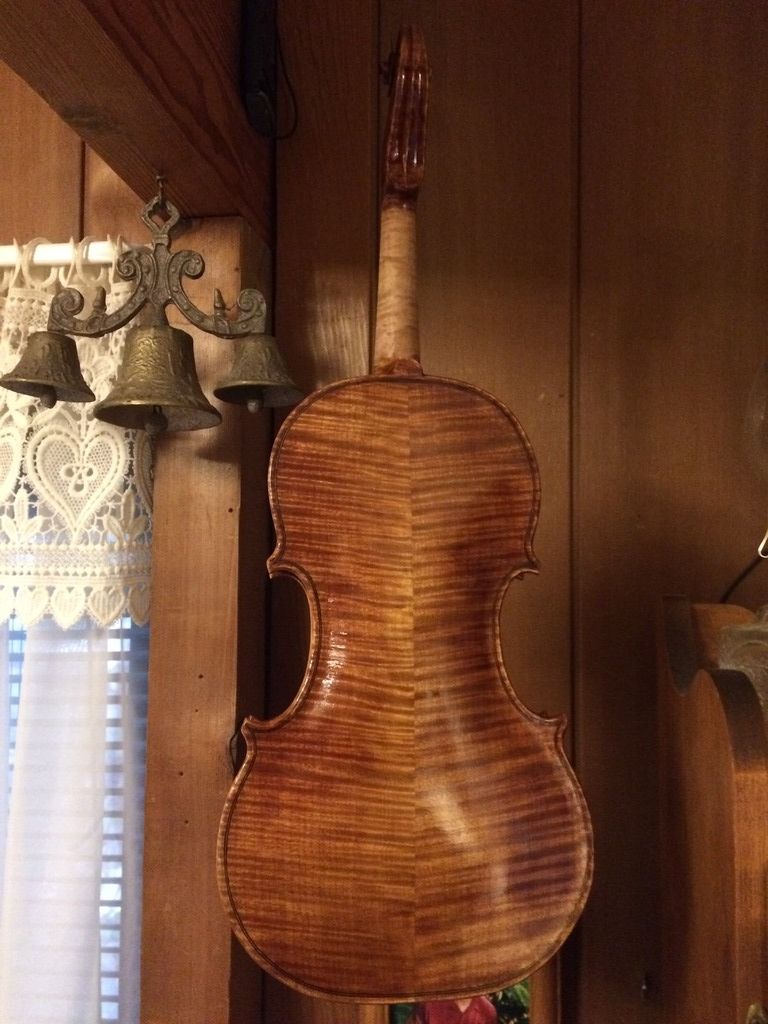
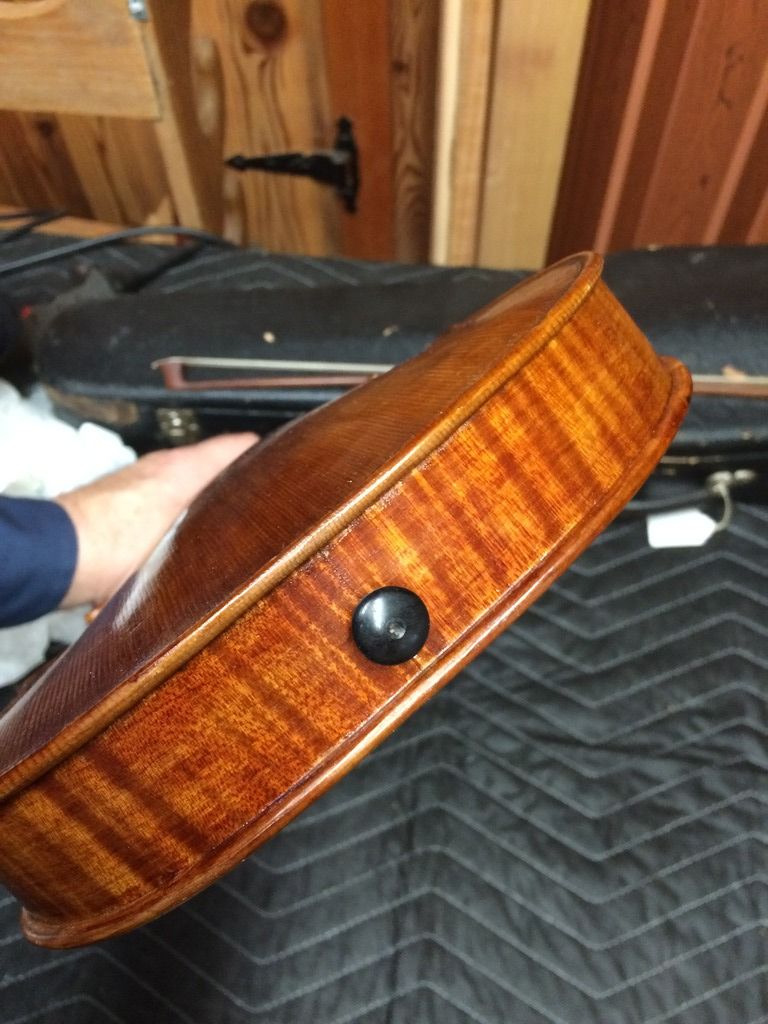
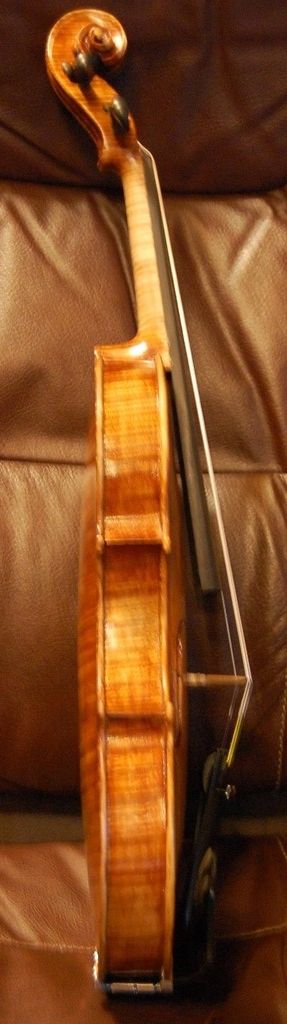
Grafted Scroll and Neck-Set
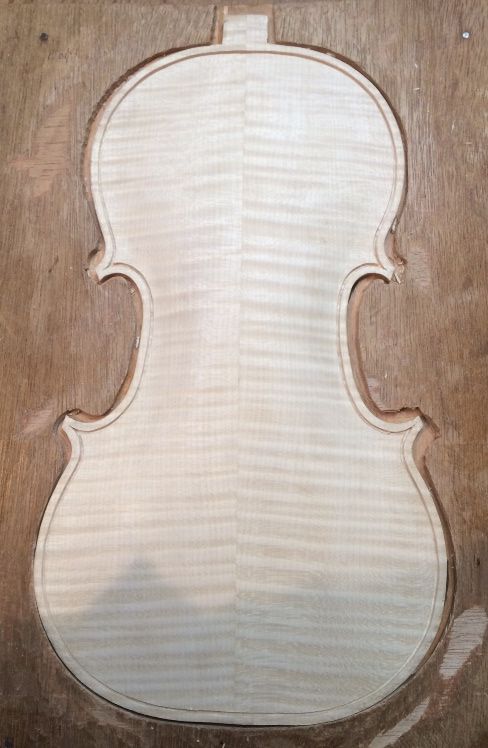
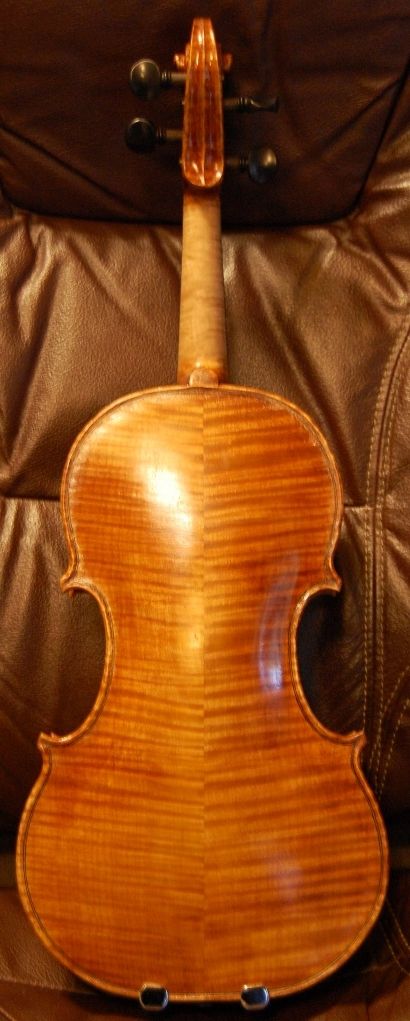
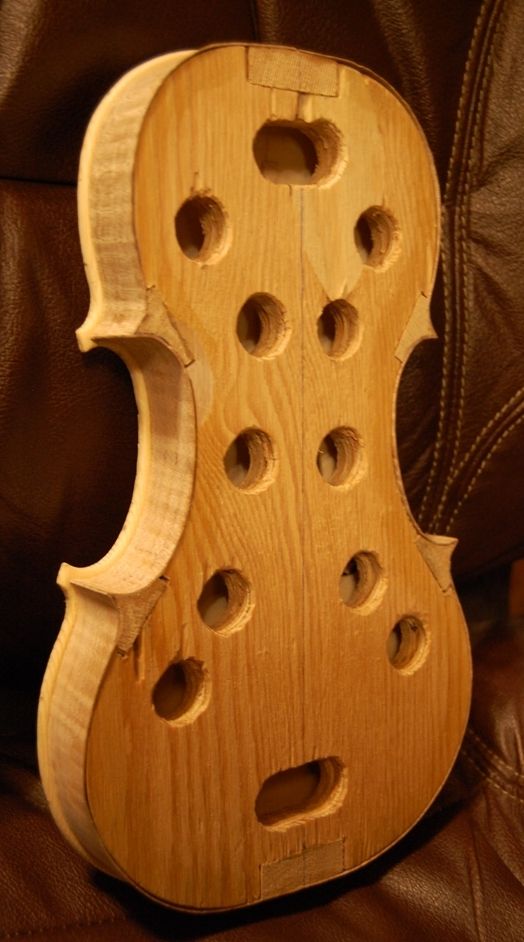
Once the graduations are complete, and the inside of the back plate has been scraped completely smooth, I install the label and I am almost ready to close the corpus. In this case, however, I also had decided to use the scroll I had carved, but graft a new neck to the scroll, as the original neck was too thin: so there was a good deal more work involved. Here is the grafted neck, partially shaped, with the completed back plate:
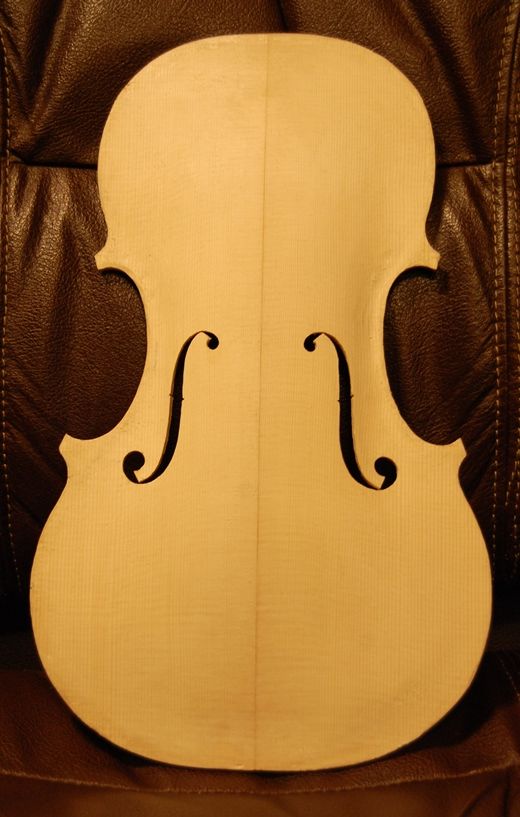
Completed back plate with neck-grafted scroll. The heel was still not shaped.
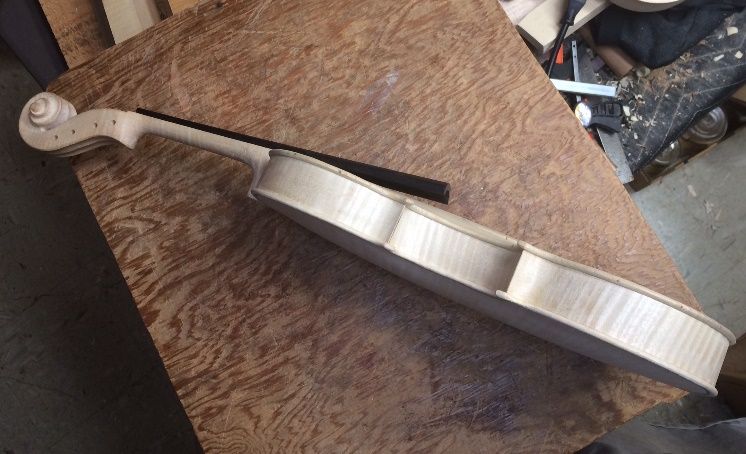
I had been anxious to complete the back plate, and had not yet set the neck. So I completed the neck and installed the fingerboard.
Fingerboard installed.
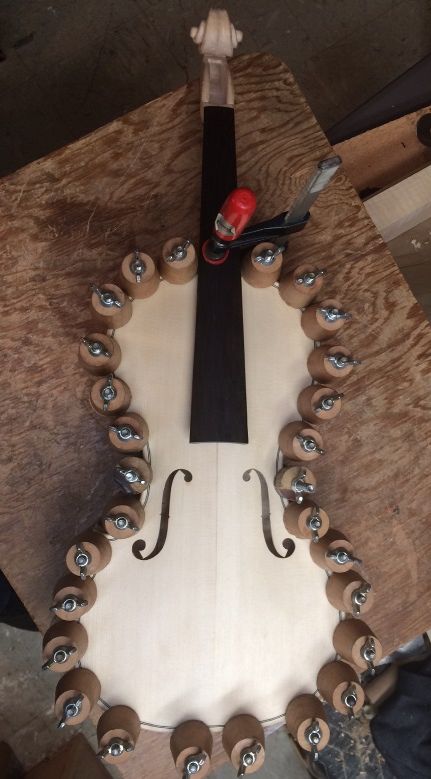
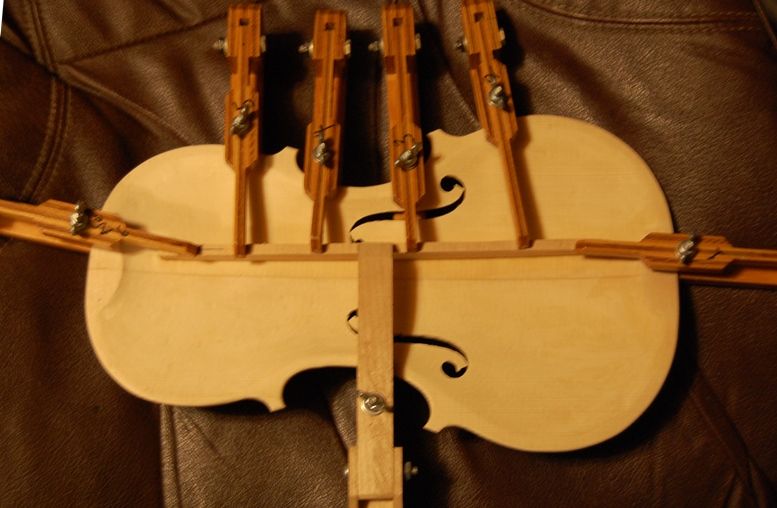
Next I set the neck, so that the angles were all correct.
Neck-set, front view. The mold is still in place.
Neck-set, side view. Notice that the neck heel has not been trimmed flush, yet.
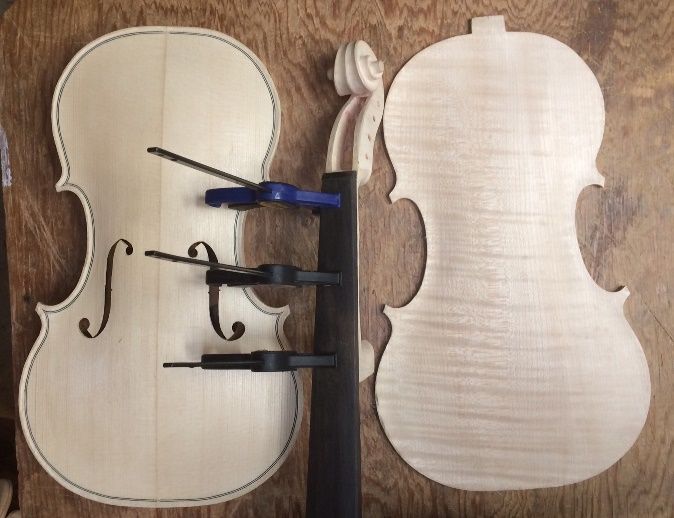
Closing the Corpus
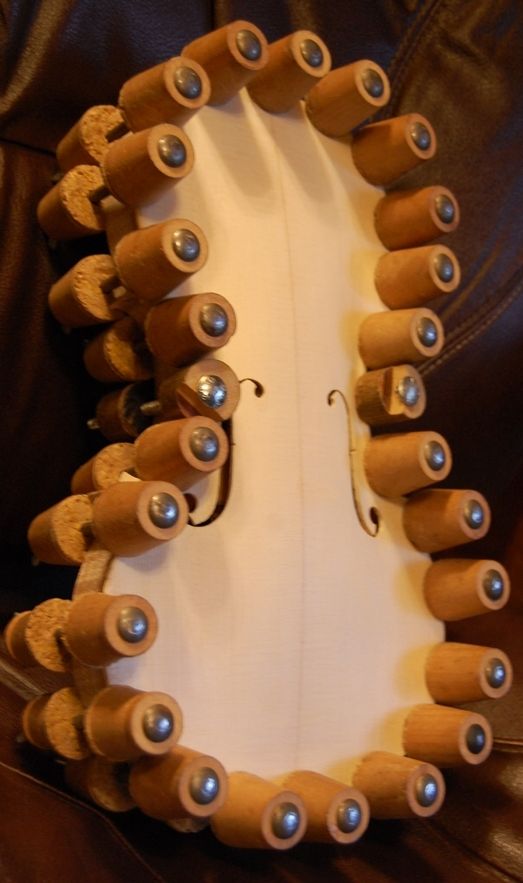
Then I removed the mold, and installed the inside linings on the back edge of the ribs, shaped the linings and the blocks, flattened the back of the garland, and installed the back plate. I use spool clamps and a single large spring-clamp to close the corpus. My wife thinks the spool-clamps look like old-fashioned hair-curlers.
Closed corpus with spool clamps and a spring-clamp.
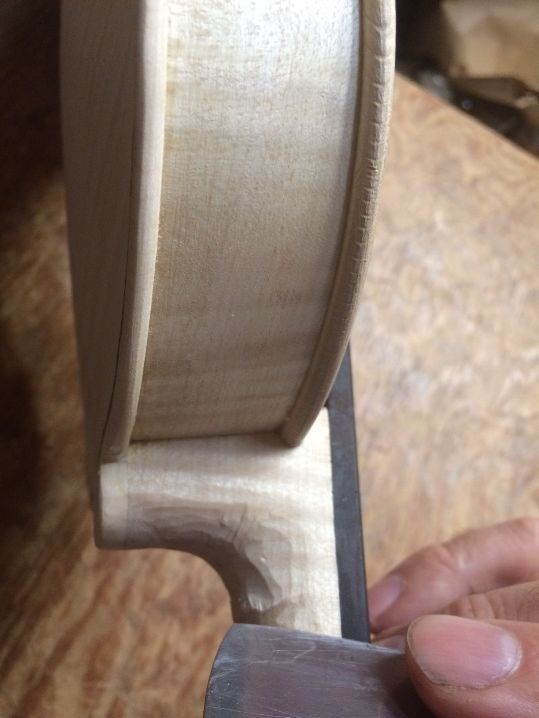
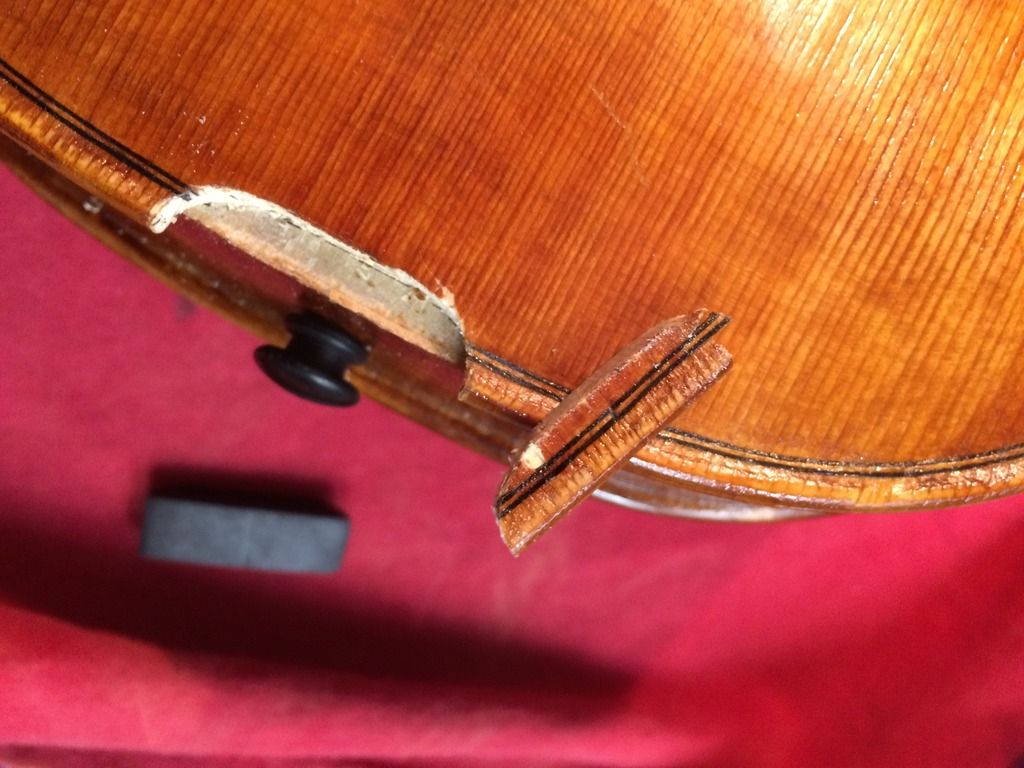
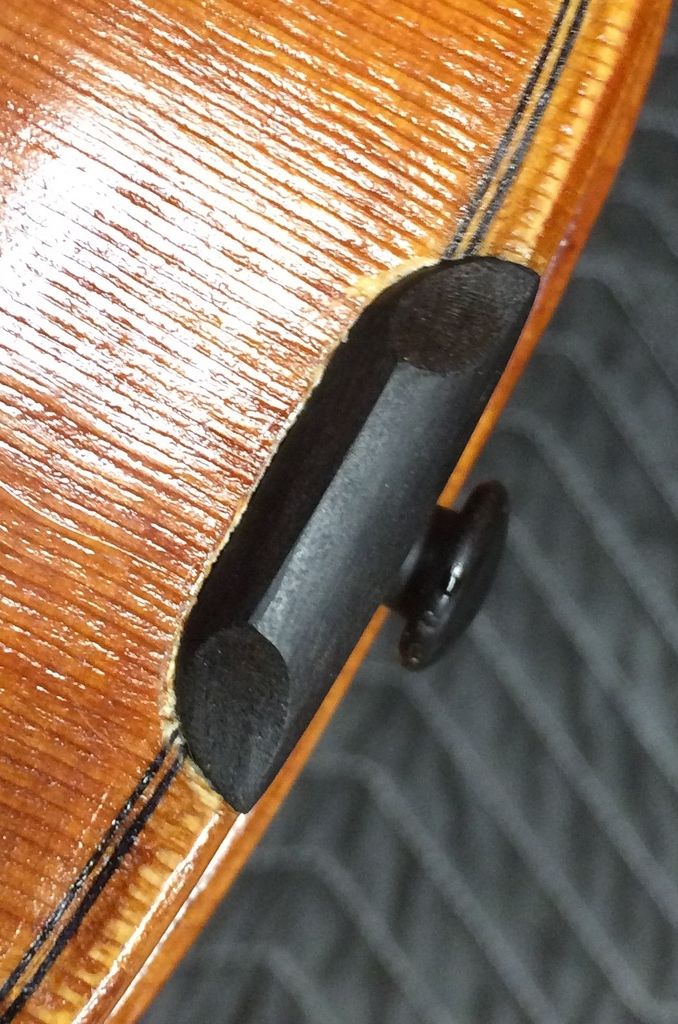
Trimming the Button and Neck Heel
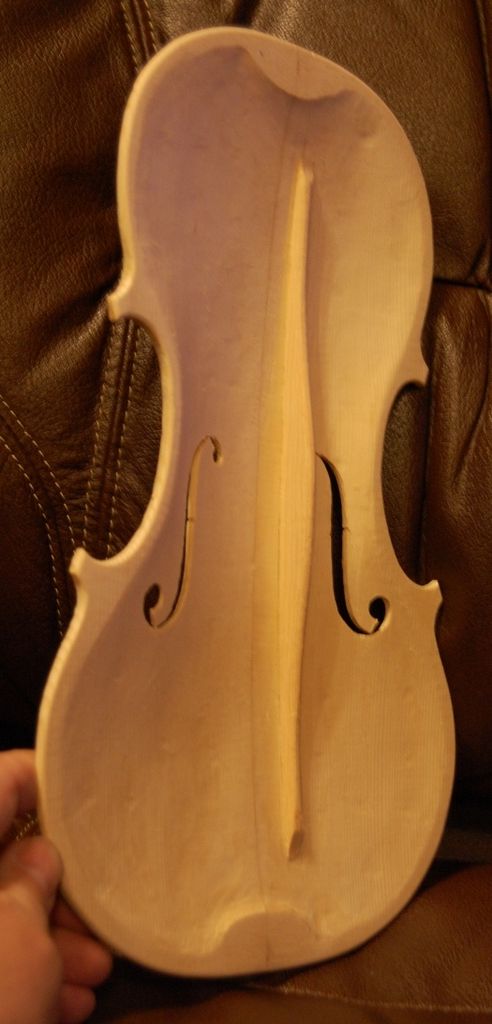
Once the glue was dry, I removed all the clamps, cleaned off any glue that had squeezed out of the joint, and trimmed the button and heel. The dimension from the juncture of the top edge of the front plate and the side of the neck heel (from each side) to the very center of the curve of the heel, should be right at 26 mm. You can see the two marks I laid out with a compass, testing that distance: it was still a little too high in the center of the curve, so the neck needed to be trimmed a little more.
Ready to trim the button and heel.
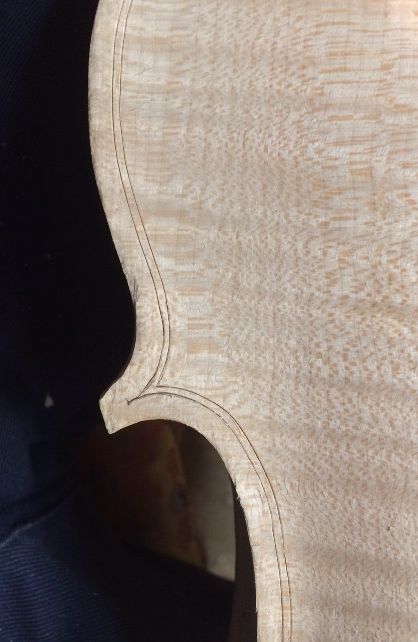
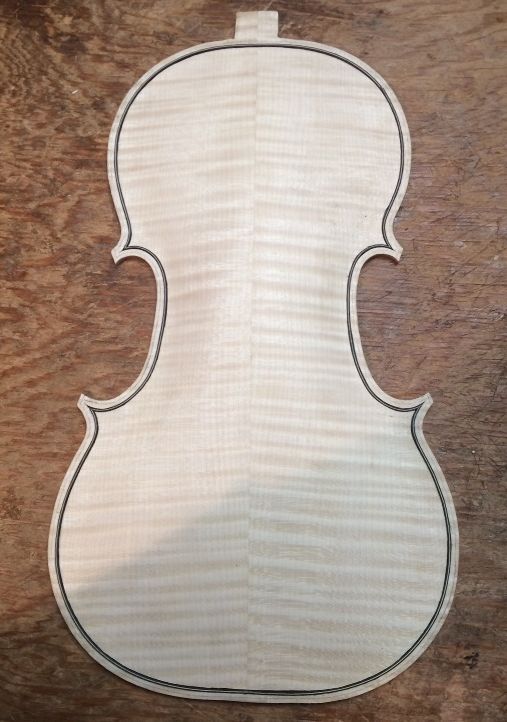
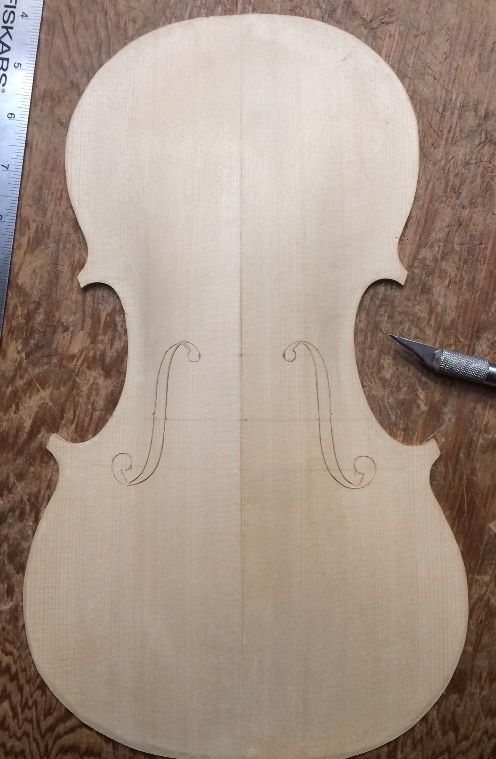
Purfling the Back Plate
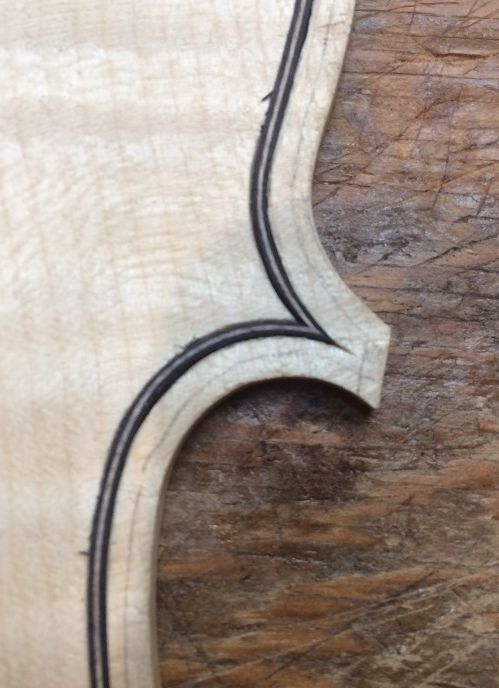
Once the neck-heel and button were trimmed, I still had to perfect the outline of the back plate, making certain that the overhang was even all around, as much as possible. Then I laid out the purfling slot, using a purfling marker, and began incising the outlines of the slot.
Incised purfling slot. It will be corrected, and fine-tuned as I work, and look good with the purfling.
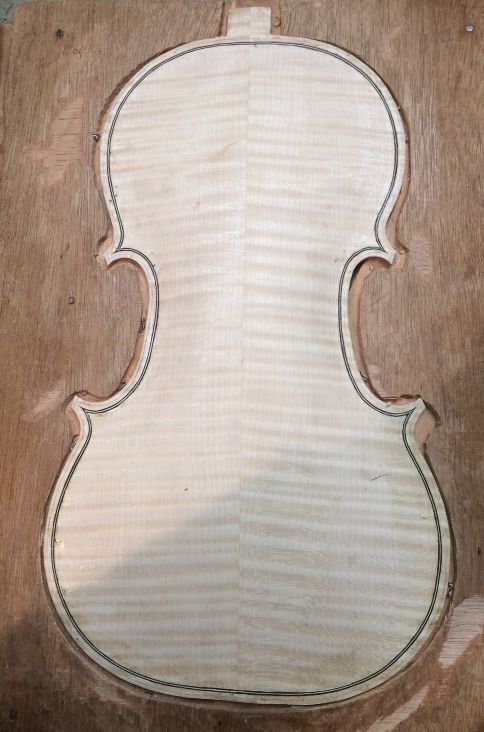
Next I cut the slot out, using a small knife and a purfling pick, then dry-fit the purfling, after bending it on the bending iron. Finally I glue it in place, using hot hide-glue.
Purfling installed, and glued in place.
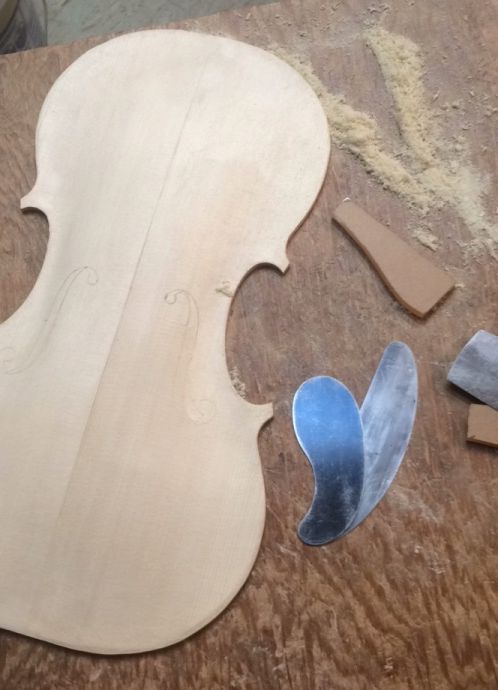
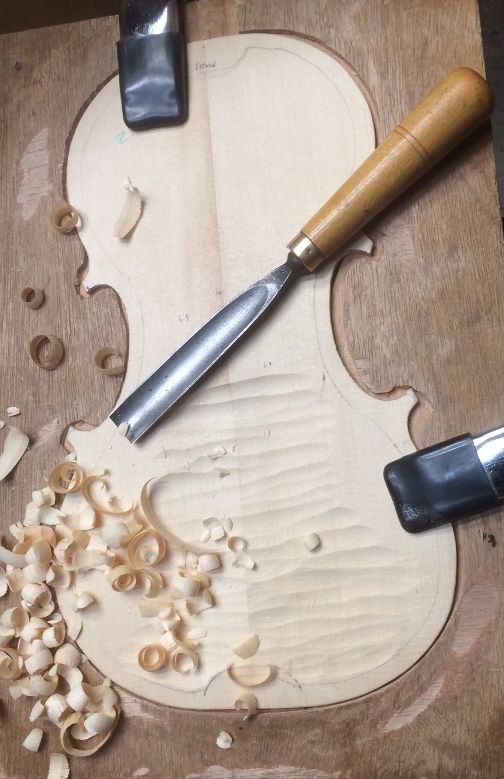
Edge-Work
I marked a crest-line, about 1.6 mm in from the outer edge, then used a gouge and scrapers to carve the channel, and fair it into the plate surface. The edges were all still quite rough,and crude, so I began shaping them, using a small plane, and a half-round file, then sandpaper to get a smooth edge all around. I don’t use sandpaper much, but this is one place where it is appropriate.
Trimmed purfling, smoothed channel, and edges taking shape.
The front edges have to be finalized as well.
Finishing Process Begun
Once all the varnish preparation is complete, I brush a coat of coffee all over the instrument, to tan the wood a little, and raise the grain. When that is dry, I sand off most of the raised grain, using 400-grit sandpaper. This ensures that the grain will not raise too much during application of the spirit varnish, later. Afterward, I rub in a coat of gypsum in a coffee suspension, to fill the pores of the wood with particles of the mineral. This keeps the varnish from saturating the wood, and possibly dampening the sound.
Mineral ground drying. See how it obscures the wood? that goes away when the sealer is applied.
The sealer renders the mineral ground transparent, and it will never be visible again.
I expect that, by tomorrow, the sealer will dry sufficiently that I can begin varnishing. I am getting anxious, as the show is a week from tomorrow, and I am far from completing this instrument.
Thanks for looking.
If you found this post helpful, please share with your friends!
While varnish was drying on the Titian model, I went back to the Plowden model, and began purfling the front plate and graduating the back plate:
Graduation about half done.
Graduation progress and purfling installed.
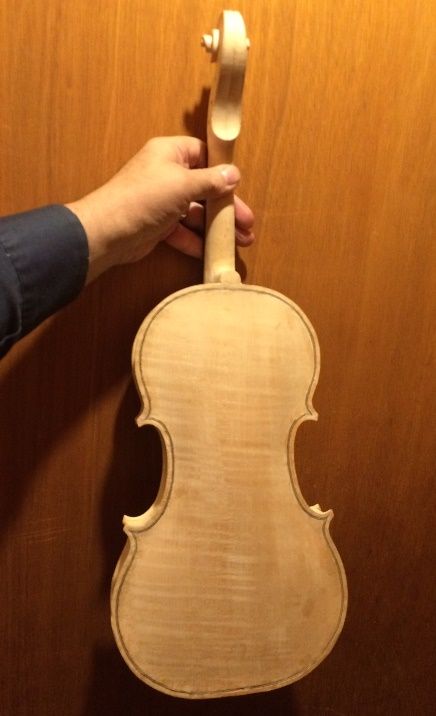
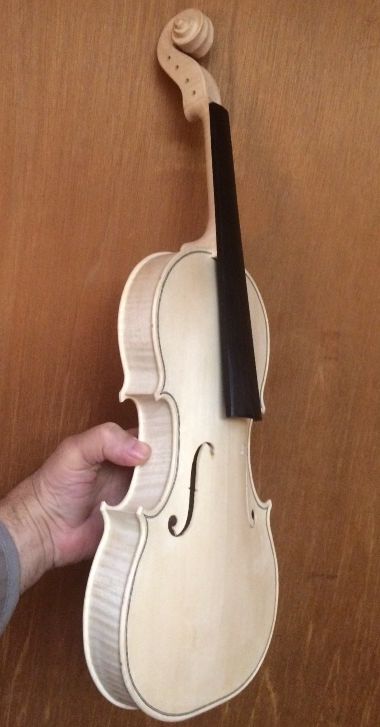
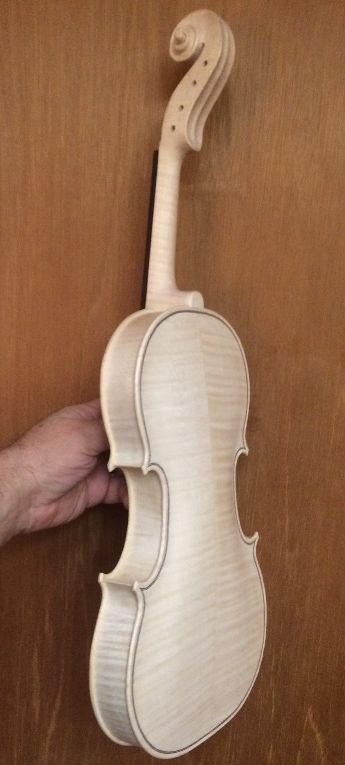
Also, I finalized the finishing process on the Titian model, and an ready to begin set-up. The pegs are trimmed, polished and drilled for strings. The nut is at the correct level and has been slotted for strings. The saddle is installed, too. The end button and soundpost were both installed quite some time ago. So, really, all that is left is the bridge and strings, and final adjustment. I don’t tend to count the tailpiece, but, as a matter of fact, it, too requires some adjustment. So does the chinrest, so I shouldn’t treat them as non-entities. The feet opf chinrests virtually never fit correctly as shipped. Tailpiece adjustment requires trial and error fitting, to get the ratio between vibrating string length and after-length (string between bridge and tailpiece fret) adjusted to a 6:1 ratio.
Anyway, here is where it currently stands. I could probably finish it tonight, but then I would be too tired to go to work in the morning…so, tomorrow will have to do. 🙂
Titian front, ready for set-up.
Titian back, ready for set-up.
Nut and pegs complete, ready for strings.
Saddle installed, ready for set-up.
So, I hope to take both of these instruments to the show in March (“Violin Tasting Event” at the Hilton Hotel, March 10th in Corvallis, OR), as well as the one in May (which used to be the Marylhurst show, but it will now be at Portland Community College, Sylvania campus: still called the Northwest handmade musical instrument show.) Anyway: lots of work left to do, in order to get ready.
Thanks for looking.
If you found this post helpful, please share with your friends!
When I last posted, I was beginning the graduation process for the back plate of the Titian copy. I had a pretty busy week, but this is where it went:
Completing the graduation of the Back plate on the Titian Strad copy.
Once the graduation was complete, I removed the interior form (sometimes called the “mold”) from the garland, and trimmed the blocks and linings, so that the garland and back plate could be joined. I had already flattened the back of the garland, so this was a pretty simple step.
Graduation complete: ready to close!
I aligned the plate on the garland as closely as I could, dry, then began applying clamps to hold it. I adjusted the position slightly as I progressed, so that when I finally had clamps on all corners, and in the center of each bout, the position was exactly what I wanted. Then I began removing two or three clamps at a time, and slipping hot hide glue between the plate and the garland, using a thin palette knife. I quickly replaced the few clamps I had removed, and more clamps between them, so that the section was securely attached. Then I moved to the next section and repeated the process, until there was glue and clamps all the way around. I saved the neck block for last, because I intended to add that larger clamp, and it would have been cumbersome, had I used it early in the procedure.
Closed, clamped, and resting overnight.
I allowed the glue to dry overnight, and, in the morning, I removed the clamps and began carving the heel, and working on the edges of the back.
Closed, but a long way from done.
Shaping and scraping the heel.
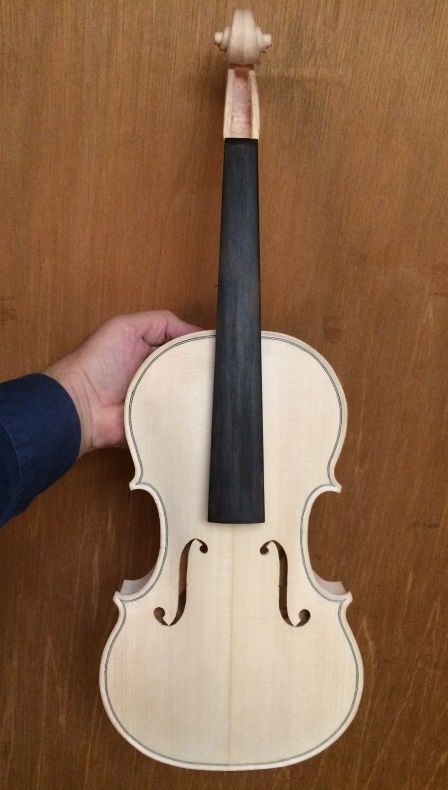
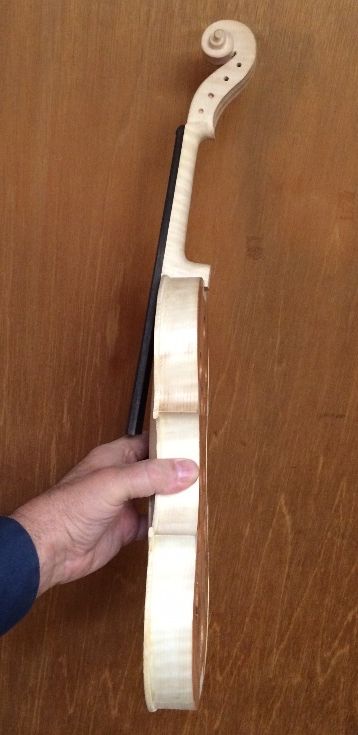
Finally, all the surfaces looked right, and the next step will be to remove the fingerboard, and prep the entire corpus for the varnighing process. The Guarneri copy is side-lined for the moment, which is what usually happens when I attempt to make more than one instrument at the same time. I usually get to a certain point on all of them, and then run with one to the finish, and come back for the rest. (Ah, well…at least they do get done.)
Ready for varnish prep. Front view.
Ready for varnish prep. Back view.
Full Front view: ready for varnish prep.
Full Back view: ready for varnish prep.
Next time, I will either talk about the varnishing preparation process, or I will follow the work on the Guarneri. Probably the varnish-prep. 🙂
Thanks for looking.
If you found this post helpful, please share with your friends!
I decided that I would prefer to purfle first, then graduate, on this plate. Maple is much tougher than spruce, and I wanted maximum mobility as I cut the purfling slot, as well as avoiding any danger to the rest of the indtrument when forcing the purfling into the glue-filled slot. It can require a great deal of pressure.
I used the purfling marker to trace out the location of the purfling slot.
Then I began incising the sides of the slot, and removing the waste wood, with a purfling pick.
I always forget, between instruments, just how tough the European maple is. I always find that I have to take breaks once in a while, and allow my hands to rest.
I always find the back purfling to be physically difficult, but it is easier to do clean work.
Back purfling slot complete.
After cutting the slot and removing the waste wood, I double-check the width ans depth of the slot by inserting a scrap of purfling into the slot, and dragging it around the entire slot, so that I know the purfling will fit cleanly.
Then I use a bending iron to bend the purfling, I cut the miters for the “Bee-stings”, and I insert the purfling, dry, to get a perfect fit.
Purfling installed dry.
Before I start gluing, I also take time to mark the edge of what will be the “crest” of the edgework, so that I don’t gouge too deeply or too wide, when cutting the channel. After gluing, it is difficult to get the pencil to mark on the wood, if it is either damp or glue-coated.
If you look closely, you can see the pencilled-in crest marks.
Finally, I lift out each purfling segment, one at a time, and slip hot hide glue under the purfling, then quickly press the purfling back down into the slot. I use a hard plastic roller to help force the purfling deeply into the slot.
The purfling is glued in place, and I can cut the channel now.
In this case, I chose to work on the graduation, next. I did not get it done, but I am within an hour of completion. Then I can conplete the plate, add the label, remove the mold, and close the corpus.
Graduation in progress.
I will also complete the channel and the inner edgework, before removing the mold and installing the plate. But it is getting there…
Vacation is a hard time to get things done, because the people take higher priority, and everything eats up the time. (Ah, well…always good to spend time with family.)
Thanks for looking.
If you found this post helpful, please share with your friends!
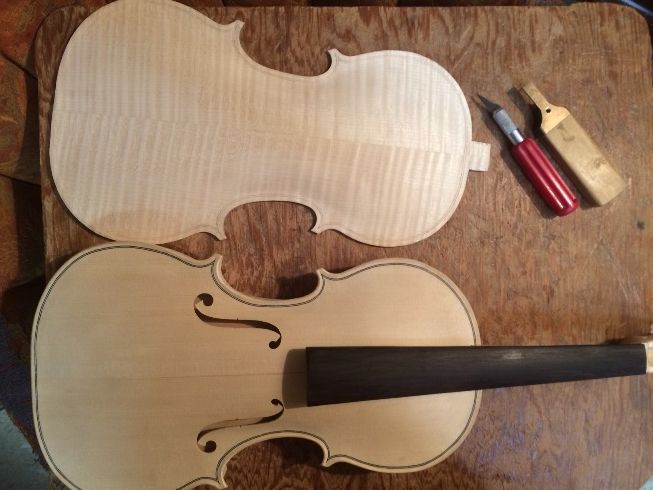
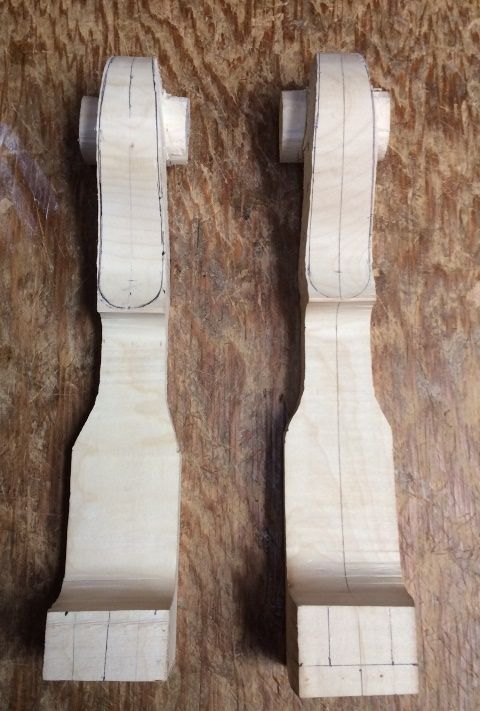
Here are the back plates: the arching is complete, but the graduations are not begun…inside surface is still flat. The two scrolls have only been cut out, for the rough profile. I did lay out and drill pilot holes for the tuning pegs. That will make it easier than trying to drill them after the outer shape is completed. At this point the sides are relatively flat.
Two back plates, nearly complete: two scrolls, just begun.
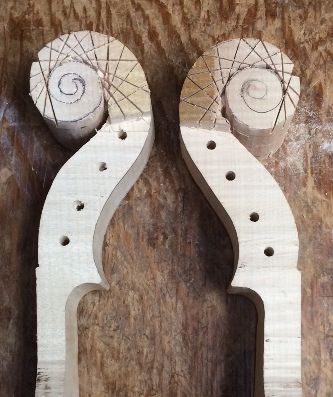
Then I began cutting out all the rough outlines of the two scrolls, using a saw:
Beginning to cut out the neck/scroll combination, using a saw.
Removing the excess wood from the sides.
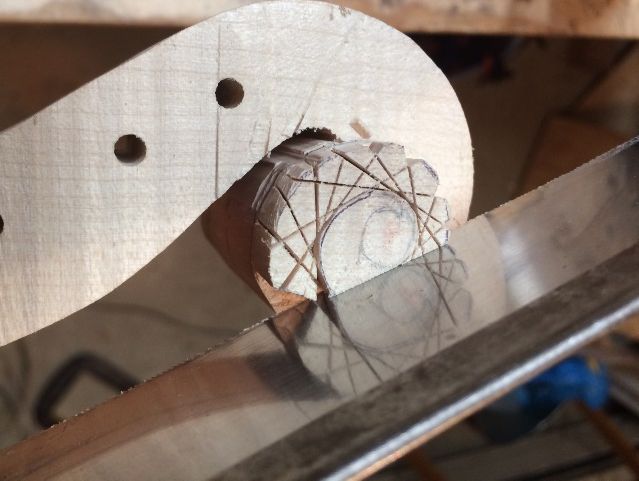
Cutting to the layout lines, all around the scroll, from both sides.
Continuing around the first turn of the scroll.
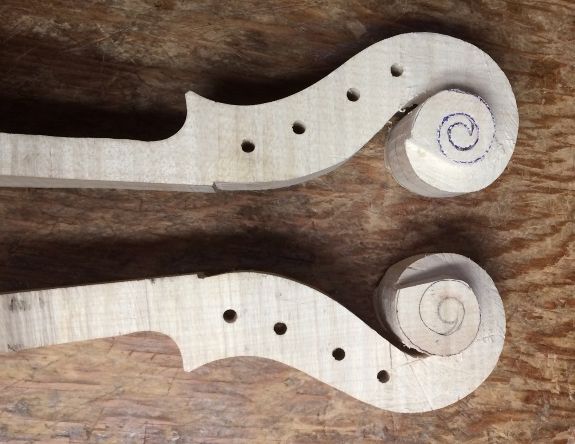
Cuts completed around the first turn of both scrolls.
Excess wood removed from first turn on both scrolls.
Back view with first turn wood removed.
Completing the scond turn of the scroll, using a fine-toothed pull-saw.
Second turn cuts completed.
The remaining wood will be removed using gouges, planes and scrapers, There is still a long way to go, but it does look more encouraging, this way.
Next time we will be carving the pegboxes and scrolls.
Thanks for looking.
<br class=”Apple-interchange-newline”><div></div>
If you found this post helpful, please share with your friends!
In my last post, I told you I would “talk about F-holes, next time”…and we are doing so. But final arching, as well as graduation have to be completed before we actually cut out the f-holes, so, first things first:
I lay out and incise the f-holes after the arching is (mostly) completed, but before beginning any graduations. (I had a few mishaps years ago, when I graduated first, and subsequently discovered that my plates were actually too thin where the f-holes were to be laid out. I learned from the error, and I check the thicknesses around my already-in-place f-hole incisions, before beginning graduation, now.)
I laid out the distance from the upper edge of each plate to where the bridge would go. That is where the inner “nicks” of the f-holes will go. I measured back from there to find where the inner edges of the upper eyes of the f-holes would go, and laid out not only that longitudinal position, but the lateral distance off center, to the inner edge of each eye. Then I repeated that process for the inner edges of the lower f-hole eyes, and I was ready to use a template to scribe in the actual perimeters of the f-holes. I simply aligned the clear plastic template (traced off the full-size photos of the original instruments) so that the inner nicks were on the bridge line, and the inner sides of both upper and lower eyes were at their correct locations. I pressed the template firmly, so that it followed the curvature of the plate, and traced with a very sharp pencil.
I try to bear in mind that the pencil line will actually be “inside” the actual footprint of the f-hole, and I will remember to adjust it later. For now, however, I incise the perimeter of both f-holes fairly deeply, so that the marks will not disappear as I complete the final arching. (In the photo below, I had also traced around the incision with a very sharp pencil, to highlight the cut, so I could see it from any angle. Otherwise it can be hard to see.)
F-holes laid-out and incised.
Final Arching
I have learned that arching is one of the most important factors in violin sound. I use two “markers” for determining the final arching.
The first: I can see that, when viewed from the side of the instrument (at least, the ones I am concerned with), the f-holes on the old master instruments appear to have the main stem nearly parallel with the plane of the ribs. I have no idea whether that is truly important as far as aesthetics, but, I have also observed that, when left to my own instinct (or lack thereof) as to proper arching, my f-holes invariably end up resembling an “S” laid on its side. So, it is a “marker” that tells me my arching is a bit “off”, if nothing else. That is why I incise the f-hole perimeters deeply enough so that I can adjust the arching to get the stems of the f-holes parallel to the rib-plane, and be fairly sure that, at least that part is better than it was before.
The second “marker” is even more mundane: I made “arching templates,” traced from the posters, so that I can actually check and see that my arching closely follows that of the old masters. It is fascinating to me, to see them drop into place, one by one, as I carefully plane and scrape away the last few “humps”. I know that many makers are convinced they do not need such a “crutch”, but I see it as only a tool. I would never claim to be able to draw a perfectly straight line by eye and hand alone, and I shamelessly use a straight-edge for such a task. Arching templates are the same thing, in my estimation. Whenever I use them, even on a plate that I thought to be very close to correct, I invariably discover that it was not as good as I thought it was.
Using arching templates and scrapers to perfect the arching contours
The truly-completed arching is not terribly different than the rough-arching I had completed before incising the f-holes, but that sortof difference can make the difference between “acceptable” and “extraordinary” sound. When I first began using such templates, I immediately got a different response from players. They said, “This one is different! Whatever you did on this one, do it again!” (Okay…will do!) So…now I do it on every single instrument, and try to make each one better than the one before.
Graduation
What we call “graduation” is simply the process (and results) of carefully carving the inside arch to match the outside arch, leaving a specified thickness between, which could all be the same, or they could vary according to some sort of deliberate scheme designed to project well, or to give superior sound in some other way. Or it could be following a “general plan,” but, beyond that, be fairly random. There are all sorts of patterns and plans.
In this case I attempted (at least in a general way) to mimic the graduations of the original old master instruments whose pattern I was attempting to follow. (In case you have not read the previous installments, these two are to be modeled after the 1715 “Titian” Stradivari instrument and the 1735 “Plowden” Guarneri del Gesu instrument, respectively.) Their graduations are pretty thin, so this is a little scary, to me. I hope it works well.
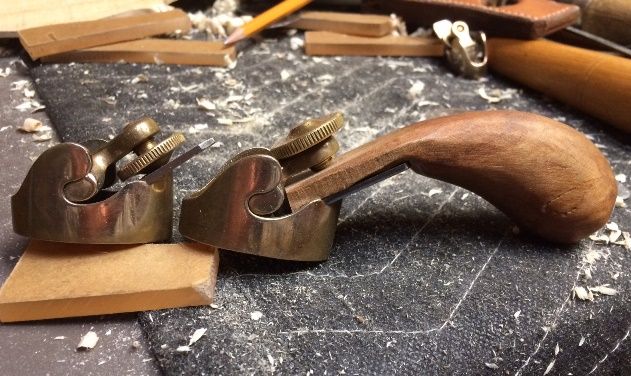
I use a gouge to rapidly carve out the rough wood, until I am approaching the proper thicknesses, but then I switch to a toothed finger-plane for rapid, but controlled, wood removal. When I am getting close enough that I am fearful of going too far, I switch to a non-toothed curved-sole finger plane and carefully bring the thicknesses down to my target measurements.
Carving rough graduations
Planing rough graduations, using toothed finger-plane
Checking graduation using shadow-lines.
Final check of graduations.
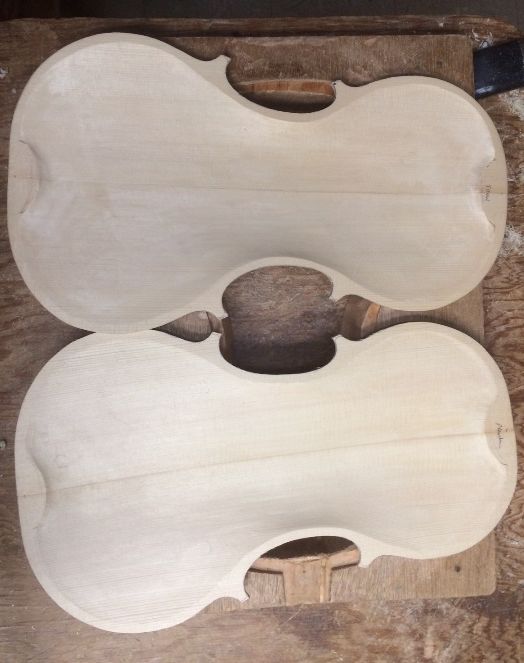
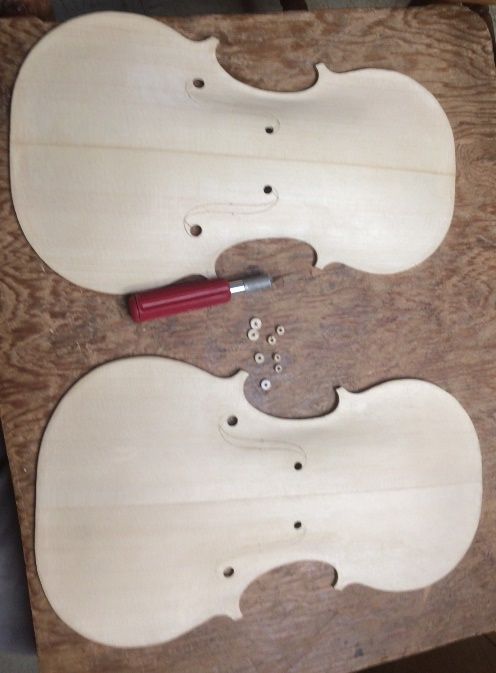
Two plates with graduation completed.
F-Holes
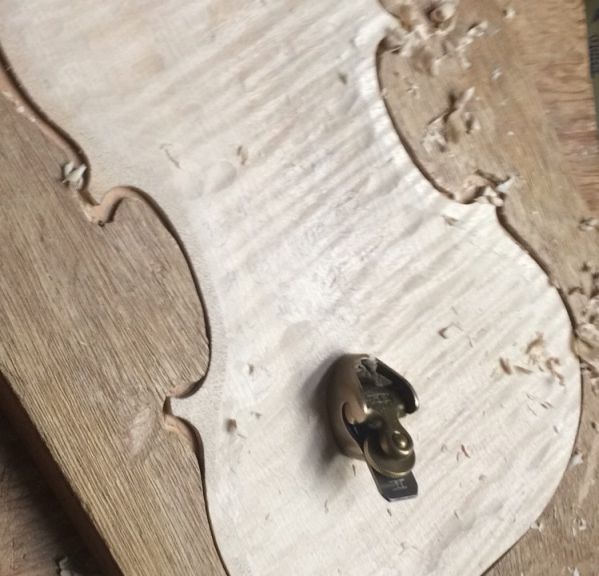
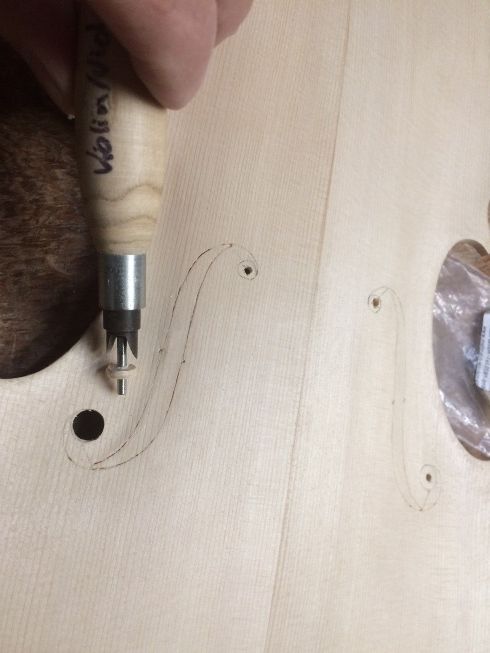
The F-holes are pretty much “locked-in,” now; the only thing remaining is to actually remove the wood inside the f-hole lines. The first order of business is to remove the circular portions at the upper and lower eyes of each f-hole. For this, I use a tool called an “f-hole drill”, which my grown children purchased for me a few years ago. It makes perfectly round holes, ranging in size from 5.5 mm up tp 10 mm in diameter, in 1/2 mm increments. I center a 3/32″ diameter hole in the center of the round portion of each eye, and then, using the correct bit, I insert the guide pin into that hole and gently rotate the tool to incise the hole, forst from the outside, and then from the inside, to prevent splintering, but completing the cut from the outside, so that in case any splintering does occur, it will be on the inside.
F-hole drill with cut-out plug from lower f-hole eye.
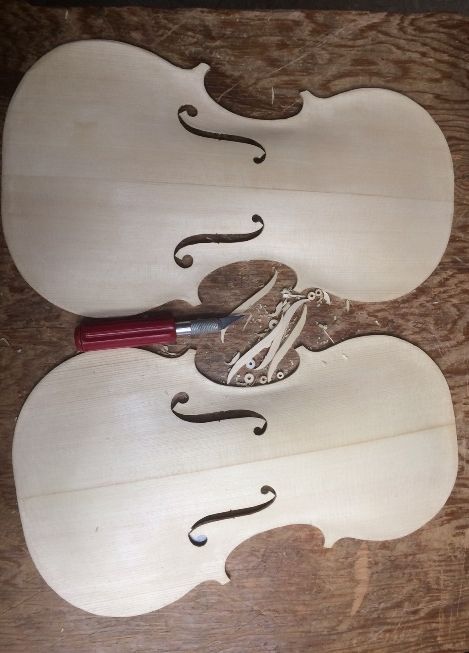
All f-hole eyes cut: ready to remove remaining wood.
Then I use a very thin, sharp knife to complete the incisions around the perimeter until the wood pops out cleanly.
Final f-hole wood removal.
Completed f-holes, ready for cleanup and final shaping.
I will continue to fine-tune the shape of the f-holes up until I begin varnishing, but, for now, they are complete.
The next thing will be the bass-bar in each top plate. The bass-bar supports the bass-side foot of the bridge, and the bass side of the plate. It is necessary in order to achieve the rich deep tones on the bass side of the violin range. So…next time: bass-bars!
Thanks for looking.
If you found this post helpful, please share with your friends!
This becomes another critical issue: How thick should the plate be at any given point? I will try to follow the poster to some degree, but it was only correct for that particular instrument, with that particular set of plates. The wood I have may not be anywhere close to the same stiffness or density, so I have to get into some sort of “ball-park” range, and then start making decisions based on this wood that I am carving. How it feels, how it flexes, how it sounds when I tap on it, all make a difference in my mind, though I am aware that there are some standard thicknesses to which many makers adhere.
Others measure the vibrations of the nearly completed plates using a frequency-generator, and try for certain frequencies to make a certain set of patterns (called eigenmode frequencies, and nodal patterns, or Chladni patterns). I have tried this and couldn’t get it to work for me. Then, one day at a workshop, one maker was haranguing me that I wasn’t graduating my plate correctly, and took me out to the plate-shaker thing, and demonstrated to his satisfaction that I had it “all wrong”. I had simply followed some graduation thickness numbers given me by a master maker (who does not want me mentioning his name), so I could not tell him that. I was feeling pretty glum about the whole exchange, when he looked up and saw another maker coming in, who he considered to be an expert at testing plates. He said “Ask him! He’ll tell you!”
So, the other fellow obligingly came over and began setting up the plate-shaker, while the first guy stalked off.
I noticed that the second guy did not set it up at ALL like the first guy had done, but I kept my mouth shut. He ran through the frequencies and numbers, and finally said, “It’s perfect! Don’t do another thing to it! Install the plate!”
So, I walked back into the work area, not intending to say a word, but the first fellow was waiting for me: “Well?! What did he say??” I repeated, verbatim, the second fellow’s verdict. The first guy said “What??!! How come I got the numbers I did??” I replied, “I couldn’t tell you! Idon’t know how to run that machine!” No more interference that week… 🙂
So…the point is, there are a variety of ways to achieve the goal of good plate graduation. That experience convinced me that even just following a set of established thickness values can work just fine. And, ultimately, that is probably about what I will do, on this violin.
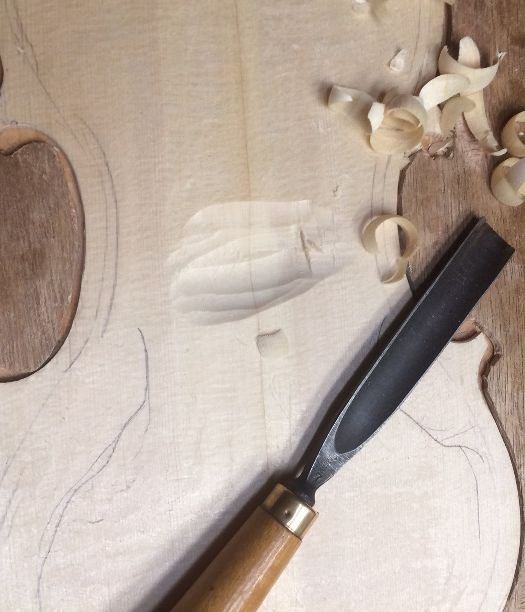
Moving Wood
I began with a gouge, trying to get within a few millimeters of the right center thickness.
Beginning inside carving with a gouge.
Then I switched over to a toothed plane, which I find more comfortable to use. The handle on it is a modification I added to shift the pressure to the heel of my hand instead of my thumb and forefinger.
Toothed plane progress.
The normal orientation of the screw in the Ibex plane (left) has been reversed to hold the wooden handle as well as the blade.
Repairs
But then I heard a cracking sound: Not a good thing to hear when you are working on a violin. I looked the plate over and could find nothing amiss, so I went back to moving wood. Heard it again, louder. (Sigh…)
It turned out my work-cradle had broken! (What a relief!) Well, I made it 15 years ago, and it has served well, so I took the time to glue it and insert three dowels, diagonally, through the break, to hold the joint against further failure.
Repair of broken work cradle.
Work cradle construction: a heavy pine plank with a cutout to support the margin of the plate. Thin plywood surrounds the plate-edge.
Back to work:
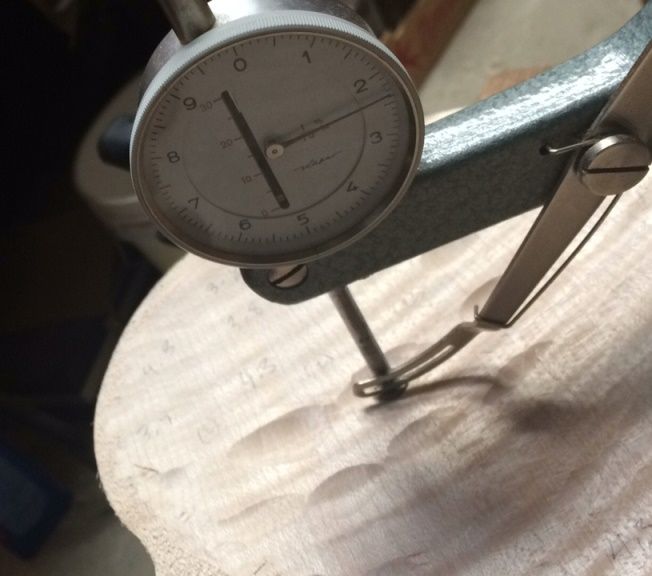
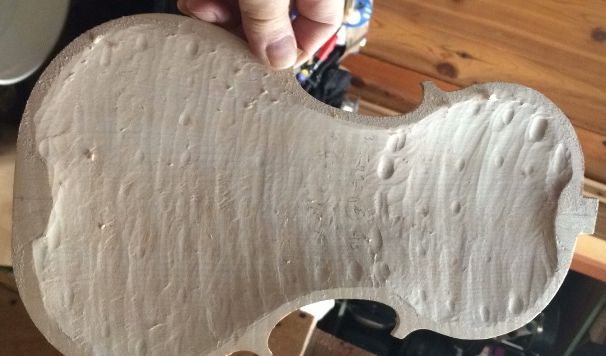
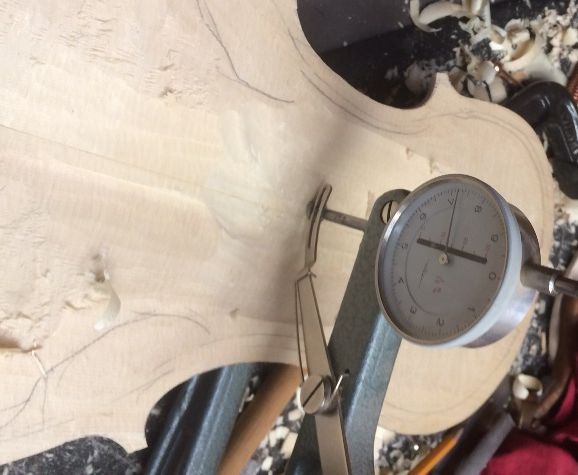
I am aiming for about 4 millimeters in the middle, and all over, which I will refine later to the specific measurements I want. In the photo, below, reading the dial on the caliper, you can see I am nowhere close. But…I’m tired, and I’m going to call it a night. By the way, in case anyone was wondering, those jagged-looking black pencil lines around the lower corners are outlining an area that was pretty close to the right thickness already: I don’t want to touch them until I am on the home-stretch where graduation is concerned. It is VERY easy to get too enthusiastic and carve too deeply in such an area, and ruin the plate.
Long way to go!
So, next time, I hope to have the graduation complete, so I can cut out the f-holes and install the bass-bar.
Thanks for looking.
If you found this post helpful, please share with your friends!
I had a number of other projects going, so I neglected to maintain the website presence…the only post lately has been of another violin resurrection. But…I hope to change that.
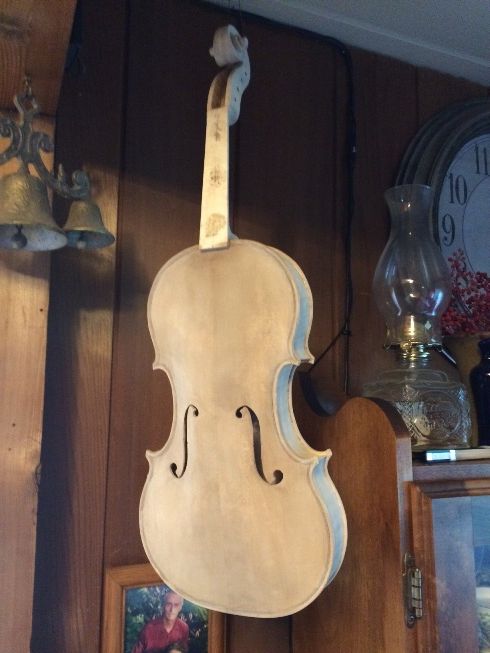
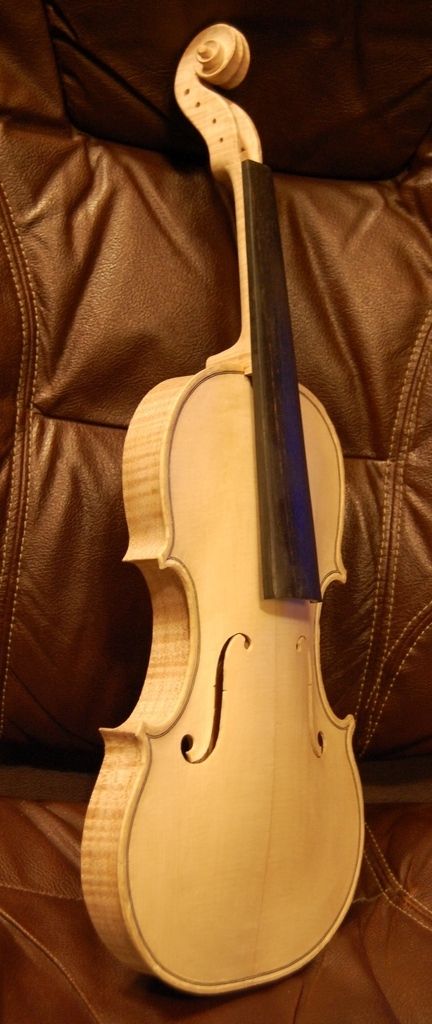
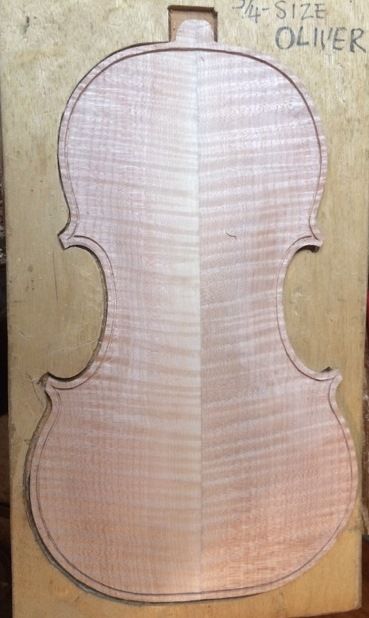
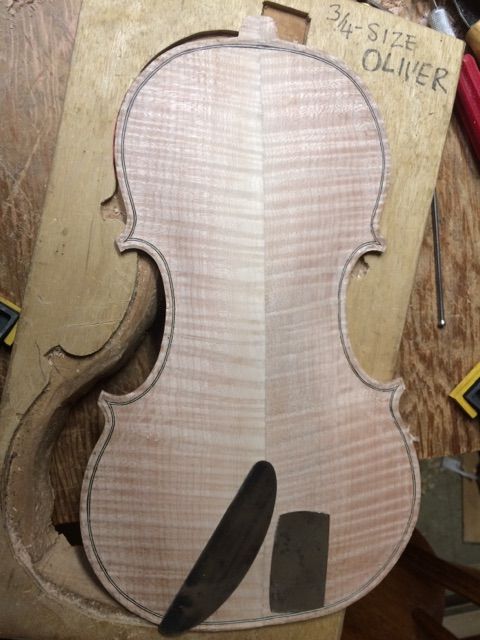
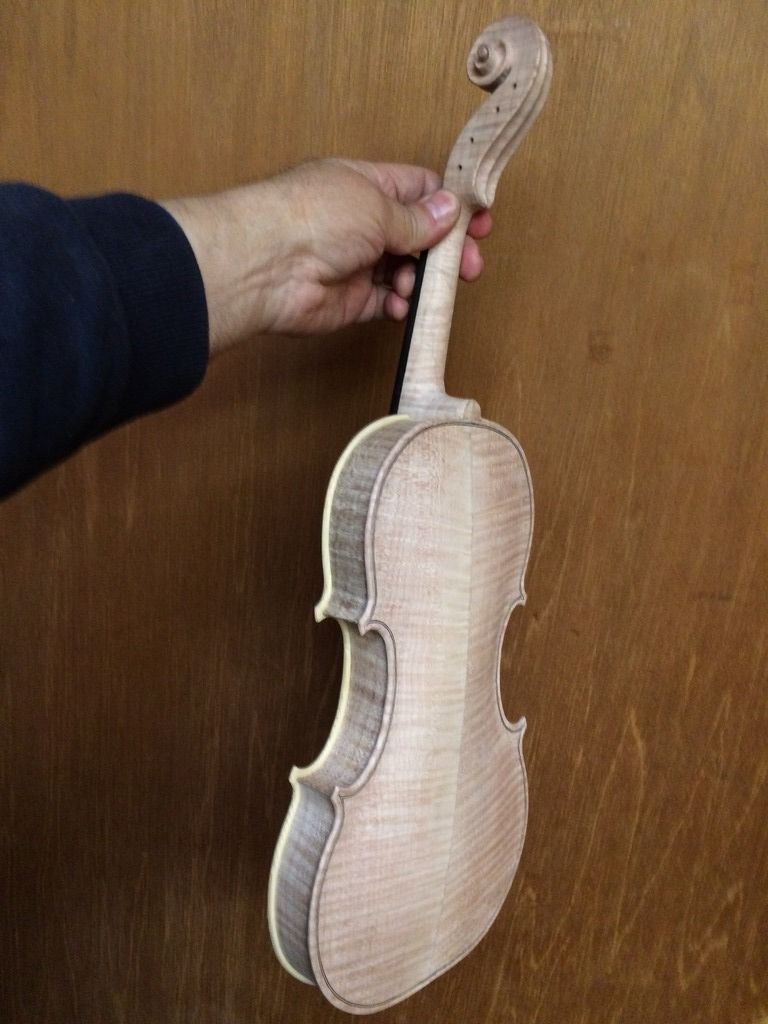
The last post was of the neck-set on the 3/4 violin. It looked like this– but the back plate was not made, yet. Most makers complete the entire corpus, then set the neck. I complete the rib garland and the front plate, then set the neck while the inside mold is still in place. This allows me to get the neck-set perfect, and to level the back of the garland, including the back of the neck-heel, before making the plate. When I install the plate, it fits perfectly, only requiring the final trimming of the heel and button together, to establish the optimum height in the center of the curve of the heel.
Neck-set side view
Completing the Back Plate
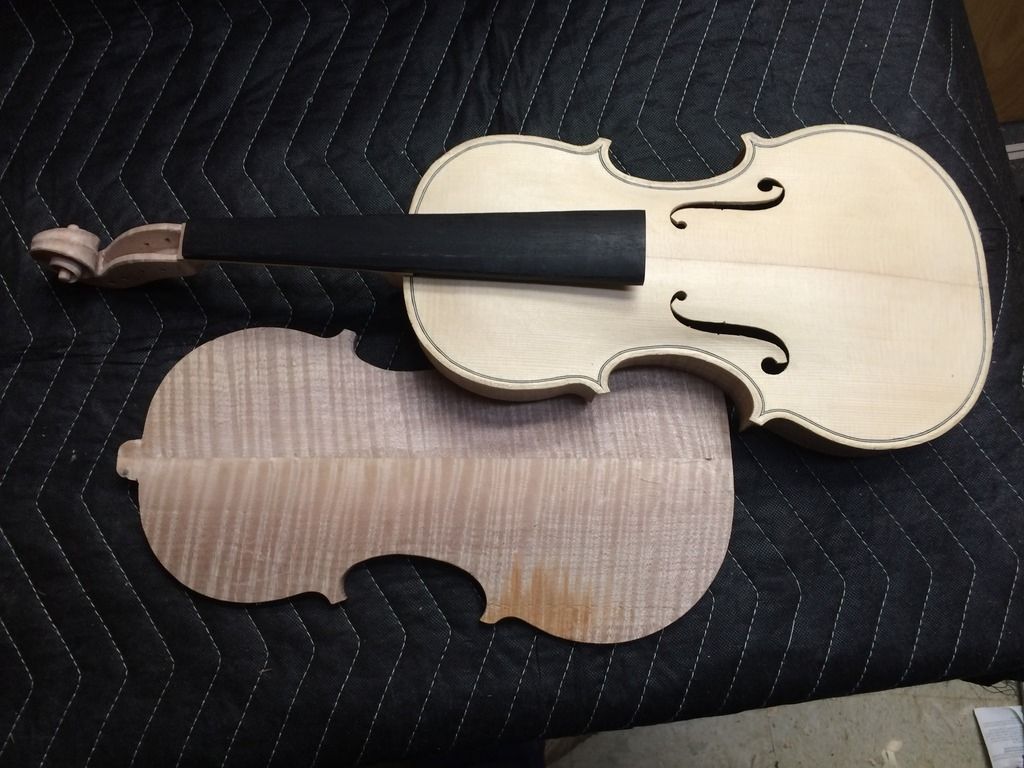
So, the next thing was to trace the back plate, and complete it:
Corpus with back plate blank
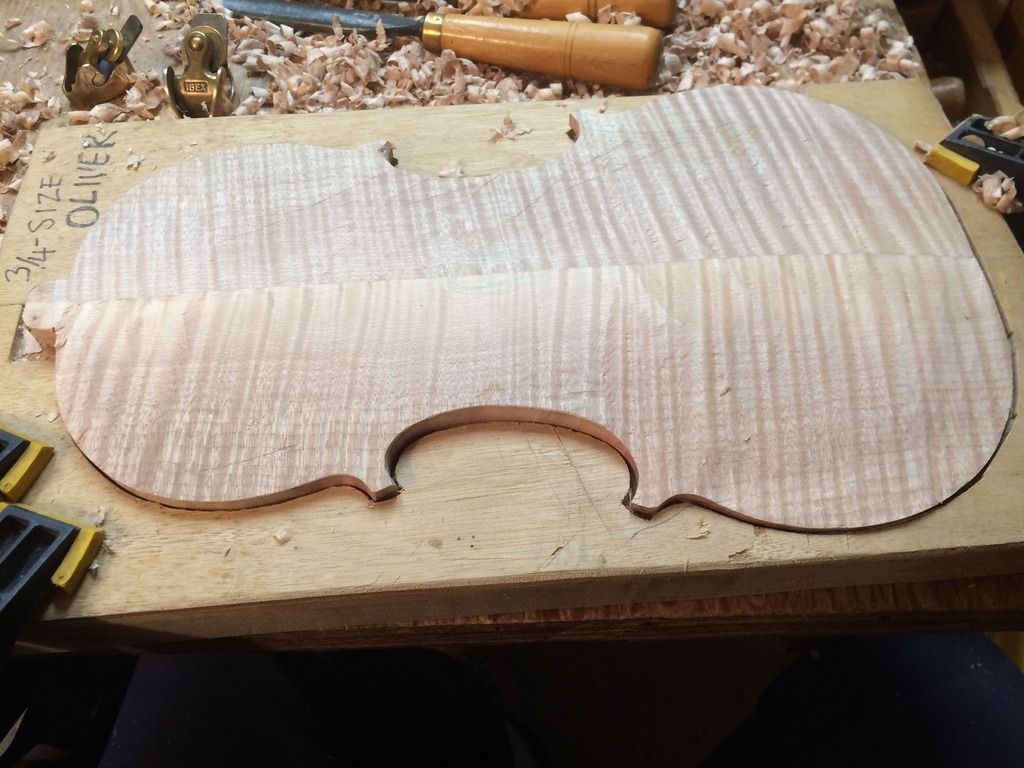
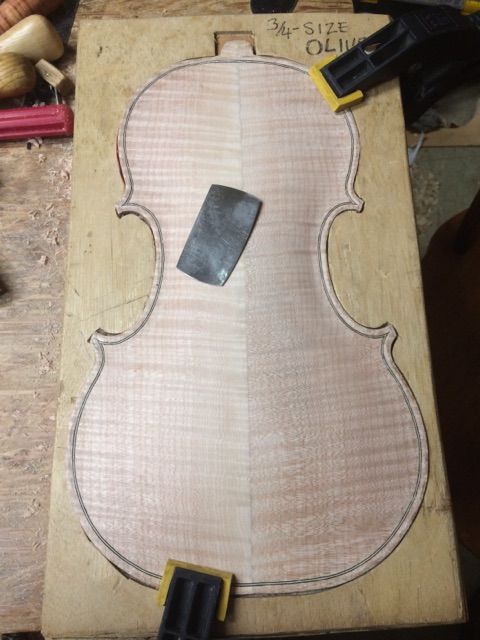
Beginning to carve the back archings. There is a long way to go!
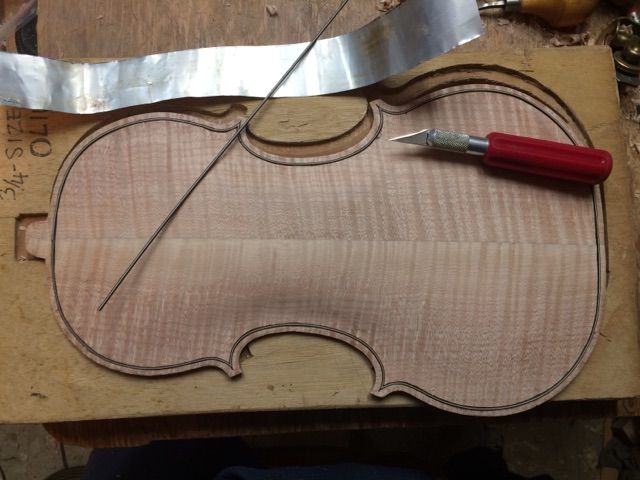
Once the arching is complete, I cut the purfling slot
Then I install the purfling, dry, to make sure everything fits correctly. That strip of aluminum is my bending strap.Then I glue the purfling in place.
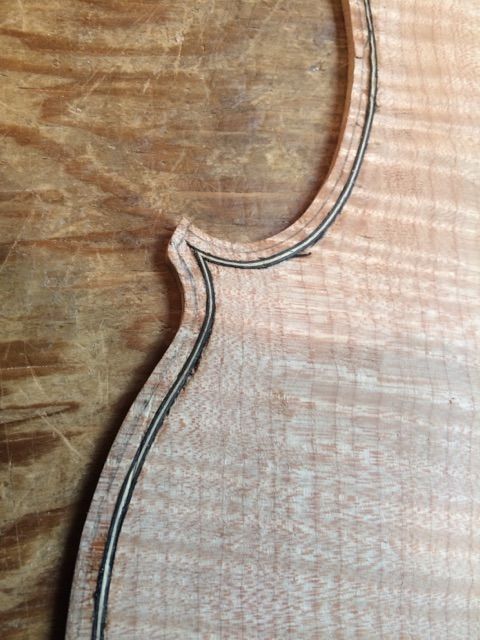
Then I mark the edge of the crest, so I know where to carve the channel.
Then I carve the channel, using a gouge, and use planes and scrapers to fair-in the curves of the channel and the archings.
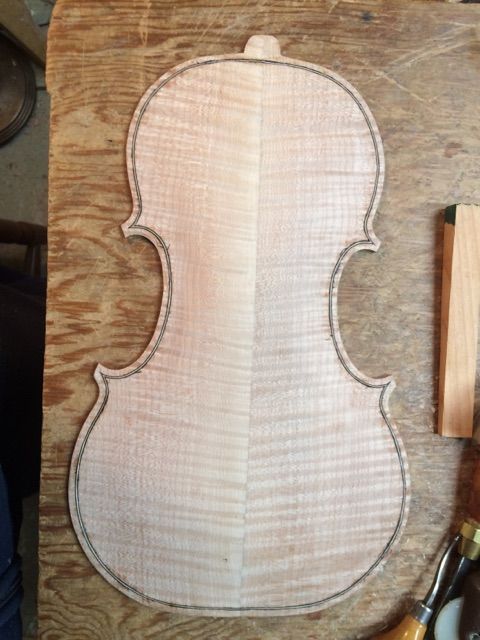
Here, the arching and purfling are complete…but the graduations (inside arching) are not begun.
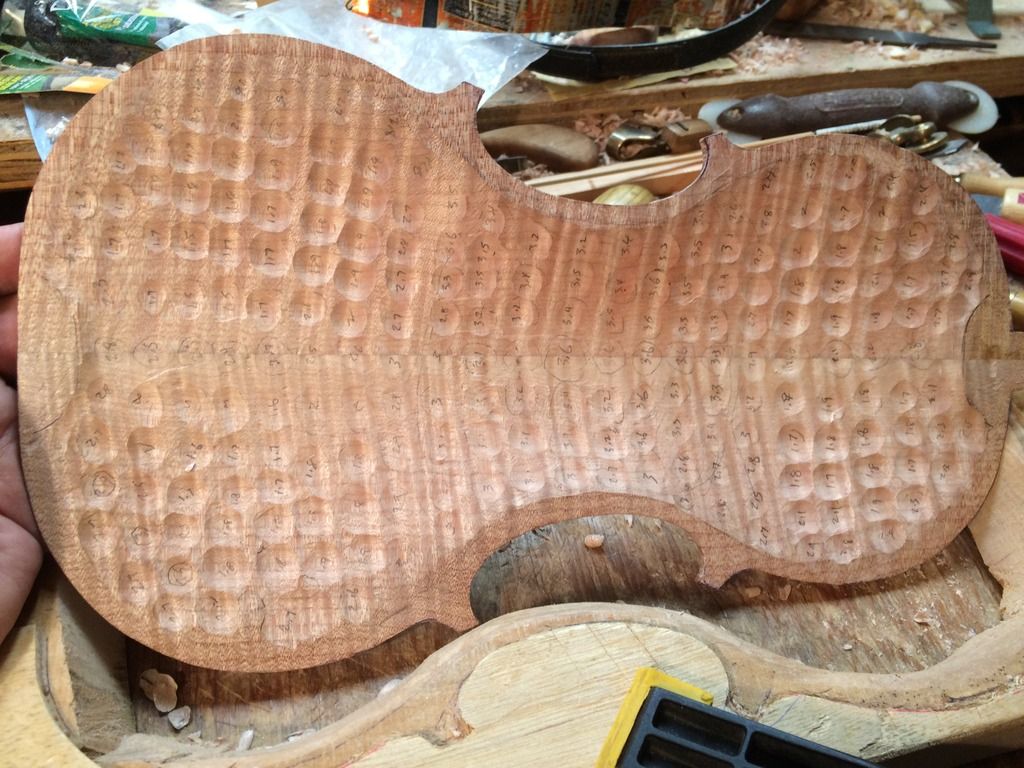
Graduation
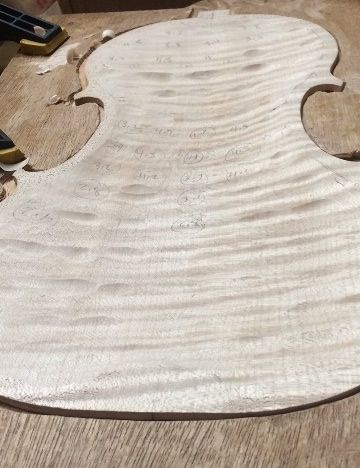
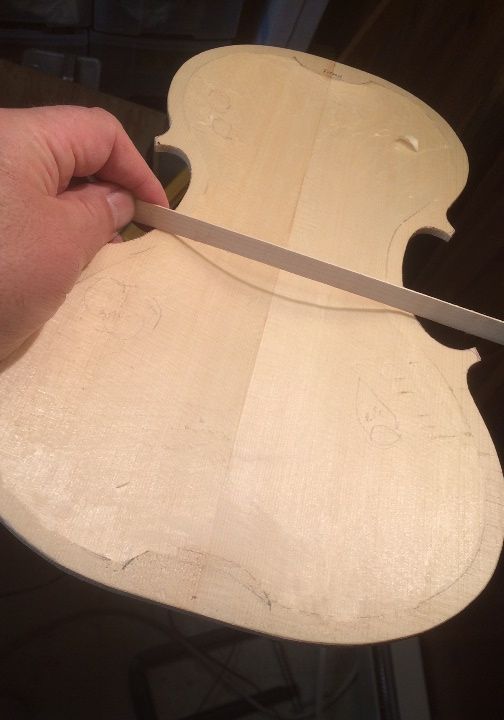
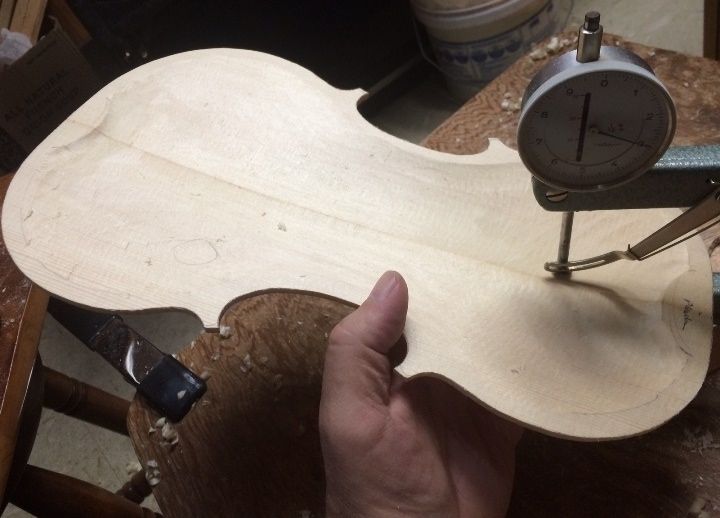
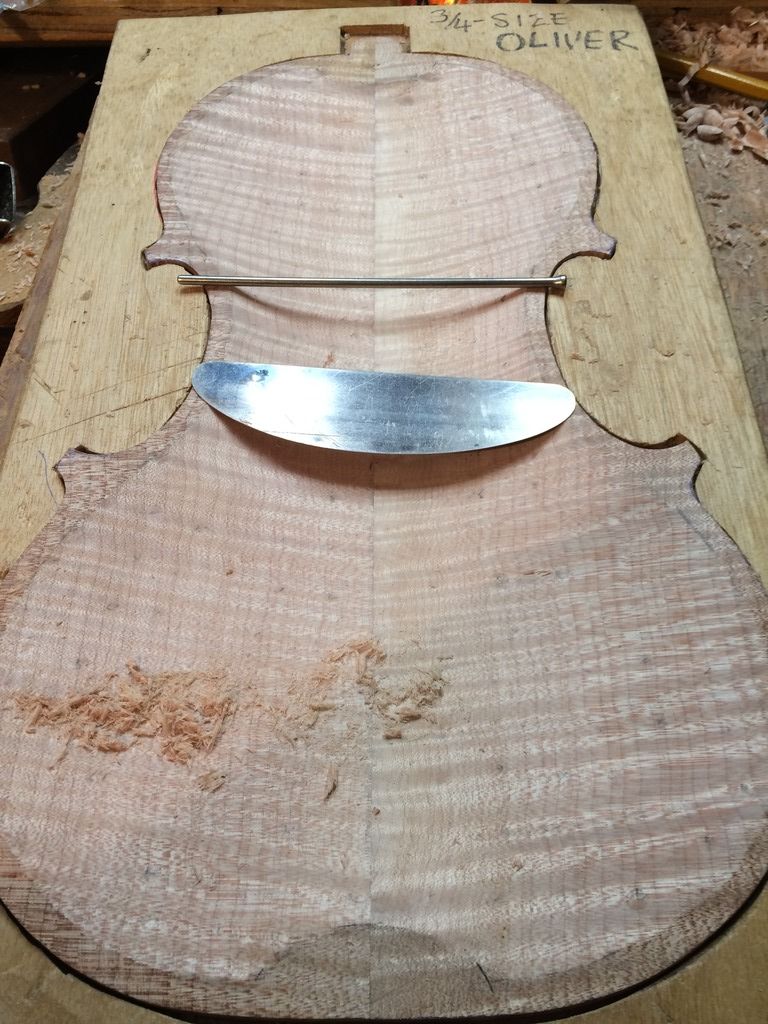
I begin by measuring the thicknesses all over the plate, so as not to run into any surprises and make the plate too thin. Then I use gouges and planes to bring all the thickness close to what I want. But, to make sure I don’t go too far, I measure and carve out small spots all over, to the exact thickness I want in each little “polka-dot”. That makes a “graduation map” that allows me to follow my plan to completion, by removing all the excess wood between the dots, thus “connecting the dots.”
There are other ways to do this. One involves a special tool, commonly called a “Strad-Spike”, because one was found among the tools of Antonio Stradivari. I have seen them and and have actually used them, but have never gotten around to building one. So…
Graduation map laid out.
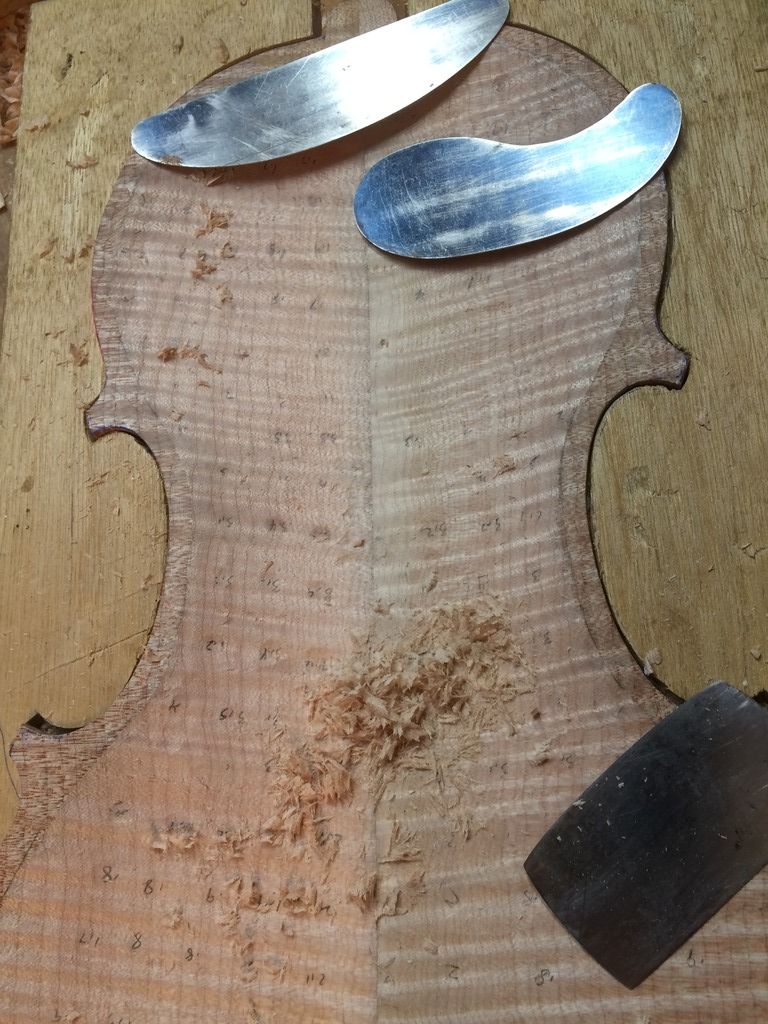
Final thicknessing in progress.
Graduations almost completed.
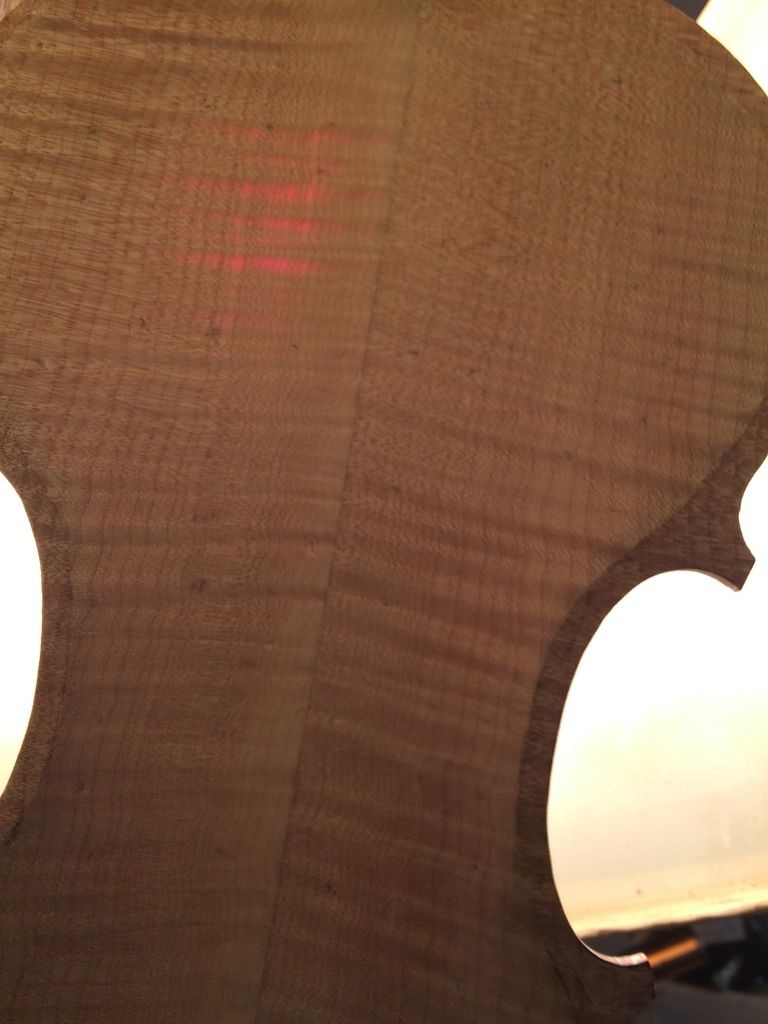
By the way, I think it is interesting to hold the plates up to a lamp and see how much light comes through:
That is a lot of light coming through that spruce plate…it is about the thinnest plate I have made.
Even the maple lets a little light through.
Closing the Corpus
Finally, to install the label and close the corpus. (I always forget to take a picture of the label…sorry.) Most makers put their label in after everything is fully completed. I used to do that, but I found it so frustrating to get a glue-coated label through the f-hole, line it up correctly and get it smoothed out on the back plate…all working through the f-hole…that I decided my labels will go in when I close the corpus; always. That means the label predates the completion by a few weeks at most, as a rule. I think one time there was a long wait, but that was the lone exception.
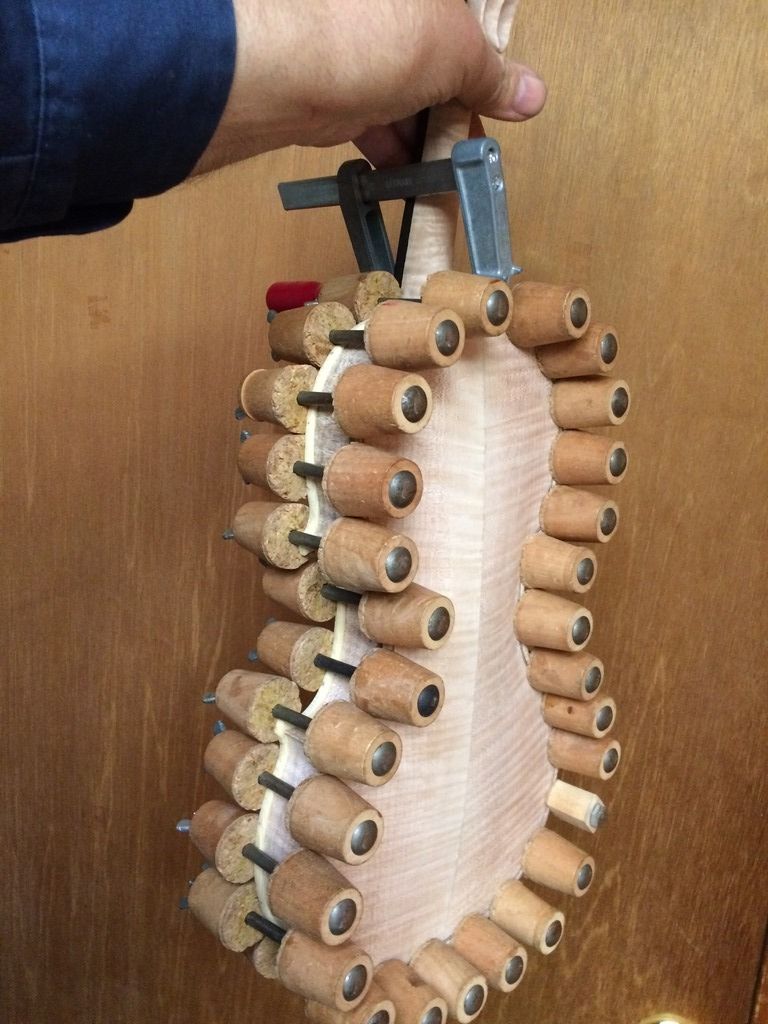
Closing the corpus
Fully glued and clamped, using hot hide glue and spool-clamps.
Closed corpus from the back.
Closed corpus from the front. Dainty little thing, isn’t it? This is my first 3/4-size violin, and it feels pretty tiny.
Finishing
I removed the fingerboard so as to be able to easily access the entire exterior, for final scraping and finishing.
After that, I had a lot of “scraping and looking” to do. (Scrape and look, using a low-angle, dim light, then scrape and look some more.) When everything was as smooth as I could make it, and exactly the shape I wanted, I stained the entire violin with coffee, to get rid of the stark-white bare, new-wood look. It takes at least three coats, usually, to get the color dark enough that it will not shine through the varnish. The collateral effect is that the grain raises because of the water. So, I sand it lightly, to smooth the grain “just enough.” I want the grain to be visible in the final state, but not too visible.
Coffee stain
Then, I rubbed in a coat of the mineral ground. I brush it on liberally, rub it in hard, with my fingers, then wipe it off as hard as I can, using a rag. When it dries, the instrument will be whiter than ever– chalk-white, all over. The first time I did this I was pretty alarmed at the look, but I had just watched Roger Hargrave do the same thing, and knew that the white mineral would completely disappear with the first coat of sealer or varnish. And it did!
Here is the violin with the sealer applied:
With three coats of coffee, and the dark sealer, the wood looks pretty dark. But it will look good under the varnish.
The back, with the seal-coat.
After that it was a case of applying several coats of golden varnish, then a few coats of red-brown varnish, and a final two coats of the golden stuff.
Front varnish nearly complete
Back varnish nearly complete.
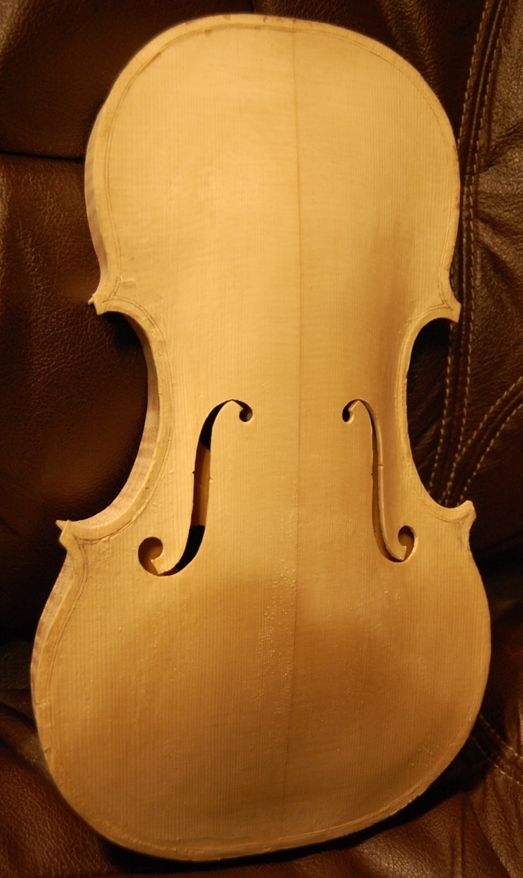
There is the front with the final coat of varnish.
Set-up
Standard set-up, and the violin will be done! That includes the saddle and endpin, as well as re-installing the fingerboard, fitting and installing pegs, a bridge, the nut, the soundpost, tailpiece, and strings. A chinrest completes the instrument.
Bottom of the violin before the endpin and saddle were installed.
Endpin installed: saddle is next.
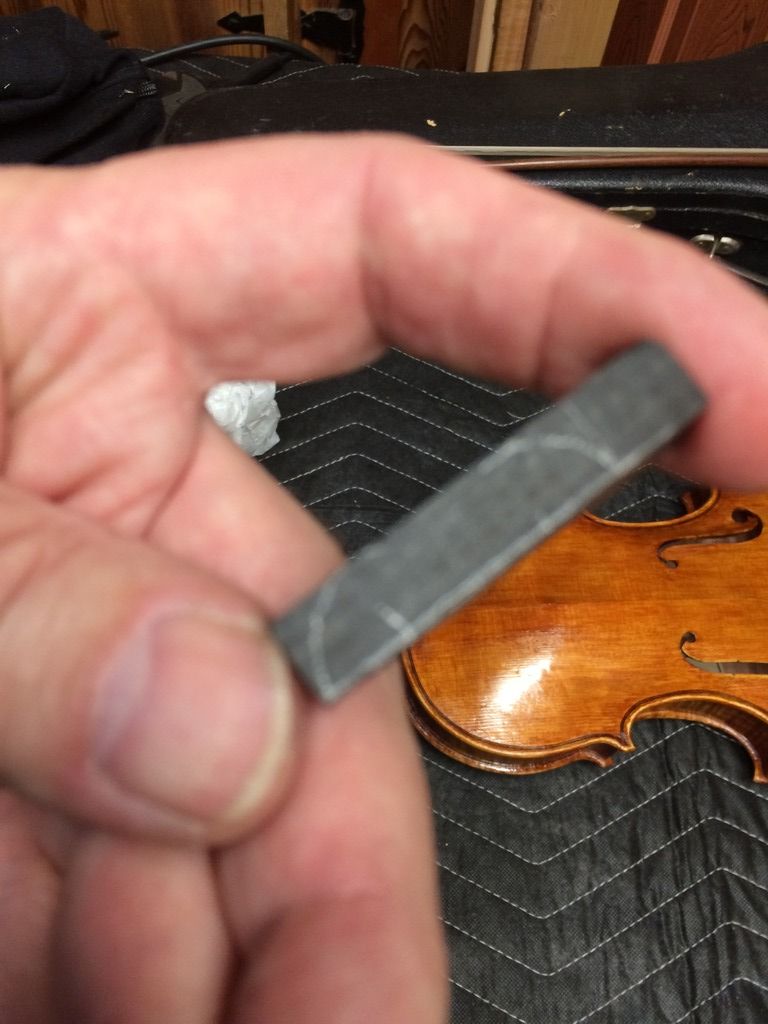
Heres the plan: a rounded saddle to prevent “saddle cracks”. They work because there is no sharp corner to act s a stress riser.
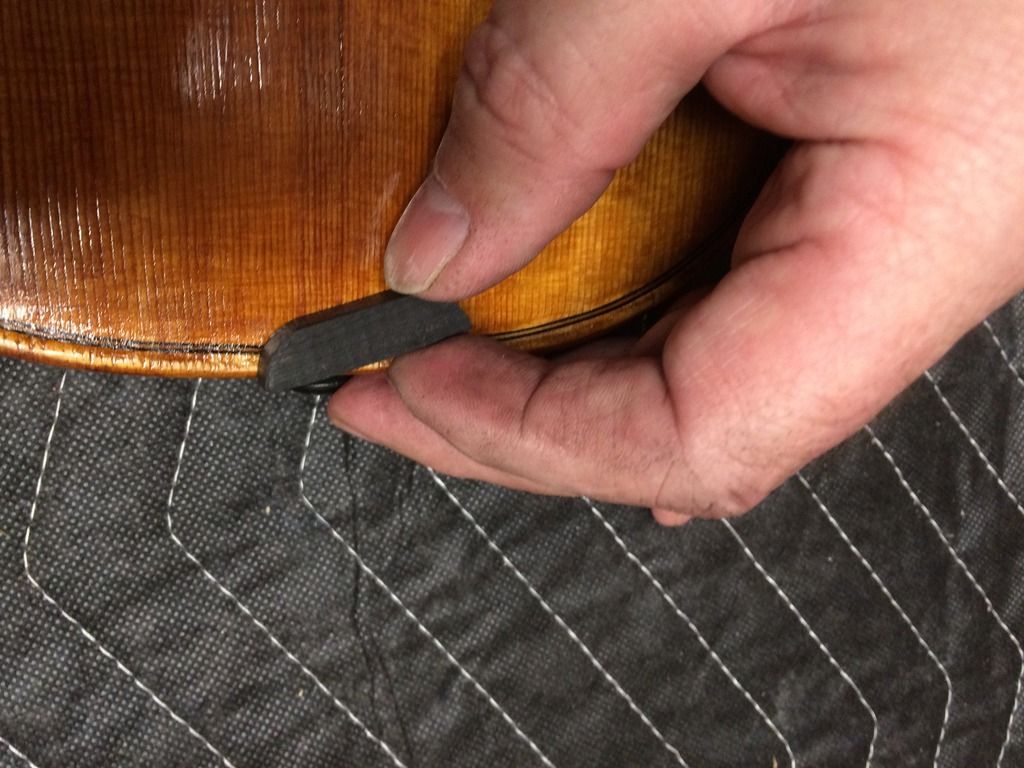
There’s the footprint of the saddle: no further shaping is done until I cut out the mortise in the front plate.
I traced the footprint onto the front plate, and began cutting out the mortise.
Then I cut out the mortise using sharp gouges and a small knife. Any nicks in the varnish will be retouched later.
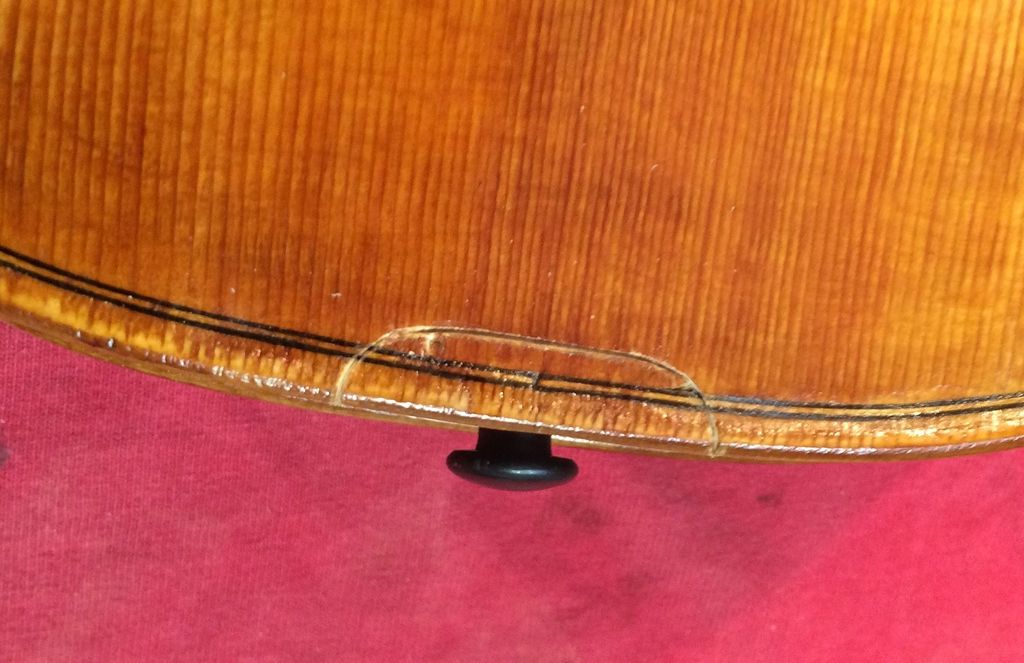
The varying thicknesses of the top plate can then be traced onto the saddle itself, and final shaping can begin.
Saddle and endpin are nearly complete. The saddle will be filed a little more, and the varnish retouch will happen later on.
I reinstalled the fingerboard, and while the glue is drying, I fit and installed the tuning pegs.
Fingerboard and pegs complete. Notice the nut is also intalled.
Completion
Finally the little violin is complete!
Front view of completed 3/4-size violin
Side view…
And the back view.
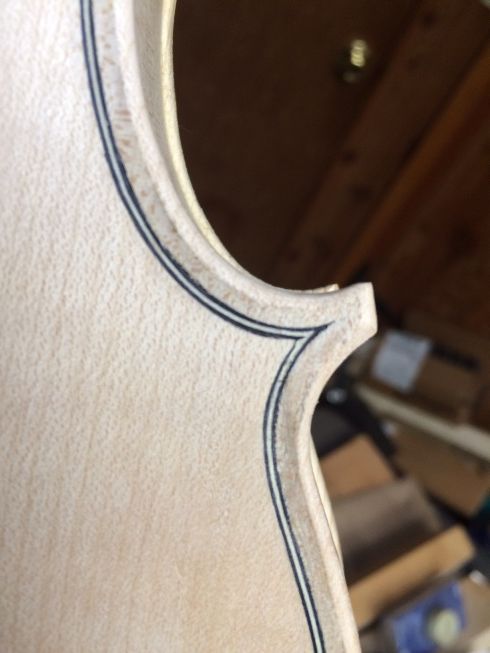
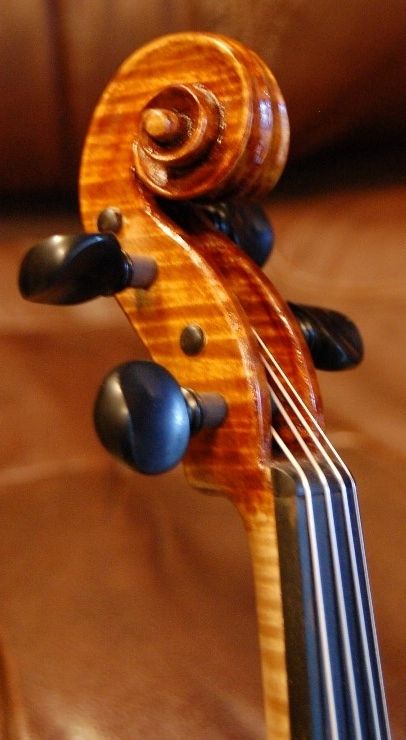
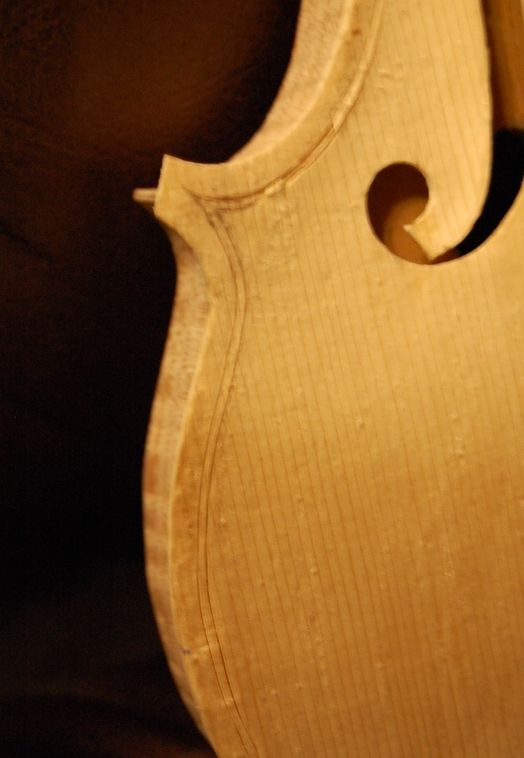
Close-up of the scroll
Thanks for looking. Please keep in mind that the Marylhurst Musical Instrument Show will be April 29th and 3oth. If you can make it, I hope to see you there. This little violin will be there for you to test drive, along with others.
If you found this post helpful, please share with your friends!
So, I went ahead and cut out those f-holes, using an f-hole “drill” my children bought for me, and an X-acto knife.
F-holes cut out and ready for the bassbar…outside view. They still will require a good deal of refinement.
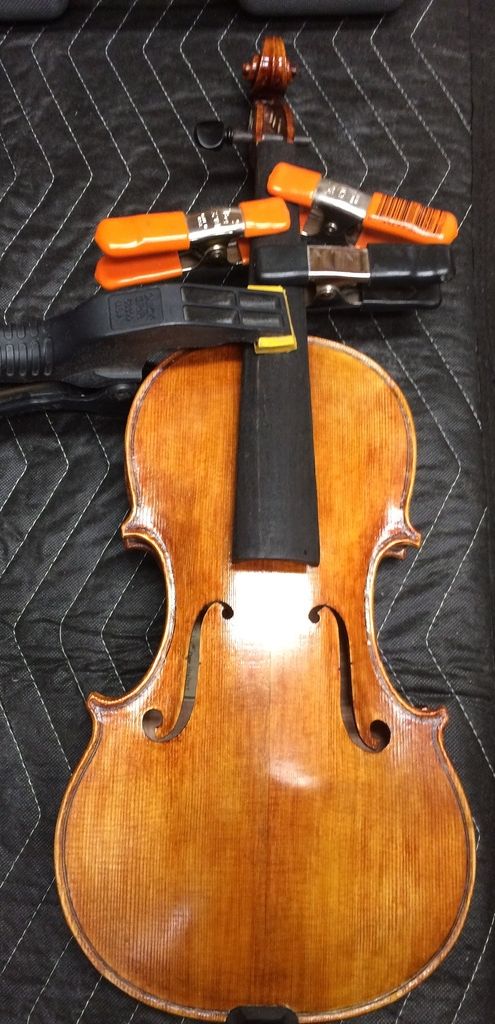
Then I chalk-fit a bassbar blank, and glued it in place, using special clamps made by Jake Jelley, the friend who encouraged me to continue building instruments.
Bassbar blank with clamps. You can see the f-holes cut out…they still need more trimming.
Shaping the Bassbar
I carved and planed and scraped the bassbar into what I judged to be an appropriate shape for this instrument. Both it and the f-holes will receive a bit more scraping and shaping before they are varnished. The whole instrument, actually, is fair game for tweaking, refining, and perfecting, until the varnishing begins.
F-holes, bassbar and graduations nearly complete. Outer edges have been rounded to approximate their final shape.
Installing the Front Plate
I aligned the front plate as closely as I could with the rib garland, and applied six spool clamps–one for each inner block. Then I loosened one clamp at a time, and, using a thin palette knife, I slipped hot hide glue between the plate and the blocks and linings. I rinsed the edge, overhang and rib quickly with hot water, and wiped it with a rag, then re-tightened the clamp, and added more clamps between that clamp and the next, repeating the procedure untill all the edges and especially all the blocks were securely glued and clamped, and relatively clean.
Front plate installed, using spool clamps. Ann thinks these look like hair-curlers. 🙂
Back view of mold with front plate installed, and spool clamps. The mold will be removed after the neck is set.
Purfling Comes Next
Not everyone does things in the same order. I have had trouble, in the past, getting my edge overhangs even all the way around. If I install the purfling first, then I am locked in, so to speak, and if the overhang is uneven, there is nothing much I can do. But if I purfle after installing the plate, I can take time first to adjust that overhang, using files and scrapers, until I am satisfied that it is the way I want it, and then purfle, following my adjusted edge shape.
Installed front plate, from the mold side, showing the overhang. Notice that there are no back linings, yet.
Purfling laid out and lightly incised. (The shadow is my head– I was too close to the plate.)
The idea at this point is to just deepen the lines a bit, not to try to cut the full depth of the purfling slot. You can see that, in some places, the waste wood begins to pop out on its own. Most will have to be removed using a purfling pick. Here is a closer photo of the incised purfling lines:
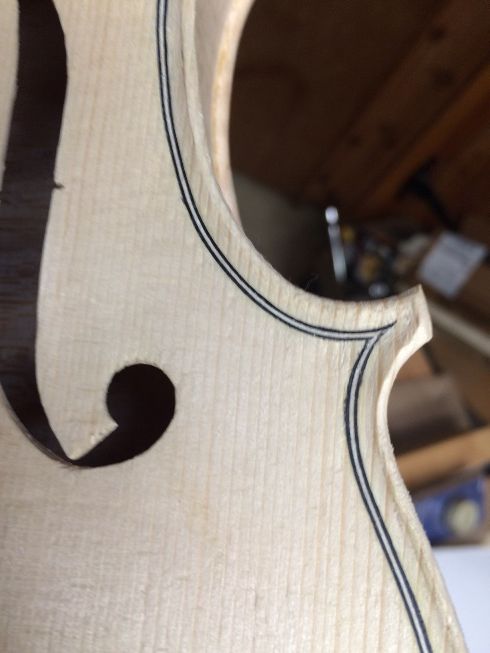
Close-up of the incised purfling lines. That corner will still undergo significant shaping and refining.
So…next time, I will show the completed purfling, and the neck-set– I hope. 🙂
Thanks for looking
If you found this post helpful, please share with your friends!

 Follow