
 Follow

Five String Fiddle Progress: Back Plate
Flattening the back of the garland
After the glue was completely dry, I removed all the clamps from the linings and cleaned up the interior: that is to say, I tapered the back linings, so that they faired smoothly into the ribs, and I shaved and scraped the blocks to their final shape.
Then I rubbed the back surface of the garland (rib and block structure) on a “sanding-board” to level the back of the garland, and to ensure that the back of the neck heel was completely level with the back of the garland. That way, I can fit the back plate absolutely flat against the garland, and trace the shape.
I didn’t take a picture of this procedure, this time. Here are some taken when I was building a cello:
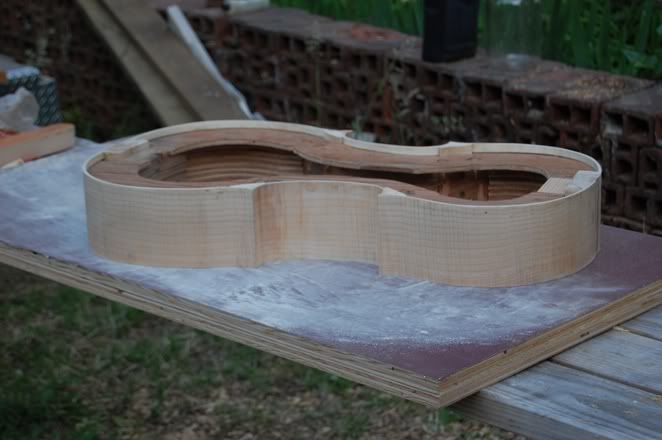
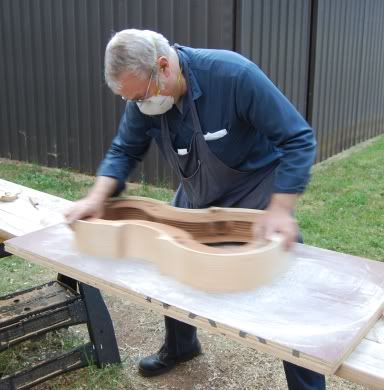
I make pencil-marks on the edges of the linings, ribs and blocks, all around, and scrub until the marks disappear. When all the marks are gone, the garland is flat. It gets pretty vigorous and physical, but it is quite effective.
Here is the flattened garland, ready to trace the back plate:
As you can see, the blocks are quite smooth, now, and the linings taper gently into the ribs. After this point, there will be no more changes to the interior of the corpus, except as it directly affects the back plate.
Tracing the plate
I clamped the plate to the corpus, carefully centering the glue-seam of the back plate on the centerline of the neck and the end block.
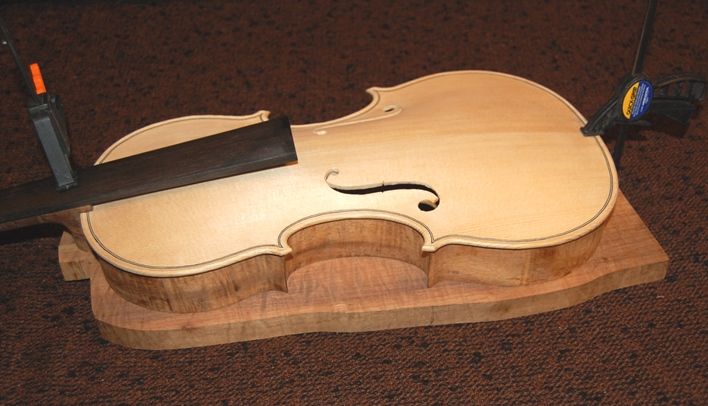
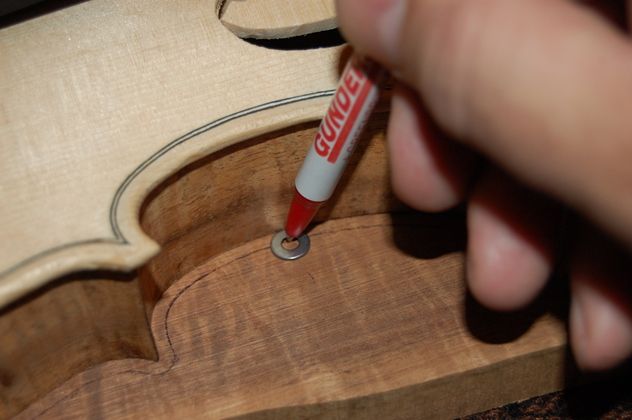
Then I traced around the garland using a ball-point pen and a flat washer whose flange is exactly 2.5 mm wide, so that my line will be 3 mm from the ribs, all around. I watch carefully to make sure the washer stays flat on the plate…they have a tendency to flip up and follow the pen. I work along the perimeter, giving several strokes to every part, so that the line will be visible against the dark wood. Notice that this procedure makes “round” corners. I will modify them before cutting them out, so that they are the correct shape.
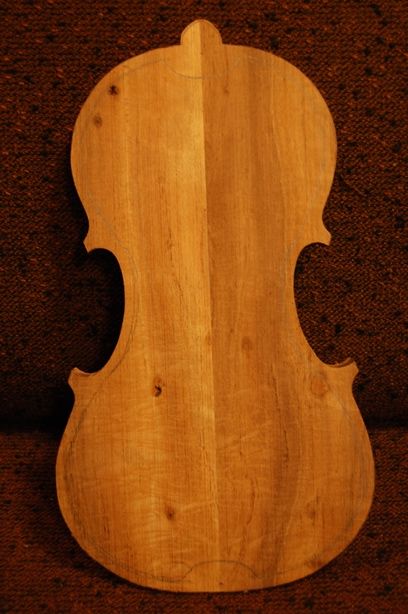
And, there is the plate, almost ready to be cut out:
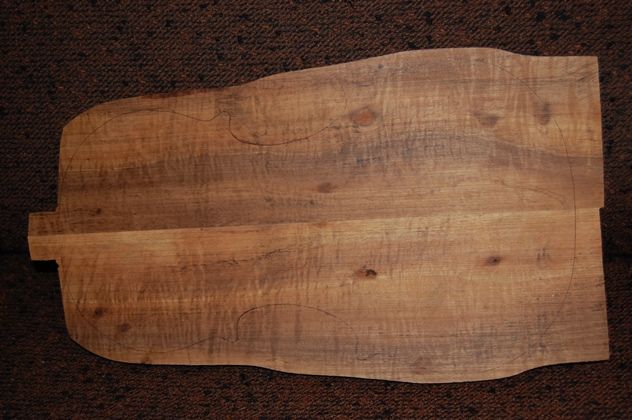
One thing I do, that I forgot to photograph, is that I re-shape the corners. I use a straight-edge to connect a line from the end of the rounded corner where the pen circumscribed the corner of the rib to the center glue line at the location where the purfling will cross the far end of the plate. (Or, you can just use a 30/60/90 triangle to lay out a 30-degree angle off the center glue line on the end of each corner. But I do it with the straight-edge.) Then I continue the curves of the inner bouts to connect with the straight lines I just scribed in, and the corners are complete. I use a sharp scraper to remove any ink lines that are not part of the perimeter outline, and then I really am ready to cut out the plate.
Cutting out the plate
I use a band-saw to cut within a millimeter of the line, and then use an oscillating spindle sander to perfect the edge, right up to the lines. These and my drill press are pretty much the only power tools I use, though I have occasionally used an angle-grinder with a coarse sanding disc to remove rough excess wood, on larger instruments.
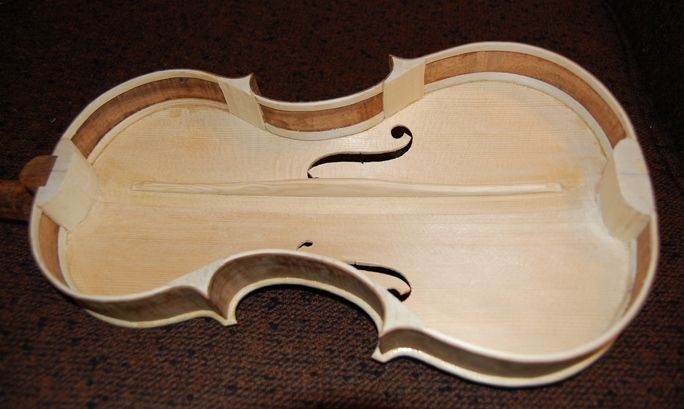
I run my fingers around the edges looking for lumps, and work those out as well, using a file as needed. Here is the completed plate blank:
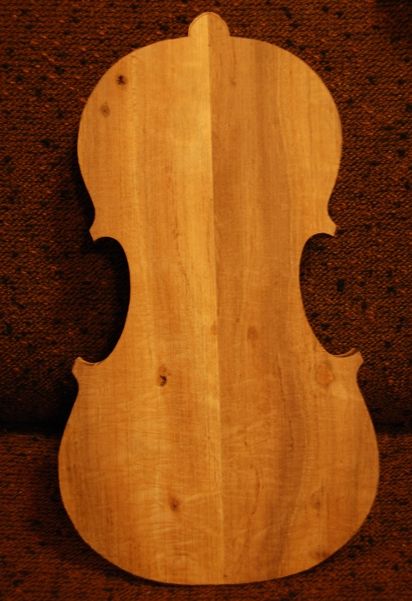
At this point I also sketch in the interior graduation plan–just the outline of the inside boundaries of the plate, so that I know where I am going to carve. There is no reason it has to be done at this point, but it helps me remember which side was outside and which inside…and that really does matter, as the plates are vitually never exactly bilaterally symmetrical. If I forgot and arched the wrong side, the completed plate would never fit the garland (ask me how I know…).
You can see that there are numerous bark inclusions in the wood, which I will fill with matching wood…but I will wait until the arching is complete before I attempt to fill the holes, so that I do not plane away my plugs. It is unsusual to use wood with holes in it like this, but it is also unusual to use anything other than maple for a violin back. Five-string bluegrass fiddles are not burdened by the same 300+ years of tradition as violins, though, so exotic woods can be used. This wood has amazing flame and figure in it, and the plugged holes will not detract from the beauty of the wood.
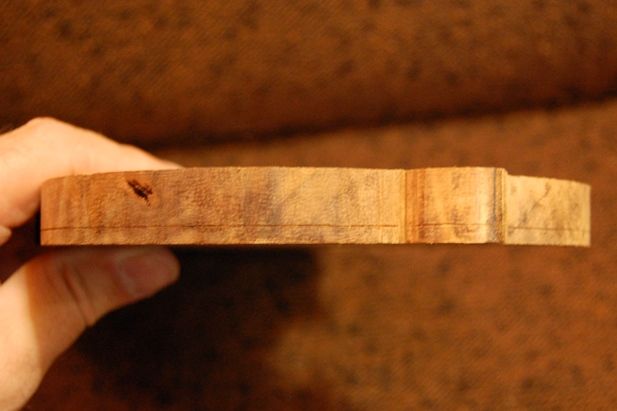
Before I begin arching, I establish the edge-thickness all the way around, using a “wheel-style marking gauge“, set to 4 mm. It has a tiny sharp wheel that does the marking, and it makes very cleanly scribed lines.
Beginning arching
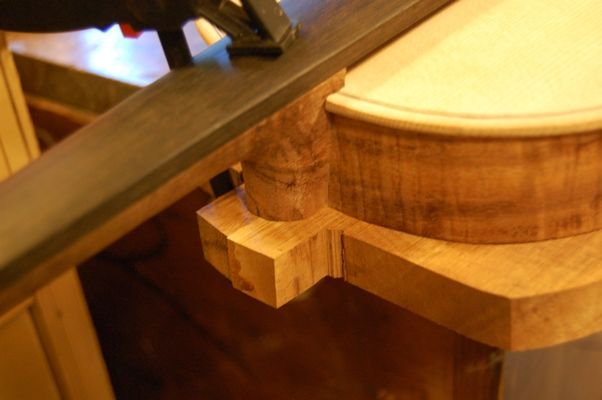
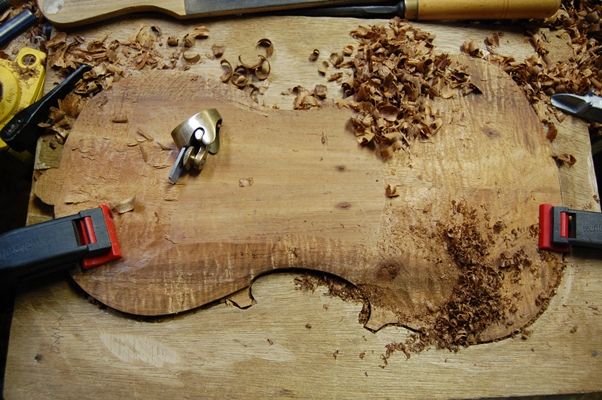
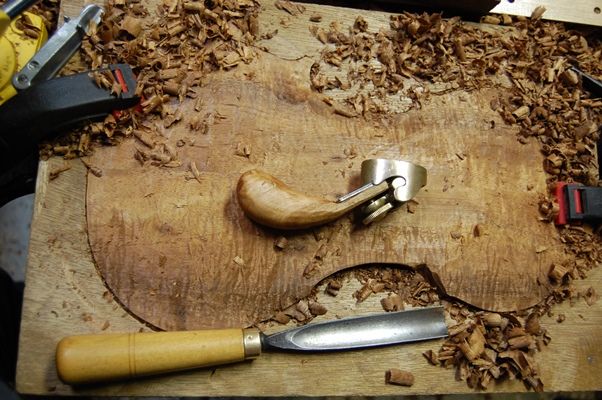
I used a Japanese-style pull-saw to cut the approximate height of the plate thickness on each of the corners, so as to avoid unnecessary stress on the corners while carving the arching. It looks a little odd until the arching is complete, but it avoids the possibility of breaking off a corner. I use a large, sharp gouge to reduce the edges and begin the arching; then a toothed finger plane to continue the curves until I am very close to the desired shape. at that point I will switch to a smooth, curved-sole plane and bring the arching to nearly exactly the desired shape. From that point on, a variety of scrapers will be my only shaping tools, for fear of tearing out wood along the figuring .
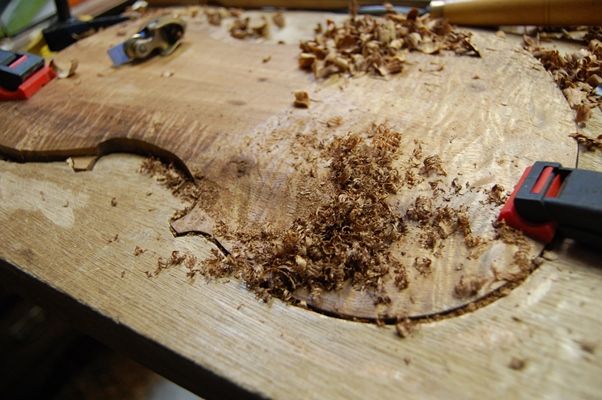
Here are some photos of the progress. This is very hard, difficult wood to carve, and my hands are giving out, so this is about as far as I am going tonight:
So…that is it for today. Pretty fancy wood, isn’t it? The customer bought it in Hawaii 33 years ago, or so, and has dragged it around all these years, until he decided that he wanted a five-string fiddle. Probably the only opportunity I will ever have to make a fiddle out of curly Koa, but it is really going to be a beautiful instrument.
My hands are getting too tired to work effectively. I will try to get more done later this week.
Thanks for looking.