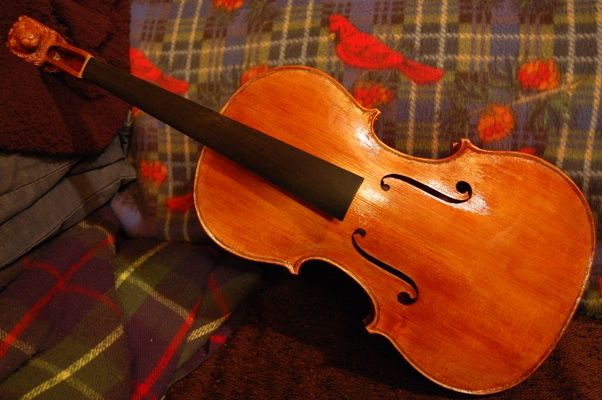
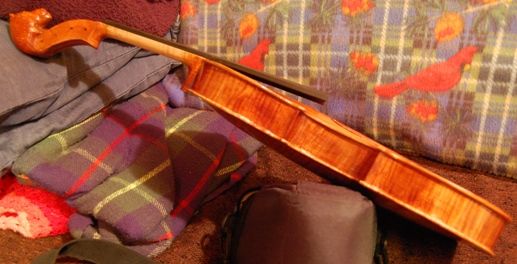
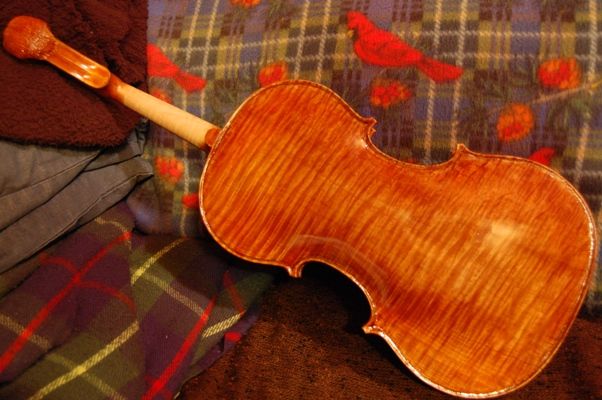
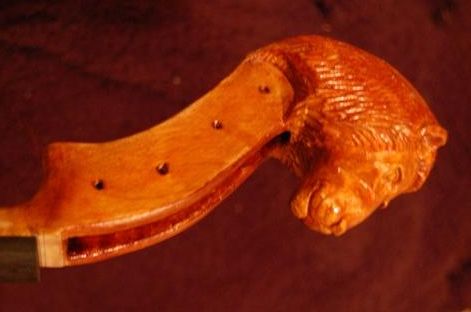
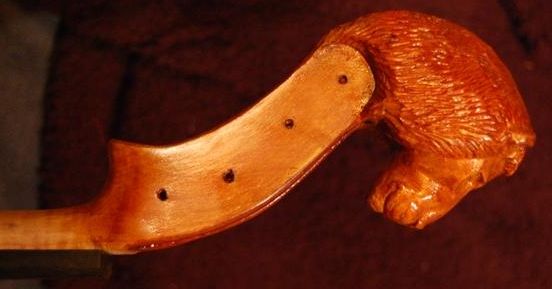
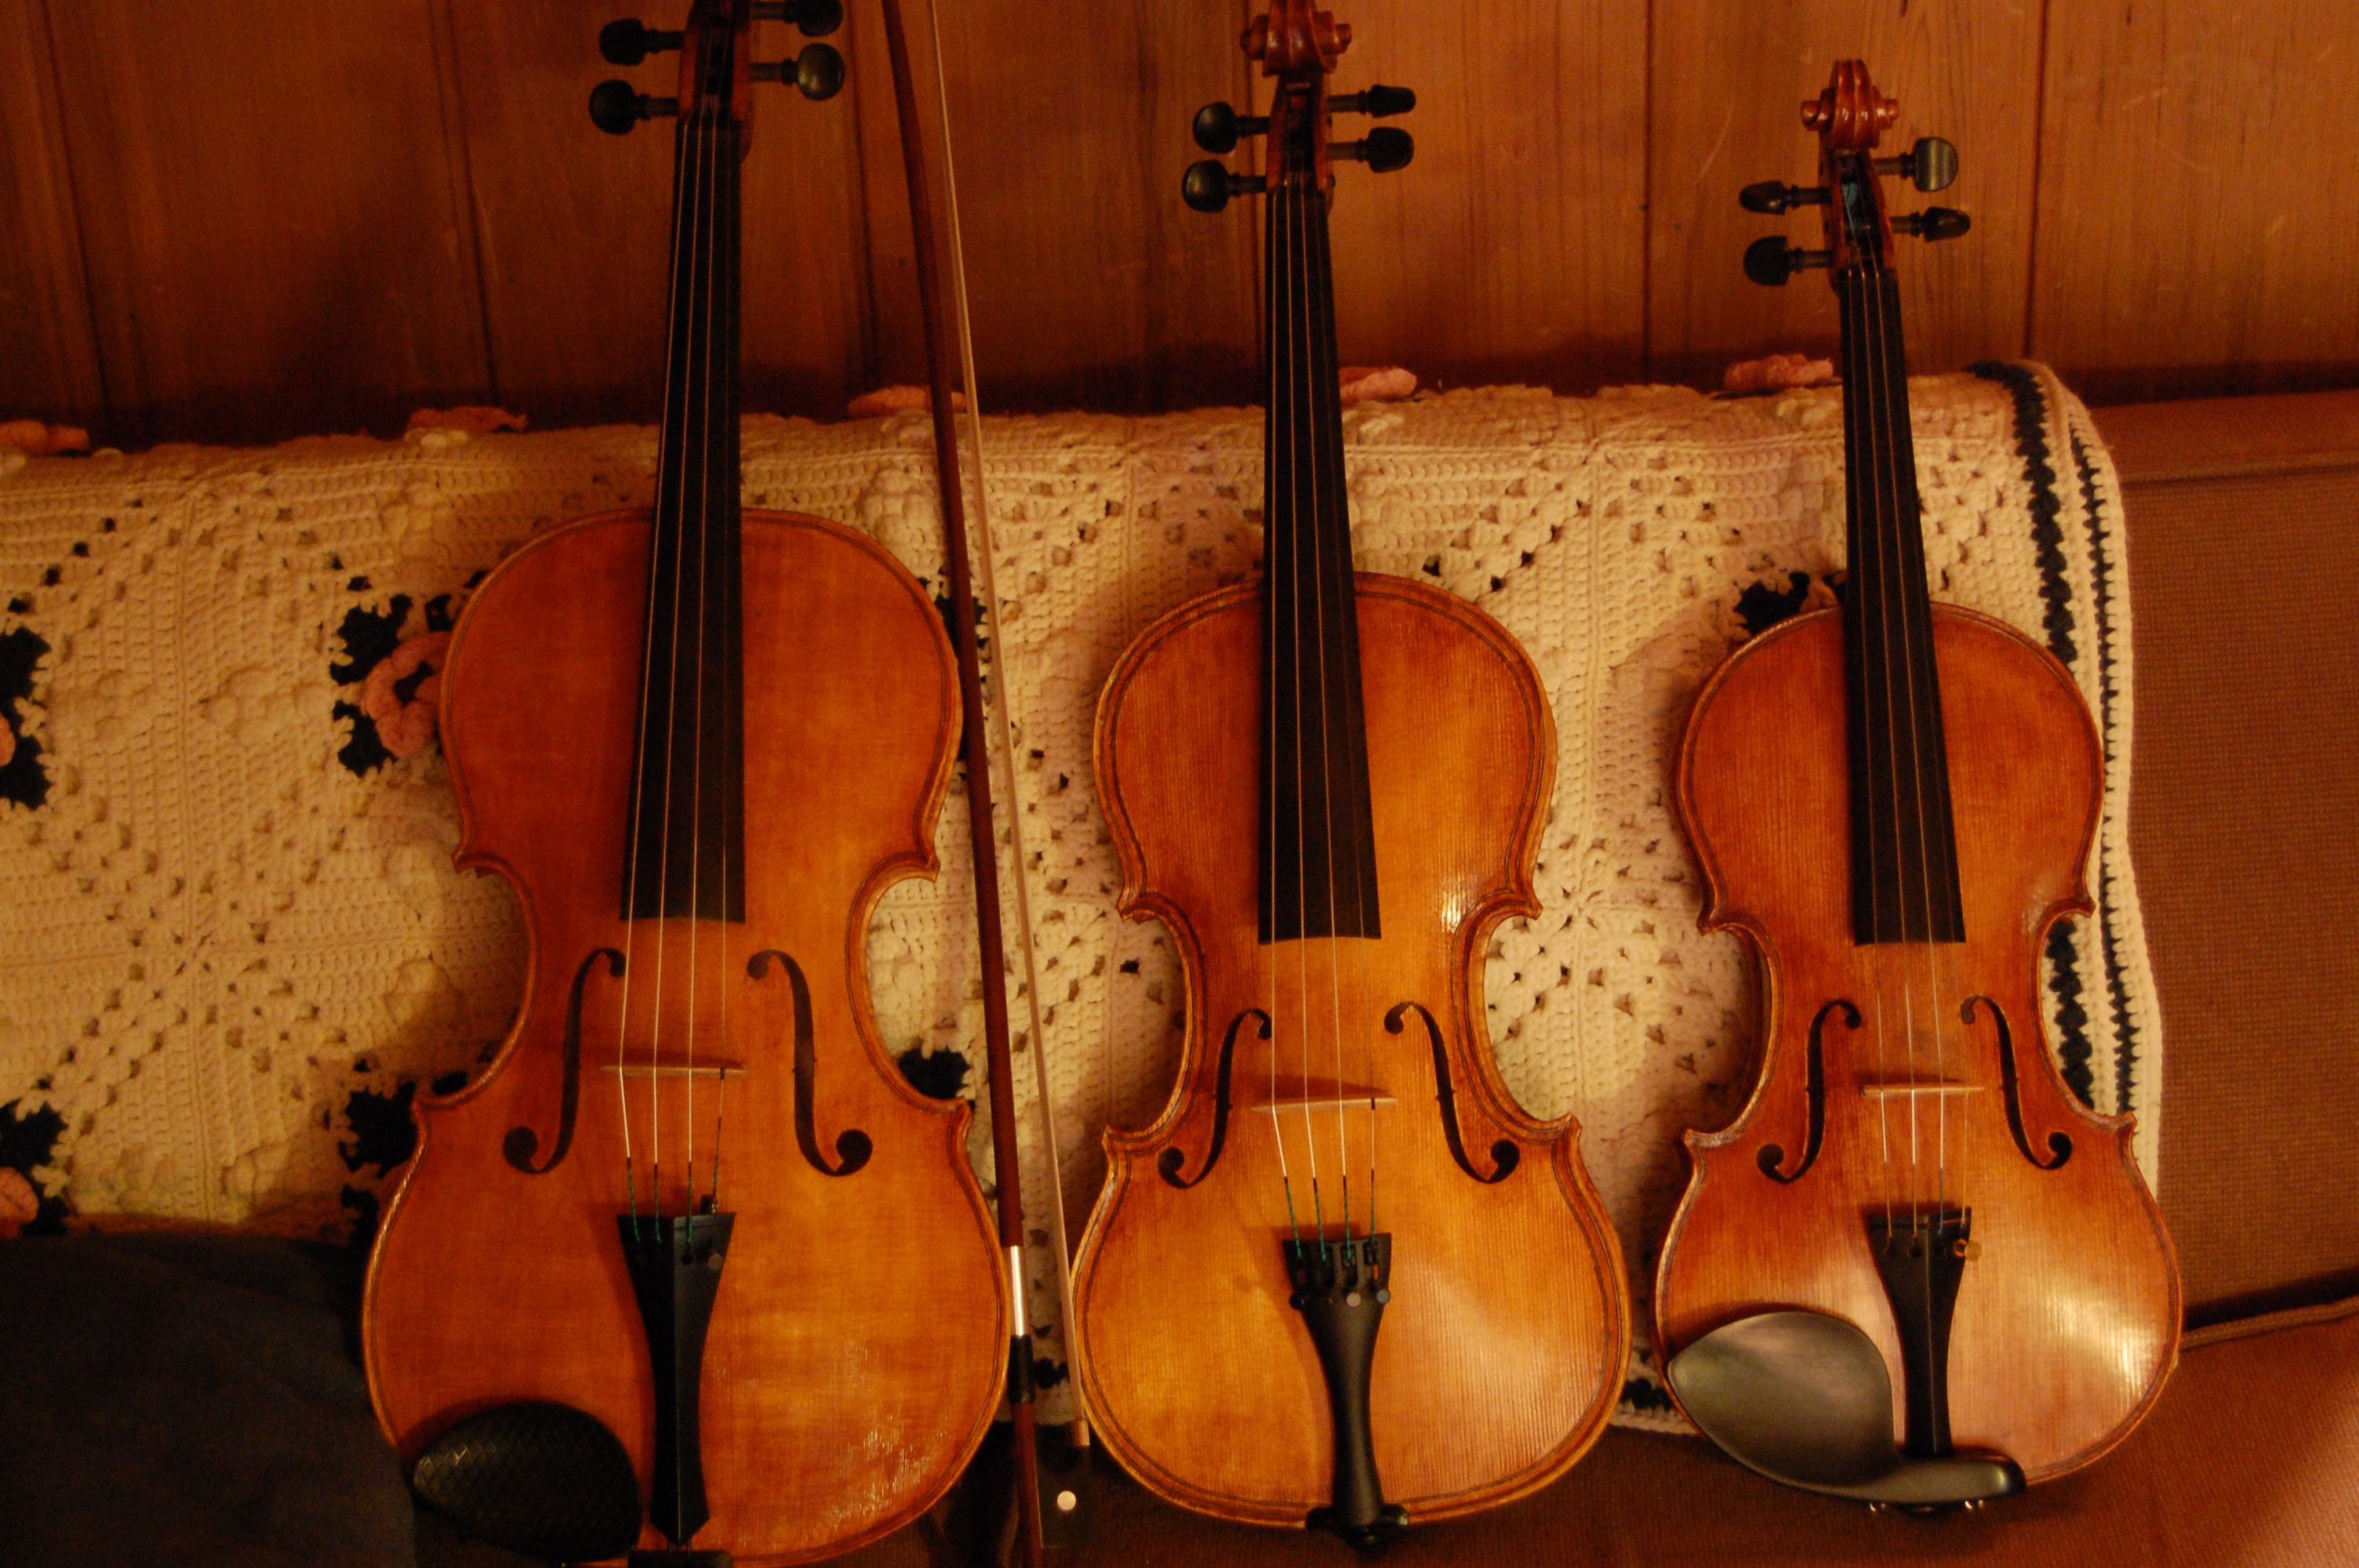
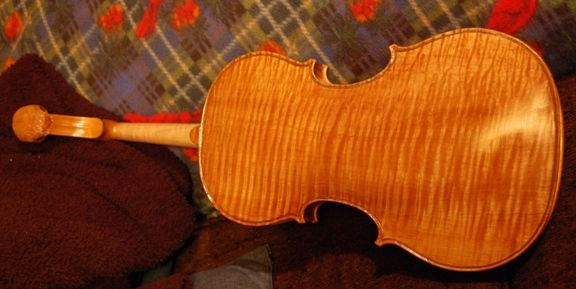
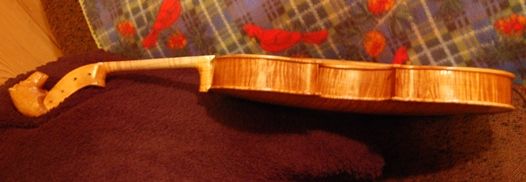
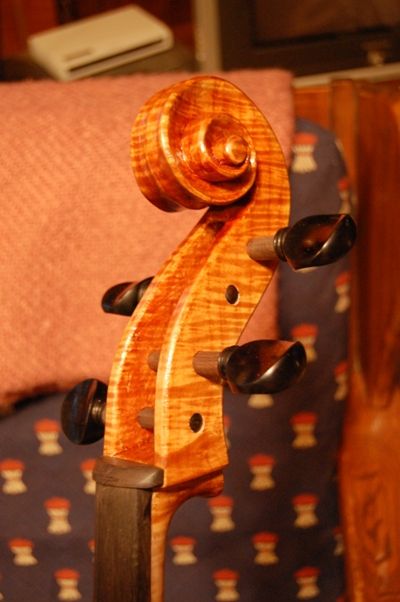
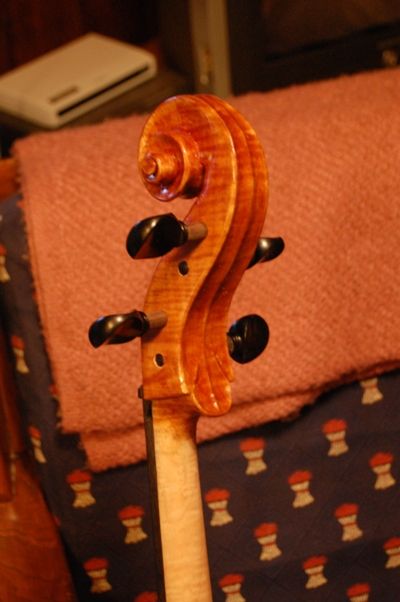
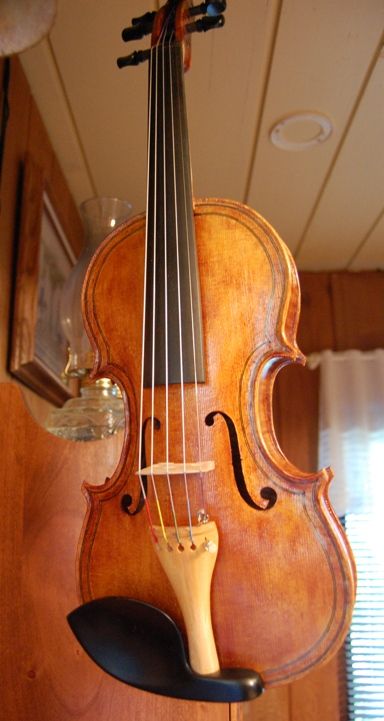
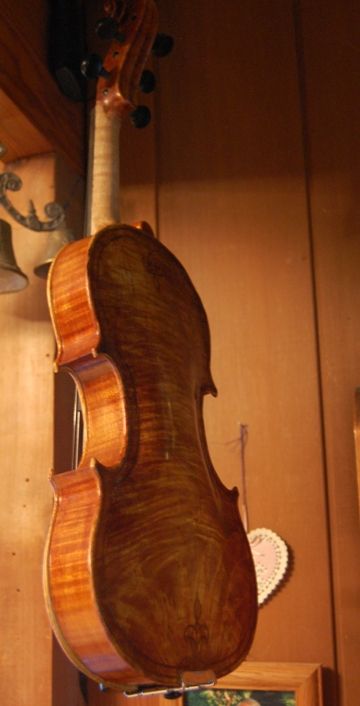
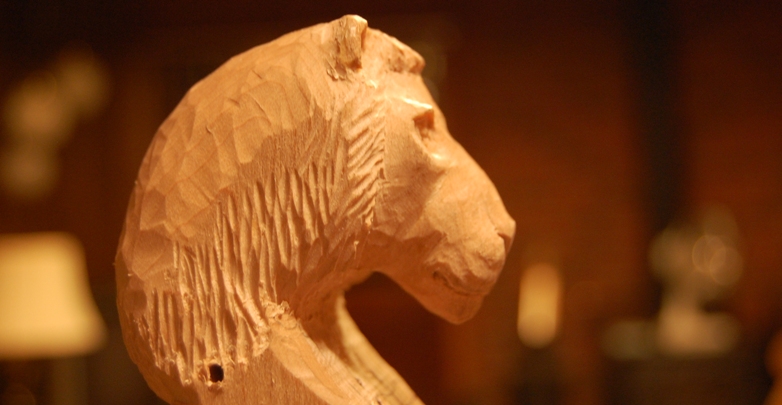
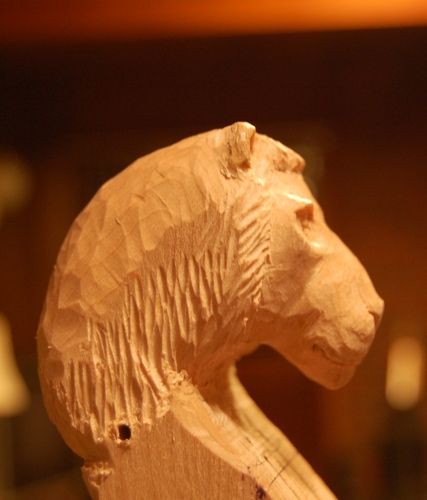
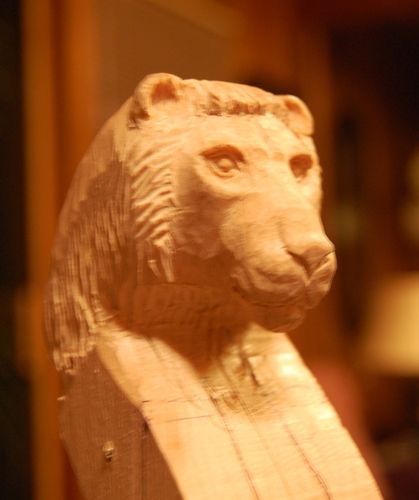
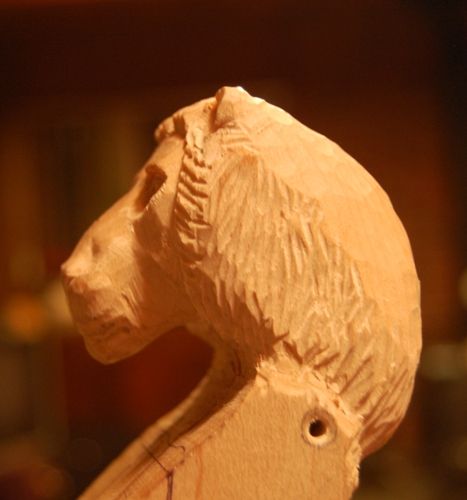
I will still have to complete the rubbing out of the varnish and the final setup of the instrument, but I expect to have it playing by Friday. Here are some current photos:
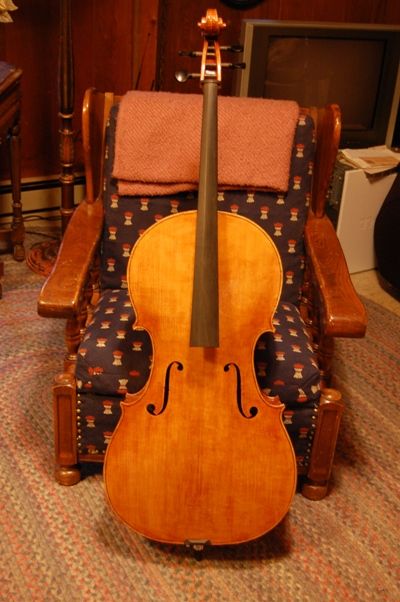
Front of lion head viola with final varnish
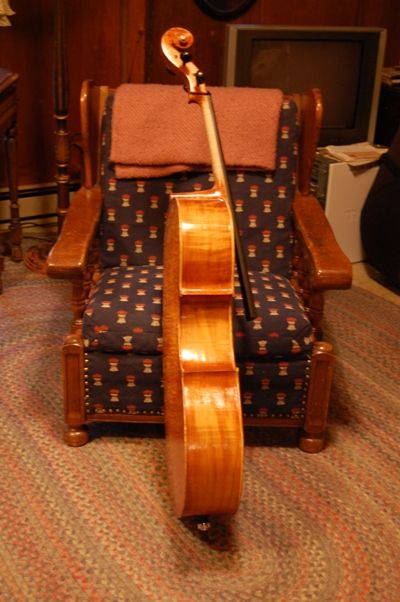
Side of lion head viola with final varnish
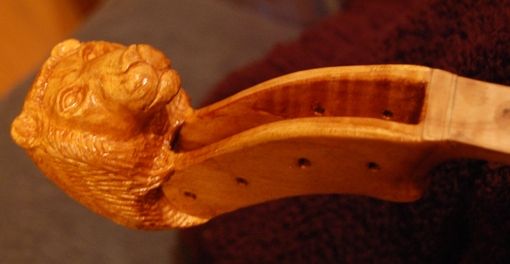
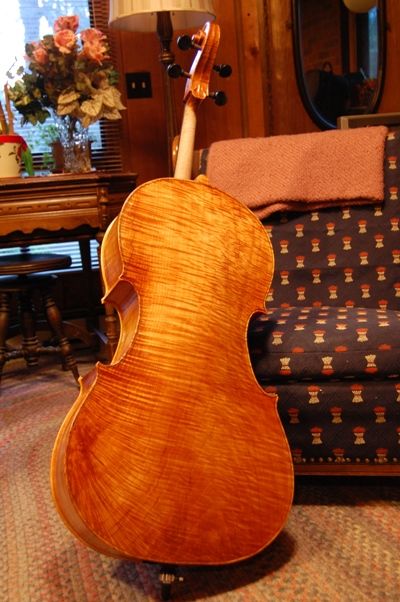
Back of lion head viola with final varnishScroll of lion-head viola with final varnishSide of lion head scroll with final varnish
I am sure there will be minor retouches to do after everything is complete, but this is pretty much what it is going to look like. I like the way the big leaf maple is glowing under the varnish, and even the hard rock maple scroll seems to glow a little. I hope it plays well. 🙂
If you found this post helpful, please share with your friends!
Lion-head viola looking good, with three coats of varnish, but far from finished.
Here are a few pictures of the viola with three coats varnish. I definitely intend to go darker, but it is looking sorta nice. I especially like the way the heavily flamed one-piece Oregon Maple back is beginning to show its inner glow.
I may not get much done on it tomorrow. I need to clean the chimney and move firewood.
If you found this post helpful, please share with your friends!
Once the varnish is finished and dry, I complete the final assembly of the cello.
Adding the Saddle
I do something a little different with my saddles: it is not immediately obvious, but the left and right corners of the saddles frequently are a source of cracks in the front plate. Many luthiers combat this tendency by adding a small gap on each side of the saddle, to allow the plates to shrink a little without stressing those corners. I take it a step further, and actually eliminate the corners by putting a significant radius (maybe 10mm) on each corner, so that they are smoothly rounded. Sharp corners are a stress riser, and eventually a crack will form there. A rounded corner adds much less stress to the plate, and, as I also leave the small gap for shrinkage, I anticipate that there will never be a saddle crack in these instruments.
The saddle is cut all the way through the plate, so that it rests upon (and is glued to) the end block. It extends 30mm on each side of the center line and 12mm into the plate. The saddle provides a hard bearing surface for the tailgut to rest upon, so that it does not dig into the soft spruce of the front plate. It is about 12mm high (above the block) at its highest point, but the point is not centered; it is about at the forward third , so that the pressure of the tailgut is transferred directly down into the block, and does not cause the saddle to flip over in either direction.
Adding the Nut
There are two different styles of cello nut: one style allows the contour of the nut to match that of the fingerboard, around the corners, and drops down to about 5mm thick over the corners of the pegbox cheeks. The other follows the contour of the fingerboard, but then extends that contour in a smooth curve down to the corners of the pegbox cheeks, so that the nut follows a smooth arc all the way across. I have done the first way in the past. this time I chose the second. I think I like it.
The nut provides a hard bearing surface for the strings to rest upon, and provides a tiny clearance over the fingerboard, so that the end of the string length is a clean sharp edge, and makes a clear sound.
Installing the pegs.
Once the nut and saddle were glued in place, it was time to start the pegs. I had drilled the pilot holes before beginning the carving of the pegbox, so now all I had to do was to ream them to the correct size with a peg-hole reamer, then shave the pegs to match, using a peg shaver. It sounds easy, but it is fairly laborious and time consuming; Cello pegs are pretty big, and we are shaving off an awful lot of wood. Same for the holes…there is a lot of work in those four little holes. Once the pegs have been correctly fitted, they are treated with a peg-compound that provides a heavy, stiff lubrication…the peg is not supposed to either slip or stick…it should hold the tension of the strings without failing, but allow the player to adjust the pitch smoothly and easily. Once the pegs fit correctly, they have to be removed and trimmed to the appropriate length, the ends polished, and holes drilled for the strings.
Installing the end-pin
Finally, the end-pin hole had to be drilled and reamed, and the end-pin shaved to fit the hole. Pretty much the same procedure as the pegs, with the exception that it is fairly ticklish toward the end…one twist too far, and the end-pin will be loose (guess how I know). If that happens you can use a spiral bushing to shrink the hole back down a tiny bit, and save the day.
I began by using a 5/8″ spade bit to drill a hole all the way through the end block, precisely at the center of the end seam, and perpendicular to the surface, there. Then I used a large tapered reamer to enlarge it into a tapered hole ready to receive the end-pin assembly. The final hole was about 7/8″ diameter at the outer opening.
Other tasks
I did build some cello stands a few days ago, and a rack to hold violins and violas (I settled on a capacity of six instruments). I still have to stain and finish those items, so I can pad them all and have them ready for the upcoming show.
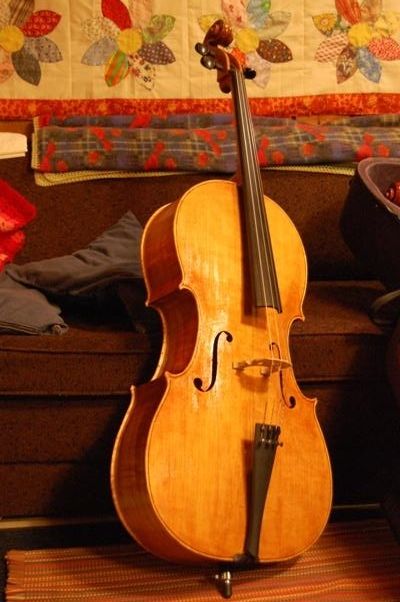
But the cello is essentially done. All that remains now is to cut the string slots in the nut, drill the pegs for strings, fit a bridge and soundpost, and set it up. (Simple, right?) Anyway, here is how it looks today:
Cello front with nut, saddle, pegs and end-pin.Cello side with pegs and end pin.Cello back with pegs and end-pin.Cello scroll with nut and pegs.Cello scroll back with pegs.
I will still have to give a final polish to all the ebony parts and the varnish, of course, but the cello is very nearly complete. After everything else, I will stain and add a light finish to the handle portion of the neck, so that it does not look so white, and will not pick up dirt too badly.
Here is the completed cello:
Completed Cello, modeled after the 1712 “Davidov” Stradivarius
The cello plays very well, and I trust I will find a home for it. I am not surprised that it responds well– this is modelled after the 1712 “Davidov” cello, by Antonio Stradivari…and the original is in professional use by Yo Yo Ma, today. I feel good about that pedigree…. Follow @ChetBishop
If you found this post helpful, please share with your friends!
This is all I got done tonight. The edges are all at about 6mm, now, and the rough contours of the arching are complete. Tomorrow, I hope, I will finalize the edge footprint, so that it is exactly the shape I want the cello to be. (I waited until the edges were thinned, because it is much easier to make small adjustments to a plate when it is 6mm thick than to do so when it is 35mm thick, as it was two days ago.)
Flattening and thinning the rough plate
Two days ago, I worked the thick plate from 35mm down to 29mm, and decided to start from there on the rough arching. I may bring it a little lower yet…I haven’t decided yet just how high I want the back arching on this cello. I am thinking a little higher than the last one. The original Davidov is pretty flat…I may still emulate that curve.
Rough Arching
Tonight I simply worked a flat area all the way around the plate, at about 6mm (which I had marked ahead of time with a marking gauge), and then used a variety of tools to bring the shape of the plate to a “cello-shape”, though still a little plump.
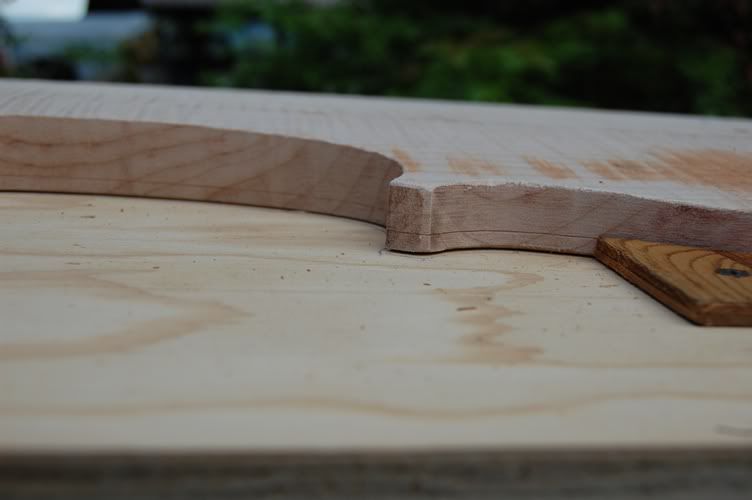
Edge-thickness marked with marking gauge.
This (above) is actually a photo from the previous cello…I forgot to take a photo of the edge mark on this current cello before I began carving. Once I have the edge shape exactly the way I want it, I will probably take it down to 5.5 or even 5mm. The 6mm mark was just a good starting point for rough work. I ran a ball-point pen around the groove, too, after scribing it with the marker, so I could see it more easily, as it was sort of dark out in the shop. So, this is how it looks now.
Rough-arching completed–almost ready for purfling.
Purfling is next
Once the edge is exactly the shape and thickness I want, I will mark the purfling groove location, and begin cutting the groove for the purfling. Once the purfling is completed, I can finalize the outside arching before beginning the inside carving. When this is completed, it will be a maximum of 8.5mm-9mm in the center area, fading out to 4mm or so around the flanks, and back up to 5mm at the edge itself. I have a long way to go. It is certainly pretty wood, though. That is always encouraging.
If you found this post helpful, please share with your friends!
Violins have been codified in terms of form, size, materials and tuning for over 400 years. Orchestras have 30+ violins, between which the untrained observer would have a difficult time distinguishing, let alone identifying as having come from a particular maker’s hand. And yet experts can frequently tell at a glance when, where and by whom that violin was made. And ALL of them have four strings (count ‘em): G, D, A, and E. No five-string violins in the orchestra!
The violas, too, have their four strings, always at C, G, D and A. They are less tightly defined, however and are all over the board in terms of size and shape. Some are so large that most normal-sized people can’t play them, and some are not much larger than a violin. But they all have those four strings, tuned exactly a perfect fifth below those of the violin. No five-string violas, either.
NON-traditional is OK, too.
Really, a viola works best at what it does, and a violin works best at what it does, as specialized tools…but when they are so close in size—indeed, sometimes overlapping—what prevents us from having one instrument that covers the full range of both? A five-string fiddle?
Well…that isn’t as easy as it sounds. The physical size of a violin is barely big enough to really produce the open G-string tone, so simply adding a low C-string will not work well…and the viola is almost too big to make good high-pitched notes, so adding a high E to a larger viola is usually not very satisfactory either.
Five-string fiddles specifically designed for five-strings
But it CAN work…with some tweaking. Honestly, probably a five-string fiddle would work best in the size of a small viola—say, 15”—or even 15.5”. But country fiddlers and bluegrass fiddlers, who are waking up to the desire for a fifth string, and a lower range, don’t want a “five-string viola”–they want their instrument to fit in a regular fiddle case—not a viola case. They want a handmade five-string bluegrass fiddle. (See Five-string fiddles)
What has worked for me, so far, is to maintain the “footprint” of a regular violin, but increase the depth of the body a little; lengthen the pegbox, obviously, for the extra peg and string; thin the plates just a little more, and deepen the bassbar a bit. I may try widening the center bouts just a little, too, sometime. But for now, I have a working model, with which everyone seems very pleased: it is very easy to play, has good balance across all five strings, a big deep bass end on the C string, and clear, strong high notes on the E string.
So, when a fiddler wants to be able to go low and growly, he/she can do so. When he/she needs a high end for some special sizzle, it is there. All in one fiddle case. A five-string fiddle case.
Front view of Oliver Five-string fiddle, by Chet Bishop. Sold.Back view of Oliver Five String Fiddle, by Chet Bishop (Sold)
If you found this post helpful, please share with your friends!
So many of the “lion-head” instruments of the past have been either so highly stylized that they were unrecognizable, or so poorly carved as to achieve the same result, or, when done in a completely recognizable fashion, were representative of a snarling, dangerous beast which I find difficult to associate with a viola. I wanted the dignity and power of the lion– the majesty, to coin a cliché, and not the predatory beast.
Grafted Scroll
I wasn’t even sure I could carve such a head, so, rather than risk a perfectly good neck-billet on a gamble against my questionable artistic ability, I decided to plan a grafted scroll. I have done this in the past, but this is the first time it was planned. Usually, a scroll graft is a repair, or a major alteration. In some (relatively rare) instances, a maker will perform a scroll graft in the new-making process, so that the new instrument will seem to be old. (No deception involved, it is just that virtually all instruments made before 1850 now have a scroll-graft, as a result of a shift in musical demands, and changing construction styles. Most of the “baroque” instruments were re-worked in this way, so that very few have the original neck.) The scroll-grafts I have done were repairs, up until now.
Knowing that there was a very good chance that my lion-head might not turn out well, I chose a very hard, even-grained maple block for the head, and only enough of the pegbox area to permit a graft. When/if the head turns out acceptably, I have a viola neck billet prepared to graft into the hard maple head, and after that it can be treated as any other scroll/neck for a viola.
Lion-head in the making
This is how the Lion-head looks for the moment. The mane will have to fair into the cheeks of the pegbox–(which haven’t been sawn out, yet, as full-width is easier to hold in the vise.) That will have to happen soon, to finalize the shape of the head and mane.
Lion-head scroll from bass side
Lion-head scroll front quarterLion-head scroll from Treble side
16.5″ Oliver Viola
The proposed viola is 16.5″ on the body, with a one-piece big-leaf maple back, and Sitka spruce top. The neck is big-leaf maple, except for the hard-rock maple head. (BTW, that hard-rock maple really earns its name– it was really hard to carve). As the viola is one of my own design, it is labelled an “Oliver” viola (my middle name, and that of my Dad and Grand-dad.) I use that name for all the instruments I design myself. Any design I copy from someone else’s work, I label as “Modelled after…”
The other violas I have made to this design (same body as #11 Oliver Viola– see the chronology) have had very good tone…I seriously doubt that the lion-head will affect the tone significantly for better or worse. But some people like a traditional scroll and will not like the lion. Others may find the lion attractive. We’ll see how folks respond. So far, I like it.
If you found this post helpful, please share with your friends!
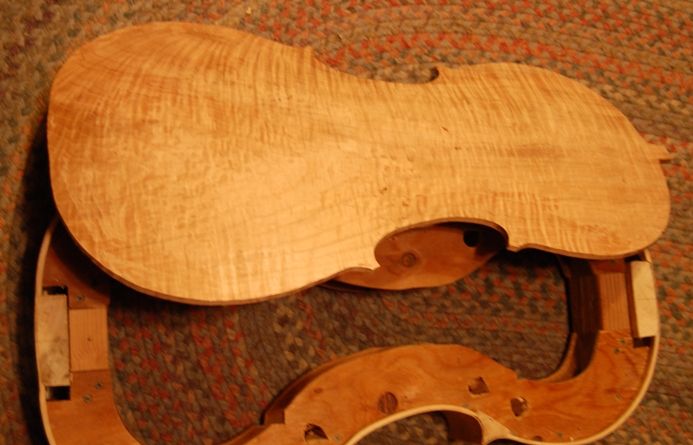
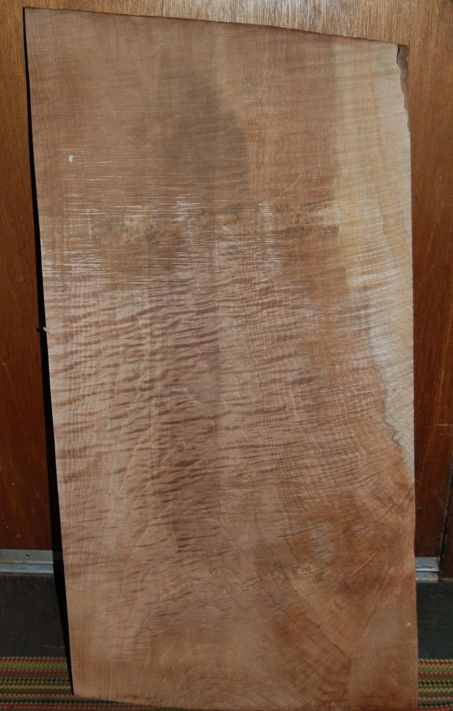
This will be another “Davidov” 1712 Stradivarius model, similar to the one on my Chronology page (instrument #16), but with a one-piece back. I like one-piece backs, but they are not very common on a cello. This wood (back, sides and neck) is from the same maple log as that from which instrument #19 (five-string fiddle #2) is made. The belly will be Sitka spruce. I plan to make the whole instrument darker than the last one was. Here is a photo of the slab from which the back will be made:
This is a slab of old-growth Big-leaf Maple heartwood. Not everyone will use heartwood, but I like it. I planed some of the rough surface off so that you can see the flame in the wood.
I will try to post photographs of the progress, as the cello emerges.
If you found this post helpful, please share with your friends!
Resurrected Website: Bluefiddle’s West Wind Strings
A couple of months ago, in my befuddled, well-meaning, bungling way, I killed my website entirely.
The host was able to save it, but I had been in the process of changing hosts, so that was a bit awkward. I have switched from Joomla, which I was just beginning to understand to WordPress, regarding which I understand nothing…and have bought the requisite book: “The Complete Idiot’s Guide…” Sounds as though it was written for my kinda guy. A friend has reconstructed the site using WordPress, and has assured me that I will be able to master the new software. I trust he is correct.
New Five-string fiddle
I did complete one new instrument since I last posted: a five-string fiddle (sometimes called a “bluegrass fiddle”), using the wood from the Big Leaf maple log I had been given a few years ago. This is the first instrument I have made using that wood, and I am delighted with the look, response and sound. Here are a few photos of the new, handmade in Oregon, bluegrass fiddle:

 Follow