The Inside carving (Graduation)on the one-piece Cello back is complete.
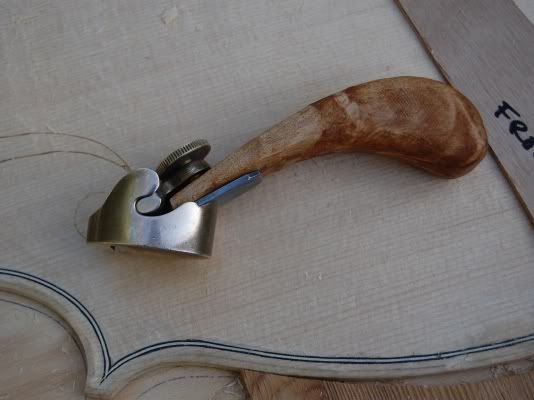
Planes and scrapers ruled the day
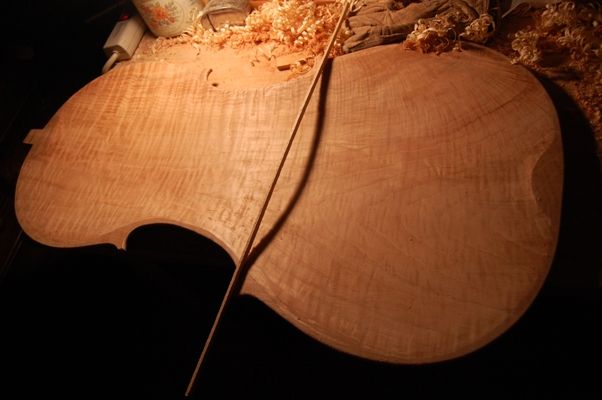
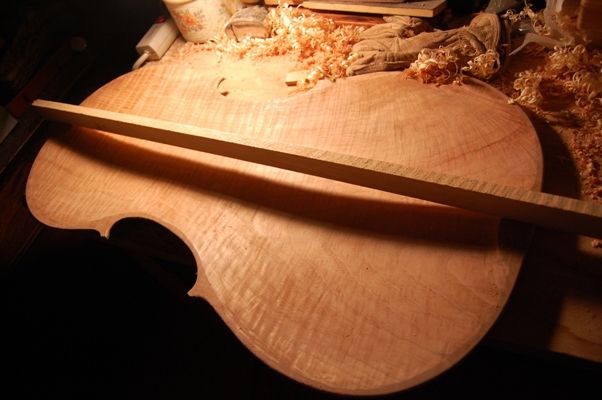
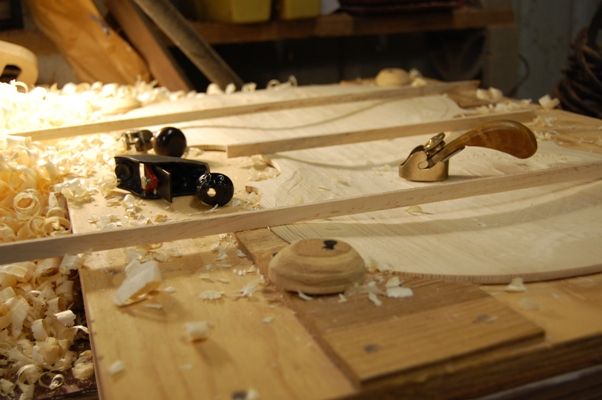
Here is what it looks like now:
The scrap of lining material is only there to cast a shadow so you can see the curves.Same thing again, but with a bigger stick. 🙂
Again, you can’t see it very well, but I also rounded the edges, beginning the edge-work that is so important to the finished product. I do the inner edge first, as it is hard to access once the plate is installed. I began with a tiny plane, and cut a narrow bevel all the way around the edge, at a 45 degree angle. Then I used a file and a scraper to round it into what is essentially a quarter-circle curve.
This plate is ready for installation.
I will try to close the corpus this week, and then scramble to complete the neck and scroll.
If you found this post helpful, please share with your friends!
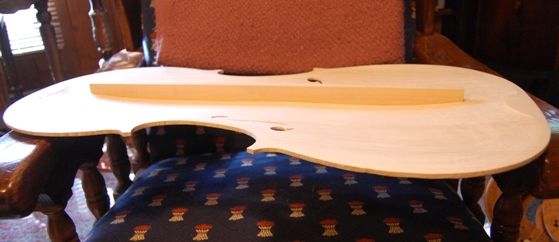
The Bass Bar is in place and trimmed. The F-holes have been refined, somewhat, and the edge-work is begun.
Bass-bar was #1 on the list!
I installed the bass-bar first thing this morning (chalk-fit to the inside of the plate in the exact location it was to be glued, then glued with hot hide glue).
Then, while the glue was drying, I went and did other things. Swept up the shop, changed the tires on my car (snow tires have to be off this weekend), and designed some display stands for the upcoming show at Marylhurst University. I had intended to begin the graduations on the one-piece cello back plate today, but after I did the tires, I was pretty worn-out, and hurting, so I decided it was time for a break, and, since the glue was dry, time to trim the bar.
Bass Bar in the rough
Here’s what the bass-bar looked like in the rough, when I took the clamps off:
Bass-bar in the rough, viewed from the topCello Bass-bar in the rough, viewed from the side.
Bass Bar Trimmed and finished:
And here is what it looked like after planing it to the shape I wanted it to be:
Finished cello bass-bar from frontFinished Cello Bass-bar from side
Edge-work and final prep for finishing
Although you probably really can’t tell in the photos, I have also scraped the entire plate, inside and out, under low-angle light, to get every dip and hump as smooth as can be.
Also, I began the edge-work; I first planed a small (3mm) bevel all the way around the inside edge, then rounded it with a file, to establish the inside curve of the edge. The outside will be treated the same way, after the plate is installed on the garland. It is much easier to manipulate the plate by itself, instead of the whole cello, so I want to do as much as I can before it is assembled.
I also spent time refining the f-holes; smoothing the inner edges, matching bass to treble shape, etc. That, too, is much easier before the plate is assembled with the garland.
Tomorrow I will try to graduate the back plate.
Gotta do taxes, too, though. (Hooray for Turbotax!)
If you found this post helpful, please share with your friends!
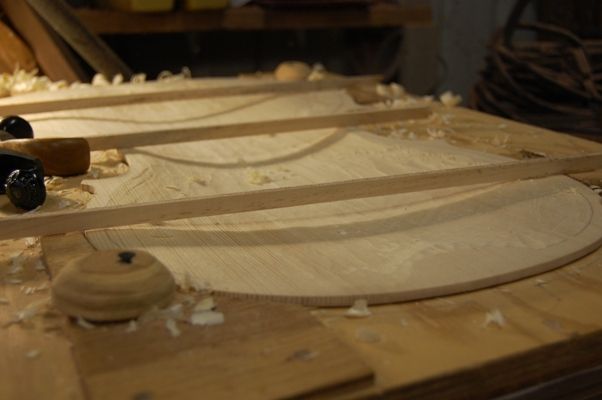
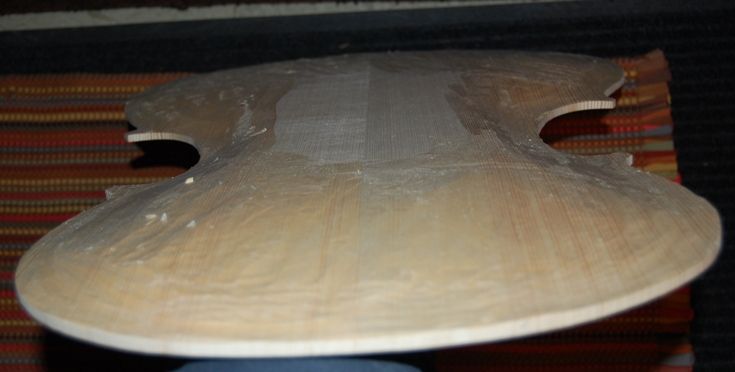
Smooth inside and out, and all thicknesses correct
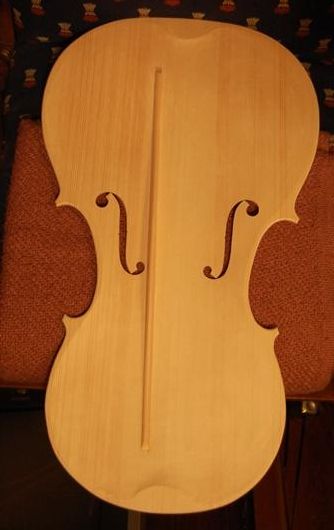
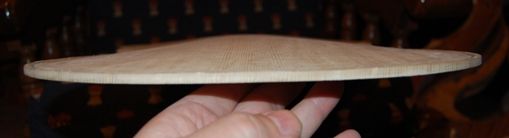
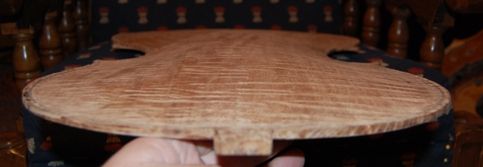
It took me a couple of hours, I guess, to do the final graduation, planing and scraping the inside of the European Spruce front cello plate to perfection (or nearly so). Here is the plate, with some pieces of willow lining stock across it, to form shadows so you can see the curves. The color is so neutral that without the shadows, the plate looks flat in photographs.
Graduation complete!
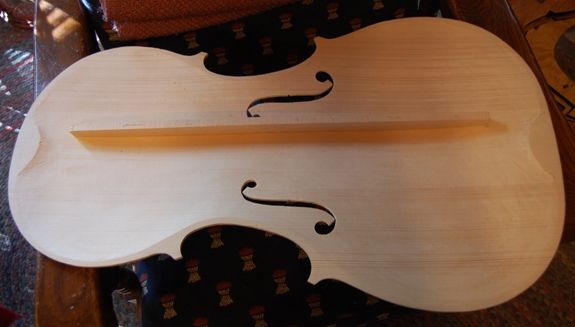
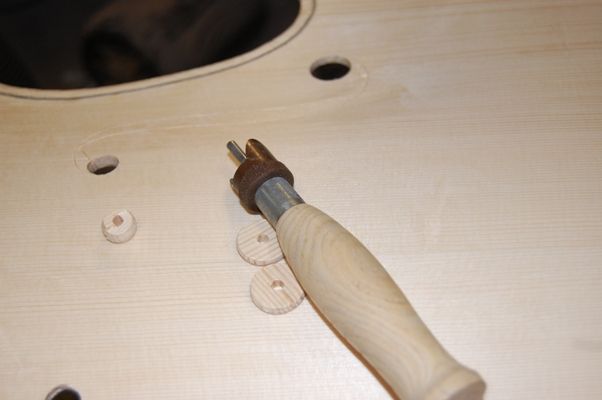
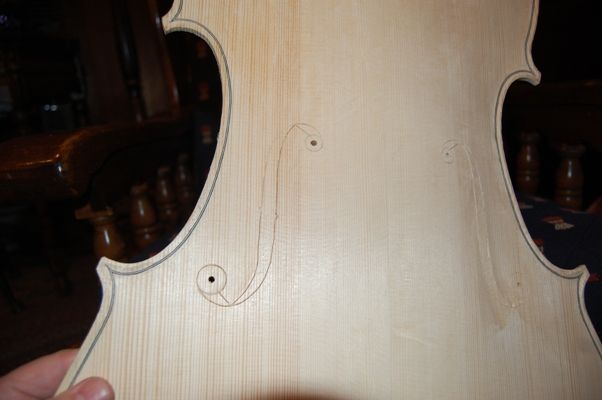
The f-holes had been incised earlier, so all that was left to do is finish cutting them out. I used the f-hole cutter to cut the circular portions of each f-hole.
F-hole cutter in useFinished result
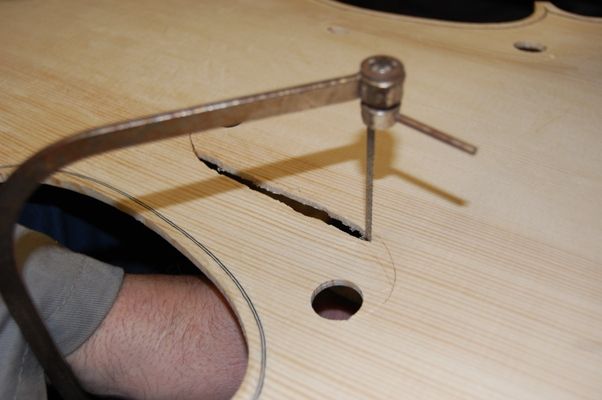
Then I used a coping saw and a knife to complete the cutting. Each hole will still be refined and perfected, later, using a knife and a small file.
Cutting out the f-holes with a coping saw.
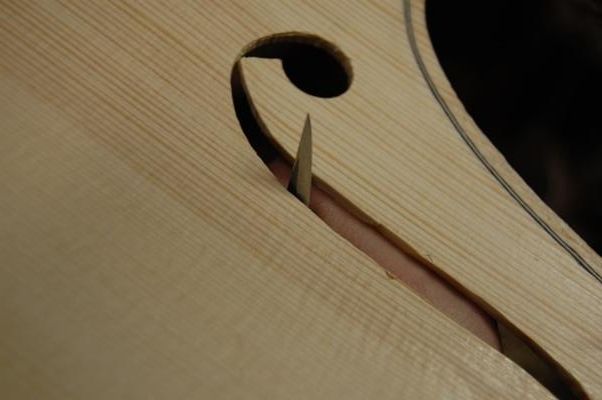
Finishing the F-hole shape with a knife.
But the f-holes are essentially complete. the next step is to install the bass-bar.
Completed f-holes, ready for refinement.
If you found this post helpful, please share with your friends!
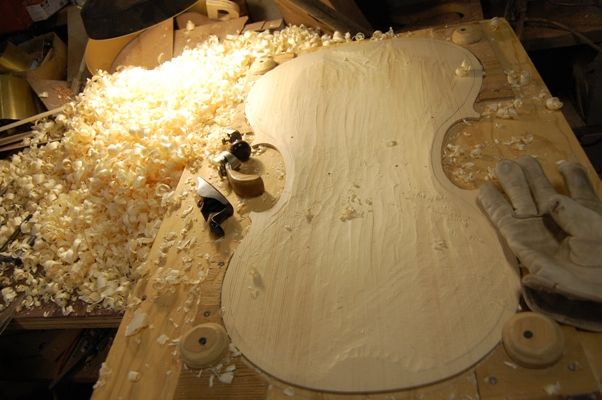
I probably should have used gouges, but the planes are so easy to control and the spruce is so easy to carve, that I chose to use these three planes: (I may still use gouges to get the areas around the end block platforms correct.)
Carving inside of cello top plate: Two hours work, and not done.
As you can see, the plate is not yet done, but I was pretty tired to start with, today, and now I am even more so.
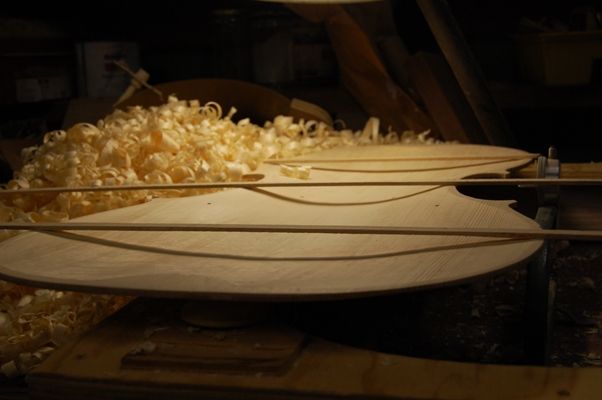
Cello front plate with tools
Keeping the Goal in View
Here is how deep the graduations are, so far. I hope to have the thickness of the whole center area at about 5.5mm, fading to 4mm up the center on both ends, and 3mm on the upper and lower “flanks”, for lack of better word. Right now the center is 6mm, and the areas up the center are still about 7mm…the areas out in the skirts are way too thick, still: 10-12mm. It takes a fair amount of care, graduating a cello plate: I have to stop every few minutes and check the thickness with a dial caliper, to avoid making the plate too thin.
Depth of partial graduation–correct in center; unfinished elsewhere.
Perhaps I will have it finished and ready for the bass bar by Tuesday. Tomorrow is busy, and I will work late Monday, so…probably Tuesday. That’s OK: it will give my hands time to recuperate. They are pretty worn out…and that one-piece maple cello back will be much tougher to carve.
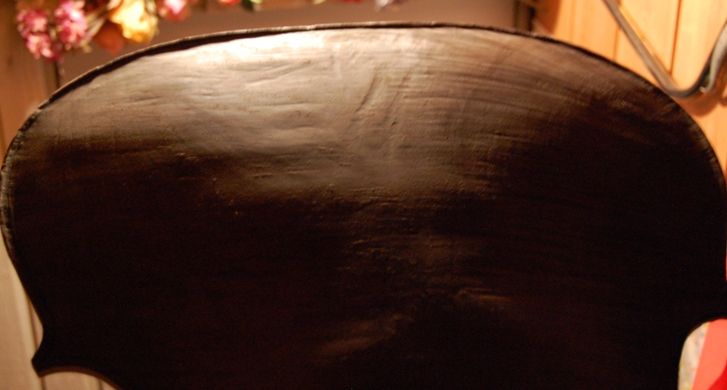
I did, however, complete the refinishing of the viola I built back in November. It looks pretty nice, now. So I will have that for the show, as well.
If you found this post helpful, please share with your friends!
Today I used low-angle light to reveal all the humps and hollows, and used scrapers to bring all of them to a smooth continuum of curving wood.
“Flat F-holes”
Once I had the front plate fairly smooth, I laid out the f-holes, and incised them deeply. My reason for doing this is that every single instrument I have made, the arching proved to need correction, as revealed when I laid out the f-holes. Invariably the arching was too “puffy” around the lower ends of the f-holes, so I had to re-carve that area. Finally it occurred to me that if I cut the lines in, they would remain visible as I carved, and I would not have to lay them out over again. That turned out to work pretty well, so now I routinely assume I will have to correct the arching, and I incise the f-holes, then view the plate from the side: what I am aiming for is that the general shape of the f-hole will seem to lie in a plane parallel to that of the ribs when the instrument is assembled, rather than describing a lazy “S” from the side.
Here is an example from an unfinished viola, from several years ago:
Flat f-hole
It is not something “exact”, but more of a general impression. One way or another, it allows me to see when my arching is not right, and correct it.
So, here is the top plate with the f-holes incised. I will finish cutting them out after the inside carving (graduation) is nearly complete.
Cello Front plate with f-holes incised
Here’s an end-view…doesn’t show much:
End view of Cello Front Plate
And a sort-of “3/4” side-view…trying to show the curves:
3/4 view of Cello Front plate
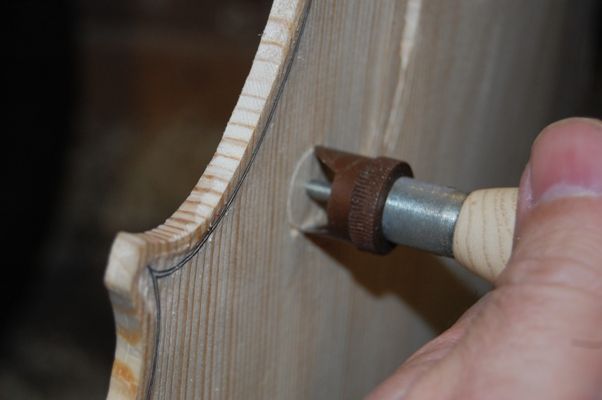
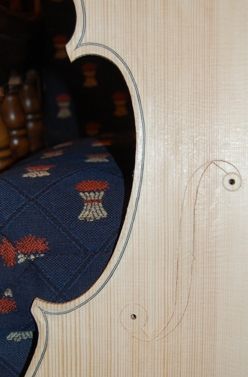
Here’s a close-up of the c-bout with the f-hole incision (I used a special f-hole cutting tool to incise the circular parts):
C-bout with incised f-hole
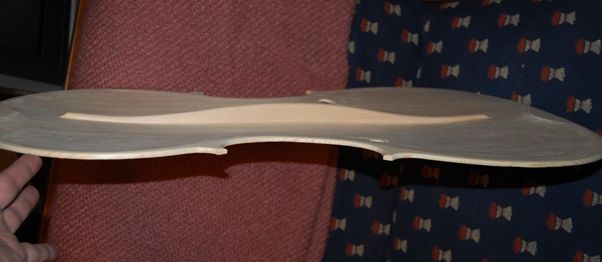
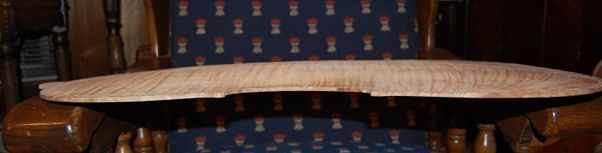
Annnd the back plate: (still may be a bit puffy in spots…I will work on it more later. Right now my hands are hurting from all the scraping) That’s all for today! I’m worn out.
Side view one-piece Cello Back plateEnd view of one-piece cello back plate
If you found this post helpful, please share with your friends!
First mark the Crest of the channel, then cut the channel!
When I first began making fiddles, it had never occurred to me that there was a specific distance from the edge that I should aim for– I just started cutting, and eyeballed the whole edge. As a result I had some very rough-looking fiddles. Now I mark about 40% (2mm, in this case) in from the outer edge, and cut my channel so that the edge of the channel hits that mark, while the top of the purfling gets trimmed back so that it is clean and smooth.
I used two gouges to cut the channel–a small one to carefully trim back the narrow lip of wood between the purfling groove and the marked crest, and a larger one to cut the rest of the channel.
Then Begin The Final Arching
Once the channel was relatively close all the way around, I began cutting the longitudinal arching down to the final level. I will not complete it tonight…I had two phone calls and a customer (future) show up, so that took up a bunch of time, and now it is getting late. Here’s what it looks like for now:
Cello Front Purfling Channel CutFront Lower Bass Corner
Anyway…that’s it for tonight! The Spruce cuts very easily with a small, sharp plane. I hope to complete the arching tomorrow evening.
If you found this post helpful, please share with your friends!
Here is the cello top, freshly purfled, hot hide-glue still wet. Tomorrow night I will try to complete the final arching and lay out the f-hole perimeters.
I had some distractions tonight, but that is life. Life is what happens while you are trying to complete your projects and plans. Embrace it or fight it, that is simply how it is.
This spruce has very pronounced winter grains, which were hard to cut smoothly for the purfling slot, but the plate rings like a big bell if you tap on it. I think it will probably be a very good cello.
Freshly Purfled Top
Anyway, tomorrow evening when the glue is dry, I will cut the channel and begin finalizing the arching. If I get it close, I will try to get the f-holes laid out and outlined. After that it will be time for graduation of the plate (carving the inside arching).
Press on!
If you found this post helpful, please share with your friends!
The Cello top is rough-arched, and ready to purfle.
All thicknesses are approximately correct
The European Spruce top, from International Violin Co., carves easily, but is quite crisp, too. I reduced the top to 24mm thick, using an abrasive planer, then reduced the edges to 5.5mm, using an Ibex plane, modified to take a wooden handle.
Poor Man’s Scrub Plane:
Here is the tool, from a year ago, when I was working on a different cello:
Modified Ibex plane with wooden handle.
This tool allows me to apply much more force, and cut deeper, faster. Sort of a “poor man’s scrub-plane”. Once the edges were close to the 5.5mm line, I switched to a 10mm Ibex plane and shaved the edges of the spruce right down to the line.
And here is the result of about two hours’ work:
The edges are 5.5mm…the middle is 24mm. I will finish the arching after the purfling is complete.
Ready for purfling
The cello top is ready for purfling. Tomorrow I will begin the purfling, and complete it on Friday, I hope. Then I can complete the arching, trace the f-holes, and start making this thing look like a cello.
If you found this post helpful, please share with your friends!
One-piece Cello Back progress; Cello top beginning
Low-angle Light Reveals Lumps
Remember I said that the cello back was ready for scrapers and low-angle light? Well, here is what low-angle light reveals:
Low-angle light, illuminating lots of lumps. (Fun to say, but a pain to smooth out.)
Pretty rough-looking, huh? But that low-angle light is what reveals the lumps so that they can be planed or scraped away. Some of those lumps are big enough that I intend to use a small plane to reduce them before scraping again.
Saturday, I joined the top plate halves. The notches in the ends and center were to accommodate clamps. I had worked the mating edges as smooth and flat as I could get them (it seemed perfect, but looks can be deceiving), and then heated the two surfaces with my heat gun until they were uncomfortably warm, slathered on the hot hide glue, and presented one half to the other, rubbing them under pressure, to get the glue to run out the edges. Then I clamped each end firmly, and finally applied two bar clamps in the center notches.
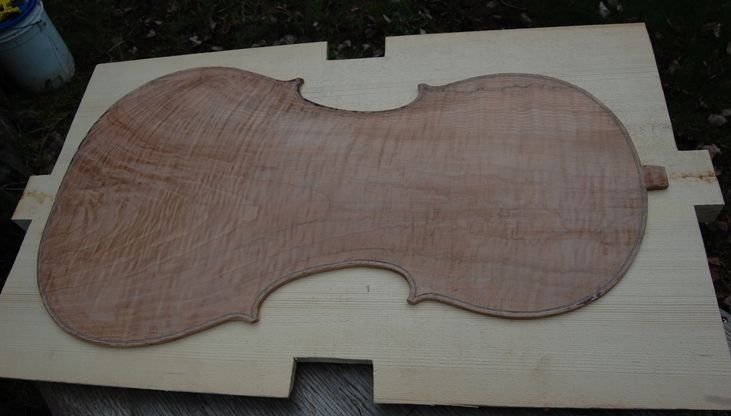
I was fearful that the joint might not have been good, but today I took the clamps off and had a look. All is well! Here are the two plates (front and back) together. Notice how much nicer the back plate looks in normal light? That is why you never trust the looks of the arching until you have checked under low-angle light.
One-piece back with front billetFront and back plates, inside to inside
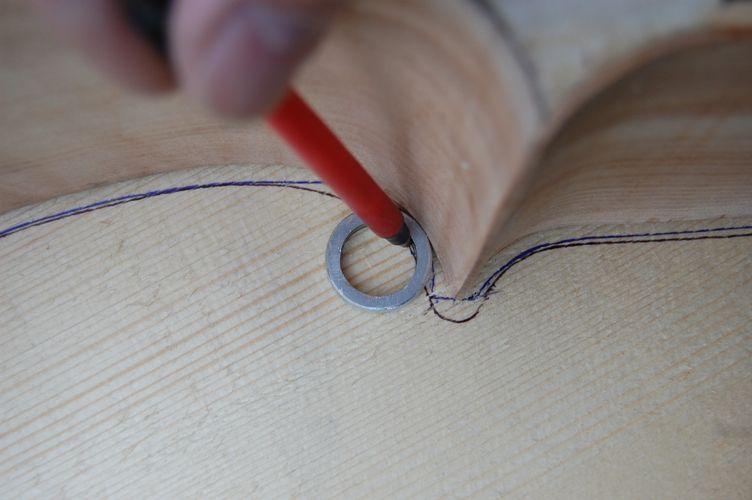
I was curious how close the front and back of the garland might be, in terms of shape (they almost never are exactly the same), so I traced around the back plate in blue ink, and then checked it against the actual garland. (Oops. No, that will not be good enough… see the blue line in the photo below?)
Using a slice of aluminum pipe and a ball-point pen to trace the shape of the front plate from the garland.
So I re-traced in black ink, directly off the front side of the garland, using the section of aluminum pipe to maintain the overhang distance. See the difference?
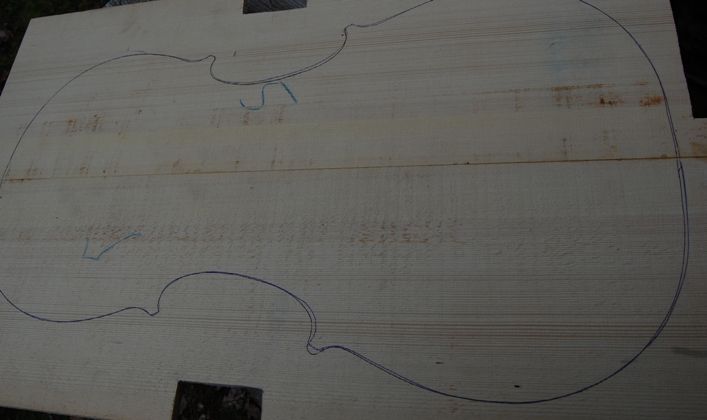
Blue line is traced from the back–black is from the front of the garland.
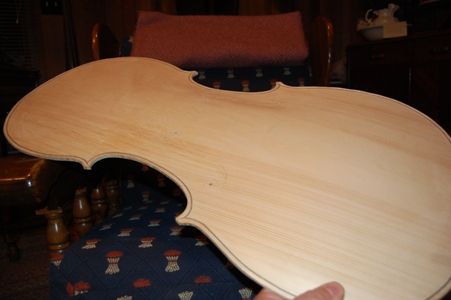
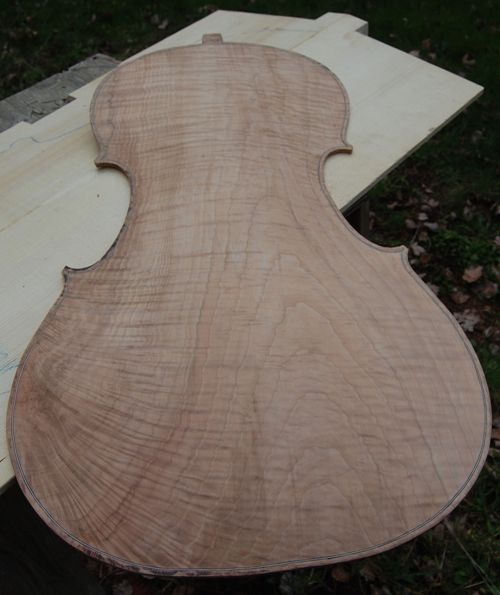
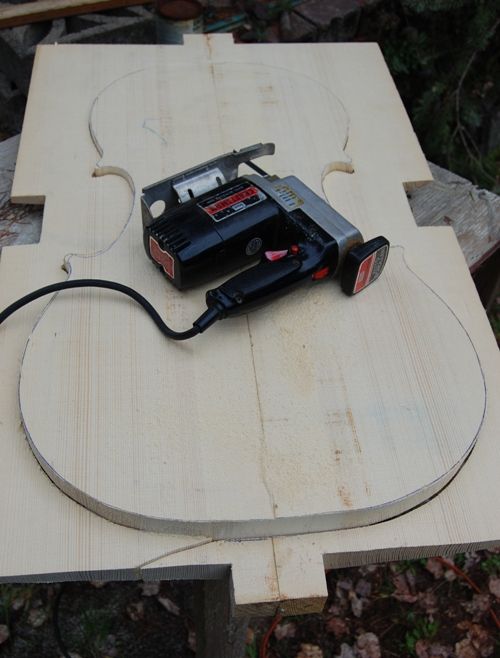
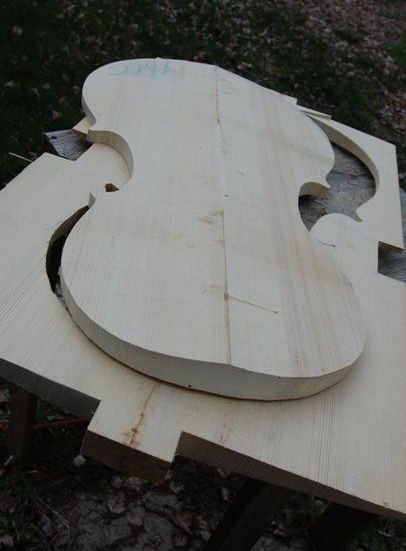
So, I cut the plate out on the black line, leaving the corners just a little long, so I could work on them more carefully, later. Here is the result.
Front plate cut out with saber-sawFront plate ready for arching
If you found this post helpful, please share with your friends!

 Follow