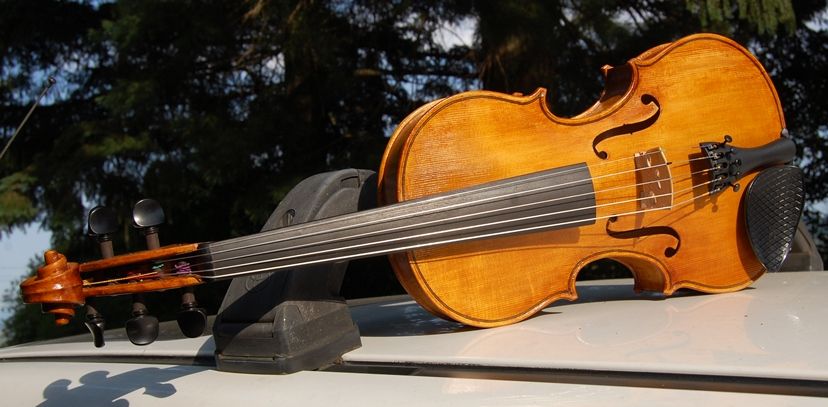
Here’s the most recent five-string fiddle, handmade in Oregon, varnished and ready to play.
The sound is balanced across all strings and has good volume. I guess I would say it still sounds a bit “new”, but that is to be expected with less than five minutes play time. The strings are Helicore, and were sold specifically for a five string fiddle. I have set them up with Dominants, and they sound good that way, too.
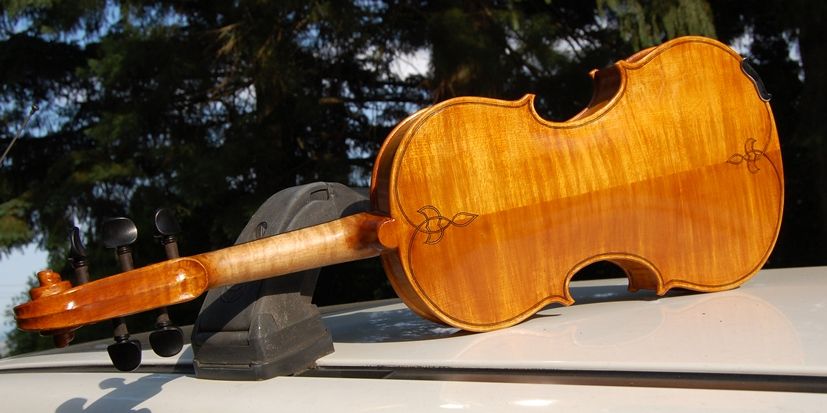
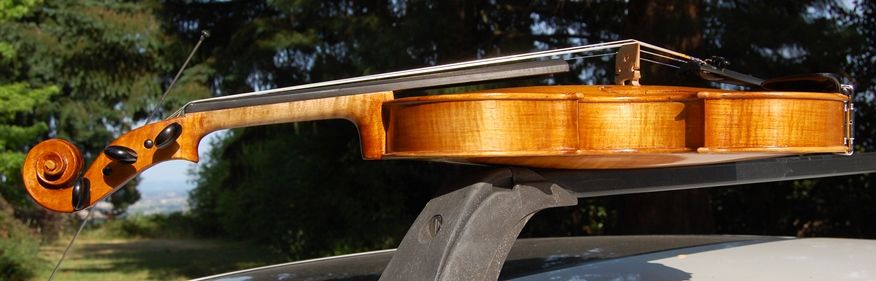
Just as I began to take photos (on my car again) the sun came out from behind a cloud, and the varnish glowed very nicely. (I love it when that happens.)
Varnished Five-string Fiddle in the Sun
Varnished 5-String Fiddle Back
And the side view with the varnish in the Sun
I am looking forward to hearing a good fiddler (old-time, country, bluegrass, celtic) put this one through its paces. Or a violist or a violinist…I’m not particular.
Thanks for looking.
If you found this post helpful, please share with your friends!
It has been a while since I felt that I could afford the time to work on the bow…I would go by and look at it, sometimes, but I had other things to do– cleaned the chimney, took apart the wood stove and re-cemented gaskets, etc. It’s funny–the commercial chimney sweeps all tell me that my chimney is too dangerous, and they will not touch it– (very steep roof– 12:12 pitch– and quite high). So I have to do it myself every year. Ah, well…it gives me something to grin about…and leaves me sore for a few days every year. I’ll be 60 this month: the irony that I have to go clean the chimney that men half my age refuse to attempt is not lost on me.
Making a Stainless Steel Bow-tip Plate
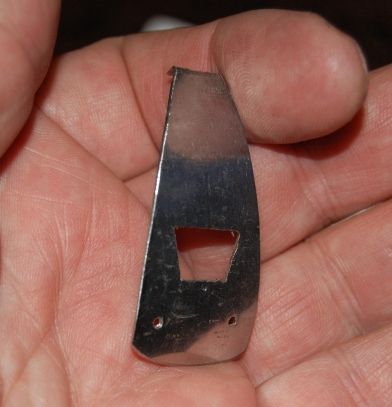
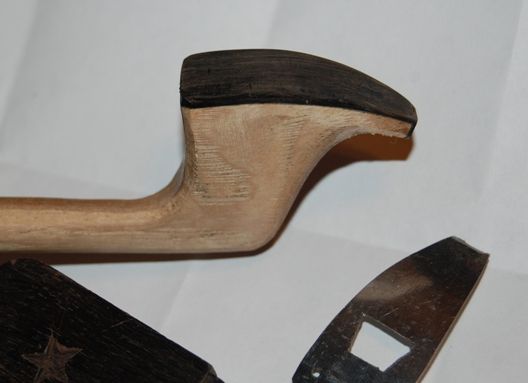
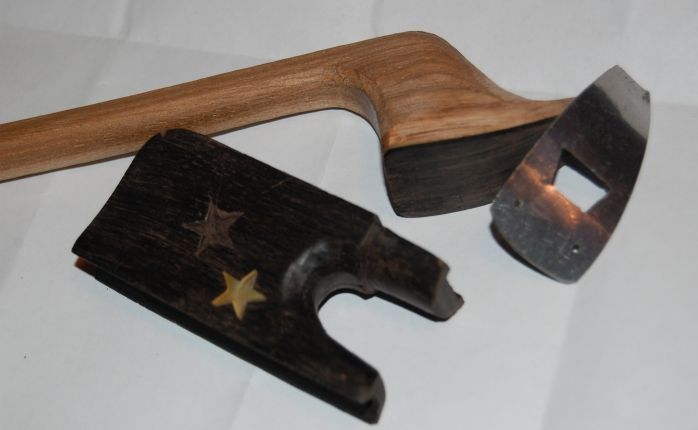
Anyhow, I finally took apart one of the stainless utensils I had bought for a dollar at a resale shop, and hacksawed out the rough shape of the tip plate. Drilled holes for pins, cut out the trapezoidal window for the tip mortise, and bent the little tab on the end of the tip plate. Felt pretty good about it…bent it to fit the curve of the bow tip. Looked pretty nice.
First try at making a stainless steel tip plate for a bass bow.
Making the Ebony Liner for the Bow Tip
I had a terrible time bending ebony to fit the bow tip (probably a little too thick), but I managed to do it, and even got it fitted, glued, and trimmed to size:
Ebony lining with stainless tip plate, for Bass Bow.
Fitting the Tip Plate
Then, I had hoped to glue the tip plate in place, and even went to the auto-parts store and bought some black epoxy that is supposedly “specially formulated to glue all metals”. But when I got home and looked more carefully, trying to fit the tip plate to the ebony liner, it turns out that I had used up all my tolerances on the stainless and it was just a little too small to fit the bow correctly. (Rats!) That left me two choices:
Modify the bow to fit the stainless tip plate, (which would be dumb) or
Go make another tip plate and be more careful this time. (sigh…)
So I will do that later. (This is not a new thing for me– I have a long history of trying to make something a perfect fit, and finding out that I went just a bit too far…thus proving the wisdom of the adage, “measure twice, cut once.”)
Gold Star Inlays for the African Blackwood Frog
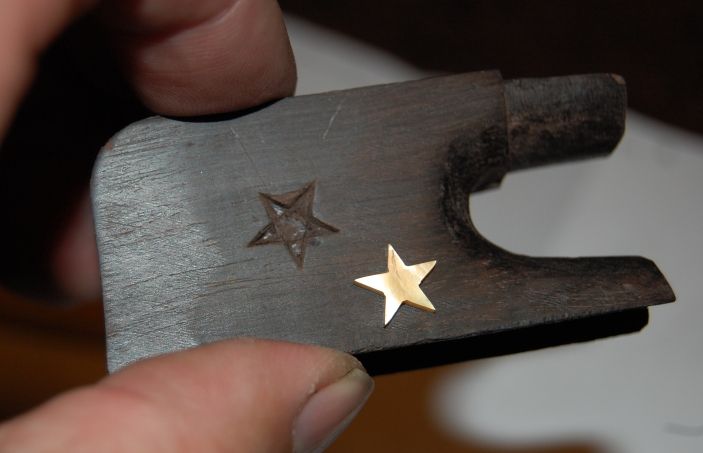
I decided to work on inlaying the little (10 mm) gold stars I had bought from Andy DePaule. I laid out the locations as accurately as I could, then lightly glued the stars in place with a tiny dot of superglue. When the glue was hard, I used an X-acto knife to scribe around the stars, cutting as accurately as I could, into the African Blackwood of the frog. Then, using a small flat gouge, I popped the mother of pearl stars back off, and began to carve out the cavities for the inlays.
Inlay in progress
I cut around the perimeter as deeply as I could with a tiny chisel, then scooped out the excess wood with an even tinier chisel, and finally used the tip of the X-acto blade to clean out the sharp corners. When (many attempts later) the star finally dropped into place , I put gel-style superglue under the shell, and pressed it into place. One has to be gentle with the shell. It will not stand much pushing around before it snaps–it is quite brittle. So one has to simply try and try again until the piece fits as deeply as if needed, with hardly any pressure.
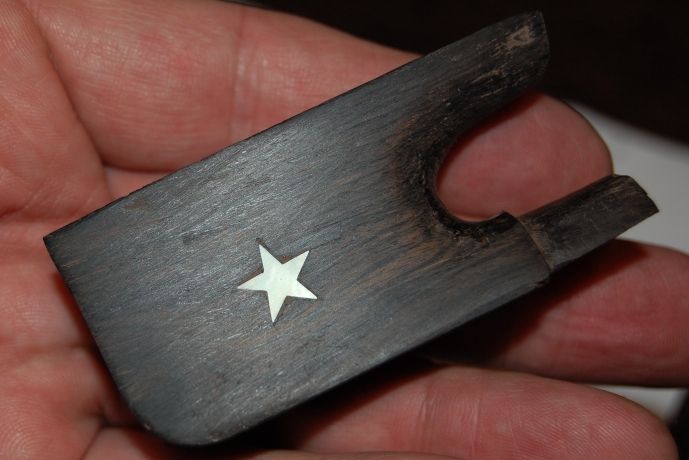
As soon as the superglue gel hardened I added some ebony dust to the very small grooves around the stars where I did not get a perfect fit, then dropped a drip of water-thin superglue into the area, and sanded it flat.
Finished inlay of Gold star on Bass Bow Frog
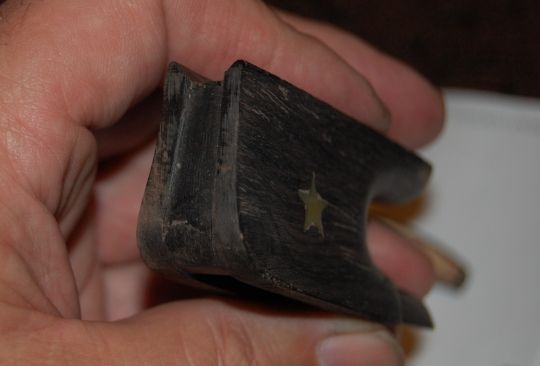
It is interesting to see how the different light reflects differently. Those gold stars can just look pale, or they can shine like real gold, in the right light. Here’s sort of an end-view of the frog:
End view of unfinished Bass Bow Frog.
So– that’s the progress report: I will install the second star, make a new tip plate, and complete the frog and button, then I can hair the bow and see what I have got. Here’s the pile as it stands:
A work in Progress.
I will post more photos when I get a little further along.
Thanks for looking.
If you found this post helpful, please share with your friends!
Life is what happens while you are making other plans, they tell me. This season has been loaded with distractions. I worked a lot of late hours at Gunderson, Inc. where I was teaching classes on Welding Supervision.
Two young fellows were coming to the house a couple of times per week to work on instruments they were building. One was working from a kit, but had zero experience with tools, so it required a great deal of personal attention; the other built from scratch, and is nearly finished with a very nice 15-5/8″ viola, a fairly faithful copy of the 1580 Gasparo da Salo viola. (Funny, when those young fellows are here, I don’t get a thing done on my own work.) I did begin three 5-string fiddles, months ago, but have only made measurable progress on one; the Spalted Maple 5 string fiddle.
I took two weeks vacation between Christmas and New Years, but ended up being sick nearly the whole time. Besides, my daughter was home from school for that two weeks, so I had reason to be distracted. 🙂 I did get a couple of work days in, but it has been a struggle.
Finally, I have several repair jobs going, each of which really needs to be done, so, to make a long story slightly shorter, things haven’t turned out as planned.
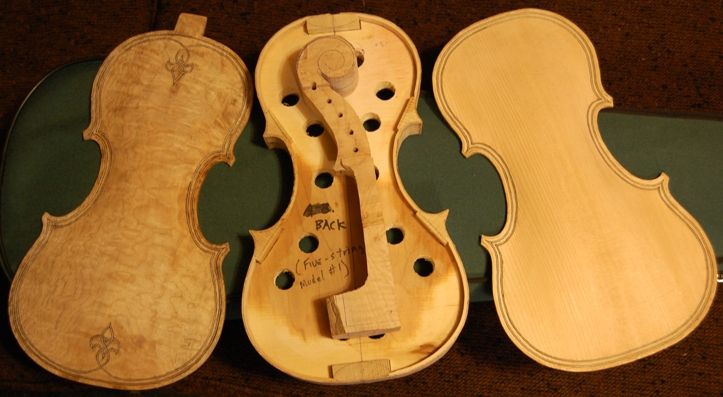
Double Purfling Complete, Including Purfling Weave on Back
The maple for the one-piece back is some Oregon Big Leaf Maple that was given to me by a local landowner and forester a few years ago. This is the third instrument I have made from that tree. It is a relatively soft maple, and has had a very nice tone, so far, in my experience. I have made one five string fiddle from it, so far, and one cello.
The Spruce is Sitka– a one-piece sitka front plate– only the second time I have ever seen one, and it is some of the toughest spruce I have ever worked with, which I think will make a good, thin, top plate for the instrument, as I have made one instrument before with very similar spruce, and it turned out a winner, as a bluegrass, celtic and country fiddle. But it was not fun cutting the double purfling by hand, as every “winter grain” was so hard it would catch the knife blade and try to turn it. However, here is the progress so far:
Progress on Five String Fiddle
Today I will make the final corrections on the front and back arching and cut in the f-holes (I hope), then begin graduating the front plate. Hopefully, by next week, I can have the corpus nearly completed. Maybe somewhere in there, I can get a good run at the other two fiddles, as well. I really need all three completed by the time of the show in April. There will be about 500 people per day, coming through that show, and some of them will be fiddlers. 🙂
We will see; I am feeling somewhat less than optimistic, however, after the experiences of the last three months.
I decided to make two new molds, so that I could have more than one handmade five-string fiddle in the works at any given time. The new molds are made from the same half-model template, so they are very similar in character, but I did notice that somehow my original mold had been a little narrower in the center bouts than I had intended (don’t know how it happened), so the new ones are wider there, which may make the sound even more deep and clear. The instruments from the first mold have all been very good, so I am hoping the ones off the new molds are even better.
Different Materials
The original Oliver 5-string mold has the ribs and linings in place, and the chosen material for ribs, back and neck is spalted maple. This is an unusual choice, from a classical perspective, but a five-string fiddle is an unusual instrument, and I think it will prove a good choice. I really like the looks, so far. The second and third Oliver Molds (essentially identical, otherwise) have higly figured Oregon Big-leaf maple and Oregon Myrtle, respectively, for the backs and ribs. The Myrtle is a two-piece back, and the neck on the Myrtle fiddle is Big leaf maple; otherwise all the fiddles have matching ribs, backs and necks. The other two are each a one-piece back, also.
I am planning to use Port Orford Cedar for the two-piece front plate on the Myrtlewood fiddle. This will be the first time I have used anything other than spruce for a violin top, but I have been told it is exceptionally good for other types of instruments, and a friend gave it to me to try in a fiddle. I plan to use Sitka Spruce for the on-piece top of the curly big-leaf maple fiddle, as well as for the spalted maple fiddle. I am hoping to experiment with front plates made of Alaskan Yellow Cedar sometime soon, too.
Different fittings
Depending on the way they look when completed, I may vary my fittings a little, too…haven’t decided yet. I tend to like simple fittings, but I have used fancier fittings, once, and they did look nice– I am just not sure they belong on a bluegrass five string fiddle. Perhaps I can get a set of Oregon Mountain Mahogany pegs, or something. Mountain Mahogany is a very hard wood native to Oregon, but much lighter in color than Ebony, so it adds a different look.
Same Workmanship
I intend to use the same methods as always, including the double purfling that adorned the previous five-string fiddles. I will still use a scraper for the final contour and texture, though perhaps I will leave a little less “corduroy” texture on these than on some others. Some people like less.
Same Varnish
I will use the same Spirit varnish that have always used on all three fiddles, as well as the same graduation scheme and internal arrangements (bass-bar shape and size, etc.), so the sound should be the same.
Same Strings
I will use the Helicore five-string sets, as usual, though I have found some other combinations that work remarkably well.
Progress reports to come
As things progress, I will post photos, so you can see each of the three fiddles grow from a small stack of wood to a completed instrument. Each will emerge as a brand-new, handmade bluegrass 5 string fiddle when complete.
Stay tuned… (no pun intended). 🙂
If you found this post helpful, please share with your friends!
Technical difficulties, I guess. All I know is the Contact Form didn’t work.
If you have tried before and it failed, I apologize– the phone number was good, and a few folk called, but the contact form failed consistently. A friend repaired it today, and it works as advertised.
If you contact me now I will get your message in my e-mail, even if I don’t go check the website. And I check my email multiple times a day, as a rule.
So– I’m really sorry for the delay; please drop me a line.
Chet Bishop
If you found this post helpful, please share with your friends!

 Follow