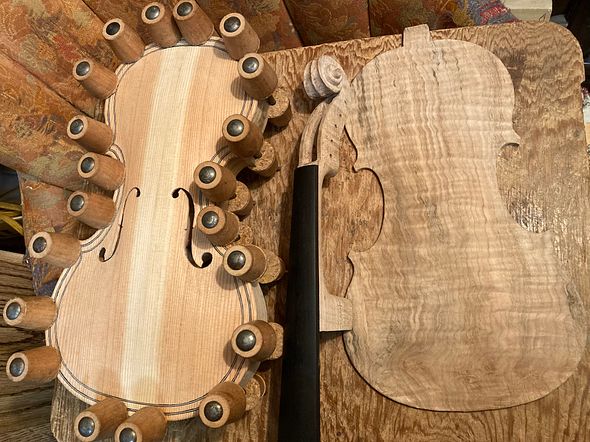
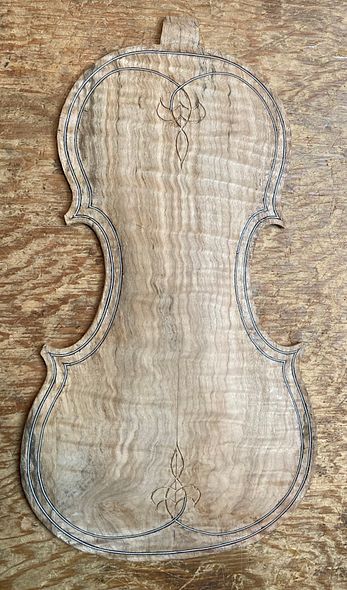
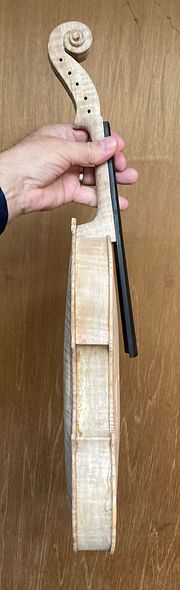
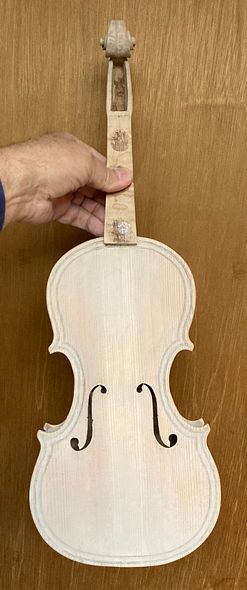
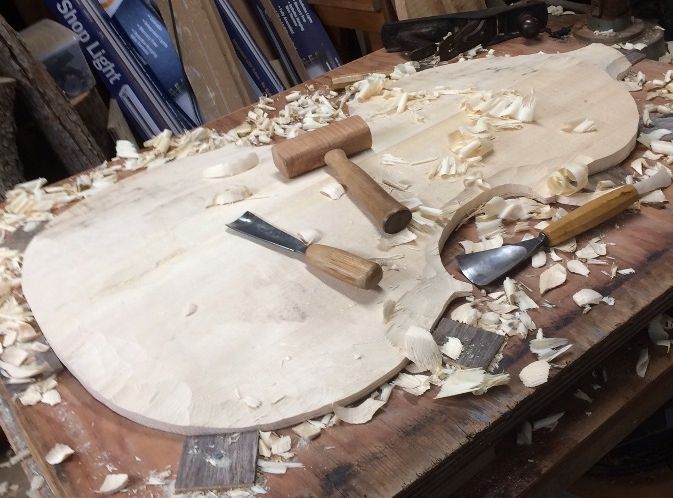
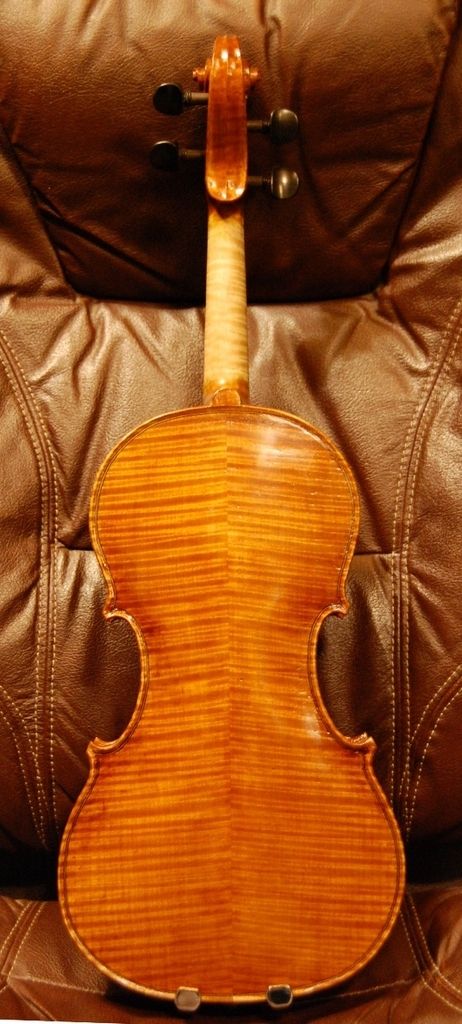
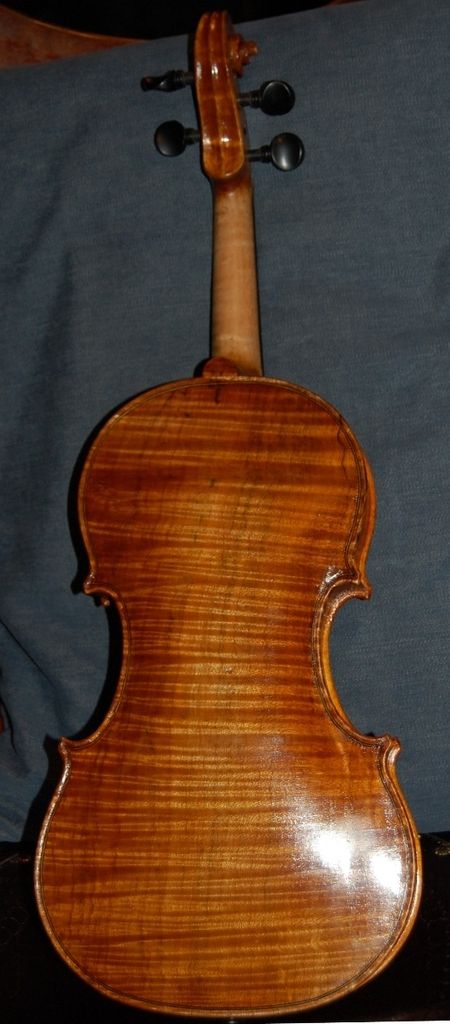
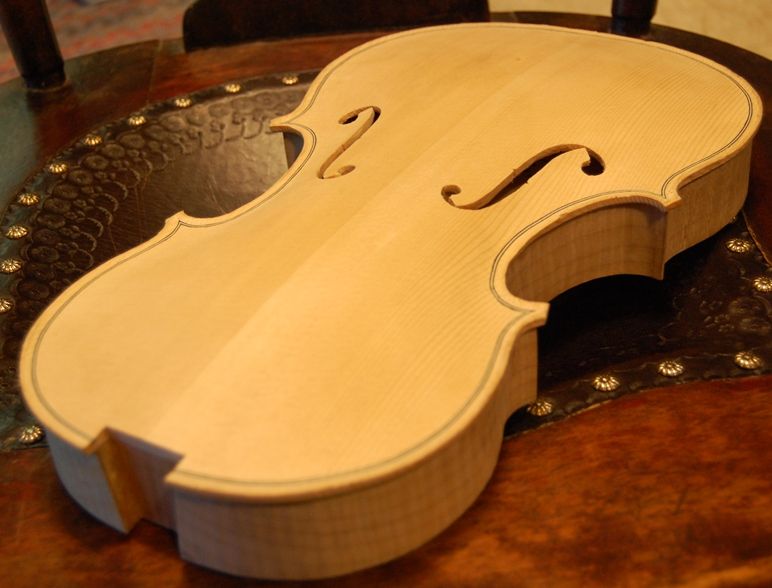
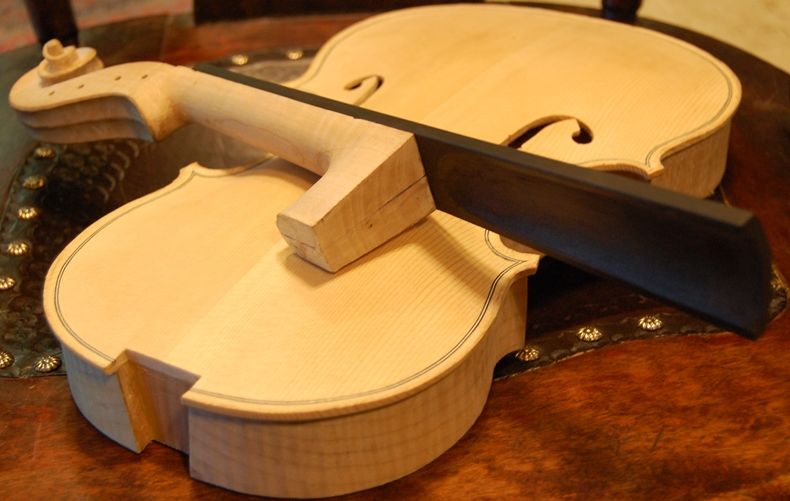
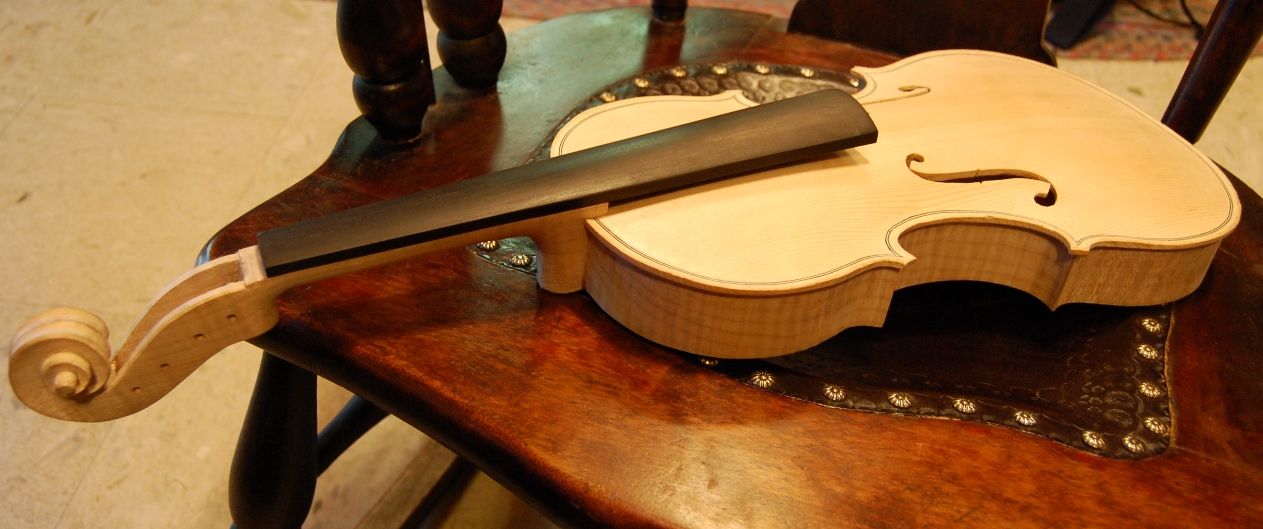
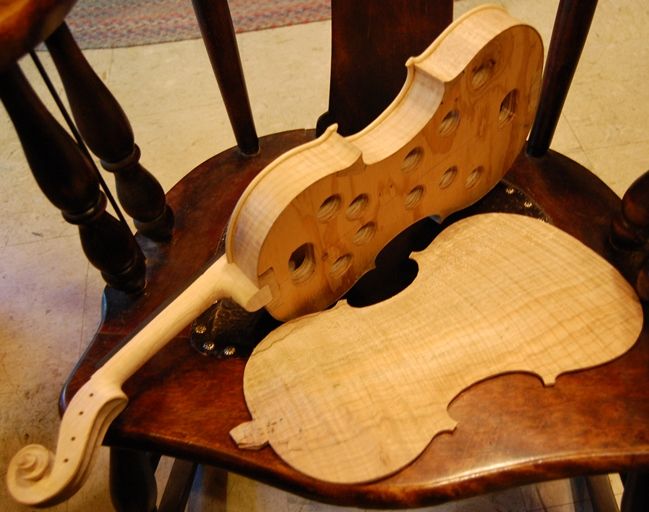
Front, with rib garland, back, neck and fingerboard, nearly ready for assembly.
I failed to take photos of the actual neck-setting procedure on this violin. (Sorry.) I will link to a series of photos from a previous instrument. That one had a major “flesh-wound” mishap. (I accidentally thrust a gouge through my left thumb…but it does include the neck-setting process. And the wound healed!)
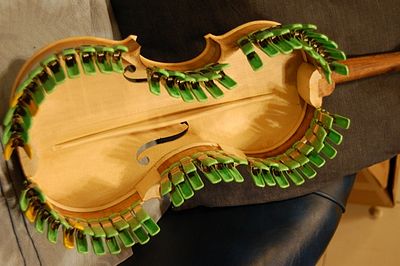
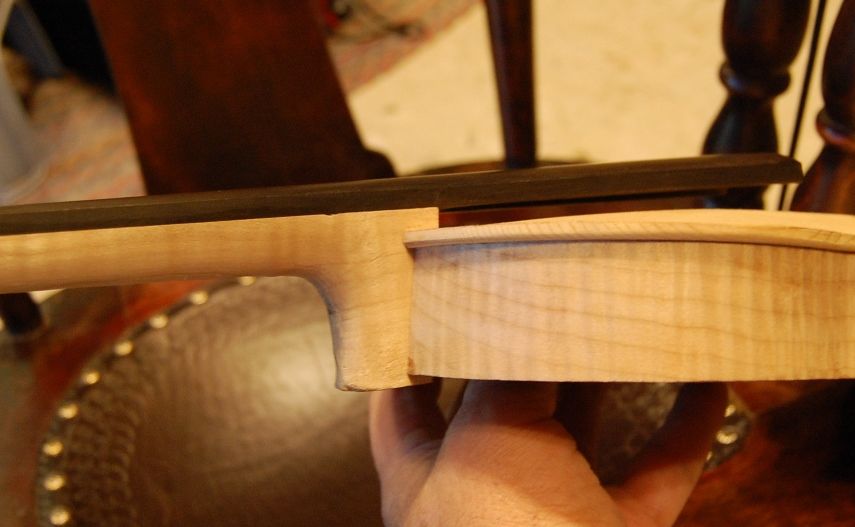
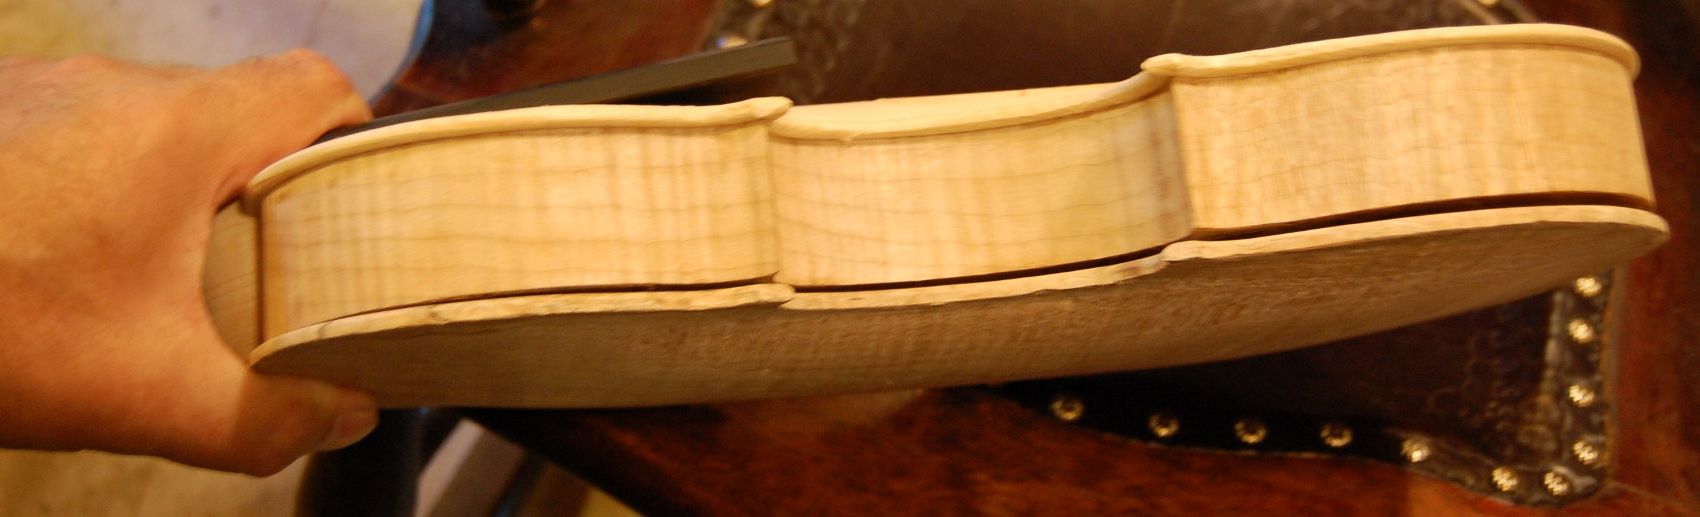
This one went very smoothly: I think it took less than an hour to achieve a perfect fit. Then I removed the interior mold, and installed the back linings, so that the corpus was complete and ready to receive the back plate.
Back linings, installed on an earlier instrument. Once again, I forgot to take pictures.
Completing the Back Plate
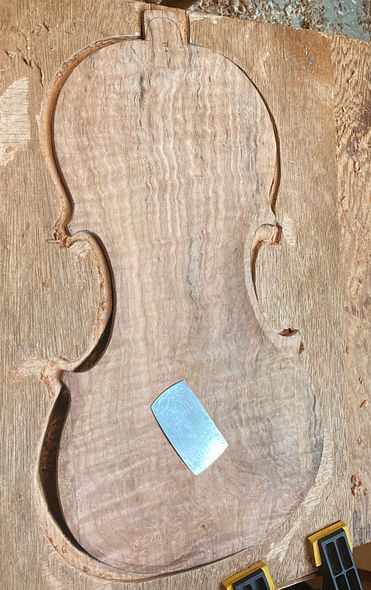
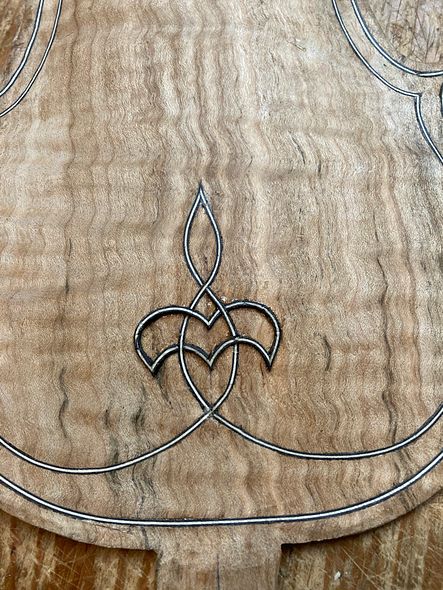
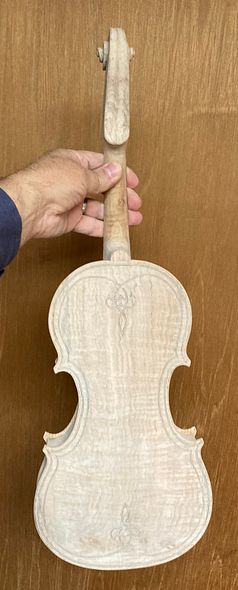
I also had to complete the back plate. I had already completed the outside arching, and most of the interior carving, as well. Still had to finish scraping the interior dead-smooth, installing the purfling, and installing the label.
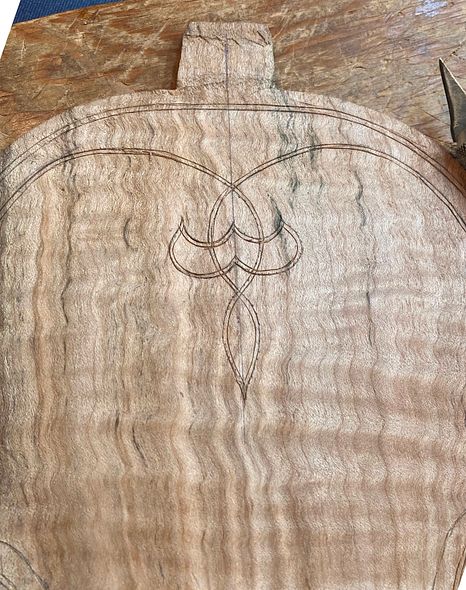
Completing the interior of the back plate.Beginning the purfling weave on the back plate.Partway done with back plate purfling.Completing the purfling weave inlay.
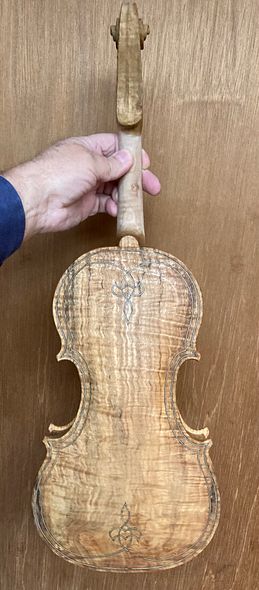
Once the plate was truly complete, I added the label, and installed the back plate on the corpus.
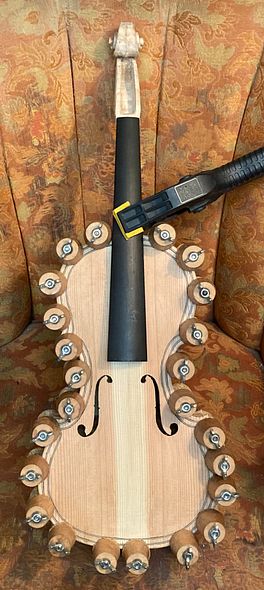
The spool clamps hold the entire perimeter while the glue sets. the spring clamp holds the neck heel and button tightly in place.Back plate installed: notice that the button is far oversized. (See next photo.)The back button is deliberately left oversize, to be carved to final shape as a unit with the neck heel.Neck heel and button carved to match.
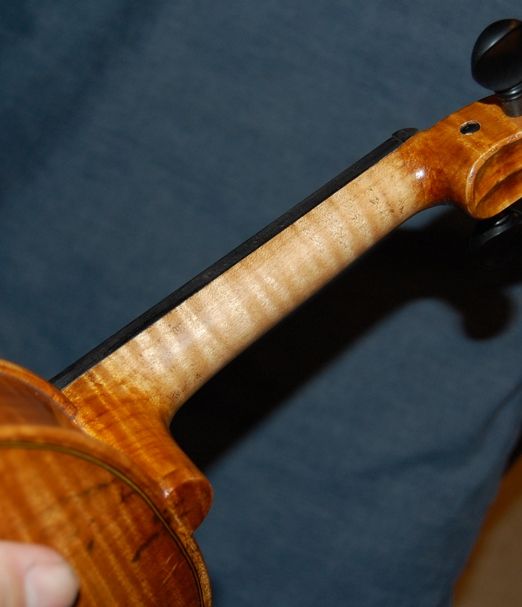
Preparing for the Varnish
I removed the fingerboard, to give me easy access to all parts of the front of the fiddle. Notice that the fingerboard had only been held by three “dots” of hide glue. even so, the glue took off a microscopically thin layer of ebony when I removed the fingerboard. (That is what the “black stuff” is.)
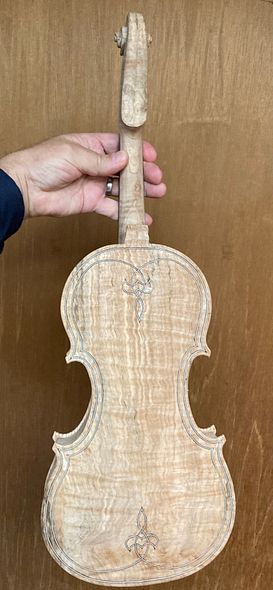
Fiddle “completed in the white.” Ready for all varnish-prep work.
All final shaping has to be completed at this point: any bumps, humps and hollows have to be carefully addressed, using a sharp scraper, before the mineral ground is applied. The mineral ground is a suspension of extremely fine particles that “plug” the pores in the wood, so that the varnish does not penetrate deeply and deaden the sound.
I apply it wet, with a brush, and vigorously rub it into the wood with my bare fingers, then rub off as much of the excess material left on the surface as I can. It is not supposed to be “on” the surface, so much as “in” the surface of the wood.
Front side, with wet mineral ground.
The wet mineral ground temporarily darkens the wood, but, as it dries, it turns stark white.
Dry mineral ground.
The next step is always pretty amazing: when I brush on the sealer, it surrounds all the “white” particles in the wood, and they become transparent. Look at the “before and after” photos of the back plate, as the sealer is applied:
Back plate with dry mineral ground.Same plate with sealer applied.
From this point forward, it is just a matter of applying numerous coats of varnish, and adjusting the color as the process progresses. Furthermore, I want all the parts to “fit together” in terms of color. (You can see that there is a difference between the front and back color, for example.)
Next time, we will talk about color varnish coats.
Thanks for looking.
If you found this post helpful, please share with your friends!
To those of you interested in classical instruments, please visit my Chronology page (link at the top of the screen) where you will find all my recent instruments.
Thanks for looking!
If you found this post helpful, please share with your friends!
I recently brought in my family heirloom Violin to Mr. Bishop: The violin was in terrible shape as it had sat in my grandmother’s closet for nearly 70 years. There was a large crack on the top of the violin and many seams on the top had become delaminated. The tuning pegs were no good and the bow had lost all curvature and most of the hair. There were also many other unforeseen issues from previous repairs on the interior of the violin.
I initially contacted Mr. Bishop because I could tell that he is very passionate about these instruments, and his original builds are absolutely beautiful. He quoted me a very reasonable price for the amount of repairs this instrument needed, he gave me a very realistic time frame and completed the repairs right on time.
Not only did he finish the repairs on time, but we were right on budget with his original quote. Now my poor old family heirloom looks amazing and plays much like I imagine it did for my grandmother.
I can never thank him enough for the quality of effort he put into this instrument, and for the quality of the finished product. Thankfully my family heirloom can now continue to be passed down, and I’m sure my grandmother will be absolutely ecstatic when I bring this up to show her how it now looks.
I highly recommend anyone who is looking for a new instrument, or just looking for repairs on their current instrument to contact Mr. Bishop first. You will not be disappointed in any way.
Eternally grateful, Lucas Cunningham.
If you found this post helpful, please share with your friends!
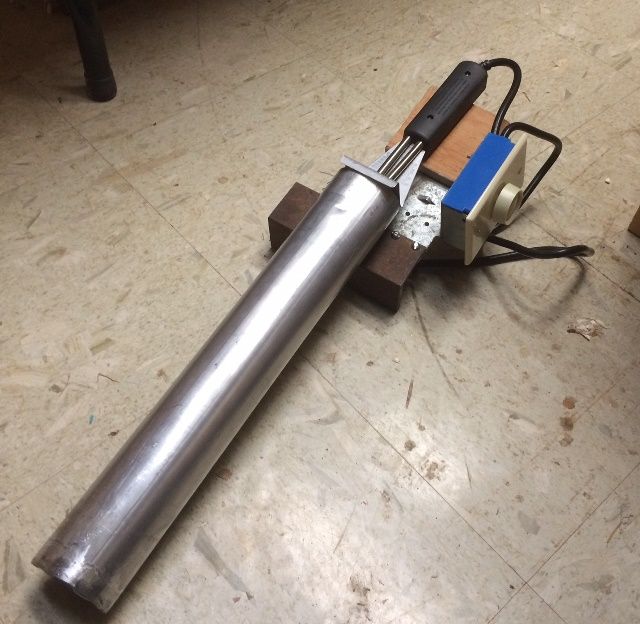
I began this bass some time ago, but it was set aside for several years, because of other jobs that came in, and because I was very dissatisfied with how the rib-bending was going. I had a huge, propane-heated bending iron I had made, which simply did not get hot enough.
This year I made a new bending iron, heated with electricity, and it worked very well. So I am up and going again.
Steel tube with a charcoal-briquette lighter inside, controlled by a 600W dimmer switch.
I completed the rib garland, and, more recently, traced the front plate outline, cut it out, and now I am shaping the outer arching of that plate.
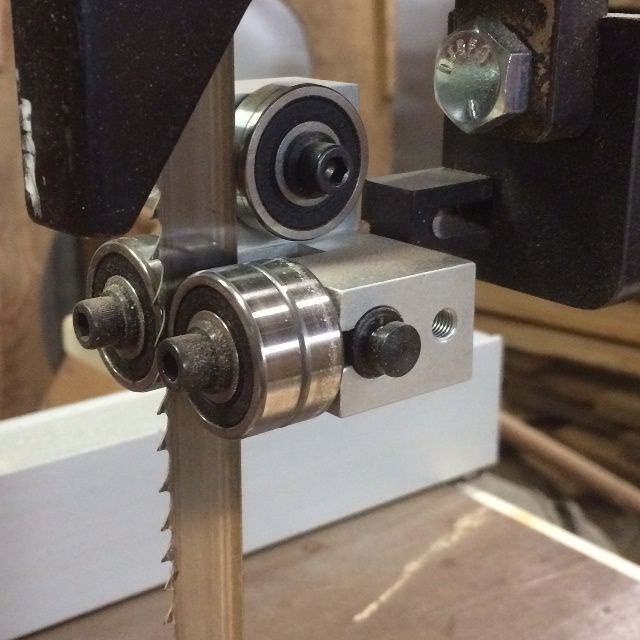
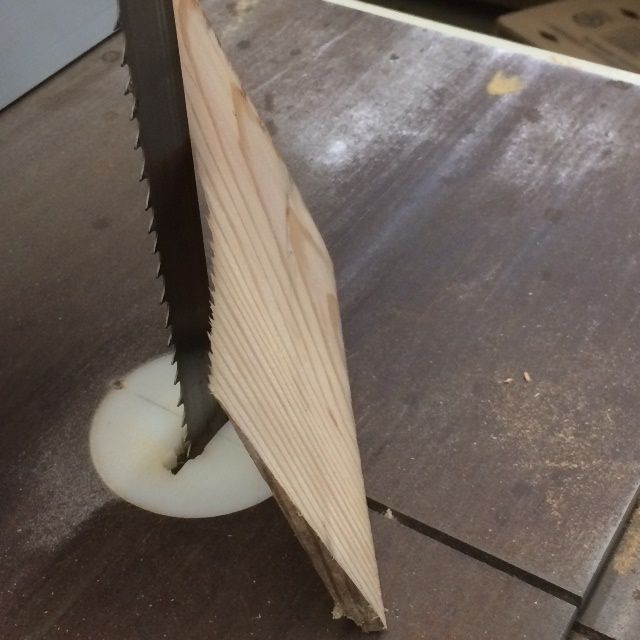
A number of years ago, I had a sudden opportunity to buy an 18″ Jet bandsaw (for which I had yearned, lo, these many years...) and I jumped on it without hesitation. It has been a great saw, but it was gradually becoming more and more impossible to saw a straight line.
New Guides
My youngest son looked it over, and pointed out that the original guides were worn out, and that conversion kits were available to make all the guides roller bearings, instead of sliding surfaces. But the kits were $250, or so, and I hesitated. I attempted various adjustments, to no avail, and finally went online, and watched a number of videos explaining why the saw behaved the way it did, and decided that, since the saw was effectively useless the way it was, it was well worth the upgrade cost.
So I ordered the correct kit from Carter tools, after watching a bunch of videos by Alex Snodgrass, and installed it, expecting the change to be instantaneous. (Well, almost: It still took meticulous re-setting of several variables: the blade had to be correctly positioned on the drive wheels, the guides had to be correctly adjusted for the size of the blade, and the blade had to be correctly tensioned…and I did all that.)
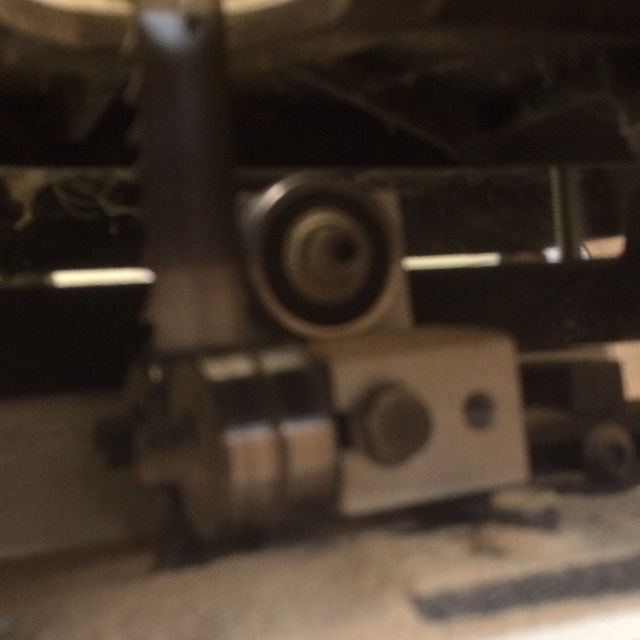
Upper guide kit correctly installed.Lower guide was harder to photograph, but there it is, also correctly installed.
Results? Not exactly what I expected.
It sawed exactly the same as before! (Augggh!)
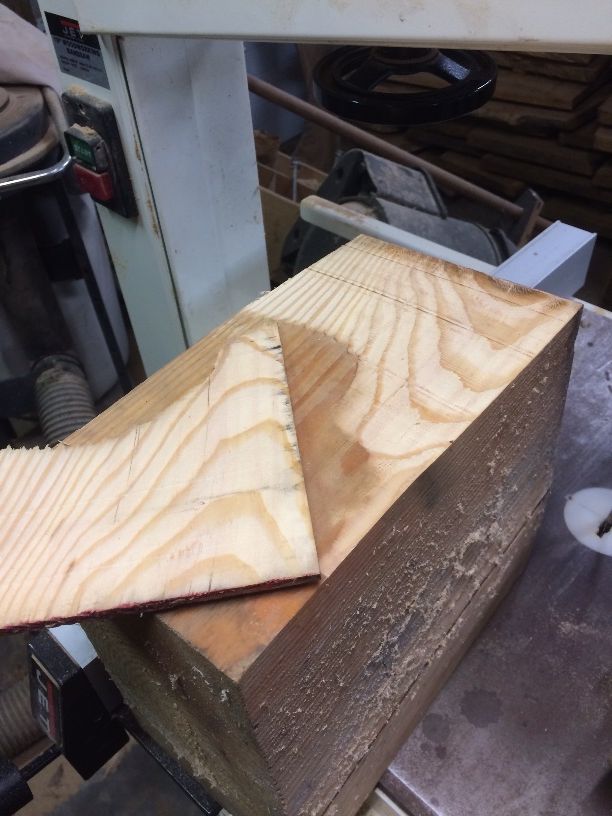
I attempted a re-saw, and the blade dived for the left edge.See the angle? There was no resisting it…it was determined to go left!
Back to the Manual
So I went back to the computer and downloaded a manual that was for almost the same machine as I have, and looked at the trouble-shooting list.
It turned out that the blade I was using had been damaged, and the teeth had lost their set. I installed a new blade, readjusted everything (different size blade) and tried again:
Just an old chunk of 1 x 4 fir, chosen for the test. Perfect re-saw!
And that was it! It turned out that, while the guides really were worn out, and needed replacing, the blade was also worn out, and remained as the final issue. Now that it has been replaced, the saw cuts like magic!
Results!
So now I have begun resawing all the chunks of maple I have set aside for fiddles! 🙂 I can saw rib-stock, and neck billets, and backs, and have them come out usable again. What a relief!
Thanks for looking
If you found this post helpful, please share with your friends!
The Northwest Handmade Musical Instrument Show will be this weekend, May 4th and 5th, at PCC Sylvania campus, from 12 noon to 5 PM, Saturday and Sunday.
My newest two violins will be there, to try out, along with about eight other violins, violas, five-string fiddles, and one cello.
I really hope to see you all there.
If you found this post helpful, please share with your friends!
I don’t know how I managed to do it, as I always take photos of my work, but I somehow skipped one.
In March of 2015 I completed a very good quality violin, just before the 2015 Northwest Musical Instrument Makers Show, at Marylhurst University. I vaguely recall that I was pressed for time, and got it playable literally the day before the show, or thereabouts. But, for whatever cause, I neglected to take photos of the build-process, and even of the completed violin. It wasn’t until I was trying to update my “Chronology” page that I realized something was missing…
Then I had to go back and look at the dates inside instruments (as well as my archived weblog posts) in order to figure out what had happened. This was the Forgotten Violin:
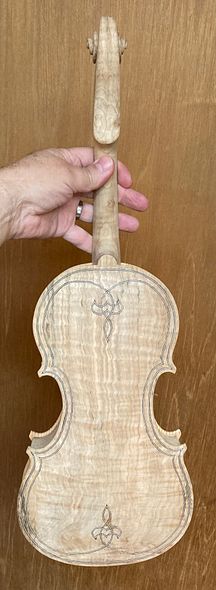
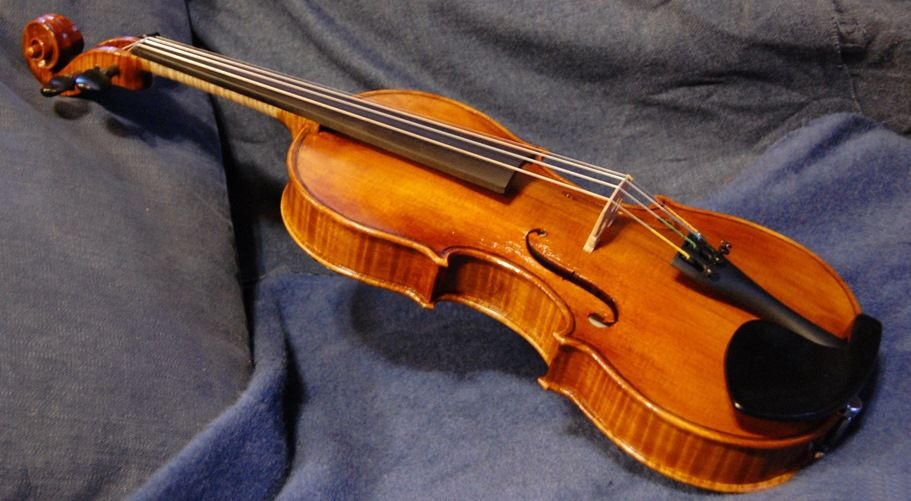
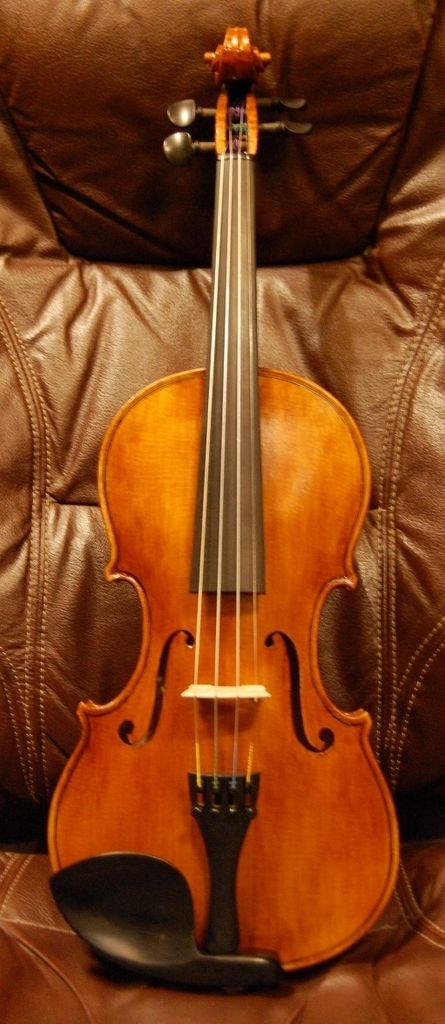
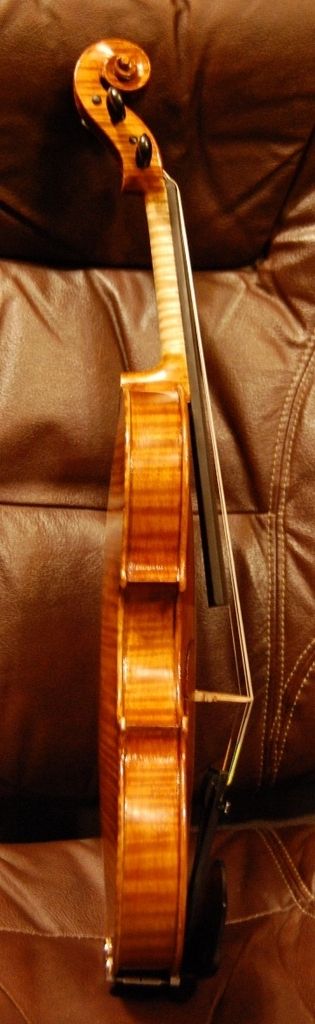
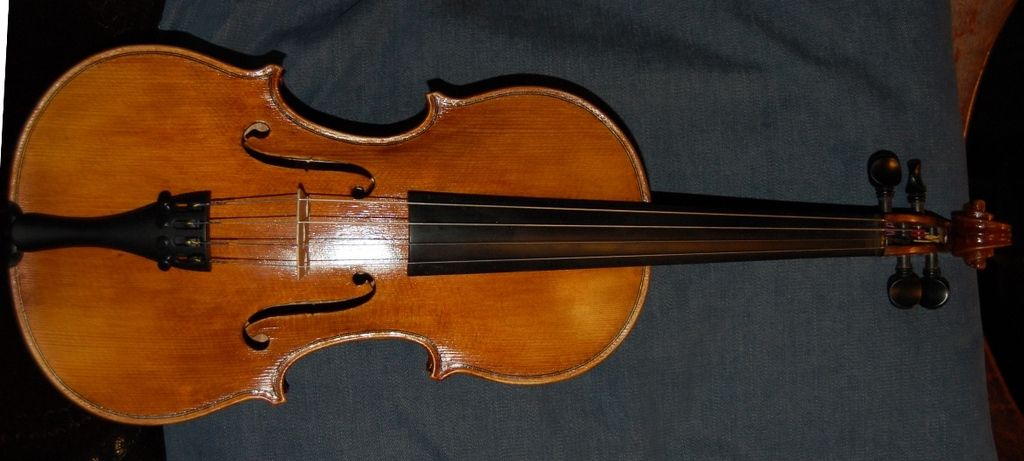
Oliver Long Model
A Different Mold:
This is only the second violin I have produced from this particular mold: The other was actually the first violin I ever made, so the two can’t really be compared. I changed some things since then anyway, so I have dubbed this mold, as it now stands, the Oliver “Long Model”, since it is a little narrower in the upper and lower bouts, giving it a “long” look, though it is really about the same length as the others.
European Wood–(mostly)
I am pretty certain that the front and back plates are European Spruce and Maple, respectively, but the ribs and neck are not European. I believe the neck is Red Maple that I bought from Elon Howe, in Michigan, and the ribs may be, as well. I wish I had written down all this information when I made the instrument, but I didn’t, and my memory is not coming up with any certainties. Sorry.
Cycloid arching
The one thing that made this violin special in my mind, is that it is the first one on which I attempted to use the “Hypocycloid” or “Curtate Cycloid” curves to establish the arching. In the past, I either slavishly copied the arching of the old master instrument I was trying to emulate (which can work very well, provided the instrument you are copying worked very well), or I just winged it, and established the archings the way I thought they ought to be. This time I actually established my curves differently, using math, a compass and straightedge, and actual little wheels of thin plywood I made. (Sounds strange, I know…but it was math that was definitely available to the old master makers, and technology that was available to them, as well, so I wanted to try it.)
And it worked out very well. I had very positive reviews from professional players from this instrument as well as those whose arching reflected the Cremonese master (Guarneri del Gesu) I had attempted to copy on those instruments. (Why?) Evidently that is how they originally perfected their arching, as the templates I made from scratch closely matched the templates I lifted from their work. It was an interesting experiment at any rate, and I still have the templates, if I want to use them, and I know how to establish all the curves again, if I need to do so. In the meantime, this is a very good violin.
A Violin for smaller hands
I deliberately made this instrument on the “delicate” side: just a little narrower at the neck than usual, and a daintier scroll than I usually make, because there was a small-stature player I was hoping to interest in the violin…but (naturally)… it turned out they were not in the market at the time. (Sigh…) This is an exceptionally easy instrument to play, though, and has very good projection and tone. So…I guess I will simply hope to find another player with small hands. 🙂
At any rate, here is the violin:
Oliver Long Model Front
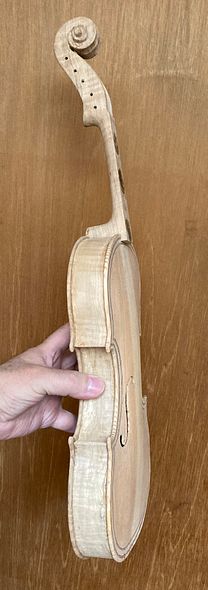
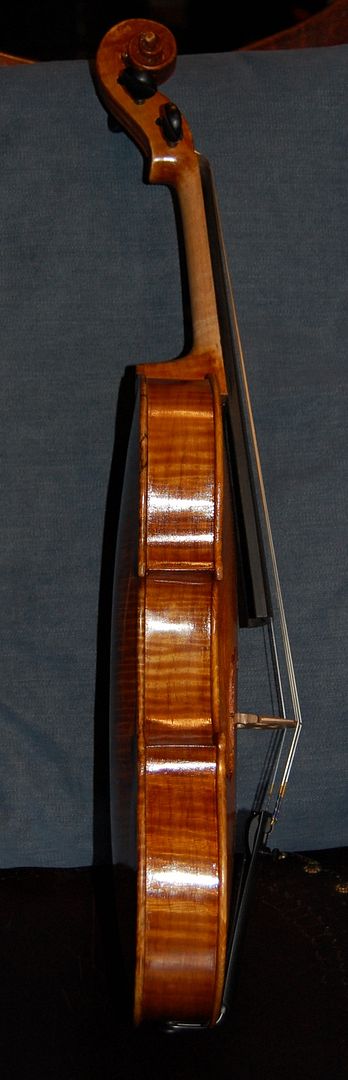
Oliver Long Model Side
Oliver Long Model Side
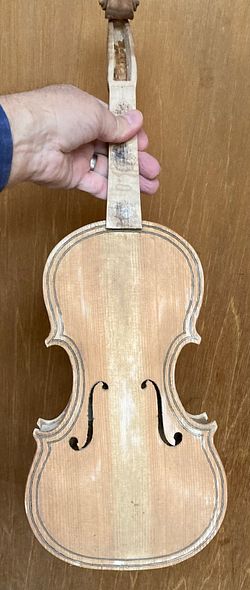
Spirit varnish, and… Not Antiqued
This is one of the few instruments on which I chose to apply my finish without deliberately induced “antiquing.” I don’t do it often, because I really like the antiqued look…but I like this one, too, so I may do some more like it.
Anyhow– that’s the story of the “One that almost got away.” …”The Forgotten Violin.”
Thanks for looking. 🙂
If you found this post helpful, please share with your friends!
Set-up can include a fairly wide range of things not related to the actual building of the instrument:
Dressing the fingerboard
Adjusting the string-height at the nut
Fitting the bridge
Fitting and adjusting the sound-post
Fitting (or lubricating) new tuning pegs
Installing strings, tailpiece and chinrest
Final adjustments for sound and playability
Height of strings above the end of the fingerboard
Balance of tone across the strings (adjusted at the soundpost)
Usually the instrument already has the fingerboard and saddle when “set-up” begins.
This Instrument
In this particular case, I had already installed, but not dressed the fingerboard, so I still had to:
Dress the fingerboard,
Install and finish the tuning pegs,
Drill the holes in the tuning pegs for the strings,
Fit and install the nut
Cut the slots in the nut, to receive the strings,
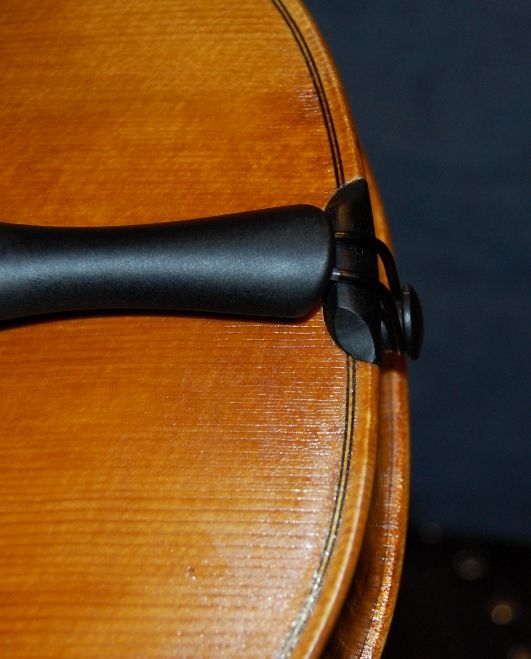
Drill and ream the hole for the end button, and fit the end button
Fit the soundpost, to a preliminary position,
Fit the bridge and adjust it for height,
Install the tailpiece, strings and chinrest.
Perform any “final touches”, to repair small varnish flaws, etc.
I have been swamped with other responsibilities, so, this time, I made no effort to record the process as it was being done. If anyone is interested, one can search the archived articles on this site, to see photo-essays of set-ups. Here is the completed instrument, from various views:
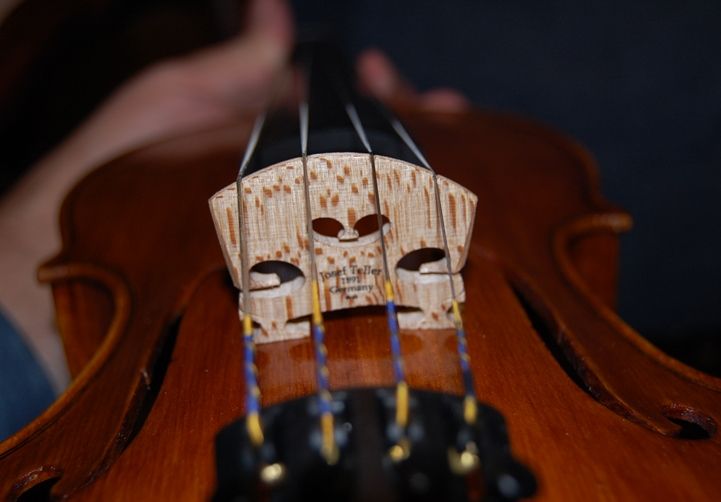
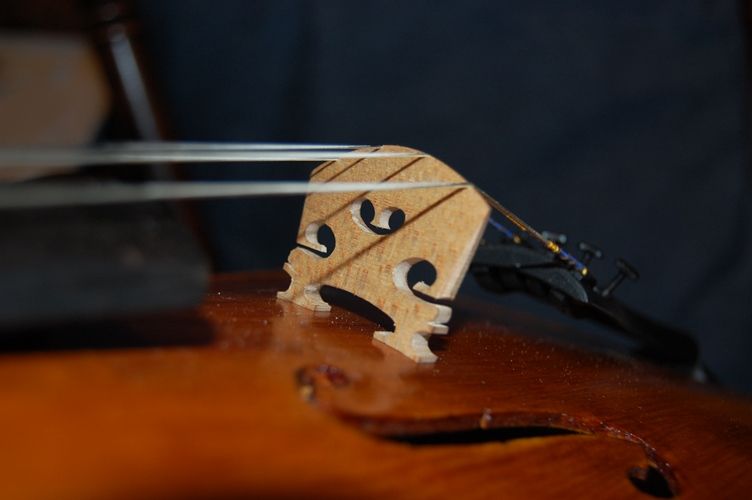
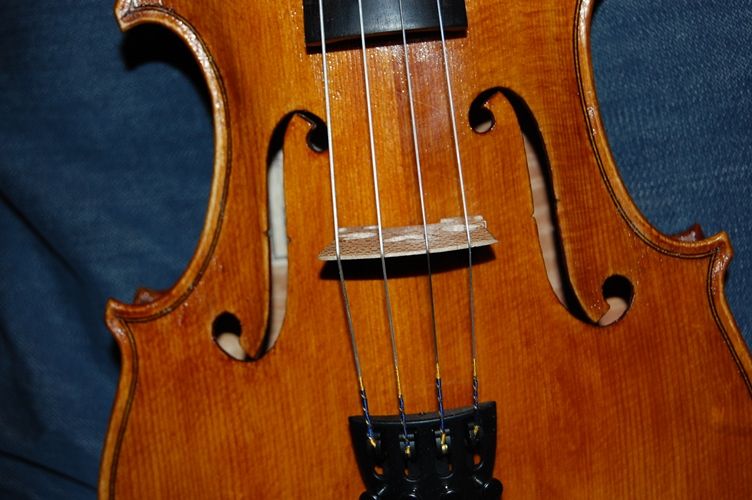
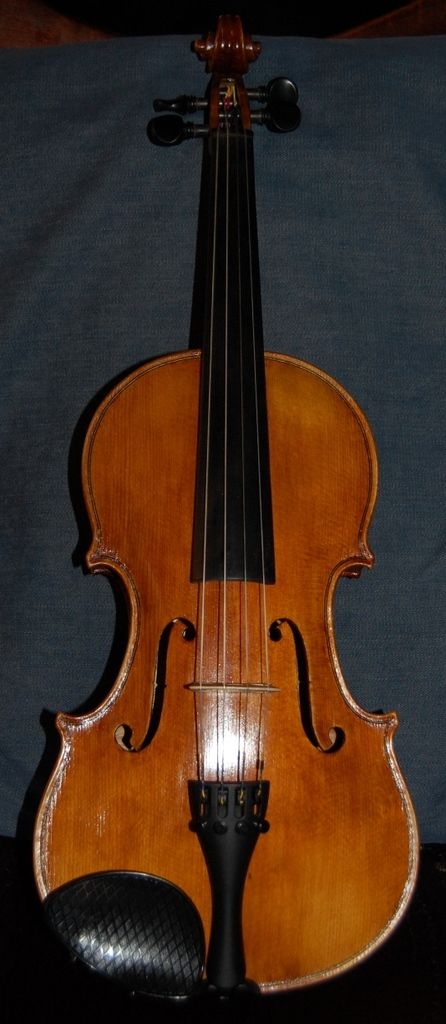
Completed saddle, end-button and tailpiece: notice the curved ends on the saddle.Completed 14-inch viola front side: sitka spruce.Side view of 14″ Viola. Notice the deep ribs.Completed 14-inch viola back. That big-leaf maple is pretty stuff. This was from the log donated by Terry Howell.Completed neck; If you check back a few posts, you can see how different the neck looks before and after polishing and sealing.Completed treble-side scroll. This big-leaf maple, for the scroll and neck, was cut in my wife’s parents’ yard, some time ago.Completed Bass-side scroll.Completed bridge, from the tailpiece side. Those are Helicore strings, and a Josef Teller bridge.Bridge viewed from the fingerboard side.Bridge and sound-holes viewed from the front of the instrument.
So! That is the 14-inch Viola! I will add a chinrest in the morning, but I wanted to get these pictures posted.
So far the sound is good. It is a little unfocused on the C string, but I usually expect some of that at first. I adjusted the soundpost to enhance the C-string, and tomorrow I hope it will have improved. I could tell it was opening up within 20 minutes of hard bowing, so I expect it will be a very good viola. These strings are Helicore: I would prefer orchestral strings, I think, but it is difficult to find a good C-string for a 14″ viola.
This will make a very good viola for some player with small hands.
Thanks for looking.
(Edit: Here is the finished instrument WITH the chinrest. And, as I hoped, it sounds even better this morning. 🙂 It has a good, open, rich C-string and good balance across all strings.)
Completed 14-inch viola with chinrest.
If you found this post helpful, please share with your friends!
As I work by myself, I frequently fail to take pictures. I did take a few, though. (If you are impatient, you can scroll down and peek at them.)
F-holes Cut Out
I used a special tool to begin the cutting out progress: It is called an “f-hole drill”, but all it really amounts to is a specialized twin-blade hole-cutter. My children bought it for me, one year, and it has been a wonderful tool. In the first place, obviously, it is a time saver, but the biggest difference is that I can now make the upper and lower eyes of my f-holes perfectly round, to begin with, and work any special shaping in, starting from the already round holes.
I remove the waste wood from the uprights of my f-holes with a small sharp knife—many makers use a saw, and I have done so as well, but I eventually reverted to the knife. Just personal preference, I suppose.
Bass Bar
Once the f-holes are cut out and close to perfect (always allowing for later nit-picking), I install the bass bar. The bass bar is a gently-arched brace supporting the bass-side foot of the bridge. Guitars have a whole collection of similar bracing, supporting what amounts to a nearly flat (and very thin) plate. The violin family instruments depend primarily upon the compound curves of the arching to supply strength, and only need the one brace to support the bass-side bridge-foot. The other side of the bridge is supported by the soundpost, which, while it is not directly under the treble-side bridge-foot, it is very close to it, and is in a location on the treble side matching the lateral position of the bass-bar on the bass side.
I lay out the position of the bass-bar, and then use a compass to transfer the shape of the inside of the front plate to the bass-bar blank. Then I use a knife to remove most of the waste-wood, and begin checking the results against the inside curve of the front plate. When the fit is getting close to correct…close enough that it is becoming difficult to see what needs to change…I apply a strip of paper-gauze adhesive tape (available in pharmacies) to the inside of the plate, covering the bass-bar position, and I rub blue chalk into the tape. I happen to use a product sold as “sidewalk chalk;” they are big sticks of chalk, and supposedly are easy to wash off of sidewalks. But they work well for me, and the blue is high-enough contrast that I can see it easily.
I press the nearly correctly-shaped bass-bar into the chalked tape, and check to see where the chalk transferred. I cut, plane or scrape just the chalked places from the bass-bar, repeating until, finally, when I press the bar into the tape, the whole thing comes up lightly coated with chalk. Then I remove the tape, clean off any remaining chalk from both pieces of wood, and install the bass-bar, using hot hide glue and clamps. I have a specialized set of wooden clamps made for this task.
When the bass bar glue is completely dry, I remove the clamps and trim the bar to the desired shape. I make my bars a little higher than most luthiers do, in the center, but tapering to about 5-6mm high for the last few centimeters of both ends. (I will take some pictures after I remove the inside mold, so you can see the final shape.)
Edge Preparation
It is much easier to do the inside edge-work if I do it before I install the plate on the garland. So, I use a tiny finger-plane, along with round and flat files, to round the inner edge of the plate, all the way around the perimeter. I may have to do a little correction later, but I want it as close to perfect as is possible, before gluing the plate to the garland.
Installing the Front Plate
I line up the plate on the garland as accurately as I can, matching the center-line of the plate to the centerline of the garland, and then use spool-clamps to hold it in place. I was originally taught to use tiny pins to assure good placement, but eventually discontinued the practice. We know for a fact that the old masters did this, as we can see the remnants of those wooden pins in their violins, still today. Perhaps I will eventually resume using pins. For now, I do not.
Once I have the plate perfectly aligned and securely clamped, using a very thin palette knife, I slip hot hide-glue into the joint between plate and garland, and then add more spool clamps to draw the joint closed. This is a very “stress-free” way to glue plates in place. I used to experience near-panic every time I installed a plate, racing to clamp the joint before the glue gelled, but now it is a very easy and relaxed task.
Purfling
As you may remember, I have not yet installed the purfling. I wait until the plate is on the garland before purfling nowadays, because the purfling “locks-in” the location of the plate edge, and I have had problems in the past with the rib garland changing shape a little, between my tracing the plate and trying to install it. so, after gluing the plate to the garland, the first step is to double check my over-hangs, to see that they are all pretty close to the same. If I need to change them, I do so: I am free to adjust the shape of the plate to match the garland again. When the overhangs are all acceptable, I begin purfling.
Purfling is fairly simple-sounding:
mark the groove location
cut the groove,
fit the purfling,
glue the purfling,
mark the edge crest, and
cut the channel.
It sounds easy, but I still find it a hard job to do perfectly. I want my miters perfect, my bee-stings clean and sharp, and all my borders parallel. This is my 30th instrument from scratch, and I am still finding it to be challenging. Guess I am a slow learner. 🙂
Cutting the Channel
Before I begin cutting the channel I use a compass to mark a line all the way around the instrument, 1.6 mm in from the outer edge. Then, using a sharp, curved gouge, I cut my channel to that edge crest line, trying to cut the whole channel to intersect the surface of the purfling and that pencil line.
Fairing in the Channel to the Arching
Once I have the purfling completed and the channel cut, I still have to fair-in the surface of the rest of the plate to match the curvature of the channel. I do not want there to be any sudden changes; humps and hollows catch the eye of the person looking, and call into question the skill of the maker. (Besides, I think they are ugly….) I use a very sharp finger-plane to begin shaping the surface of the plate and approximating the final curves I want. Finally I use sharp scrapers to bring the curvature of the whole plate to its final shape. I use a low-angle light to cast shadows from any humps or hollows, so that I can spot them and scrape them away. At this point, the scraper has to be sharp, and I have to use a gentle touch. The changes I am making are frequently much thinner than a piece of paper.
Outer Edgework
After the whole plate is the shape I want, the last task is to shape the outer edge. I begin by using a tiny finger-plane to take the outer corners down at a 45 degree angle, then use half-round files to shape the edge all the way around, bringing the curve of the outer edge up to just intersect the edge-crest line I established earlier. I get it as smooth and even as I can, using a file, but I know when I stain the wood with coffee, it will raise the grain terribly along these edges, so I will eventually re-smooth all of them, using abrasive paper of some sort. In this particular case, I did the outer edgework after setting the neck. No special reason…that is just what I did.
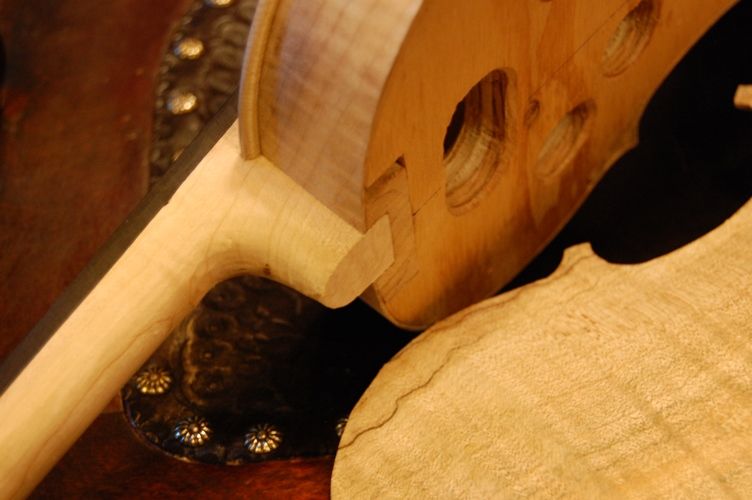
Neck Set
I measure carefully, and cut the tapered mortise using a razor-saw, then use a sharp chisel to remove the waste wood of the mortise. If I do the job correctly, it works very well. I check the sides and bottom to the mortise to see that they are flat and straight, then begin attempting to fit the neck. I have already joined the fingerboard to the neck and have shaped the heel where it will join the neck-block. So, from this point forward, all the shaping and adjustment will be done to the mortise, not the neck. When I am satisfied that the fit is correct, the neck will have to be centered. straight with the centerline of the front plate, straight with the centerline of the end block (not twisted at all), and at the correct angle to place the end of the fingerboard at the right height. Also, of course, the neck has to be set so that the distance from the nut to the edge of the front plate is correct. I check and re-check, until everything works correctly. Since I set the neck before installing the back plate, I want the heel of the neck to protrude past the back end of the neck-block. I will plane it flush after the glue is dry.
Here is the completed mortise, cut for the neck. The outer edgework has yet to be completed. You can see the edge-crest marks.
The mortise is complete, and I am ready to set the neck.
There is the dry-fit neck set. Notice the overhang of the heel of the neck beyond the neck-block. That will be planed off after the glue is dry.
So there is the dry-fit assembly. It is starting to look like a viola!
When every measurement is correct simultneously, and the fit is tight, I remove the neck one last time and slather hot hide glue into the neck mortise. Immediately I jam the neck into place, and quickly check all those measurements again. Bingo! They are all correct, and I can relax while the glue dries! Once the glue is dry, I plane off the neck heel overhang, flush with the neck-block.
The glue is dry, and the neck-heel overhang has been planed flush with the neck block. I am ready to remove the mold.
In this picture, I have filed the outer edge curvature already, and, though you can’t see it in this photo, I have also completed the graduations on the back plate, and have filed its inner edges, so it is ready to install. But; before I can do that, I have to remove the mold and add the back linings.
Ready to remove the mold.
Dreaming of the next step!
I am getting tired, though, and have some other things that need doing, so the viola will have to wait until another day to move any further toward completion.
Thanks for looking.
If you found this post helpful, please share with your friends!

 Follow