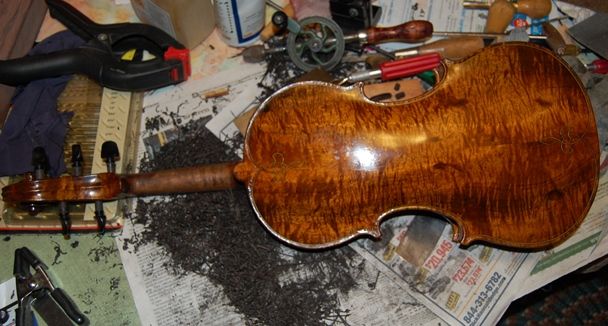
Progress on the Small (14-inch) Viola and the “Plowden” Guarneri model violin
Here are some photos of what is happening with these two fiddles. I decided to add a third instrument to the bench, so to speak, a 3/4-size violin (separate notes on separate thread), so it is slowing me down just a little.
Progress Checklist
Both the viola and the violin are moving along:
Arching is complete on the front plates of both instruments.
F-holes are laid out on both instruments, cut out and complete on the violin.
The bass bar has been fitted, installed and trimmed in the viola.
Graduation is nearly complete on the viola, complete on the violin.
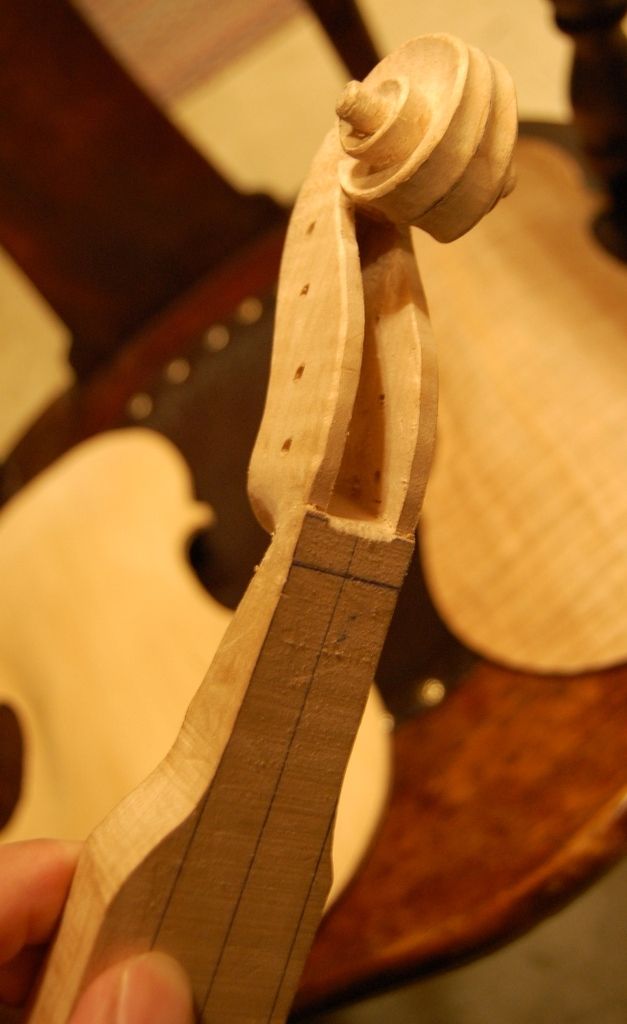
The scrolls are partially carved…still a fair way to go.
The back plates are arched, but there is still some work to be done on each before I would call them absolutely complete.
The top plate has been installed on the violin, and purfling installed.
The violin top plate and rib garland are nearly complete…the edgework is done, but some refining will still happen.
You can see that I trimmed a couple of millimeters off the corners of the violin front plate. I will do the same on the other three plates as well.
Here are some photos:
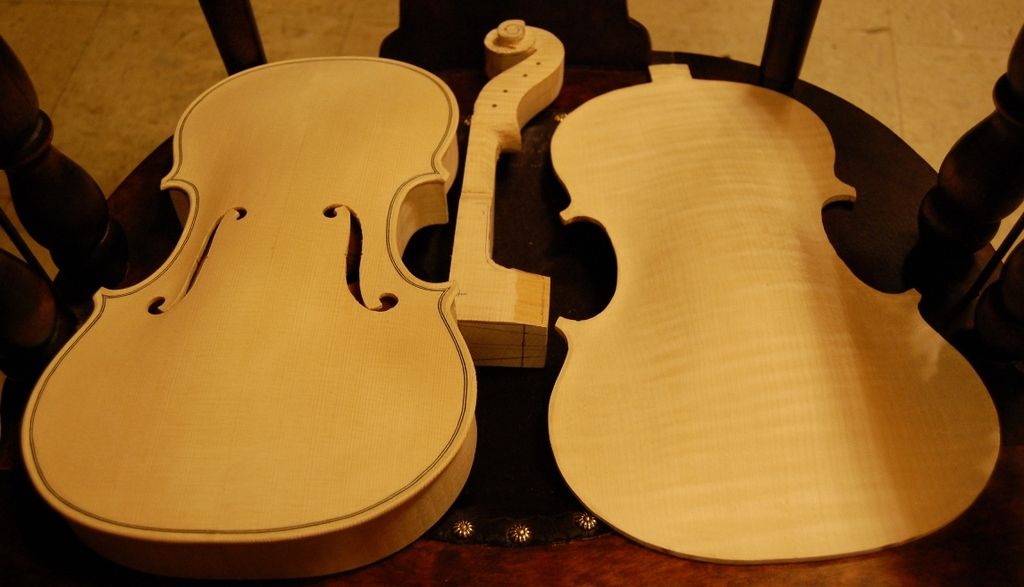
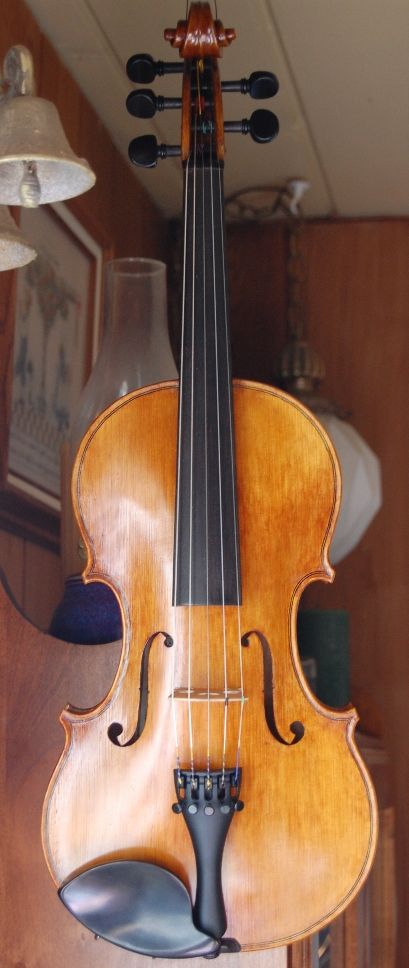
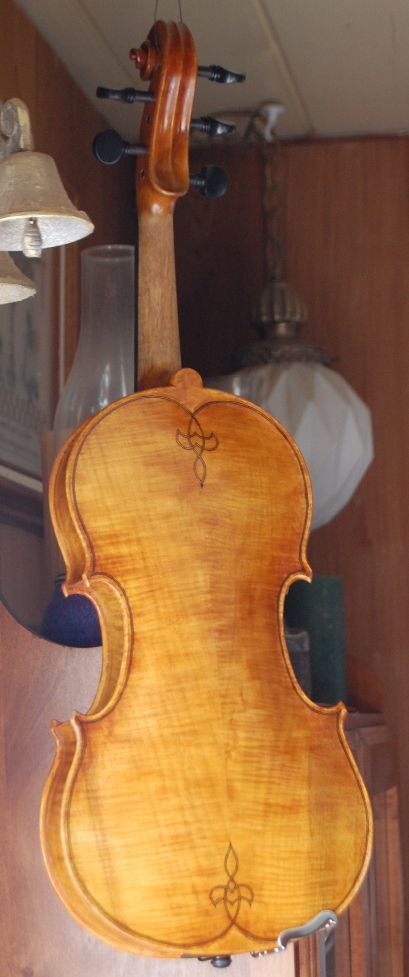
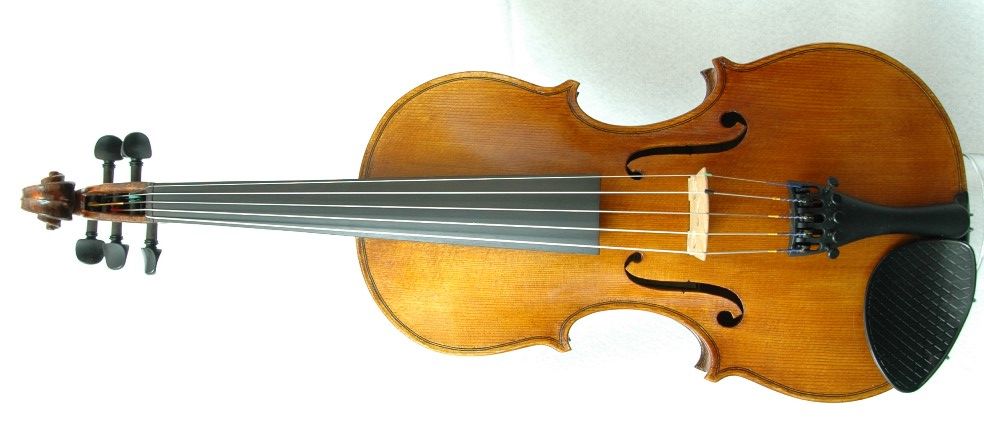
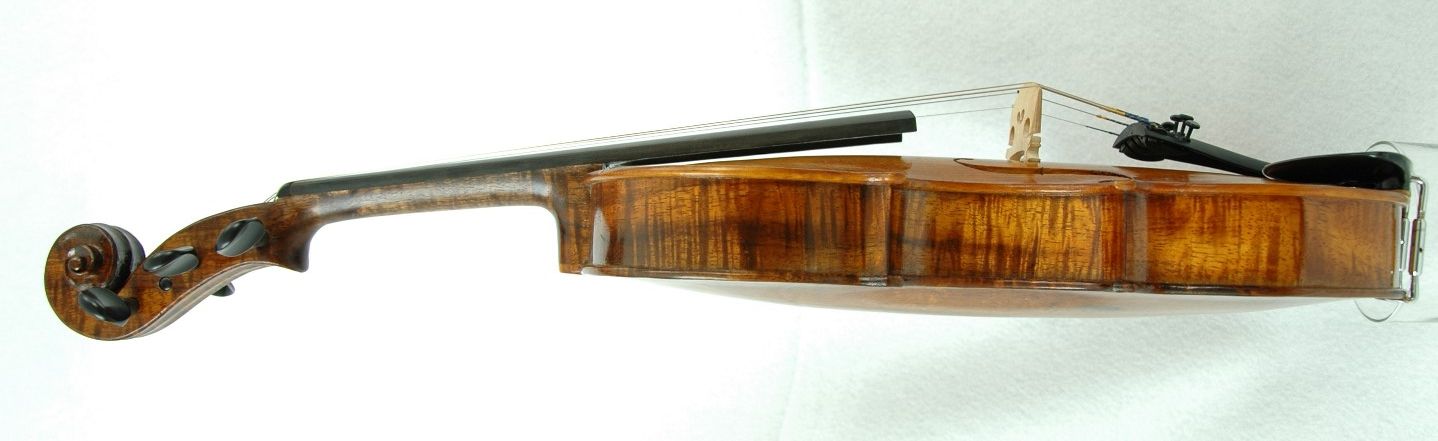
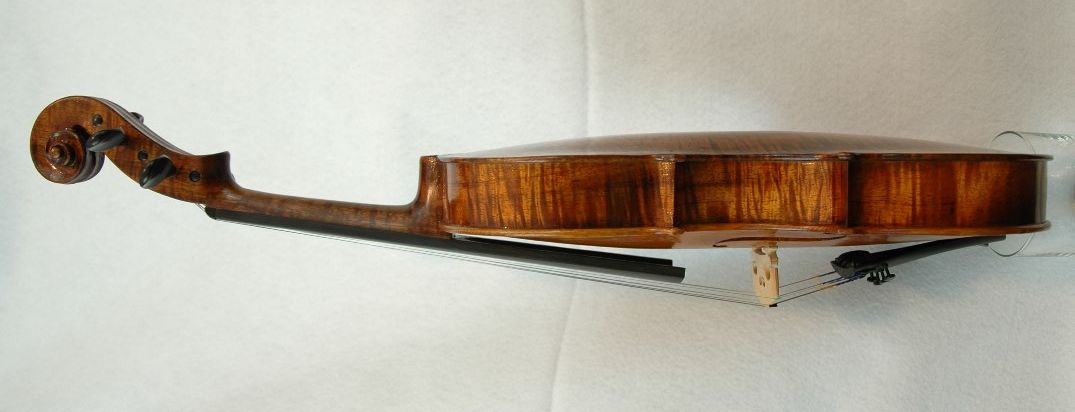
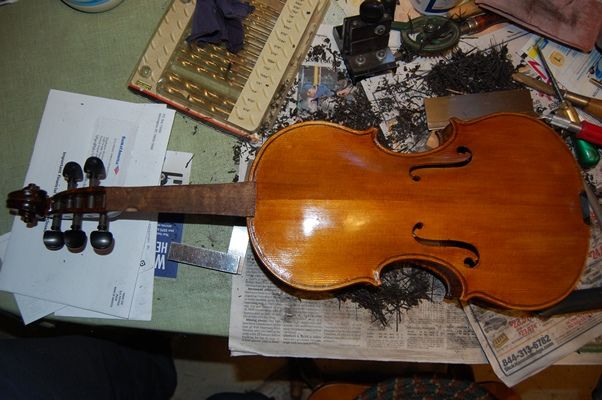
July 3rd status of Guarneri-model violin. (Wood for back, sides and neck is European Maple. Wood for top is European Spruce.)
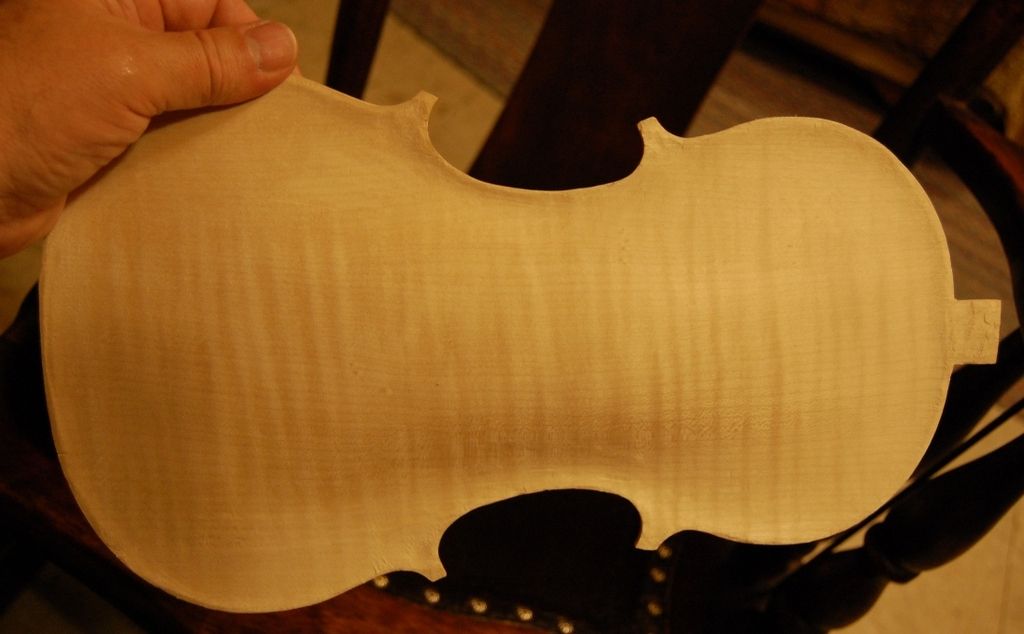
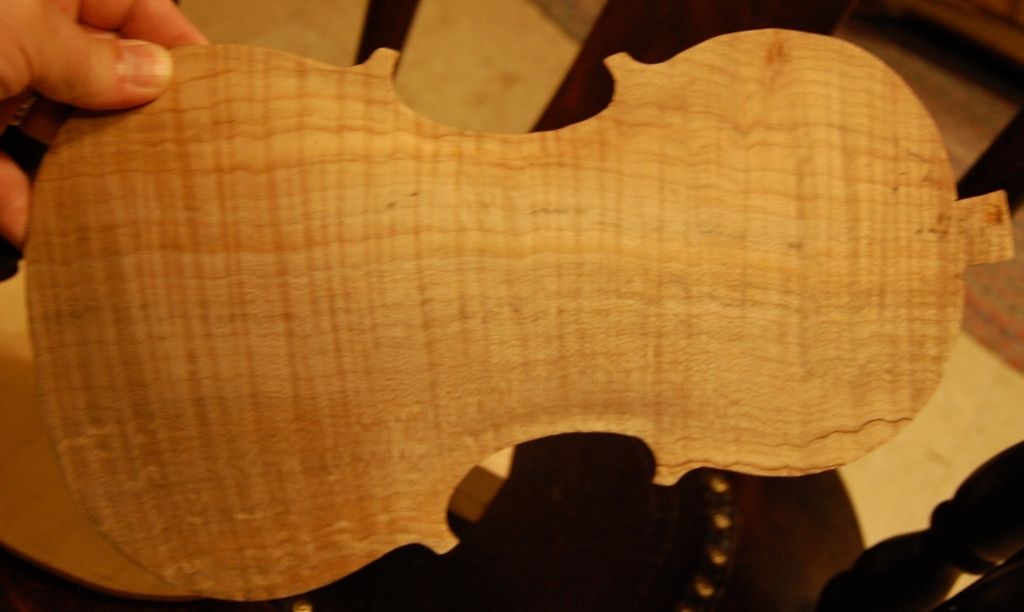
July 3rd status Guarneri-model one-piece violin back. Arching and graduation are nearly complete.
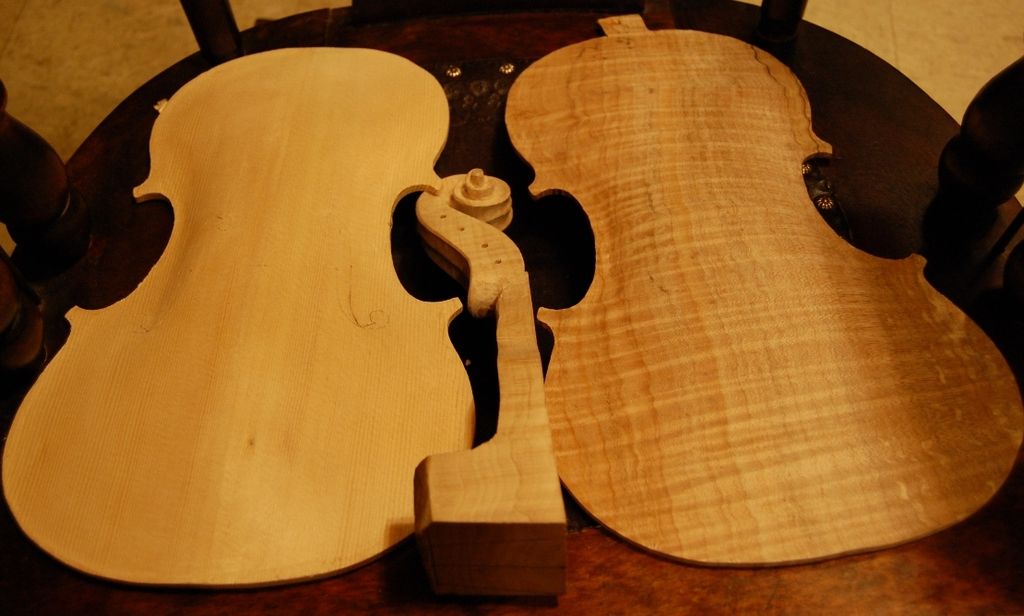
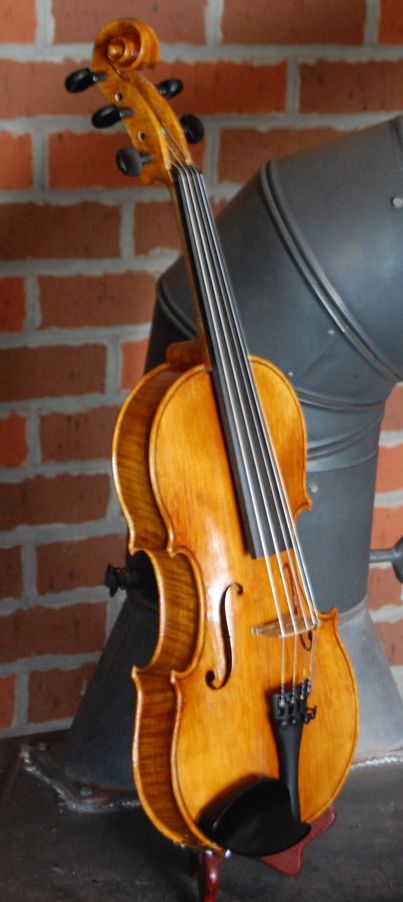
July 3rd status of Oliver 14″ Viola.
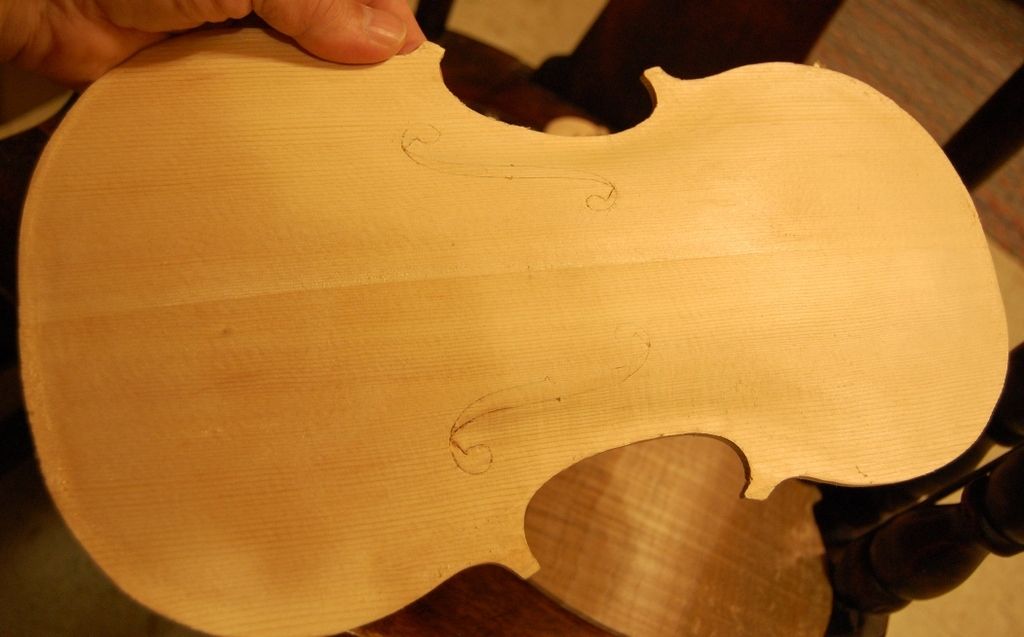
July 3rd status Oliver 14 inch Viola front plate. Arching and graduation essentially complete. F-holes laid out and deeply incised. (Wood is Sitka Spruce.)
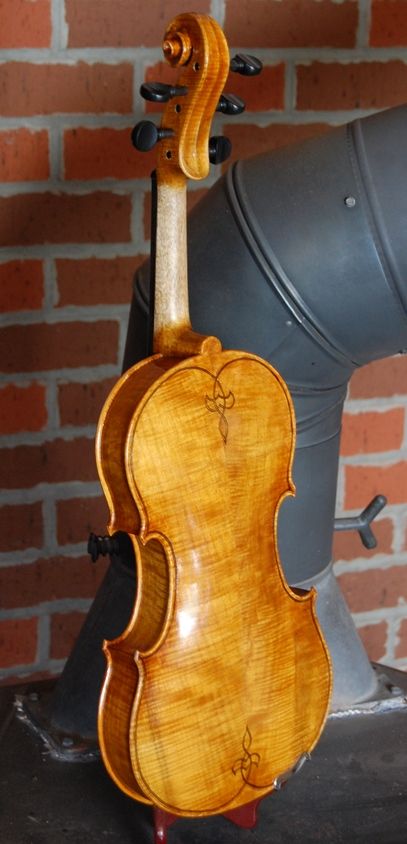
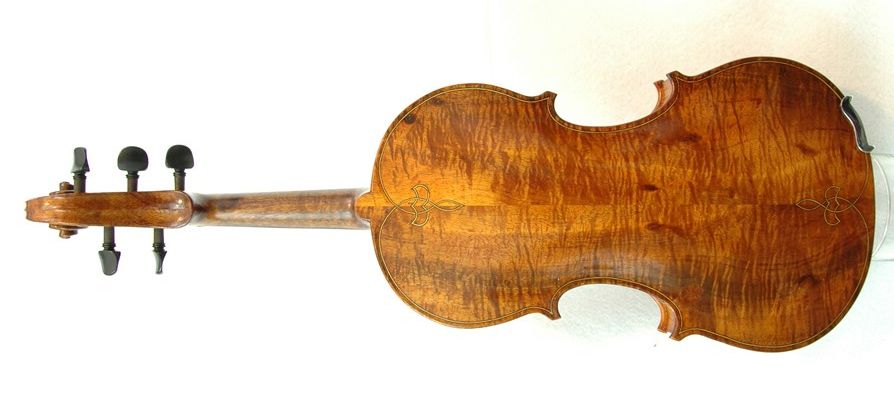
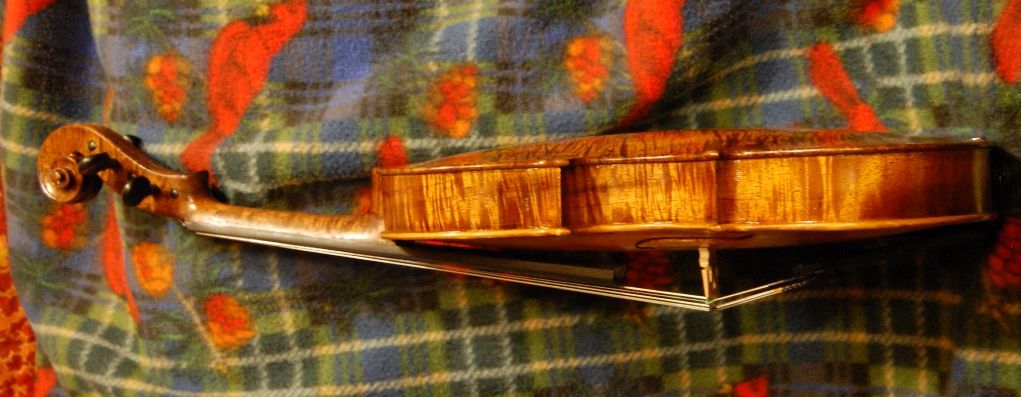
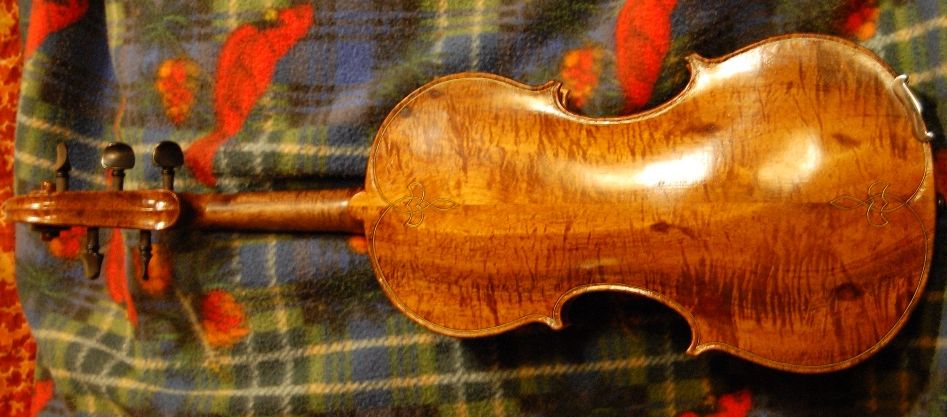
July 3rd status Oliver 14 inch Viola back plate. Arching and graduation nearly complete. (Wood is spalted, highly figured Big Leaf Maple, harvested about five miles from my house.)
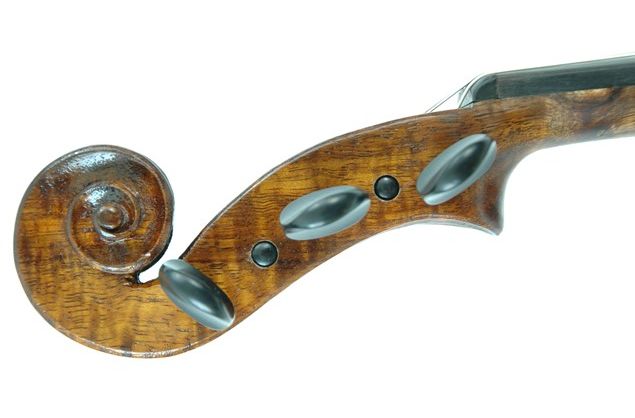
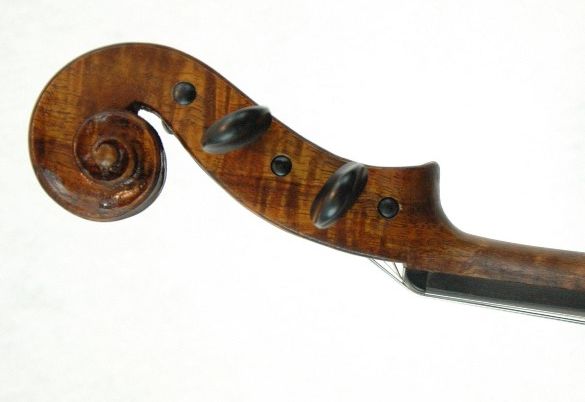
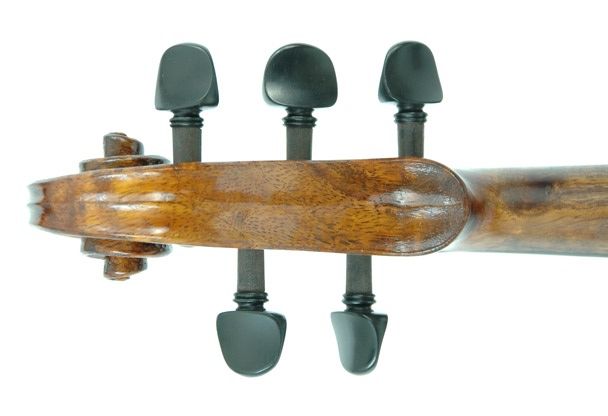
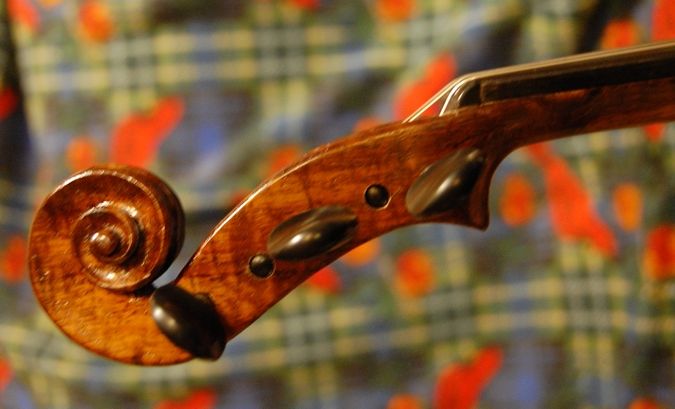
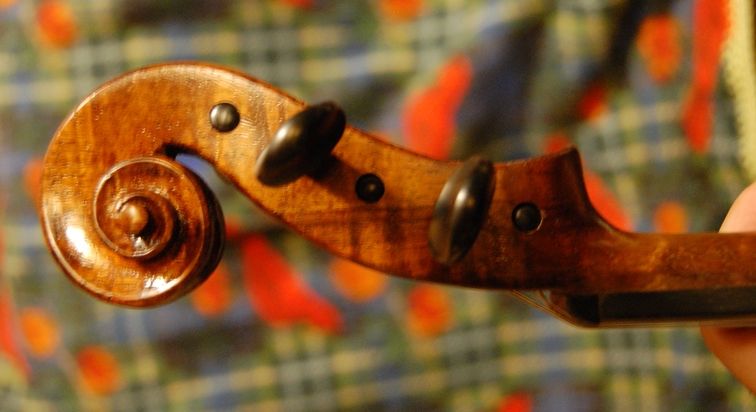
July 3rd status Oliver 14 inch Viola scroll and neck. (Wood is spalted Big leaf maple…from the same log as the back plate.)
Prognosis:
So…you can see that progress is happening. Not at a very exciting pace, but I hope the wait will be worthwhile.
My goal is to produce three very good instruments this summer/fall:
the 14-inch viola,
the Guarneri-model violin, and
the 3/4-size violin,
and then show them, along with a larger viola, to orchestra directors and teachers in the Greater Portland Area.
My rationale is that good small violas are hard to find, and so are good fractional sized instruments. If I can demonstrate to the teachers that I can produce very good instruments in smaller sizes, as well as the larger sizes, then perhaps they will recommend their students to me.
All I can do is try….
Thanks for looking.
If you found this post helpful, please share with your friends!
The Rationale for Building a Fractional Instrument
Why Fractional Sizes Exist at All
When I was a child, I don’t recall there being the option of using fractional instruments to start out. I am sure they had to have existed, but when I was (briefly) sent to a violin teacher, there was no suggestion that I be fitted with a ¾ or a ½ size violin, though it would have been appropriate (I was about 8 or 9, if I remember correctly.) I went to class a few times and then gave it up, probably due to lack of interest (I really wanted to play the French horn… so they bought me a cornet…but that is another story), however, the added difficulty of an oversized instrument could have been part of the problem.
But there are children who are delighted the first time they hear a violin, and passionately want to play one. They do have the drive to practice, but they are too small to comfortably use a full-sized violin, let alone a viola or cello. So, we try to supply them with a smaller instrument on which they can develop their skills until their physical stature catches up with their talent and passion.
The value of a good quality instrument is that it feeds the original delight of the child, and convinces him or her that his or her first impression was correct: that the violin is an exquisite tool to make exquisite music. The cost of a poor quality instrument is that the child may lose interest entirely. (Video games, anyone?) The price (good or bad) can only be determined by the long-run result…some things you pay the price up front, and get long-term value. Others, you get a great deal up front and pay the price later. Hard to tell, sometimes, which is which.
Why Few Luthiers Will Build Them
Because parents know the child will outgrow the smaller instrument in a short time, they are reluctant to buy a good, handmade (quite costly, and fragile, as well) fractional instrument. The only alternative seems to be an imported factory-made instrument (often of dubious quality.) Millions of cheap, fractional fiddles are purchased, therefore, with the thought that “Well, they will outgrow this by next year, and then we can get the next size up.” But by that time, the passion is gone, as they are not hearing the sounds they want to hear, and they are ready to quit. Not every child is silly enough to think that the scratchy, squawking sounds coming from under their ear is comparable to the gorgeous music that originally attracted them to the violin.
But, so long as very few parents can afford to buy a handmade fractional instrument, there will be few luthiers who feel it is worth making one. Without an existing order for such an instrument, it looks doubtful that the maker will ever see a return on his/her investment of time and money. I did see a photo, once, of the gorgeous ¼-size violin made by Roger Hargrave for one of the Buckingham Palace toddlers. (Nice work, if you can get it.)
For The Discerning Ear
Here’s the real issue: Most people can hear the difference between a great violin and a “violin-shaped-object” (ultra-cheap, poorly designed, poorly made, of poor-quality materials, strung with poorest quality strings, etc.) But many people cannot hear the difference between an average violin and a great one. It takes a good player to tell the difference in playability, and a discerning ear to hear the difference in tone. For the discerning ear, I want to offer the very best instrument I can make.
But, when dealing with folks who truly can’t tell the difference, I no longer try to convince them that the difference even exists, let alone how important it is to the player. I encourage them to buy the one that fits their perception of value. I am friendly and polite about it, and explain that the differences are subtle enough that it takes some practice to hear them.
But, if they go out and buy a very cheap VSO (violin-shaped-object) from eBay, or the like, and then bring it in, complaining about the sound and playability, I may simply opt out of working on it. The labor to make it playable will easily exceed the purchase cost of the instrument. Again, I am friendly and kind about it, explaining what the problem is. I am not dismissive…they are doing their best to make good decisions.
On the other hand, sometimes they have bought a fairly decent student instrument for a few hundred dollars, and, as they work with it, they eventually develop a discerning ear, enough to realize they have a cheap fiddle that (surprise!) sounds rather like…a cheap fiddle. At that point I am glad that I was friendly and accommodating when I first dealt with them, as they may feel more inclined to do business with me once they understand what I originally tried to explain.
What are the Other Options?
There are a few possibilities that I can see:
I can buy an unfinished violin of a given (small) size, and re-work it to sound much better (resolve arching and graduation issues, check rib thickness, etc.), then finish it much as I do my own work, and set it up to optimize sound. This will result in a very playable, nice-looking instrument, for less than a third the cost of a handmade instrument. But, in following such a plan, I am limited to the parameters dictated by the work already done at the factory: I cannot make the ribs and blocks taller, for instance. Also I can’t choose the wood from which the instrument is to be made to begin with, as I do my own.
I can hand-make a fractional sized instrument from scratch, which will take only a little less effort than building a full-sized instrument, and almost exactly the same costs for materials. That instrument will far exceed the capabilities of virtually any factory instrument, but we are back to the issue of cost…who wants to buy a violin at full price, knowing that it will soon be outgrown? So; my best option may be to sell that instrument to a parent at a deeply discounted price, with the provision that, if they bring that instrument back undamaged, when the young violinist is ready for a full-sized instrument, I will apply their full purchase price to a larger instrument at full price. In this way, they effectively have had the use of a top-quality instrument for nothing, as they grew into a larger instrument. Good deal for them…risky for me. I may be able to repeat that transaction several times, if everyone takes good care of the fractional size instrument in question. On the other hand, it may get destroyed the first time out.
Another possibility centers on adult players: I recently had an adult, petite, female violinist ask whether I make a ¾-size instrument. She was not interested in a trade-up; she wanted a better daily player for herself. I could build such instruments on speculation, hoping for such players to show up at my door. But if they don’t…well, then I will just have a rather expensive child’s instrument on my hands.
With all of this in mind:
I am beginning a ¾-size violin, patterned after the best of the old masters, but slightly altered to achieve optimum sound. The demands placed upon a diminuative violin are somewhat different than those on its full-sizes counterpart. I expect that it will exceed the power and playability of virtually any fractional factory instrument (as they arrive from the factory), and possibly most full-size factory instruments. If I sell it to an adult, who simply wants a smaller fiddle, then the price will be only a little lower than the full-size instruments; it will cost nearly the same to produce. But for a child, perhaps it can be sold at a more deeply discounted price, with the understanding that the instrument will be coming back in a year or so, to be traded in on a full-sized instrument.
I will also look into buying some white Chinese instruments, to work over and improve, to offer as student-grade instruments. We’ll see how it all works out. I don’t particularly want to get involved with that sort of thing.
The new 3/4-size violin is being made of highly figured Red Maple and Englemann spruce. (Really pretty stuff.) I’ll try to post photos of the instrument as it progresses.
Thanks for looking.
If you found this post helpful, please share with your friends!
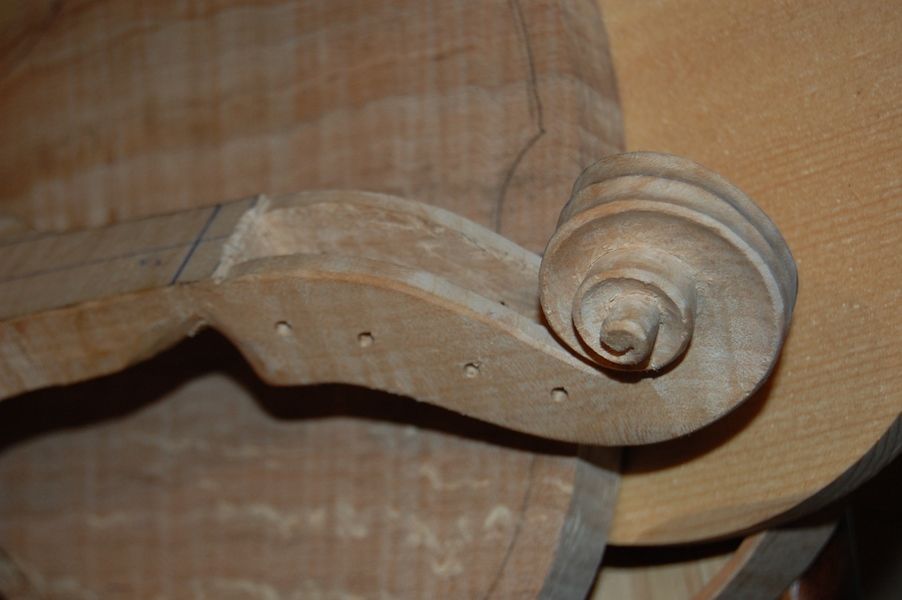
I spent most of Saturday working on carving the viola scroll. I am not as fast as a lot of luthiers seem to be. It takes me more than eight hours to carve a scroll, and I can’t go at it for eight hours straight, anymore, anyway. So, between the heat and my other responsibilities, this is pretty much all I got done. It is still not complete, of course, but it is looking closer to complete, and it feels encouraging, to look at it.
This is a Big Leaf Maple scroll and back, on top of a Sitka Spruce top plate. It is interesting to carve domestic maple in close proximity to European maple. They are not the same at all. The big leaf maple is much softer, and feels almost fuzzy, under the scraper. Much lighter-weight, too, and has a different ring, when I tap it. European seemsto be superior for violins, though domestic maples seem to work fime for larger instruments (or possibly it is the lower tones involved.) This instrument will be a good “experiment” in that regard. If this instrument is very good, then the lower tone is the issue– if it is questionable, I may repeat the experiment immediately with European Maple and see if that corrects it. If it does, then the size of the instrument may be what is the problem.
But I suspect it will be a very good viola. I have made other very small (14-7/8″ on the body) violas using the same woods, before, and they were very good. This will be the smallest I have made, using domestic woods.
Partially completed scroll for the 14″ viola
Planing and flattening the plates
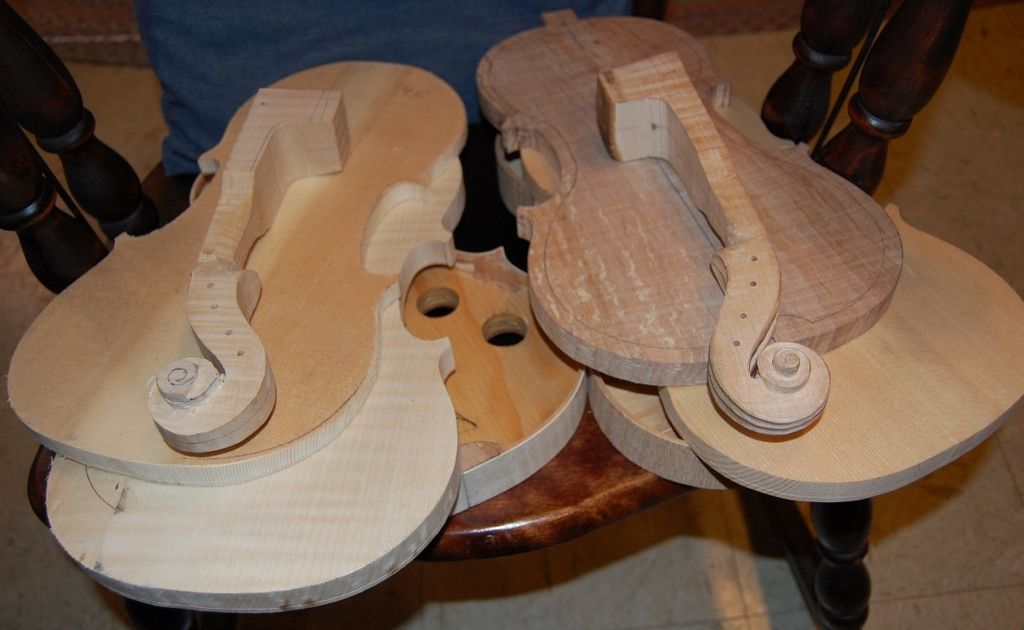
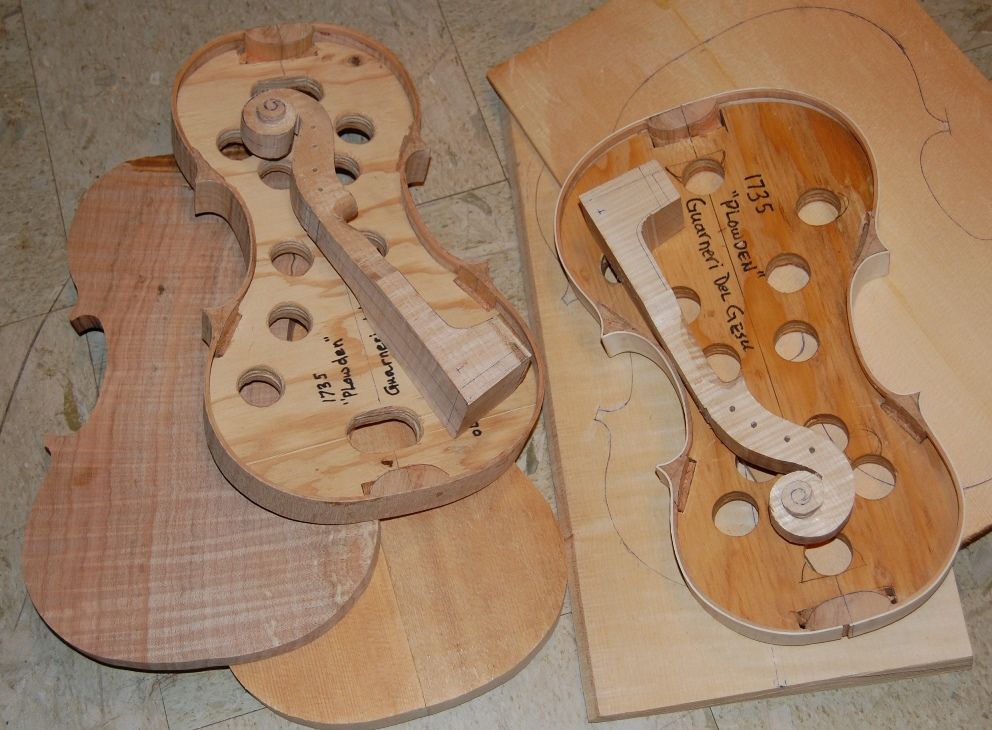
Actually, come to think of it, I did do a little more– I went and used my son’s tools and planed the two violin plates to appropriate thicknesses to start working them. I was shooting for about 17mm thick, to begin with, so that my finished arching will be close to that thickness, after everything else has been carved away. Then I laid-out the shapes of the plates by tracing them from the completed garland, and cut them out at home. So, here is what the whole pile looks like today. Last week, some of the plates were still square and flat, and very thick…this week they are all the correct thicknesses, and one scroll is nearing completion.
The lines on the right-hand maple plate (the viola back) are sketching in where the carving will happen on the inside of the plate: I will carve the outside first, to get the exact arching I have planned, then carve the inside to a similar shape, to get the exact thisknesses I hope to achieve (called “graduations” because the thickness is different in different areas, and changes gradually from area to area.) Both the arching and the graduations are critical to the final resulting sound. In my opinion, the arching is probably more important, but I can’t prove it.
I do know that when I accidentally arched some of my early violins the way (I later was taught) a viola is supposed to be arched, those violins sounded like violas, in spite of everything else about them being “violin.” It was very perplexing to me, at the time, as my ear was not well-enough trained to hear the difference, and all I knew is that it was a violin! And these crazy players kept telling me it sounded like a viola! They were right! The arching was the issue that decided the character of the sound. Good learning experience.
Current State of the Fiddles
The wood on the left is European maple and spruce I bought from International Violin Co., in Baltimore, MD. I have used their wood before, and it has worked well. Both have linings and blocks made of weeping willow.
As you can see, both instruments have one-piece backs, and two-piece, book-matched fronts (sometimes referred to as tops, or bellies). In both cases the ribs and necks/scrolls are of wood matching the back plate.
I will keep you all posted.
Thanks for looking.
If you found this post helpful, please share with your friends!
Progress Report on the 14″ Oliver Viola, and the Violin Modeled after the 1735 “Plowden” Guarneri.
“Life is what actually happens while you are making other plans.”
Well…company came and went, and the week didn’t happen exactly as I wanted it to; There were other things to do, and people to spend time with. My only daughter was here all week, which was nice– she flew in from Switzerland, with about a week’s notice. We went to the beach, Monday, and spent the day infiltrating all the art and clothing stores in Cannon Beach, then had fish and chips and headed home. 🙂
My younger brother dropped in for a surprise visit today, with my young neice. That was a nice visit. While they were here, a neighbor couple showed up, too. We ate and visited, and had a nice evening. Afterward, I helped Ann trim a hedge and haul the branches to the burning pile. All good things.
So! Progress report:
I am trying to keep the two instruments on parallel tracks for completion…hoping to keep them no more than a few hours apart in terms of progress.
Progress in building 14” Guarneri-model Viola and Violin:
(Hand-carved instruments begun on May 25th, 2016)
Cut and install the blocks. (May 25th)
Prepare the ribs, by sanding (using a plywood jig I made to use with my spindle sander). (May 25th )
Bend the ribs, using the bending iron, and install them on the blocks (several steps). (May 26th, 27th)
Prepare, install and shape the front linings. (May 27th, 28th)
Use the sanding board to flatten front of garland. (May 30th)
Prepare the plate stock (book-match and flatten inner side) (Front only—one-piece backs on both fiddles.) (May 30th)
Use the completed garland to establish the shape of the plates. (May 30th)
Cut the front plate exactly to size, including filing and sanding. (Only got the viola cut out. I will cut out the violin tomorrow night if it isn’t too hot when I get home. )
Lay out and cut out scroll and neck. (May 26th)
(Began carving both scrolls using gouges and small finger-planes—spent a good part of May 28th doing that, while waiting for bending irons to heat up, etc. More time as time and strength allow. That maple is tough stuff, and my hands tire quickly anymore.)
Here is the photo-evidence: Handmade in Oregon 🙂
May 30th Progress Report.
The instrument on the left is the 14″ viola, and is made of Oregon Big Leaf Maple, and Sitka Spruce. The one on the right is the violin, and is made of European Maple and Spruce. Both have blocks and linings of weeping willow.
I ran out of time and energy, so the cutting out of the violin plates will have to wait until later. Once they are cut out, I can begin arching the front plates, and get these things looking more like fiddles.
As you can see, I am trying corners that are a little longer, this time. I may end up shortening them after all, but I left extra in case I wanted them longer. Usually I make pretty short corners.
Vacation is Over– Back to Work!
That’s all I have to show, for today. I go back to work tomorrow. Classes are over for this term, but I still have to prepare certificates, and arrange make-up tests for those who need them.
(For those who don’t know, I teach Welding Supervision classes at Gunderson, Inc. where I have worked for the last nearly 30 years. I began there as a welder, but nowadays I mostly lecture. Print-reading classes, remedial Math classes, Welding Inspection classes, Safety, Metallurgy, etc. It is not as fun as making fiddles, but it is steady. :-))
Thanks for looking,
Chet
If you found this post helpful, please share with your friends!
I had a fair amount of positive feedback on two particular instruments at the Maryhurst show: a “1735 Plowden” Guarneri model violin, and a 14″ Oliver viola that has pretty amazing sound. So I decided to see if I could repeat the successes, and am building a new one of each model.
1735 Plowden Guarneri model
This is a very powerful instrument, pretty classic Guarneri style and sound. I took my measurements from the Strad poster and technical drawings, and copied the archings from there, as well. The first one had a rich powerful tone from the day it was first strung up and playing. So, I hope the second try at the same instrument will be even better.
This one (like the first one, and, like the original) is European maple (one-piece back) and European spruce. I am using willow for blocks and linings. I am always impressed with the difference in how the European wood handles under the knife, gouge or plane. I have been told by all my mentors and teachers that, at least for violins, the European Maple is definitely superior in terms of tone. I am going to take their word for it…they are all very experienced makers who really ought to know. They did say, however, for violas, cellos, and basses, that domestic woods seem to work fine. Must have something to do with the higher-frequency sound or something like that. Although, that last five-string fiddle I made, of Myrtle and Port Orford Cedar, has very good high end tone, as well as good low notes…so I don’t know why one is better than another. The Myrtle is definitely harder, heavier wood…maybe that helped.
14-inch Oliver Viola
This will actually be off the same mold as the Guarneri violin (a duplicate of it), so it will have exactly the same “footprint”, but the arching and graduations, as well as the rib-height and other differences will definitely make it a viola, not a violin with viola strings. It is comparatively easy to make a large viola that sounds great, but much more difficult to make a very satifactory small viola. Fortunately, I fell into (quite by accident) an arching pattern that worked very well, and later had it confirmed by one of my teachers, so I had early (accidental) success with small violas, and have gotten better as I learned to understand what was happening with them.
I like the viola sound, and I am big enough to play my largest viola model (16-1/2 Guarneri model) comfortably, but I can see where a professional player could encounter some problems holding his/her arm out at that distance for hours of practice or orchestral performance. So, the small violas have a special attraction in terms of comfort…and if they can sound comparable to a larger instrument, so much the better. I also make a 14-7/8″ viola, but the 14″ viola is the smallest I have made.
This one is Big Leaf maple and Sitka spruce. Willow linings, same as the other new instrument.
Parallel Processes
I will be attempting to complete the two new instruments side by side, step by step, so that whatever stage I am at in one will be where I am on the other, as well (give or take an hour or two.) We’ll see how that plays out.
I’ll post pictures in a few days.
Thanks for reading.
Chet
If you found this post helpful, please share with your friends!
Some time ago, a friend (Cliff Stansell, of the Pistol River Trio) asked me to build (strictly on speculation) an Oliver five-string fiddle of Oregon Myrtle wood (for back, sides and neck) and Port Orford Cedar (for top and bassbar). He prevailed upon his brother (Les Stansell, a maker of Guitars and Ukuleles, using those woods) to donate the wood for the experiment. This is the result:
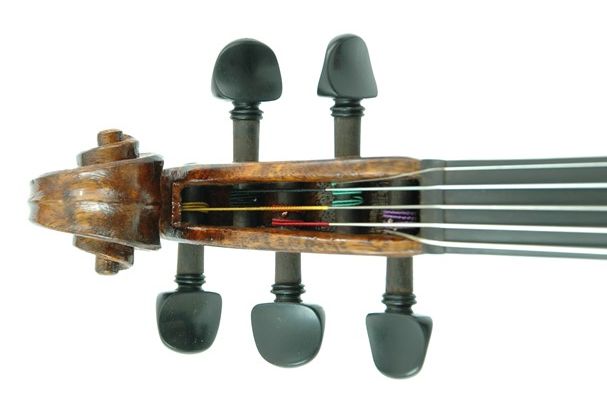
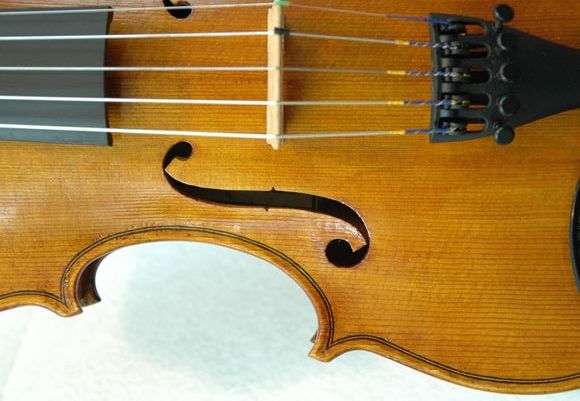
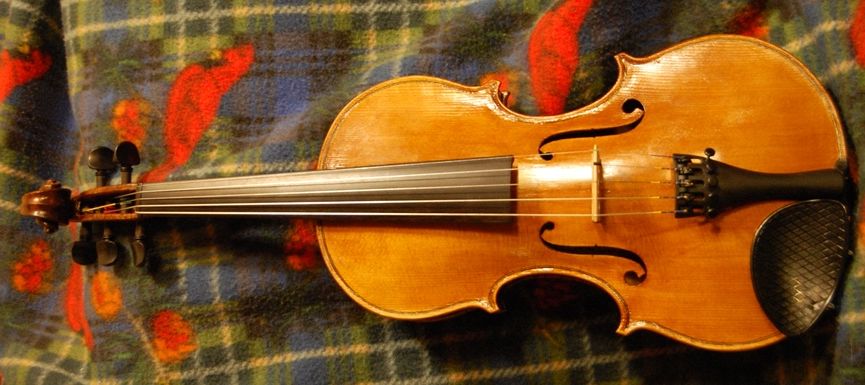
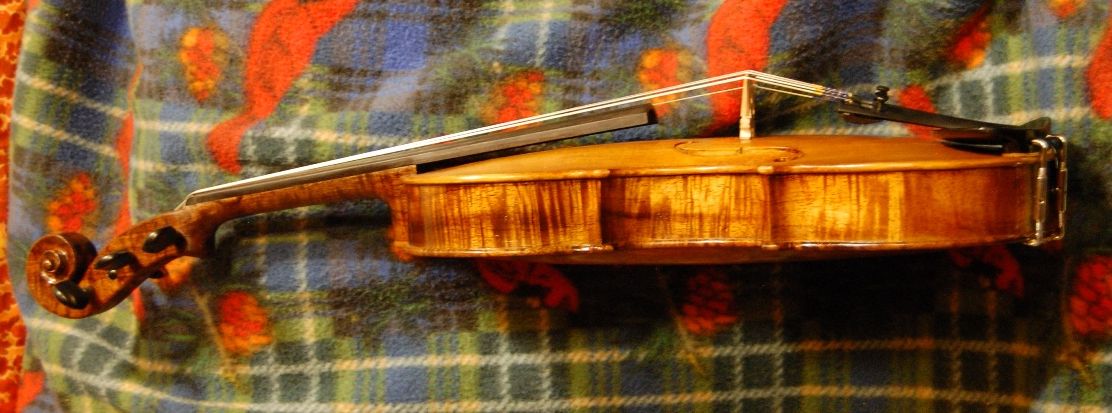
New 5-string fiddleBack view
Front view, hanging upBack view hanging up
What about Sound?
Well, quite honestly, it has been strung up for less than 12 hours, and, though I have spent some time playing it, and adjusting the soundpost, etc., it is really still too early to be sure how it will sound.
So far, I feel pretty positive about it. I know the arching and graduations are good, but I have never used this combination of woods before, so it is hard to be sure what is a product of the wood, and what is a product of the luthier.
It feels heavier to me, quite naturally, simply because Myrtle is a harder, heavier wood than Maple. But that may be OK. I know that Bubinga (even harder and heavier) is regularly used for five-string fiddles, and I actually have some Bubinga to try someday soon. The Koa I used for the 5 string fiddle last year was also very hard and heavy, and it turned out to sound very good. So I am hopeful that this one will too. It already sounds good…but I want it to sound Great!
(Update: by the next morning the sound had improved remarkably, as new instrument frequently do: I had adjusted the soundpost just before calling it quits for the night, and such adjustments frequently take a few hours to “settle in”.)
Marylhurst Show is coming up in two weeks.
For anyone interested, the Annual Marylhurst Musical Instrument Makers’ Show (click the link for details) will be April 30th and May 1st this year. I hope to see you there. Come and test-drive this fiddle and the others.
Thanks for looking.
If you found this post helpful, please share with your friends!
We (my wife and I) went to the home of the customers who had commissioned the Koa Five-string Fiddle. They received us graciously, and were thrilled with the new instrument. We spent an hour or so visiting, playing the instrument, etc. and finally left to go back home.
The new owners graciously volunteered to lend me the 5-string Koa fiddle in April to show at the Marylhurst University Musical Instrument show. So, if you come to the show you can play the curly Koa Five-string fiddle.
Here are pictures my son took the night before we made delivery:
Front view
Bass side
Treble side
Back view
Bass side scroll
Treble side scroll
Back side scroll
Front side scroll
Bass side f-hole detail
These photos were a lot better than the ones I took, so I thought some people might like to see them. If you want to see the fiddle in person, please come to the show. I hope to have a double bass done by that time, too, but we will see what I actually accomplish.
I will try to post progress reports on the bass project, too.
Thanks for looking.
If you found this post helpful, please share with your friends!
Five String Progress Report #17: Finally finished, Set-up and Playing!
Fair Warning:
I got cranking on the task again, and did not take photos until the job was done.
The photos are at the bottom of the post, so if you want to skip all the narrative, you can scroll to the bottom, and just look at the fiddle.
What I accomplished was to:
Dress and polish the fingerboard
Install, file to final shape (including string grooves) and polish the nut
Install the sound-post
Drill and finish the string-holes in the pegs
Fair in the ends of the nut with the sides of the upper end of the fingerboard
Polish the saddle and endpin
Polish the “handle” portion of the neck one last time, and
Touch up the varnish around the saddle and other “dings”
Rub about 2-3 drops of shellac into the neck: just enough to seal and polish it
Fit the bridge
Fit the tailpiece
Install the strings and chinrest
Play that thing!
Dressing the Fingerboard
When we last looked at the fiddle, the fingerboard had been permanently glued in place, but it had not been planed to the proper curvature, either logitudinally, or tranversely. I want the completed fingerboard to have just enough “scoop” longitudinally, that there is nearly a string’s width of clearance under the center of the largest string. This seems to help prevent buzzes, among other things, and helps with intonation, I think. The transverse curve is set at a 42 mm radius. I have a steel template I made of scraper stock that is flat on one side, and has the 42 mm curve on the other. I primarily use it to check the curve, but I can also use it to scrape, and sometimes I do so. All the board-dressing has to be done with the nut removed, obviously. It is smart to mask off the scroll with something, too– tape rags over it, maybe, to prevent hitting it with the plane.
I began with the small “hammer-handle” curved-sole plane, reducing the surface in the center of the board; then a very small, cheap stanley plane, razor-sharp and adjusted for a fine cut. I checked every few minutes to see how the curve was developing. When it began to look reasonable, I switched to a scraper, working diagonally across the board, to get rid of the plane marks. Then I switched to a coarse Swiss file, held flat on the board, and working up and down the board until all the “dull-spots” had begun to be shiny. I check the curve again when it is all smooth, then switch to abrasives, using a hard plastic block that looks like teflon, but is some sort of high-density plastic they use at work sometimes. This was a scrap, and it works well for a sanding block, though a hard wooden block would be fine. It is about 3″ long, 1-1/2″ wide, and 1″ thick.
I started with about 100 grit, then almost immediately switched to 400 grit, then to 600 and finally 1500 grit. With each change, I worked up and down the board until all the board had the same look. After the 1500-grit work the board was very shiny, and exactly the right curvature in both directions.
Installing the Nut
The nut ultimately has to support the upper ends of the strings, just a scootch above the surface of the fingerboard: about the thickness of a good business card is ideal. bear in mind that every “non-open” note is actually touching the fingerboard, so the closer you can get to the board without touching it, the better. This does require that the fingerboard be perfectly dressed, without even the slightest humps or hollows, otherwise it will buzz.
I had already shaped the nut so that it was about a millimeter taller than the end of the fingerboard, exactly the width between the end of the fingerboard and the beginning of the pegbox cavity, and curved to perfectly match the top of the fingerboard. Also, the top of the nut has to “roll off” into the pegbox smoothly, so that there is no sharp break in the curve as the strings go over the nut toward the pegs. We are trying to avoid any unnecessary stress risers in the strings.
I glued the nut in place using the amount of hot hide glue that covered the end of a toothpick. It doesn’t take much at all. Some people only glue the nut to the fingerboard end, not the neck. In some ways that makes sense to me, but I am still in the habit of gluing to both surfaces. Probably I ought to change that: just think about it–the pressure of the strings is holding the nut immovably in place– the only reason you need the glue at all is so that you don’t lose the nut when you are changing the strings. (Ah, well…next time, maybe.)
Soundpost
While the glue on the nut was drying, I fit the soundpost. I want the completed soundpost to start out about one post width behind the treble foot on the bridge, and pretty much centered on that foot, laterally. In addition, I want it vertical: parallel with the vertical edges of the end and corner blocks. so I remove the end-pin, shove my bi-focals as close to the hole as possible, and, using a bright light source, I maneuver the soundpost into the position I want it. Too tight is better than too loose, as I can keep trimming until the fit is perfect. I can’t put wood back, though, so if I make it too short, the game is over and I have to begin again. (I have done that many times. This takes practice, believe it or not.) A perfectly fitted soundpost is airtight on both ends, just tight enough that it will not fall over when you change the strings, and in exactly the right spot. I will share how I adjust it, though there are undoubtedly as many opinions about that as there are luthiers, so I expect many will disagree. The adjustment has to come after the strings are tuned.
String-holes in the Pegs
By this time, the nut was dry enough I could handle it without fear of knocking it loose, so I could drill the string-holes in the tuning pegs. I used a 1/16″ bit, in an “egg-beater” style hand-cranked drill, to pierce the pegs.
Knowing that the pegs will work their way deeper, over time, as they are used, I have deliberately cut the pegs just a tad short, so that as they work deeper, they will not stick out the other side of the pegbox too far. With that in mind, I also place my string-holes slightly toward the fat end of the peg, inside the box, so that it will not eventually disappear into the other cheek of the pegbox.
I mark the locations with the tip of my small knife, and drill them out, avoiding going through into the pegbox back. What I did this time was to drill part way, and then remove the peg, and complete the hole with the peg held freehand. A lot of luthiers make a drilling jig, that emulates the pegbox, and holds the pegs firmly, and is much more accessible while offering no danger to the fiddle. (I keep telling myself I need to make one of those…one of these days I will get around to it.) After drilling the holes, I dress the ends of the holes with a round file, so they offer less stress to the strings where they pass through the holes.
String-grooves in the Nut
At this point I felt confident that the glue had set on the nut, so I carefully measured and scribed the string grooves in the nut. Then I filed each groove, using an appropriately sized file. As I said before, I use the little tip-cleaning files available in welding shops. You have to make sure you are actually getting the file-type cleaners…the new ones are just twisted wire.
I cut each groove down until it seems the right height above the surface of the board, but I know it will require some fine-tuning once the strings are actually installed. I extend each groove over the curve, and aiming the direction I want the strings to go. I slope the outside two strings inward a little to keep the strings from rubbing on the inside of the pegbox cheek.
Final Polishing
I also file and scrape both ends of the nut, to fair them into the sides of the upper end of the fingerboard, then polish the sides until the joint is very smooth. I polished the saddle and the end-pin, until the ebony glowed like jewelry. I realize it will get dull later, but for now it looks great.
I went ahead and polished the “handle” portion of the neck one last time, using 600-grit and then 1500-grit. Finally, I used a tiny artist’s paint brush to touch-up the varnish any where it had been scratched or in any way damaged during installation of the fitting, and, applying a dime-sized dot of shellac to a rag (about 2-3 drops), I rubbed it vigorously into the handle portion of the neck to seal it against sweaty hands and to polish it so it glows. (Nice-looking fiddle!)
Fitting the Bridge
I no longer use sandpaper in cutting a bridge. I have finally gotten good enough at spotting what needs to be trimmed that I can achieve full fit without resorting to abrasives or even chalk-fitting. This is a job for a sharp knife, and a “calibrated eyeball”.
I begin by setting the bridge blank (I used a Milo Stamm bridge blank this time) on the belly of the violin, centered between the inner nicks of the f-holes. I position the bridge with the branded side toward the tailpiece (away from the fingerboard).
I tip the bridge toward the tail-block just enough to make the “south side” of the bridge perpendicular to the belly (at that point). Then I usually slide a sharp pencil along the base of the feet on the south side, to establish the curvature of the belly on the feet, so I know where to begin. When I am done, I want the back side (tail-piece side–south side) of the bridge to be perpendicular to the belly, and the feet to have achieved an “air-tight” fit in their respective spots. When I have managed that starting point, I can begin carving away all “excess wood” on the upper part of the bridge.
I carve using a very sharp, fairly large knife, to get the feet fitted to the top. To complete the fit, I sometimes switch to a very sharp, slightly curved scraper. Once the feet fit perfectly, I hold the bridge firmly in place, with one hand, and slide a pencil along on the fingerboard with the other hand, with the pencil projecting out far enough to scribe the curve onto the bridge. That line will not be correct, but it gives me a place to start. I usually raise up the center of the curve about 3 mm; the bass side about 2.5 mm; and the treble side 1 mm. I fair in the curve across the top, so that it is similar to the fingerboard but more sharply curved.
I trim the top down to that new line, or just above it a millimeter or so, and establish the string positions, making small notches for each string, in exactly the right location, but knowing that the height will be wrong. I then set the height using the strings. I install the tailpiece and all the strings, spacing them out across the bridge, in their respective slots, and measure the height of each string. I want about 5 to 5.5 mm on the C string, about 5.5 to perhaps 6 at most, on the G string, the same on the D, , a litle lower on the A, and about 3 to 3.5 mm on the E string. I check, calculate about how much to take off on each string, if any, then usee a string jack to raise the strings so I can remove the bridge. The string jack will also maintain tension while I work on the bridge, so I can just slip it back in and check the height as I work.
When the string heights are right, I complete the trimming of the bridge, removing all excess wood. I open the “kidneys” and “heart” somewhat, lower the knees, thin the bridge from front to back, so that the upper edge is about 1 mm to 1.5 mm thick. I thin the feet so they are about 1 mm thick at the toes, and thin the ankles appropriately, as well. I don’t like the look of a fresh-cut bridge, so I rub that fresh-white bridge on the back of my head, where there is enough oily scalp under the hair, to take off the white, and leave a thin oily film that looks a little more subdued.
At that point I tune the violin, and check the height of the strings at the nut. I loosen one string at a time, and file the grooves until the strings come very close to the fingerboard, then re-tune.
Adjusting the Tailpiece
This time I got lucky, and arrived at the correct adjustment on the first attempt, but usually I have to take the strings back off, and adjust the tailpiece. What I am after is to get the ratio of the vibrating string length to the “afterlength” between the bridge and the tailpiece to exactly a 6:1 ratio. In this case, the vibrating string length was exactly 330 mm, and the afterlength (measured from the contact point the bridge to the contact point on the tailpiece) was exactly 55 mm. Couldn’t be better!
Installing the Chinrest
There are many types of chinrests, made of many different substances. I have made them from scratch, and have bought ebony, boxwood, Rosewood, and bakelite chinrests. People have different tastes and needs (Allergies are a problem for some people, using some substances…Cocobolo is a bad one for some people; Rosewood for others.) I used bakelite, this time, on the theory that it is light, and will not dampen the vibration of the instrument very much. Besides, I have never heard of anyone having an allergic reaction to bakelite. But fittings are pretty easy to make, and if someone wanted a curly maple chinrest, or whatever, I would certainly make it for them.
Play-in, and Soundpost adjustment
I can’t prove that “play-in” really happens. Most players feel that something changes in the instrument over the first month or so of playing…and that it happens faster if one plays aggressively, loudly, and frequently. So, initially, I play a lot of double-stops, re-tune frequently, and play a lot of scales and songs that are simple enough I can manage them. (I only play by ear, and nothing fancy; Hymns, waltzes, etc., and a few celtic pieces thrown in…)
I adjust the soundpost to try to get the best balance from string to string, and the best quality of sound I can coax out of the violin. I begin by tuning very carefully, then I play the G note on the C string, for instance, and alternate between the open G and the G note on the C-string, listening to the quality of sound, and the relative volume, brightness, etc. If one is significantly weaker (say, the C-string is weaker than the G), then I fudge the soundpost very slightly toward the weak-sounding string. Usually just a tiny move is sufficient. once I have adjusted so that the balance is fair across all five strings, if I want it brighter as a whole, I can move the soundpost slightly north, etc. I still want it close to vertical, and still have to have that “air-tight fit”.
Over the next week, I will play it a lot, and keep checking the sound, the balance, etc.
Results?
This seems to have about the strongest C-string of all the five-string fiddles I have made. I don’t know if it is due to the Koa wood, or the special arching I experimented with this time. I really hope it is the arching, as I probably can repeat that, but may never get to work with Koa again. The only way to find out is to make another fiddle of some other wood, and duplicate the arching.
The balance is good across all five strings,and quite strong…definitely on the bright side. I expect that the hard heavy Koa wood, in thin graduations, affected that aspect of the sound. The sound is clear, even in higher positions on the bass strings. My anticipation is that, as it plays-in, the sound will open up a good deal more, and mellow somewhat.
Gotta do another one….
Here are the photos:
Finished Front
Finished bass side
Finished Treble side
Finished Back
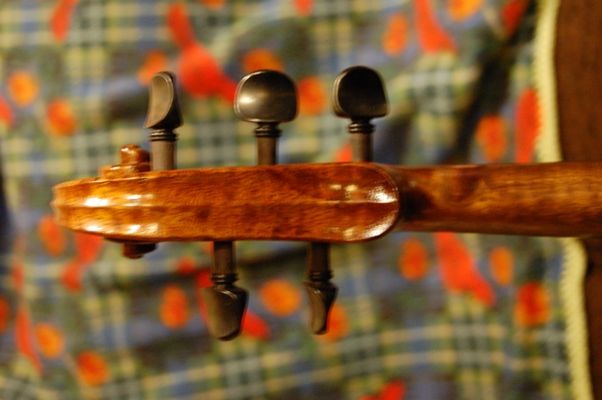
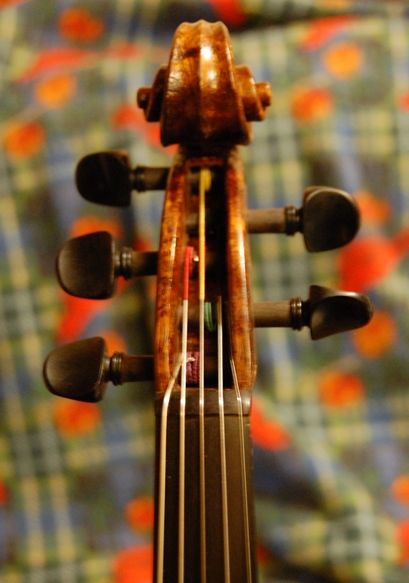
Bass side scroll
Treble side scroll
Back of Scroll
Front of Scroll
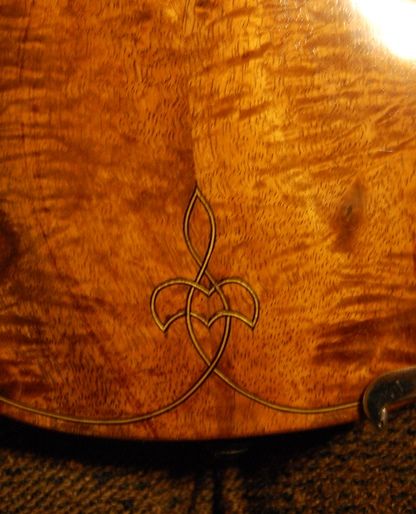
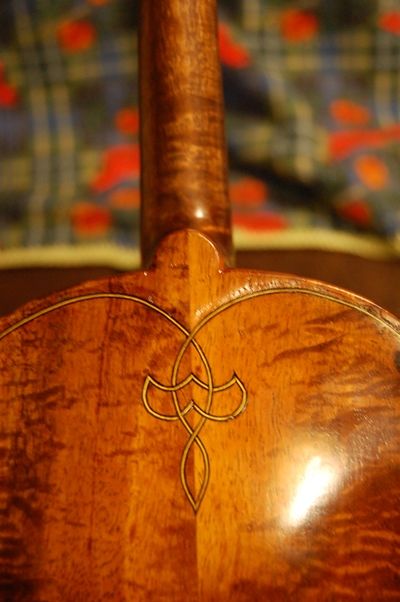
Lower “fleur-de-lis”
Upper “Fleur-de-lis”
If you found this post helpful, please share with your friends!
I failed to take any photos of this, but– it is pretty simple: I centered a hole on the center joint between the lower ribs, and centered between the plates. I drilled it first to 1/8″, then to 7/32″, and finally reamed it with a 1:30 tapered reamer… the same one I use for tuning pegs. I shaved the endpin blank to the correct size and taper using my peg-shaper, while gripping the endpin with a special homemade gripper. I shaved the endpin until it would just barely fit into the hole, leaving a little clearance between the collar and the rib surface. (There is a photo of it later on…)
Fingerboard:
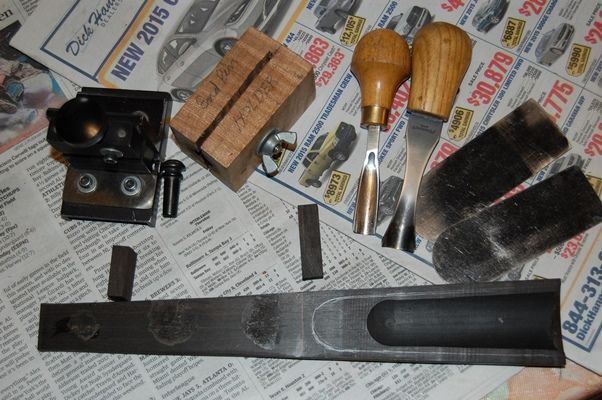
In the photo below you can see some of the tools I used to fit the ebony fittings to the violin. Looking at the fingerboard, you can see the three “dots” of glue that secured it to the neck while I was shaping both the neck and the fingerboard. When I re-install the fingerboard, there will be glue on the whole faying surface. The carved out portion will help to lighten the fingerboard, and apparently helps tone.
Fittings waiting to be shaped and installed.
The black mechanism is the peg shaver I use. The block next to it is the gripper I use for end-pins. The endpin blank is right next to the shaper. The small ebony block between the shaper and fingerboard is the nut blank. The larger ebony block midway along the fingerboard is the saddle blank. The fingerboard has the shape laid out that I intend to carve away, and the gouges and scrapers on the right are the tools with which I did it.
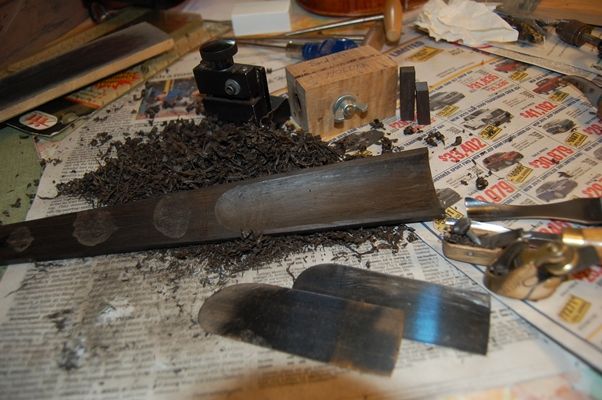
So, one of the first things I did was to make sure my tools were sharp, then I went all around the edges of that trough shape, carving away small chips of ebony to produce a shallow trench all around the edge. Then I carved as best I could with the gouges, until I decided it was time to get the planes into the fight. The little Ibex plane worked well, but the little wooden homemade plane actually worked better, because it has a deeper curve in the sole. It was made of a small section of a broken hammer handle, a piece of scraper blade, and a threaded steel plate to adjust tension and hold the blade in place.
Fingerboard ready for installation. This part took me about an hour. Ebony is hard stuff.
Saddle
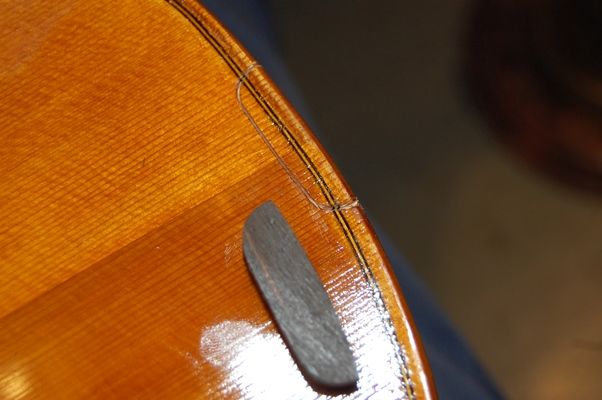
Next I worked on the saddle: I cut my saddles with radiused front edges, so as to avoid saddle cracks, which are extrmely common in violin-family instruments…partly, I am convinced, because virtually everyone makes them with square corners, which adds a huge stress-riser to that location in the spruce. To me, that is asking for a crack. I try to avoid suich things.
Saddle footprint with curved front corners.
Some luthiers try to avoid cracks by leaving a small gap on the ends…that makes good sense, too, but why not eliminate the “notch” altogether? Just my opinion…. Either way, you have to remove the wood of the violin front plate to receive the ebony saddle. I use a thin knife to slice through the spruce, and then a flat chisel to loosen the piece being removed. I set aside the piece in case it turns out I made an error of some kind, and need to put some back. It is a whole lot easier to match grain from the piece you just removed, rather than from some random piece of spruce.
Once the saddle fits the mortise perfectly, leaving a small gap on each end (about the thickness of a business card), I glue the saddle in place, and forget about it. Here is a photo of the finished saddle. I didn’t take photos while I was carving. I get pretty wrapped up in what I am doing and forget to take pictures.
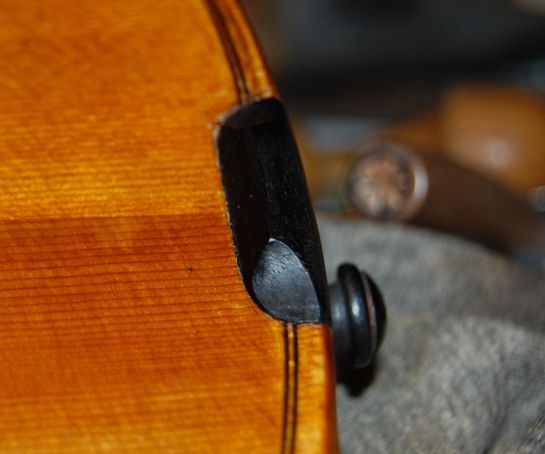
Saddle and endpin
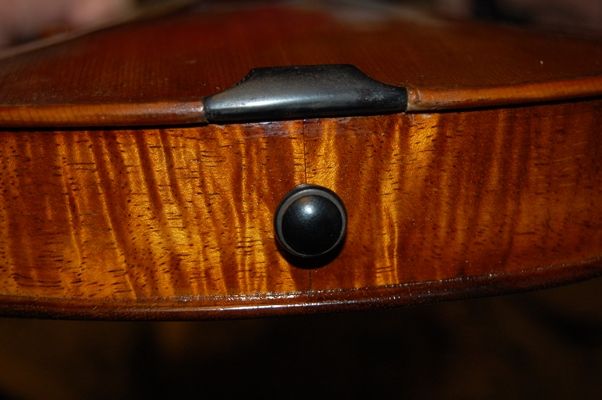
Another view of the saddle and endpin. (Pretty ribs, huh?) Varnish touch-up still has to happen.
Pegs
The next issue was the pegs. I wanted them done before I installed the fingerboard, simply because I wanted to be able to set the instrument aside so that the glue under the fingerboard could dry, and not feel that I was being prevented from working.
I had earlier drilled pilot holes in the pegbox, so that I would have guides to help keep the holes perpendicular to the centerline. So I reamed out those holes, all to approximately the same size, using the same reamer (1:30 taper) as I used for the endpin.
Then I sliced a shallow groove next to the collar, on each peg, all the way around, using a very fine razor-saw, to avoid breaking off the collar. (Doesn’t always work, but it seems to help.) I shaved the pegs until they fit the holes, at nearly the right depth, then “greased ’em up” with peg dope, and worked them in, so that the holes and pegs fit perfectly. Later I trimmed off the excess length of each peg on the far side of the pegbox, domed and polished the cut ends, so they would look nice, and put the pegs back in place.
Saddle and pegs installed.
Fingerboard Installation
Last, I installed the fingerboard…I had marked ahead of time the exact location where the nut and fingerboard were to meet; so now, all I have to do is put the fingerboard exactly where it was before (against that line) and glue it in place. I positioned it using a single spring clamp and aligned the upper end as closely as I could, then aligned the lower end as well, and added a large spring clamp in that location. Finally, I re-adjusted the upper and lower clamps until both ends were perfect.
Then I removed the lower clamp, and, using a thin palette knife, I ladled hot hide glue into the space between the neck and fingerboard, sliding the blade up the neck as far as it would comfortably go, and replaced that clamp so that it squeezed out hot hide glue all around. I cleaned up the excess quickly, and double checked to make sure that the position was again perfect.
Then I removed the upper clamp, and repeated the gluing routine, but this time, as I cleaned up, I kept adding more clamps, removing a previous one, and wiping carefully, until I had four clamps in place and no glue drops where they did not belong.
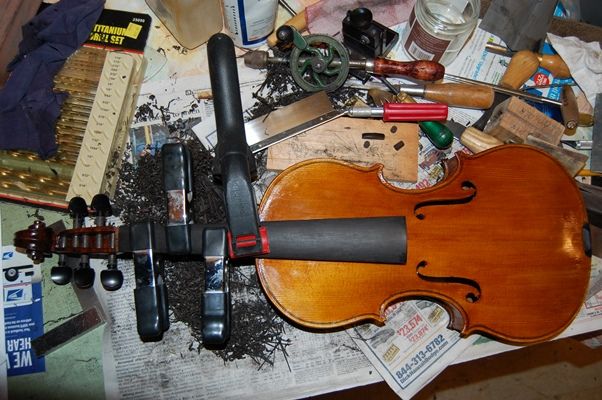
Fingerboard installed with hot hide glue and spring clamps.
That was pretty much the end of the day. My hands were tired and hurting, and I had other things that needed to be done. Much later, I got back and removed the clamps:
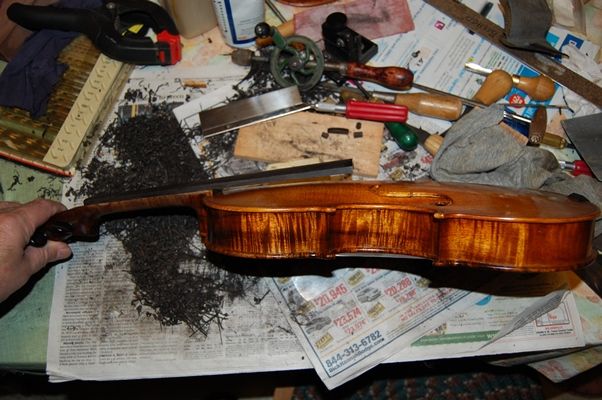
Side view with fittings.
Back view with fittings.
The nut will have to wait until the fingerboard has been planed and scraped to exactly the right curvature, and polished smooth. We call that “dressing” the fingerboard.
After that it will be “set-up” time.
My next post will show the finished fiddle, strings and all.
Thanks for looking.
If you found this post helpful, please share with your friends!

 Follow