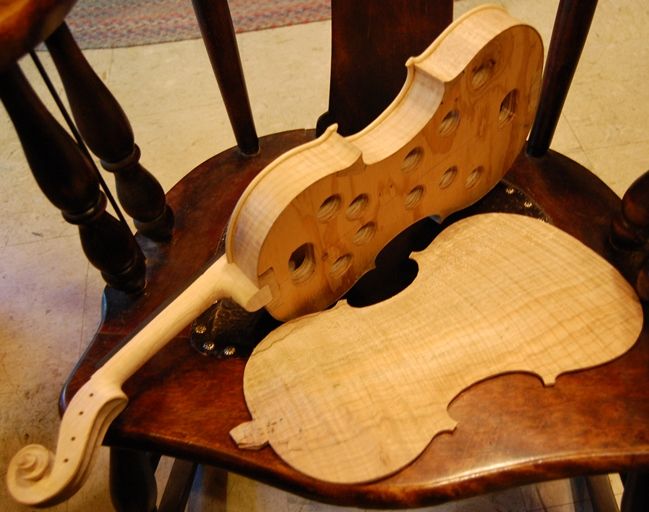
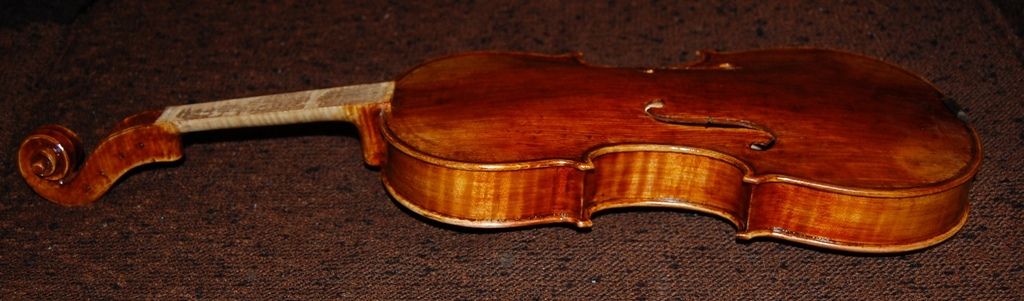
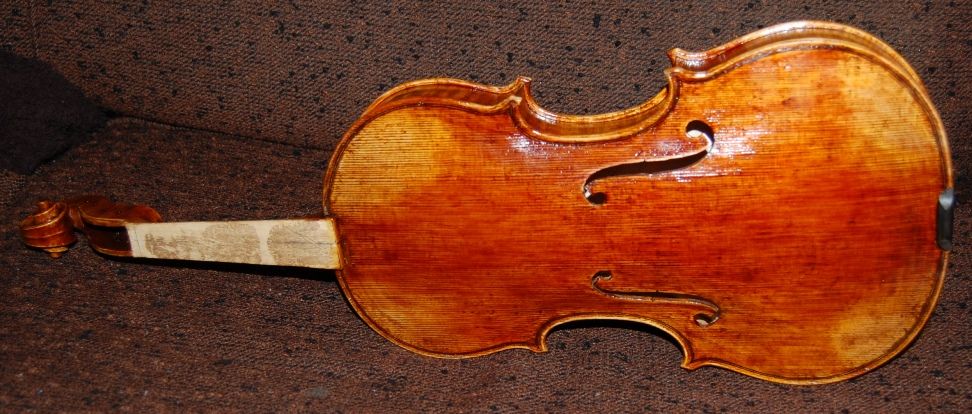
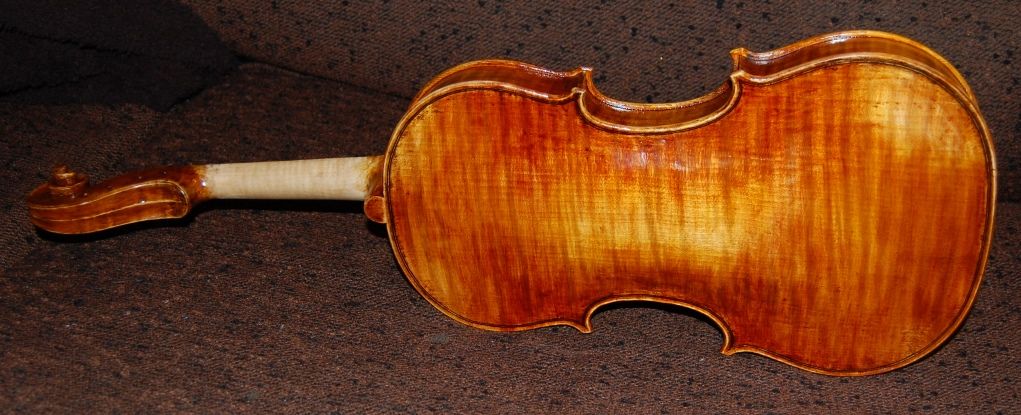
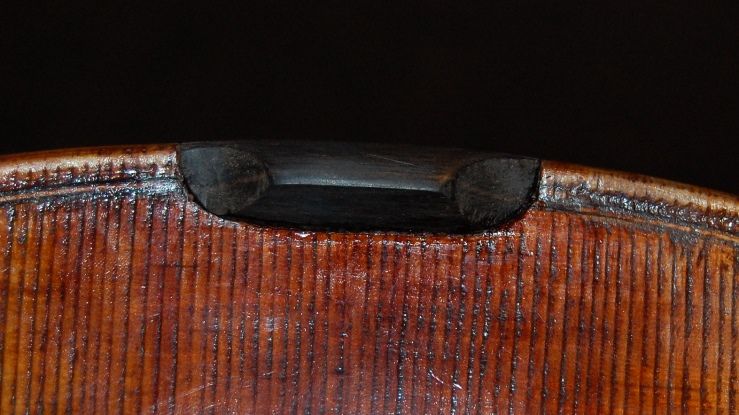
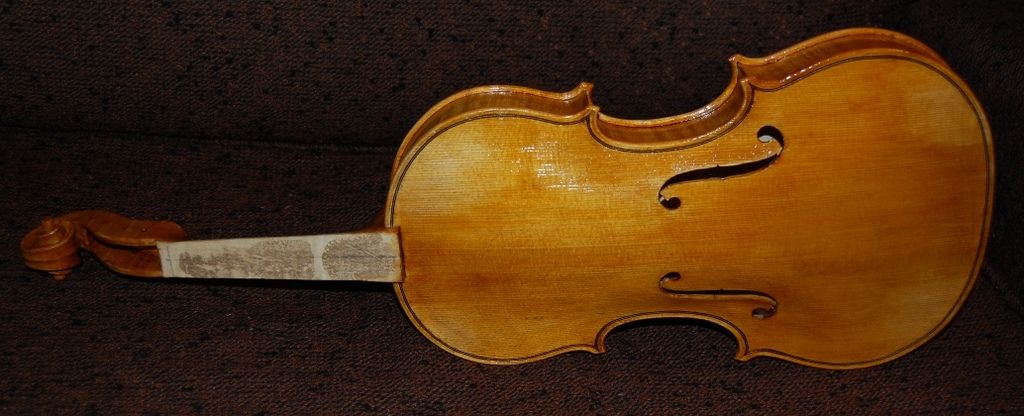
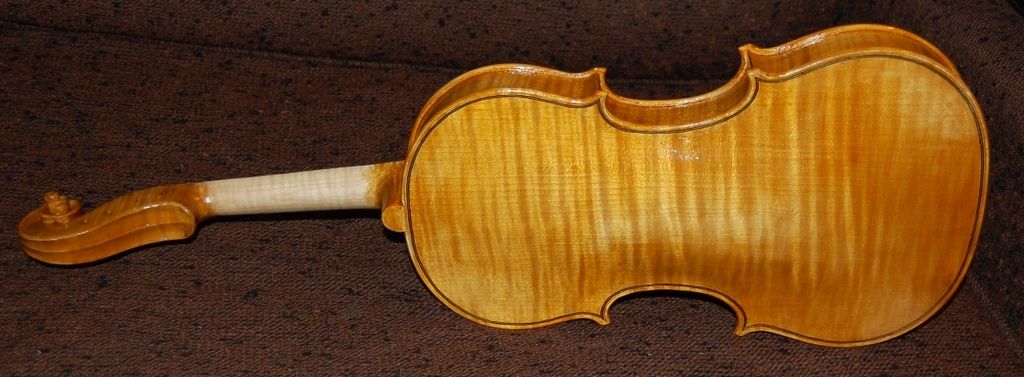
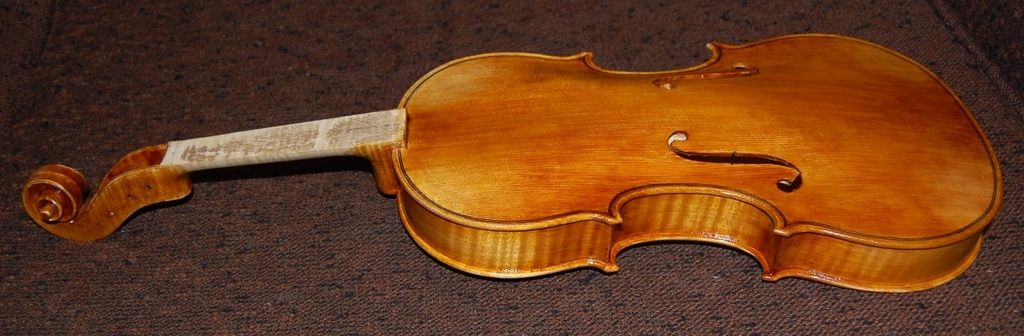
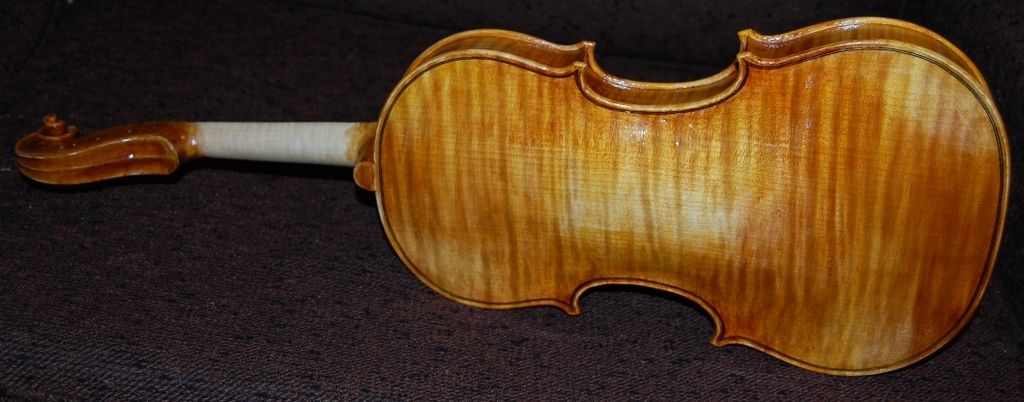
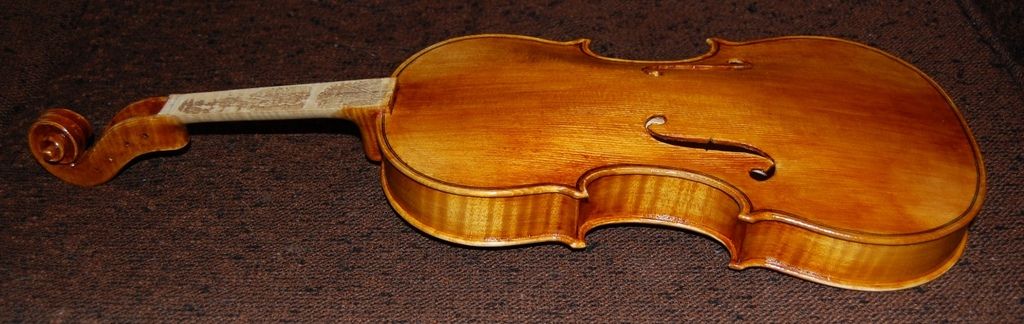
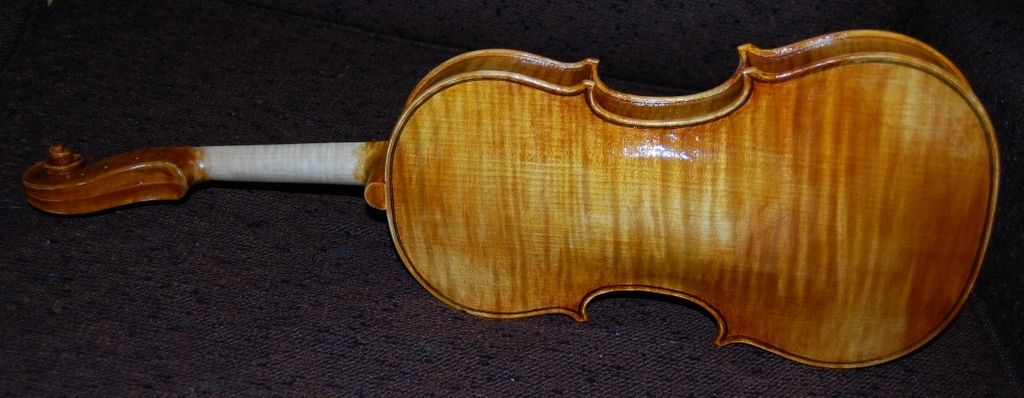
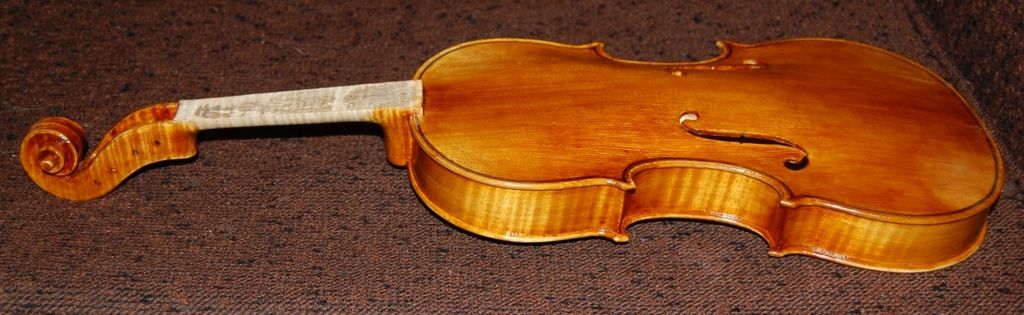
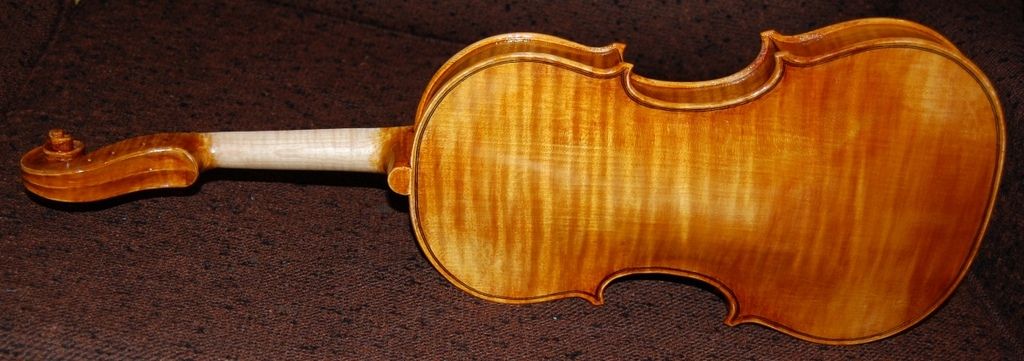
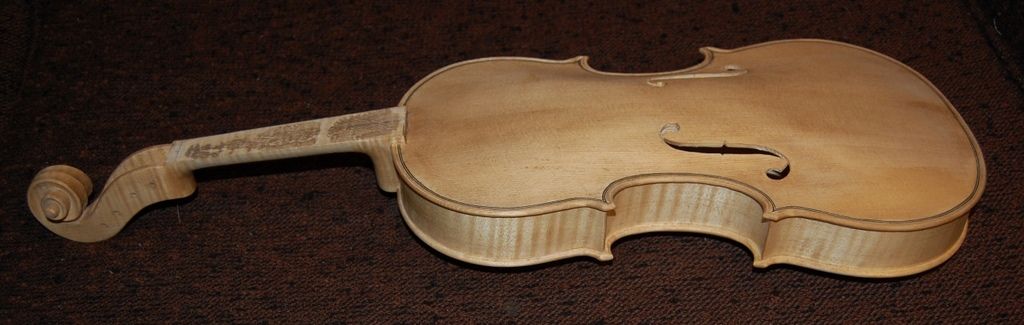
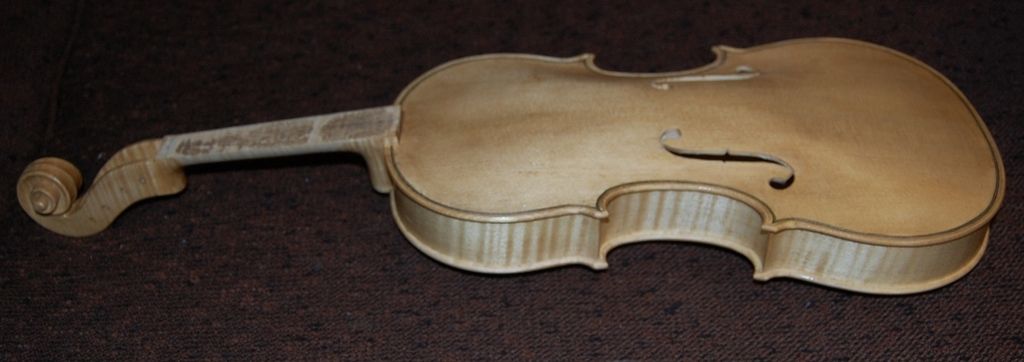
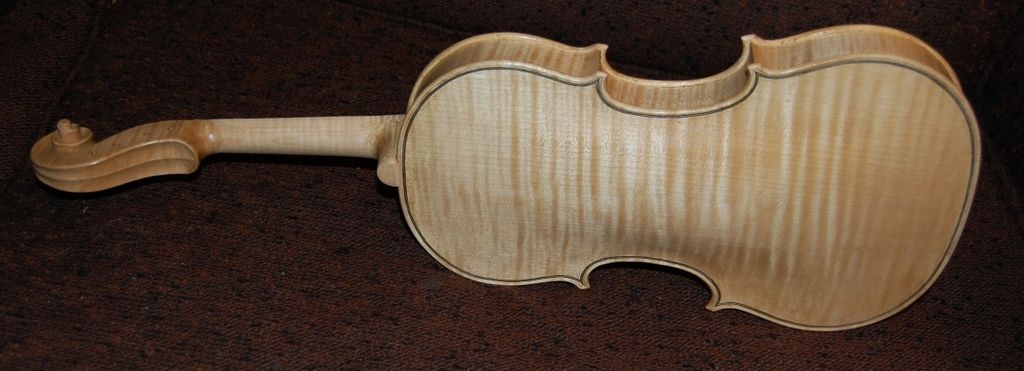
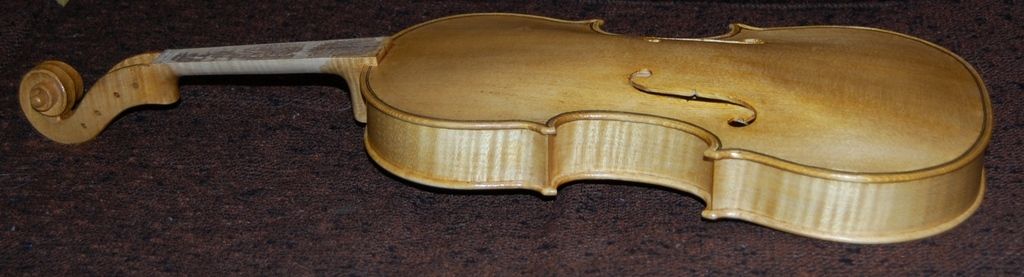
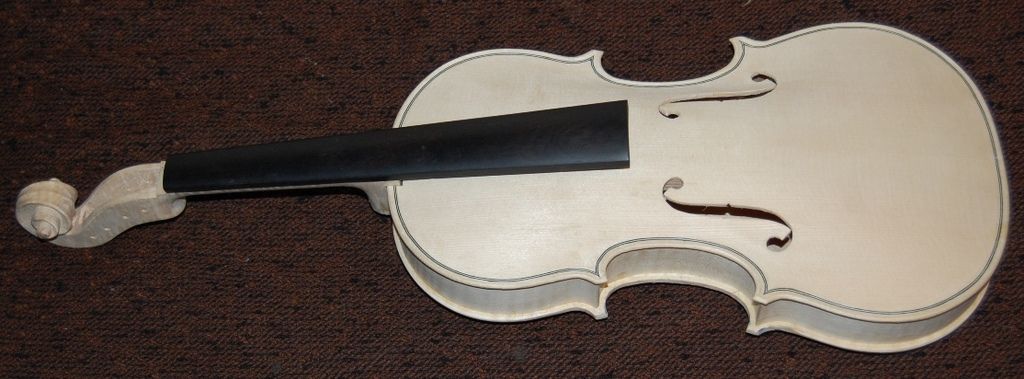
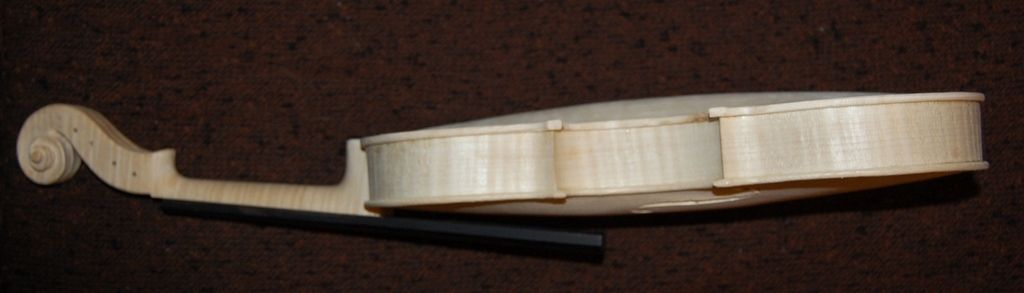
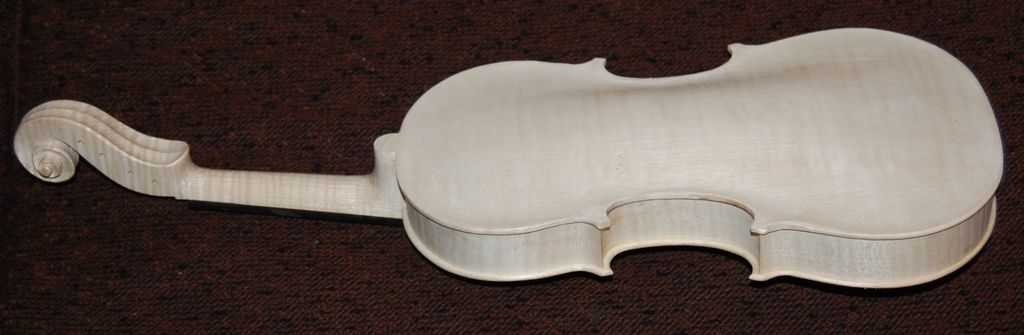
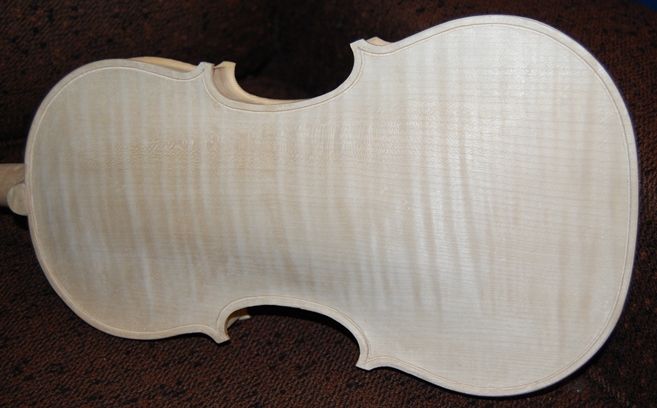
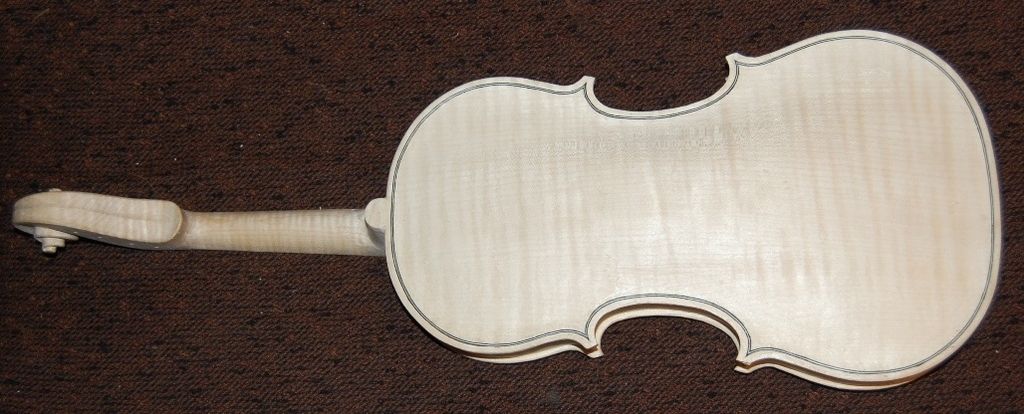
When we last looked, I was ready to remove the mold but had not yet done so.
Ready to remove the mold.
Removal of this sort of mold (French style) is very simple: I insert a tool (parting knife, usually) between each block and the mold, to break the glue that had secured the molds to the blocks, then I just gently lift the mold straight out.
Installing the Back Linings
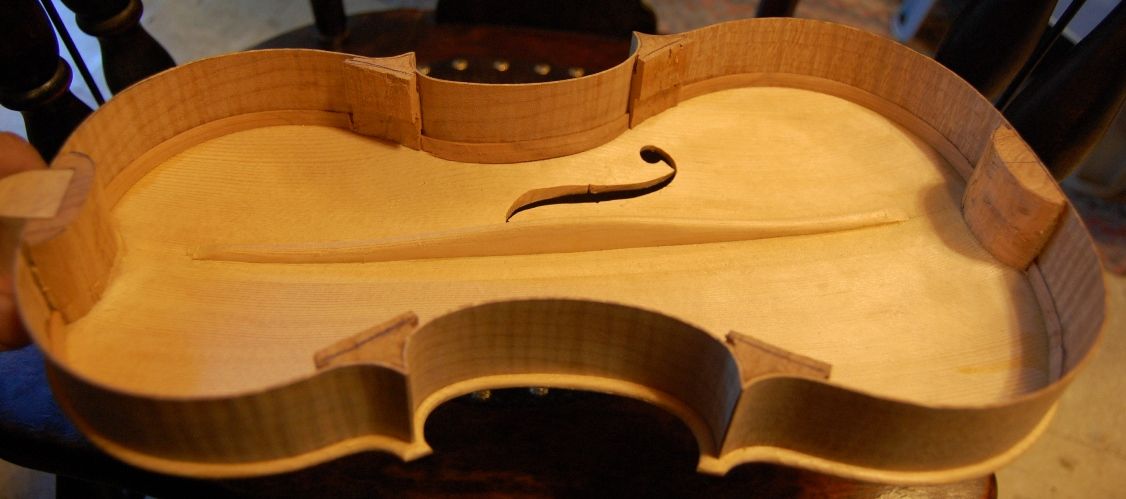
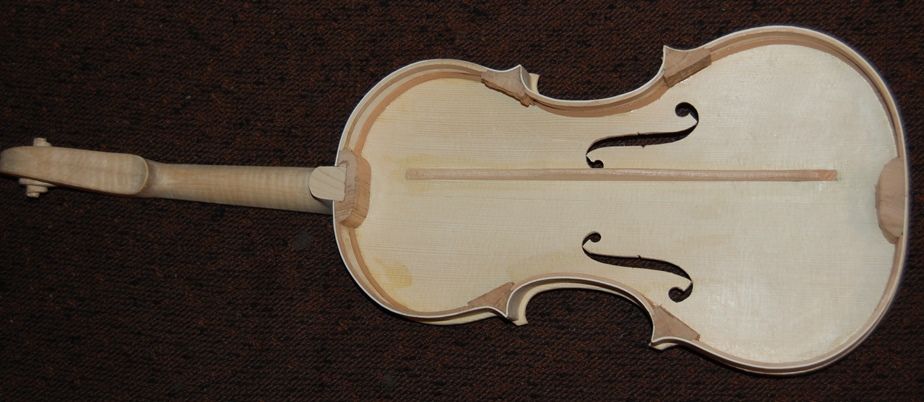
So, here is the viola body with the mold freshly removed:
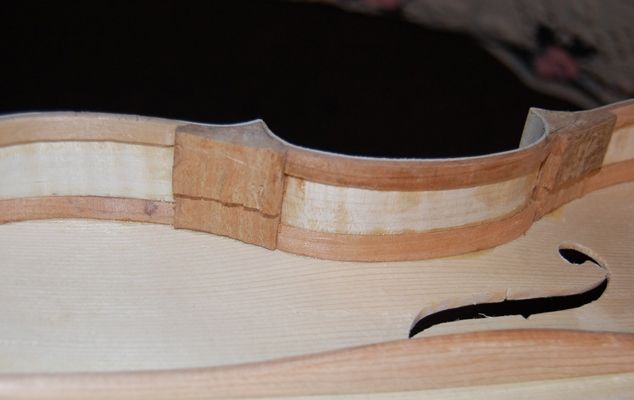
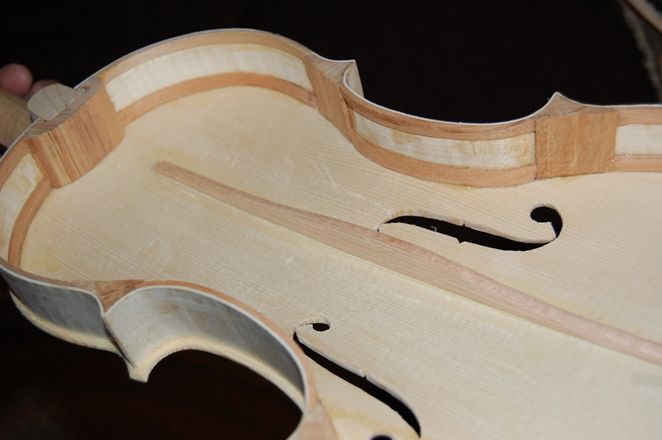
The mold is gone, but the linings are not yet in place, and the blocks are still not shaped.
The viola still needed the back linings, so, I cut a tiny mortise in each side of each block, to receive the linings, bent the linings to shape, and installed the linings.
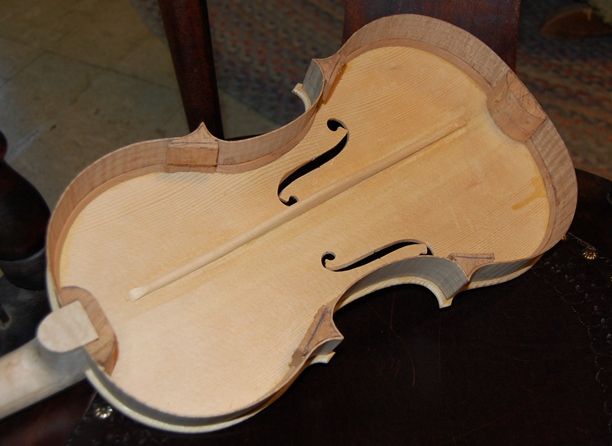
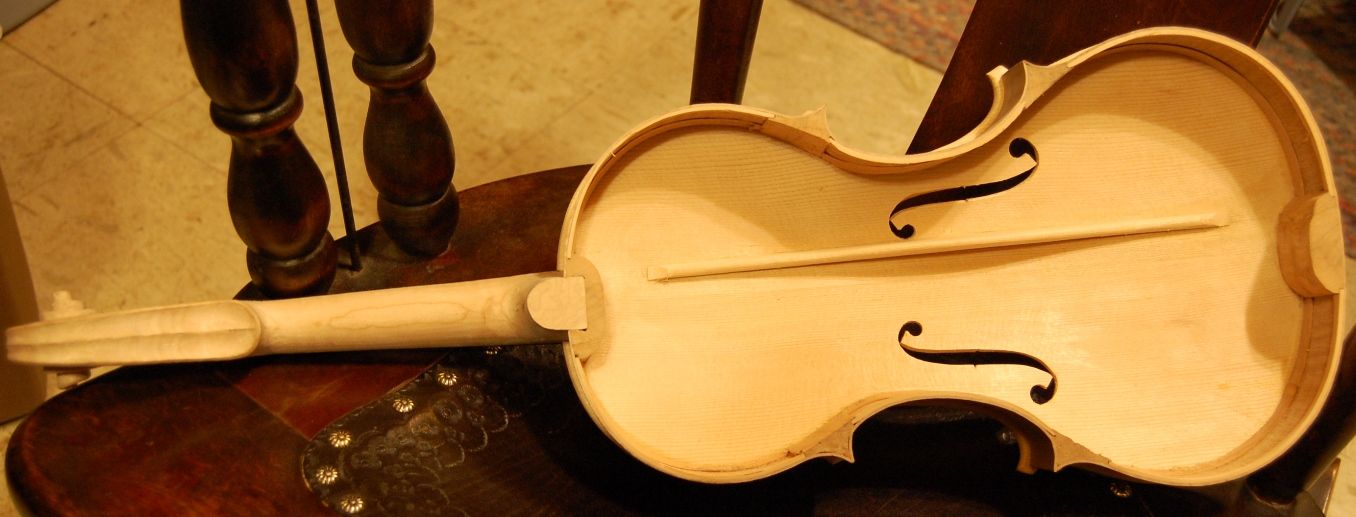
Here’s that side view of the completed bassbar that I promised a week or so ago. You can see the two mortises in each block, prepared for the back linings.
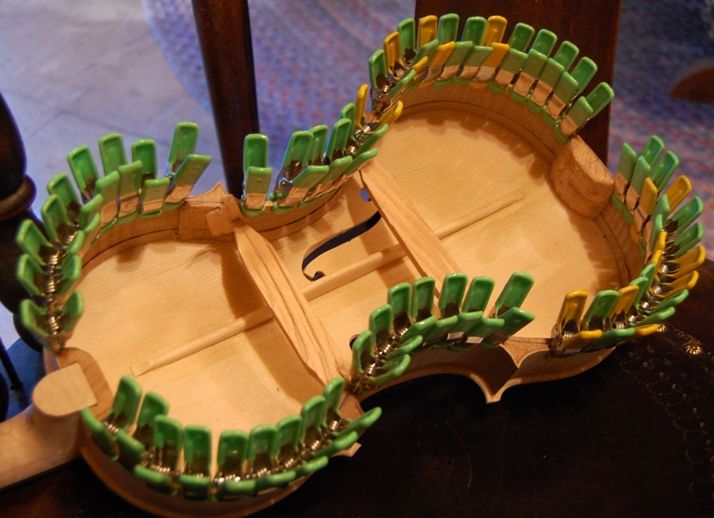
Linings installed, using hot hide glue and lots of clamps. Those braces were just temporary insurance that the garland would stay the same shape.
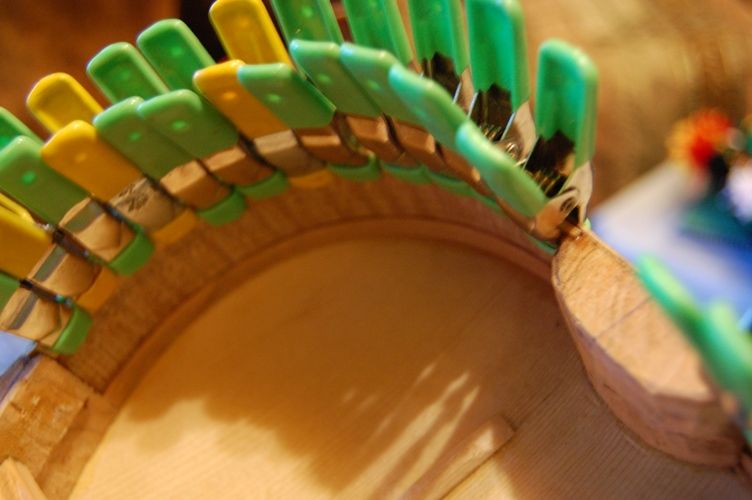
Closeup view of clamps and linings.
Shaping the Blocks and Linings
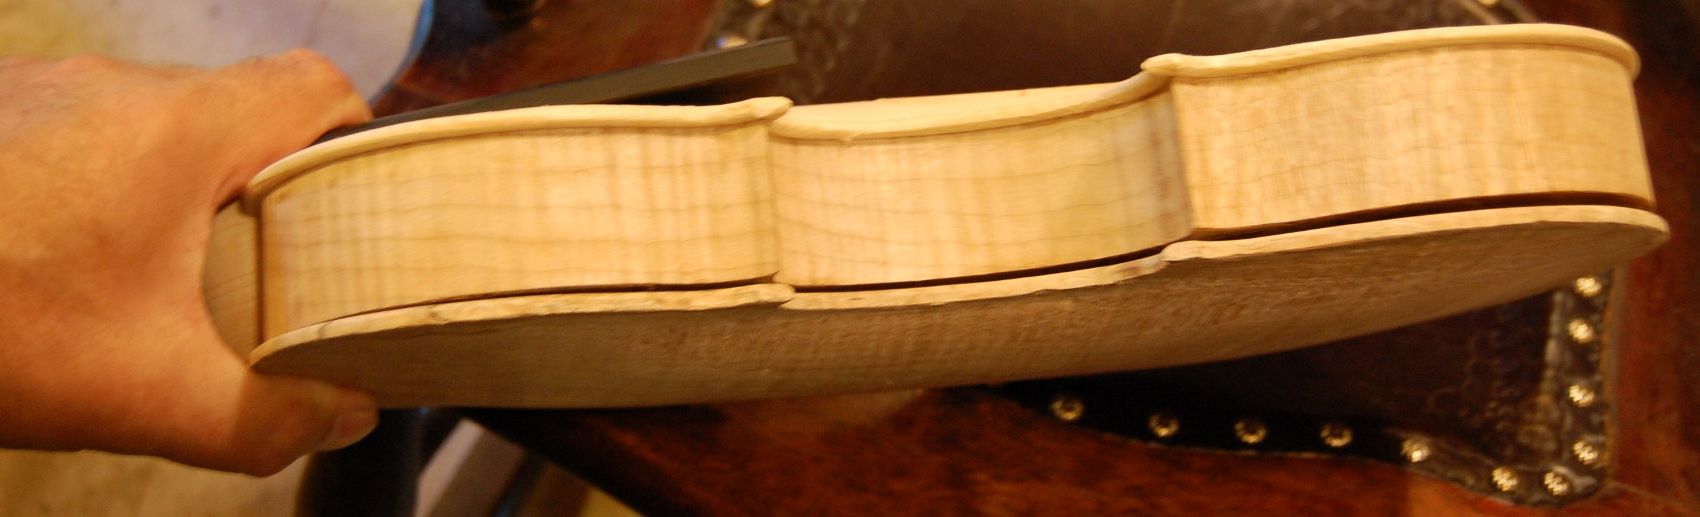
After the glue dried, I removed the clamps and shaped the linings and blocks. I carved the linings to a smooth taper, and scraped them to a clean, smooth curve. I sanded all of the inside to remove splinters, etc. I also leveled the back of the garland and the heel of the neck before moving on. It had to be dead flat and smooth:
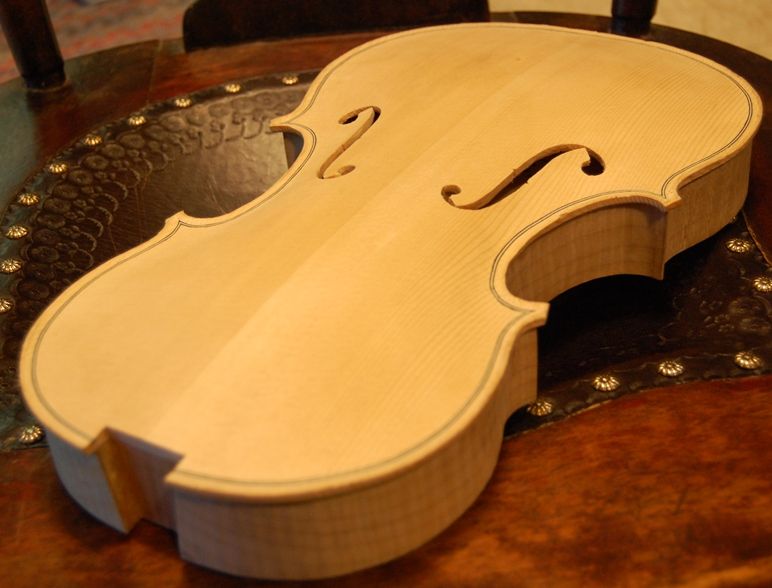
So, there it is, ready for the back plate to be installed.
Installing the Back Plate
While the glue was drying, I had installed the label on the inside surface of the back plate, located so that it will be visible through the bass side f-hole. (Forgot to take a picture…sorry.)
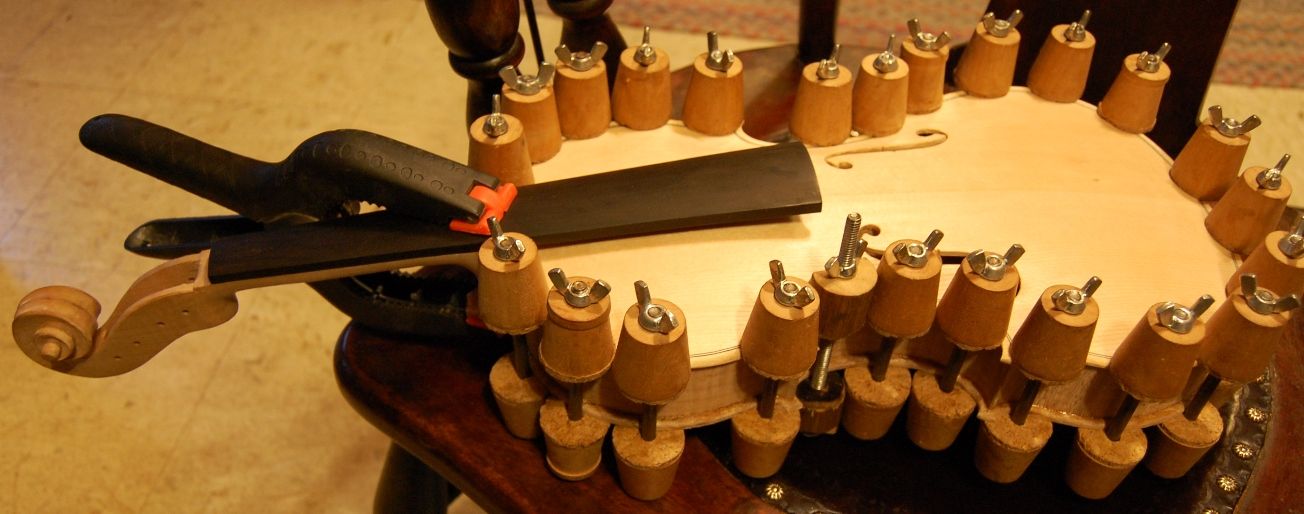
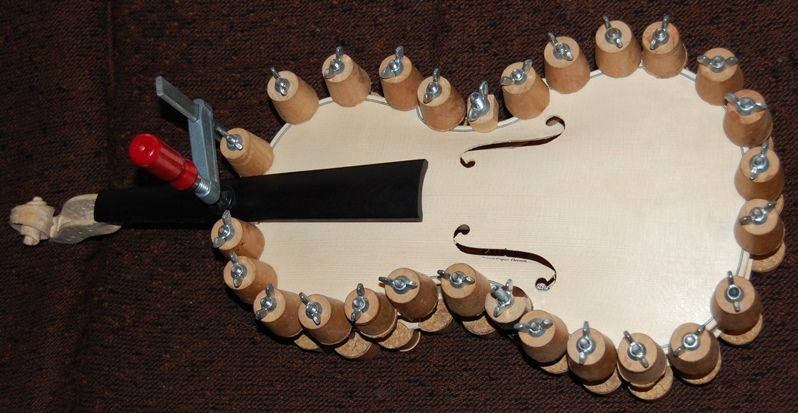
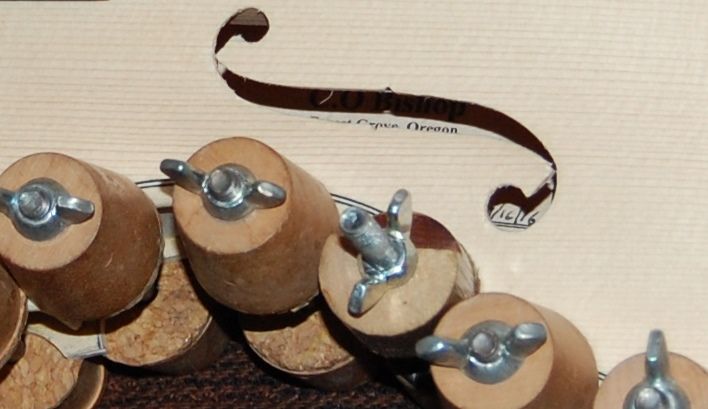
Once all was ready, I clamped the back plate in place, dry; then, using a thin-bladed palette knife, I inserted hot hide glue all around the perimeter; quite liberally at each of the six blocks, and clamped it up tightly. The last clamp to be applied was the neck block clamp. I checked the angle of the neck one last time before adding still more glue under the button, and adding that clamp. But here it is, all clamped and drying. My wife always says the clamps look like old-fashioned hair-curlers. (Yeah, I remember those things….)
These spool clamps were given to me by my friend and mentor Jake Jelley. I don’t know whether he made them himself, but they are definitely handmade, and they work very well.
I will try to get the back purfling done this weekend. Then we will be on the home stretch.
Thanks for looking.
If you found this post helpful, please share with your friends!
As I work by myself, I frequently fail to take pictures. I did take a few, though. (If you are impatient, you can scroll down and peek at them.)
F-holes Cut Out
I used a special tool to begin the cutting out progress: It is called an “f-hole drill”, but all it really amounts to is a specialized twin-blade hole-cutter. My children bought it for me, one year, and it has been a wonderful tool. In the first place, obviously, it is a time saver, but the biggest difference is that I can now make the upper and lower eyes of my f-holes perfectly round, to begin with, and work any special shaping in, starting from the already round holes.
I remove the waste wood from the uprights of my f-holes with a small sharp knife—many makers use a saw, and I have done so as well, but I eventually reverted to the knife. Just personal preference, I suppose.
Bass Bar
Once the f-holes are cut out and close to perfect (always allowing for later nit-picking), I install the bass bar. The bass bar is a gently-arched brace supporting the bass-side foot of the bridge. Guitars have a whole collection of similar bracing, supporting what amounts to a nearly flat (and very thin) plate. The violin family instruments depend primarily upon the compound curves of the arching to supply strength, and only need the one brace to support the bass-side bridge-foot. The other side of the bridge is supported by the soundpost, which, while it is not directly under the treble-side bridge-foot, it is very close to it, and is in a location on the treble side matching the lateral position of the bass-bar on the bass side.
I lay out the position of the bass-bar, and then use a compass to transfer the shape of the inside of the front plate to the bass-bar blank. Then I use a knife to remove most of the waste-wood, and begin checking the results against the inside curve of the front plate. When the fit is getting close to correct…close enough that it is becoming difficult to see what needs to change…I apply a strip of paper-gauze adhesive tape (available in pharmacies) to the inside of the plate, covering the bass-bar position, and I rub blue chalk into the tape. I happen to use a product sold as “sidewalk chalk;” they are big sticks of chalk, and supposedly are easy to wash off of sidewalks. But they work well for me, and the blue is high-enough contrast that I can see it easily.
I press the nearly correctly-shaped bass-bar into the chalked tape, and check to see where the chalk transferred. I cut, plane or scrape just the chalked places from the bass-bar, repeating until, finally, when I press the bar into the tape, the whole thing comes up lightly coated with chalk. Then I remove the tape, clean off any remaining chalk from both pieces of wood, and install the bass-bar, using hot hide glue and clamps. I have a specialized set of wooden clamps made for this task.
When the bass bar glue is completely dry, I remove the clamps and trim the bar to the desired shape. I make my bars a little higher than most luthiers do, in the center, but tapering to about 5-6mm high for the last few centimeters of both ends. (I will take some pictures after I remove the inside mold, so you can see the final shape.)
Edge Preparation
It is much easier to do the inside edge-work if I do it before I install the plate on the garland. So, I use a tiny finger-plane, along with round and flat files, to round the inner edge of the plate, all the way around the perimeter. I may have to do a little correction later, but I want it as close to perfect as is possible, before gluing the plate to the garland.
Installing the Front Plate
I line up the plate on the garland as accurately as I can, matching the center-line of the plate to the centerline of the garland, and then use spool-clamps to hold it in place. I was originally taught to use tiny pins to assure good placement, but eventually discontinued the practice. We know for a fact that the old masters did this, as we can see the remnants of those wooden pins in their violins, still today. Perhaps I will eventually resume using pins. For now, I do not.
Once I have the plate perfectly aligned and securely clamped, using a very thin palette knife, I slip hot hide-glue into the joint between plate and garland, and then add more spool clamps to draw the joint closed. This is a very “stress-free” way to glue plates in place. I used to experience near-panic every time I installed a plate, racing to clamp the joint before the glue gelled, but now it is a very easy and relaxed task.
Purfling
As you may remember, I have not yet installed the purfling. I wait until the plate is on the garland before purfling nowadays, because the purfling “locks-in” the location of the plate edge, and I have had problems in the past with the rib garland changing shape a little, between my tracing the plate and trying to install it. so, after gluing the plate to the garland, the first step is to double check my over-hangs, to see that they are all pretty close to the same. If I need to change them, I do so: I am free to adjust the shape of the plate to match the garland again. When the overhangs are all acceptable, I begin purfling.
Purfling is fairly simple-sounding:
mark the groove location
cut the groove,
fit the purfling,
glue the purfling,
mark the edge crest, and
cut the channel.
It sounds easy, but I still find it a hard job to do perfectly. I want my miters perfect, my bee-stings clean and sharp, and all my borders parallel. This is my 30th instrument from scratch, and I am still finding it to be challenging. Guess I am a slow learner. 🙂
Cutting the Channel
Before I begin cutting the channel I use a compass to mark a line all the way around the instrument, 1.6 mm in from the outer edge. Then, using a sharp, curved gouge, I cut my channel to that edge crest line, trying to cut the whole channel to intersect the surface of the purfling and that pencil line.
Fairing in the Channel to the Arching
Once I have the purfling completed and the channel cut, I still have to fair-in the surface of the rest of the plate to match the curvature of the channel. I do not want there to be any sudden changes; humps and hollows catch the eye of the person looking, and call into question the skill of the maker. (Besides, I think they are ugly….) I use a very sharp finger-plane to begin shaping the surface of the plate and approximating the final curves I want. Finally I use sharp scrapers to bring the curvature of the whole plate to its final shape. I use a low-angle light to cast shadows from any humps or hollows, so that I can spot them and scrape them away. At this point, the scraper has to be sharp, and I have to use a gentle touch. The changes I am making are frequently much thinner than a piece of paper.
Outer Edgework
After the whole plate is the shape I want, the last task is to shape the outer edge. I begin by using a tiny finger-plane to take the outer corners down at a 45 degree angle, then use half-round files to shape the edge all the way around, bringing the curve of the outer edge up to just intersect the edge-crest line I established earlier. I get it as smooth and even as I can, using a file, but I know when I stain the wood with coffee, it will raise the grain terribly along these edges, so I will eventually re-smooth all of them, using abrasive paper of some sort. In this particular case, I did the outer edgework after setting the neck. No special reason…that is just what I did.
Neck Set
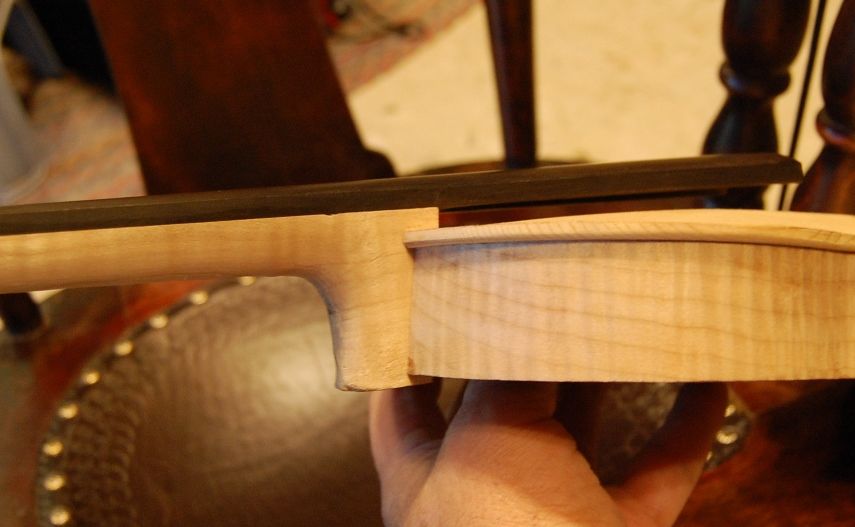
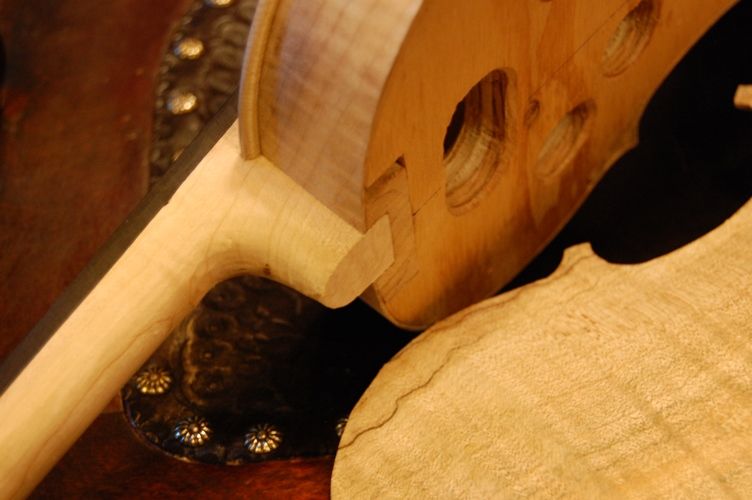
I measure carefully, and cut the tapered mortise using a razor-saw, then use a sharp chisel to remove the waste wood of the mortise. If I do the job correctly, it works very well. I check the sides and bottom to the mortise to see that they are flat and straight, then begin attempting to fit the neck. I have already joined the fingerboard to the neck and have shaped the heel where it will join the neck-block. So, from this point forward, all the shaping and adjustment will be done to the mortise, not the neck. When I am satisfied that the fit is correct, the neck will have to be centered. straight with the centerline of the front plate, straight with the centerline of the end block (not twisted at all), and at the correct angle to place the end of the fingerboard at the right height. Also, of course, the neck has to be set so that the distance from the nut to the edge of the front plate is correct. I check and re-check, until everything works correctly. Since I set the neck before installing the back plate, I want the heel of the neck to protrude past the back end of the neck-block. I will plane it flush after the glue is dry.
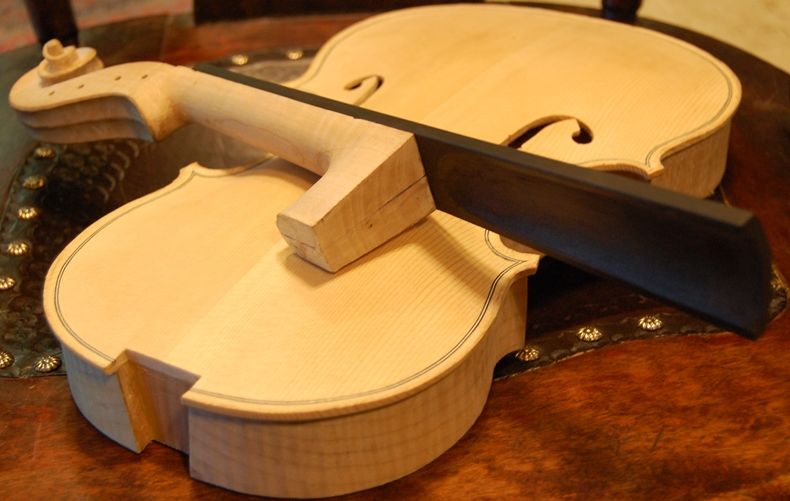
Here is the completed mortise, cut for the neck. The outer edgework has yet to be completed. You can see the edge-crest marks.
The mortise is complete, and I am ready to set the neck.
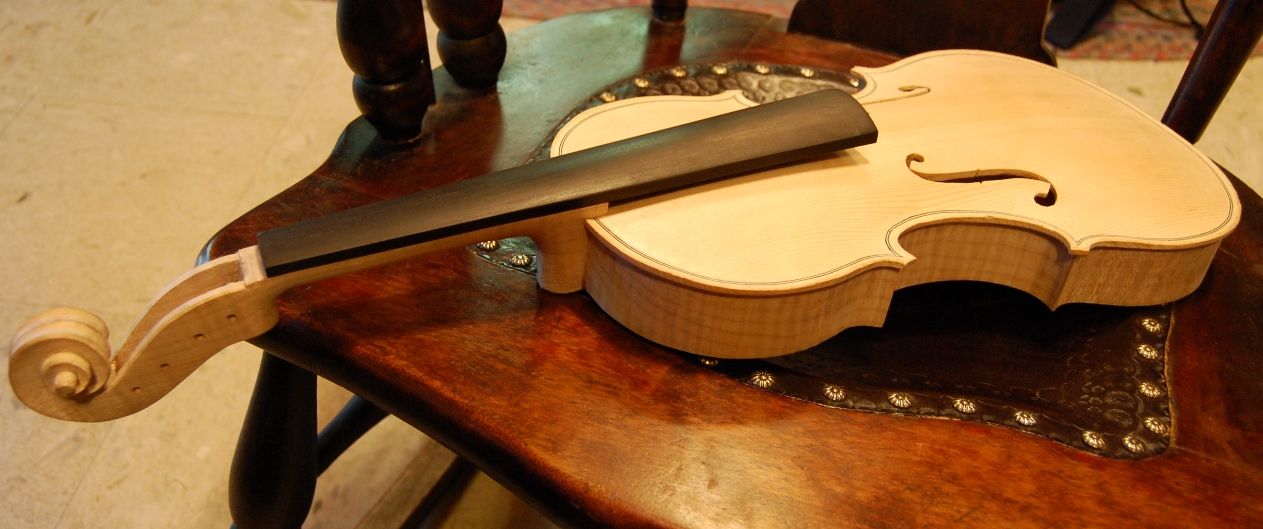
There is the dry-fit neck set. Notice the overhang of the heel of the neck beyond the neck-block. That will be planed off after the glue is dry.
So there is the dry-fit assembly. It is starting to look like a viola!
When every measurement is correct simultneously, and the fit is tight, I remove the neck one last time and slather hot hide glue into the neck mortise. Immediately I jam the neck into place, and quickly check all those measurements again. Bingo! They are all correct, and I can relax while the glue dries! Once the glue is dry, I plane off the neck heel overhang, flush with the neck-block.
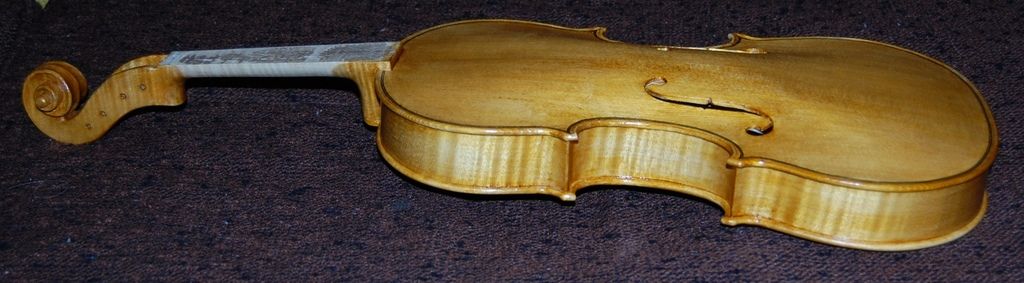
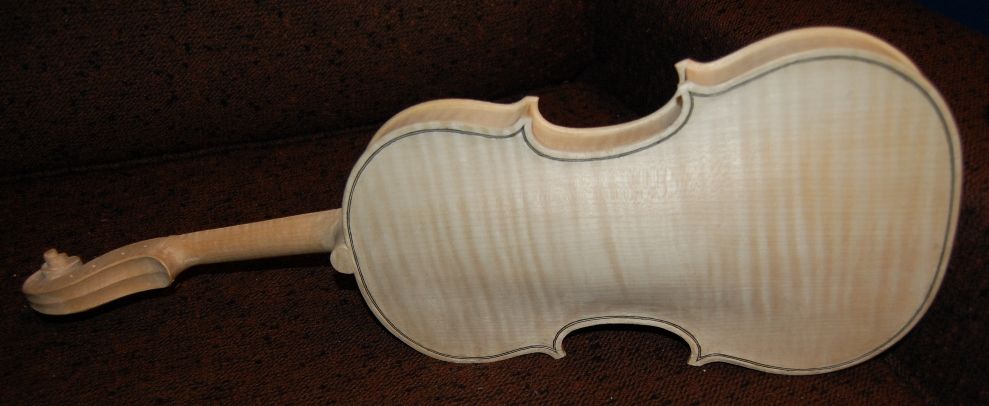
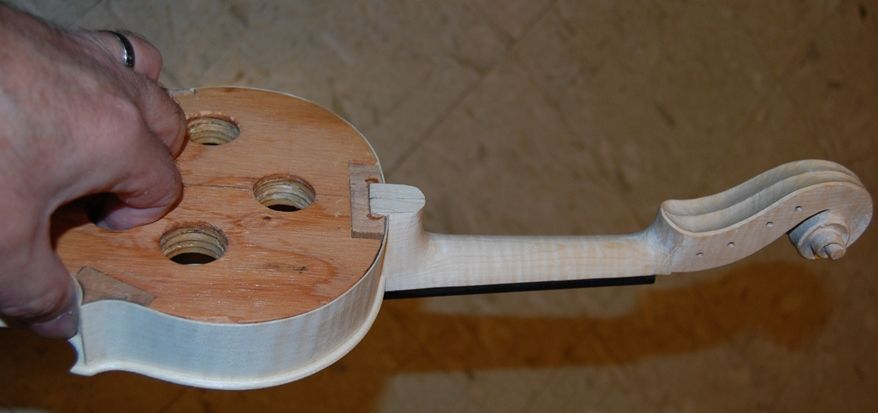
The glue is dry, and the neck-heel overhang has been planed flush with the neck block. I am ready to remove the mold.
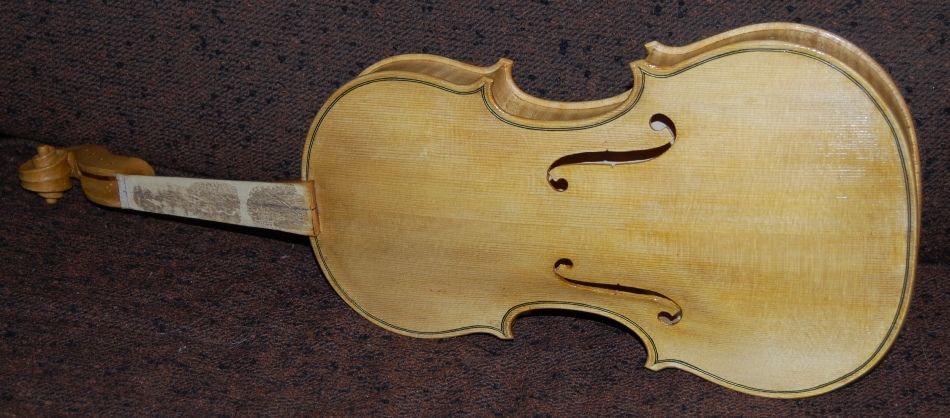
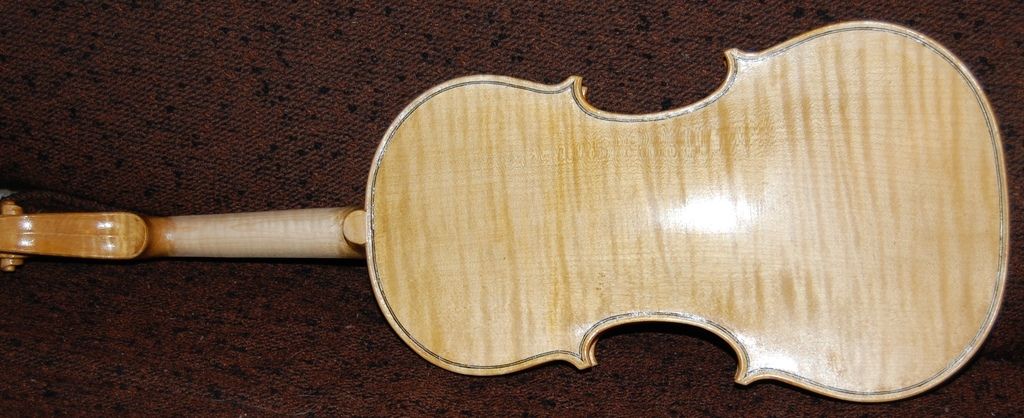
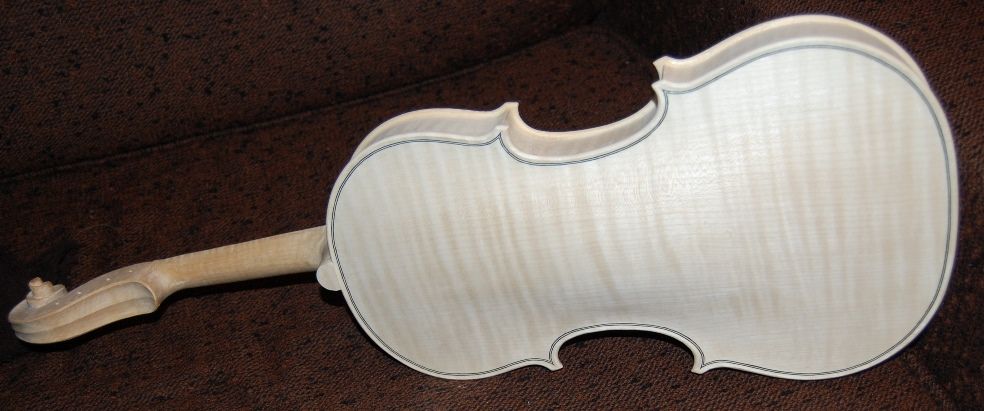
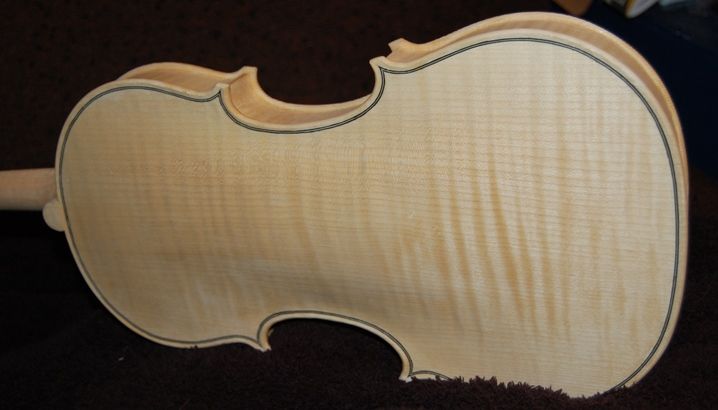
In this picture, I have filed the outer edge curvature already, and, though you can’t see it in this photo, I have also completed the graduations on the back plate, and have filed its inner edges, so it is ready to install. But; before I can do that, I have to remove the mold and add the back linings.
Ready to remove the mold.
Dreaming of the next step!
I am getting tired, though, and have some other things that need doing, so the viola will have to wait until another day to move any further toward completion.
Thanks for looking.
If you found this post helpful, please share with your friends!
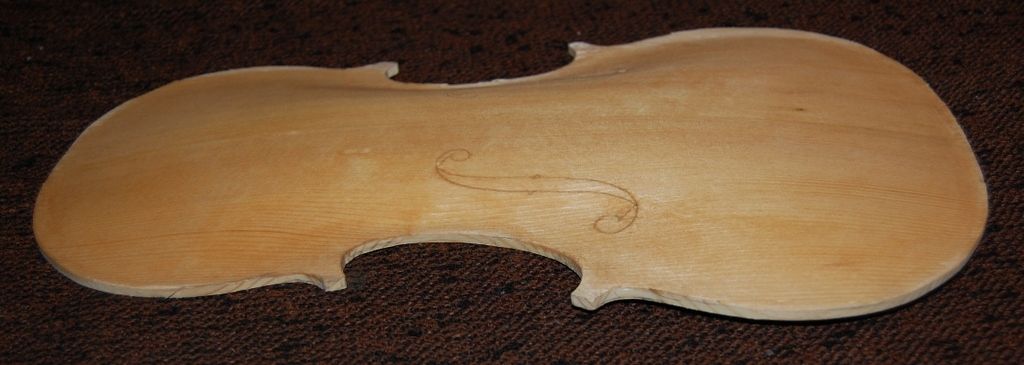
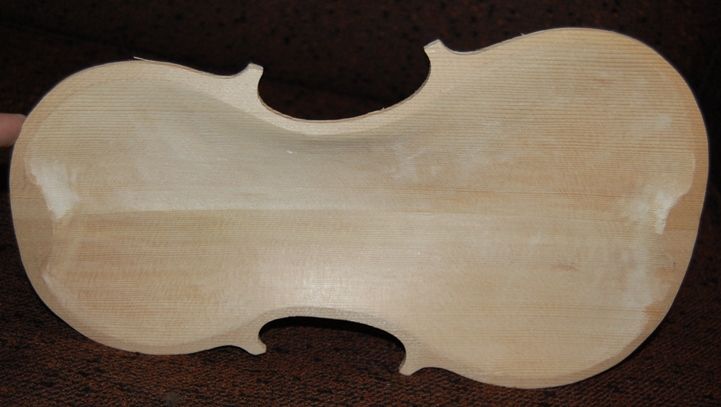
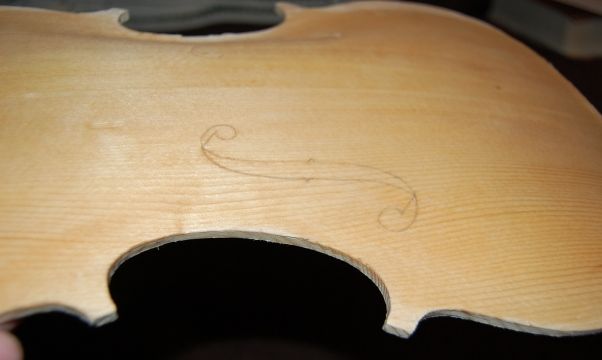
The outside arching for the front plate is essentially complete, though there will be a lot of scraping, later on. I began the graduation (inside arching) of the front plate about the same time as I took off and “sprinted for the finish line” with the “Plowden” Guarneri-model violin (see recent posts), but all I accomplished was that the center of the plate is about the right thickness– everywhere else it was still way too thick.
So! Back to work! You can see (below) that the f-holes have been laid out and deeply incised, which allowed me to accomplish the last stage of the front arching (explained in an earlier post.) Now I need to carefully carve away the interior, until all the plate is the thickness I want it to be…which varies by region, all over the plate. I have to be very careful to check certain areas with a caliper before I begin to carve, or I may easily go too far and make the plate too thin. (Voice of sad experience….) The area around the lower ends of the f-holes are very likely victims of this error, so I try to check regularly, and avoid carving away too much in those areas, especially.
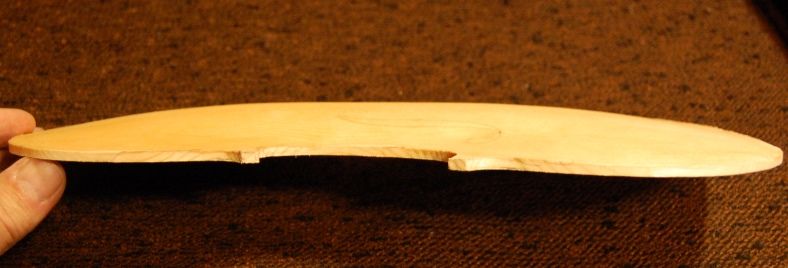
The outer arching of the small viola is complete, not counting the purfling channel.
Side view of the small viola’s arching, before purfling and edgework is done.
Inside arching of the small viola. The Graduation is complete. Next, I need to cut out the f-holes, and add the bass-bar. I do realize the corners are too long…I will trim them later.
Coffee Stain
One thing I decided on this instrument was that I should begin the coffee staining very early, so that, ifthere is any distortion, due to the wetting of the wood, I can correct it before the plates go on the garland. In this photo, it is hard to see how much the grain is raised, but, those wide summer grains of the Sitka Spruce are all swelled up like corduroy!
Accentuated grain lines, due to coffee stain.
I will let it dry, and then gently scrape it smooth again. The issue, here, is that the summer grain swells more than the winter reeds, but when we scrape the wood, the summer reeds compress, while the winter reeds resist the blade and are cut away. The result is that the summer reeds are already raised, even before I wet it down and deliberately raise the grain, before leveling it again.
Things remaining:
When the plate is nearly perfect all over, I will finish cutting out the f-holes, and finish their edges as well as I can. I nearly always see something later that I have missed, so I just accept the fact that I will be making corrections right up until the time I begin varnishing. The same thing applies to the scroll. It will never be “perfect”, and I accept that.
I will lay out and fit the bass-bar, trying for an air-tight fit between the bass bar and the inside of the front plate. I install it using hot hide glue and clamps, but will trim it to the proper shape after the glue is dry.
After the bass-bar is fully completed, I round the inner edges of the front plate, so that it is ready to install on the garland.
Post Script:
All of the above was accomplished three weeks ago, before we left on vacation, so it should have been published then, too…but I kept thinking I would get a little more done before we left, so it simply did not happen.
We are back, and progress is once again happening, so I will post more in a day or two.
Thanks for looking.
If you found this post helpful, please share with your friends!
Probably some people don’t consider all of this to be “set-up”, though I usually think of it that way. “Set-up” usually means taking a fully completed violin, made by someone else, and:
dressing the fingerboard if needed
adjusting the string height at the nut
Fitting the bridge to the corpus, and cutting the height to set the string height over the fingerboard
Treating the pegs, if needed (Some are very dry and need “peg dope” as a stiff lubricant)
fitting the soundpost, or adjusting it, if it is already there
adjusting the tailgut, to achieve the correct afterlength between bridge and tailpiece
installing strings
checking the string height over the end of the fingerboard, and adjusting as needed (by adjusting the bridge height)
balancing the tone by adjusting the soundpost position
(sometimes) installing a chin-rest (if it wasn’t in place already)
final check by playing
But, as a builder, once the varnishing is done, all the rest of it feels like “set-up” to me. So, I am usually thinking of:
fitting and installing the endpin
installing and trimming and polishing the saddle
installing and trimming and drilling the pegs
dressing the fingerboard to achieve the correct camber and contour
fitting, installing and dressing the nut, including string grooves
and then all the things listed above, for final set-up. So, to prevent confusion, I am going to call it “final assembly and set-up.”
Saddle and Endpin
I began by installing the saddle and endpin:
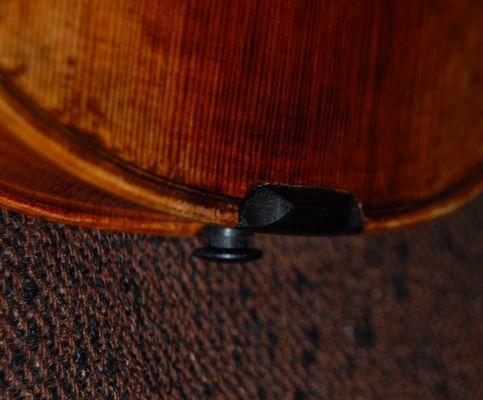
Saddle with endpin (sometimes called end button.)
Tuning Pegs
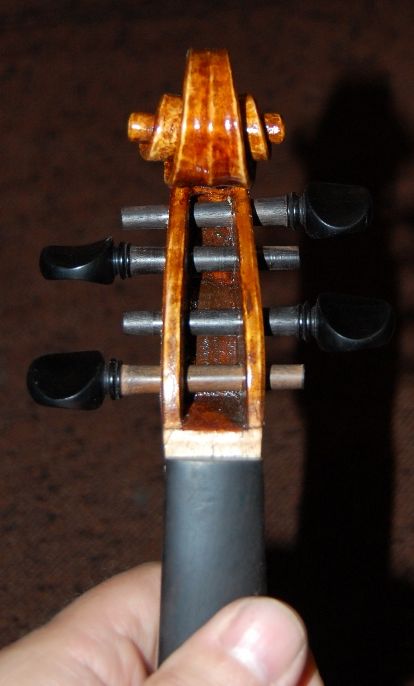
Then I drilled the peg holes, and reamed them to the correct (1:30) taper, and shaped the pegs to fit the holes at the correct depth. I lubricated the pegs with “peg dope” and worked them into their respective holes, pushing and turning vigorously, to make them seat well. I don’t want them to do a lot of “self-adjusting” later on, so that they drift dramatically deeper in the first few months after assembly. I want it to happen now, before I trim the pegs to length, and (especially) before I drill the string-holes. Otherwise I can end up with the string-holes up against the far wall of teh pegbox, instead of roughly centered. I do drill the holes (shown later) slightly closer to the gripped-end of the pegs, knowing that there will be some drift, but the idea is to avoid the drift as much as possible.
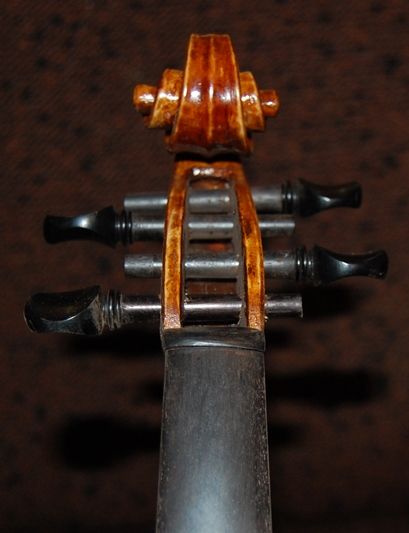
Pegs before trimming the length or drilling the string-holes. Notice that the one peg is a different color (sigh…).
Endangered Species of Hardwoods, and Alternative Wood Choices
It is sometimes frustrating to find that the ebony for the pegs is not always consistent in color: as Ebony becomes more scarce, the people making the fittings are less picky about the wood, and the sapwood for ebony is a tan-color. You can see a little stripe of it on the end of the “D” peg, where it will be cut off, but the whole “G” peg is the lighter wood. If it bothers me enough, I may either dye it or simply cut a new peg. Haven’t decided, yet. I will probably try dyeing it, first, to see how it looks, at least.
However, this raises another point: there are other woods that function well for fittings, so–why do we not use them? The main reason is customer demand. Everyone wants ebony, so, to satisfy the customers, we all buy ebony blanks from which to make the pegs. BUT! Some makers are branching out into other, more plentiful woods, such as Ipé. I have used Ipé a few times for fittings, but not for pegs. Though I do have a lathe, I have never tried making pegs myself: I always buy the blanks and turn then to the correct taper and diameter by hand, using a peg-shaver. Ipé blanks are not yet available. So…perhaps I need to try making some alternative-wood peg blanks myself. If some poor, underpaid child in Sri-lanka can do it, why not I? 🙂
The obvious alternative wood, for me, though, living here in Oregon, would be Oregon Mountain Mahogany. It is not terribly common, but is certainly not endangered, though it is usually not a very big tree. A friend gave me several small logs, cleared from some remote mountain property. I am drying it, gradually, and will attempt to use it sometime in the near future. It is a light-tan to medium brown color and is quite hard. I would certainly not be the first to try it, but the commercial pegmakers who turn them out on a lathe, one-by-one, want (rightly) a very high price for their work, so I have never bought any.
Meanwhile, as I mentioned earlier, Ipé is a readily available hardwood coming from Latin America, but so plentiful that they are selling it as decking material…to walk on! It is a pleasant, medium-dark brown, and quite hard. Oddly, though, the dust from sawing or sanding it is bright yellow.
Other options include Osage Orange (sometimes called hedge-apple, or Bois D’arc). It can be very hard, but it is a bright yellow-orange when freshly shaped, and, though it fades to a nice brown over a long time, I think I would have to accelerate that change in some way…I’m not impressed with the look, right now.
Another is Persimmon, which, ironically, though it is native to the United States, is in the same family as ebony. I have never used it for anything, nor have I even seen it, but I am told it can work well, and that it looks good too. I simply haven’t seen it.
So–I try to be responsible in my wood-choices, but the bottom line continues to be the bottom line. Eventually, the customers have to also agree, or I can’t sell my work. One time (once only) I made a fingerboard out of purple-heart: the prospective customer was not only not impressed, they were angry, as if I had tried to pull some sort of trick on them. Purple-heart is really bright purple when freshly shaped, but fades to a nice dark, red-brown with time and exposure to the air. But the couple who had been interested in a student instrument for their child were angry that I had made the fingerboard out of purple-heart, and I never saw them again. (Sigh…) My thought had been that a small child might really like that, but I certainly won’t try that again.
Re-installing the Fingerboard
I usually remove the fingerboard to make varnishing easier, as it gives me easy access to the front of the instrument. But that means I have to re-install it perfectly, and that is not as easy as one might expect. Remember, the board is rounded on top; the neck is rounded on the back, and both taper from one end to the other. The only flat surfaces are the surfaces between the two. So, with the slippery, hot, hide glue between them, there is a strong tendency for things to shift under pressure, and result in a bad fit.
What I now do (after years of struggling with the above scenario) is:
Position the board on the neck, exactly the way I want it, dry, then
Clamp it in place, using several clamps on the handle portion, and one larger one at the heel.
Check angles and heights, etc. to be sure everything is really correct.
Loosen and remove the large clamp at the heel, and
Insert hot hide glue, using a thin palette-knife, spreading the glue carefully, to avoid any dry spots, then, immediately replace the clamp.
Wipe off excess glue that squeezed out under clamping pressure, then,
Remove the small clamps, check to be sure nothing moved, and, using the same palette-knife,
Repeat the gluing process on the upper end.
Replace the clamps, checking to be sure nothing has moved.
Wipe off the squeezed-out excess glue, and allow it to dry, and finally, remove all the clamps.
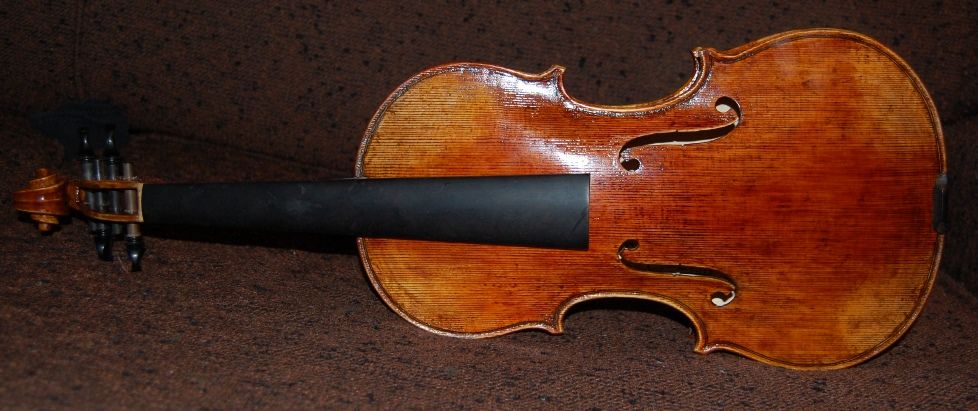
Here is how it looks at this point, after scraping the sides of the fingerboard and neck:
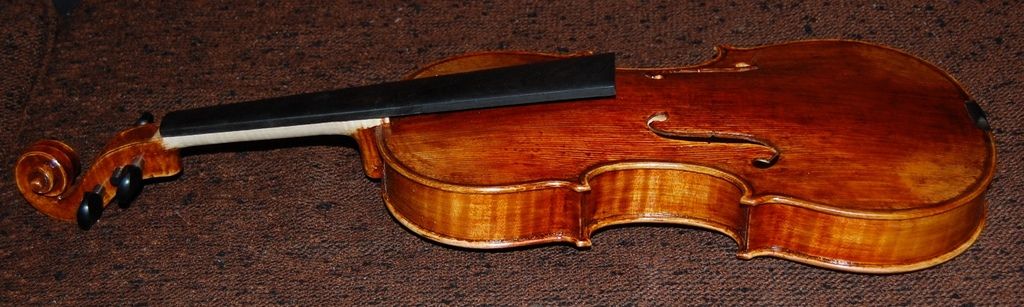
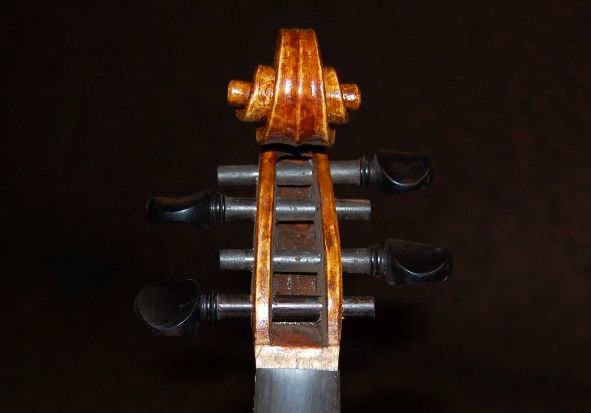
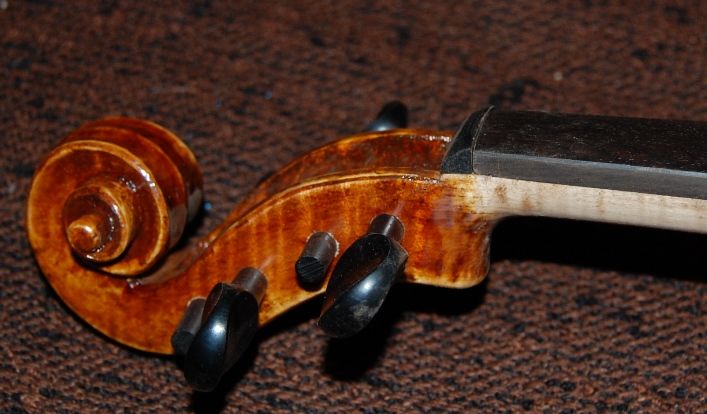
Side view with fingerboard and tuning pegs. The nut is not there yet, nor has the fingerboard been dressed. The neck wood is completely devoid of added color.
Front view with fingerboard and tuning pegs. The pegs have not been cut to length, nor have the string-holes been drilled.
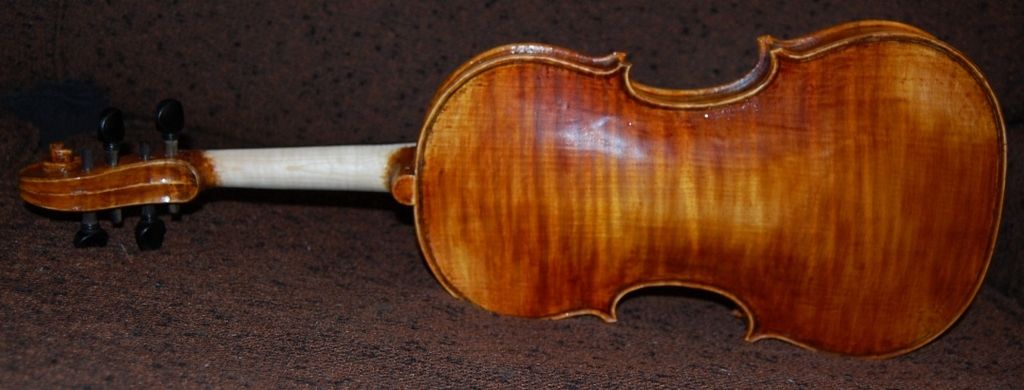
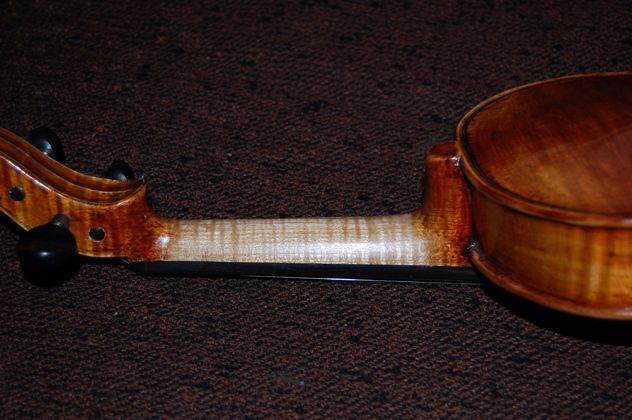
Back view– same status. You can see the transverse flame in the neck, in this picture, but it is quite faint. It will show up better after I seal the neck.
Dressing the Fingerboard and Smoothing the Neck
I buy my fingerboards as blanks. Every surface is oversize and must be cut to correct dimensions, curves, etc. So, though the fingerboard looks OK at this point, it will still have to be “dressed”. Dressing the fingerboard means planing, filing and scraping it to produce exactly the shape needed so that, when being played, there will be proper clearance for the vibrating strings and no buzzes anywhere on the board: no humps or hollows, and just the right curves. A slight camber (scoop) is desireable, so that a straight-edge laid longitudinally on the fingerboard will reveal about one string-diameter gap between the middle of the board and the straightedge. That gives the needed string-clearance for the vibrating strings when playing. The transverse profile I shoot for is a radius of 42mm at the “big end” and transitioning to a flatter curve at the nut. Finally, I polish the fingerboard surface, using progressively finer grits, finishing at 1500 grit. At that point it is mirror-shiny, and quite beautiful to look at. I realize it will not stay that way, as wear from the strings, grime from players hands and rosin accumulate, but it is nice to see it that way when it is new.
The sides of the fingerboard have to smoothly fair into the neck, so that one cannot feel the seam at all. This is accomplished by scraping, then filing and sanding with progressively finer grits. I wet down the handle portion of the neck with coffee, to raise the grain, and let it dry. Then I sand off all the raised grain so that it is silky smooth again. I repeat the wetting, drying, and sanding procedure until the grain will no longer raise and it stays smooth after wetting and drying.
On my first few instruments, I did not know this little “secret”, so my beautiful, silky-smooth necks ended up very rough, after just a few days of being played by a sweaty-handed player. They would bring them back, unhappy with the feel of the neck, and I was confused, because I was quite sure I had left them perfectly smooth. I eventually realized what was happening, and began making the “preemptive” move of raising the grain ahead of time, and smoothing it, over and over, until it becomes completely stable. Then I will seal the neck with a tiny amount of spirit varnish (a dime-sized spot on the end of my finger, with a rag), rubbed in hard, until it is dry and shiny. I used to use linseed oil, but it collected dirt, over time, and eventually looked dark and grimy. Using my current method, they stay beautiful and stay smooth. (Everyone else probably already knew that; I guess I am a little slow at learning some things. 🙂 Here are the results of the above paragraphs:
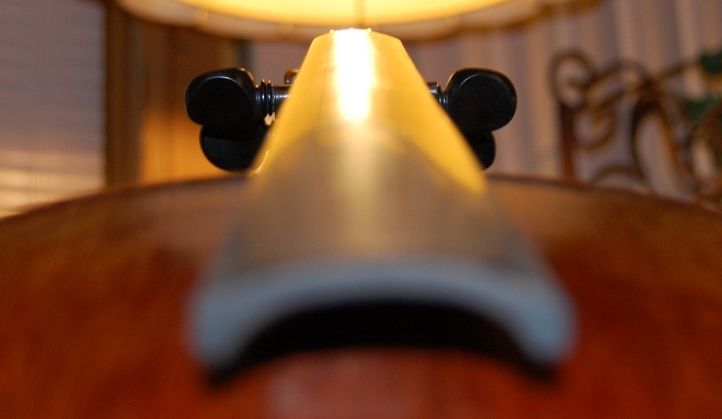
The camera’s depth-of-field limitations at close range made it difficult to get a very clear shot of this, but you can see how smooth it is. The sides still will receive some more work, to remove the “ripple” you can see, there.
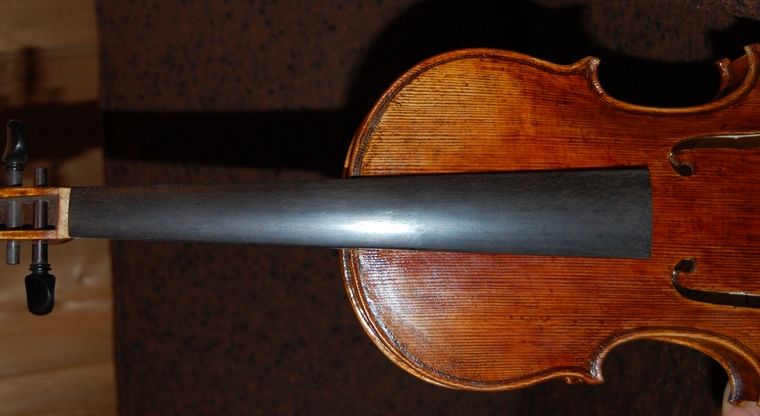
Here is a clearer picture, but it doesn’t have the same perspective that sighting down a freshly-dressed fingerboard provides:
Dressed fingerboard, straight-on view.
By the way, I went back and dyed that one light-colored peg:
The “G” peg, here, has been dyed, to get closer to the color of the other pegs. When I am done, they will all look the same. This was definitely an improvement, though. 🙂
This one was taken after everything else was complete (out of sequence.) But that is what the finished violin neck looks like.
Fitting the Nut
The nut is a tiny piece of Ebony, with the grain transverse to the fingerboard, over which the strings all bend, and on which they converge, as they approach their respective tuning pegs. The shape of the nut is fairly critical to playability, sound and string-life. The feel of the instrument is either good or bad, depending on the shape of the neck, fingerboard and nut, the nut being under the thumb and forefinger of the player more frequently than any other part except the handle portion. So, all of them have to be flawless. That small white rectangle (or trapezoid) in the photograph above, is the footprint of where the nut will be attached.
Here (below) is the nut, freshly glued in place– there will be a little more scraping and filing to do, to bring it to a perfect fit all around, but if you look closely, you can see that the portion standing proud above the surface of the fingerboard is less than a millimeter in height, so the string grooves will be very shallow. I do not want the strings “buried” in the nut, as I feel that it diminishes the tone, as well as having a negative effect on string life.
Here is the fitted nut, freshly glued in place. There’s a little more shaping, before it is really done, escecially including the string grooves.
Here is a side view of the nut, with the scroll and fingerboard. You can see the very slight lip of the nut, standing above the fingerboard.
In the photo immediately above, you can see that the handle portion of the neck is not longer a clean white: that is the third grain-raising with coffee, and it is staying pretty smooth this time. If it does not feel rough, after it dries, I will sand it one last time, and seal the neck after touching up the places where I had to scrape to level the fingerboard seam. Meanwhile, as it is drying, I will fit and set the soundpost.
Soundpost Setting
In several languages of which I am aware (French, Italian, Spanish and Romanian, I think, to begin with), this little thing that looks like a dowel-rod, is called the “soul” of the instrument. That is appropriate, because it has final control over the sound of the violin. If it is set incorrectly, or too tight, too loose, wrong position, wrong angle– whatever–the result will always be negative. That is not to deny that there are a few instruments with odd requirements, so that the soundpost “looks wrong”, but sounds great– and if you try to set it “right”, the sound will suffer. However, as a general rule, there are some standards regarding the placement of the soundpost. Most luthiers start with those values, then make tiny adjustments to coax the best sound from the instrument. Sometimes a difference of 0.2 mm can make a huge difference. Sometimes it seems to make no difference at all. Some instruments are simply more forgiving than others.
In general, the starting position of the soundpost is:
Centered, laterally, under the treble bridge foot, but
Located one post diameter (more or less) “south” of the back edge of the treble bridge foot. (I frequently end up placing it closer than that.)
Vertically adjusted between the back and front plates so that the top and bottom ends fit “airtight”, and under
Pressure just a little more than the amount it takes so that if you loosen the strings, the soundpost doesn’t fall over.
I frequently make my posts tighter than this, as I know that in the first six to twelve weeks, the shape of the top will change somewhat, rendering the post much looser than at the beginning. Many makers simply ask the customer to bring the instrument back in six months, for a “post adjustment”. I just start off a little tight, and still stand ready to re-adjust or replace it if it ever needs it.
I insert the post through the treble f-hole, using a special (traditional) tool called a soundpost setter. I insert the soundpost setter into the post, and then slide the post, tool and all, into the corpus and locate the post as described above. (Sorry; no photos, here– it takes two hands to do the work, and I had no one to take pictures. Maybe some other time.)
Final Set-up
Final set-up included fitting a bridge, adjusting the tail-gut, installing strings and adding a chin-rest. I’ll spare you the details, as, again, it all took two hands, and I was working alone.
The violin is finished. The strings are an old, used set of Dominants I had in a drawer, specifically saved for initial set-up work, as it usually requires many iterations of tensioning and de-tensioning the strings, and that takes the “new” out of new strings very quickly. But this time I hit the target right on the first try. The strings came out at exactly the right height, which doesn’t happen for me very often.
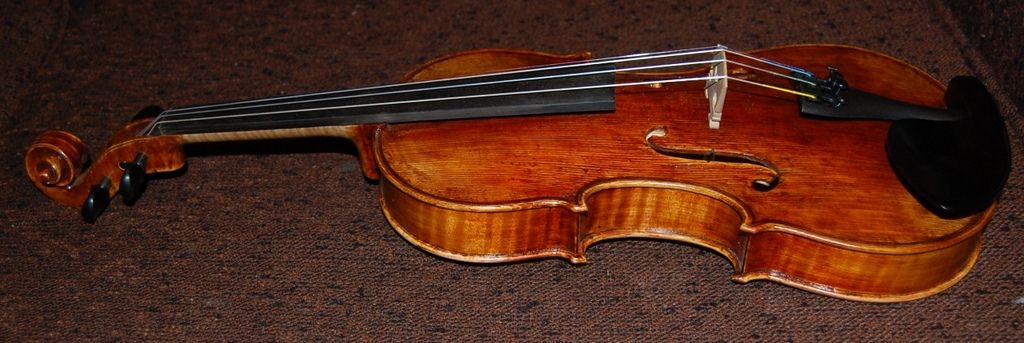
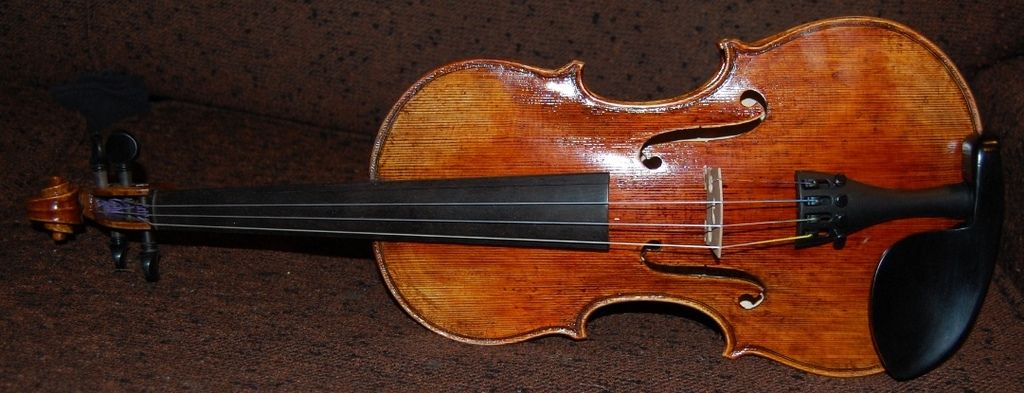
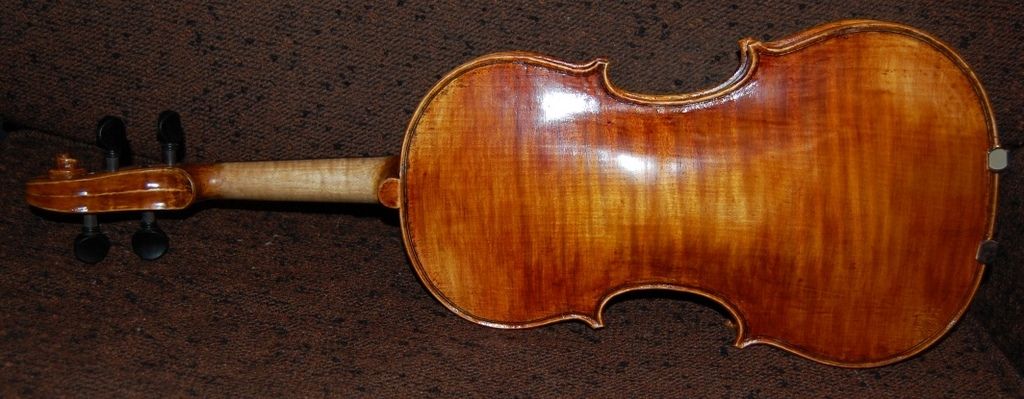
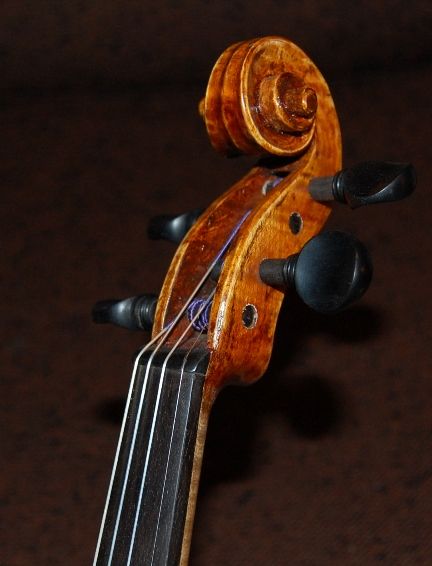
Anyway, here is the finished instrument:
Finished violin , side view. These colors are actually pretty close. Not sure why it works sometimes and not others. I will color the bridge a bit when I change the strings.
Front view. I changed my mind about the tailpiece. That is a Wittner tailpiece with four built-in fine tuners. Not ebony, but man-made material, and very light.
Back view. Notice the neck color– the flames show better, now, after sealing and polishing the handle portion.
Scroll, showing the trimmed and domed peg-ends, and the finished and polished nut.
You can see that the varnish has been restored in the places where I had scraped it off during final neck-shaping. The handle has been stained with coffee, sanded and polished to 600-grit, sealed and polished with spirit varnish, and will stay smooth indefinitely. Looks nice, too. 🙂 Those pegs will continue to work in deeper, and will hopefully end up aproximately flush on the terminal side.
Playability and Tone
I try to make sure that the neck is the right shape and size and that all the dimensions are correct, to begin with, but then I bring the string height at the nut as low as I can, to make it an easy touch at the nut. I also adjust the string height at the end of the fingerboard, to an optimum height, for the same reason. Beyond that, the response and volume and ease of speaking are all largely a matter of arching and graduation, I think. Probably wood choice matters, too, but I consider that to be a given.
I do balance the tone of adjacent pairs of strings; that is, I play the “D” on the G-string, and match it to the open string “D” next to it. I adjust the soundpost until the timbre of the two are close enough that it is difficult to hear a crossover. I do the same between the “D” and “A”, and then between the “A” and “E”. On this one, I was fortunate, in that it was right on the first try. I did not have to move the soundpost from my original setting. (Nice! That doesn’t always happen, either!)
This violin sounds very good, in spite of the old strings. It has lots of volume, and good projection. I will play it for a week or so, then change the strings for a set of Evah Pirazzi strings I bought for that purpose. I think this will be a very powerful instrument, but I need to find a local professional player to run it through its paces. I am really not qualified to put it to the test. 🙂 I play by ear, and not very well, at that. Maybe one of the many teachers in my area will do the honors.
So! There it is! I hope to find a player soon, and then I will give feedback here on the website, with their comments.
Thanks for looking.
If you found this post helpful, please share with your friends!
Well– as I said in an earlier post, one of the decisions that has to be made is whether to “antique” a new instrument. As a rule, I try to go easy on this, doing minimal shading and light wear patterns; but it really does pay to do something to satisfactorily darken the bare wood before beginning varnishing. Otherwise, I will regret it later on, when I can see the bright wood through the dark varnish, and there isn’t much I can do to make it look right.
As you may recall from the first post on varnishing this violin, I was not very happy with that first coat of varnish–it was too light in color. I should have stripped it off and started over, but I kept thinking “just a little more varnish!” Well…it wasn’t working. Especially under bright light, the light wood just grinned at me from behind the varnish.
So, not really wanting to strip it and start over, I used a different ploy: I coated the entire instrument (except the handle area of the neck) with a very dark pigment, allowed it all to dry, and then sanded it back off, knowing that I would damage my lovely varnish in the process, but alsoknowing that the dark pigment would only remain in the low areas of the grain, and that, if I was careful, there would still be a fair amount of the varnish left, but with bits of the dark pigment remaining, looking like the accumulated dirt and skin-oils from hands, ground into the wood over the years….hopefully.
And, it seems to have worked. That foundation looked a little better…more believable, I suppose; so I went with it, and here are the results:
Antiqued side view.
Front view, antiqued, and saddle installed.
Back side antiqued.
I am not showing the intermediate steps…they really put the “ugh” in ugly, for about a day or two, there. But after the pigment was sanded back off, and the varnish cleaned up; using a rag, I rubbed a seal-coat of very light spirit varnish into the whole fiddle, to lock down the pigment and clean off any loose stuff left from the sanding off of the pigment. Then I began re-varnishing with the dark red-brown varnish, thinning with alcohol as needed, to get it to flow well. It took a couple of days to get it to a point I felt happy with, but I am much more satisfied with it now than before. I’m sure some will disagree and hate it, but: sorry, that is the way this one had to go. Perhaps the next one I will try something a bit different, and get it right the first time.
Rationale Behind “Antiquing”
Meanwhile, here is something to consider, regarding “antiquing”: I had a professional violinist (Adam LaMotte) tell me, “Chet, we players all want an old master violin. If we can’t afford one, then we want our violin to looklikean old violin.” A famous violin-shop owner in England (Charles Beare) put it this way: “An unattractive violin simply does not get played…it gets no attention from customers. There is absolutely no reason you should consider ‘antiquing’ your instruments, unless, of course, you actually want them to sell!” That is fairly succinct. Evidently even the “big boys” recognize this odd little fluke in the violin market. I have never understood the market trends that drive people to buy pre-distressed (worn-out) blue-jeans, either, but someone has made a lot of money doing just that.
Ah, well…at least the “wear” on the violins usually does not hurt them at all. (Although I have known of people deliberately cracking and re-gluing instruments, and it is fairly common to bush and re-drill peg-holes on a brand new fiddle, to make it look old. And some go as far as a scroll-graft, knowing that virtually all pre-1850 violins have had a neck-graft, and a genuine neck graft is usually a sign of a genuine old violin. Sigh… not anymore. I have done neck-grafts, but only when there was a cause, and it was a needed repair. Same for peg-bushing. I have done lots of them, but only in repairing old instruments.)
So– the bottom line, to me, is that I really like them to look at least a little like an old, gently worn violin. And sometimes even, a very old, heavily worn violin. (This one fits into the latter category, except no cracks, and no bushed peg-holes.) There are certainly people who won’t like it…but there will definitely be those who fall in love with it, too, so I’m not too worried. There are better ways to darken the wood without hurting it, though, and next time I will try to do so. (Some people have tried certain chemical treatments which looked remarkably good, but, as it turned out, destroyed the structural integrity of the wood.)
Saddle
You will also notice that the saddle has been installed. This is another thing I do a little differently: I round the corners of the saddle, thus eliminating the stress-risers built into square mortises.
Here is the saddle, installed…still could use more polishing. Notice the round corners.
The saddle still needs a little more scraping and polishing to get it looking right, but this is how it looks from the side.
Why Rounded Corners?
Ever notice the shape of the windows in airliners? Ever wonder why they haven’t any square corners? (See Comet Disaster) Here’s a partial quote: “In addition, it was discovered that the stresses around pressure cabin apertures were considerably higher than had been anticipated, especially around sharp-cornered cut-outs, such as windows. As a result, future jet airliners would feature windows with rounded corners, the curve eliminating a stress concentration. This was a noticeable distinguishing feature of all later models of the Comet“
At any rate… the intent of the rounded corners is to prevent saddle cracks.
Saddle crack in a cheap fiddle. Notice that it emanated directly from the square corner of the saddle mortise.
So far, my practice of rounded saddle corners has proven quite successful. Also, though you can’t tell it from the photos, there is a tiny gap at the ends, to allow for plate expansion and/or contraction. It isn’t much, but it is there.
Fittings
The saddle is ebony, as will be the fingerboard, nut and tuning pegs on this violin. I haven’t decided yet whether to use an ebony tailpiece and chin-rest, but I probably will do so. (Tradition, you know….) 🙂
The next post will complete the set-up procedure.
Thanks for looking.
If you found this post helpful, please share with your friends!
In the last post, we were looking at the third coat of varnish. It looked pretty raw, still. You can imagine how much brighter the white wood might have looked under the varnish, without having stained it first. Some people hang their newly made instruments out in the sun, so that the ultraviolet light oxidizes the wood somewhat, and darkens it quite a bit. (Especially those who live where the sun actually shines: I, on the other hand, am in western Oregon, where the sun is a novelty… I do have a U.V. cabinet, but have not been very impressed with the results, so I haven’t been using it.)
Violin back with three coats of varnish.
Something I have occasionally done is to apply a few coats of varnish, then strip it all back off, down to the wood. It does not affect the mineral ground, nor the sealer, but it does affect the foundation color of the wood, much improving the finished look. But it is a lot of extra work…so I have only done it a few times.
Regardless of how I accomplish the color I want, the next step is to level the varnish.
I use fine abrasive paper (400-grit), to gently remove any bumps, and to leave a matte-finish all over the violin. I am very careful to not fully remove the texture of the raised grain, left from the coffee stain, but only to scuff-up and smooth the varnish itself. The wood should have been the way I wanted it before I began varnishing. I prefer that my violins still have some “wood-texture”. Some people like the mirror-bright plastic look, but I don’t. On a guitar, that is one thing. These are supposed to be concert violins… another thing entirely.
The things I am especially vigilant about are sags, drips, runs of any sort, and brush-hairs, etc. If there is an actual flaw in the varnish, I want to remove it before I move on. But, many times, I will deliberately (later) fill any “texture” with a darker substance, again emulating the “wear and dirt” of old instruments. I limit this to pretty minor stuff, usually. I have known fellows who took “antiquing” much further; as in, breaking wood off corners, etc, and abrading away varnish right into bare wood, then rubbing dirt into the wood. Sorry…I am not going to do that. 🙂
The important thing is to realize that any anomalies in texture will be highlighted by the varnish, not hidden. Something as small as a brush hair or a speck of sanding dust will become terribly obvious if one continues to varnish over it. (I learned this the hard way….) The varnish piles up around it and literally makes a mountain of a molehill. It pays to take the trouble to get things smooth before you move on.
Completing the Varnishing Sequence
I try to make sure that each layer of varnish actually contributes what I want; building toward the whole effect. So, I have to decide when to do any shading or antiquing. I have to decide how much extra color to apply in the darker areas, and what the overall color impression is to be when a person first sees the violin: Dark? (How dark?) Antiqued? (How much?). So, there usually comes a point where I decide the violin is dark enough, and I add two or more additional coats of yellow or clear varnish to increase the feeling of depth, and to shift the overall color impression back toward golden. Sometimes that works well; sometimes it does not. Occasionally I have had to give it up, strip the fiddle, and start over. 🙂
So, here is the rest of the varnishing, in the order it actually happened:
I neglected to take a picture of the fourth coat of varnish, but it wasn’t all that different from the third…same varnish, etc. So, here is the
Fifth Coat:
Fifth coat of varnish…side view of new violin.
You can see the areas where I have left thin varnish, to imitate the look of an area where varnish is worn off. I will sand them, later, to add realism.
And, the back! Again, you can see the “wear” areas. The varnish is taking on some of the depth of color and clarity that I enjoy.
After the varnish dried overnight, I gently sanded it again, then added a sixth and seventh coat. Here are the photos:
Sixth Coat:
This one was mostly a case of adding strong color in the areas I wanted darker, and virtually none in the areas I want lighter. There was a tendency to streak, so I would feather the transitions out, using a fine sable brush, moistened (not wet) with alcohol. It worked well, but, if you look closely, you can still see streaks. These will be smoothed before the seventh coat, either by the alcohol method or by sanding. It is important to realize that, on the flamed maple, your brush-strokes should follow the flame, and on the spruce, follow the grain. In both cases, the natural lines in the wood tend to disguise any leftover brush-marks.
Sixth coat of varnish: adding color in selected areas.
Sixth coat of varnish on back; adding color in selected areas.
I allowed the sixth coat to thoroughly dry, then sanded it with 400-grit, well-worn abrasive paper, and applied a final “color-coat”: after this one, I will only add yellow or clear varnish, to accentuate depth or shift the color range toward gold.
Seventh Coat:
Seventh coat (final “color-coat”. ) It doesn’t look very different from the sixth coat, but, in person, the thin areas are less “dry-looking.”
Seventh coat of varnish on the back of the violin. The neck shows the original color of the wood. It will be stained and sealed at the very last step before set-up.
Eighth Coat:
I doubt you would really see a great deal of difference in this coat. The photographs are not very accurate in terms of color– I guess the flash does that. They are too red, and too bright-colored. It is not really that bright, but the color is shifting back toward gold, as I apply the last two or three coats in yellow varnish.
Eighth coat (yellow varnish): This is nearing completion. There will be some minor retouch after everything else is done, but this is pretty much the way it will look.
Again, the colors are not very accurate…but it does look nice. Just not this bright.
So: I think that is about as far as I will take the color, for right now. I will very likely decide later that I want it darker, and, if I do, I can always add more color. But I think I will go ahead with the saddle, fingerboard, nut, etc. and see how I feel about it. If I decide it is fine the way it is, then I will go forward with set-up. If I want it darker, I can add color at that point, and another yellow or clear coat, and then do set-up.
So, that is as far as it is going tonight.
Thanks for looking.
If you found this post helpful, please share with your friends!
In the last post, I showed the photo of the violin with just the turpentine/pitch sealer coat in place, and not totally dry. Remember that this was applied over a coffee stain, and a mineral ground that I had rubbed into the wood.
Sealer coat.
When that coat was finally dry, I checked for any distortions (from the coffee stain, I guess) and corrected them with plain water, just moistening any low areas with a damp rag, and watching them come back to normal. Since I just barely moistened those areas, they stayed in the correct position after drying the second time. This has been a rare occurrence in my experience, but I was grateful that it turned out to be a relatively easy fix.
Then I sanded lightly with worn 400-grit, to remove any bits of loose debris and/or any little fibers of wood that had lifted above the smooth surface. I had already done this after staining (both times), but it always pays to go over things again.
First Coat of Varnish
The first coat on this instrument was a very blond spirit varnish; not my usual. I am not entirely pleased with the result, but it is acceptable.
First varnish coat, side view.
First coat of varnish, back view.
Scond Coat: Darker Yellow
I sanded it lightly, again, and then applied a darker yellow varnish. Fortunately, spirit varnish dries very rapidly, so I can sometimes get two or three coats in one day, early in the sequence. As the varnish gets thicker, it dries more slowly. I assume that this is because it can no longer soak into the wood at all, so every bit of the drying has to happen from one side of the varnish film; but perhaps there is more to it than that. At any rate, as the instrument nears completion, I have to allow longer time for drying. The other side of the “fast-drying” coin (or two-edged sword) is that it is extremely sensitive to the next coat of varnish, as the solvent in the new coat can easily lift the previous coats, forcing me to completely start over, in some cases. I really need to be patient, and work carefully, applying many thinner coats, rather than fewer thick coats.
Second coat of varnish– darker yellow– side view.
Lots of room for improvement, here– and that is how spirit varnish works. I keep adding color, and “evening things out” until it looks right.
Yellow varnish back– still pretty pale-looking, after that second coat.
Third Coat: Red-Brown varnish
After the yellow varnish dried I began adding (several coats of) a darker red-brown varnish, allowing each coat to dry, and sanding lightly between coats, to make sure the finished result is good. This is the first coat of the red-brown varnish, so, actually the third coat, overall. It will get at least five or six more coats of varnish before it is done, but the differences become less and less obvious, as the varnishing nears completion. I am enjoying looking at the beautiful European maple and spruce. I ordered this wood from International Violin Company, in Baltimore.
Third coat, using red-brown varnish.
Back, with the third coat of varnish. (Quite an improvement isn’t it?) You can see the brush-marks in the varnish, but they will be sanded smooth before I apply the next coat.
The Plan:
As I continue to add coats of varnish, I am keeping an eye on the general “flavor” of the instrument. I may skip certain areas for several coats, to leave the varnish thin in those areas. I deliberately try to emulate the look of some of the more gently-used “Old Master” instruments. I am not attempting to “fake age”, so much as attempting to capture some of the charm and appeal of those intruments. If anyone has a question about my motives, all one has to do is check the label: every instrument is signed, numbered, and dated. The date on the label is the day I actually closed the corpus, so, perhaps a few weeks prior to final completion, but no more than that.
I also may switch back to a yellow varnish at some point, to shift the color back toward gold, rather than just a red-brown. And, occasionally, I have stripped everything back off and started over. As the original maker, I have that option. and, invariably, the result the second time was far better.
I will post more varnish photos as the violin nears completion.
Set-up:
Once the varnishing is complete, I will replace the Fingerboard and begin the final fittings and set-up of the violin.
Fingerboard
Saddle
Tuning pegs
Nut
End Pin
Soundpost
Bridge
Tailpiece
Strings
Chinrest
Hopefully, all of that will be covered in the next post.
Thanks for looking.
If you found this post helpful, please share with your friends!
For every violin, viola, five-string fiddle, cello or double bass I build, the finishing process is nearly the same. After completing the last of the purfling, the order is as follows:
Channel (the concave curve in which the purfling is nearly centered, but which must fair smoothly into all the other surfaces, concave or convex.)
Final edgework (making the outer edge (and inside of the plate) curve together into the channel and arching)
Varnish prep (final fairing-in of all curves and elimination of all bumps and unwanted ridges)
Water-based stain (usually two or three applications)
Mineral ground (one application)
Seal-coat (one application)
Varnish (numerous coats)
All set-up issues: saddle, fingerboard, nut, pegs, soundpost, bridge, endpin, strings, tailpiece and (on the smaller instruments) chinrest.
The Channel, and Final Edgework:
I scribe a margin around the entire outer edge, usually about 1.6mm in from the outer edge. This will serve as the “limit” for the channel. I cut the channel to the desired depth, using gouges first, then small planes and scrapers, bringing the smooth curve up to match the scribed limit. Then I file the outer edge so that it curves in from the center of the edge of the plate up to meet the scribed margin of the channel. The other margin of the channels are scraped so that they fair into the curve of the plates themselves. I true-up all my lines using scrapers, files, and very fine abrasives, and then I am ready for final varnish preparations.
On my last post, I had just completed the back purfling. That seemed a good place to “call it a night”.
Back purfling complete: the channel has not been started. You can see the sharp edge of the purfling in a few places.
Then I began preparations for cutting the channel, by scribing in the boundary line:
Scribed line, marking the edge of the channel.
Scribed pencil lines where the channel will go at the corners. (I didn’t use the flash on this one–that’s why the color is different.)
Beginning the channel cut. The purfling looks cleaner, as the rough, glued edge is gone. I also began shaping the edges.
Varnish Preparations
I have a particular spot on my basement stairs, where I can get a very low-angle, not-too-bright light source, which casts shadows across the face of the instrument, and makes is easy to see irregularities. So, the last thing I do is stand there, holding the fiddle and rocking it very gradually, to see any shadows that indicate a rough spot or an irregular shape. When I find one, I gently scrape it away with a very sharp scraper. I want to move as little wood as possible at this point in the build: I already have the arching and graduation just about exactly where I want them to be. This is strictly fine-touch finish-scraping.
Some people are very particular about not using ANY abrasives. Sorry– I do use them, in a very limited way, but only at the very last part of the build. The edges of the spruce plate, for instance, are so soft that a scraper is simply too aggresive for final shaping, especially after I raise the grain with my water-based stain (strong coffee, in my case…yes, and I drink the leftover “stain.”) So I use a very fine (worn 400-grit) abrasive paper to make the edges smooth and pretty. I also use it later, between coats of varnish, to make sure that no bits of dust, splinters, etc. can spoil the next successive coat(s) of varnish.
Channel and edgework complete…no flash. The wood isn’t really this yellow– we have a fairly dark house, and the sunlight filtering through makes it look this way.
Same shot of the completed channel, with flash. This is pretty close to the real color at this point.
Coffee Stain
I use a coffee stain because it imparts a gentle yellowish look to the wood, without doing any damage to the wood. Many people use strong tea, and I have done so. Some have a particular tea they use, for the color they want. That is fine. Some have alcohol-based, color-fast dyes to accomplish a similar result. That is OK too. I’m just telling you what I do. People have sometimes asked whether I use de-caf or regular. I love that question: I say, “Oh I always use regular, to wake up the tone!” 🙂 (Riiiight…)
Coffee stain, not fully dry yet. I used the flash on this, so the color change is real.
Mineral Ground
This is something I got from Roger Hargraves. He is a master luthier living in Germany, and he wrote an online book as he built a magnificent double bass. In it he explained why he uses a mineral ground, and what it is (it is effectively exceedingly fine gypsum dust, introduced into the wood pores in a liquid suspension. He used a very thin varnish as I recall…I used coffee, again. It dries slowly, is easily applied, and cleans up with water.) So, I apply the mixture with a brush, one area at a time, rub it in with my fingers, and immediately rub back off as much as I possibly can, using a rag. I do NOT want a thick layer of stuff on top of the wood– I want the pores themselves to be filled with the particles. I coat all areas except the “handle”portion of the neck in this manner. Supposedly it leeps the varnish from saturating the wood, thus avoiding overloading the wood with varnish and deadening the sound. Does it help? He says it does, and I know for a fact that he did it…and I saw the bass in person, last year at the International Bassists Society convention, in Ft. Collins, CO.
The ground dries chalk-white, in spite of the fact that I used coffee for the liquid. I sand it gently to remove any excess gypsum (there always is a fair amount that comes off the surface at this point). Sorry, I didn’t take a picture at this point. You’ll have to take my word for the fact that it simply looked like a chalk-white violin, with the grain and purfling quite obsecured by the dry mineral ground.
Sealer
Then I seal the violin, all except the “handle” portion of the neck. There are many things people use for sealer: Some use special commercially available preparations (I have done that, too), and some use very thin varnish, or shellac. For now, my sealer is a combination of Pine sap (yes, that sticky gunk that flows out of a cut in a pine-tree) and turpentine. The turpentine penetrates the wood very readily, taking the pine pitch with it. I allow the turpentine to evaporate off, leaving the pitch in the wood. I am of the opinion that the pitch is an OK thing in the wood, and that it seals the wood against further penetration by varnish. That’s my theory, anyway. 🙂 The mineral ground turns completely transparent under the saturation of the turpentine and pine pitch, and remains that way after the turpentine evaporates. Here is a photo of the violin with the mineral ground rendered transparent by the sealer. It will probably take a few days to get absolutely dry, (turpentine evaporates slowly) so this is the last photo for this post:
Mineral ground renedered transparent by sealer coat.
Varnish
I have used a wide variety of varnishes, but currently I am using a spirit varnish concoction. If I need more color, I use the “Transtint” dyes available in woodworking stores and online. It does not take a great deal of dye…you want to go easy on this stuff. I have considered extracting dyes from plants, etc. Never have gotten around to it. 🙂
I’ll show the varnishing process in the next post.
Thanks for looking.
If you found this post helpful, please share with your friends!
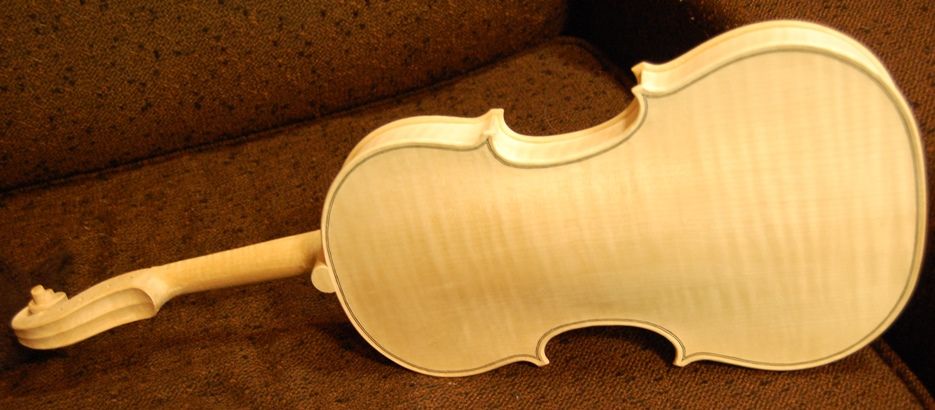
More Progress: The Plowden-model looks like a violin!
Removed the Mold and Installed the Back Linings
One nice thing about this (French-style) mold is that it is easy to remove– it usually takes less than five minutes to get it out, provided I have waxed the non-glued surfaces of the mold, so there is no chance of an accidental adhesion to the ribs. I simply use a flat chisel to crack the glue loose at each block, where it is attached to the mold, and then slip my parting knife (in reality, it is an old potato knife) between the block and the mold, to make sure nothing is still adhering to the mold. After that I can slide the mold out by lifting as shown, while wiggling each individual block to make sure they are all moving evenly. The only drawback is that I have to install the back linings after the mold is removed, and the rib garland is pretty fragile. In the past, I have used a two-part collapsible mold, in the italian style (centered between the front and back edges of the ribs); but it is more difficult to remove. The only real advantage is that I can install all the linings while the corpus is still on the mold, and still get the mold out without too much trouble. I believe it does have a slightly greater tendency to leave the ribs slightly convex in the center, as well, and some people find that attractive. (I do too…. Perhaps I will eventually go back to using the Italian-style molds.)
Back before mold removal. You can see how thin and fragile those ribs are.
This time, the linings went in without a struggle, though, and the whole task took about 30-40 minutes. A few hours later, the glue had dried, and I was able to remove all the tiny spring-clamps, and get going on leveling the back of the garland, and cleaning up the interior.
Back linings installed, ready for shaping and smoothing.
Blocks and linings before shaping and smoothing. I had trimmed the front side of the blocks, and the front linings, before I installed the front plate.
Blocks and linings shaped, ready for scraping and smoothing. The blocks and linings are weeping willow…the bass bar is Sitka spruce.
Cleaning up the Interior
Cleaning the interior primarily means shaping the linings and blocks, after the mold is out of the way, but it also is a final opportunity to scrape any rough spots, and make any minuscule repairs. So, I put on my magnifying visor, and look things over very carefully. I use a knife to trim the linings so that they are triangular in cross-section, thickest at the edge, to suport the edge of the rib, but tapered so as to not restrict the vibrations of the middle of the ribs too much.
One thing I have to remember, at this point, is that it is also my “last shot” at the interior of the back plate, so, before I install it, I carefully check and scrape it, and, as a final “seal of approval”, I install my signed and numbered label, gluing it in place where it will be visible through the bass-side sound-hole. All my instruments are individually hand-crafted, and each ends up a signed and numbered original, not a mass-produced instrument. I’m really not interested in doing things the “factory” way.
Installing the Back Plate
I used to complete all the work on the back plate, including purfling and final edge-work before installing it on the garland. But I have recently altered my order of operations so that I purfle and do edgework after the plate is installed. This allows me to adjust the plate overhang boundaries, and make final decisions as to how I want things to look, before permanently locking the shape in place by installing the purfling.
I also used to “self-induce panic,” by spreading hot hide glue around the perimeter of the garland and plate, and then frantically trying to align the edges perfectly and adjust all the (25-30) spool-clamps, etc. before the glue gelled. That was a fool’s-errand, as the glue usually gels far more quickly than I could ever get everything clamped in place. The late Sam Compton shared how he applied the glue and allowed it to gel, then aligned everything at a leisurely pace, gently clamping everything in place. Afterward, he went around the perimeter with a hair-dryer, gradually warming the plates until the glue re-liquefied. Finally, he tightened the clamps just enough to completely close the joints. Pretty clever.
I ended up clamping everything dry, then loosening a few clamps at a time, and slipping the hot hide-glue into the seams, using a very thin palette knife. That seems to work pretty well, and definitely eliminates stress. (His method probably is even better, but this is how I do things, for now.)
Back plate glued in place, using hot hide glue and spool clamps.
Label visible through f-hole. The f-holes still will require quite a bit of smoothing.
Final Edge Shape and Purfling
Once the back is securely glued in place, I can trim the edges to exactly the shape I want, so that the overhang is matching the front plate, etc., and then begin purfling.
Front view: back plate has been installed and trimmed to size.
Side view, before purfling and edgework.
Back view: before purfling and edgework.
I use the purfling marker to scribe in the double lines (except for the corners) where the purfling will be inlaid. I then draw in the corners very carefully. I have occasionally used a template for the corners, but it seems to not always work, since the corners are not always exactly the same. So I end up just making some layout marks to get the limits delineated, and then I draw the corners in, freehand.
I incise the purfling slot with a small, sharp knife, in three or more steps:
The first pass with the knife is very shallow and light, only serving to deepen all the scribe marks.
The second and third passes bring the purfling slot to the correct depth, and
The last step is to use a purfling pick to remove all the waste wood between the paired cuts.
One-piece European maple back: the Purfling slot is partially completed; but still too shallow, and a little too tight.
Purfling slot is completed… it turned out to be a little too tight: I used a tiny sharp knife to trim the tight spots, until everything fit.
I check the depth and width of the slot by inserting a small section of purfling into the slot, all the way around, until I am sure that the slot is correct. then I bend and fit the purfling strips, and make sure the fit is as exact as I can make it, terminating in the classic “bee-stings” at the corners, rather than a simple “mitered corner.”
Finally, when all is as close to perfect as I can manage, I lift each section of purfling partially out of the slot, one at a time, and slip hot, thin, hide glue into the slot, using the thin palette knife again. I press the purfling all the way down to the bottom of the slot, and allow the glue to dry before beginning the final edgework.
Back purfling completed. Channel still needs to be cut and edgework is still untouched.
The Channel, and Final Edgework:
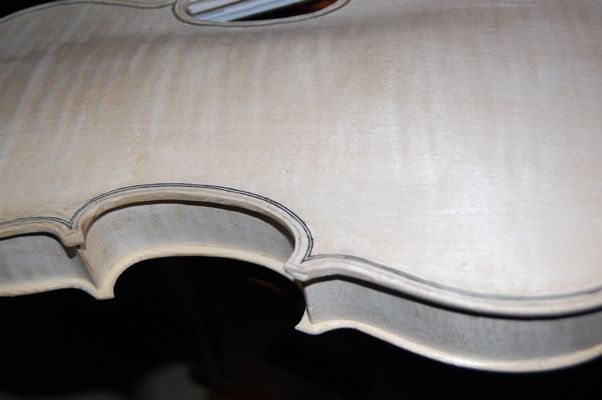
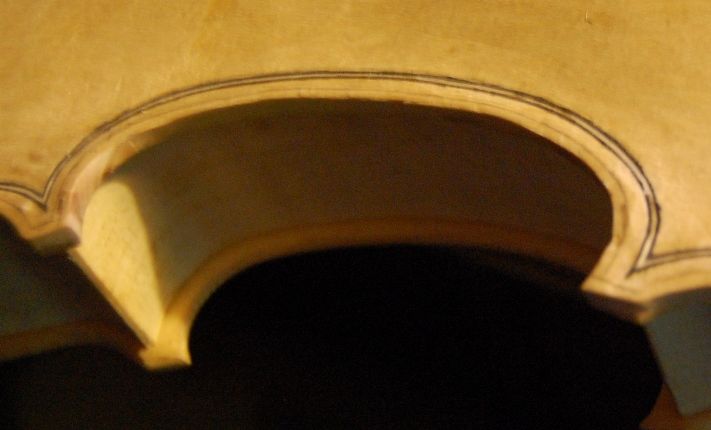
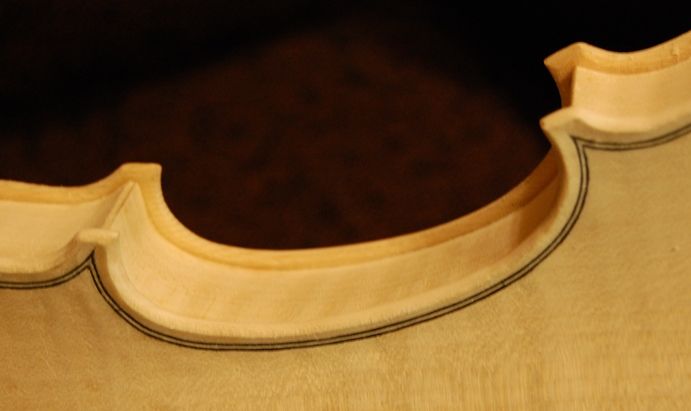
I scribe a margin around the entire outer edge, usually about 1.6mm in from the outer edge. This will serve as the “limit” for the channel. I cut the channel using gouges first,then scrapers, and bringing the smooth curve up to match the scribed limit. Then I file the outer edge to round in from the center of the edge of the plate up to meet the scribed margin. I true up lines using scrapers, files, and abrasives, and then I am ready for final varnish preparations.
We’ll talk about all that in the next post, and post pictures. I need to get this one wrapped up. I’ll show close-ups of the edges and corners next time. there is still a long way to go, but it is looking more encouraging. 🙂
Thanks for looking.
If you found this post helpful, please share with your friends!

 Follow