More Plowden Progress

Please share with your friends!

More Plowden Progress

Graduation

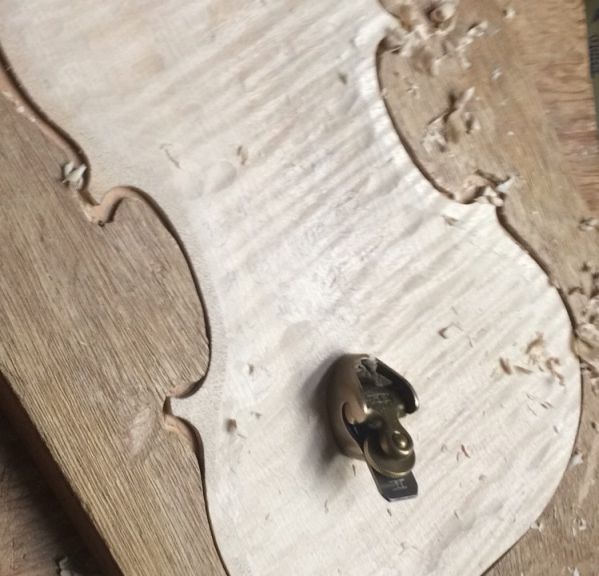
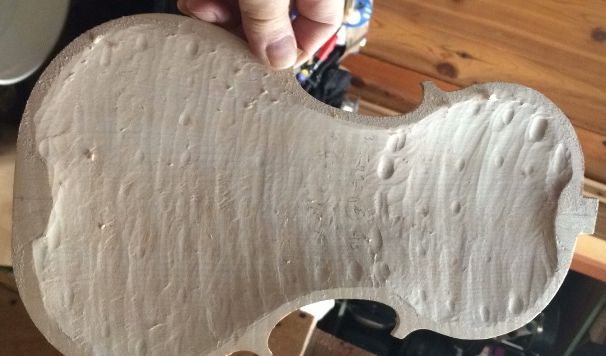
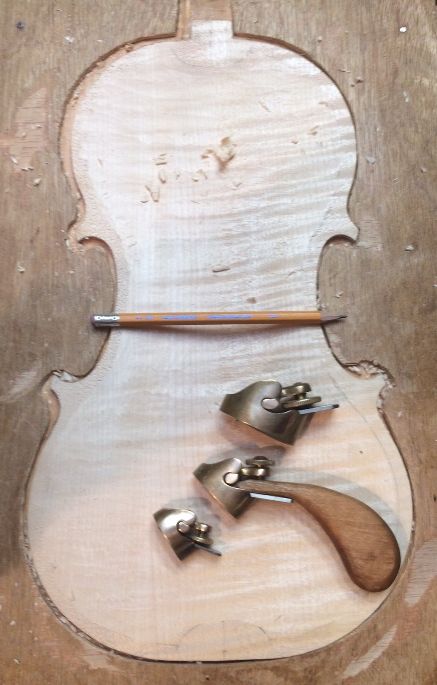
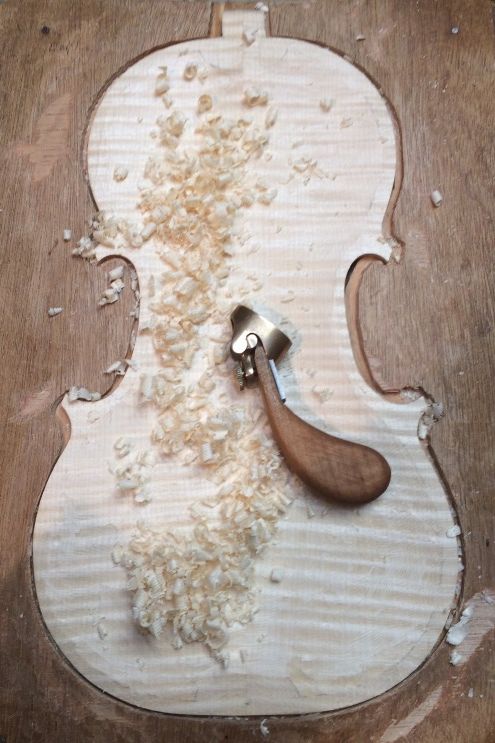
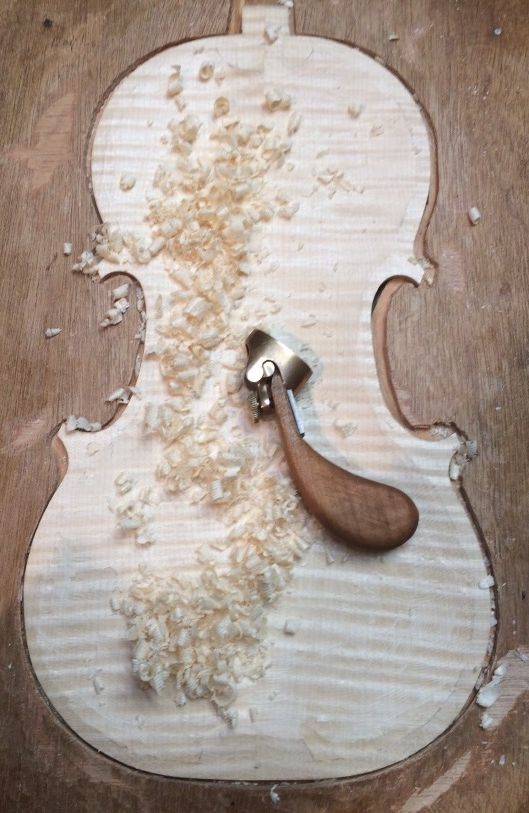
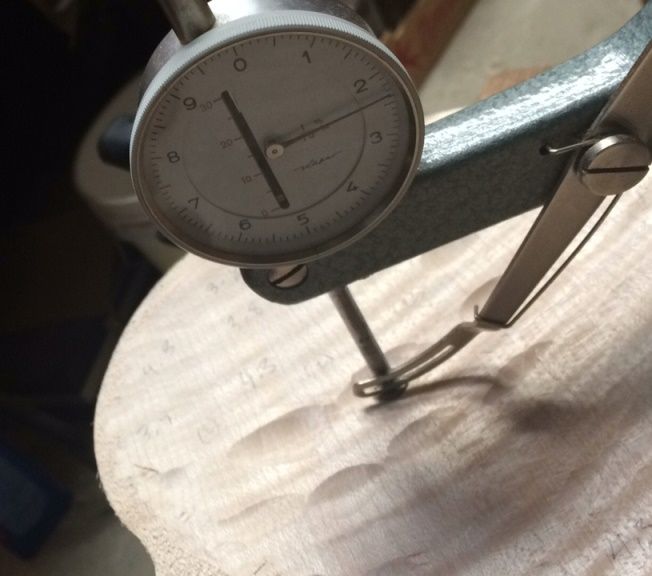
Graduating hard maple can be a tough, laborious job. Besides, there is always the possibility of carving too deeply and ruining the plate. So, I try to cut the risks by creating a “map” by marking the thickness every few centimeters, and then carving the “dots” until each “dot” is about the thickness I want. Finally, I connect the “dots”, using planes and scrapers, checking for thickness as I progress.
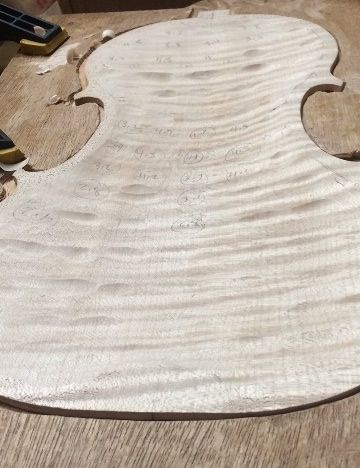
Creating the dots.
Creating the dots. The circled numbers are already the correct thicknesses.


Checking thickness.
Checking thickness. Pretty thin plate!


Connecting the dots.


Getting there!
Getting there!


Grafted Scroll and Neck-Set

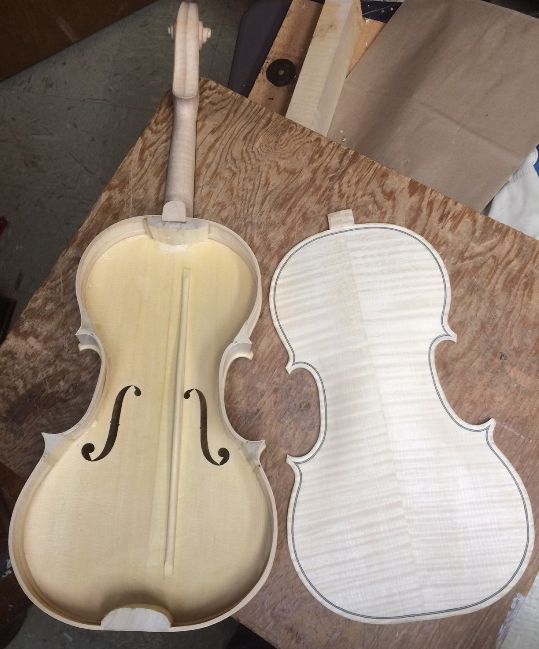
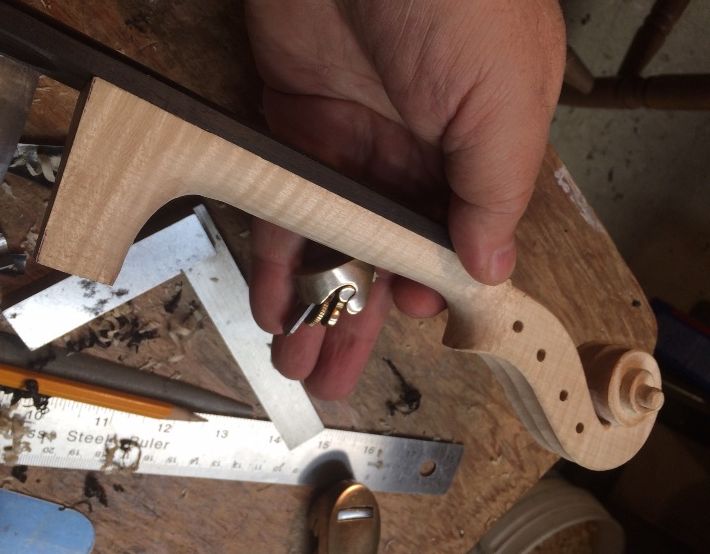
Once the graduations are complete, and the inside of the back plate has been scraped completely smooth, I install the label and I am almost ready to close the corpus. In this case, however, I also had decided to use the scroll I had carved, but graft a new neck to the scroll, as the original neck was too thin: so there was a good deal more work involved. Here is the grafted neck, partially shaped, with the completed back plate:
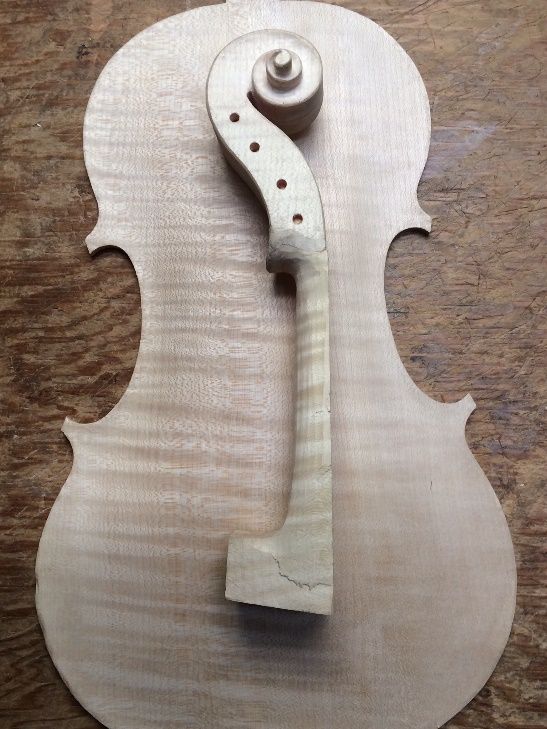
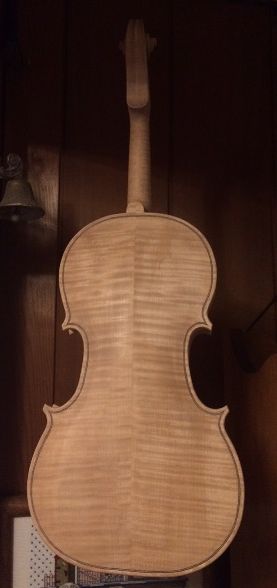
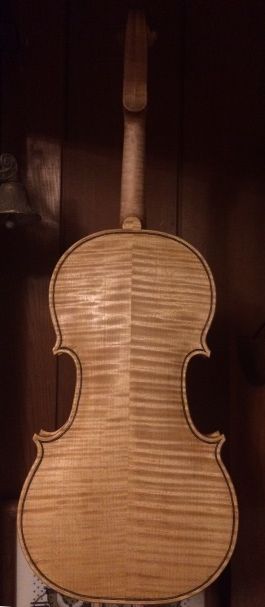
Completed back plate with neck-grafted scroll.
Completed back plate with neck-grafted scroll. The heel was still not shaped.

I had been anxious to complete the back plate, and had not yet set the neck. So I completed the neck and installed the fingerboard.
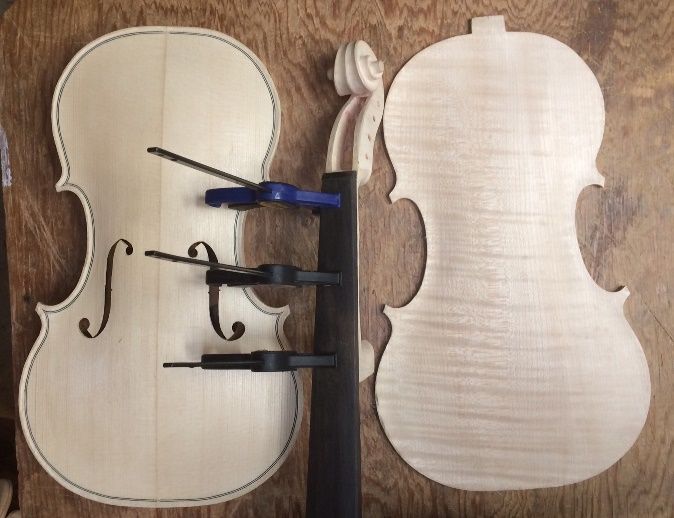
Fingerboard installed.


Next I set the neck, so that the angles were all correct.
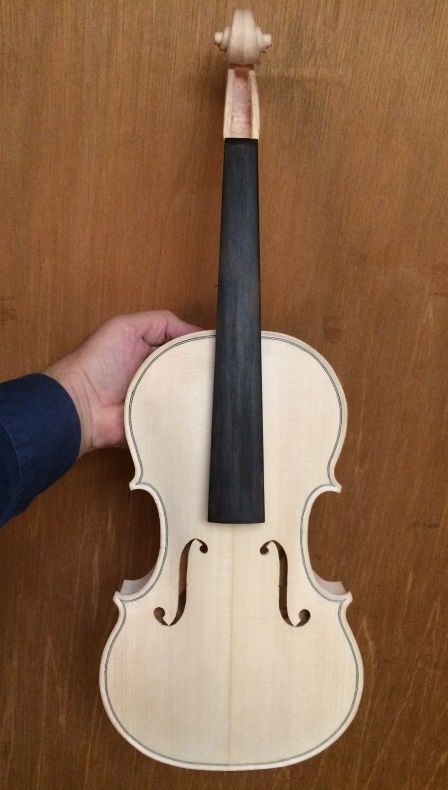
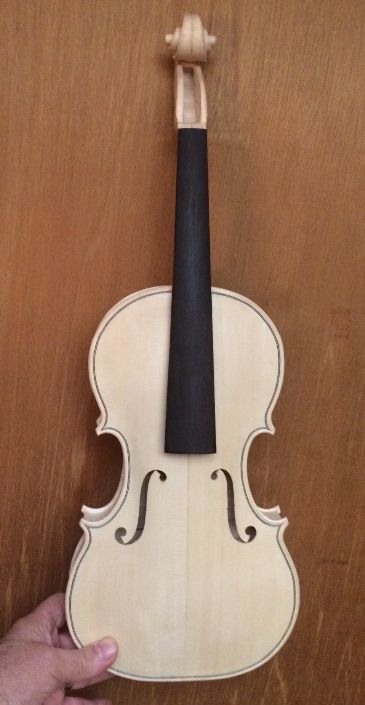
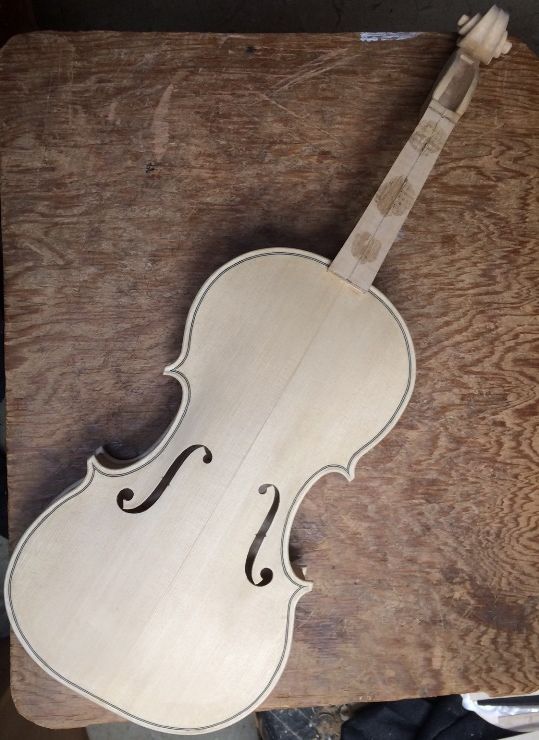
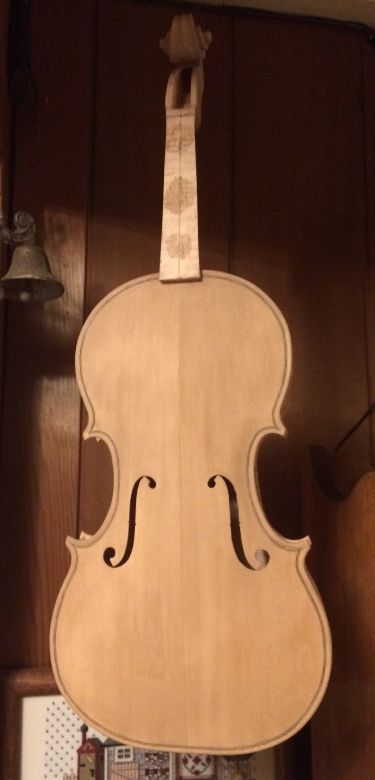
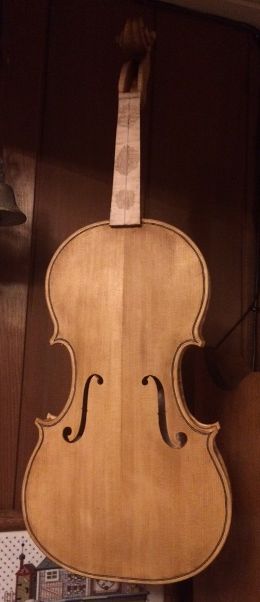
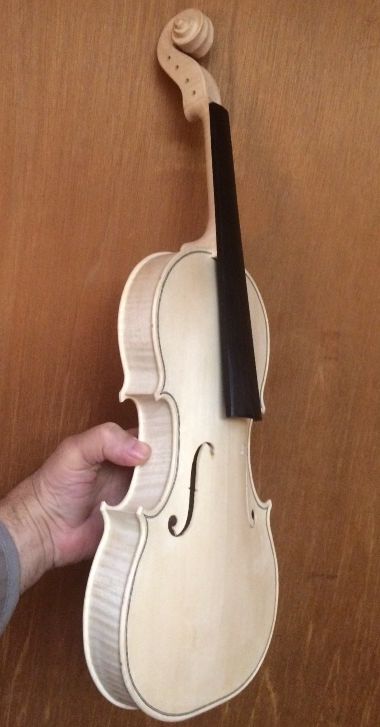
Neck-set, front view.
Neck-set, front view. The mold is still in place.


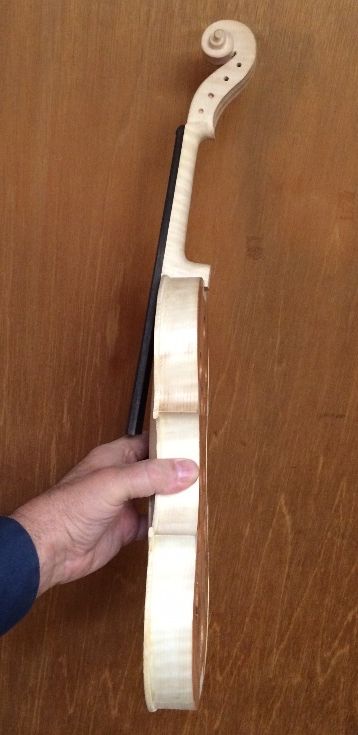
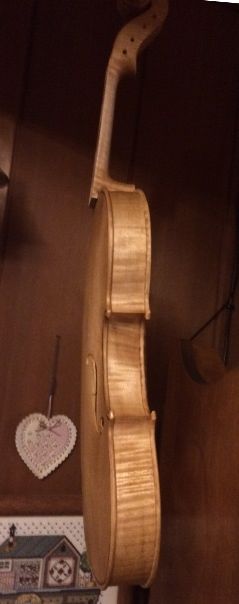
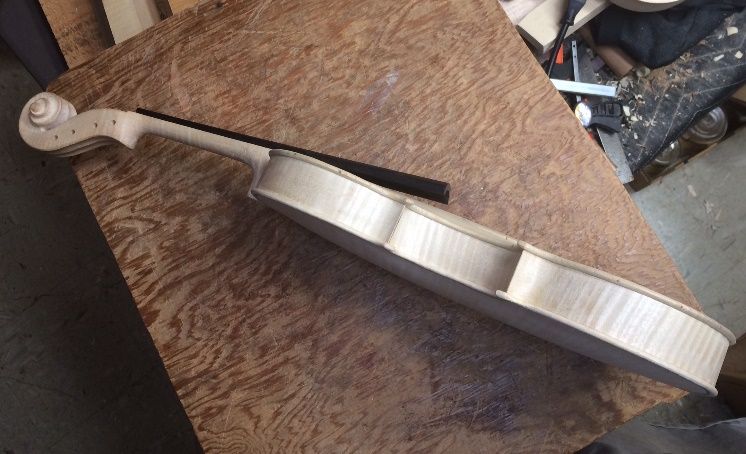
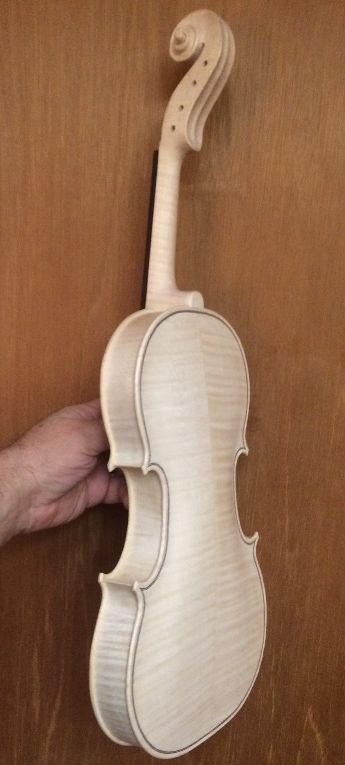
Neck-set, side view
Neck-set, side view. Notice that the neck heel has not been trimmed flush, yet.


Closing the Corpus

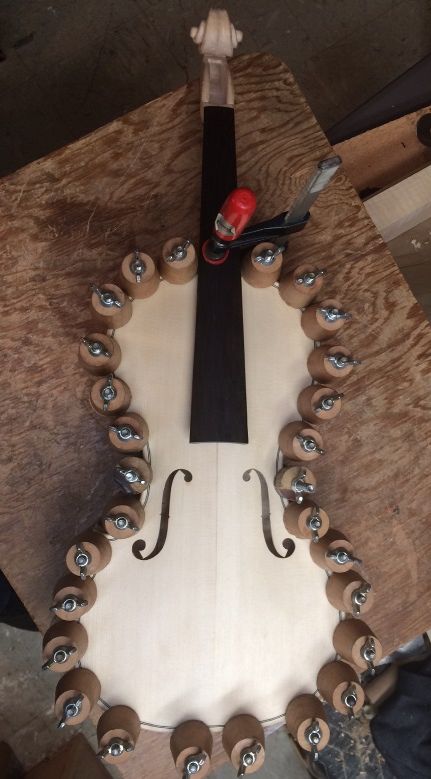
Then I removed the mold, and installed the inside linings on the back edge of the ribs, shaped the linings and the blocks, flattened the back of the garland, and installed the back plate. I use spool clamps and a single large spring-clamp to close the corpus. My wife thinks the spool-clamps look like old-fashioned hair-curlers.
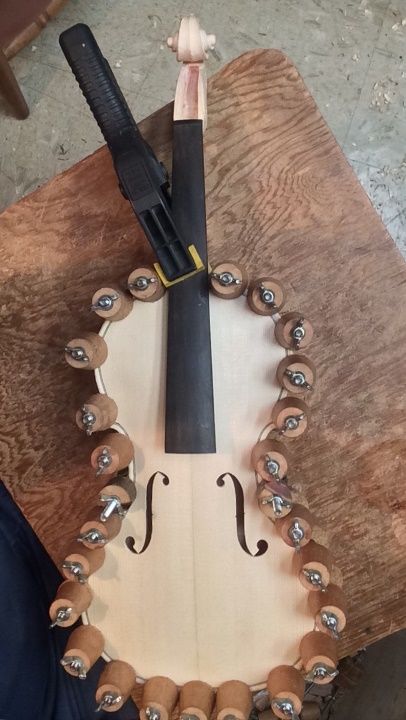
Closed corpus with spool clamps and a spring-clamp.


Trimming the Button and Neck Heel

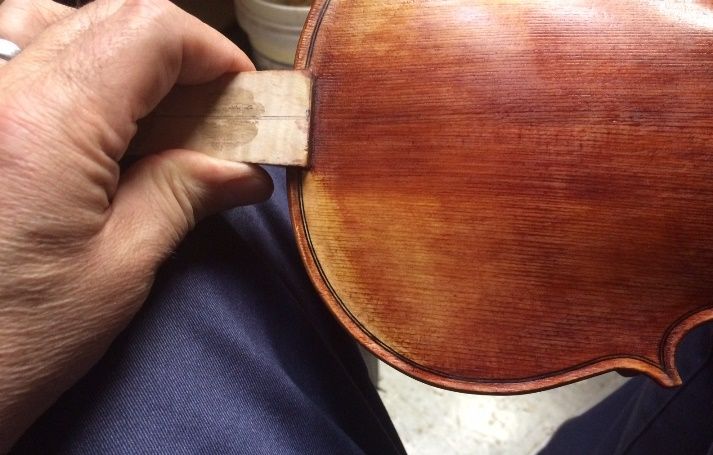
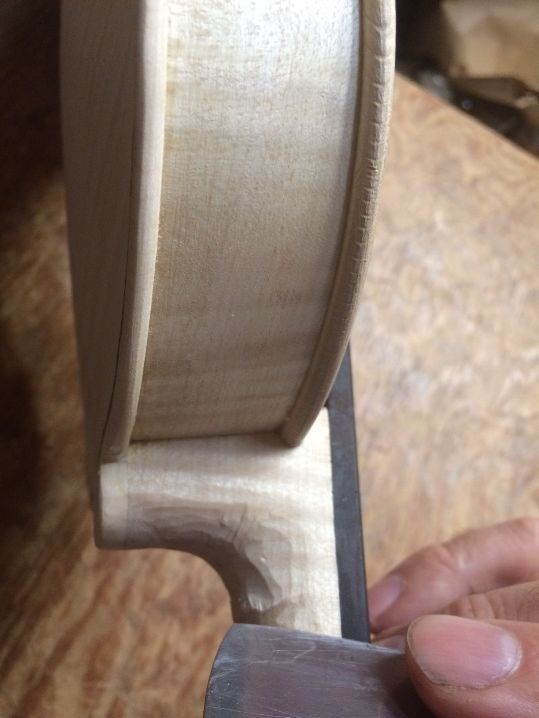
Once the glue was dry, I removed all the clamps, cleaned off any glue that had squeezed out of the joint, and trimmed the button and heel. The dimension from the juncture of the top edge of the front plate and the side of the neck heel (from each side) to the very center of the curve of the heel, should be right at 26 mm. You can see the two marks I laid out with a compass, testing that distance: it was still a little too high in the center of the curve, so the neck needed to be trimmed a little more.
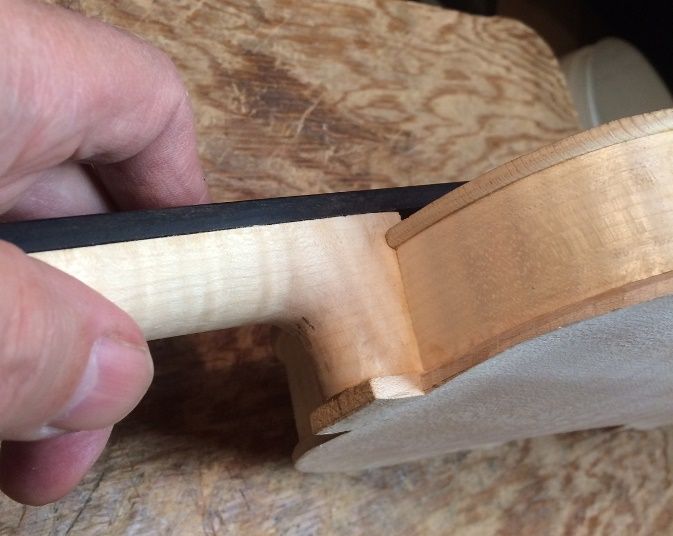
Ready to trim the button and heel.


Purfling the Back Plate

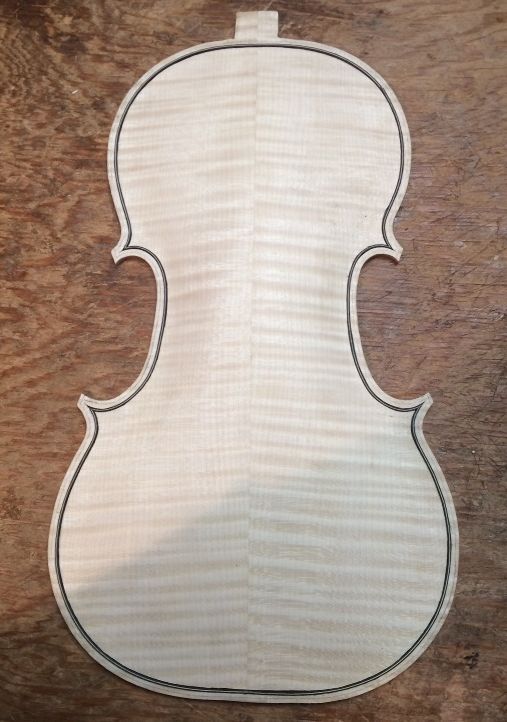
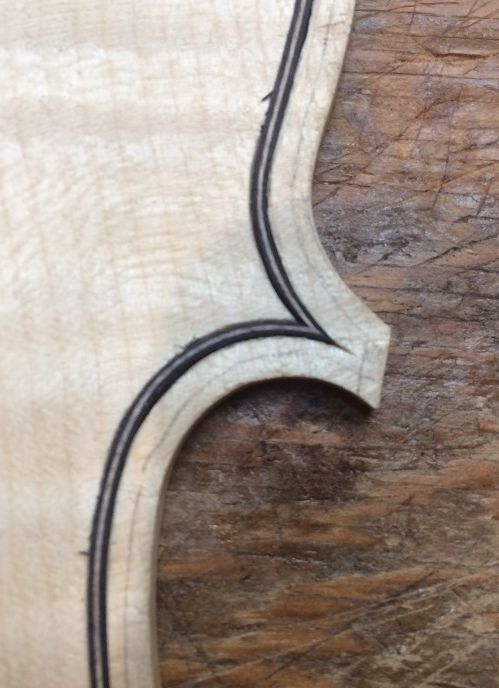
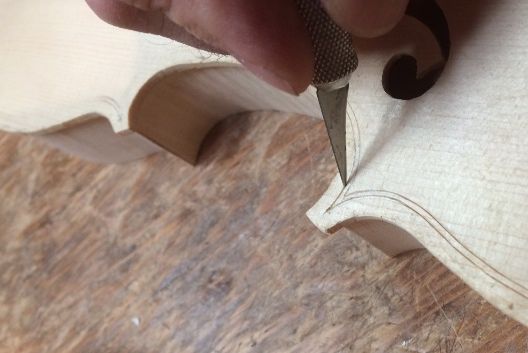
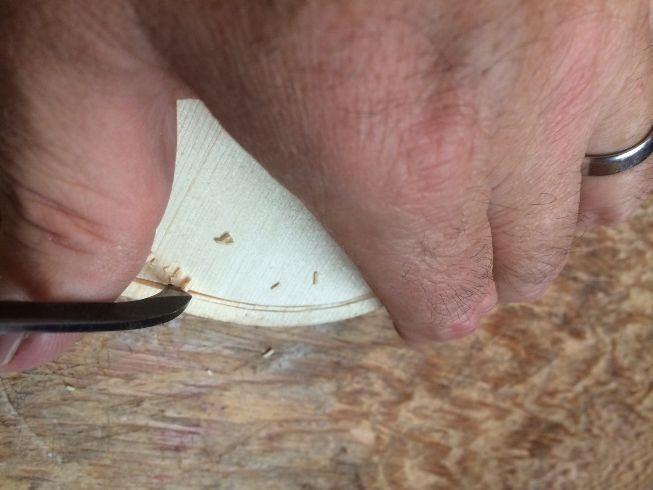
Once the neck-heel and button were trimmed, I still had to perfect the outline of the back plate, making certain that the overhang was even all around, as much as possible. Then I laid out the purfling slot, using a purfling marker, and began incising the outlines of the slot.
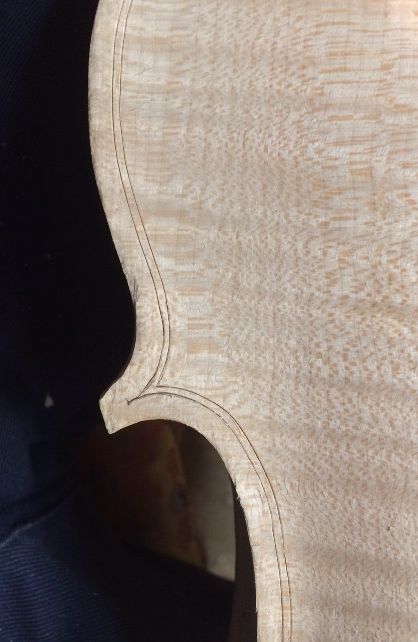
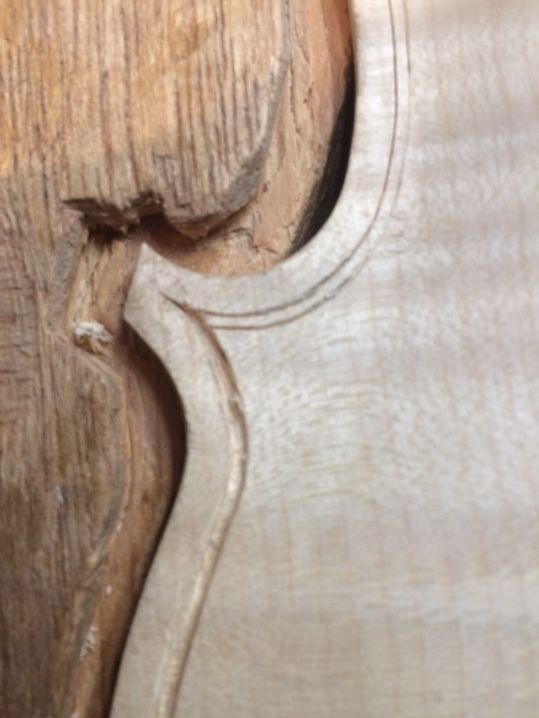
Incised purfling slot.
Incised purfling slot. It will be corrected, and fine-tuned as I work, and look good with the purfling.


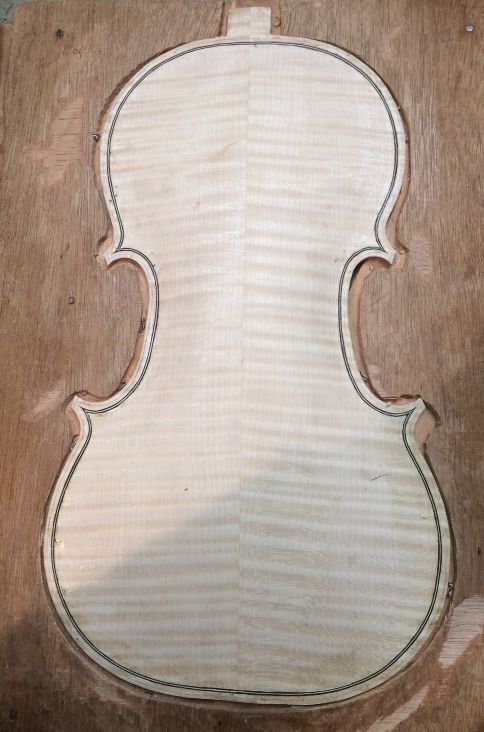
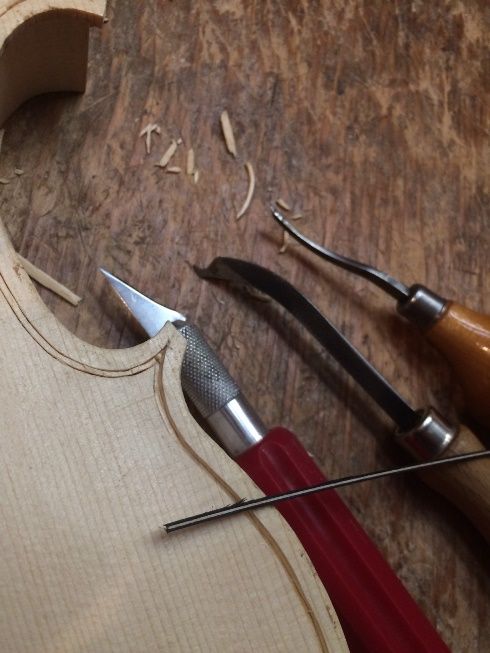
Next I cut the slot out, using a small knife and a purfling pick, then dry-fit the purfling, after bending it on the bending iron. Finally I glue it in place, using hot hide-glue.
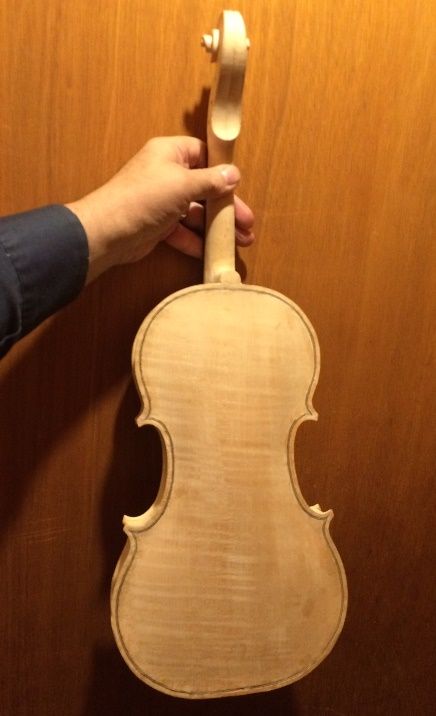
Purfling installed, and glued in place.


Edge-Work

I marked a crest-line, about 1.6 mm in from the outer edge, then used a gouge and scrapers to carve the channel, and fair it into the plate surface. The edges were all still quite rough,and crude, so I began shaping them, using a small plane, and a half-round file, then sandpaper to get a smooth edge all around. I don’t use sandpaper much, but this is one place where it is appropriate.
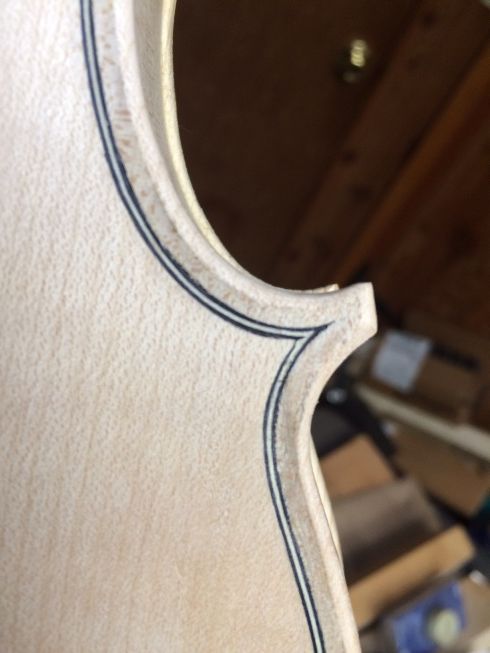
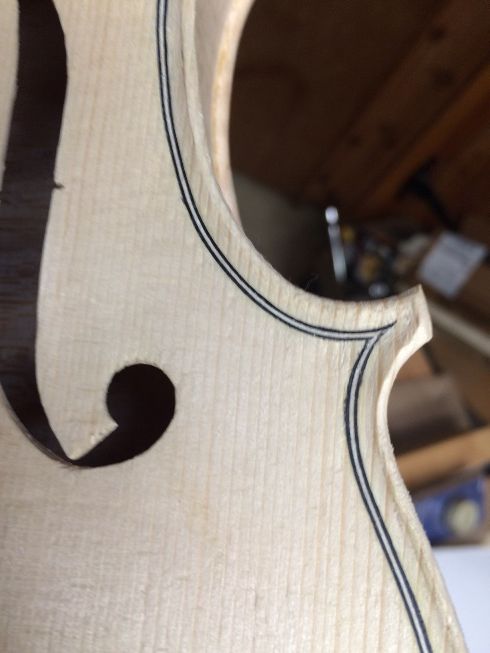
Trimmed purfling, smoothed channel, and edges taking shape.


The front edges have to be finalized as well.


Finishing Process Begun

Once all the varnish preparation is complete, I brush a coat of coffee all over the instrument, to tan the wood a little, and raise the grain. When that is dry, I sand off most of the raised grain, using 400-grit sandpaper. This ensures that the grain will not raise too much during application of the spirit varnish, later. Afterward, I rub in a coat of gypsum in a coffee suspension, to fill the pores of the wood with particles of the mineral. This keeps the varnish from saturating the wood, and possibly dampening the sound.
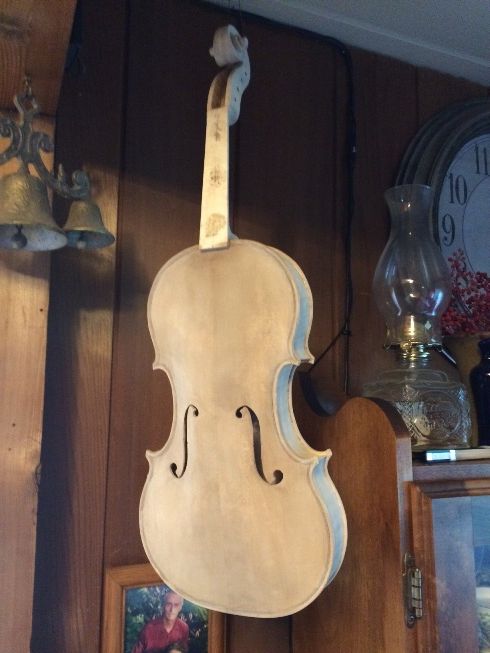
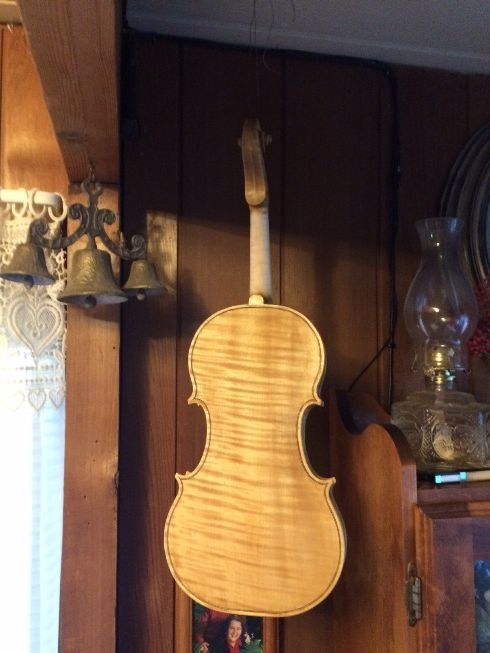
Mineral ground drying.
Mineral ground drying. See how it obscures the wood? that goes away when the sealer is applied.


Back with sealer.
The sealer renders the mineral ground transparent, and it will never be visible again.


I expect that, by tomorrow, the sealer will dry sufficiently that I can begin varnishing. I am getting anxious, as the show is a week from tomorrow, and I am far from completing this instrument.


Thanks for looking.


If you found this post helpful, please share with your friends!

Completed Titian Copy

Please share with your friends!

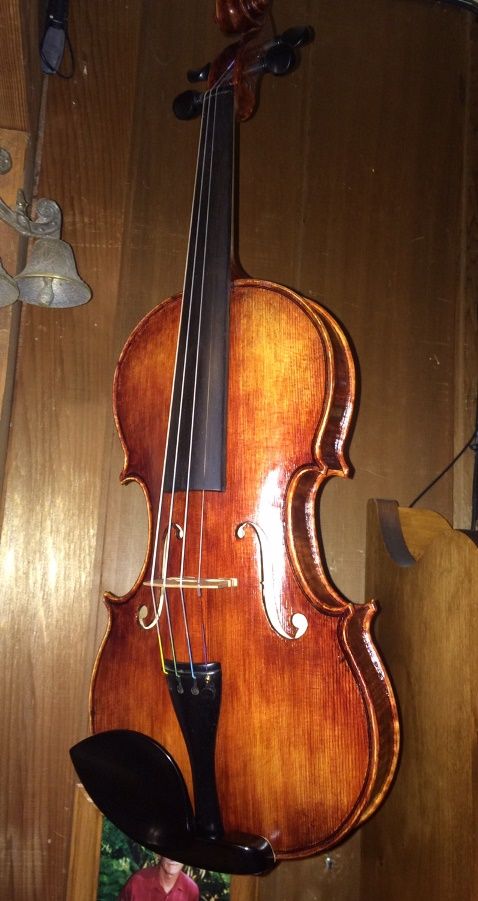
Completed “Titian” Stradivarius Copy

Final work completed

I will probably polish it more, and make adjustments, here and there, but the violin is essentially done.

The photo below is not a good representation of the color– the flash made it look unnaturally bright. The back photo is pretty accurate, though:

flash changed the color.
Unnatural colors, here. Sorry. The previous photos were pretty accurate for color.


Better colors, here.
Better colors, here. I’m guessing the flash caused the problem above.


better colors
This is closer to the true colors. Maybe not as clear, however.


Anyhow, that is where it stands. I have a show in March, in Corvallis, as I announced earlier. I still hope to take this instrument as well as the “Plowden ” Guarneri del Gesu copy to that show, along with a few others: violas, five-string fiddles, and at least one cello.

Hope to see you there.

Thanks for looking.

If you found this post helpful, please share with your friends!

More Progress

Please share with your friends!

More Progress

Plowden Progress

Purfling and Graduation

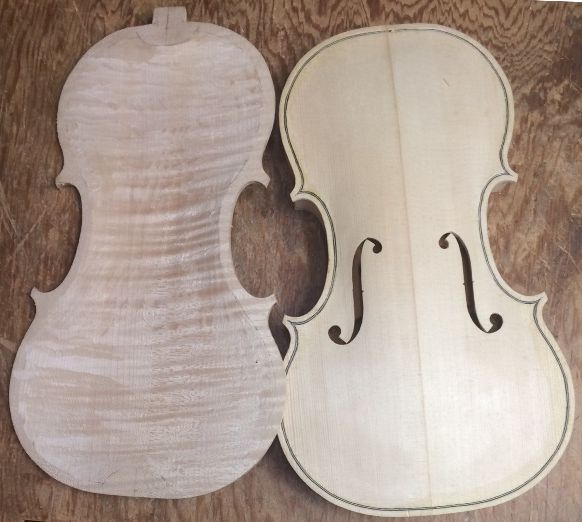
While varnish was drying on the Titian model, I went back to the Plowden model, and began purfling the front plate and graduating the back plate:

Graduation about half done.
Graduation about half done. 


Graduation progress and purfling installed.


Also, I finalized the finishing process on the Titian model, and an ready to begin set-up. The pegs are trimmed, polished and drilled for strings. The nut is at the correct level and has been slotted for strings. The saddle is installed, too. The end button and soundpost were both installed quite some time ago. So, really, all that is left is the bridge and strings, and final adjustment. I don’t tend to count the tailpiece, but, as a matter of fact, it, too requires some adjustment. So does the chinrest, so I shouldn’t treat them as non-entities. The feet opf chinrests virtually never fit correctly as shipped. Tailpiece adjustment requires trial and error fitting, to get the ratio between vibrating string length and after-length (string between bridge and tailpiece fret) adjusted to a 6:1 ratio.

Anyway, here is where it currently stands. I could probably finish it tonight, but then I would be too tired to go to work in the morning…so, tomorrow will have to do. 🙂

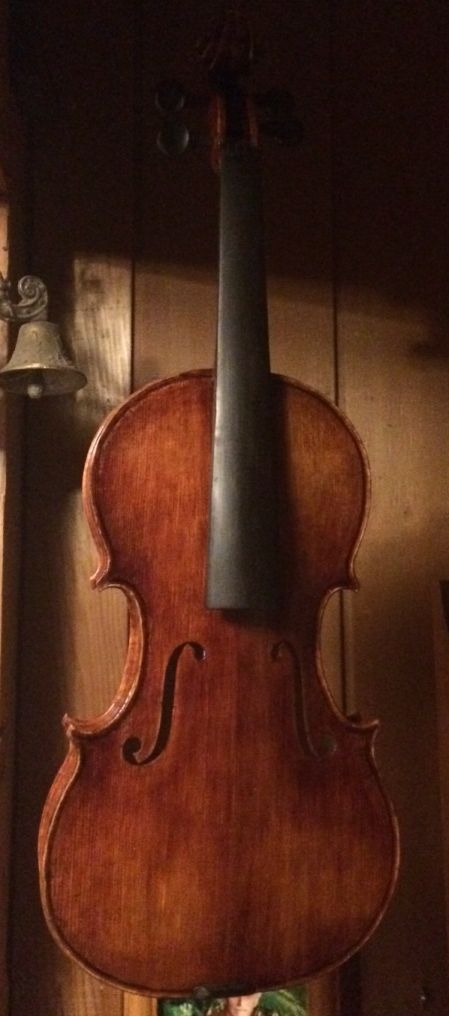
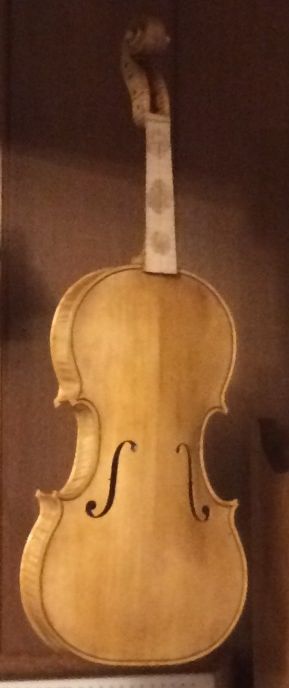
Titian front, ready for set-up.


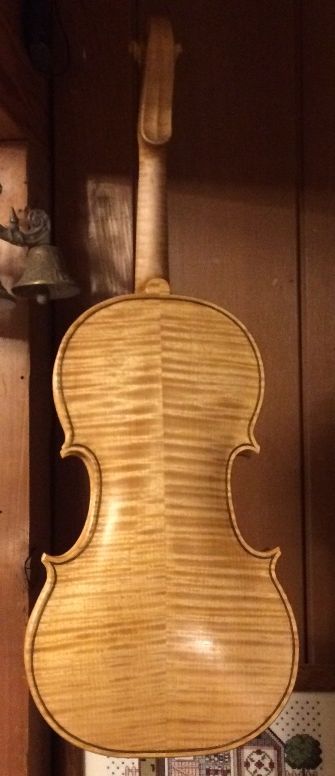
Titian back, ready for set-up.


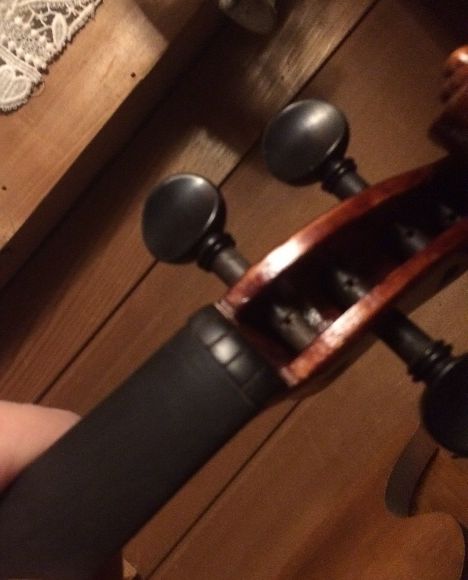
Nut and pegs complete, ready for strings.


Saddle installed, ready for set-up.


So, I hope to take both of these instruments to the show in March (“Violin Tasting Event” at the Hilton Hotel, March 10th in Corvallis, OR), as well as the one in May (which used to be the Marylhurst show, but it will now be at Portland Community College, Sylvania campus: still called the Northwest handmade musical instrument show.) Anyway: lots of work left to do, in order to get ready.

Thanks for looking.

If you found this post helpful, please share with your friends!

Instrument Show in Corvallis

Please share with your friends!

Instrument Show in Corvallis, Oregon

Violin-family Instrument-Makers from around the Pacific Northwest will be there.

I will be there, with Violins, Violas, Cello and five-string fiddles.


I hope to see you there.


Thanks for looking.

If you found this post helpful, please share with your friends!

Finishing the Finish

Please share with your friends!

Finishing the Finish

Color Coats

When I last posted, I had only the yellow, base coats of varnish in place, so the violin looked like this:

Yellow Varnish
Yellow varnish


I added a rapid series of color coats; very thin, deeply-tinted varnish, and then it looked like this:

Color coat front
Color coat, front; emulating the wear patterns on the original 1715 “Titian” Stradivarius violin.


Color Coat, Back.
Color coat, back. Sorry for the poor quality photo…I used the zoom on my phone. Bad choice.


After that coat was good and dry, I continued to build the color in the areas that needed more, and trying to leave it appropriately light in the areas where the Old Master instrument had the most severe wear. I also noticed that there was a “bump”–a ridge in the spruce, near the purfling, which I had not been able to see in the clean, fresh wood, but which, under a reflective layer, became quite apparent. (Sigh...) So, I used a sharp scraper to bring the ridge down flat, and then began rebuilding the varnish layers to match the rest of the area.

Corrective
Corrective “surgery”…removed a ridge in the spruce that I had missed earlier. Rebuilding the varnish, now.


The back was looking pretty nice, though:

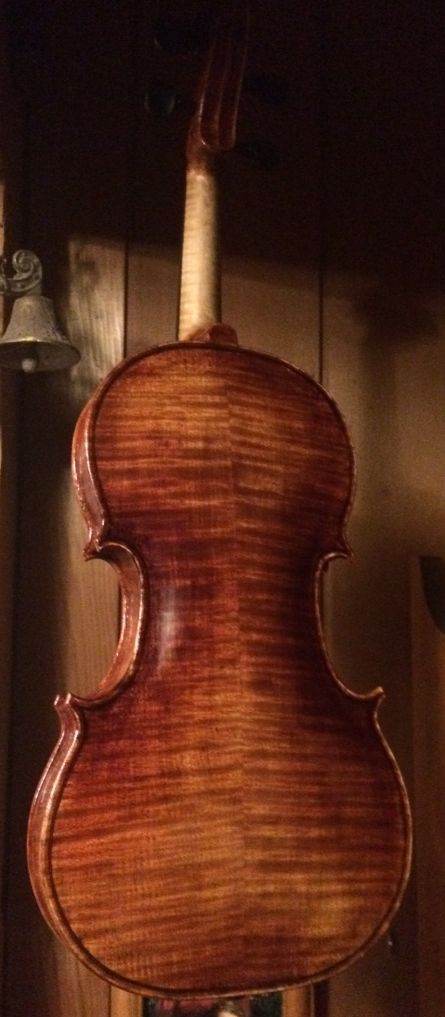
Back nearly complete.


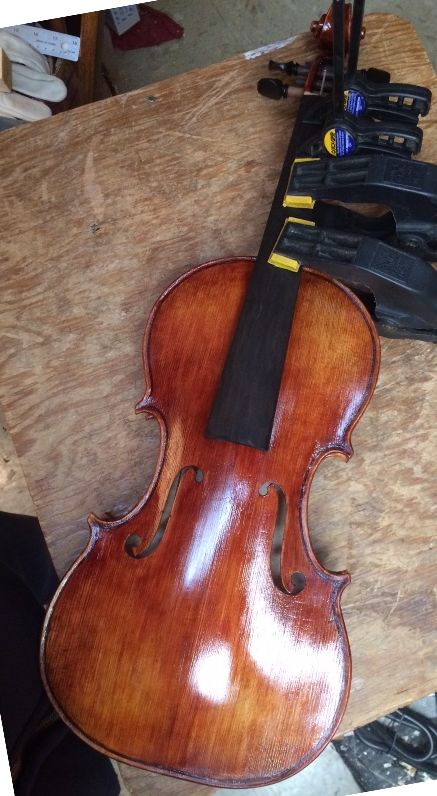
And, today, I installed the soundpost, and then applied two coats of clear varnish. Afterward, I installed the end-pin, the tuning pegs, and the fingerboard. Here it is with the clamps still in place.

End-pin, fingerboard and pegs installed
End-pin, fingerboard and pegs installed; pegs still need to be trimmed to length.


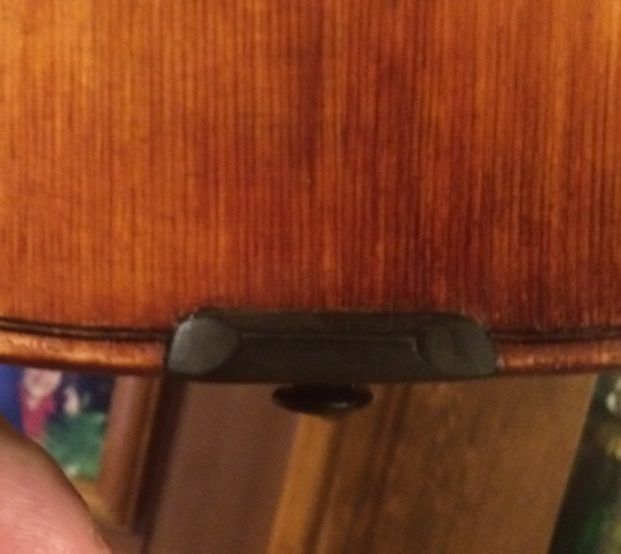
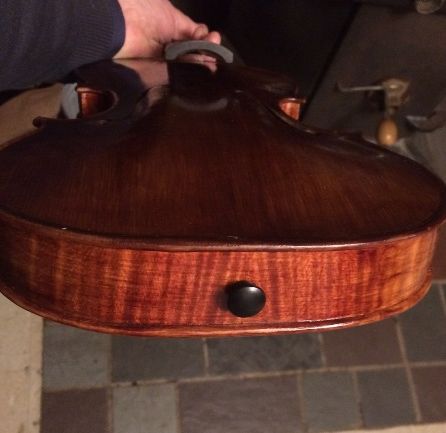
Endpin
Endpin couldn’t be seem in the previous photo…here it is.


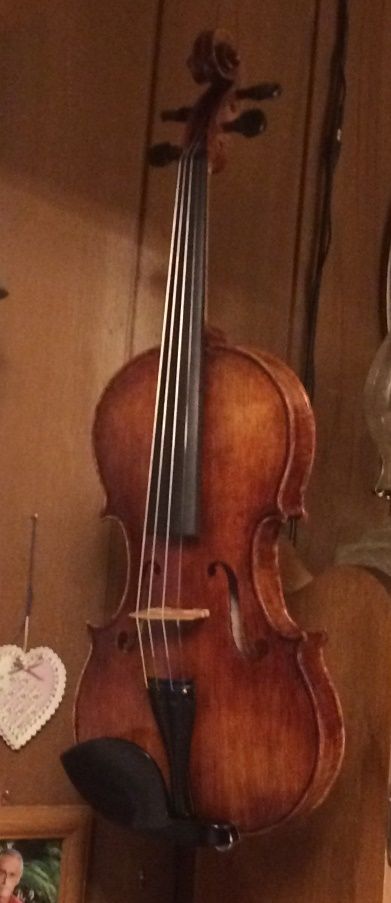
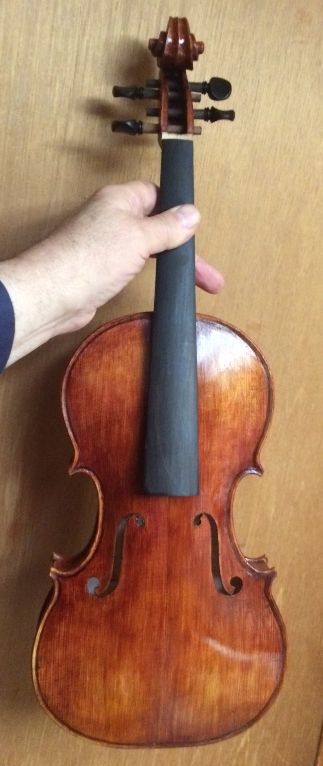
Violin front, prior to set-up
Violin front, prior to set-up.


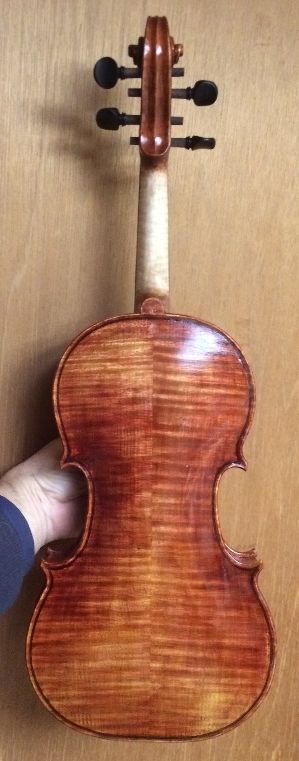
Violin back, prior to set-up.


So: That’s as far as I got, today. Next time; the saddle, the nut and final set-up. This violin is nearly completed!


Thanks for looking.

If you found this post helpful, please share with your friends!

Beginning the Finish

Please share with your friends!

Beginning the Finish

Pre-varnish Scraping and Shaping

Before any finish materials can be applied, the wood has to be about as perfect as I can make it: so I scrape it to its final shape, then dampen it with coffee, to simultaneously raise any fibers that had only been flattened by the scraper blades, but not smoothly sheared off, and, hopefully, add a slight “tan” to the wood, while doing no harm.

Thus, having removed the fingerboard (which had only temporarily been installed) and having applied two coats of coffee, allowing the wood to dry between coats, and having sanded lightly, all over, with 400-grit paper, to remove the raised fibers, and any excessive “corduroy” effect, the instrument went from looking like this:

Shaping complete, but wood un-treated.


To looking like this:

Coffee-stained, and sanded with 400-grit.


Then it is time to begin the real finish: I first coat the wood with a coffee-suspension of very fine, powdered gypsum, hoping to add more color as I fill the grain with the gypsum. I vigorously rub this suspension into the wood, hoping to encourage the tiny particles of gypsum to actually settle into the pores of the wood, so as to fill them, and to slow down the absorption of varnish. It is considered undesirable, in general, to have the varnish really soak into the wood, as it tends to dampen the vibrations that make the sound. Some varnishes are more detrimental than others, but this is something I learned by reading Roger Hargrave’s notes. He is a world-class expert, so I tend to believe him that this is a good idea. I try to remove as much as I can of the excess mineral “ground” before it completely dries, rubbing hard, with a rag, but any that has settled into grain irregularities, I simply skim over, and leave it there.

So, after the gypsum has been applied, it looks more like this:

Mineral ground applied, front view.
Mineral ground applied, front view. A little darker color, and the grain is more obscure.


Back grain quite obscured by the gypsum.
Back grain quite obscured by the gypsum. That will clear up entirely, with the application of the sealer.


The sealer locks the gypsum into wherever it has been lodged, and clears the obscurity, making the gypsum completely invisible. The sealer I am using now is a concoction of pine resin, turpentine, and alcohol, with a little yellow tinting. The turpentine and alcohol evaporate, leaving the resin in the wood.

Sealed Front.
Sealed Front.


Sealed side.
Sealed Side.


Sealed Back.
Sealed Back.


After the sealer dries (a day or so), I begin applying the various coats of varnish: the first two or three coats are fairly yellow varnish, but after that, I begin adding the colors that will characterize the finished instrument.

Front with yellow varnish.


Back with yellow varnish.


From this point, forward, the instrument will become increasingly darker, leaning toward reds and browns. Ultimately, I will try to emulate the look of the 1715 “Titian” Stradivarius violin, after which this insrument is supposedly modeled. We will see how it turns out.


Thanks for looking.


If you found this post helpful, please share with your friends!

Closure and Final Scraping

Please share with your friends!

Closure and Final Scraping

Graduation complete

When I last posted, I was beginning the graduation process for the back plate of the Titian copy. I had a pretty busy week, but this is where it went:

Completing the graduation of the Back plate on the Titian Strad copy.


Once the graduation was complete, I removed the interior form (sometimes called the “mold”) from the garland, and trimmed the blocks and linings, so that the garland and back plate could be joined. I had already flattened the back of the garland, so this was a pretty simple step.


Graduation complete: ready to close!

I aligned the plate on the garland as closely as I could, drythen began applying clamps to hold it. I adjusted the position slightly as I progressed, so that when I finally had clamps on all corners, and in the center of each bout, the position was exactly what I wanted. Then I began removing two or three clamps at a time, and slipping hot hide glue between the plate and the garland, using a thin palette knife. I quickly replaced the few clamps I had removed, and more clamps between them, so that the section was securely attached. Then I moved to the next section and repeated the process, until there was glue and clamps all the way around. I saved the neck block for last, because I intended to add that larger clamp, and it would have been cumbersome, had I used it early in the procedure.


Closed, clamped, and resting overnight.

I allowed the glue to dry overnight, and, in the morning, I removed the clamps and began carving the heel, and working on the edges of the back.

Closed, but a long way from done.


Shaping and scraping the heel.

Finally, all the surfaces looked right, and the next step will be to remove the fingerboard, and prep the entire corpus for the varnighing process. The Guarneri copy is side-lined for the moment, which is what usually happens when I attempt to make more than one instrument at the same time. I usually get to a certain point on all of them, and then run with one to the finish, and come back for the rest. (Ah, well…at least they do get done.)

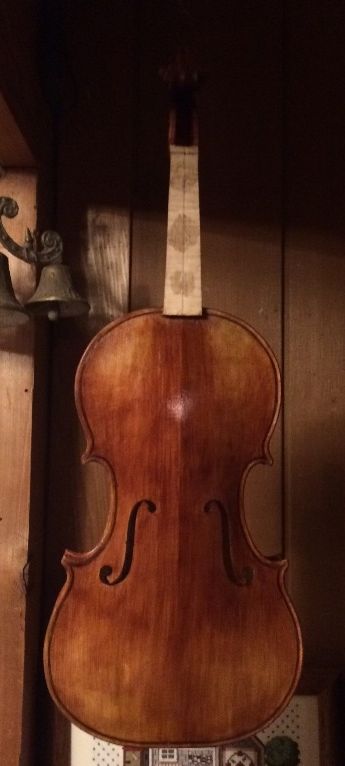
Ready for varnish prep. Front view.


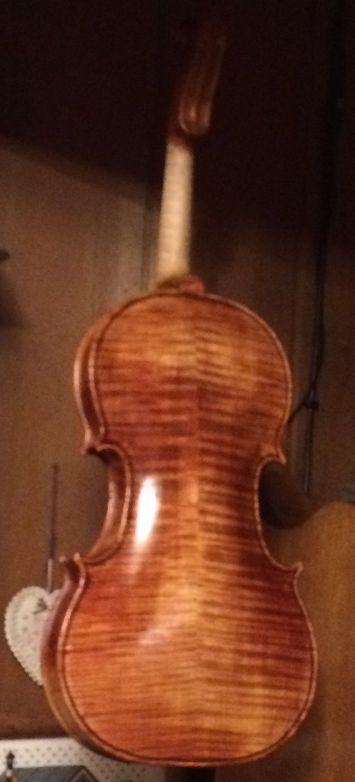
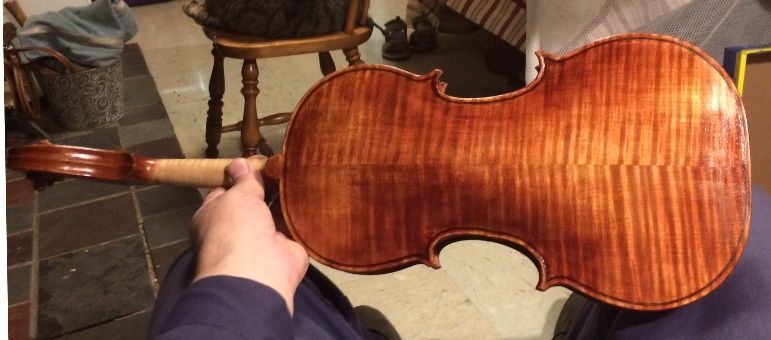
Ready for varnish prep. Back view.


Full Front view: ready for varnish prep.


Full Back view: ready for varnish prep.


Next time, I will either talk about the varnishing preparation process, or I will follow the work on the Guarneri. Probably the varnish-prep. 🙂
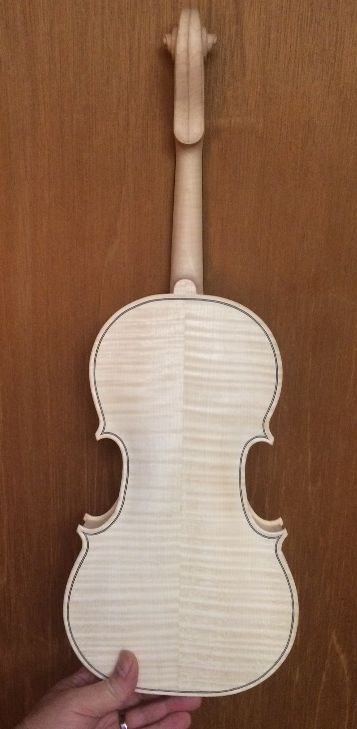
 

Thanks for looking.

If you found this post helpful, please share with your friends!

Purfling and graduating the back plate

Please share with your friends!

Purfling and Graduating the Back Plate

Purfling came first, this time.

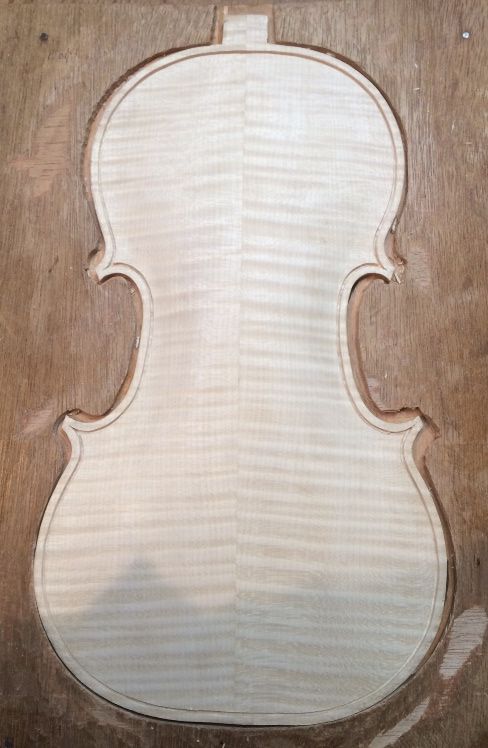
I decided that I would prefer to purfle first, then graduate, on this plate. Maple is much tougher than spruce, and I wanted maximum mobility as I cut the purfling slot, as well as avoiding any danger to the rest of the indtrument when forcing the purfling into the glue-filled slot. It can require a great deal of pressure.


I used the purfling marker to trace out the location of the purfling slot.


Then I began incising the sides of the slot, and removing the waste wood.
Then I began incising the sides of the slot, and removing the waste wood, with a purfling pick.

I always forget, between instruments, just how tough the European maple is. I always find that I have to take breaks once in a while, and allow my hands to rest.
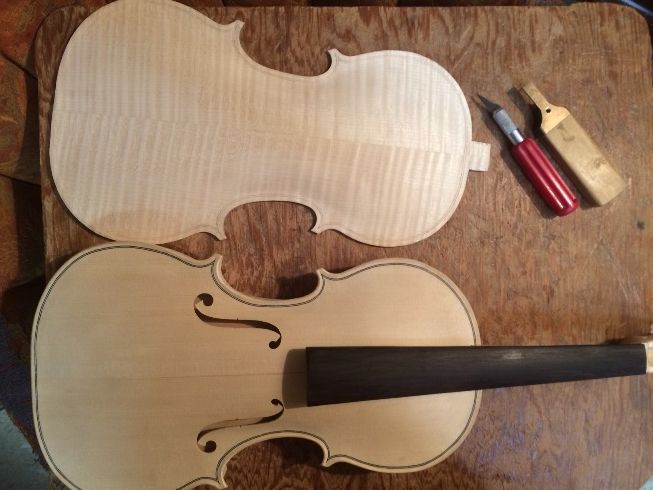
 

Back purfling slot.
I always find the back purfling to be physically difficult, but it is easier to do clean work.


Back purfling slot complete.


After cutting the slot and removing the waste wood, I double-check the width ans depth of the slot by inserting a scrap of purfling into the slot, and dragging it around the entire slot, so that I know the purfling will fit cleanly.
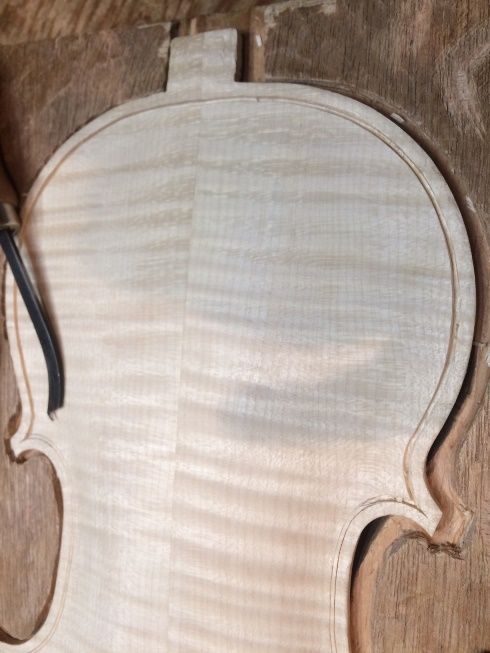
Then I use a bending iron to bend the purfling, I cut the miters for the “Bee-stings”, and I insert the purfling, dry, to get a perfect fit.


Purfling installed dry.


Before I start gluing, I also take time to mark the edge of what will be the “crest” of the edgework, so that I don’t gouge too deeply or too wide, when cutting the channel. After gluing, it is difficult to get the pencil to mark on the wood, if it is either damp or glue-coated.

pencilled-in crest marks.
If you look closely, you can see the pencilled-in crest marks.


Finally, I lift out each purfling segment, one at a time, and slip hot hide glue under the purfling, then quickly press the purfling back down into the slot. I use a hard plastic roller to help force the purfling deeply into the slot.


The purfling is glued in place
The purfling is glued in place, and I can cut the channel now.

In this case, I chose to work on the graduation, next. I did not get it done, but I am within an hour of completion. Then I can conplete the plate, add the label, remove the mold, and close the corpus.


Graduation in progress.

I will also complete the channel and the inner edgework, before removing the mold and installing the plate. But it is getting there…

Vacation is a hard time to get things done, because the people take higher priority, and everything eats up the time. (Ah, well…always good to spend time with family.)


Thanks for looking.

If you found this post helpful, please share with your friends!

Purfling and Neck-set

Please share with your friends!

Purfling and Neck-set

Purfling the Front plate

It is a lot easier to purfle the front plate before the neck is installed. But I have found that I can get better results purfling after installing the plates, than before, though I was taught to purfle the plates very early, before even completing the arching. But what consistently resulted was that I could not reliably produce even-looking edge-overhangs when I purfled before plate installation.

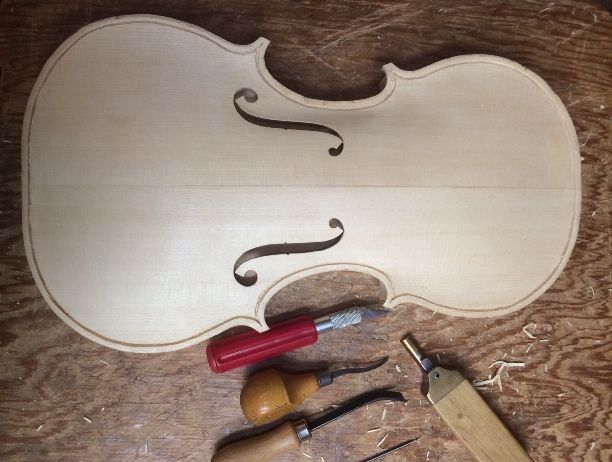
So…beginning purfling, here:

I have scribed the lines, and am beginning to incise them.
I have scribed in the lines, using a purfling-marker, and am beginning to incise them.


Removing the waste wood fromn the slot.
Removing the waste wood from the slot, using a “purfling pick.”


Slot beginning to develop.
The slot is beginning to develop. I use the piece of purfling to check the fit of the slot.


Purfling slot is complete: ready for purfling.
The purfling slot is complete: ready for purfling. A knife, two purfling picks and the purfling marker are in view.


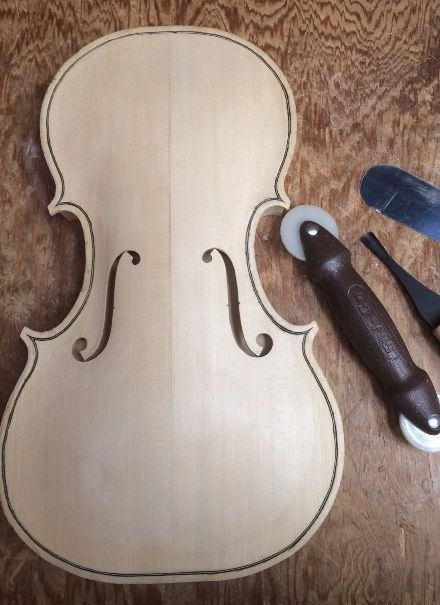
Purfling installed, but not trimmed: channel is next.
The purfling is installed, but not trimmed: the channel is next. I used the roller to press the purfling deep into the slot.


Neck Setting

I did not take as many photos as would have been ideal. I was concentrating on the work, and not thinking about pictures. Sorry.

The heel-end of the neck had to be as close to exactly the final shape as possible before I laid out the neck mortise. As it turned out, I had set the taper incorrectly, forgetting that I had deliberately left the heel long, so I had to re-shape the neck-heel. Fortunately, I caught it early, and was able to make the correction.


Neck ready to install.


When setting the neck, I make no further changes to the neck-heel, but rather, I carefully shape the mortise to receive the neck-heel.

Five factors have to come together for a good neck-set:

  • The angle of the fingerboard to the front,
  • The height of the fingerboard above the front plate edge,
  • The transverse angle of the neck,
  • The transverse “roll angle”, and
  • The distance from the upper end of the fingerboard to the upper edge of the front plate. (130 mm)

All five really must be perfect. Sometimes I can get it quite quickly. This was NOT one of those times. (sigh…)

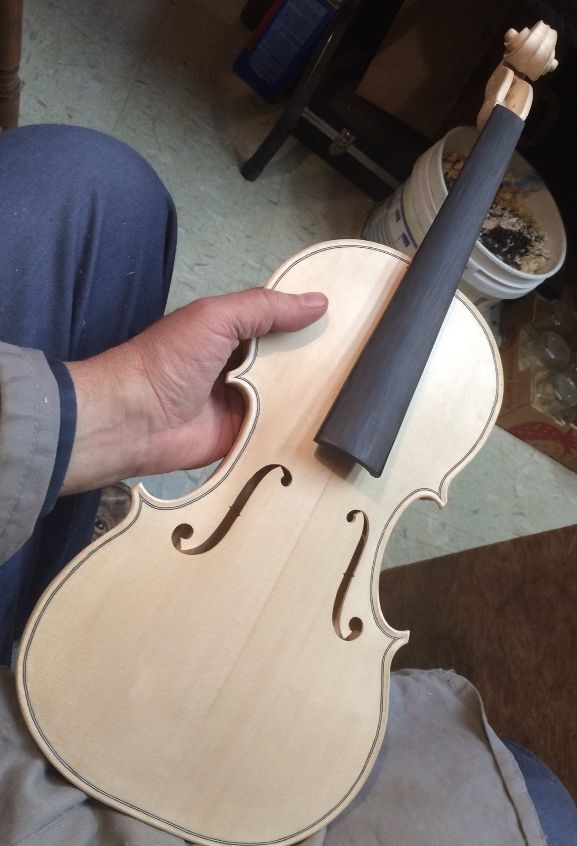
But the end result was quite satisfactory: all five were correct, and the fit was tight. I slathered in the hot hide-glue, and rammed the neck home one last time: no clamps were needed.


Neck Set Complete.
Neck Set Complete.


Next, I will check the back-plate fit, complete the back-plate graduations, install the label, remove the mold, clean up the interior, and install the back plate. This is the “Titian” Stradivari model. I decided to include a scroll-graft and an ebony “button crown” on the “Plowden” Guarneri del Gesu model. So there will definitely be some additional steps to completion, there. I will try to remember to take more pictures.


Thanks for looking.

If you found this post helpful, please share with your friends!