Channel cut and final arching begun

Please share with your friends!

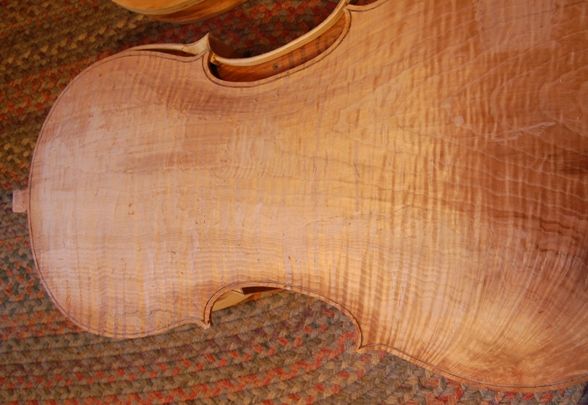
Purfling channel and recurve begun, with final arching on the way.

Mark the crest, first

There are several ways to do this, but I used a compass, with the pencil withdrawn a few millimeters. I wanted to establish the crest of the edge about 40% of the way in from the outer edge of the plate to the edge of the purfling. In this particular case, the purfling is 5mm from the outer edge, so I set the compass for 2mm, and carefully traced all the way around the plate, so that I had a visible guide to follow with the gouge as I carved out the channel.

What gouge?

I used three different gouges: two have a curvature about like the ball of my thumb…no idea what specific sweep…one with a long handle, the other quite short. The third is a much smaller gouge I used specifically in the corners. Every few minutes I stopped and honed the gouges, or at least stropped them. You have to work very carefully to avoid tear-out in carving the channel on very curly maple. I used a rotating motion with the gouges, so that the wood and purfling was being sliced away, and was less likely to split.

What plane?

Once I had the channel cut all the way around, I switched to Ibex planes and began fairing the curve from the bottom of the channel up onto the highest areas of the plate. Occasionally I switched to a tiny flat Stanley plane to smooth out the ridges left by the curved sole Ibex planes.

It is still pretty bulgy, but looking better. All still quite rough…at this point I am more anxious to move a lot of wood than to move it smoothly. As I get closer to the final shape, I will take pains to make sure everything is smooth.

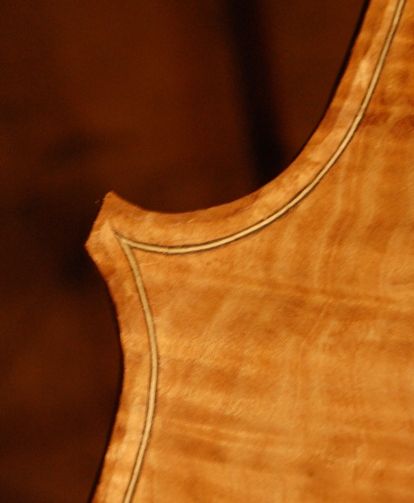
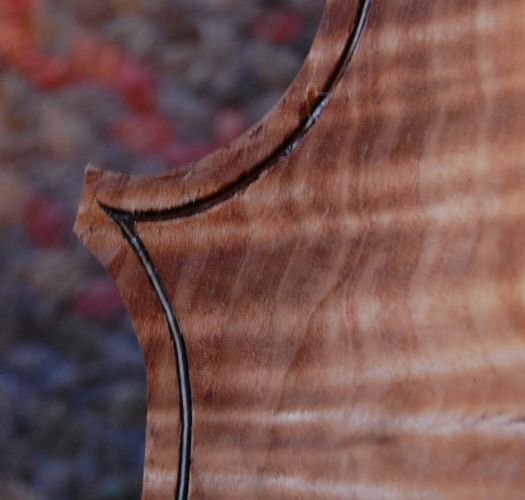
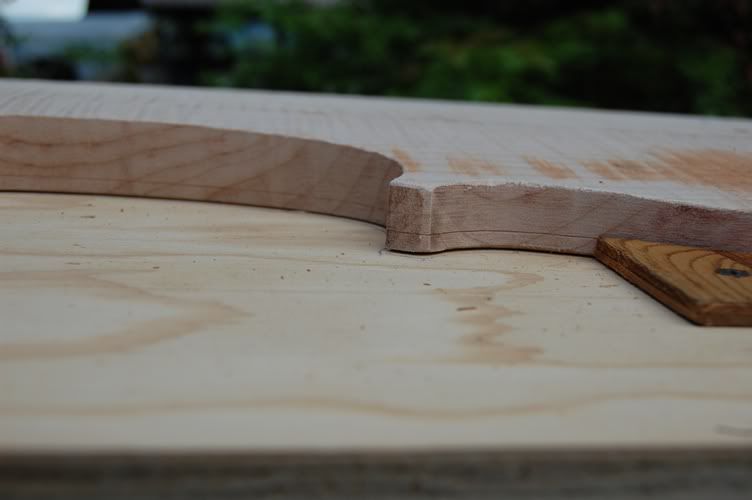
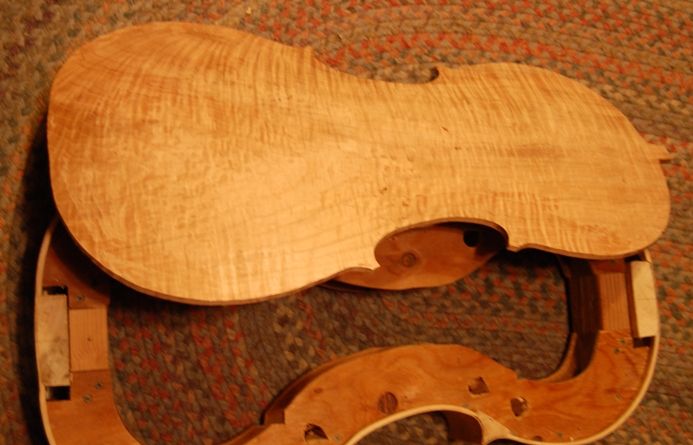
Here are a couple of pictures…not terribly clear, but I think you can see the progress.
channel and recurve cut...final arching begun
Still too high all over, but the channel is cut, and the final arching is begun.
Cello corner with channel cut and final arching begun
Same corner as before, with channel cut and final arching begun

I was getting pretty tired, so I am going to call it a night. I hope to get more done tomorrow night.

If you found this post helpful, please share with your friends!

Cello Back freshly purfled

Please share with your friends!

One-piece Cello back purfling complete.

Narrow (violin-style) purfling, like the original

Today I completed the back plate purfling. Though this is a cello, I purfled it with violin-style purfling, as it was pointed out to me by Jacobus van Soelen that the original instrument (1712 Davidov Stradivarius) had narrow purfling, like a violin, not the wide purfling I used on my first cello (and which I actually like to use on violins and violas, as well.) I just like the eye-catching appeal of the larger purfling as a rule. In this particular case, I must concede that the wood is so beautiful that it really does not need additional “eye-candy”.

The job starts with layout and measuring

Last night I laid out the corners, and marked the whole purfling channel using a purfling marker (sometimes called a purfling cutter— but I only use it for marking– I use a knife to actually cut out the slot for the purfling).

Then cutting and fitting

This morning I incised the whole purfling slot, using a small, home-made knife, and then cleaned the waste wood out of it with a purfling pick.

While I fitted purfling into the slot, and carefully fitted the corner miters, the glue-pot was heating up.

Gluing the purfling

When all the purfling seemed to fit correctly, I tipped each center-bout purfling strip up out of its respective slot, so that it pivoted up and out on the two corner miters, but left the ends in the slots, unmoved. I slipped hot hide-glue (quite thin) into the slot, using a palette knife, brushed hot water to flow the glue, and pressed the purfling strip back into the slot, forcing it deep into the groove with a special tool. (Sometimes I use my purfling pick for that job. Today I remembered that I have a plastic wheel on a sturdy handle,  actually designed for forcing the rubber trim into screen window frames. It worked perfectly. :-)) Then I repeated the above process for the upper and lower bouts.

If I start toward the middle of a section of purfling, and work toward the ends, the glue is forced along under the purfling, and squirts out along the edges and, finally, out the ends, and the miters. The result is that all of the piece has adequate glue, even if some spots had been a little skimpy. Then I brushed more hot water to re-flow the glue, and wiped off the excess with a rag.

So– here is the completed back, ready for final arching, and for having the edge channel cut, etc. It will look pretty rough until the gouge slices along the channel, and trims that excess glue and damaged fibers off the top of the purfling strip. Then it will look very nice. (Purfling isn’t only for looks, by the way, on violins– it also helps stop a split from the edge from moving up into the plate…supposedly.) Anyway, this is how it looks for now:

Completed purfling on one-piece cello back, before carving the channel.
The channel still needs to be cut, but the purfling is complete.
Lower treble cello-back corner, freshly purfled
Lower treble corner, freshly purfled

The next step will be to mark an edge margin all the way around, locating the crest of the finished edges, after which I can use a gouge to carve the channel, and begin the final arching.

But, for today, I have a bow to re-hair, so this is as far as I am going with the cello.

If you found this post helpful, please share with your friends!

Book Review: “Violin-Making, Step by Step”

Please share with your friends!

Step by Step Instrument making

“A journey of 1000 miles…”

Most any task can be broken down into a series of more manageable steps– discrete tasks within the larger task, that, taken individually, are not overwhelming. Henry Strobel took the job of making a violin, viola, or cello, and separated all the individual tasks into a very manageable series of small incremental steps. The key book is the one on violin making. The others are keyed to that manual.

Traditions maintained

Each book includes a pattern (two, in the cello book), and each gives a no-frills approach to instrument making. Henry follows traditional methods, mostly using hand tools, and using all traditional procedures,  aesthetics, materials and varnish.

Practical teaching

There are other books more glitzy, more encyclopedic, more scholastic, and much, much more expensive, but Henry Strobel’s books are imminently practical, and affordable, clear teaching. If you can actually read carefully and follow directions accurately, you will probably produce a pretty respectable instrument on your very first try, especially if you can find an experienced maker willing to coach you when you are trying something completely new to you.

Good results

I know a young man who built his first violin from this series, and it is currently being played by a first violinist in the local city orchestra. He then proceeded, for his second instrument, to make a cello (a stunningly beautiful cello) and now  is playing that cello in the same orchestra, himself.  He had zero prior experience with woodwork, and there were some frustrating times, learning to sharpen tools, etc. But he managed to complete both instruments, and both are quite good.

My recommendation:

Because I started with Henry’s books, myself (though I have gotten many others since then), I still suggest these books for the beginner. I also recommend that you start with a violin or viola, as I can nearly guarantee you will break a rib (or three) while learning to bend ribs, and it is much easier and cheaper to replace broken violin ribs than cello ribs.

Do remember that the violin-making book is necessary in order to understand the viola and cello books. But if you feel like building a fiddle, order a book, and give it a try! What have you got to lose? (And, if you get stuck, feel free to drop me a line…maybe I can bail you out. )

If you found this post helpful, please share with your friends!

Rough arching completed on back plate

Please share with your friends!

One-piece back, rough-arched, ready for purfling.

Final arching is yet to come

This is all I got done tonight. The edges are all at about 6mm, now, and the rough contours of the arching are complete. Tomorrow, I hope, I will finalize the edge footprint, so that it is exactly the shape I want the cello to be. (I waited until the edges were thinned, because it is much easier to make small adjustments to a plate when it is 6mm thick than to do so when it is 35mm thick, as it was two days ago.)

Flattening and thinning the rough plate

Two days ago, I worked the thick plate from 35mm down to 29mm, and decided to start from there on the rough arching. I may bring it a little lower yet…I haven’t decided yet just how high I want the back arching on this cello. I am thinking a little higher than the last one. The original Davidov is pretty flat…I may still emulate that curve.

Rough Arching

Tonight I simply worked a flat area all the way around the plate, at about 6mm (which I had marked ahead of time with a marking gauge), and then used a variety of tools to bring the shape of the plate to a “cello-shape”, though still a little plump.

Cello edge-thickness marked with marking gauge
Edge-thickness marked with marking gauge.

This (above) is actually a photo from the previous cello…I forgot to take a photo of the edge mark on this current cello before I began carving. Once I have the edge shape exactly the way I want it, I will probably take it down to 5.5 or even 5mm. The 6mm mark was just a good starting point for rough work. I ran a ball-point pen around the groove, too,  after scribing it with the marker, so I could see it more easily, as it was sort of dark out in the shop. So, this is how it looks now.

Rough arching on one-piece back-plate for cello.
Rough-arching completed–almost ready for purfling.

Purfling is next

Once the edge is exactly the shape and thickness I want, I will mark the purfling groove location, and begin cutting the groove for the purfling. Once the purfling is completed, I can finalize the outside arching before beginning the inside carving. When this is completed, it will be a maximum of 8.5mm-9mm in the center area, fading out to 4mm or so around the flanks, and back up to 5mm at the edge itself. I have a long way to go. It is certainly pretty wood, though. That is always encouraging.

If you found this post helpful, please share with your friends!

Why a Five-String Fiddle?

Please share with your friends!

Why not a Five String Fiddle? 

Traditioooonnn, Tradition!!

Violins have been codified in terms of form, size, materials and tuning for over 400 years. Orchestras have 30+ violins, between which the untrained observer would have a difficult time distinguishing, let alone identifying as having come from a particular maker’s hand. And yet experts can frequently tell at a glance when, where and by whom that violin was made. And ALL of them have four strings (count ‘em): G, D, A, and E. No five-string violins in the orchestra!

The violas, too, have their four strings, always at C, G, D and A. They are less tightly defined, however and are all over the board in terms of size and shape. Some are so large that most normal-sized people can’t play them, and some are not much larger than a violin. But they all have those four strings, tuned exactly a perfect fifth below those of the violin. No five-string violas, either.

NON-traditional is OK, too.

Really, a viola works best at what it does, and a violin works best at what it does, as specialized tools…but when they are so close in size—indeed, sometimes overlapping—what prevents us from having one instrument that covers the full range of both? A five-string fiddle?

Well…that isn’t as easy as it sounds. The physical size of a violin is barely big enough to really produce the open G-string tone, so simply adding a low C-string will not work well…and the viola is almost too big to make good high-pitched notes, so adding a high E to a larger viola is usually not very satisfactory either.

Five-string fiddles specifically designed for five-strings

But it CAN work…with some tweaking. Honestly, probably a five-string fiddle would work best in the size of a small viola—say, 15”—or even 15.5”. But country fiddlers and bluegrass fiddlers, who are waking up to the desire for a fifth string, and a lower range, don’t want a “five-string viola”–they want their instrument to fit in a regular fiddle case—not a viola case. They want a handmade five-string bluegrass fiddle. (See Five-string fiddles)

What has worked for me, so far, is to maintain the “footprint” of a regular violin, but increase the depth of the body a little; lengthen the pegbox, obviously, for the extra peg and string; thin the plates just a little more, and deepen the bassbar a bit. I may try widening the center bouts just a little, too, sometime. But for now, I have a working model, with which everyone seems very pleased: it is very easy to play, has good balance across all five strings, a big deep bass end on the C string, and clear, strong high notes on the E string.

So, when a fiddler wants to be able to go low and growly, he/she can do so. When he/she needs a high end for some special sizzle, it is there. All in one fiddle case. A five-string fiddle case.

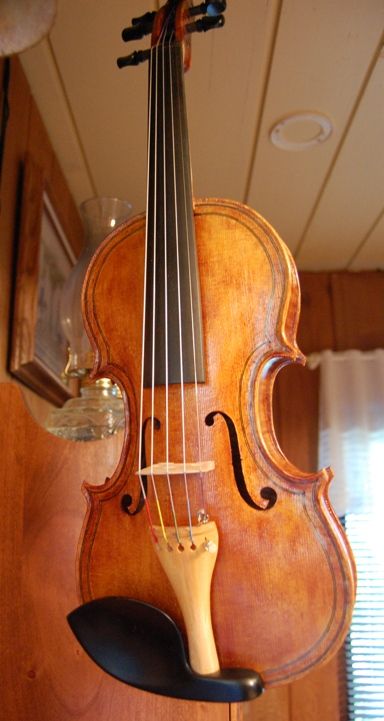
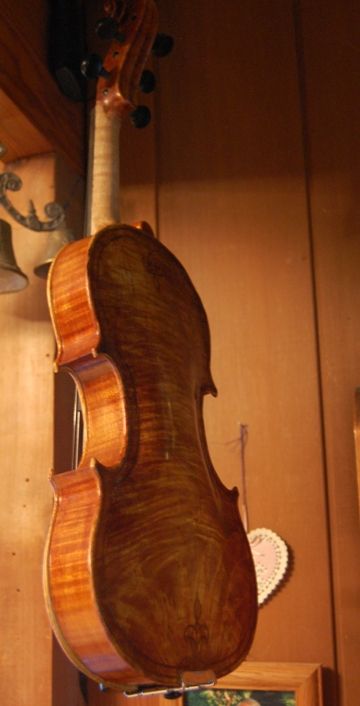
 Oliver Five-string fiddle, by Chet Bishop. Sold.
Front view of Oliver Five-string fiddle, by Chet Bishop. Sold.
Oliver Five String Fiddle, by Chet Bishop (Sold)
Back view of Oliver Five String Fiddle, by Chet Bishop (Sold)
If you found this post helpful, please share with your friends!

Cello garland lined, and Back plate cut out

Please share with your friends!

Cello linings completed; One-piece cello back plate traced and cut out…ready for arching

Back linings completed first

This morning I got up early and installed the back linings on the cello. While the hot hide glue dried, I set up a violin for a friend, whose grandfather had left it to him.

Tracing the plate

Once the glue was dry, I removed all the clamps, planed the ribs to be fairly level, and traced the outline of the back plate, using a very short section of aluminum tubing (5mm long, 25mm diameter, 3.5mm wall thickness) and a ball-point pen, to trace around the ribs and mark the maple slab from which the back was to be cut. The tubing is tall enough (5mm) to never slide under the edge of the ribs, even if there is an irregularity on either the ribs or the plate, and the 25mm diameter rolls along steadily and easily along the side of the garland itself, making it a fast, pleasant task.

Cutting out the plate and refining the edges

I cut the plate out on a bandsaw, only using a scroll saw for areas too difficult to access on the bandsaw. Then I smoothed all the edges on an oscillating spindle sander. I do not use many power tools, but the saw and the sander are two that I consider indispensable at my age. They save me a lot of wear and tear on my joints. I have built instruments using all hand tools…no power tools at all…but I do not consider it a virtue, and probably will never do it again, if I can help it. I still have the bow-saw I built for that fiddle project, and all the files, planes and scrapers. The only one I no longer use at all is the bow-saw. It hangs on the wall reminding me of that early violin.

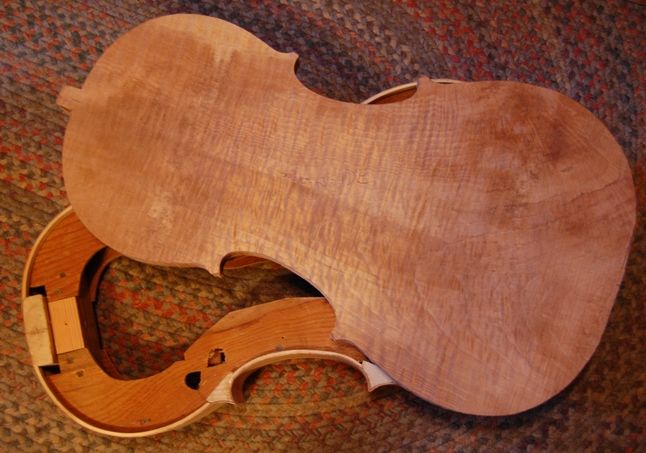
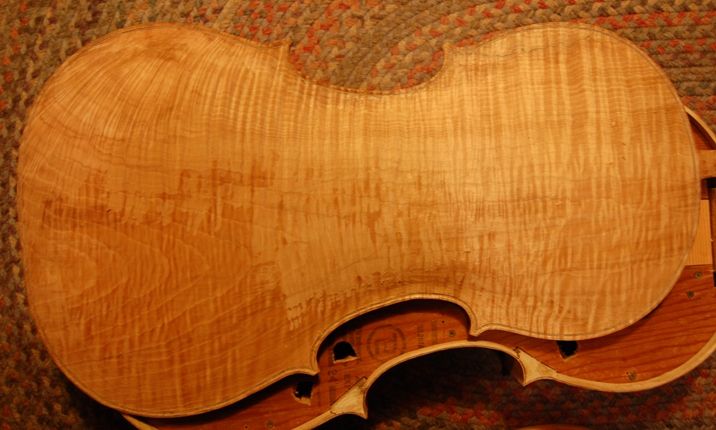
So…now the cello garland (still on the collapsible cello mold) and the back plate look like this:

One-piece cello back plate with garland on mold
Cello garland on mold, with one-piece maple back plate

Arching is next…but I am pretty tired, so I don’t think I will start today.

If you found this post helpful, please share with your friends!

Cello linings installed (front)

Please share with your friends!

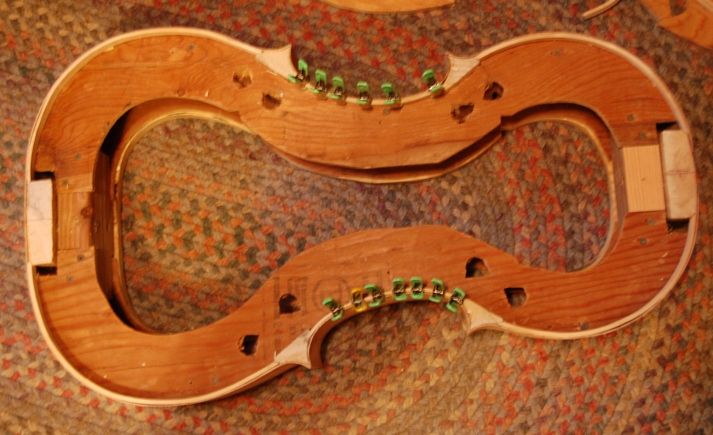
Willow cello linings installed, glued and clamped.

Purpose of the collapsible cello mold:

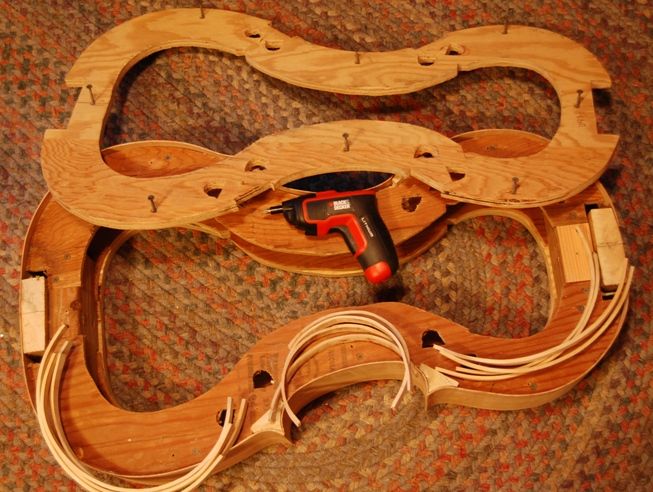
My cello mold is built with a front and back “spacer”, each of which is removable to allow installation of linings. Each is held in place by a few drywall screws. I got tired of the repetitive motion of turning the screws by hand, and bought a very cheap  electric screwdriver, barely sufficient for the task. I will later make a special attachment for it so that it can turn the tuning machines on double basses…that’s another task that wears out my wrists. Anyway– in less than two minutes I removed the front spacer, and the cello looked like this:

Cello mold with ribs installed, linings ready to install--front spacer removed.
Cello mold with front spacer removed and linings ready to install.

Dry-fitting the linings:

Then I cut the mortises into the blocks, fitted the linings (that I had bent earlier) into their respective places, and prepared for gluing. So, with the linings dry-fitted and ready for gluing, it looked like this (notice that only the center linings have clamps at this point; that is because they want to relax away from the rib, while the upper and lower linings straighten and tighten against the rib):

Willow cello linings dry-fitted, ready for gluing.
Cello linings (willow) installed dry, ready for gluing.

You can see the importance of the linings, by comparing the two photos above: without the linings, the ribs are only about 1.5mm thick…not very strong, nor is there sufficient gluing surface on that thin edge. So, with the linings in place the edge is about 5.5mm thick, which significantly strengthens the edge, and more than triples the gluing surface.

Hot Hide Glue and lots of clamps!

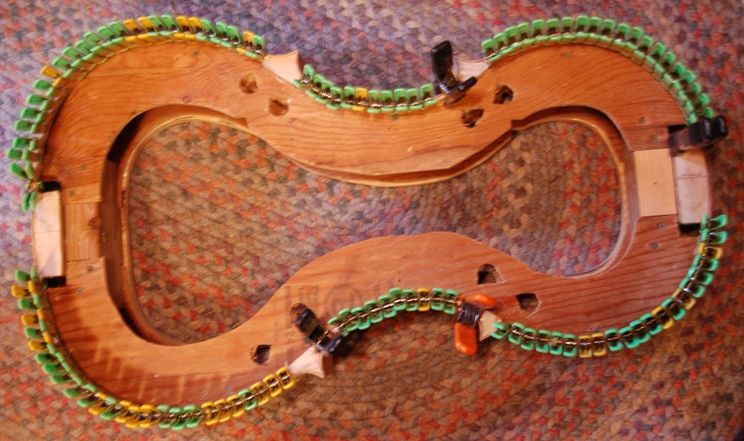
Once all the linings fit correctly, I heated up my glue, prepared a container of hot water, and my various brushes and palette knife, and, one by one, I brushed on the hot hide glue and clamped each lining in place. Those little spring clamps work pretty well. I got them from Home Depot, and they have served this purpose to my satisfaction. Occasionally there is a reluctant joint that needs more pressure, in which case I use a larger clamp, or one of those little f-clamps. (You can never have too many clamps!) After gluing and clamping, the cello looks like this:

Cello linings glued and clamped in place.
Cello linings glued and clamped.

Once these linings dry, I will remove the clamps and repeat the process on the back side. the back has a slight taper, from tail to neck. At the bottom block, the ribs are about 113mm tall. At the neck they are about 108mm tall. So I will want to plane the ribs to those approximate dimensions before I install the linings. One thing you can’t see in the photos is the fact that I fit the linings just a little high…slightly “proud” above the rib edge. I want to make sure that whatever planing needs to be done is primarily removing willow, not curly maple. I will accomplish final leveling with a sanding board, however, just before tracing the shape of the plates, from the shape of the completed rib garland.

If you found this post helpful, please share with your friends!

Bent Willow Cello Linings

Please share with your friends!

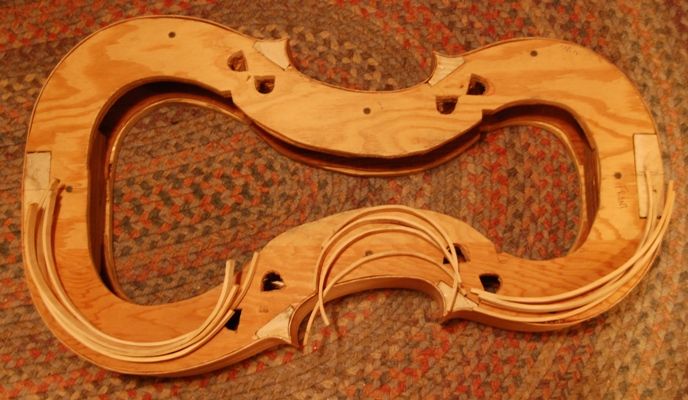
Cello Linings, Willow, bent and ready to install

The linings I sawed up yesterday are now bent and ready to install.

While the bending iron was warming up (which takes about 20-30 minutes, especially in cold weather), I used a very small hand plane to smooth the edges of the linings, since some were still a little rough, especially if they had been the outside edge of the strips I cut from that beat-up 4 x 4 I brought home.

Once the iron was hot enough to make water droplets dance on its surface, I dampened each lining strip one at a time, and used a metal bending strap to force the wood against the hot surface of the (aluminum) “bending iron”. These linings are about 4mm thick, so I gave each segment a full 15 seconds to heat up, or 20 in the case of the c-bout linings which were to endure a tighter bend. As I heated one section, forced against the flattest curve of the iron, I counted seconds, then shifted the wood sideways to heat the next section, still maintaining the curve of the first, and so on, until the entire lining strip had the curve I wanted it to have. You can see that I deliberately over-bent them: I do so because it is pretty easy to straighten them out a little, to adjust them to fit tightly against the ribs.

Here is what they look like now:

Bent willow cello linings ready to install.
Bent willow linings, ready to install with hot hide glue.

Tomorrow evening, depending on how tired I am when I get home, (or probably Friday, since I have to go to bed very early Thursday in order to get up at 2:30 AM and go teach a code clinic class before my regular work begins on Friday morning) I will remove the front section of the mold (notice the screws holding it), which will allow room for the linings to be installed. I will cut the little mortises in each side of each block, to receive the ends of the linings, then brush hot hide glue onto each rib and lining, one set at a time, and clamp them in place with little spring clamps. After the front linings are dry, I will repeat the process with the back linings.

Starting to look more encouraging, now.

If you found this post helpful, please share with your friends!

Cello Linings for Free!

Please share with your friends!

Free Willow Sources

I like to use Willow for cello linings and cello blocks, but willow is not a common timber to be able to just go and buy. Last year I got a small log of it, from a limb that blew off someone’s tree, but I have not yet cut it up, so, in spite of the fact that I “have” it, it is not particularly accessible right now.

Bruce Harvey, of Orcas Island Tonewoods,  once suggested that I learn what willow grain looks like and start watching the pallets and dunnage at work. (Apparently, though it is not popular for much else, it works for pallets and the like.) It took me a while to really learn what the grain looked like, but eventually I learned to spot it, and sure enough, a week or so ago, I spotted a likely candidate in a stack of dunnage (the timbers used to separate parts of a load of steel, for shipping purposes). I grabbed it (a 4 x 4, a little over 3′ long, dirty and battered) and checked it by whittling one corner. Bingo! Pay-off!

Tonight I needed a pile of linings for the new cello I am building, so, though I got home late after teaching a class, I walked out to the bandsaw, and, in five minutes (literally) I had a stack of linings big enough for two or three cellos…and lots more left over. (Thanks, Bruce!)

Tomorrow night I will get home a little earlier and expect that I will bend them all and install all the front linings. The following evening (or maybe Friday), I can install all the back linings. Then, Saturday, I can trace the back plate, I hope. (I haven’t even joined the front plate yet, so it will have to wait. Maybe I can get that done this weekend, too. 🙂

I’ll post pictures in another day or so. A pile of linings isn’t very exciting, unless you are building a cello. 🙂

If you found this post helpful, please share with your friends!