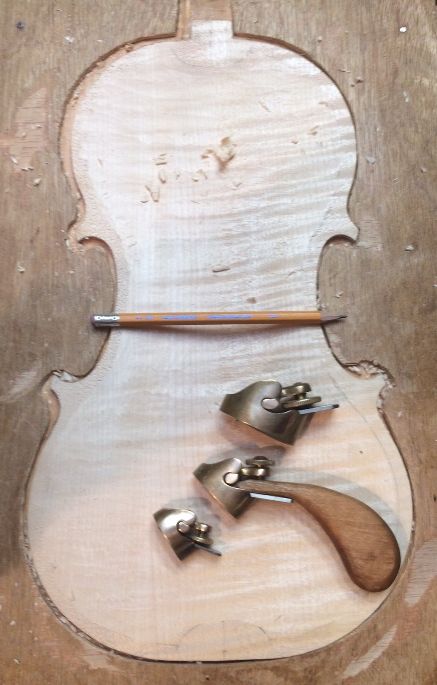
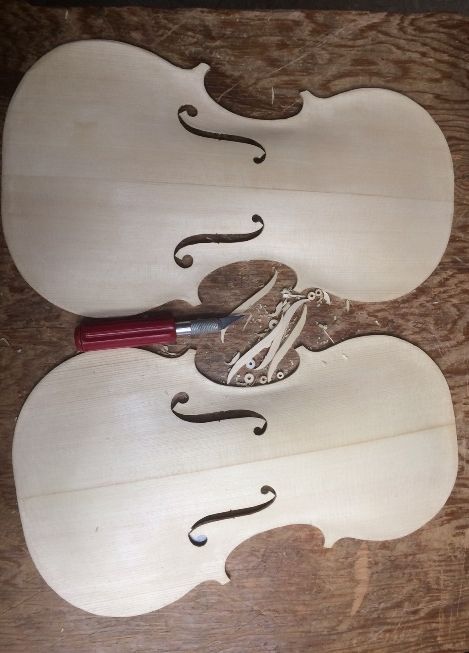
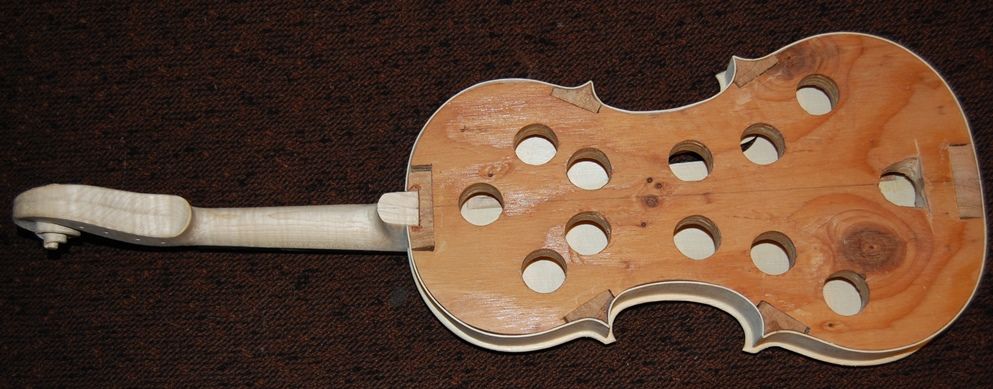
While varnish was drying on the Titian model, I went back to the Plowden model, and began purfling the front plate and graduating the back plate:
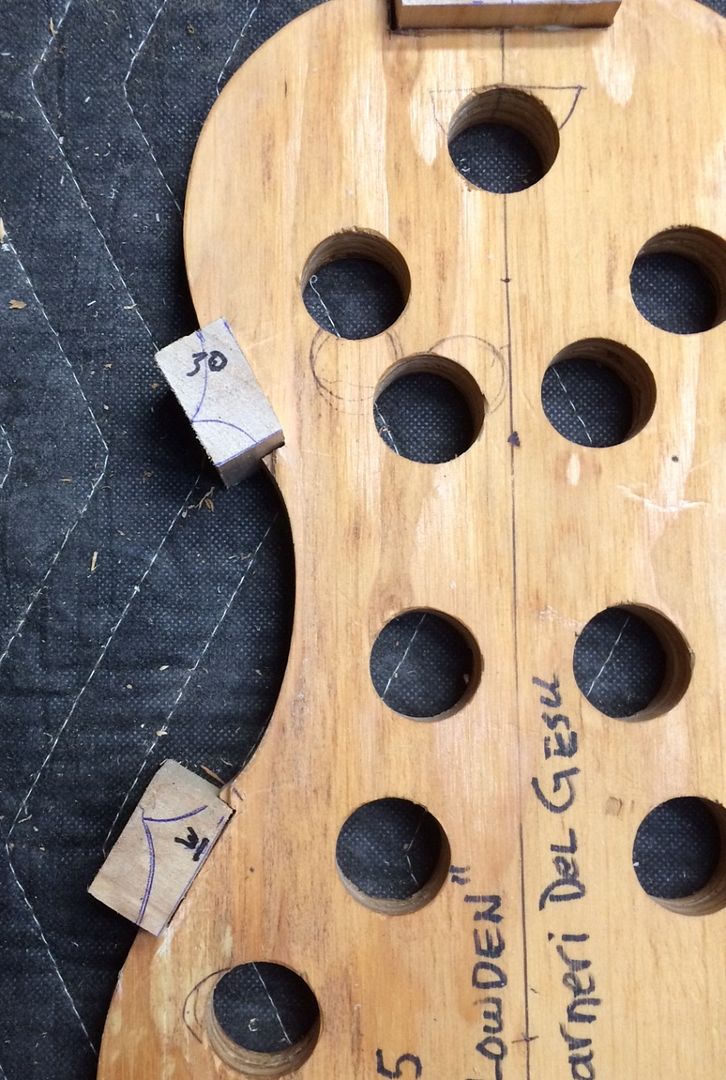
Graduation about half done.
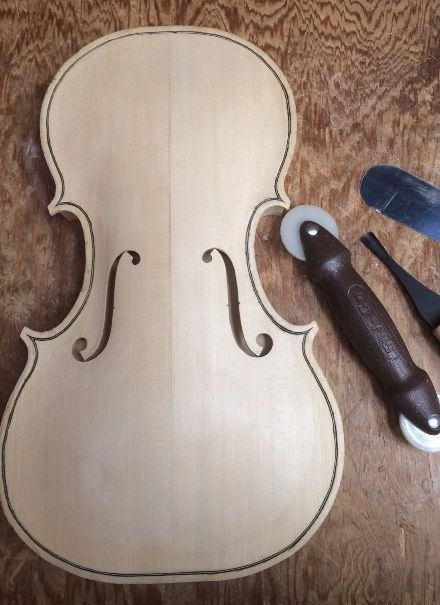
Graduation progress and purfling installed.
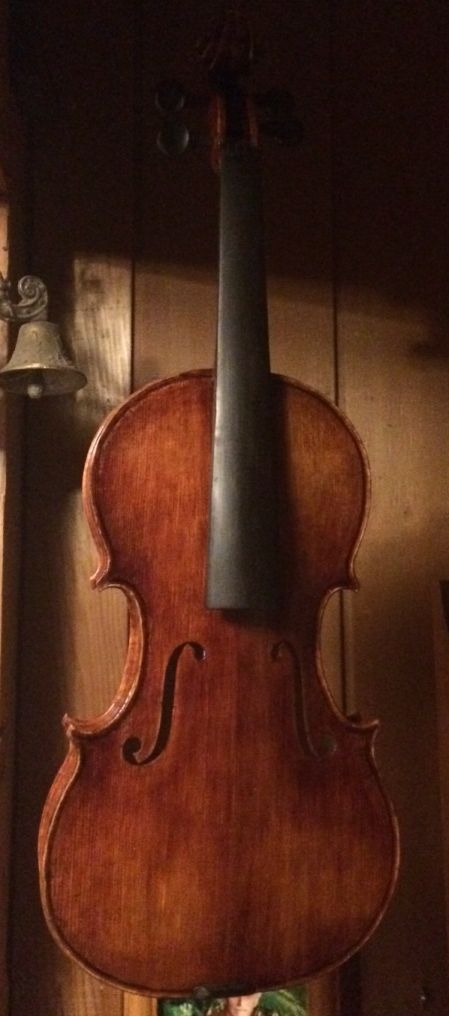
Also, I finalized the finishing process on the Titian model, and an ready to begin set-up. The pegs are trimmed, polished and drilled for strings. The nut is at the correct level and has been slotted for strings. The saddle is installed, too. The end button and soundpost were both installed quite some time ago. So, really, all that is left is the bridge and strings, and final adjustment. I don’t tend to count the tailpiece, but, as a matter of fact, it, too requires some adjustment. So does the chinrest, so I shouldn’t treat them as non-entities. The feet opf chinrests virtually never fit correctly as shipped. Tailpiece adjustment requires trial and error fitting, to get the ratio between vibrating string length and after-length (string between bridge and tailpiece fret) adjusted to a 6:1 ratio.
Anyway, here is where it currently stands. I could probably finish it tonight, but then I would be too tired to go to work in the morning…so, tomorrow will have to do. 🙂
Titian front, ready for set-up.
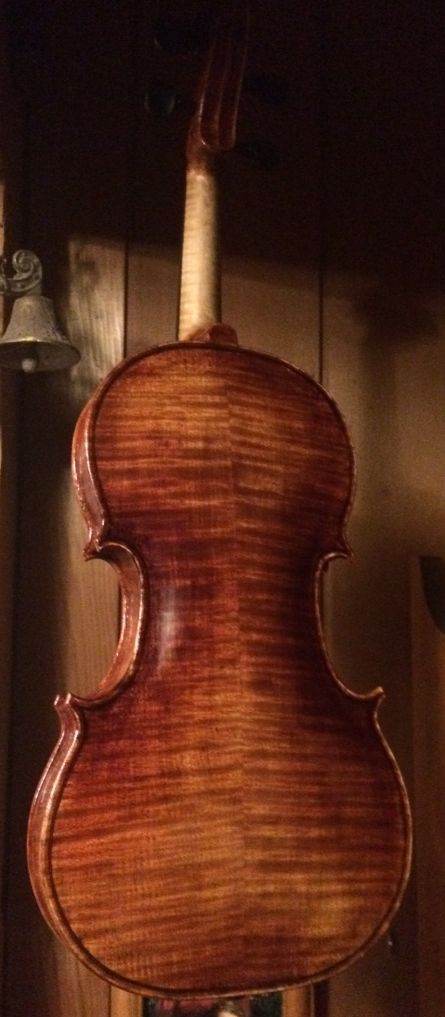
Titian back, ready for set-up.
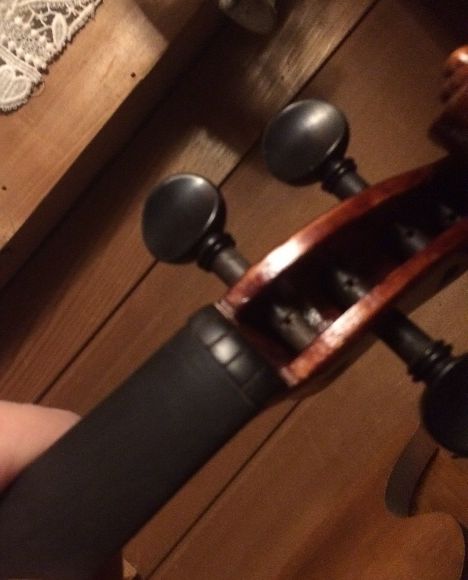
Nut and pegs complete, ready for strings.
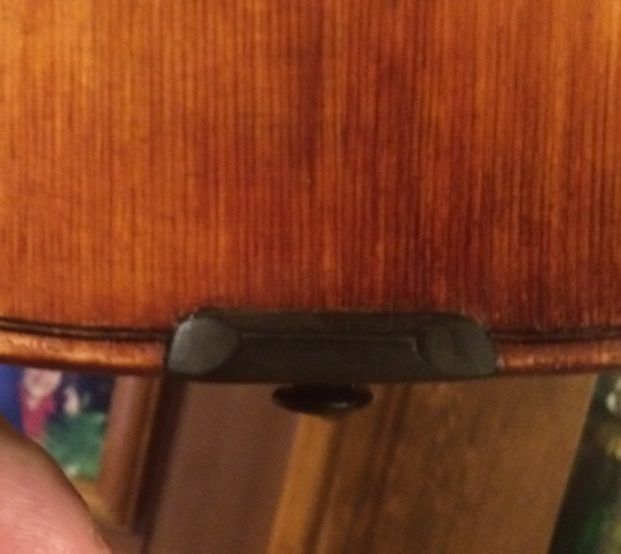
Saddle installed, ready for set-up.
So, I hope to take both of these instruments to the show in March (“Violin Tasting Event” at the Hilton Hotel, March 10th in Corvallis, OR), as well as the one in May (which used to be the Marylhurst show, but it will now be at Portland Community College, Sylvania campus: still called the Northwest handmade musical instrument show.) Anyway: lots of work left to do, in order to get ready.
Thanks for looking.
If you found this post helpful, please share with your friends!
It is a lot easier to purfle the front plate before the neck is installed. But I have found that I can get better results purfling after installing the plates, than before, though I was taught to purfle the plates very early, before even completing the arching. But what consistently resulted was that I could not reliably produce even-looking edge-overhangs when I purfled before plate installation.
So…beginning purfling, here:
I have scribed in the lines, using a purfling-marker, and am beginning to incise them.
Removing the waste wood from the slot, using a “purfling pick.”
The slot is beginning to develop. I use the piece of purfling to check the fit of the slot.
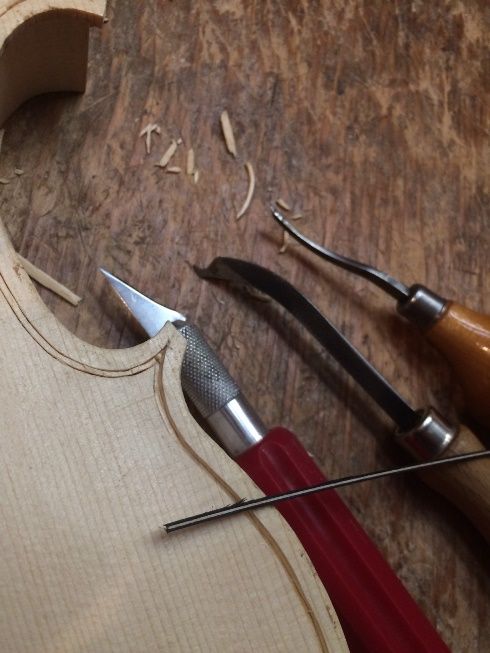
The purfling slot is complete: ready for purfling. A knife, two purfling picks and the purfling marker are in view.
The purfling is installed, but not trimmed: the channel is next. I used the roller to press the purfling deep into the slot.
Neck Setting
I did not take as many photos as would have been ideal. I was concentrating on the work, and not thinking about pictures. Sorry.
The heel-end of the neck had to be as close to exactly the final shape as possible before I laid out the neck mortise. As it turned out, I had set the taper incorrectly, forgetting that I had deliberately left the heel long, so I had to re-shape the neck-heel. Fortunately, I caught it early, and was able to make the correction.
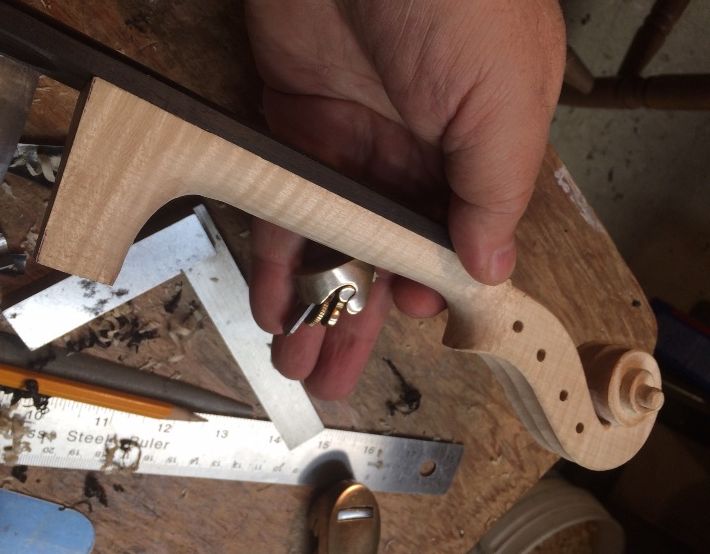
Neck ready to install.
When setting the neck, I make no further changes to the neck-heel, but rather, I carefully shape the mortise to receive the neck-heel.
Five factors have to come together for a good neck-set:
The angle of the fingerboard to the front,
The height of the fingerboard above the front plate edge,
The transverse angle of the neck,
The transverse “roll angle”, and
The distance from the upper end of the fingerboard to the upper edge of the front plate. (130 mm)
All five really must be perfect. Sometimes I can get it quite quickly. This was NOT one of those times. (sigh…)
But the end result was quite satisfactory: all five were correct, and the fit was tight. I slathered in the hot hide-glue, and rammed the neck home one last time: no clamps were needed.
Neck Set Complete.
Next, I will check the back-plate fit, complete the back-plate graduations, install the label, remove the mold, clean up the interior, and install the back plate. This is the “Titian” Stradivari model. I decided to include a scroll-graft and an ebony “button crown” on the “Plowden” Guarneri del Gesu model. So there will definitely be some additional steps to completion, there. I will try to remember to take more pictures.
Thanks for looking.
If you found this post helpful, please share with your friends!
In my last post, I told you I would “talk about F-holes, next time”…and we are doing so. But final arching, as well as graduation have to be completed before we actually cut out the f-holes, so, first things first:
I lay out and incise the f-holes after the arching is (mostly) completed, but before beginning any graduations. (I had a few mishaps years ago, when I graduated first, and subsequently discovered that my plates were actually too thin where the f-holes were to be laid out. I learned from the error, and I check the thicknesses around my already-in-place f-hole incisions, before beginning graduation, now.)
I laid out the distance from the upper edge of each plate to where the bridge would go. That is where the inner “nicks” of the f-holes will go. I measured back from there to find where the inner edges of the upper eyes of the f-holes would go, and laid out not only that longitudinal position, but the lateral distance off center, to the inner edge of each eye. Then I repeated that process for the inner edges of the lower f-hole eyes, and I was ready to use a template to scribe in the actual perimeters of the f-holes. I simply aligned the clear plastic template (traced off the full-size photos of the original instruments) so that the inner nicks were on the bridge line, and the inner sides of both upper and lower eyes were at their correct locations. I pressed the template firmly, so that it followed the curvature of the plate, and traced with a very sharp pencil.
I try to bear in mind that the pencil line will actually be “inside” the actual footprint of the f-hole, and I will remember to adjust it later. For now, however, I incise the perimeter of both f-holes fairly deeply, so that the marks will not disappear as I complete the final arching. (In the photo below, I had also traced around the incision with a very sharp pencil, to highlight the cut, so I could see it from any angle. Otherwise it can be hard to see.)
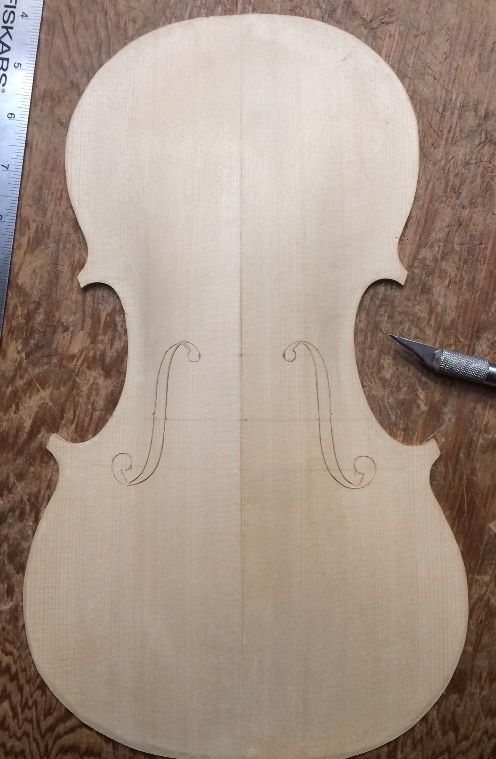
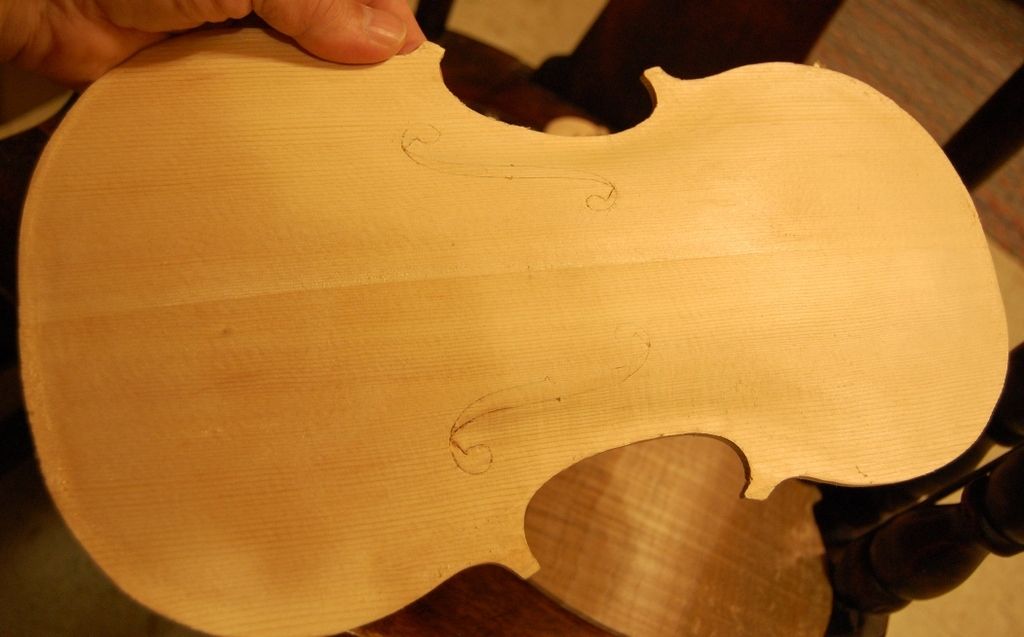
F-holes laid-out and incised.
Final Arching
I have learned that arching is one of the most important factors in violin sound. I use two “markers” for determining the final arching.
The first: I can see that, when viewed from the side of the instrument (at least, the ones I am concerned with), the f-holes on the old master instruments appear to have the main stem nearly parallel with the plane of the ribs. I have no idea whether that is truly important as far as aesthetics, but, I have also observed that, when left to my own instinct (or lack thereof) as to proper arching, my f-holes invariably end up resembling an “S” laid on its side. So, it is a “marker” that tells me my arching is a bit “off”, if nothing else. That is why I incise the f-hole perimeters deeply enough so that I can adjust the arching to get the stems of the f-holes parallel to the rib-plane, and be fairly sure that, at least that part is better than it was before.
The second “marker” is even more mundane: I made “arching templates,” traced from the posters, so that I can actually check and see that my arching closely follows that of the old masters. It is fascinating to me, to see them drop into place, one by one, as I carefully plane and scrape away the last few “humps”. I know that many makers are convinced they do not need such a “crutch”, but I see it as only a tool. I would never claim to be able to draw a perfectly straight line by eye and hand alone, and I shamelessly use a straight-edge for such a task. Arching templates are the same thing, in my estimation. Whenever I use them, even on a plate that I thought to be very close to correct, I invariably discover that it was not as good as I thought it was.
Using arching templates and scrapers to perfect the arching contours
The truly-completed arching is not terribly different than the rough-arching I had completed before incising the f-holes, but that sortof difference can make the difference between “acceptable” and “extraordinary” sound. When I first began using such templates, I immediately got a different response from players. They said, “This one is different! Whatever you did on this one, do it again!” (Okay…will do!) So…now I do it on every single instrument, and try to make each one better than the one before.
Graduation
What we call “graduation” is simply the process (and results) of carefully carving the inside arch to match the outside arch, leaving a specified thickness between, which could all be the same, or they could vary according to some sort of deliberate scheme designed to project well, or to give superior sound in some other way. Or it could be following a “general plan,” but, beyond that, be fairly random. There are all sorts of patterns and plans.
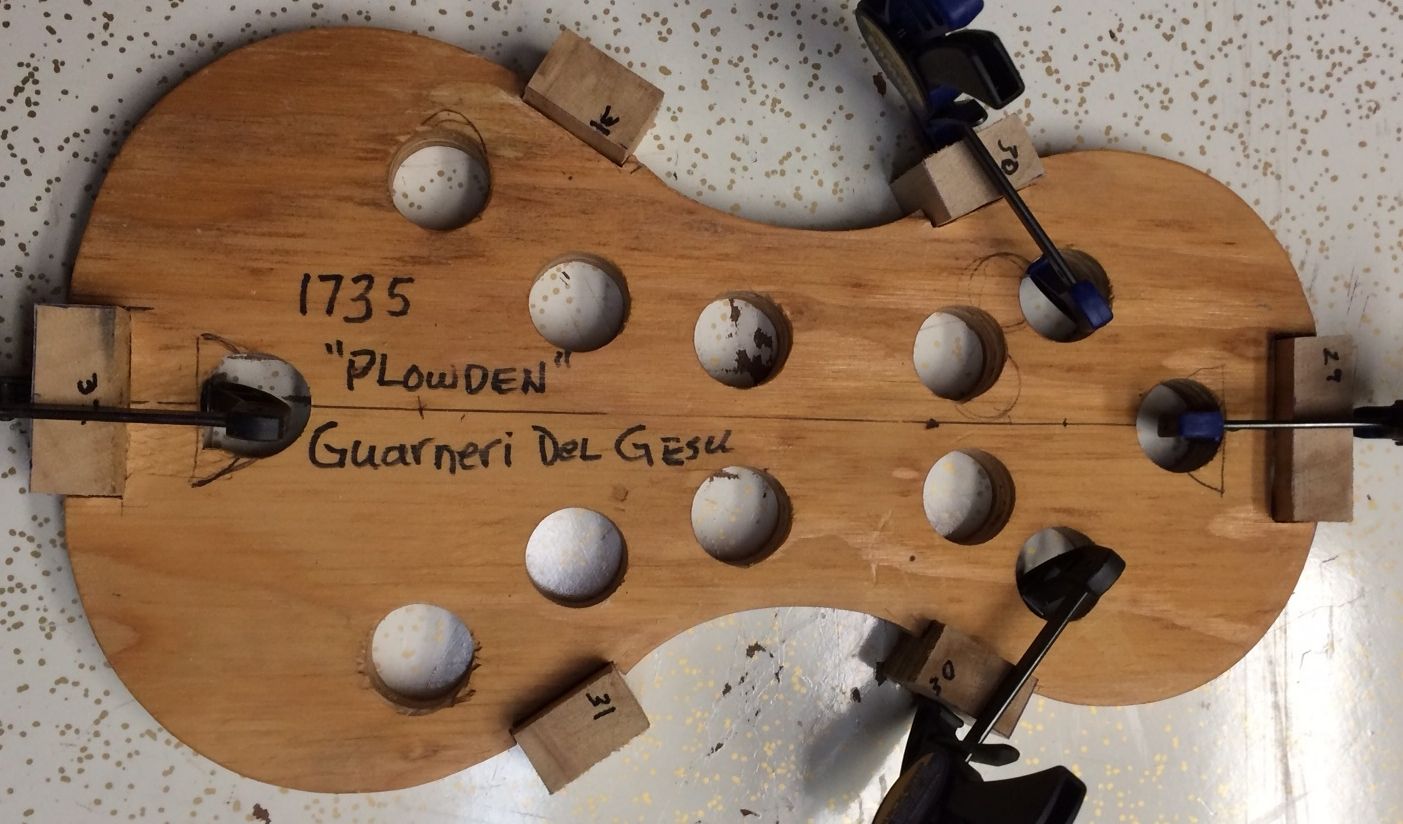
In this case I attempted (at least in a general way) to mimic the graduations of the original old master instruments whose pattern I was attempting to follow. (In case you have not read the previous installments, these two are to be modeled after the 1715 “Titian” Stradivari instrument and the 1735 “Plowden” Guarneri del Gesu instrument, respectively.) Their graduations are pretty thin, so this is a little scary, to me. I hope it works well.
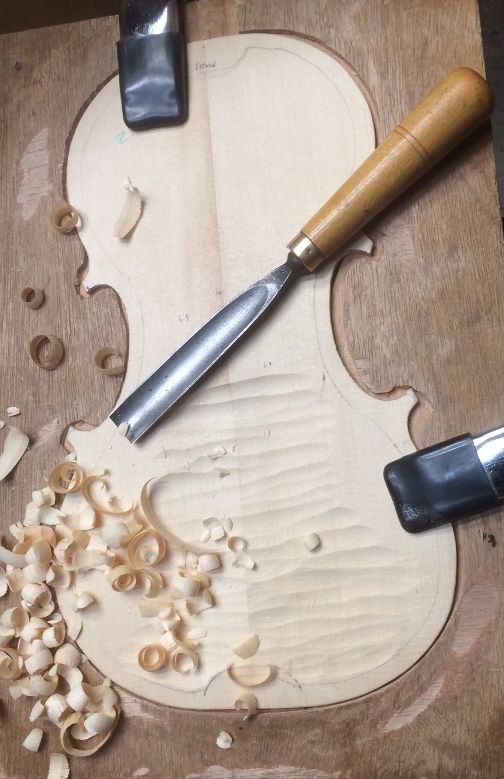
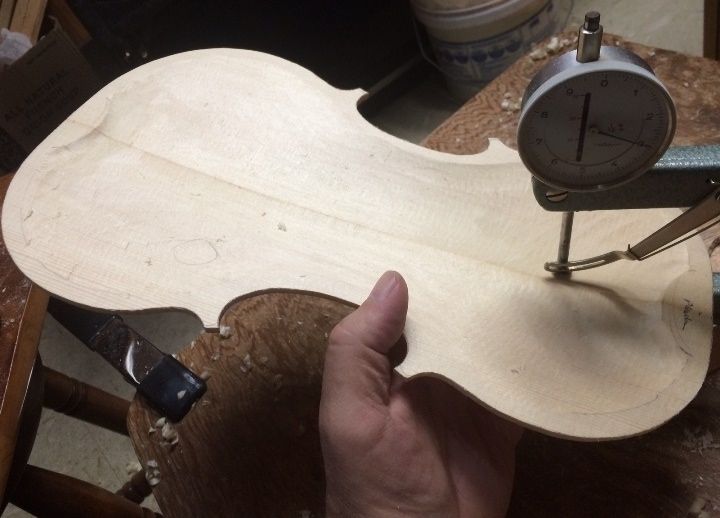
I use a gouge to rapidly carve out the rough wood, until I am approaching the proper thicknesses, but then I switch to a toothed finger-plane for rapid, but controlled, wood removal. When I am getting close enough that I am fearful of going too far, I switch to a non-toothed curved-sole finger plane and carefully bring the thicknesses down to my target measurements.
Carving rough graduations
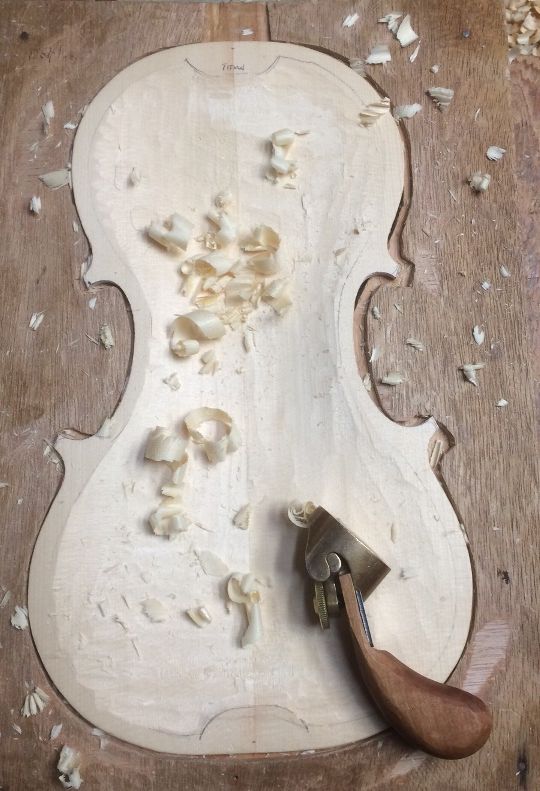
Planing rough graduations, using toothed finger-plane
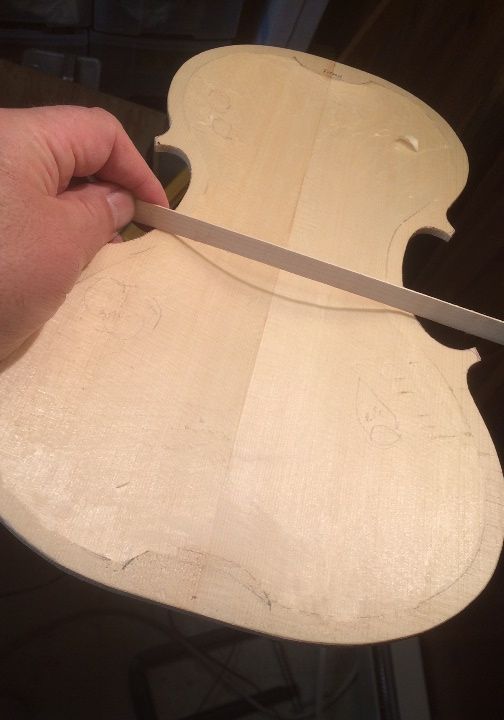
Checking graduation using shadow-lines.
Final check of graduations.
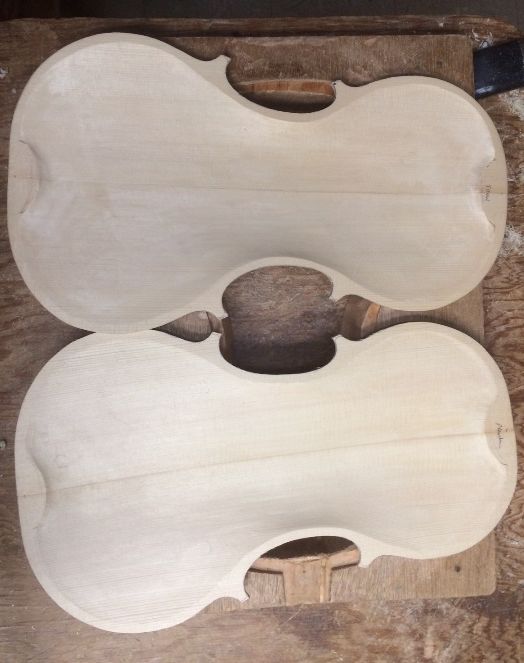
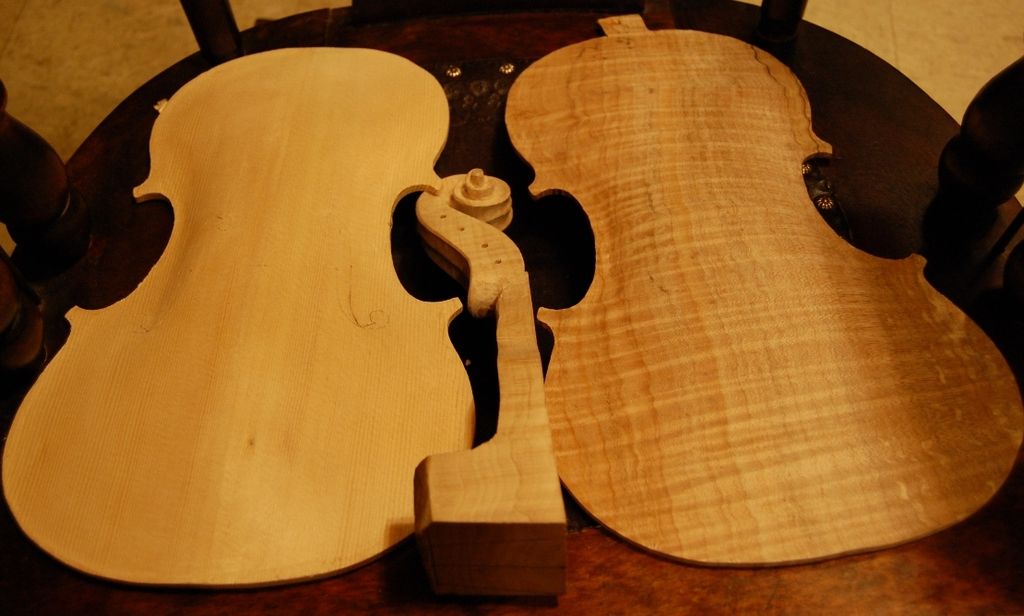
Two plates with graduation completed.
F-Holes
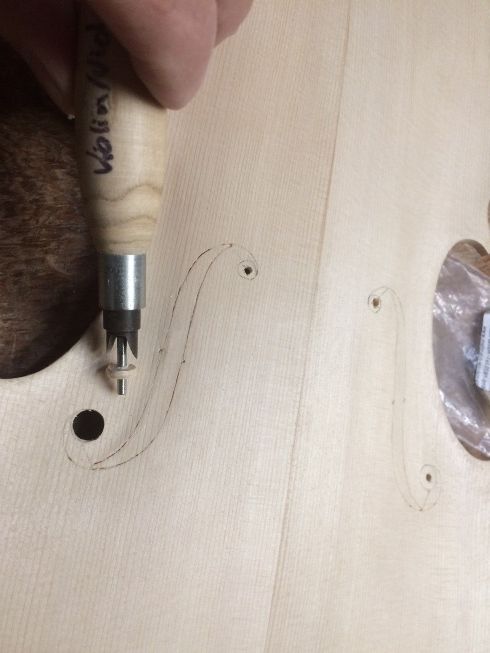
The F-holes are pretty much “locked-in,” now; the only thing remaining is to actually remove the wood inside the f-hole lines. The first order of business is to remove the circular portions at the upper and lower eyes of each f-hole. For this, I use a tool called an “f-hole drill”, which my grown children purchased for me a few years ago. It makes perfectly round holes, ranging in size from 5.5 mm up tp 10 mm in diameter, in 1/2 mm increments. I center a 3/32″ diameter hole in the center of the round portion of each eye, and then, using the correct bit, I insert the guide pin into that hole and gently rotate the tool to incise the hole, forst from the outside, and then from the inside, to prevent splintering, but completing the cut from the outside, so that in case any splintering does occur, it will be on the inside.
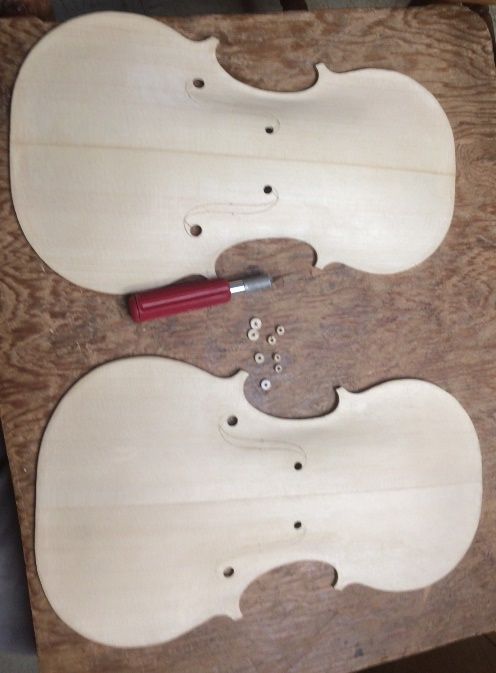
F-hole drill with cut-out plug from lower f-hole eye.
All f-hole eyes cut: ready to remove remaining wood.
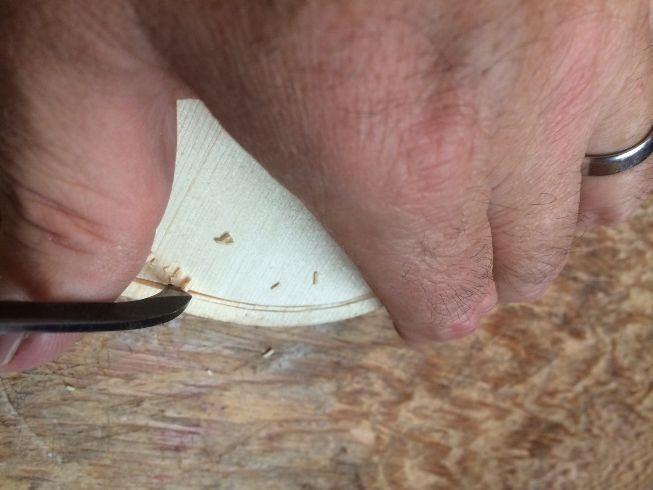
Then I use a very thin, sharp knife to complete the incisions around the perimeter until the wood pops out cleanly.
Final f-hole wood removal.
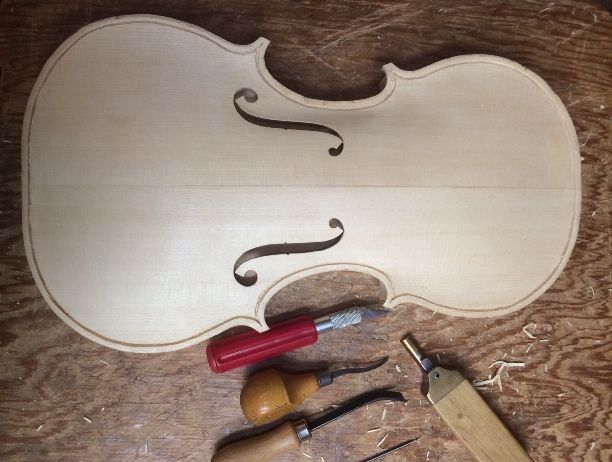
Completed f-holes, ready for cleanup and final shaping.
I will continue to fine-tune the shape of the f-holes up until I begin varnishing, but, for now, they are complete.
The next thing will be the bass-bar in each top plate. The bass-bar supports the bass-side foot of the bridge, and the bass side of the plate. It is necessary in order to achieve the rich deep tones on the bass side of the violin range. So…next time: bass-bars!
Thanks for looking.
If you found this post helpful, please share with your friends!
I had been pondering (glumly) what to build for the next show at Marylhurst University, and had nearly decided upon one of two “niche-market” items…either a very large “violoncello da spalla”, or an emulation of David Rivinus’s “Pellegrina.” I had spoken to Mr. Rivinus a couple of years ago, and he told me that, for years, he had encouraged other luthiers to use his design, as a partial solution for some of the “work-related injuries” associated with playing large violas…but no one took him up on it, so he just produced them himself for the rest of his lutherie career, ultimately making 100, or so, of the odd-looking instruments. They were all sold, ultimately, and he has stopped taking orders, so I considered “taking up the mantle”, so to speak, and producing instruments modelled after his work. But, as I said, that really is rather a “niche-market” viola.
The violoncello da spalla is possibly even more specialized, as, though it is strung very much like a regular violoncello (cello), it has a fifth string (E), above the standard C-G-D-A of the cello, is only 19-20″ long on the body, and is generally played off the right shoulder, so that the lower bass-side bout is under the chin, and the bowing arm comes up from underneath, so that the player is nearly as comfortable as when playing a small viola, but the sound is that of a cello or extremely large viola–take your pick. Very little classical music has been written for these instruments, so I doubt there would ever be a lot of market for them, though I would love to build them.
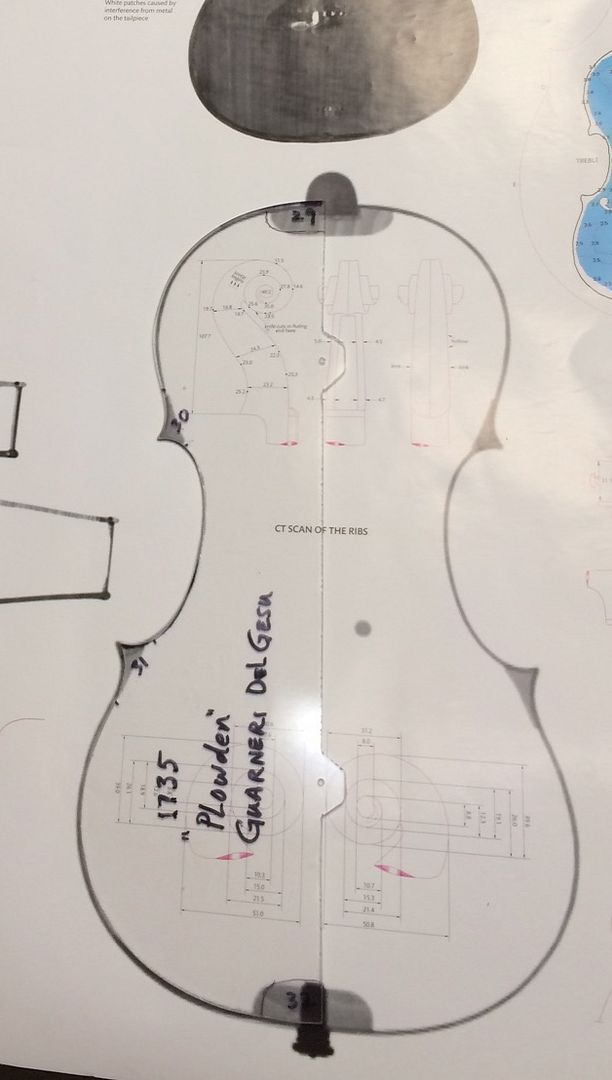
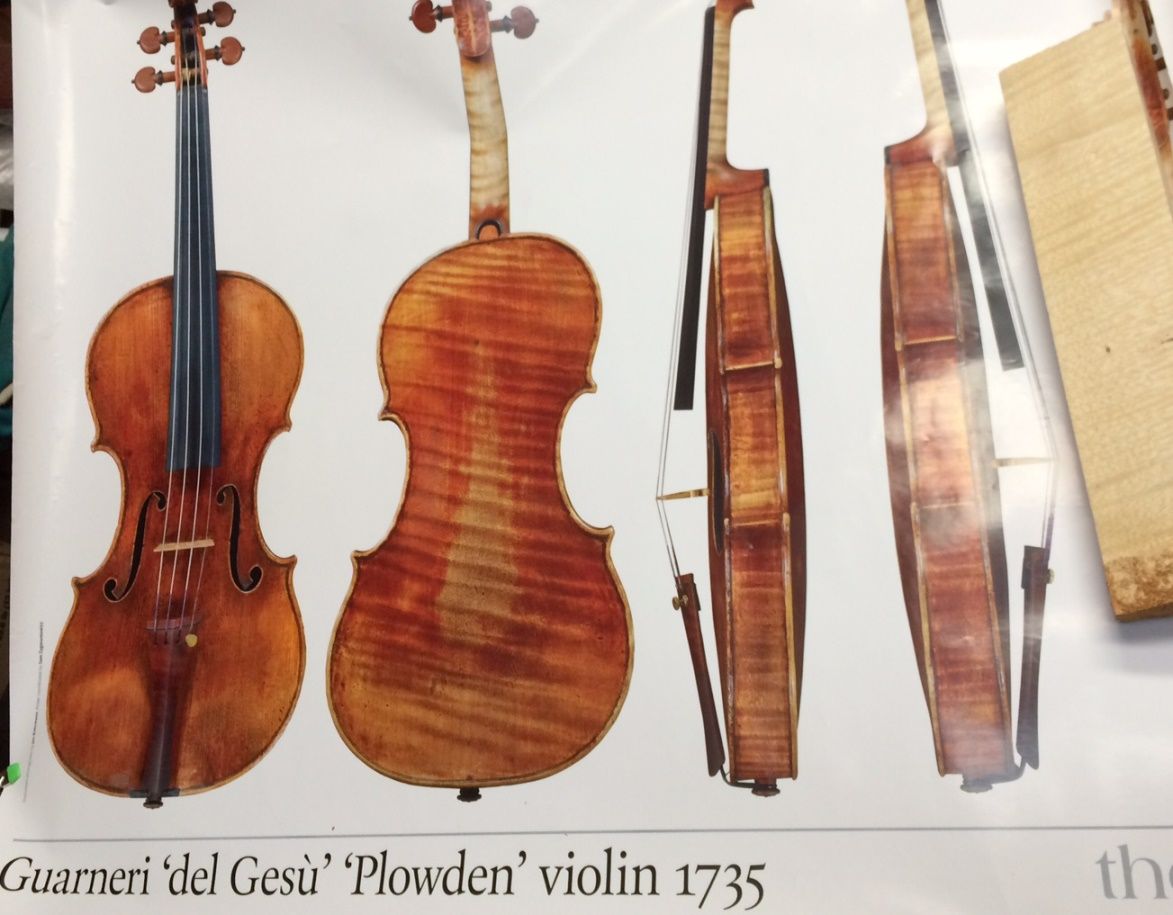
But! in the midst of these ponderings, I had sent one of my teachers a couple of sets of photos of two of my recent violins, and, while he was quite encouraging and positive, he took the time to give me a carefully-considered, and quite detailed critique (what a treasure!) of both instruments, telling me what changes he would want to see, when comparing my work to one of the Old Masters (Guarneri del Gesu, in particular.) So! I changed course, and figured that I have just enough time to attempt another copy of the 1735 “Plowden” Guarneri del Gesu violin, of which I already have the “The Strad” poster, with actual CT-scans of the original instrument, and exquisite photos of the outside, along with technical drawings and tables of measurements. Game on! New Project!
Guarneri del Gesu
(Bartolomeo Giuseppe Guarneri 1698 – 1744) was a violin maker living and working in Cremona, Italy. He was one of the sons of Giuseppe Giovanni, and, though he was not very successful in his lifetime as a luthier (having to supplement his income by other means) compared to the more famous Antonio Stradivari, some of his later instruments are highly prized today, and sell for more than perhaps the very best Stradivari violins. Currently the very highest price (undisclosed, but reportedly in excess of $15M) was paid for the 1741 “Vieuxtemps” Guarneri del Gesu, on lifetime loan to Anne Akiko Meyers. I have never attempted an instrument modelled after the “Vieuxtemps”, but I have made two or three modelled after the 1735 “Plowden.” So that is the chosen model, again.
Starting from Scratch, Again
Checking the Mold Template against the Poster CT-Scan…I thought it had been exact, but there were some tiny discrepancies.
The black-marked edges are the places I corrected next. (Not much, really, but striving for perfection, here.)
These are the photos on the poster front. The poster does not want to lie flat– I store it in a mailing tube, to keep it undamaged.
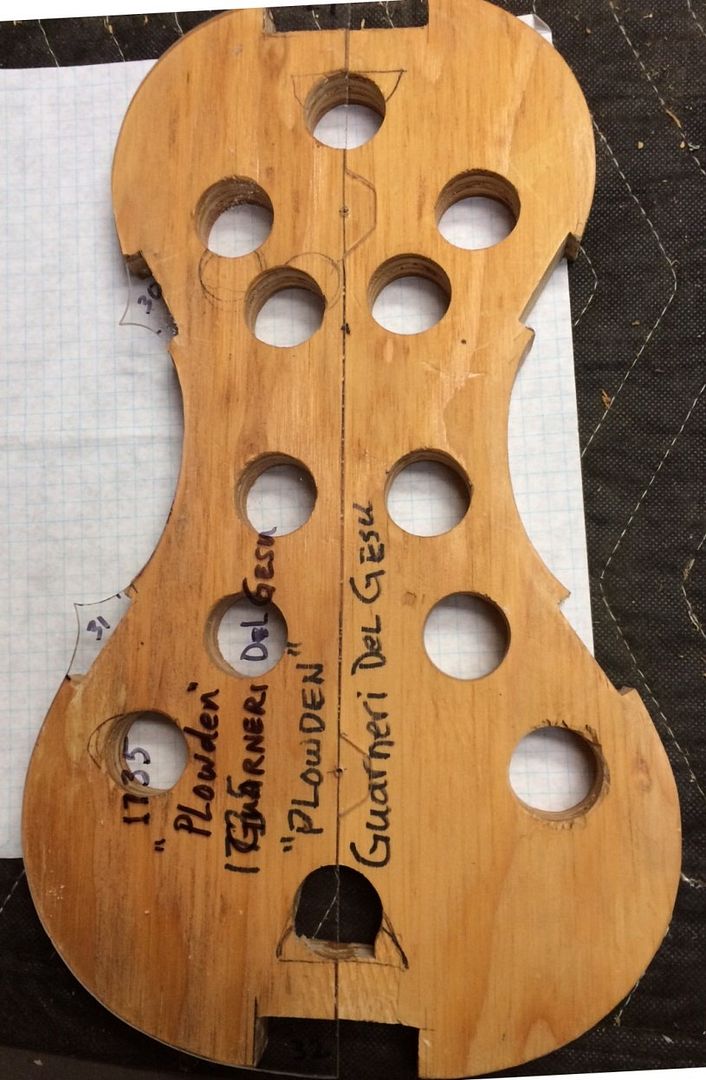
Checking the mold against the corrected mold-template: as it turns out, the corrections were all within the areas of the blocks– the mold is fine.
Blocks cut and fitted…notice the differing heights, marked on the ends.
Blocks glued in place. I use Titebond for this task, but nearly nothing else.
Block shapes, as traced from the mold template.
The Wood for the New Violin
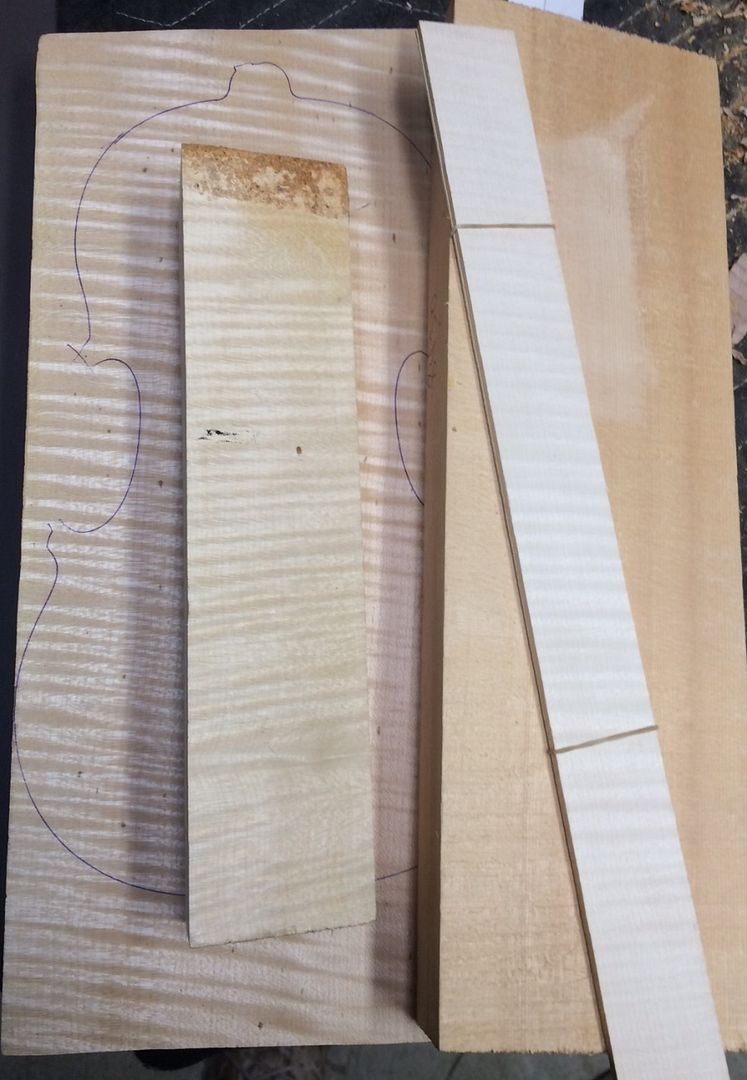
This will be a one-piece back of European Maple, neck and ribs matching the back, and a two-piece front plate of European Spruce. All were obtained from International Violin Co., of Baltimore, MD.
One-piece back, neck and ribs of European Maple, front of European Spruce.
That trace on the back plate was put there by the wood-source people…it does not reflect the shape of this violin at all.
So! That is the Beginning!
I will carve the inner curves of the center-bout blocks next, so that I can bend and fit the center ribs to match those curves. Afterward, I will carve the outer curves of those same blocks as well as the tail and neck blocks, before bending and fitting the upper and lower ribs.
As a precaution against accidentally gluing the ribs to the mold, I already rubbed a paraffin candle all over the edges of the mold, where the ribs will touch, so that if an accidental drop of hide-glue ends up there, it will not stick. (Been there…broke the rib, before I figured out what was amiss.)
This is as far as I am going today…I am still recovering from hernia surgery last week, and I find I still tire easily. But I’m on my way, and will try to keep you posted, with progress reports, here
Thanks for looking.
Chet Bishop
If you found this post helpful, please share with your friends!
Progress on the “Plowden” Guarneri del Gesu-model violin
The Plowden is “in the lead” and pulling ahead!
One fiddle is running ahead of the others. That is how it usually turns out when I am building more than one instrument simultaneously. Something catches my attention in one instrument, and I bolt for the finish line with it. I don’t know why…happens every time, though. I think this will be one of my best efforts, and should turn out to be a concert-quality violin. We will see, though.
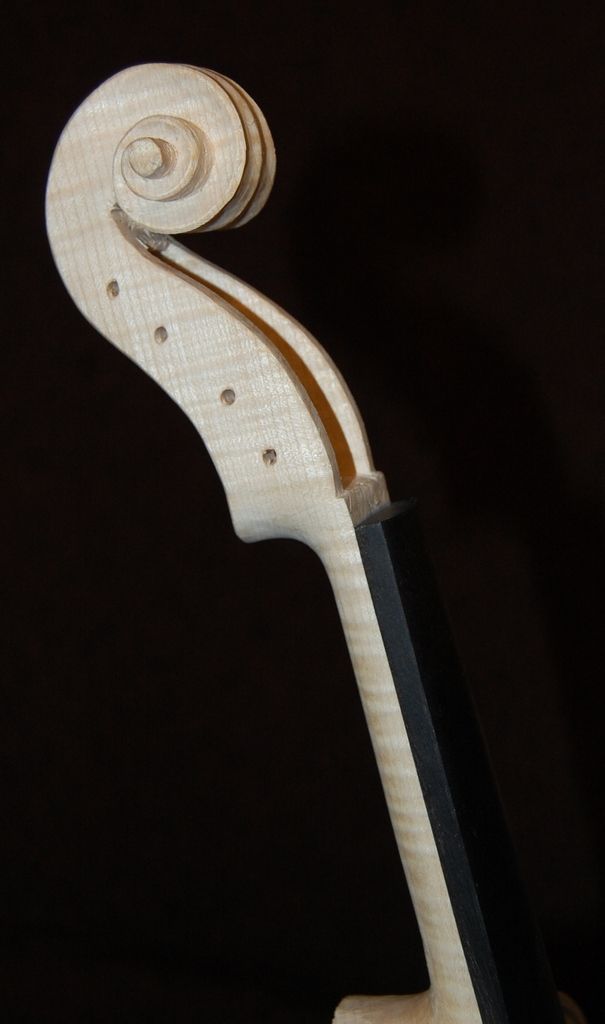
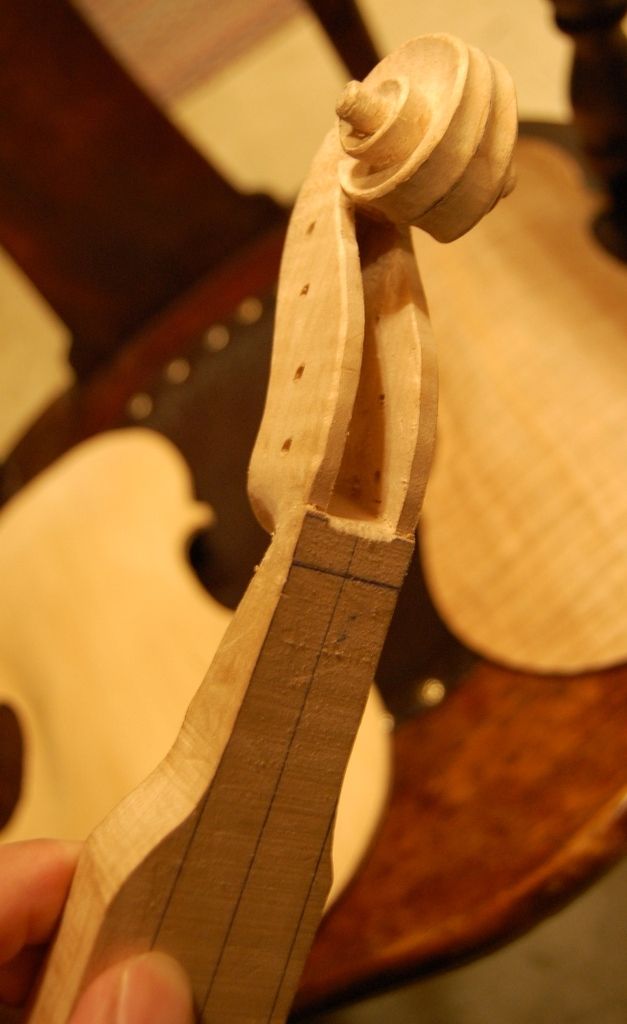
Scroll and neck complete– Fingerboard temporarily glued in place
There will still be fine-point tweaking and smoothing I will do, up until the day I begin varnishing, but the scroll was nearly enough complete that I went ahead and mounted a fingerboard on the neck, and began shaping the two of them together. The string “nut” (the tiny bar of ebony that will cross the top of the fingerboard as a support and anchor for the strings as they cross over into the pegbox) will be fitted and installed pretty much the last thing before the bridge, soundpost, and final set-up.
Scroll and neck with fingerboard
Setting the Neck
Once I had the entire neck shaped, with the exception of the final shaping of the heel (which is completed after the back plate is installed), I could begin setting the neck.
Now: I used to install the back plate and then install the neck, but that meant that when I set the neck, I had to continually worry about the angle of the heel as it presented itself to the button (the top “tongue” of the back plate that overlaps the heel of every violin-family instrument…critical to the strength of the joint.) If I install the neck first, making sure that the heel overlaps the neck block at least a little, so that I can plane it absolutely flat before installing the back plate, I eliminate the struggle to get that perfect heel-to-button joint. It becomes perfectly easy.
So…for all you luthiers reading this, yes, I am aware of the traditional way to fit this joint. I learned this particular option from reading the work of the late David Rubio. It took me a few years to recognize the value of the change, and I tried it for the first time when working on my first cello. It worked so well that I have gradually begun to do it on all my instruments.
Here is the back of the instrument, mold still in place:
Back view of instrument with neck set, but mold still in place. The heel of the neck is just barely extending past the neck block. Also, the front plate is in view, through the clamping holes in the mold.
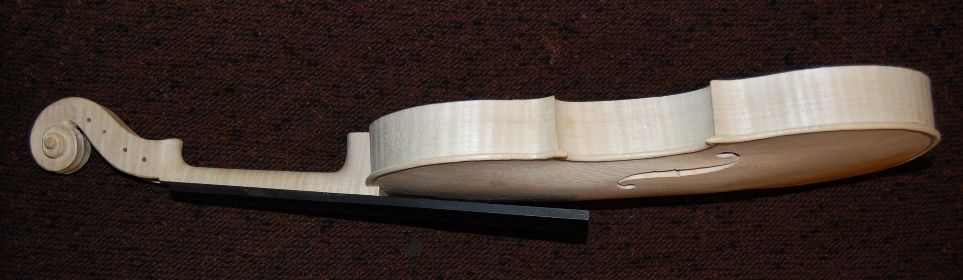
Here is the side view:
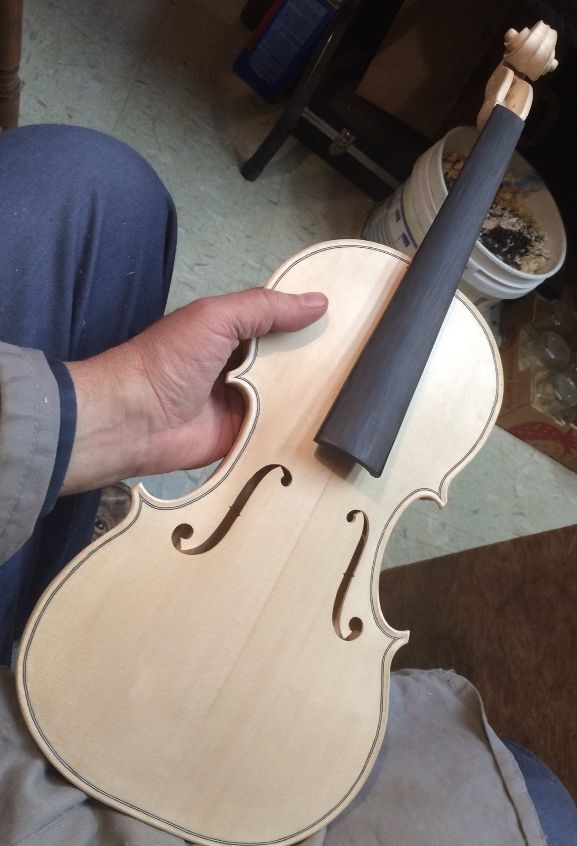
Side view of instrument with neck installed.
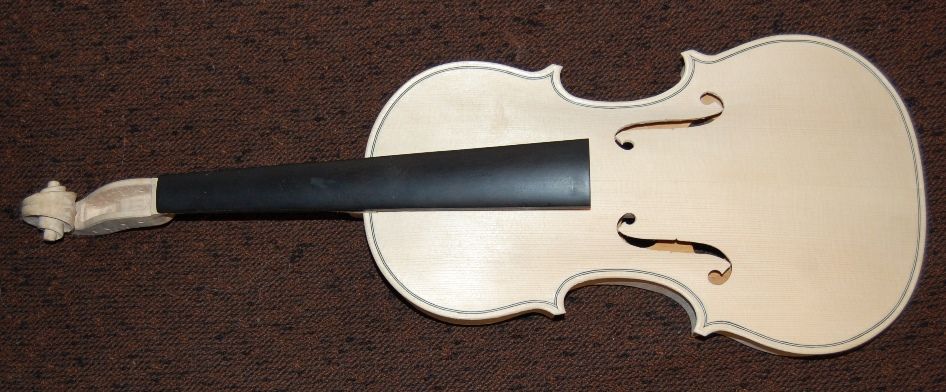
And the front view:
Front view of instrument with neck installed, and mold still in place. The mold is visible, through the f-holes.
What’s Next?
The next step will be to level the back of the corpus, so that the blocks and the neck-heel are all in the same plane. I may have to wait until the mold has been removed before completing that task: the mold is pretty much level with the blocks, and I have no desire to sand the mold. So, I may end up removing the mold, installing the linings, and then levelling the back of the corpus, along with the heel of the neck. Then I can clean up the inside of the corpus, shaping the linings and blocks, and cleaning up any rough spots. Then I can install the back plate and get moving on the purfling. After that it will be time to do all the final preparations for varnishing.
So…that is the progress report for this week.
I will try to catch up on the 14-inch viola and the 3/4 size violin soon.
Thanks for looking.
If you found this post helpful, please share with your friends!
Progress on the Small (14-inch) Viola and the “Plowden” Guarneri model violin
Here are some photos of what is happening with these two fiddles. I decided to add a third instrument to the bench, so to speak, a 3/4-size violin (separate notes on separate thread), so it is slowing me down just a little.
Progress Checklist
Both the viola and the violin are moving along:
Arching is complete on the front plates of both instruments.
F-holes are laid out on both instruments, cut out and complete on the violin.
The bass bar has been fitted, installed and trimmed in the viola.
Graduation is nearly complete on the viola, complete on the violin.
The scrolls are partially carved…still a fair way to go.
The back plates are arched, but there is still some work to be done on each before I would call them absolutely complete.
The top plate has been installed on the violin, and purfling installed.
The violin top plate and rib garland are nearly complete…the edgework is done, but some refining will still happen.
You can see that I trimmed a couple of millimeters off the corners of the violin front plate. I will do the same on the other three plates as well.
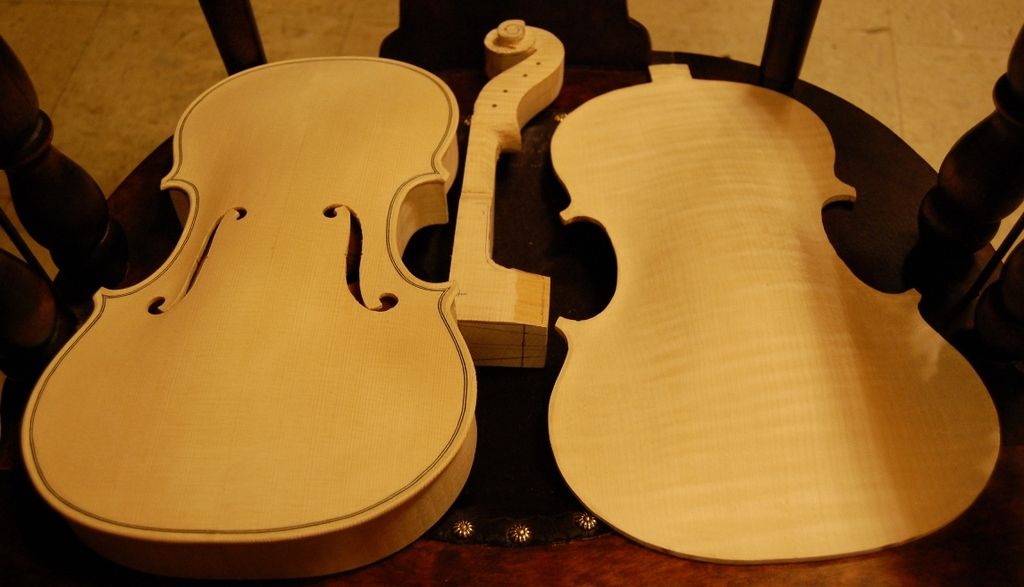
Here are some photos:
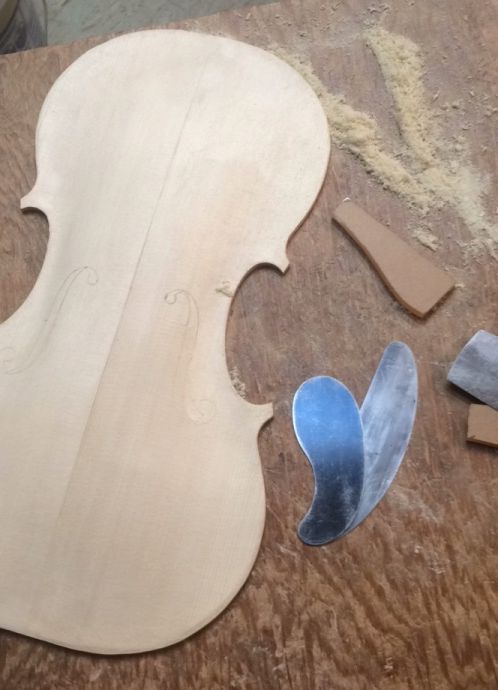
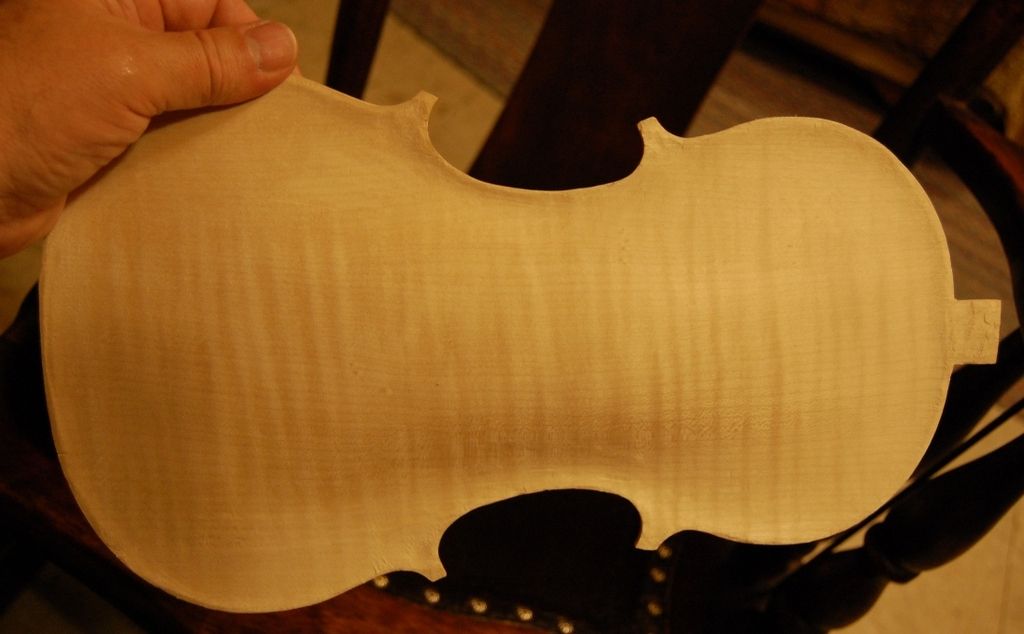
July 3rd status of Guarneri-model violin. (Wood for back, sides and neck is European Maple. Wood for top is European Spruce.)
July 3rd status Guarneri-model one-piece violin back. Arching and graduation are nearly complete.
July 3rd status of Oliver 14″ Viola.
July 3rd status Oliver 14 inch Viola front plate. Arching and graduation essentially complete. F-holes laid out and deeply incised. (Wood is Sitka Spruce.)
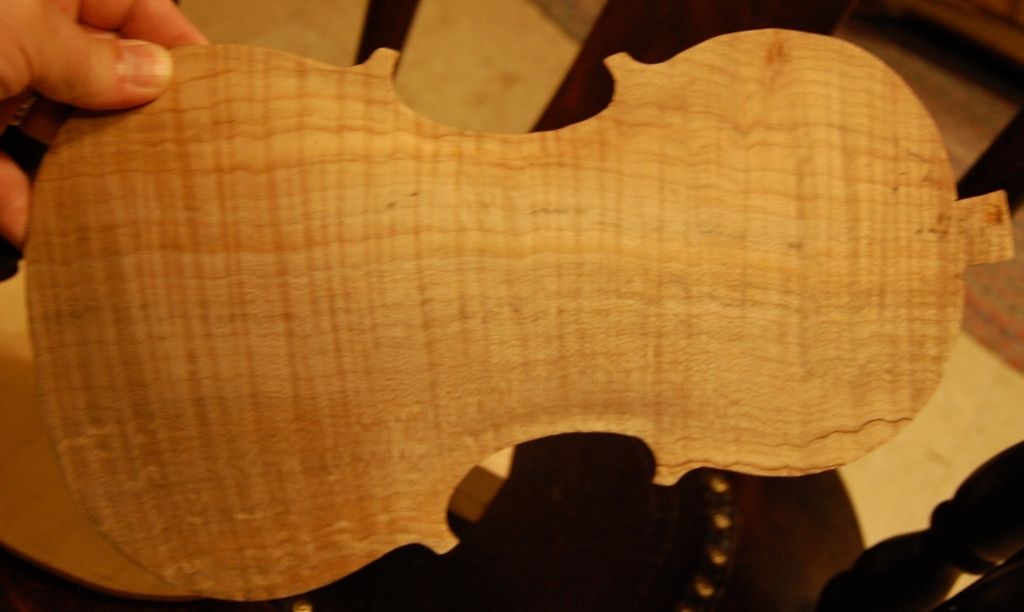
July 3rd status Oliver 14 inch Viola back plate. Arching and graduation nearly complete. (Wood is spalted, highly figured Big Leaf Maple, harvested about five miles from my house.)
July 3rd status Oliver 14 inch Viola scroll and neck. (Wood is spalted Big leaf maple…from the same log as the back plate.)
Prognosis:
So…you can see that progress is happening. Not at a very exciting pace, but I hope the wait will be worthwhile.
My goal is to produce three very good instruments this summer/fall:
the 14-inch viola,
the Guarneri-model violin, and
the 3/4-size violin,
and then show them, along with a larger viola, to orchestra directors and teachers in the Greater Portland Area.
My rationale is that good small violas are hard to find, and so are good fractional sized instruments. If I can demonstrate to the teachers that I can produce very good instruments in smaller sizes, as well as the larger sizes, then perhaps they will recommend their students to me.
All I can do is try….
Thanks for looking.
If you found this post helpful, please share with your friends!

 Follow