I decided that I would prefer to purfle first, then graduate, on this plate. Maple is much tougher than spruce, and I wanted maximum mobility as I cut the purfling slot, as well as avoiding any danger to the rest of the indtrument when forcing the purfling into the glue-filled slot. It can require a great deal of pressure.
I used the purfling marker to trace out the location of the purfling slot.
Then I began incising the sides of the slot, and removing the waste wood, with a purfling pick.
I always forget, between instruments, just how tough the European maple is. I always find that I have to take breaks once in a while, and allow my hands to rest.
I always find the back purfling to be physically difficult, but it is easier to do clean work.
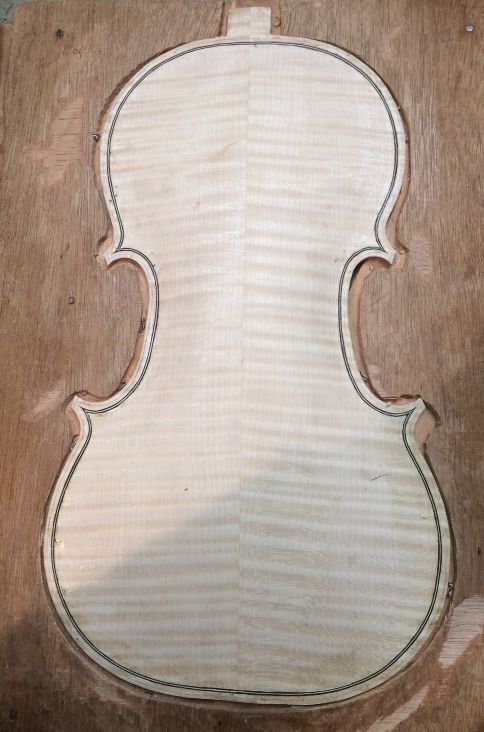
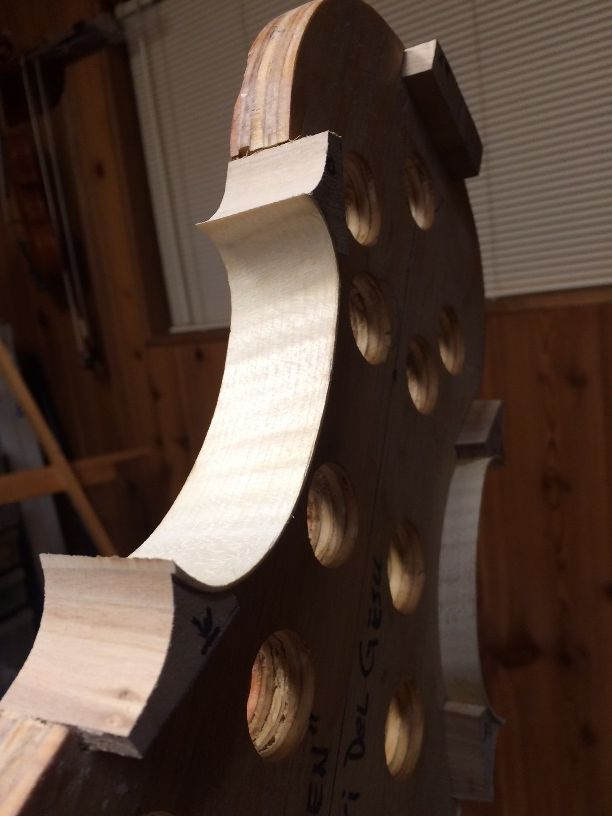
Back purfling slot complete.
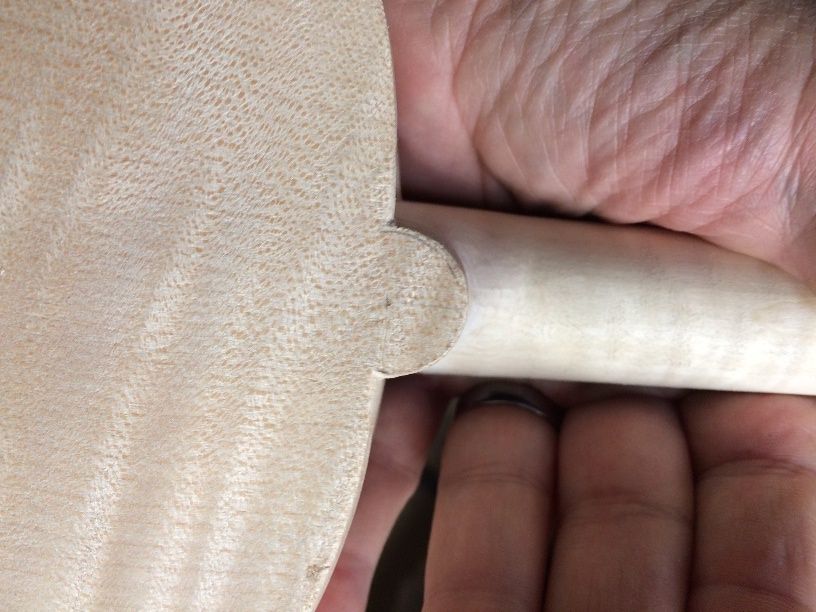
After cutting the slot and removing the waste wood, I double-check the width ans depth of the slot by inserting a scrap of purfling into the slot, and dragging it around the entire slot, so that I know the purfling will fit cleanly.
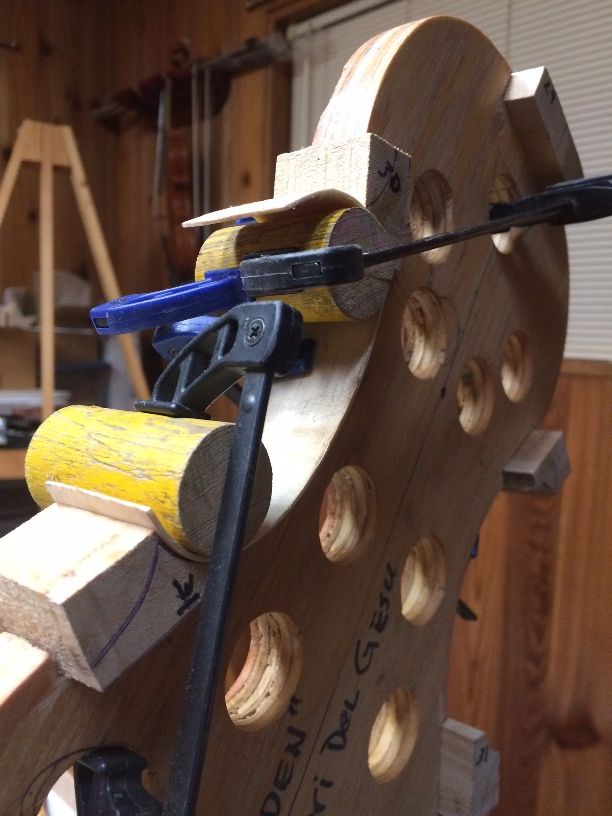
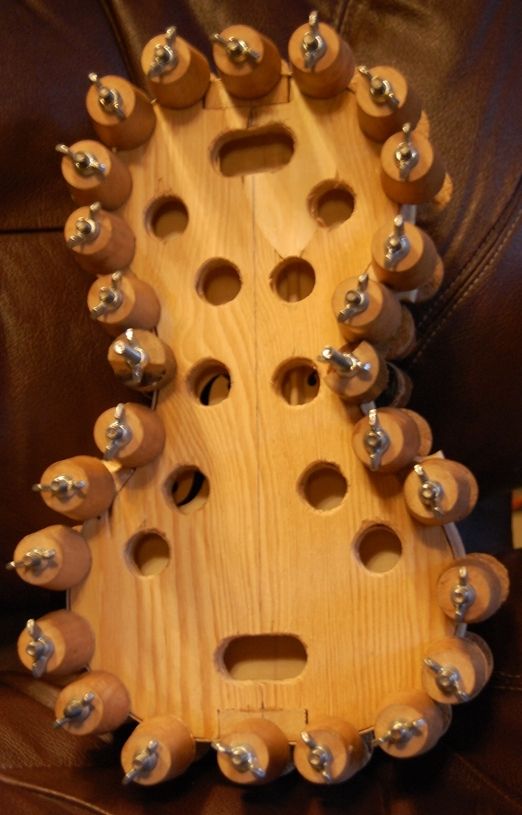
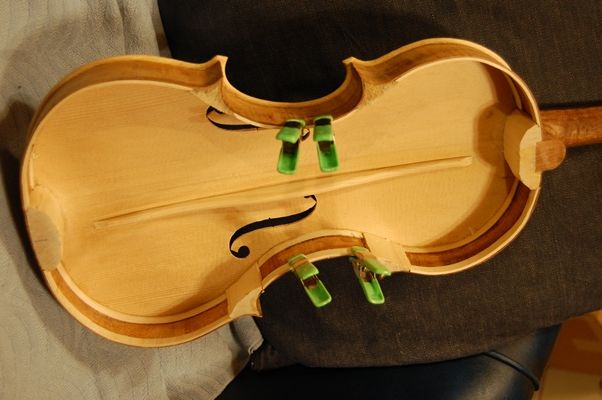
Then I use a bending iron to bend the purfling, I cut the miters for the “Bee-stings”, and I insert the purfling, dry, to get a perfect fit.
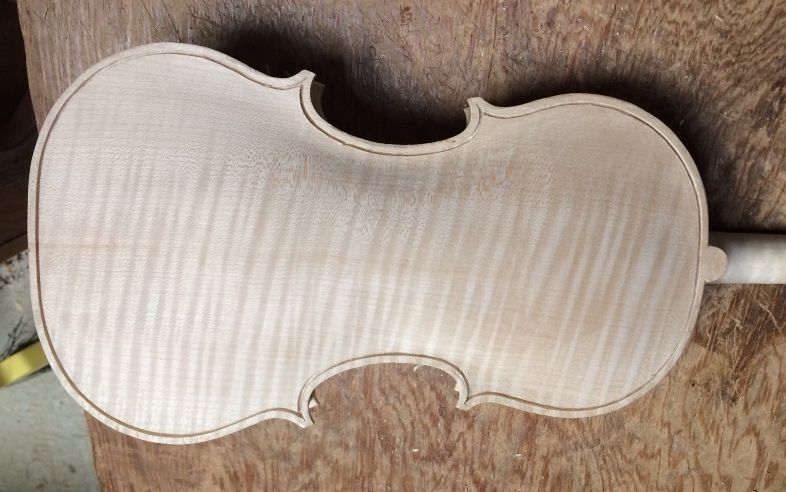
Purfling installed dry.
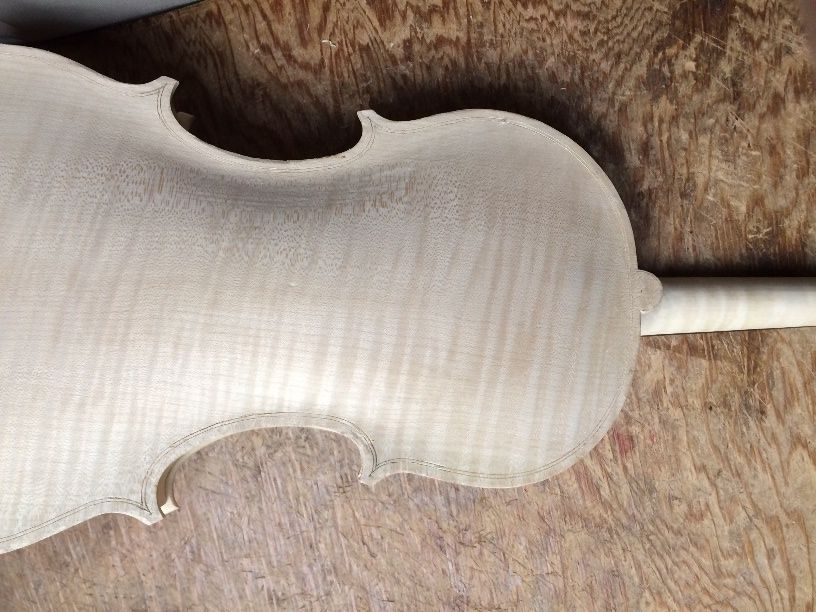
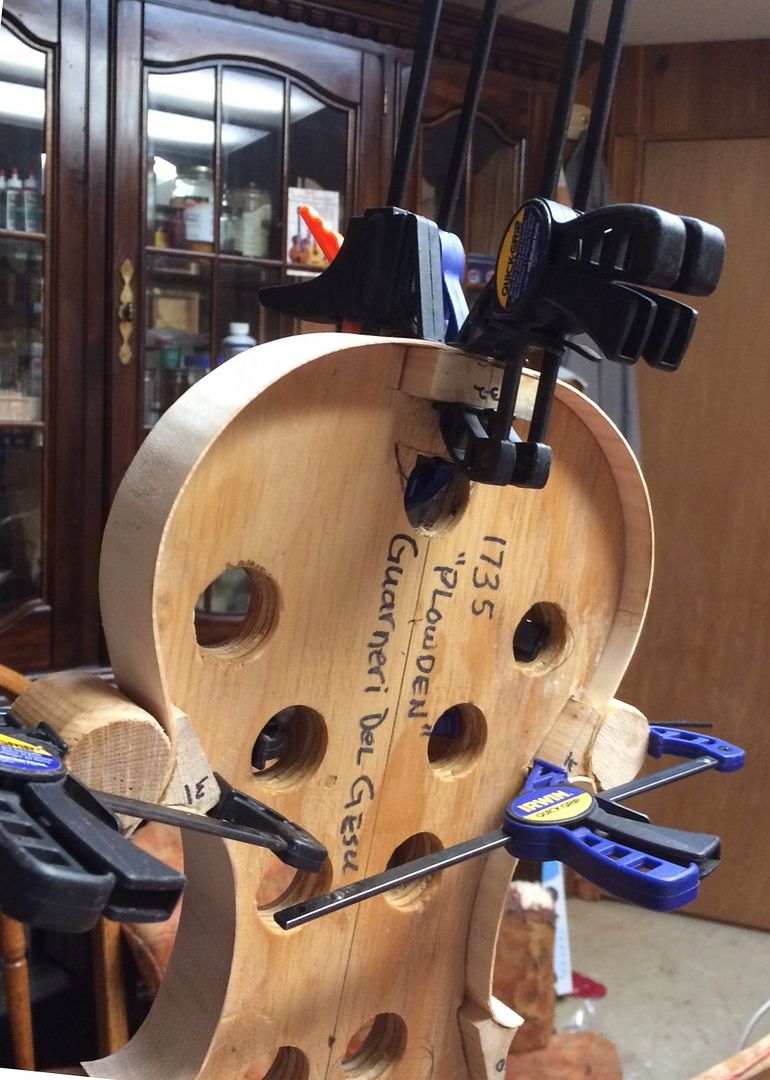
Before I start gluing, I also take time to mark the edge of what will be the “crest” of the edgework, so that I don’t gouge too deeply or too wide, when cutting the channel. After gluing, it is difficult to get the pencil to mark on the wood, if it is either damp or glue-coated.
If you look closely, you can see the pencilled-in crest marks.
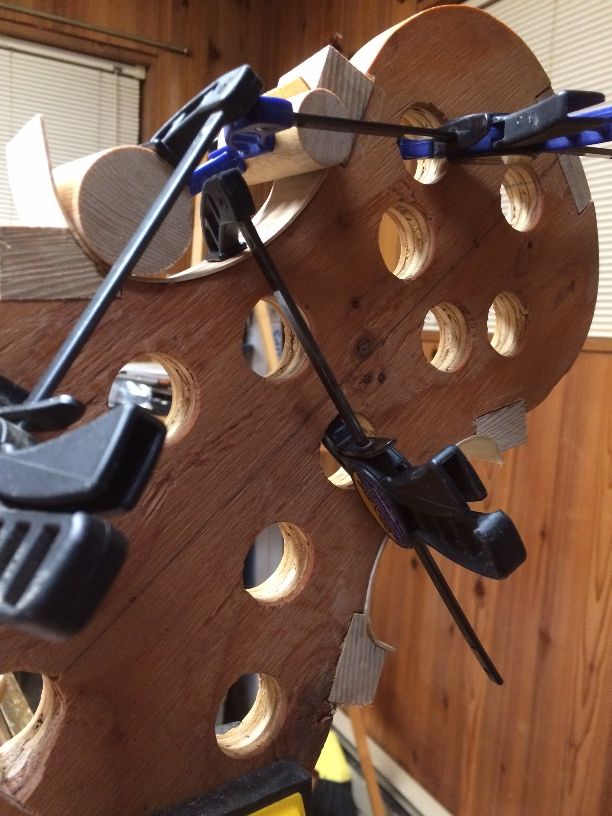
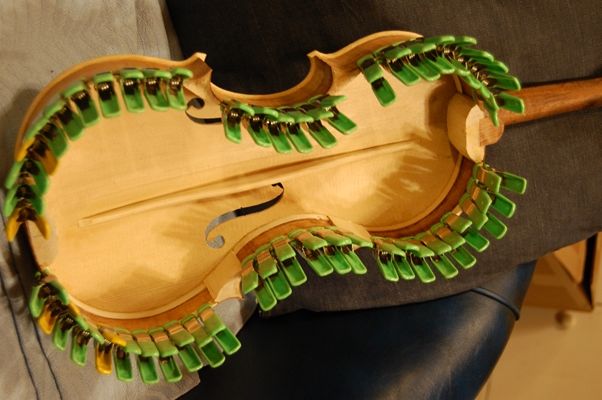
Finally, I lift out each purfling segment, one at a time, and slip hot hide glue under the purfling, then quickly press the purfling back down into the slot. I use a hard plastic roller to help force the purfling deeply into the slot.
The purfling is glued in place, and I can cut the channel now.
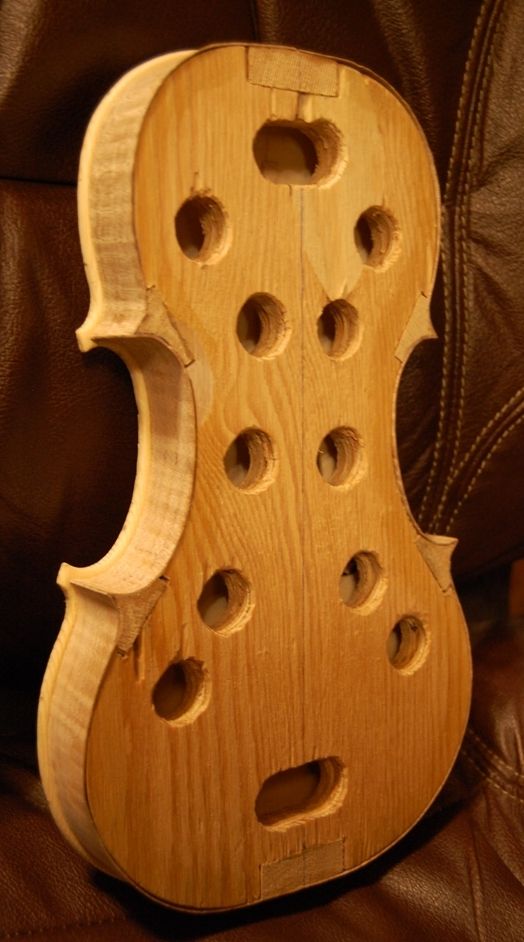
In this case, I chose to work on the graduation, next. I did not get it done, but I am within an hour of completion. Then I can conplete the plate, add the label, remove the mold, and close the corpus.
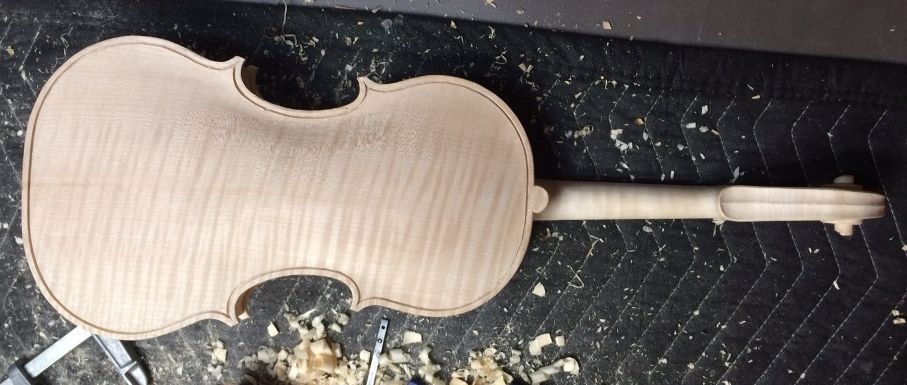
Graduation in progress.
I will also complete the channel and the inner edgework, before removing the mold and installing the plate. But it is getting there…
Vacation is a hard time to get things done, because the people take higher priority, and everything eats up the time. (Ah, well…always good to spend time with family.)
Thanks for looking.
If you found this post helpful, please share with your friends!
The bass bar in a violin-family instrument serves to support the bass-foot of the bridge, and the bass-side of the front plate (also called the “table” or, the “soundboard.”) Without adequate support in the proper place anong that side, the bass tones will sound quite flabby and unconvincing. The following is only a description of how I install the bass-bar, not telling anyone else how it ought to be done.
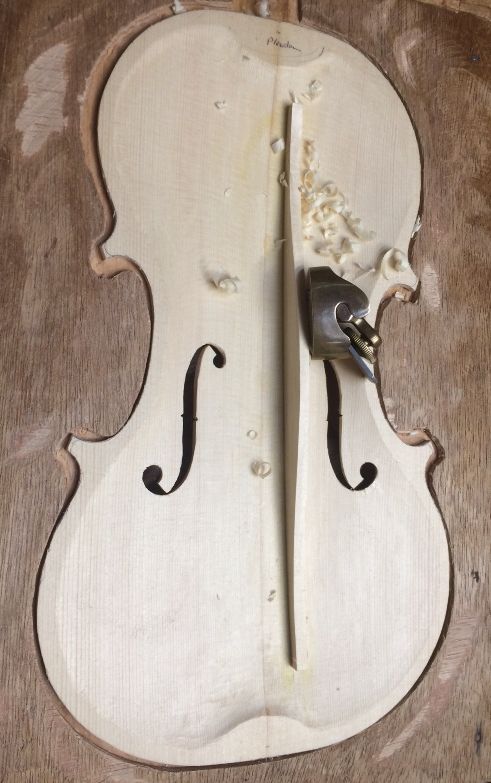
We always make the bass bar of European spruce, with the grain vertical to the plate; thus, flat-sawn to the bass-bar, itself. I begin by laying out two locations, one seventh of the distance from the center seam to the widest part of the bass-side edge at both upper and lower bout. That usually translates into about 15 mm off the center, at the widest point of the lower bout and 12 mm off center for the same place in the upper bout. I strike a line through those points , checking to see if it is far enough away from the inner eye of the bass-side f-hole to actually accommodate the completed bass-bar If it is not, then I move the line over a couple of millimeters, as needed, to gain clearance at the f-hole. Then I measure 40 mm inboard along the line from the upper and lower edges of the plate, to designate the end locations for the bass bar.
I cut the bass-bar blank to length, and plane it to the appropriate thickness, then hold it on the lines I have laid out, essentially perpendicular to what will be the plane of the ribs. I use a compass, set to the maximum gap at the bottom center of the bassbar, to scribe the contour of the plate onto each side of the bass bar. (Notice that, due to the compound curves of the violin plate, the two marks will not be the same. This is important.) Once I have both sides traced in accurately, I carve away the excess wood outside the line, to follow the line as closely as I can manage. I try to achieve a straight line between the two, regardless of where the two lines go, because that will follow the complex curves of the plate.
I double-check the bass-bar against the plate, and usually it is surprisingly close to fitting, at this point. So I use a strip of the paper-gauze tape available in pharmacies, about an inch wide, to cover the layout lines I had scribed into the plate, and then proceed to chalk-fit the bass-bar on top of that tape. The tape is very thin, so that I can see the lines through it (although I do trace them again onto the tape, to make them even easier to see.) But the tape is also so thin that, if I can get a perfect fit on the tape, when I remove the tape, I will have a perfect fit on the plate, as well, and no chalk residue to remove.
The hardest thing for me to learn in chalk-fitting, was to only remove the transferred chalk and the wood immediately under it, not the whole area. Frequently the culprit in an imperfect fit is actually quite a small area, so it is counter-productive to remove too much wood.
I chalk the tape, along the layout lines, and then press the bar into place, sliding it lengthwise a few milimeters back and forth to pick up some chalk;. I plane or scrape off the high spots where the chalk transferred, then try again. When I get a more or less full transfer of chalk from tape to bass-bar, I know the fit is acceptable. Then I carefully remove the tape, and (finally) glue and clamp the bar into place. Usually, I trim the bar a little, first, so it is nearly the correct shape on the top surface, so the clamps will fit more easily.
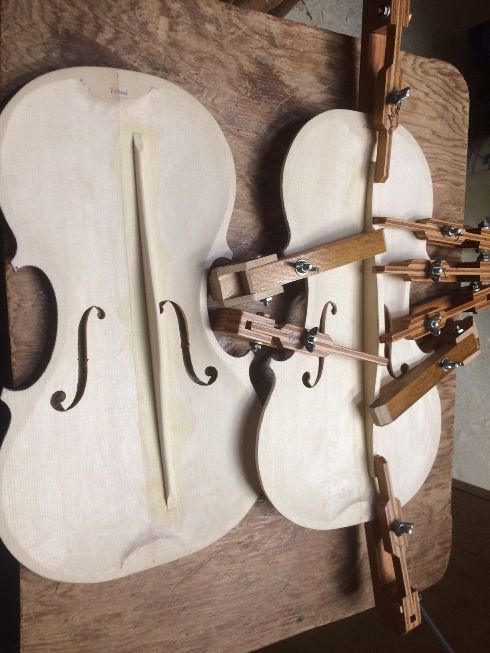
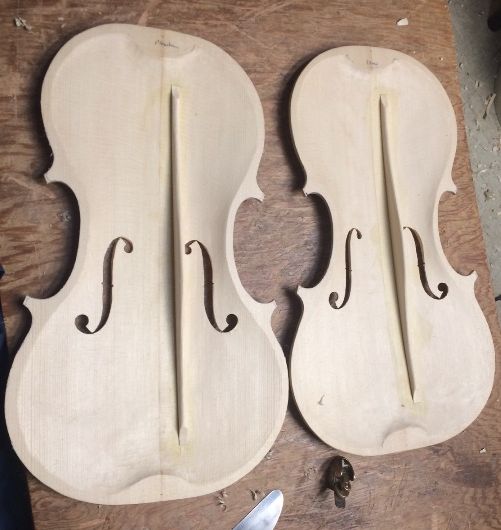
One bass bar is complete: the other has only been trimmed to make it easier to clamp.
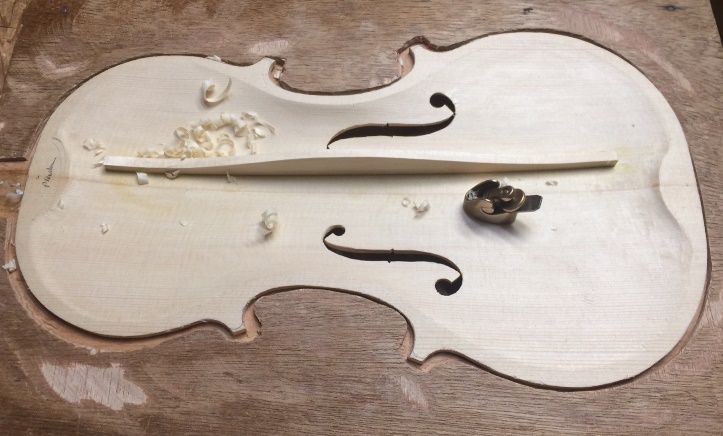
After the glue has dried and the bar is rigidly secured, I use finger-planes to trim the bar to the size and shape I want.
Beginning with a medium-sized finger-plane.
Finishing with a small finger-plane.
Final touch-up with small plane and scrapers. The camera angle is what is making the two bars look so different.
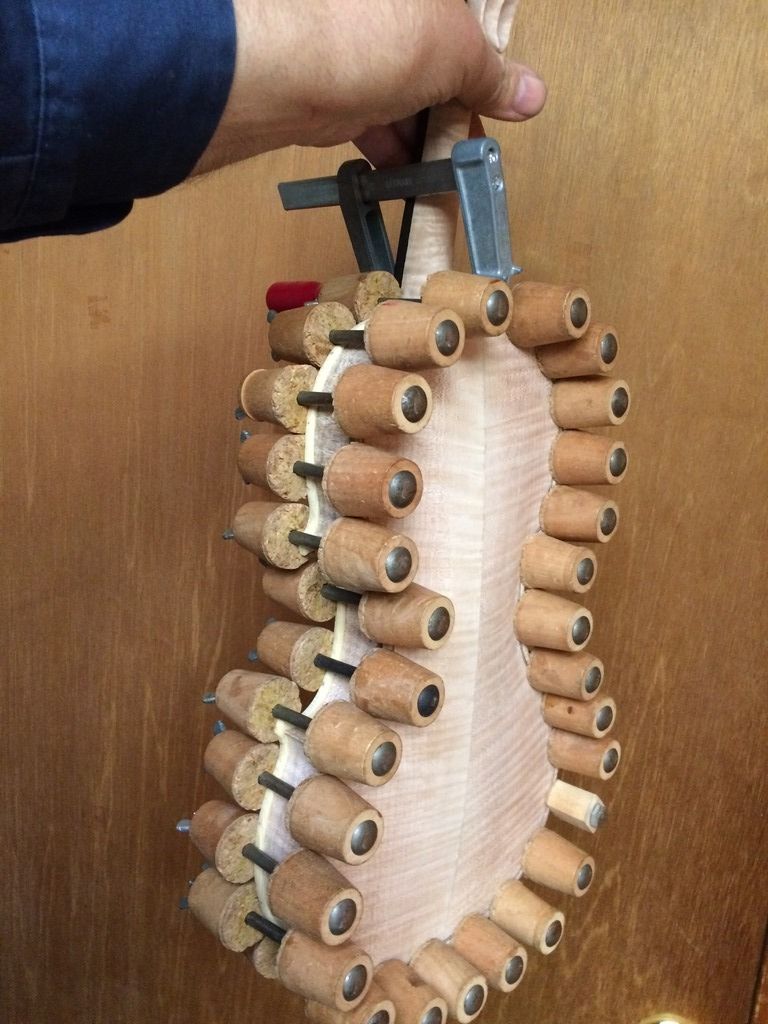
Installing the top plates
So, the next task is to complete the inner edgework, and then install the top plates on the rib garlands. I plane a tiny bevel around the edge of the plate that will face the ribs; then file it to a curve, nearly quarter-round, flush with the outer rim of the plates. Then I position the plate on the garland as precisely as possible (sometimes things seem to have moved a bit, so I have to compromise a little.) Finally, I loosen a few of the spool clamps at a time and slip hot hide glue into the joint, using a thin palette knife. I clean up all around, so as to not leave glue on the outside of the violin.
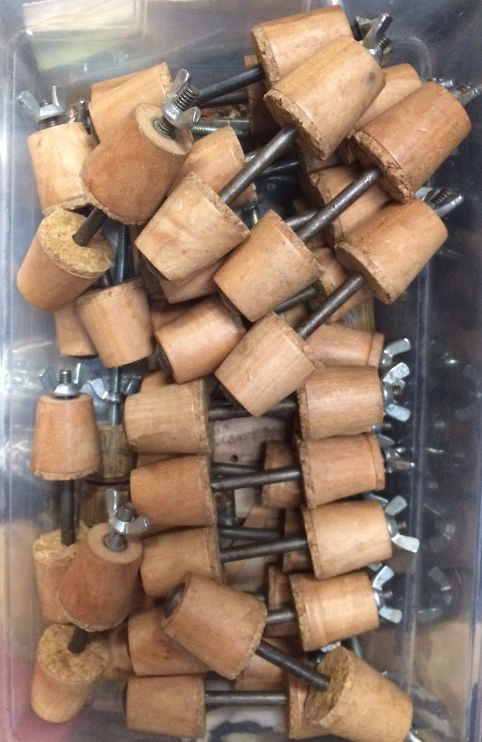
Spool clamps can look like these, or even more simple: sections of closet rod with all-thread bolts. There are a lot of possible options.
Finally, the plate is fully glued and clamped, and I wait for it to dry.
Guarneri copy top plate installed with hot hide glue and spool clamps.
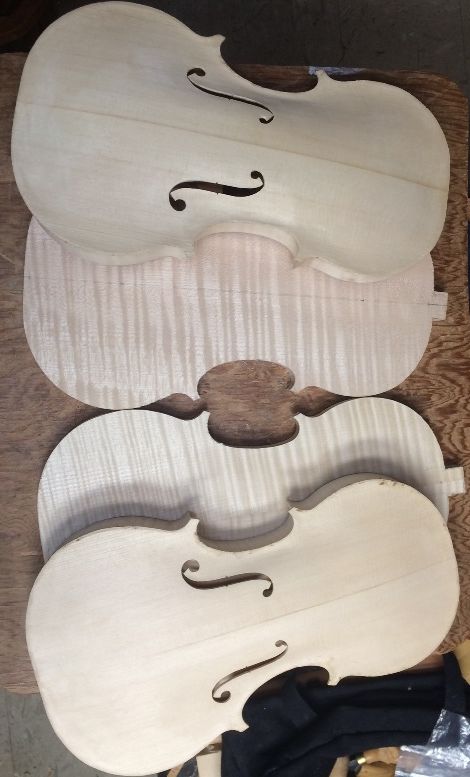
After the top plates are installed, I trace the European Maple back plates and cut them out. Here are the two garlands with the top plates installed and the back plates cut out:
Completed Garlands with plates.
Next stop will be arching the back plates.
Thanks for looking.
If you found this post helpful, please share with your friends!
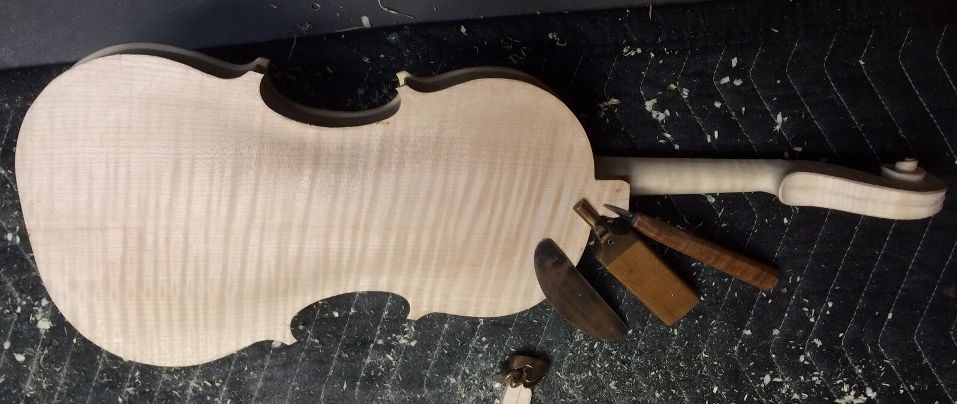
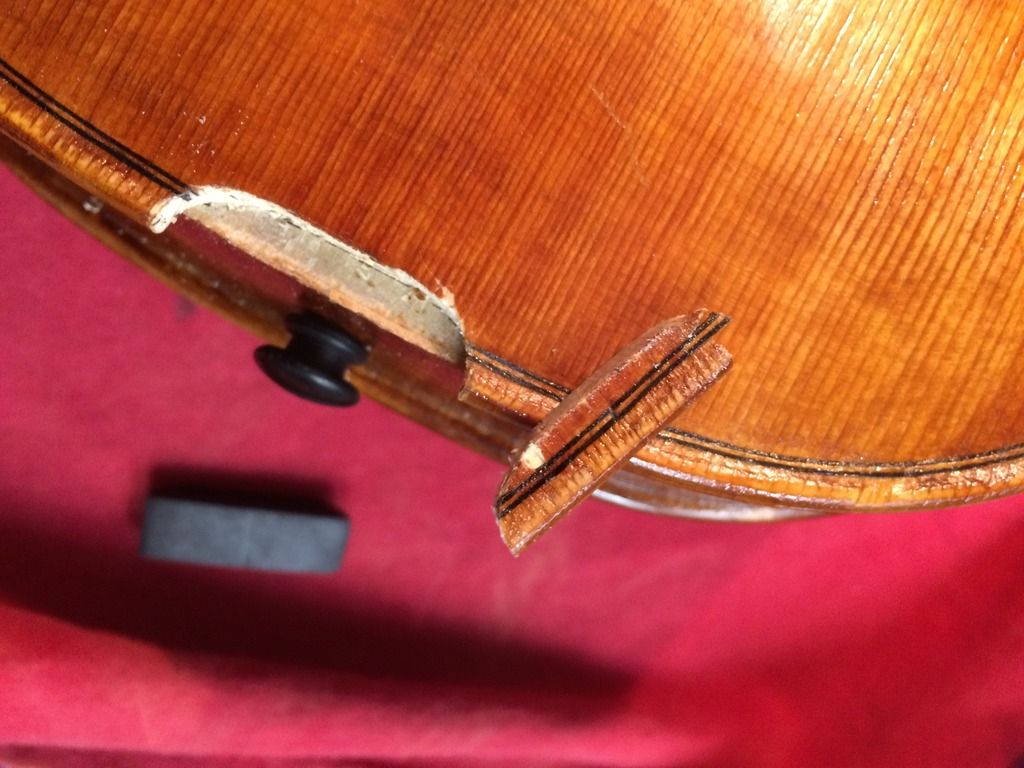
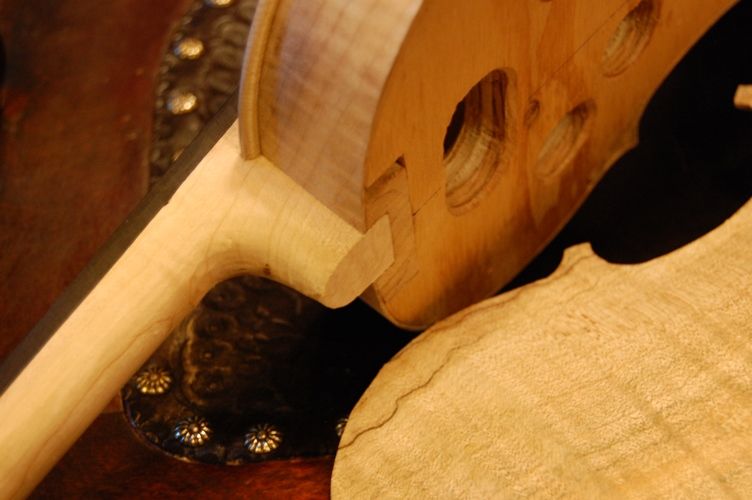
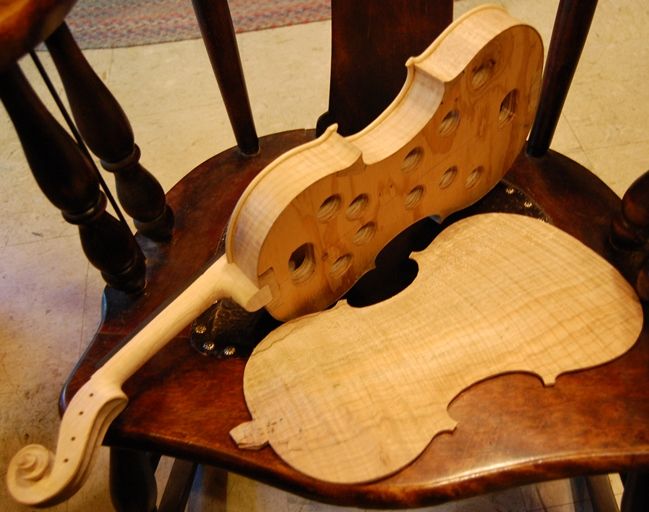
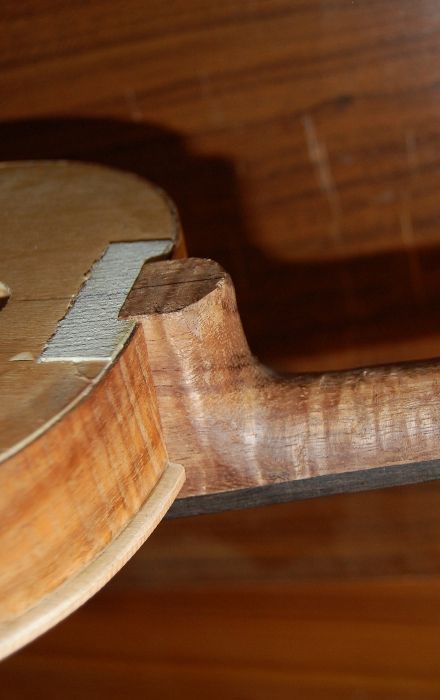
When I installed the back plate, the heel had been trimmed flush with the back of the garland, but the upper surface of the heel was still quite irregular, and the upper end of the button was ridiculously oversized. The excess wood made it easy for me to install a clamp, and get the back plate glued on securely. So…when I removed all the clamps, this is what it looked like:
Back plate installed; button and heel not yet trimmed.
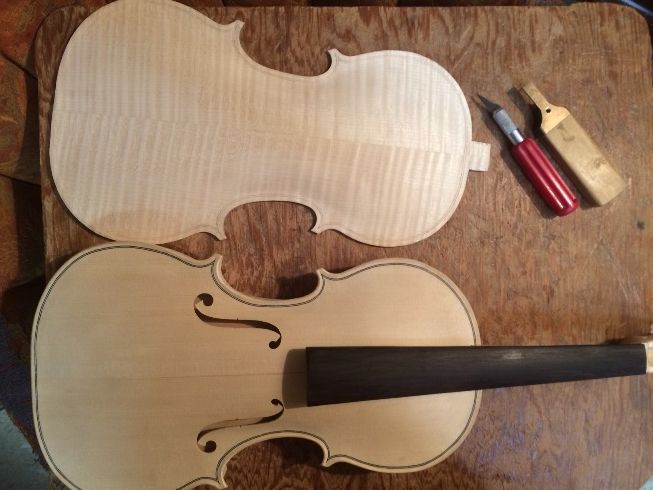
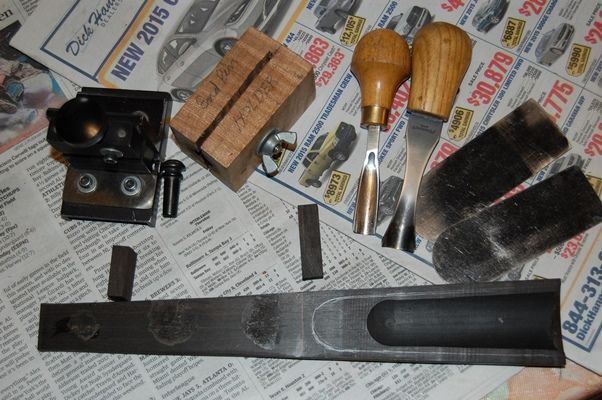
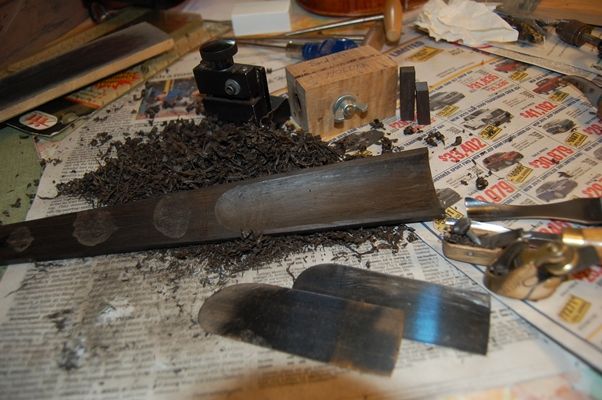
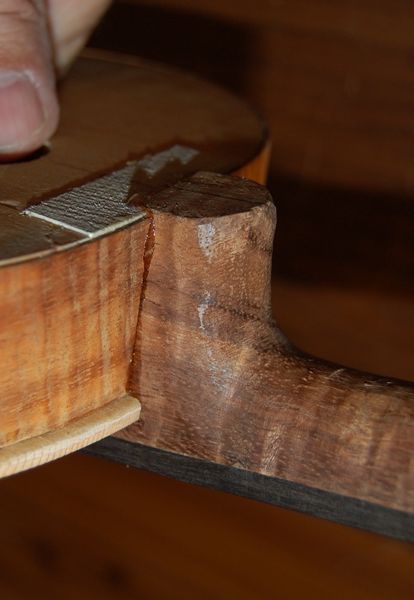
Next, I will trim the button and heel, then add purfling, then scrape. These are the tools I will use.
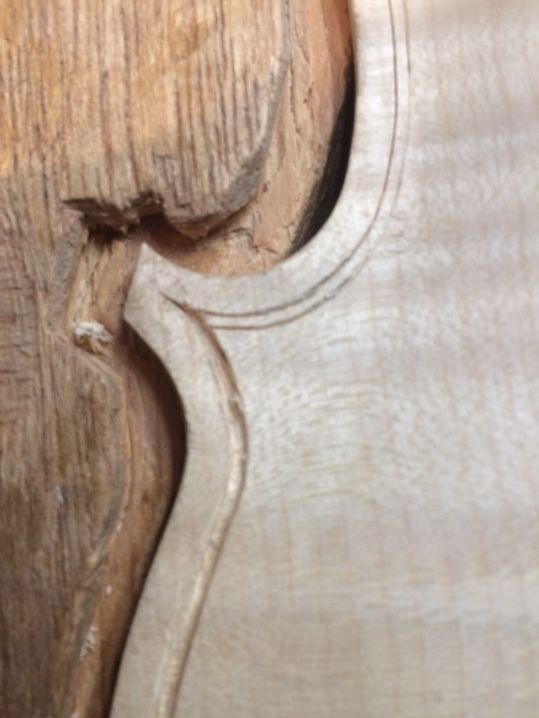
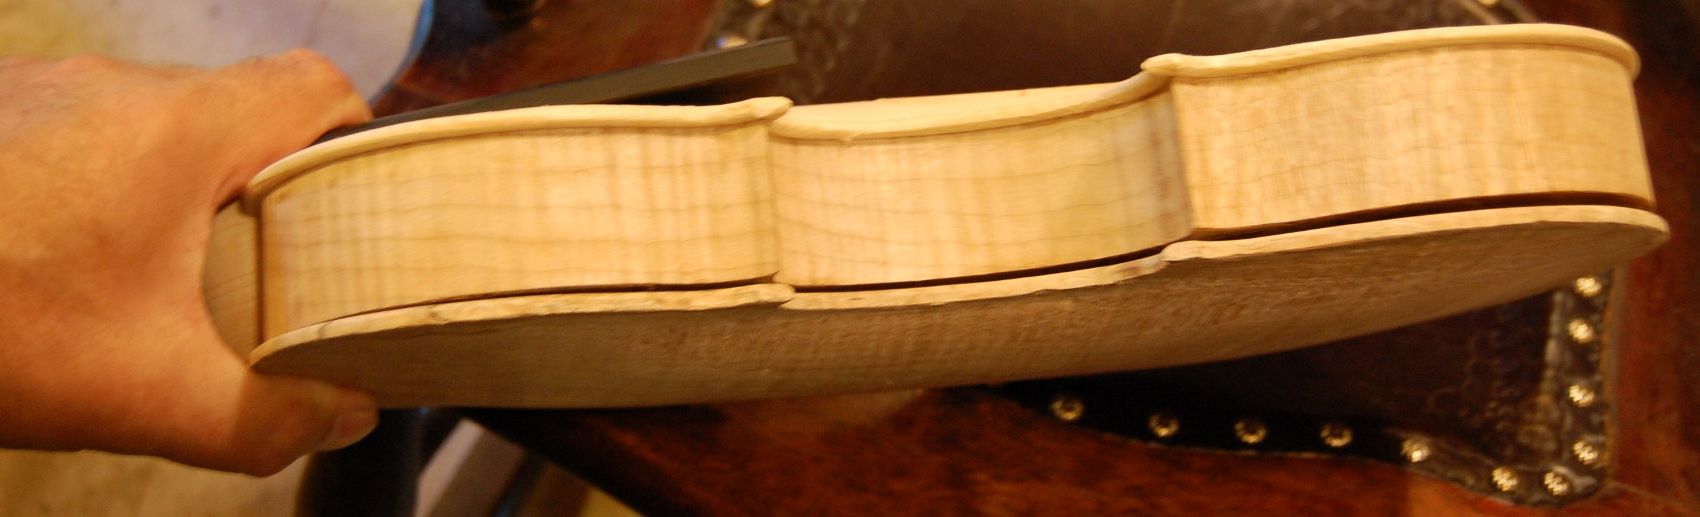
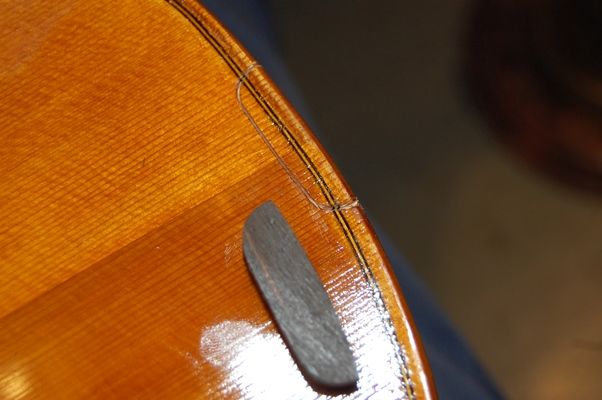
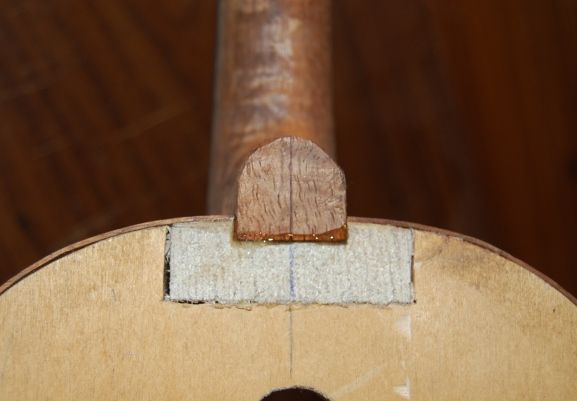
This is roughly the shape the button will be, but a little more refined, I hope.
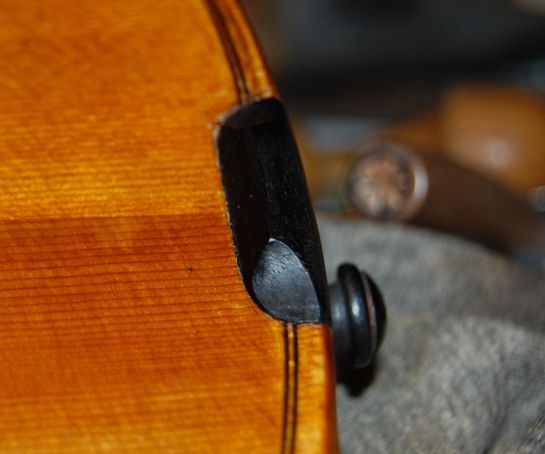
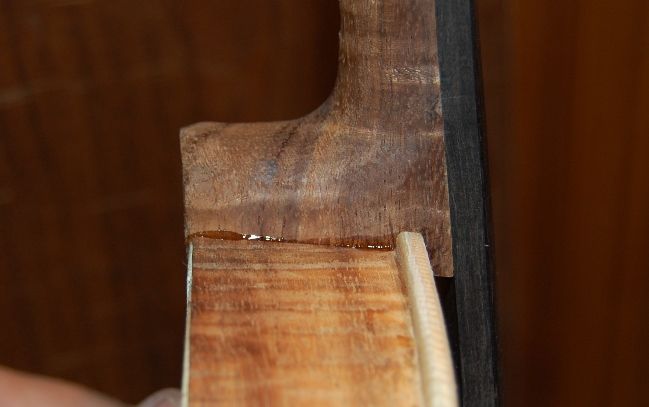
Side view of the heel and the button. The closeness of the camera warps the picture a little.
Installing the Purfling
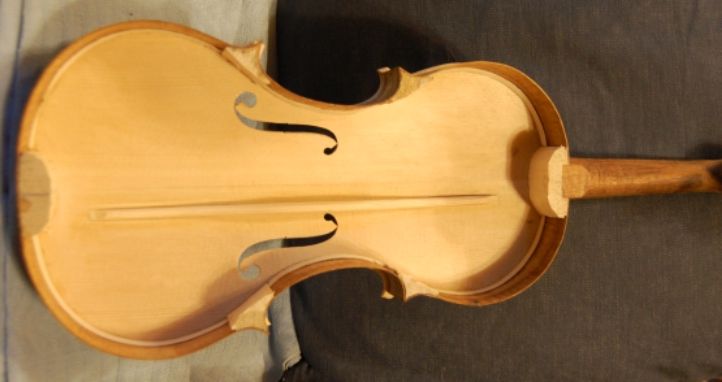
The next thing was to scribe in the purfling slot. I used the purfling marker to scribe the double line exactly 4mm from the outer perimeter of the plate, except the corners, where I used a sharp pencil to sketch the “bee-stings” in by hand. Then I incised the lines all the way around, just barely deepening the lines, so that they are more visible, and a little easier to follow with the blade of my small knife.
Purfling slot lines lightly incised.
Then I slice in pass after pass, trying to get the lines deep enough for the purfling I will install. I usually find that, especially on the hard maple, I have to cut the slot in two layers: the first gets about half the depth I want, and the second finishes the slot. Here is the slot at half-depth:
It looks good, but it is not deep enough.
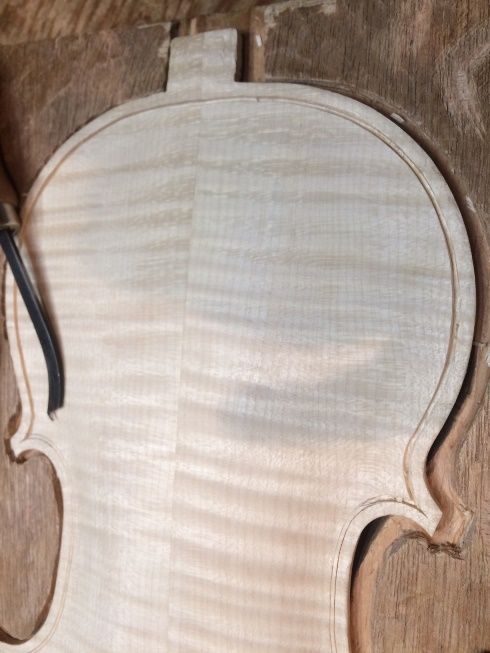
Purfling slot ready for purfling.
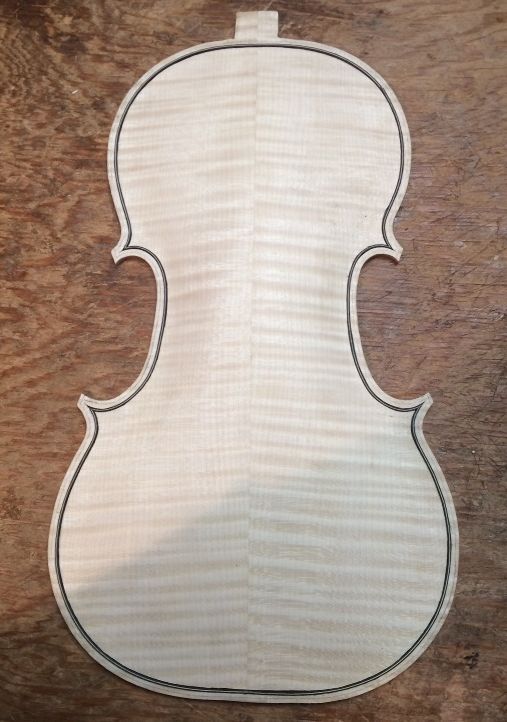
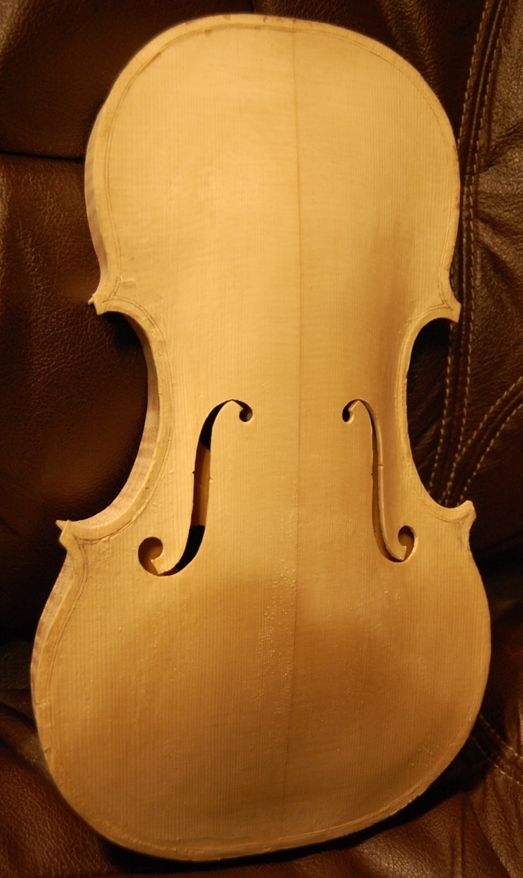
Back purfling installed…glue still wet. 🙂
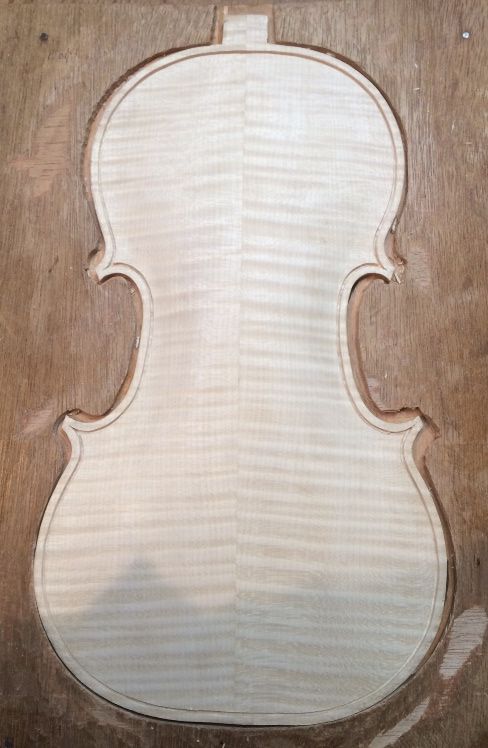
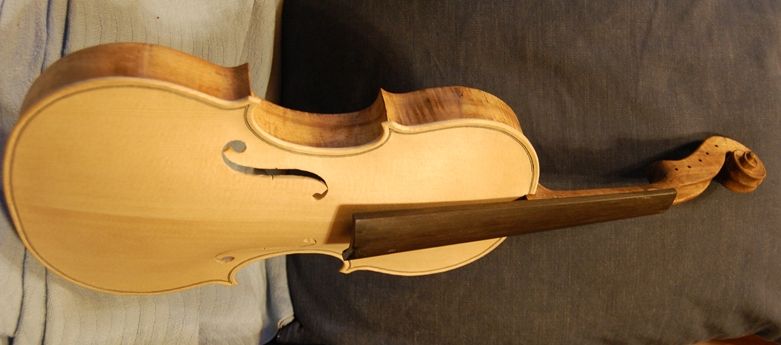
And the Front!
Back to Work!
As most of you know, I had undergone hernia surgery, just after Christmas, and had a 6″ x 8″ polypropylene mesh patch installed in my abdomen. I have been convalescing, and just this week, have finally been feeling better. So…I just received word that I will return to my work at Gunderson, Inc., tomorrow at 6AM. I think I had better call it a day, and try to get some sleep. 3:30AM comes at the same time, every morning, whether I am ready or not. I will get home sometime after 4PM, I expect. Maybe I can jump back in where I left off. 🙂
Tomorrow evening, then, I hope to complete the purfling channel and the outer edgework of both the front and back plates, and begin the final scraping in preparation for varnishing. Any little glitch, regardless of how tiny, will be very visible under the varnish. So this part has to be done with great care.
Thanks for looking.
If you found this post helpful, please share with your friends!
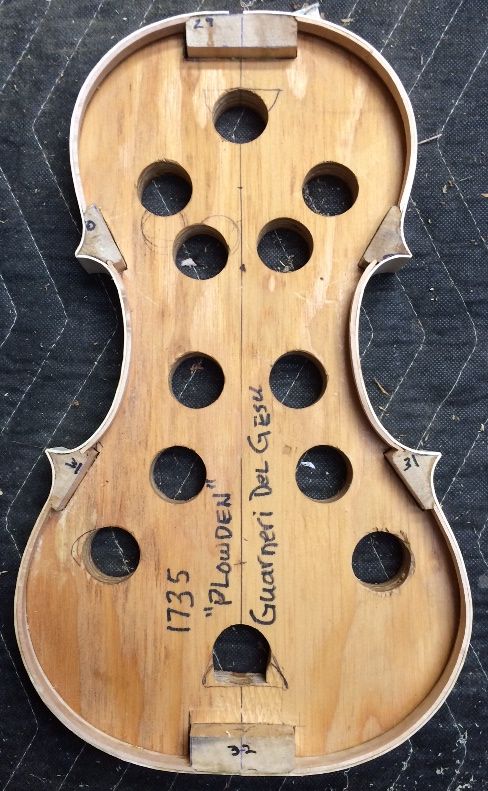
Inner curves of corner-blocks, and both end-blocks, first
I learned to shape only the inner curves of the corner blocks, initially, as well as the outer curves of the end blocks, because if I shape both curves on each corner block, then there exists the possibility that, when I clamp the center-bout ribs in place for gluing, the tips of the blocks may deflect outward, instead of holding their respective shapes.
Also, after the c-bout ribs are glued in place, when I shape the outer curves, in preparation for receiving the upper and lower ribs, I shape the ends of the c-bout ribs at the same time, so that they simply continue the curvature of the blocks, to a feather-thin end condition, before gluing the upper and lower ribs in place. Then, when I trim the upper and lower ribs, it is easy to make the glue-lines between the c-bout ribs and the upper and lower ribs completely invisible, matching the corner of the trimmed ribs at the corners of the instrument garland.
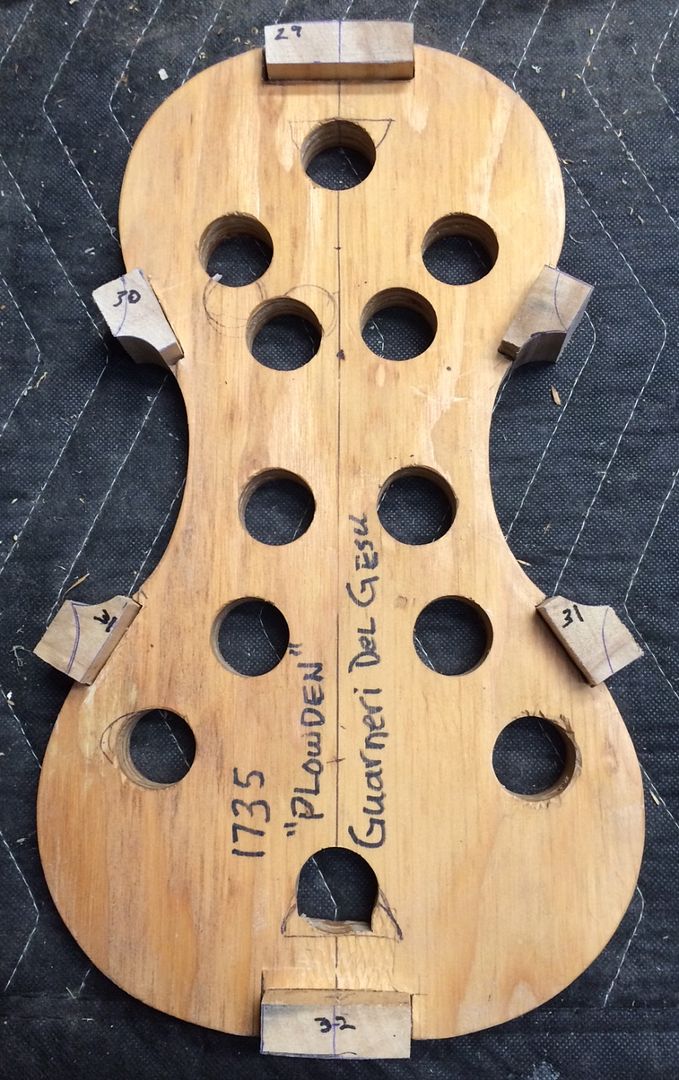
So, here is the mold with the blocks shaped as described above:
Blocks shaped in preparation to installing certer-bout ribs.
Ribs are Next
When using figured wood, I have to make a determination as to which angle the figuring will follow on the instrument. I thought I could just copy whatever the Old Master (Guarneri del Gesu) had done, but, as it turns out, he used highly figured wood for the ribs, all right, but the flame (curl) in the maple went directly across the rib at nearly exactly 90 degrees, whereas mine is quite slanted. So, I have to make a decision: Will I have the curl slant “up” (north) from the back side to the front, or the other way– from front to back?
Really, I simply have to make it consistent, on both the treble and bass sides. Some makers have the slant in the C-bouts going the opposite direction from that of the upper and lower bouts. Some, also, have used a single rib across the two lower bouts, and thus had the flame slanting one way on the bass side and the other way on the treble, and then matched the center and upper bout rib curl to the lower bout rib, so that the grain was consistent all the way around, instead of being mirrored between the two sides.
That sounds good: but, in the first place, I haven’t enough rib wood to pull it off correctly; and, in the second place, it can potentially cause problems later on, if the plates shrink (they are made of wood, remember!) and the ribs have to be shortened a little, to match. If there is already a joint at the center, it is relatively easy to simply shorten each side by a millimeter or so, as needed, and re-shape the end-pin hole. But if the bottom wood is all one piece, the repairer will have to cut through that bottom rib, and establish a new center joint; so the two halves will no longer match perfectly, though it will be pretty close.
Anyway: I usually would first thin the ribs to a consistent one millimeter thickness, and then cut them to length, carefully laying them out as to location and orientation, before bending. This time, I consulted with one of my teachers, who assured me that Guarneri ribs were a little thicker. So, since the ribs came to me at 1.3 mm, I will consider that to be the ideal thickness for this particular instrument.
Ribs for new violin (one is already on the mold.)
Then I can bend all the ribs, individually, and set them aside ready to be used. In the case of the C-bout ribs, I clamp them into the mold, where they will cool, and stabilize, in exactly the correct shape. Afterward, I used a small brush to slip glue into the joints, and secure the C-bout ribs permanently to the corner blocks.
First (Bass side) C-bout rib installed.
Second (Treble side) C-bout rib installed.
When the glue holding the C-bout ribs had dried sufficiently, I shaped the outer curves of the corner blocks appropriately: You can see, in the photograph, below, that the center rib-ends have been shaped along with the outer curves of the corner blocks, so that they will cleanly fair into the curves of the upper and lower ribs.
Final shape of corner blocks. C-bout ribs are shaped along with the corner blocks.
I then immediately installed the upper and lower ribs in their respective places. In this particular case, I chose to install the lower ribs first. After the glue dried for a few hours, I installed the upper ribs.
Lower bout ribs installed.
All ribs installed.
When the glue holding the upper and lower ribs had dried sufficiently, I trimmed the ends to the correct length, and filed them smooth. The only “end-grain” showing will be the ends of the upper and lower ribs at each of the corners. I try to make them square with the centerlines of the corner blocks, so that it gives the inpression of a “mitered”corner, but with no apparent glue-joint: the joint is exactly along the corner of the squared-off rib end. The first priority is to have the rib end at the right angle, so it will appear to be perpendicular to the plane of the garland. The next is to file them to look “square” with the corner, as I explained above. Finally, some creative scraping of the C-bout rib-ends will usually move the glue joint to be exactly on the corner of the upper or lower rib, and make it essentially invisible. This one is close:
Corner, nearly complete: a little more scraping will make that joint invisible.
Linings
The only thing left to complete the garland is to install linings on both the front and back sides. The way I have chosen to use my mold (“French” method…ribs flush to one side of the mold) precludes my adding the back linings until after I remove the mold. That is fine: I also intend to leave the mold in place until after I have set the neck, so I have quite a way to go on that step.
Not everyone installs the neck while the corpus is on the mold. I began doing it when building my first cello, and it helped so much with neck-setting that I have continued it ever since. I deliberately allow the heel to “run wild”, in terms of length (or height, depending on how you are looking at it), so that it protrudes past the back of the neck block a little bit. When all my other items (angles, measurements, etc.) are exactly correct, I glue the neck in place, and before installing the back plate, I simply trim the back of the neck-heel flush with the back of the corpus. Then the back plate fits perfectly, and I am not struggling to get that joint tight. But… I am getting ahead of myself…. 🙂
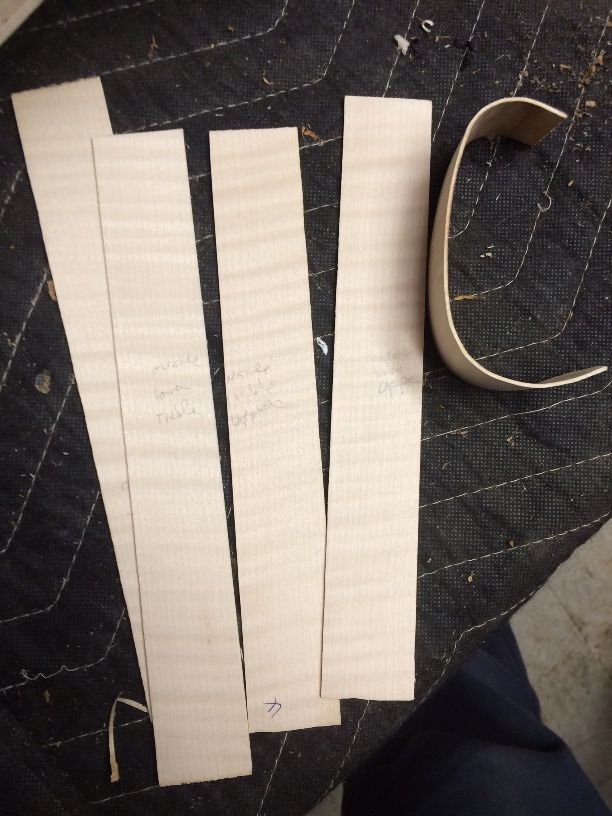
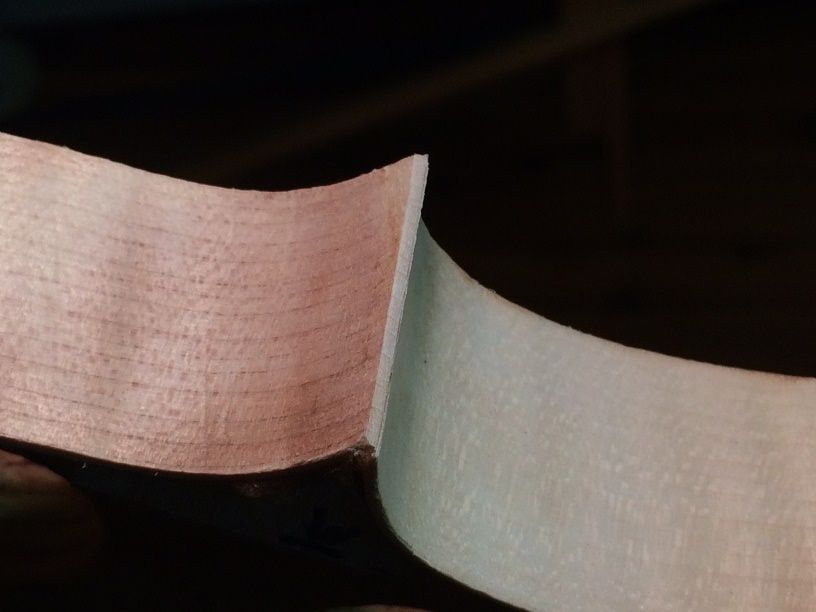
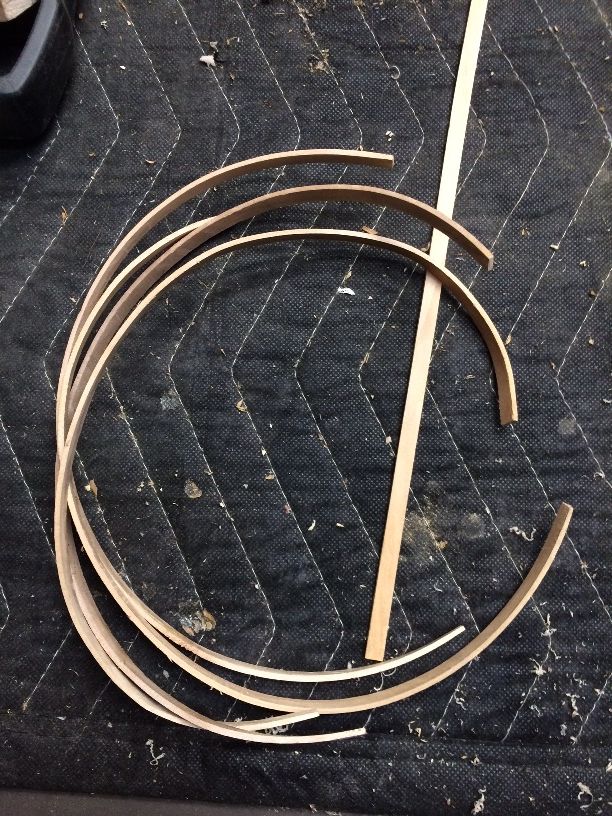
I cut strips of willow to the appropriate dimensions for linings and then plane them smooth; then bend them to fit the curves of the violin, and finally, cut them to the appropriate lengths, and install them. Willow responds very well to both bending and carving, which is why I prefer it for lining material. I can bend all the linings in just a few minutes, and they will all hold their shape until I am ready to use them.
Bent linings, ready to be cut to length and installed. Willow is easy to bend: These linings all started out like the straight one in the photo.
After the corners are all dry and secure, and trimmed, I cut two small mortises in each block, to receive the linings; then cut the linings to exactly the right lengths for a tight fit. The linings serve two purposes: they strengthen the edge of the ribs, which would otherwise be quite fragile; and they triple the gluing surface area bewteen the rib garland and the plates.
When I have all the linings fitted correctly, I remove them one at a time, apply hot hide glue, re-insert the linings, and clamp them in place, using tiny spring clamps. Sometimes one or more areas are more stubborn, and require a heavier clamp. Then I use something with more authority.
Linings fitted, glued and clamped.
So: there is the garland (rib-structure), essentially ready to use! Next time we will level the garland, and use it to trace the shape of the front plate. At some point before attaching the front plate, I will also trim the linings to a triangular cross-section, so that the inner edges taper to a thin transition, and do not add a stress-riser to the ribs. I’m not certain whether it would affect sound, but the Old Masters did it that way, so I will follow their example. The corner blocks also will be trimmed back to be fairly minimal. I will carve away the end-blocks to each be the shape of half an ellipse, but I will leave them fairly robust, for strength.
Mold with blocks, ribs and linings.
You can still see traces of ink and glue on the blocks, looking like gaps…that will all go away when I level the garland.
Thanks for looking.
If you found this post helpful, please share with your friends!
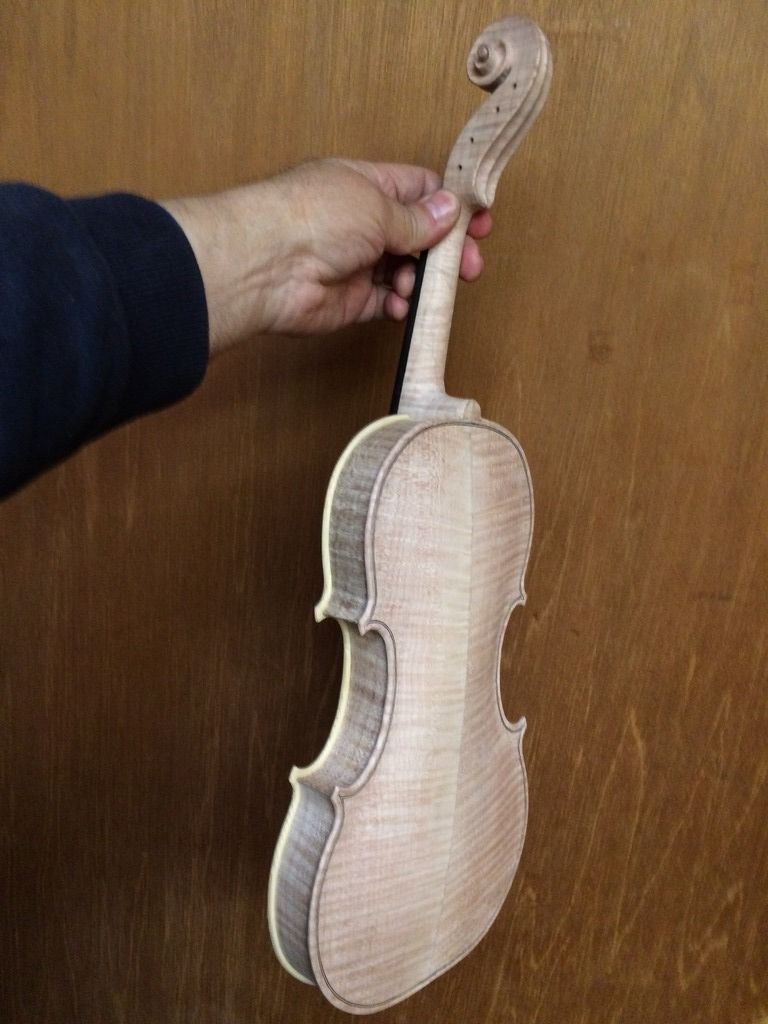
I had a number of other projects going, so I neglected to maintain the website presence…the only post lately has been of another violin resurrection. But…I hope to change that.
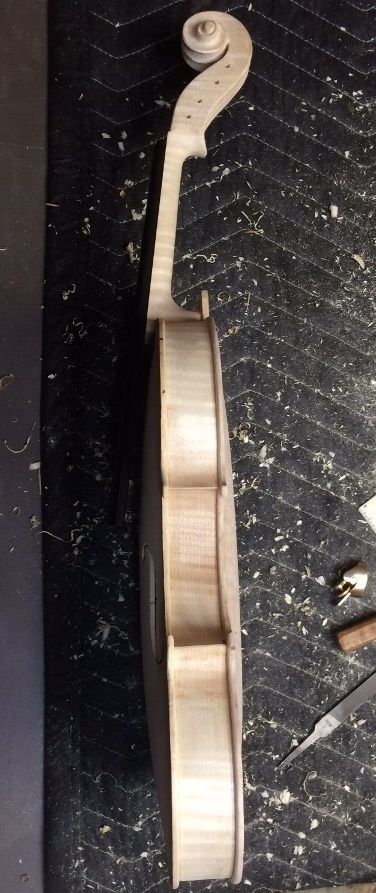
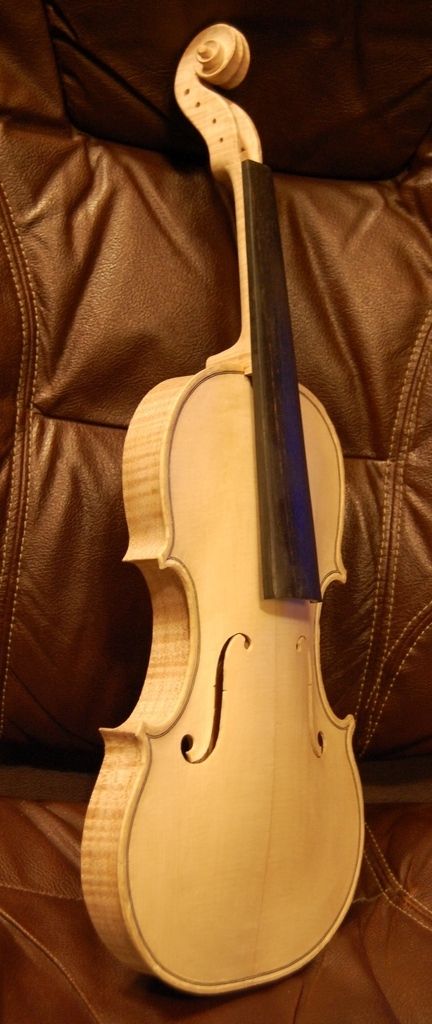
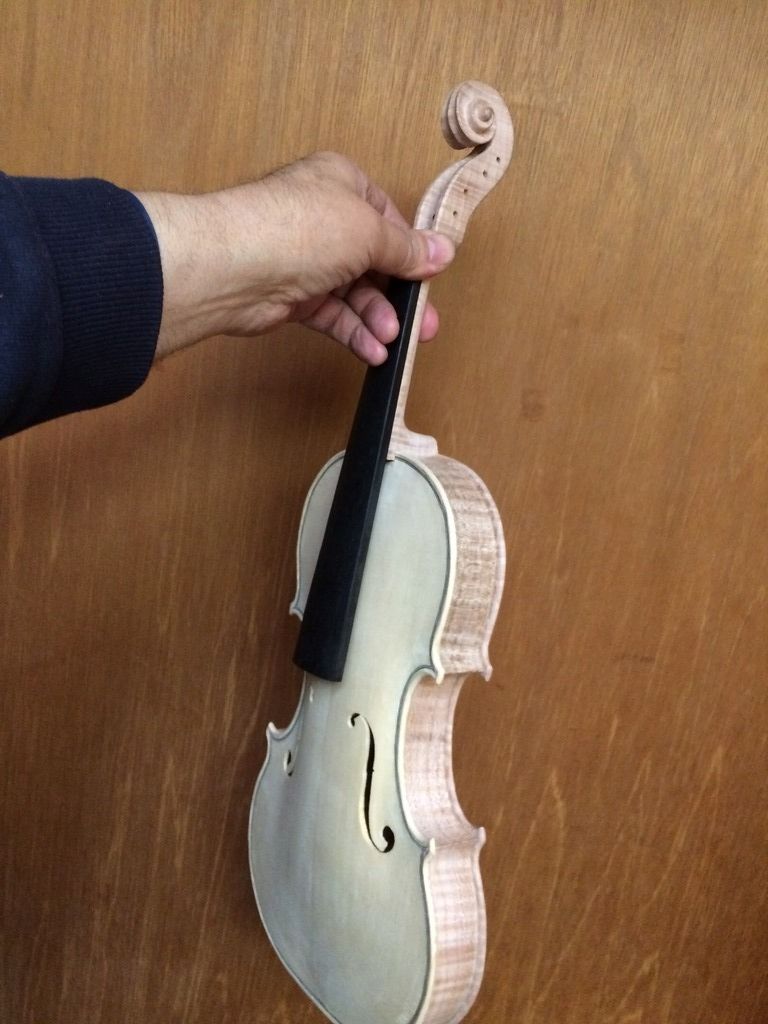
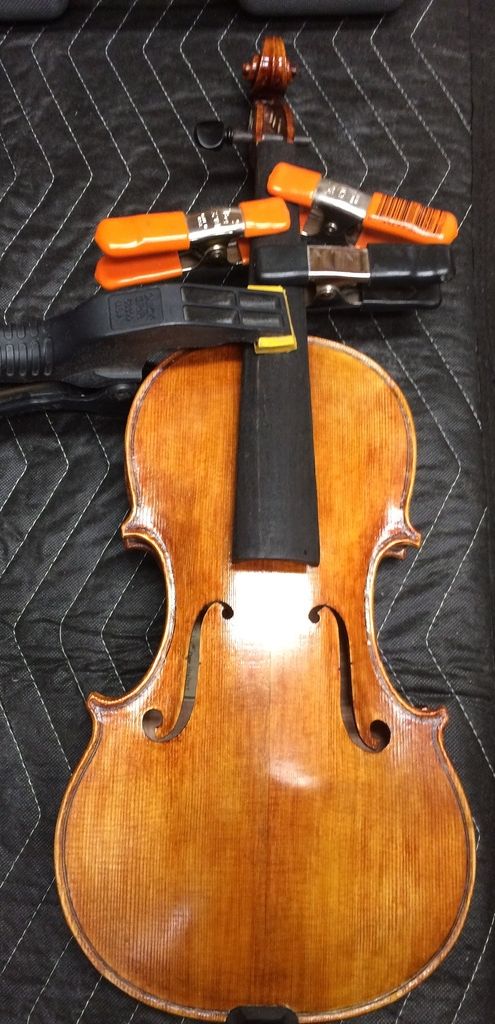
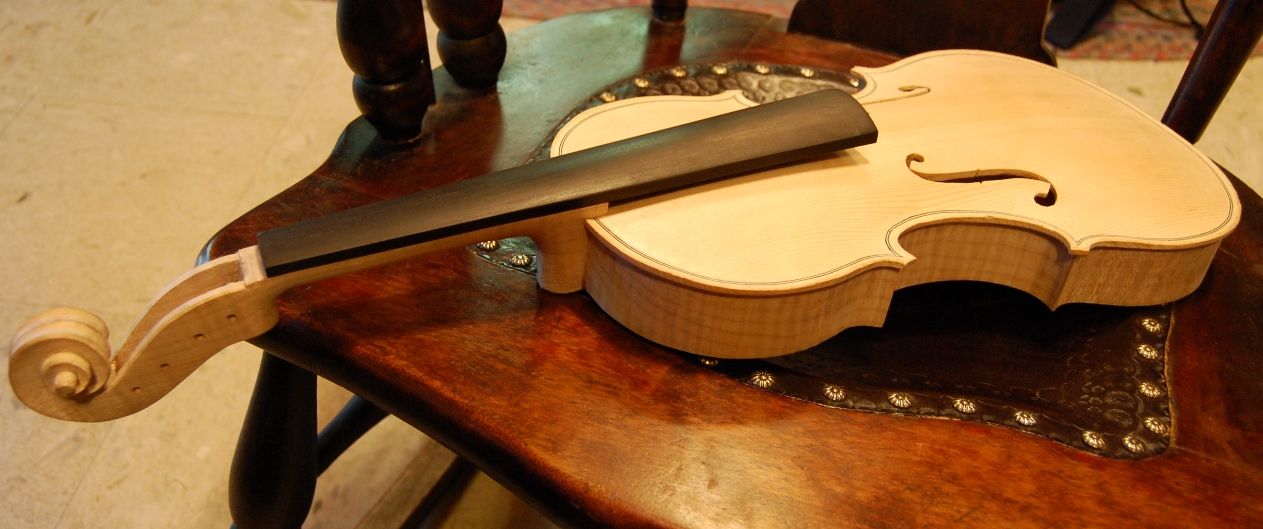
The last post was of the neck-set on the 3/4 violin. It looked like this– but the back plate was not made, yet. Most makers complete the entire corpus, then set the neck. I complete the rib garland and the front plate, then set the neck while the inside mold is still in place. This allows me to get the neck-set perfect, and to level the back of the garland, including the back of the neck-heel, before making the plate. When I install the plate, it fits perfectly, only requiring the final trimming of the heel and button together, to establish the optimum height in the center of the curve of the heel.
Neck-set side view
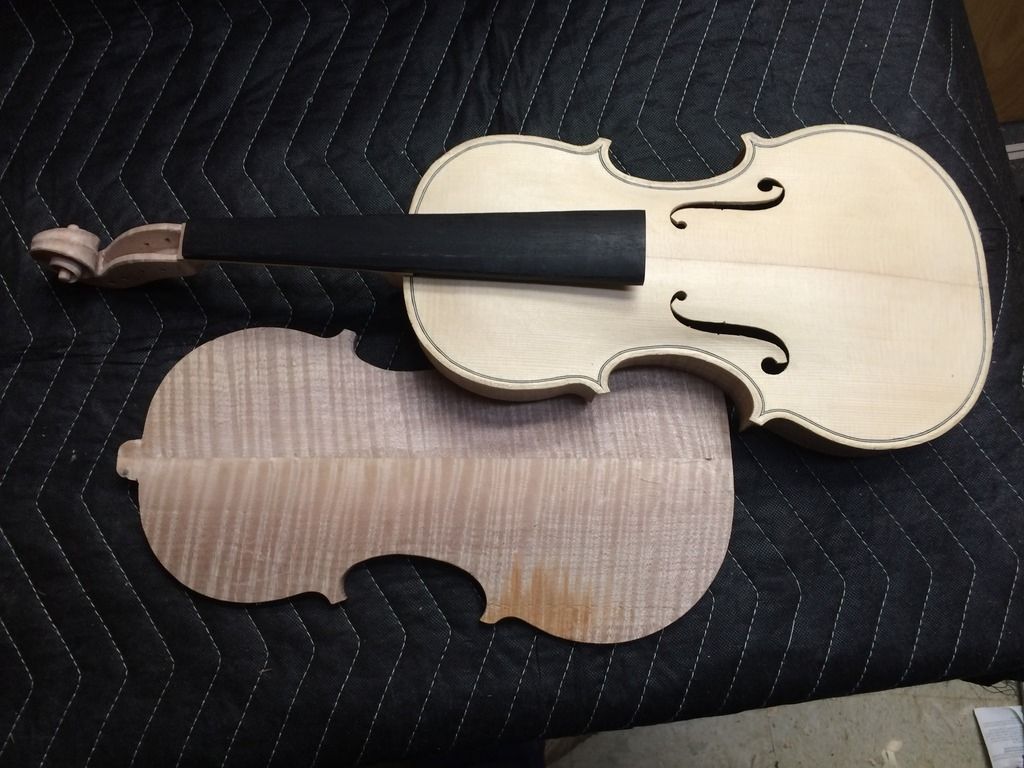
Completing the Back Plate
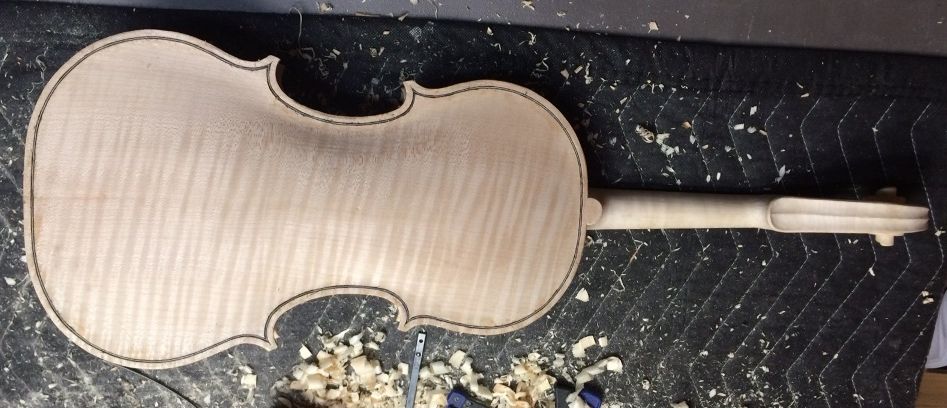
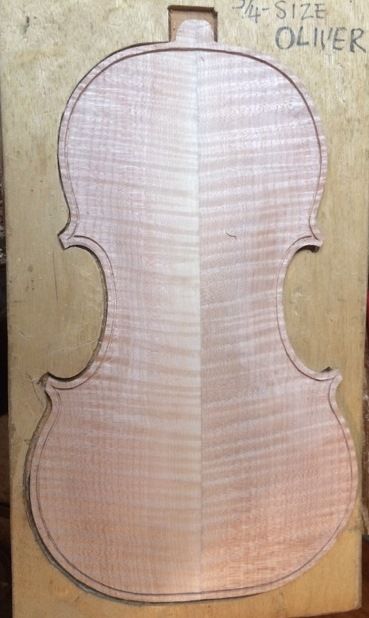
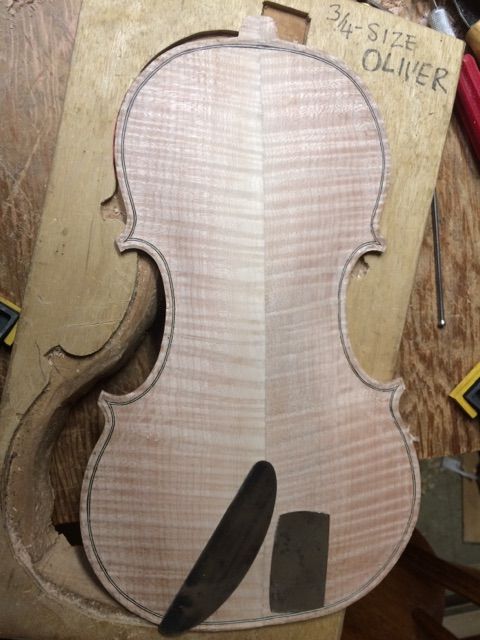
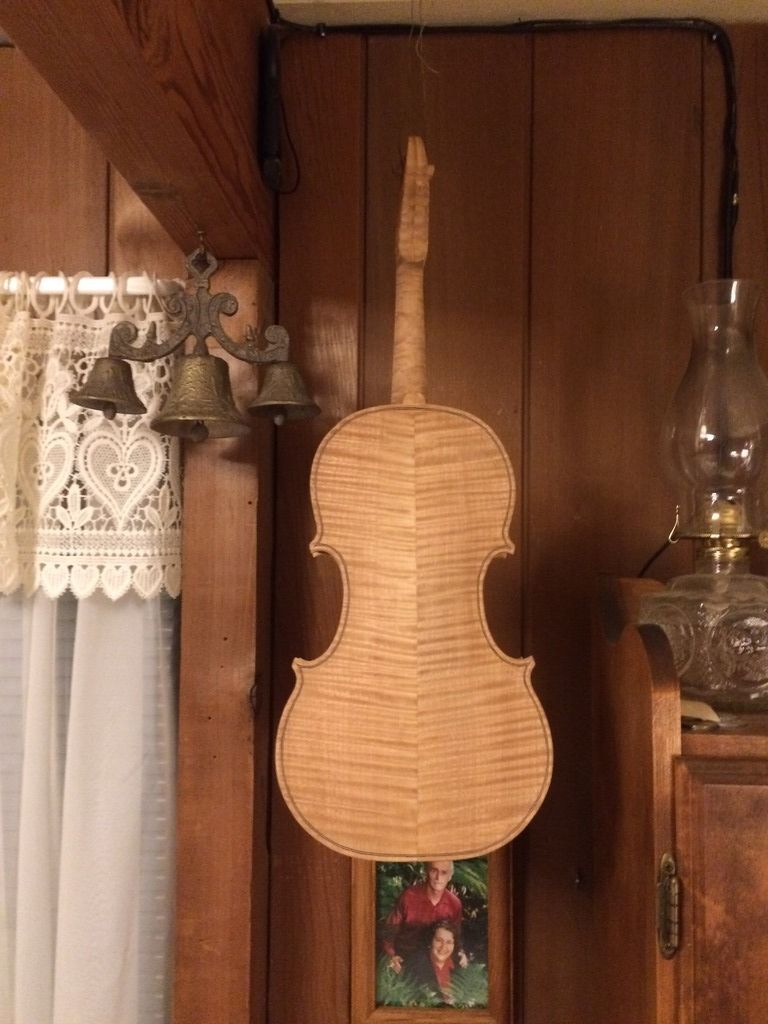
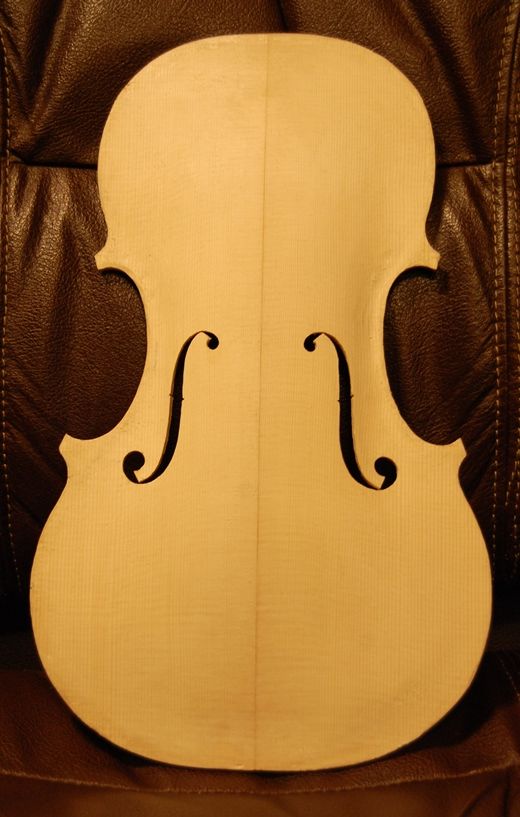
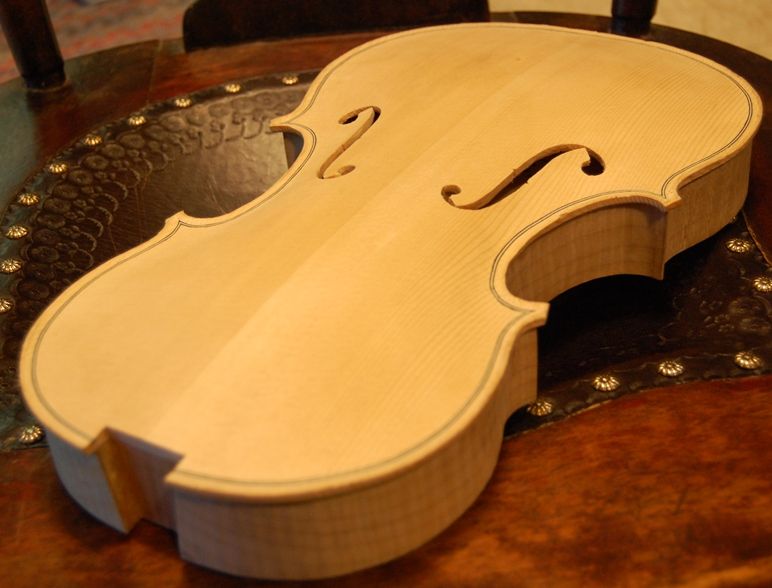
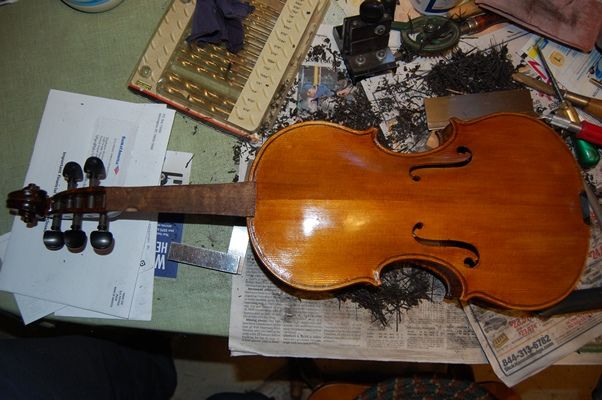
So, the next thing was to trace the back plate, and complete it:
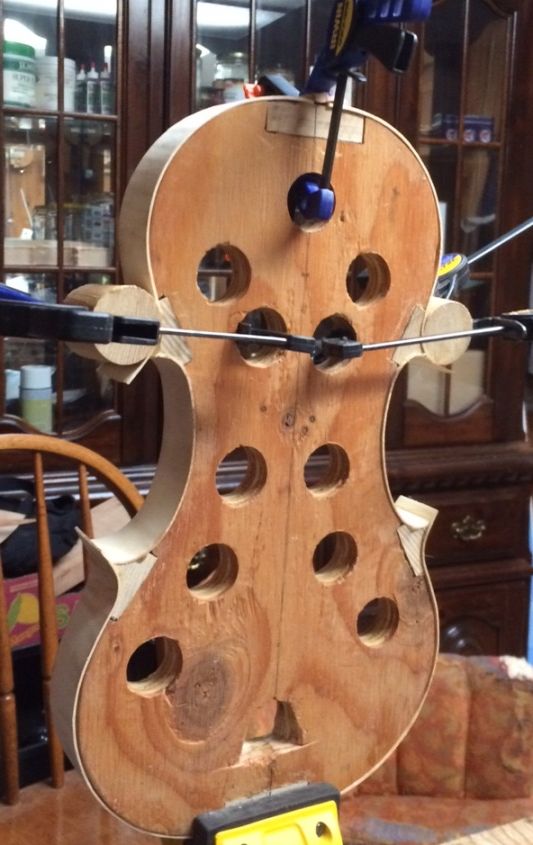
Corpus with back plate blank
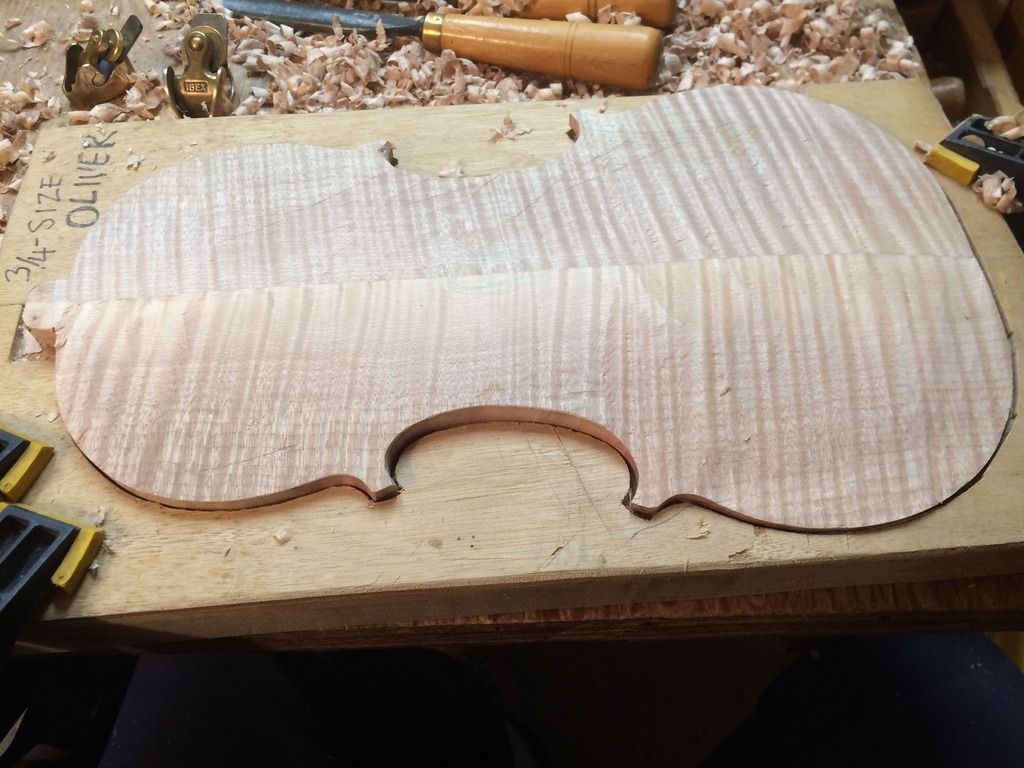
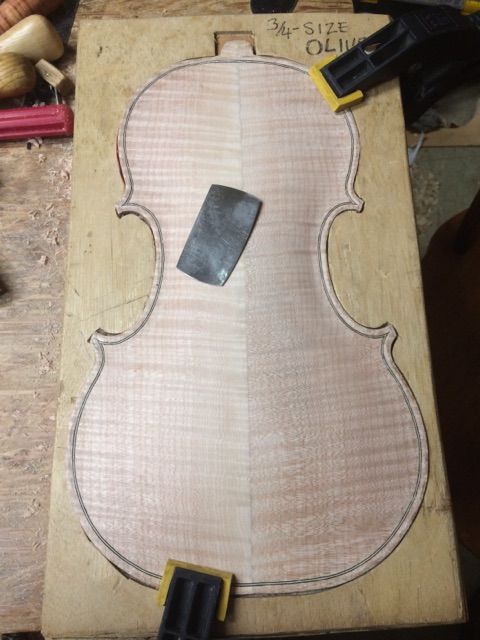
Beginning to carve the back archings. There is a long way to go!
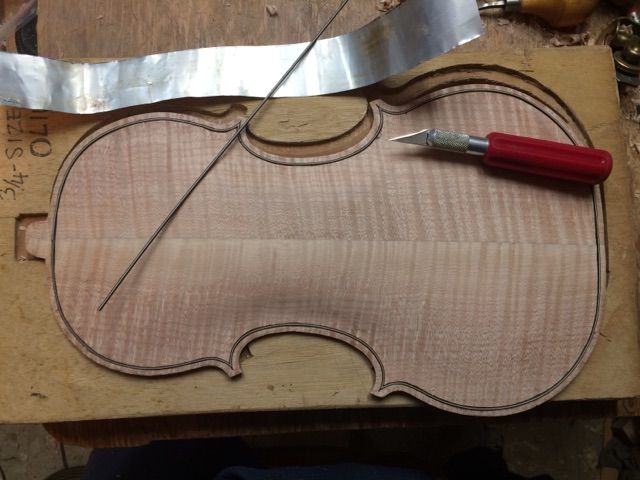
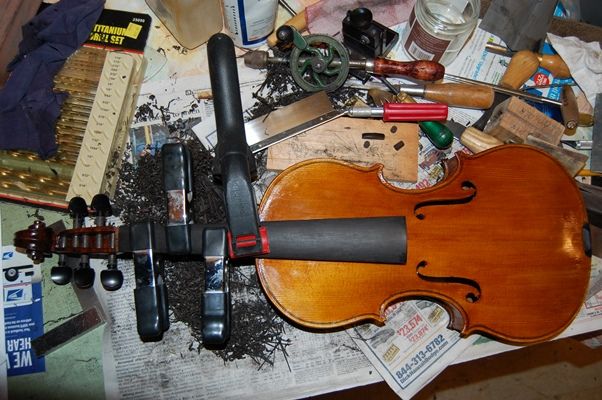
Once the arching is complete, I cut the purfling slot
Then I install the purfling, dry, to make sure everything fits correctly. That strip of aluminum is my bending strap.Then I glue the purfling in place.
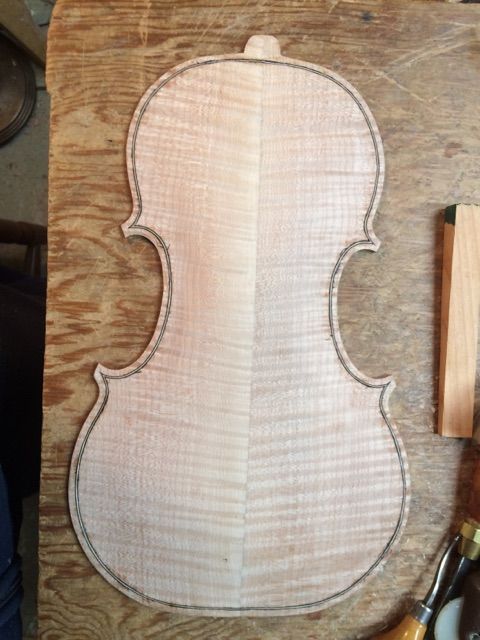
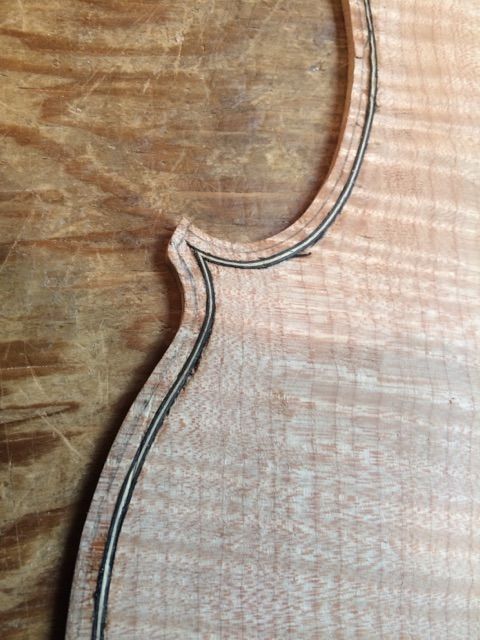
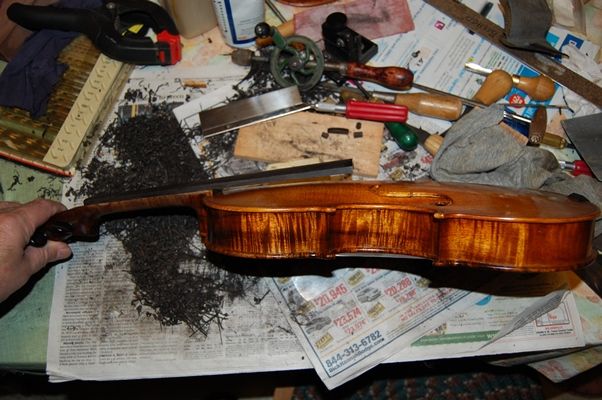
Then I mark the edge of the crest, so I know where to carve the channel.
Then I carve the channel, using a gouge, and use planes and scrapers to fair-in the curves of the channel and the archings.
Here, the arching and purfling are complete…but the graduations (inside arching) are not begun.
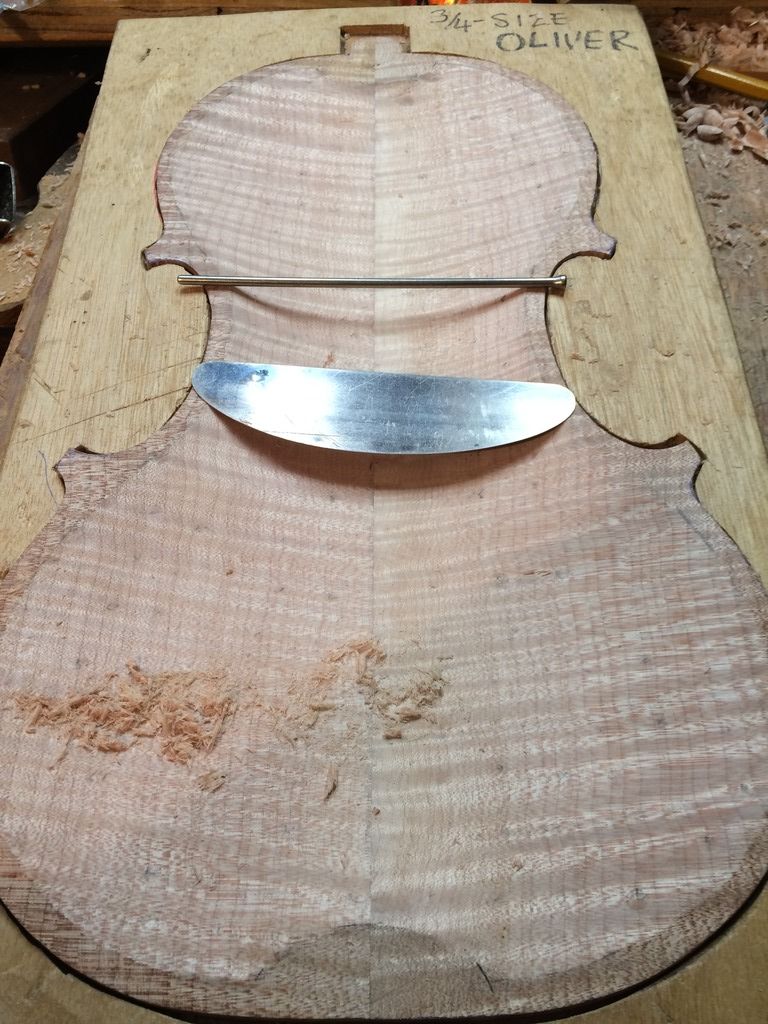
Graduation
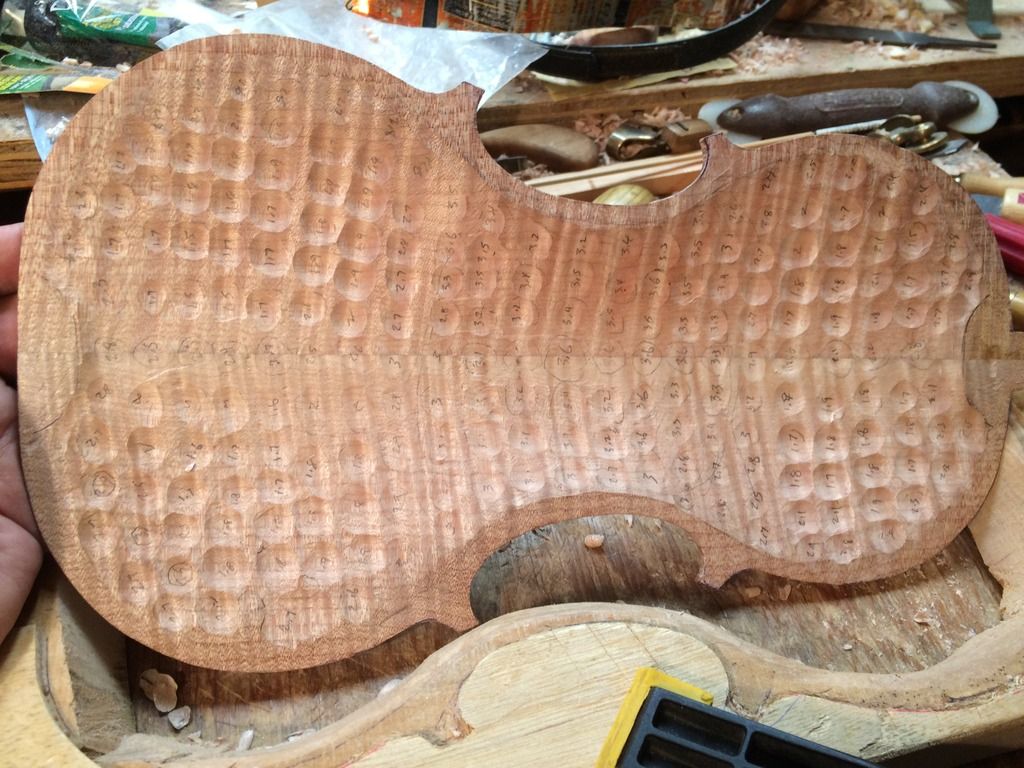
I begin by measuring the thicknesses all over the plate, so as not to run into any surprises and make the plate too thin. Then I use gouges and planes to bring all the thickness close to what I want. But, to make sure I don’t go too far, I measure and carve out small spots all over, to the exact thickness I want in each little “polka-dot”. That makes a “graduation map” that allows me to follow my plan to completion, by removing all the excess wood between the dots, thus “connecting the dots.”
There are other ways to do this. One involves a special tool, commonly called a “Strad-Spike”, because one was found among the tools of Antonio Stradivari. I have seen them and and have actually used them, but have never gotten around to building one. So…
Graduation map laid out.
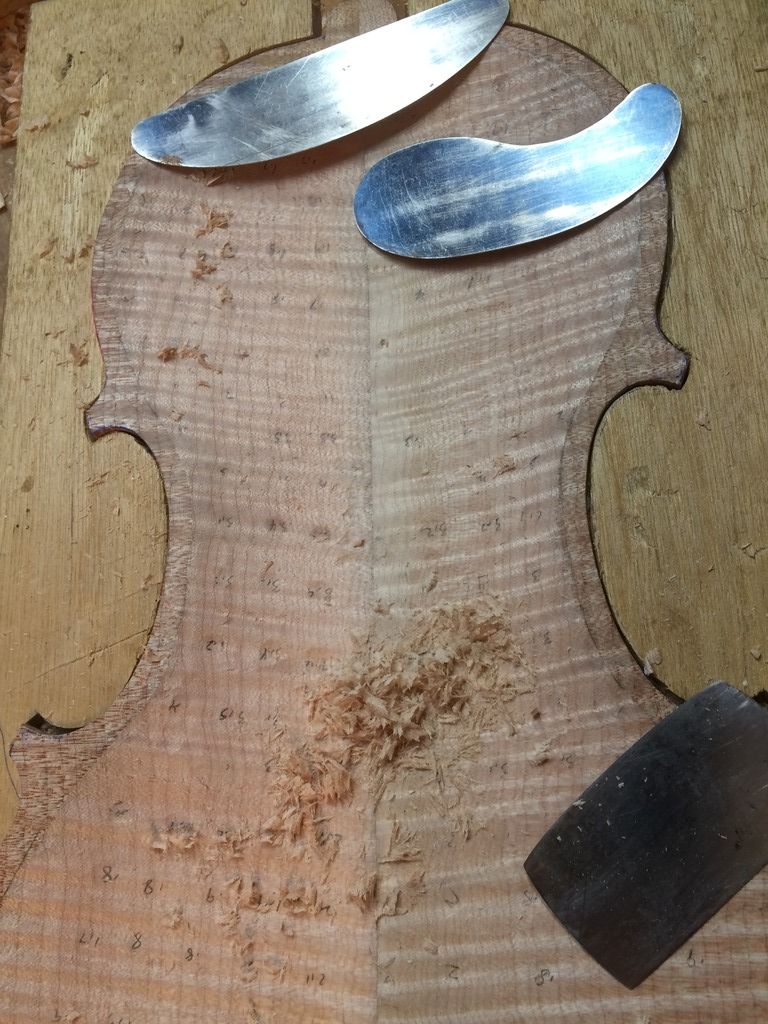
Final thicknessing in progress.
Graduations almost completed.
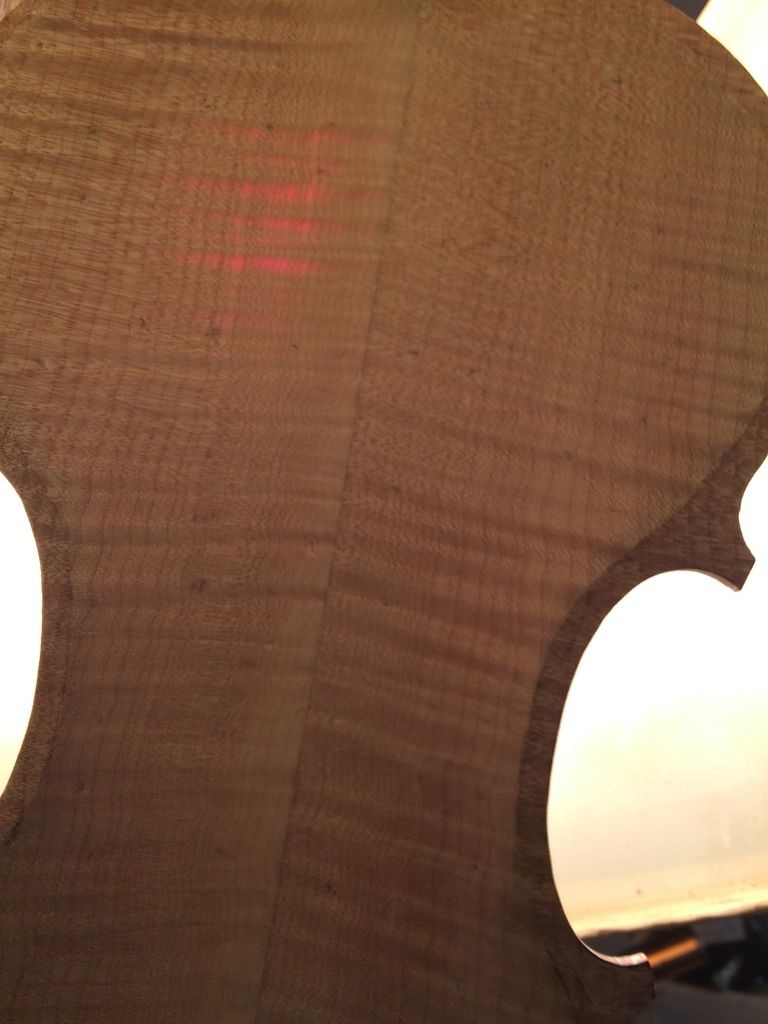
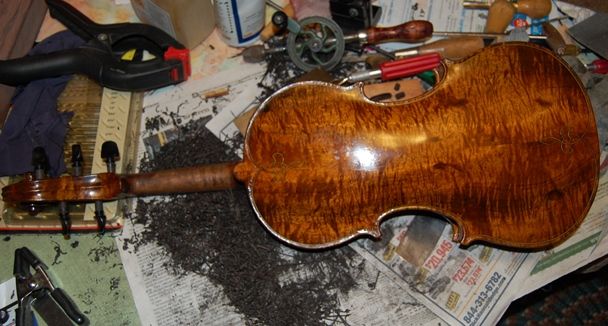
By the way, I think it is interesting to hold the plates up to a lamp and see how much light comes through:
That is a lot of light coming through that spruce plate…it is about the thinnest plate I have made.
Even the maple lets a little light through.
Closing the Corpus
Finally, to install the label and close the corpus. (I always forget to take a picture of the label…sorry.) Most makers put their label in after everything is fully completed. I used to do that, but I found it so frustrating to get a glue-coated label through the f-hole, line it up correctly and get it smoothed out on the back plate…all working through the f-hole…that I decided my labels will go in when I close the corpus; always. That means the label predates the completion by a few weeks at most, as a rule. I think one time there was a long wait, but that was the lone exception.
Closing the corpus
Fully glued and clamped, using hot hide glue and spool-clamps.
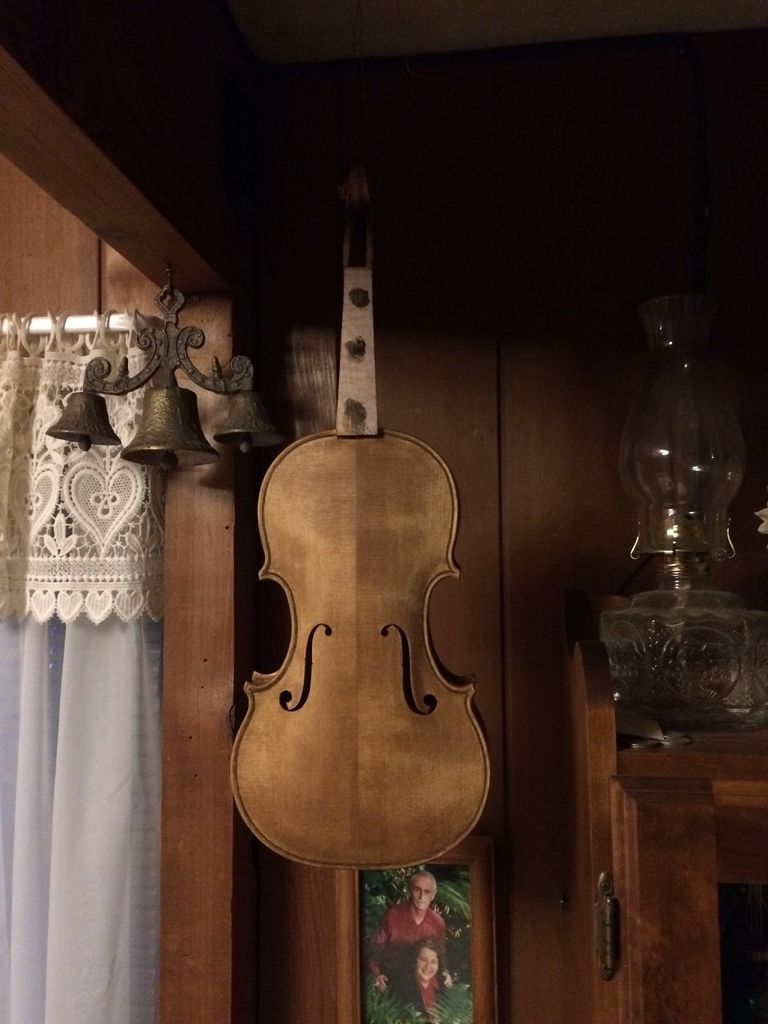
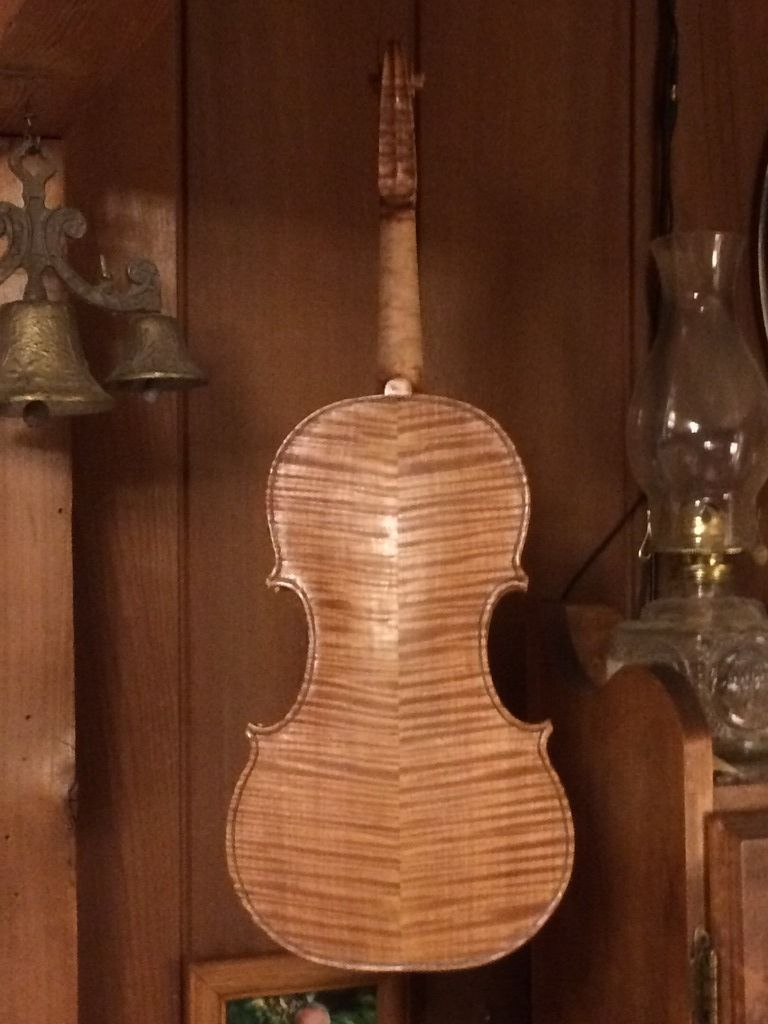
Closed corpus from the back.
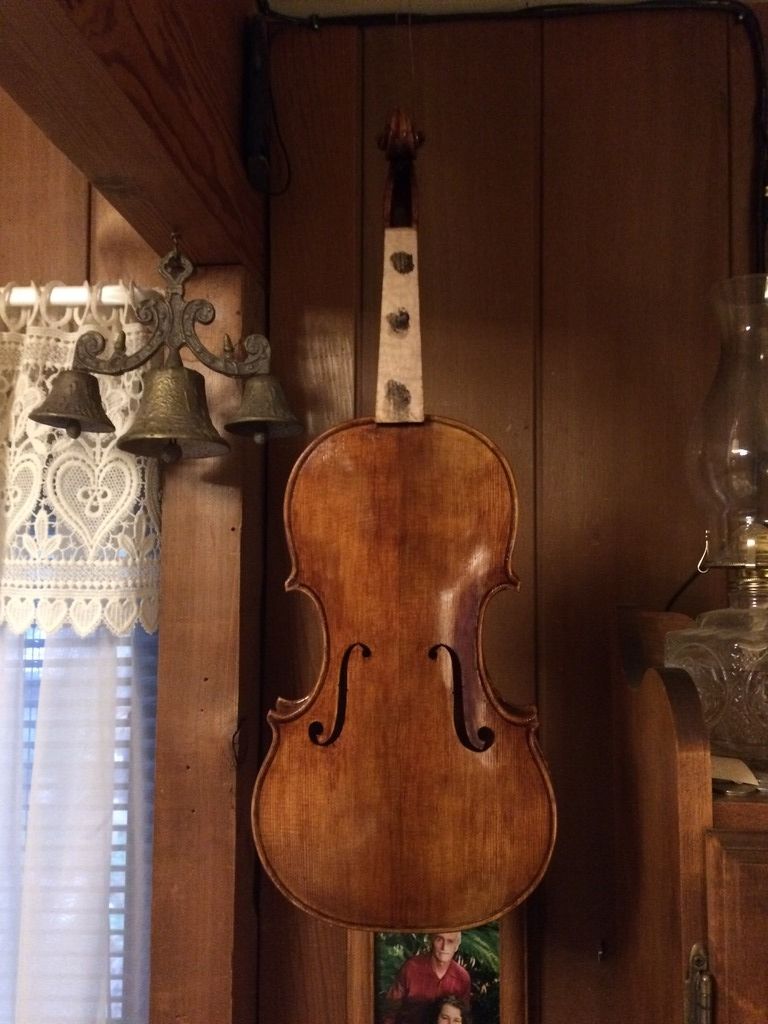
Closed corpus from the front. Dainty little thing, isn’t it? This is my first 3/4-size violin, and it feels pretty tiny.
Finishing
I removed the fingerboard so as to be able to easily access the entire exterior, for final scraping and finishing.
After that, I had a lot of “scraping and looking” to do. (Scrape and look, using a low-angle, dim light, then scrape and look some more.) When everything was as smooth as I could make it, and exactly the shape I wanted, I stained the entire violin with coffee, to get rid of the stark-white bare, new-wood look. It takes at least three coats, usually, to get the color dark enough that it will not shine through the varnish. The collateral effect is that the grain raises because of the water. So, I sand it lightly, to smooth the grain “just enough.” I want the grain to be visible in the final state, but not too visible.
Coffee stain
Then, I rubbed in a coat of the mineral ground. I brush it on liberally, rub it in hard, with my fingers, then wipe it off as hard as I can, using a rag. When it dries, the instrument will be whiter than ever– chalk-white, all over. The first time I did this I was pretty alarmed at the look, but I had just watched Roger Hargrave do the same thing, and knew that the white mineral would completely disappear with the first coat of sealer or varnish. And it did!
Here is the violin with the sealer applied:
With three coats of coffee, and the dark sealer, the wood looks pretty dark. But it will look good under the varnish.
The back, with the seal-coat.
After that it was a case of applying several coats of golden varnish, then a few coats of red-brown varnish, and a final two coats of the golden stuff.
Front varnish nearly complete
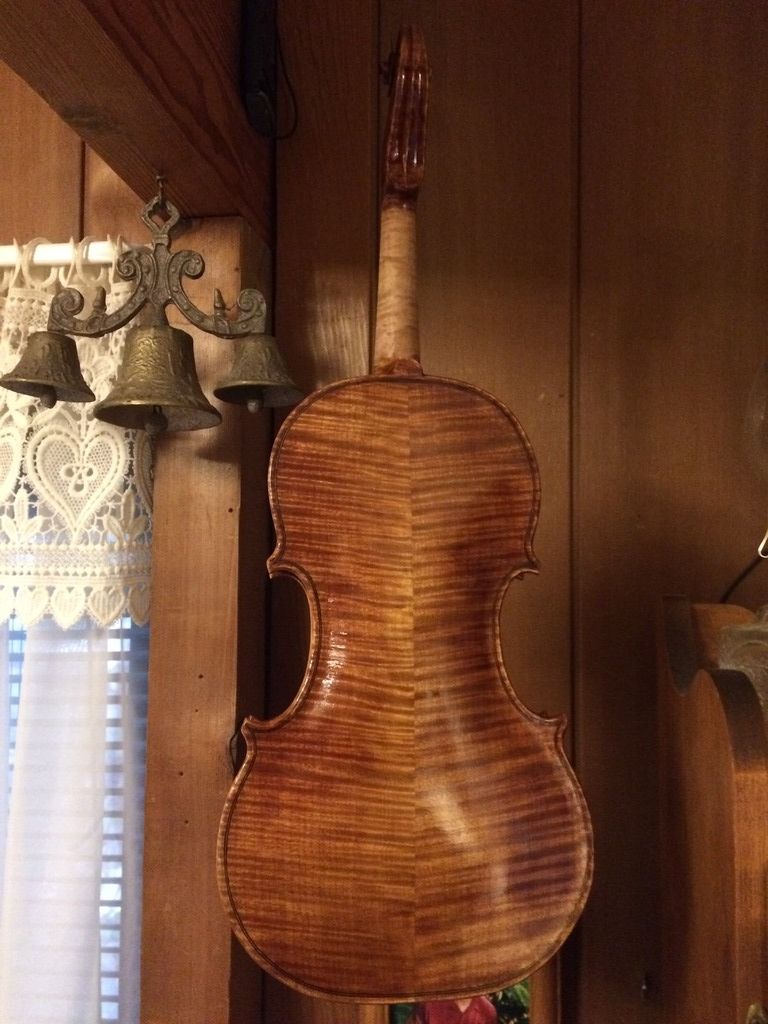
Back varnish nearly complete.
There is the front with the final coat of varnish.
Set-up
Standard set-up, and the violin will be done! That includes the saddle and endpin, as well as re-installing the fingerboard, fitting and installing pegs, a bridge, the nut, the soundpost, tailpiece, and strings. A chinrest completes the instrument.
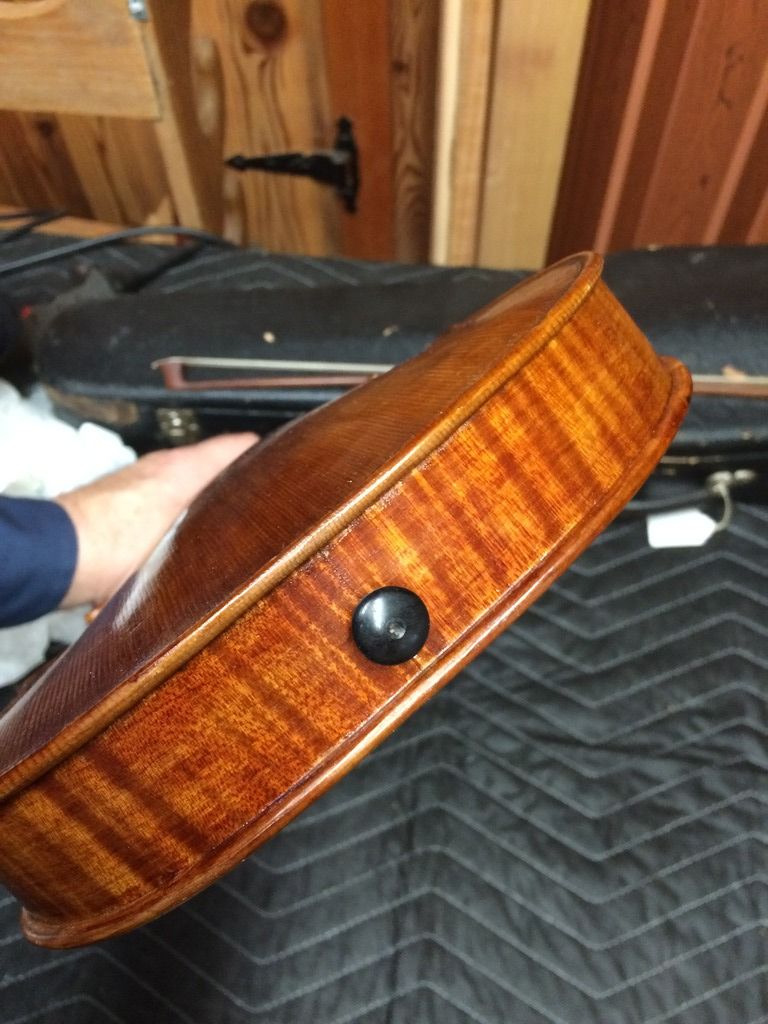
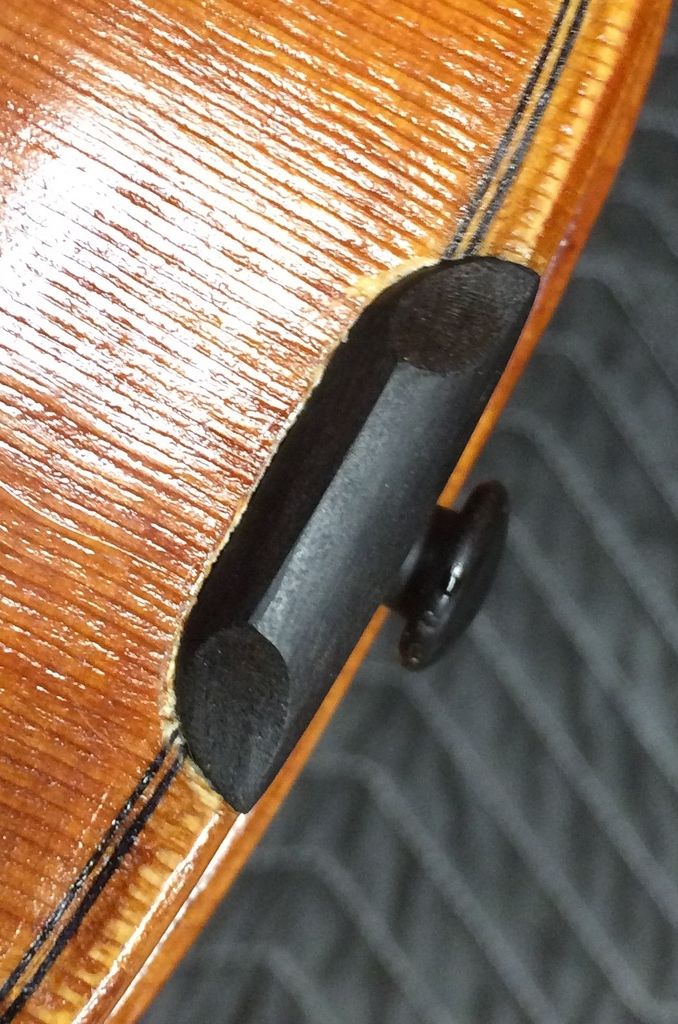
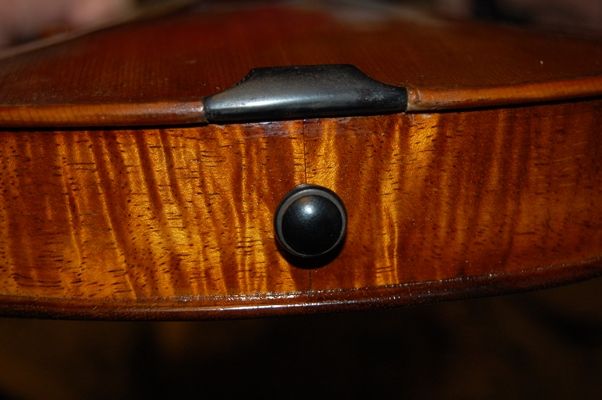
Bottom of the violin before the endpin and saddle were installed.
Endpin installed: saddle is next.
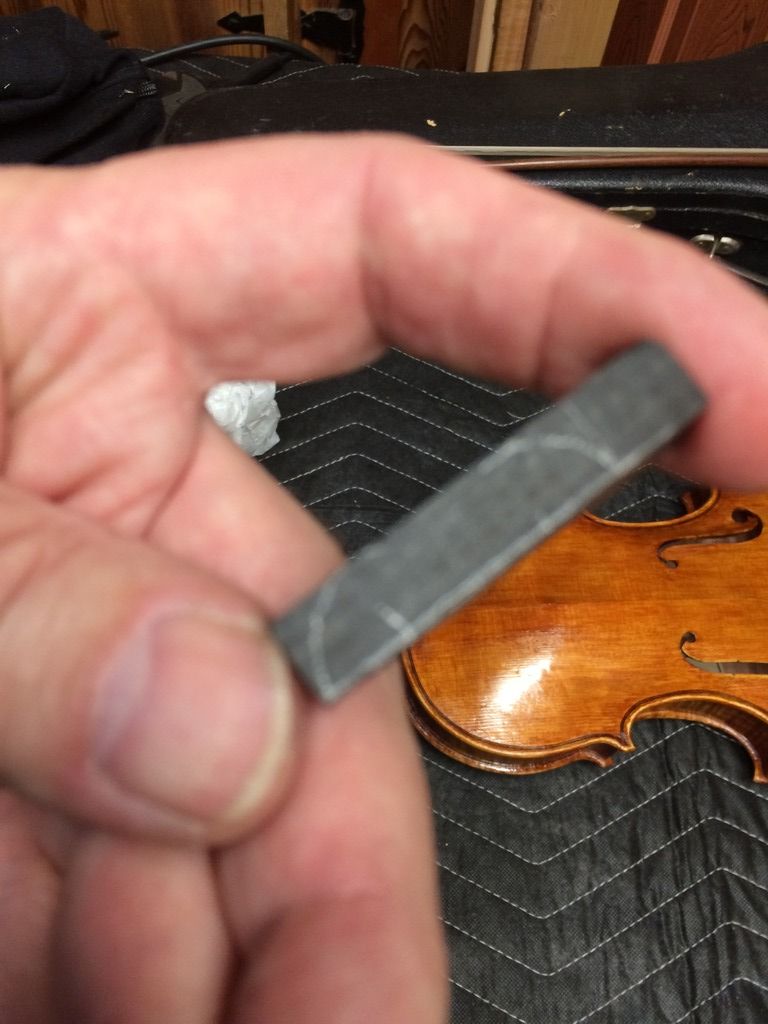
Heres the plan: a rounded saddle to prevent “saddle cracks”. They work because there is no sharp corner to act s a stress riser.
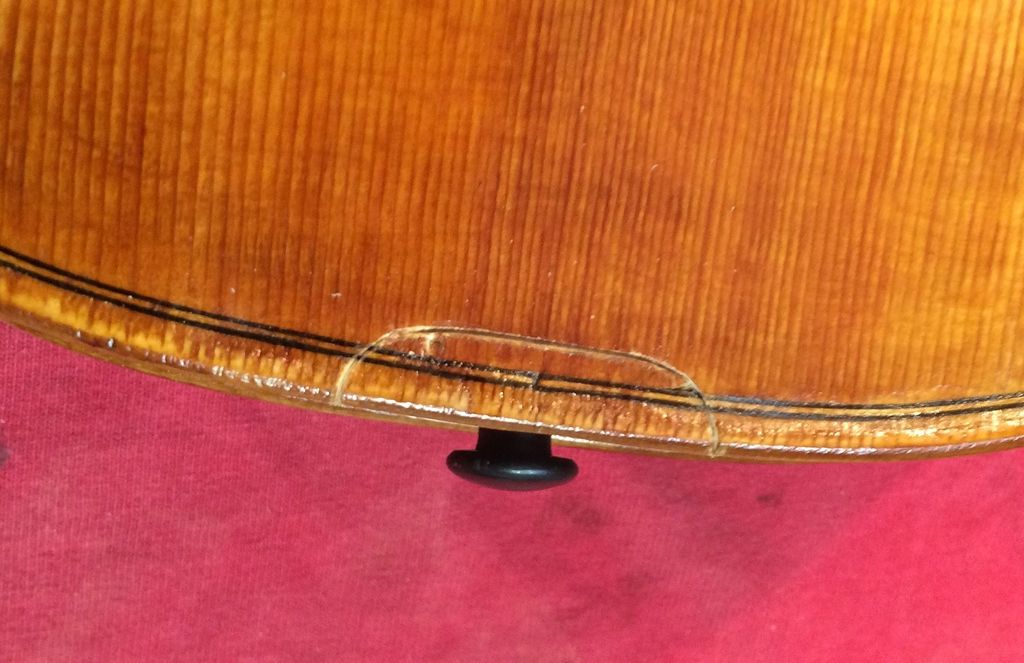
There’s the footprint of the saddle: no further shaping is done until I cut out the mortise in the front plate.
I traced the footprint onto the front plate, and began cutting out the mortise.
Then I cut out the mortise using sharp gouges and a small knife. Any nicks in the varnish will be retouched later.
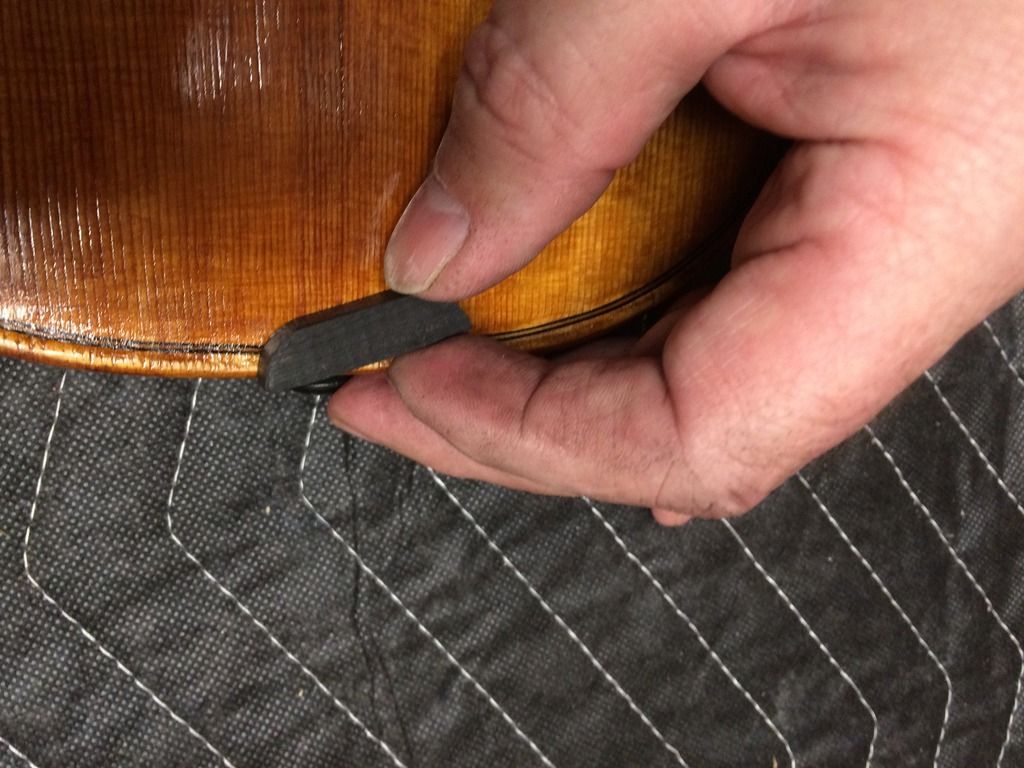
The varying thicknesses of the top plate can then be traced onto the saddle itself, and final shaping can begin.
Saddle and endpin are nearly complete. The saddle will be filed a little more, and the varnish retouch will happen later on.
I reinstalled the fingerboard, and while the glue is drying, I fit and installed the tuning pegs.
Fingerboard and pegs complete. Notice the nut is also intalled.
Completion
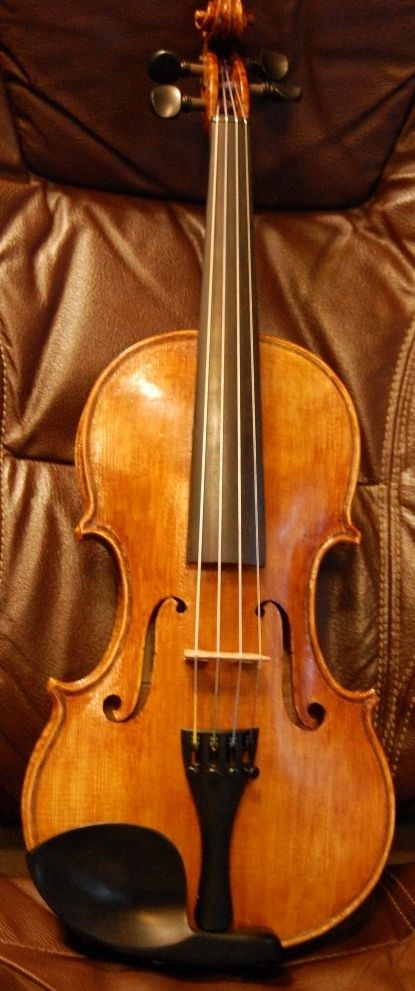
Finally the little violin is complete!
Front view of completed 3/4-size violin
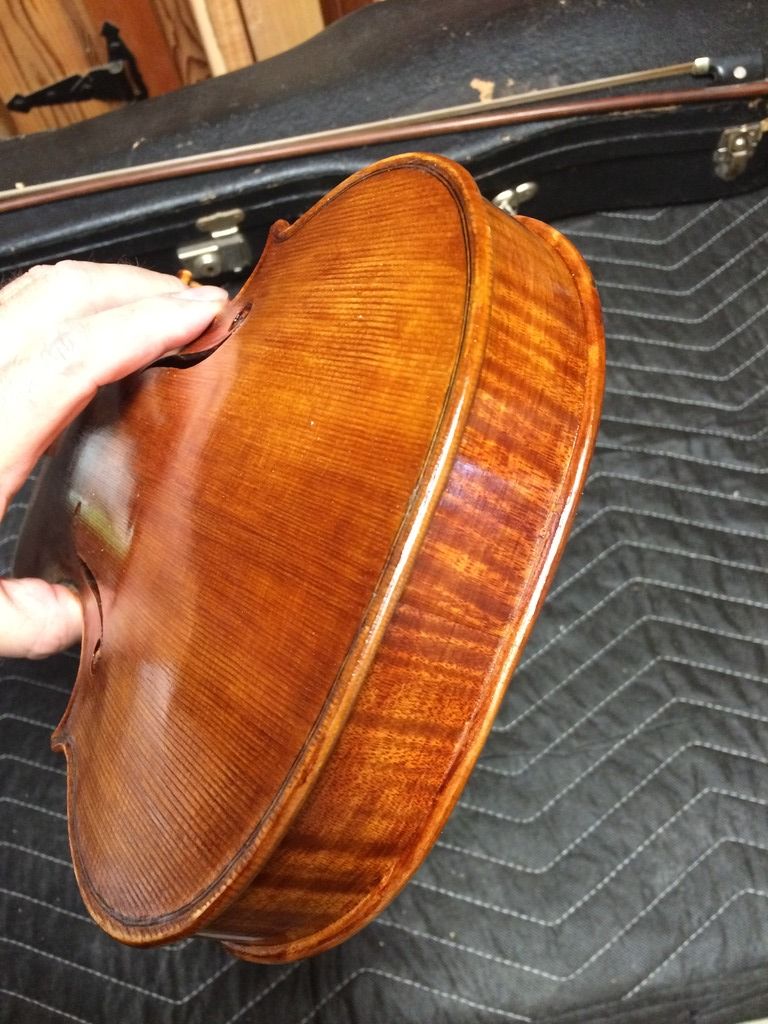
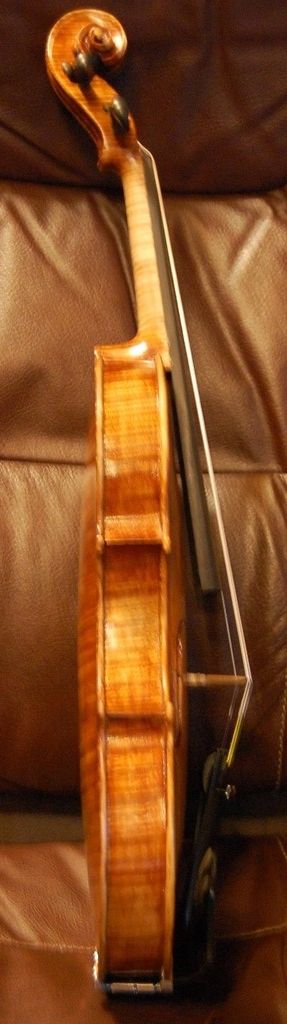
Side view…
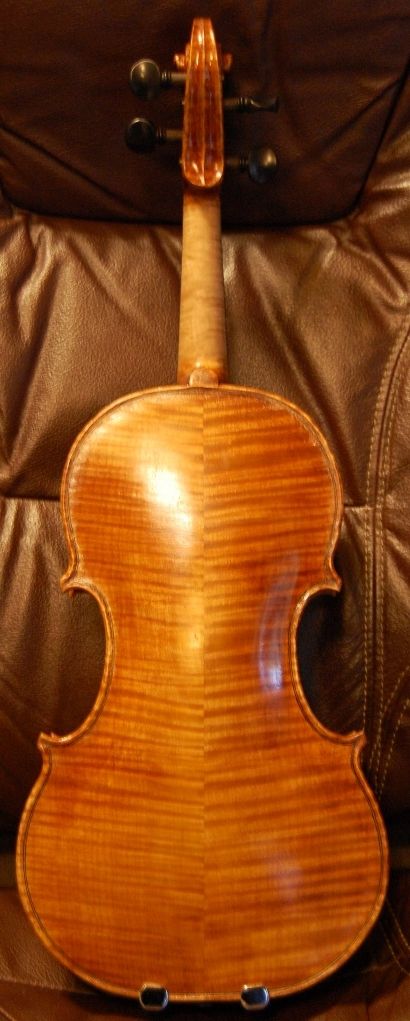
And the back view.
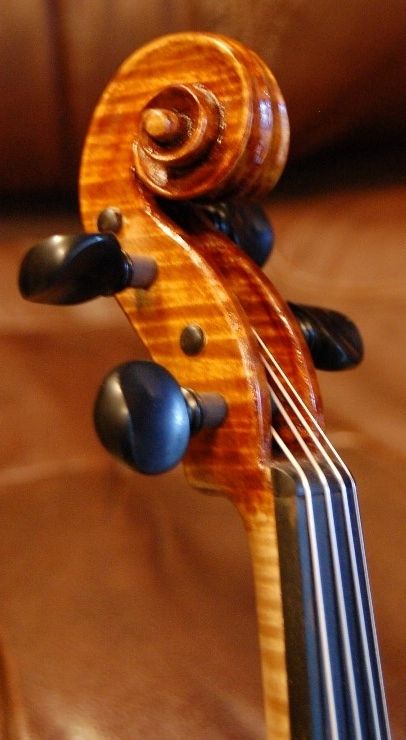
Close-up of the scroll
Thanks for looking. Please keep in mind that the Marylhurst Musical Instrument Show will be April 29th and 3oth. If you can make it, I hope to see you there. This little violin will be there for you to test drive, along with others.
If you found this post helpful, please share with your friends!
So, I went ahead and cut out those f-holes, using an f-hole “drill” my children bought for me, and an X-acto knife.
F-holes cut out and ready for the bassbar…outside view. They still will require a good deal of refinement.
Then I chalk-fit a bassbar blank, and glued it in place, using special clamps made by Jake Jelley, the friend who encouraged me to continue building instruments.
Bassbar blank with clamps. You can see the f-holes cut out…they still need more trimming.
Shaping the Bassbar
I carved and planed and scraped the bassbar into what I judged to be an appropriate shape for this instrument. Both it and the f-holes will receive a bit more scraping and shaping before they are varnished. The whole instrument, actually, is fair game for tweaking, refining, and perfecting, until the varnishing begins.
F-holes, bassbar and graduations nearly complete. Outer edges have been rounded to approximate their final shape.
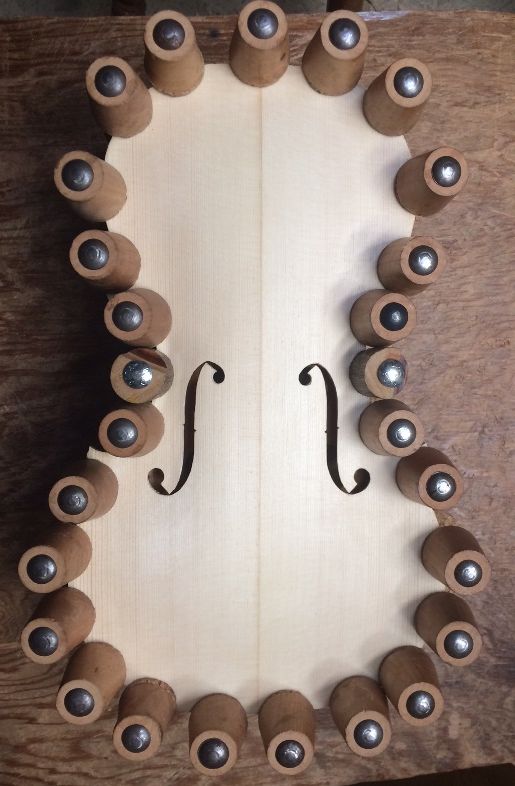
Installing the Front Plate
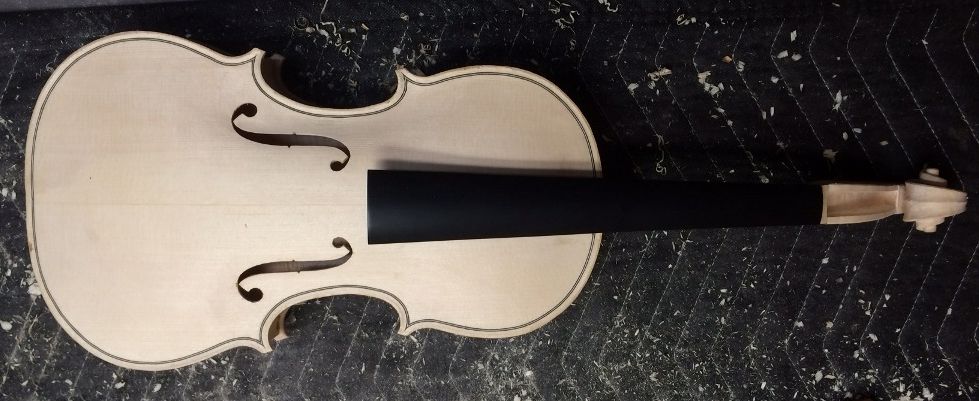
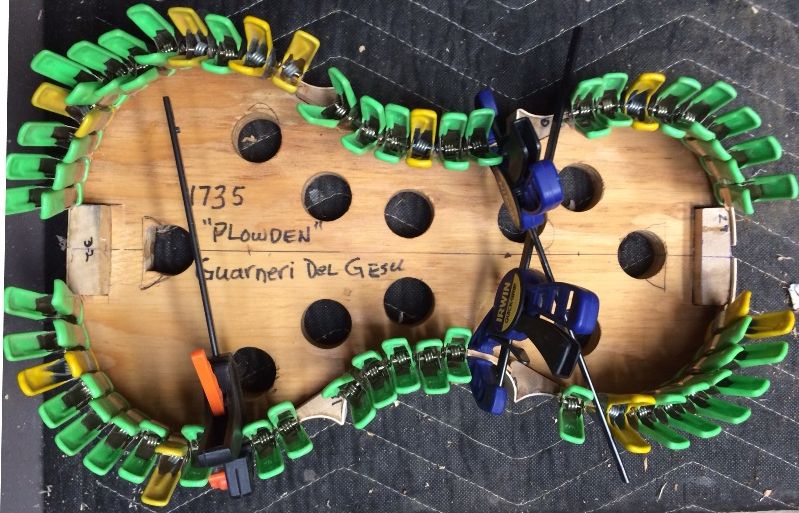
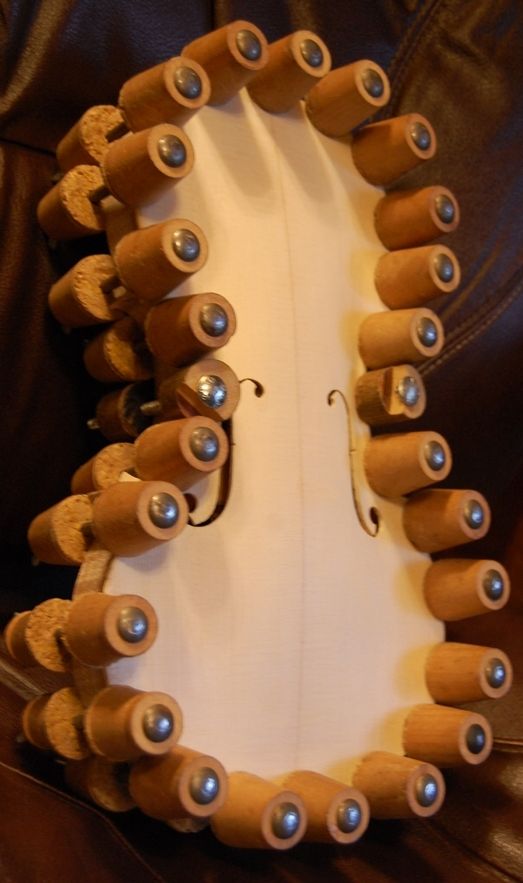
I aligned the front plate as closely as I could with the rib garland, and applied six spool clamps–one for each inner block. Then I loosened one clamp at a time, and, using a thin palette knife, I slipped hot hide glue between the plate and the blocks and linings. I rinsed the edge, overhang and rib quickly with hot water, and wiped it with a rag, then re-tightened the clamp, and added more clamps between that clamp and the next, repeating the procedure untill all the edges and especially all the blocks were securely glued and clamped, and relatively clean.
Front plate installed, using spool clamps. Ann thinks these look like hair-curlers. 🙂
Back view of mold with front plate installed, and spool clamps. The mold will be removed after the neck is set.
Purfling Comes Next
Not everyone does things in the same order. I have had trouble, in the past, getting my edge overhangs even all the way around. If I install the purfling first, then I am locked in, so to speak, and if the overhang is uneven, there is nothing much I can do. But if I purfle after installing the plate, I can take time first to adjust that overhang, using files and scrapers, until I am satisfied that it is the way I want it, and then purfle, following my adjusted edge shape.
Installed front plate, from the mold side, showing the overhang. Notice that there are no back linings, yet.
Purfling laid out and lightly incised. (The shadow is my head– I was too close to the plate.)
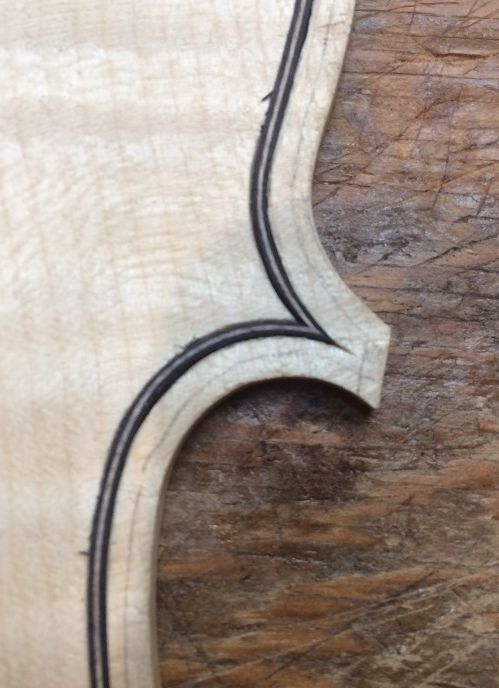
The idea at this point is to just deepen the lines a bit, not to try to cut the full depth of the purfling slot. You can see that, in some places, the waste wood begins to pop out on its own. Most will have to be removed using a purfling pick. Here is a closer photo of the incised purfling lines:
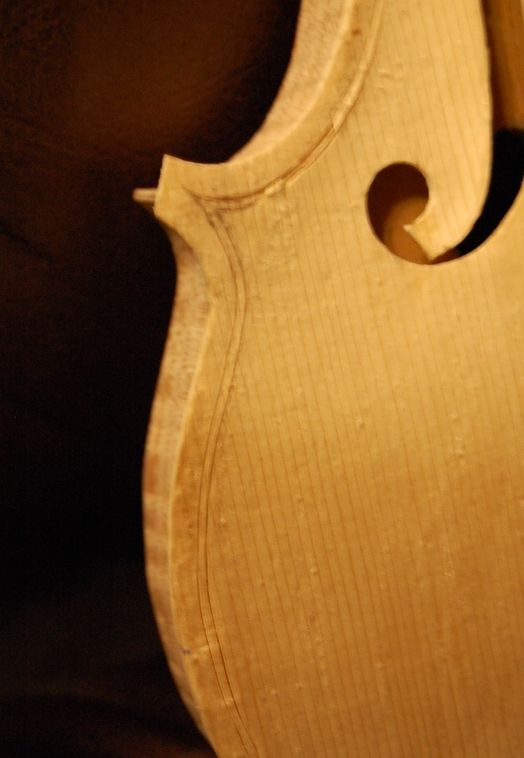
Close-up of the incised purfling lines. That corner will still undergo significant shaping and refining.
So…next time, I will show the completed purfling, and the neck-set– I hope. 🙂
Thanks for looking
If you found this post helpful, please share with your friends!
As I work by myself, I frequently fail to take pictures. I did take a few, though. (If you are impatient, you can scroll down and peek at them.)
F-holes Cut Out
I used a special tool to begin the cutting out progress: It is called an “f-hole drill”, but all it really amounts to is a specialized twin-blade hole-cutter. My children bought it for me, one year, and it has been a wonderful tool. In the first place, obviously, it is a time saver, but the biggest difference is that I can now make the upper and lower eyes of my f-holes perfectly round, to begin with, and work any special shaping in, starting from the already round holes.
I remove the waste wood from the uprights of my f-holes with a small sharp knife—many makers use a saw, and I have done so as well, but I eventually reverted to the knife. Just personal preference, I suppose.
Bass Bar
Once the f-holes are cut out and close to perfect (always allowing for later nit-picking), I install the bass bar. The bass bar is a gently-arched brace supporting the bass-side foot of the bridge. Guitars have a whole collection of similar bracing, supporting what amounts to a nearly flat (and very thin) plate. The violin family instruments depend primarily upon the compound curves of the arching to supply strength, and only need the one brace to support the bass-side bridge-foot. The other side of the bridge is supported by the soundpost, which, while it is not directly under the treble-side bridge-foot, it is very close to it, and is in a location on the treble side matching the lateral position of the bass-bar on the bass side.
I lay out the position of the bass-bar, and then use a compass to transfer the shape of the inside of the front plate to the bass-bar blank. Then I use a knife to remove most of the waste-wood, and begin checking the results against the inside curve of the front plate. When the fit is getting close to correct…close enough that it is becoming difficult to see what needs to change…I apply a strip of paper-gauze adhesive tape (available in pharmacies) to the inside of the plate, covering the bass-bar position, and I rub blue chalk into the tape. I happen to use a product sold as “sidewalk chalk;” they are big sticks of chalk, and supposedly are easy to wash off of sidewalks. But they work well for me, and the blue is high-enough contrast that I can see it easily.
I press the nearly correctly-shaped bass-bar into the chalked tape, and check to see where the chalk transferred. I cut, plane or scrape just the chalked places from the bass-bar, repeating until, finally, when I press the bar into the tape, the whole thing comes up lightly coated with chalk. Then I remove the tape, clean off any remaining chalk from both pieces of wood, and install the bass-bar, using hot hide glue and clamps. I have a specialized set of wooden clamps made for this task.
When the bass bar glue is completely dry, I remove the clamps and trim the bar to the desired shape. I make my bars a little higher than most luthiers do, in the center, but tapering to about 5-6mm high for the last few centimeters of both ends. (I will take some pictures after I remove the inside mold, so you can see the final shape.)
Edge Preparation
It is much easier to do the inside edge-work if I do it before I install the plate on the garland. So, I use a tiny finger-plane, along with round and flat files, to round the inner edge of the plate, all the way around the perimeter. I may have to do a little correction later, but I want it as close to perfect as is possible, before gluing the plate to the garland.
Installing the Front Plate
I line up the plate on the garland as accurately as I can, matching the center-line of the plate to the centerline of the garland, and then use spool-clamps to hold it in place. I was originally taught to use tiny pins to assure good placement, but eventually discontinued the practice. We know for a fact that the old masters did this, as we can see the remnants of those wooden pins in their violins, still today. Perhaps I will eventually resume using pins. For now, I do not.
Once I have the plate perfectly aligned and securely clamped, using a very thin palette knife, I slip hot hide-glue into the joint between plate and garland, and then add more spool clamps to draw the joint closed. This is a very “stress-free” way to glue plates in place. I used to experience near-panic every time I installed a plate, racing to clamp the joint before the glue gelled, but now it is a very easy and relaxed task.
Purfling
As you may remember, I have not yet installed the purfling. I wait until the plate is on the garland before purfling nowadays, because the purfling “locks-in” the location of the plate edge, and I have had problems in the past with the rib garland changing shape a little, between my tracing the plate and trying to install it. so, after gluing the plate to the garland, the first step is to double check my over-hangs, to see that they are all pretty close to the same. If I need to change them, I do so: I am free to adjust the shape of the plate to match the garland again. When the overhangs are all acceptable, I begin purfling.
Purfling is fairly simple-sounding:
mark the groove location
cut the groove,
fit the purfling,
glue the purfling,
mark the edge crest, and
cut the channel.
It sounds easy, but I still find it a hard job to do perfectly. I want my miters perfect, my bee-stings clean and sharp, and all my borders parallel. This is my 30th instrument from scratch, and I am still finding it to be challenging. Guess I am a slow learner. 🙂
Cutting the Channel
Before I begin cutting the channel I use a compass to mark a line all the way around the instrument, 1.6 mm in from the outer edge. Then, using a sharp, curved gouge, I cut my channel to that edge crest line, trying to cut the whole channel to intersect the surface of the purfling and that pencil line.
Fairing in the Channel to the Arching
Once I have the purfling completed and the channel cut, I still have to fair-in the surface of the rest of the plate to match the curvature of the channel. I do not want there to be any sudden changes; humps and hollows catch the eye of the person looking, and call into question the skill of the maker. (Besides, I think they are ugly….) I use a very sharp finger-plane to begin shaping the surface of the plate and approximating the final curves I want. Finally I use sharp scrapers to bring the curvature of the whole plate to its final shape. I use a low-angle light to cast shadows from any humps or hollows, so that I can spot them and scrape them away. At this point, the scraper has to be sharp, and I have to use a gentle touch. The changes I am making are frequently much thinner than a piece of paper.
Outer Edgework
After the whole plate is the shape I want, the last task is to shape the outer edge. I begin by using a tiny finger-plane to take the outer corners down at a 45 degree angle, then use half-round files to shape the edge all the way around, bringing the curve of the outer edge up to just intersect the edge-crest line I established earlier. I get it as smooth and even as I can, using a file, but I know when I stain the wood with coffee, it will raise the grain terribly along these edges, so I will eventually re-smooth all of them, using abrasive paper of some sort. In this particular case, I did the outer edgework after setting the neck. No special reason…that is just what I did.
Neck Set
I measure carefully, and cut the tapered mortise using a razor-saw, then use a sharp chisel to remove the waste wood of the mortise. If I do the job correctly, it works very well. I check the sides and bottom to the mortise to see that they are flat and straight, then begin attempting to fit the neck. I have already joined the fingerboard to the neck and have shaped the heel where it will join the neck-block. So, from this point forward, all the shaping and adjustment will be done to the mortise, not the neck. When I am satisfied that the fit is correct, the neck will have to be centered. straight with the centerline of the front plate, straight with the centerline of the end block (not twisted at all), and at the correct angle to place the end of the fingerboard at the right height. Also, of course, the neck has to be set so that the distance from the nut to the edge of the front plate is correct. I check and re-check, until everything works correctly. Since I set the neck before installing the back plate, I want the heel of the neck to protrude past the back end of the neck-block. I will plane it flush after the glue is dry.
Here is the completed mortise, cut for the neck. The outer edgework has yet to be completed. You can see the edge-crest marks.
The mortise is complete, and I am ready to set the neck.
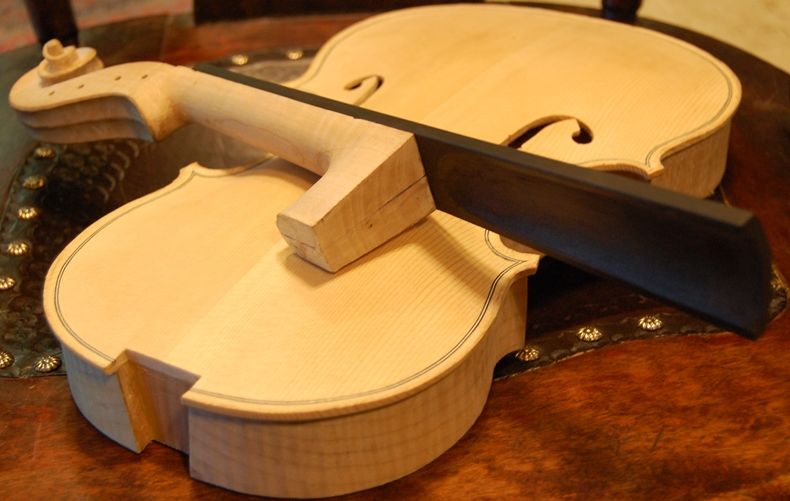
There is the dry-fit neck set. Notice the overhang of the heel of the neck beyond the neck-block. That will be planed off after the glue is dry.
So there is the dry-fit assembly. It is starting to look like a viola!
When every measurement is correct simultneously, and the fit is tight, I remove the neck one last time and slather hot hide glue into the neck mortise. Immediately I jam the neck into place, and quickly check all those measurements again. Bingo! They are all correct, and I can relax while the glue dries! Once the glue is dry, I plane off the neck heel overhang, flush with the neck-block.
The glue is dry, and the neck-heel overhang has been planed flush with the neck block. I am ready to remove the mold.
In this picture, I have filed the outer edge curvature already, and, though you can’t see it in this photo, I have also completed the graduations on the back plate, and have filed its inner edges, so it is ready to install. But; before I can do that, I have to remove the mold and add the back linings.
Ready to remove the mold.
Dreaming of the next step!
I am getting tired, though, and have some other things that need doing, so the viola will have to wait until another day to move any further toward completion.
Thanks for looking.
If you found this post helpful, please share with your friends!
I failed to take any photos of this, but– it is pretty simple: I centered a hole on the center joint between the lower ribs, and centered between the plates. I drilled it first to 1/8″, then to 7/32″, and finally reamed it with a 1:30 tapered reamer… the same one I use for tuning pegs. I shaved the endpin blank to the correct size and taper using my peg-shaper, while gripping the endpin with a special homemade gripper. I shaved the endpin until it would just barely fit into the hole, leaving a little clearance between the collar and the rib surface. (There is a photo of it later on…)
Fingerboard:
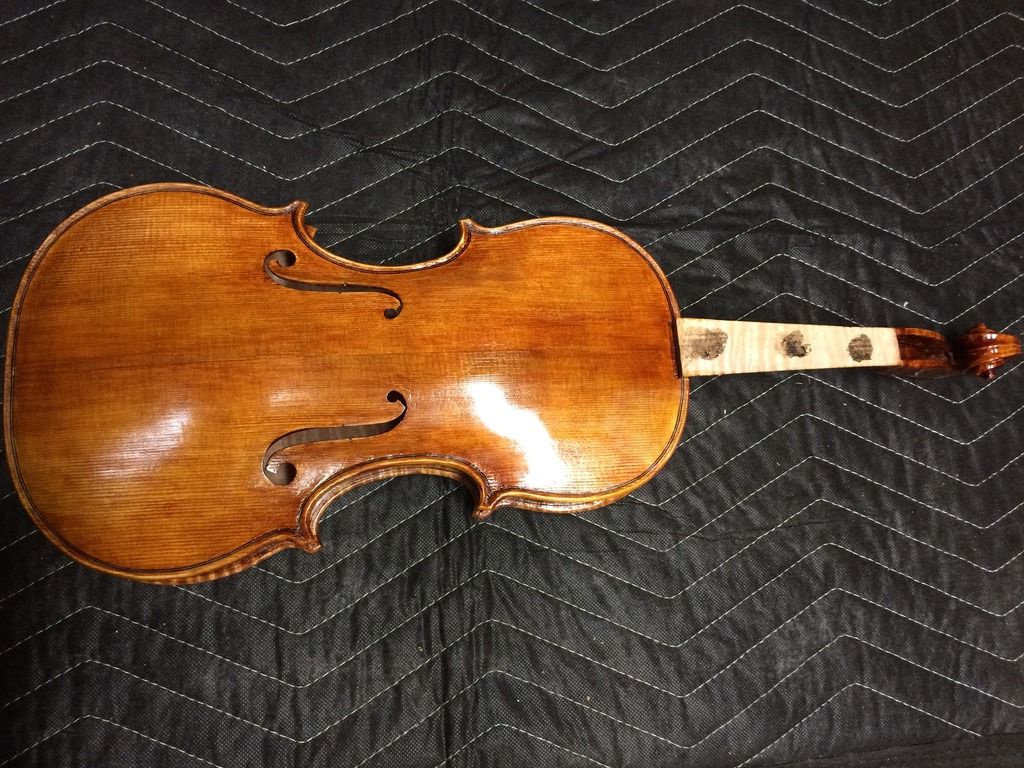
In the photo below you can see some of the tools I used to fit the ebony fittings to the violin. Looking at the fingerboard, you can see the three “dots” of glue that secured it to the neck while I was shaping both the neck and the fingerboard. When I re-install the fingerboard, there will be glue on the whole faying surface. The carved out portion will help to lighten the fingerboard, and apparently helps tone.
Fittings waiting to be shaped and installed.
The black mechanism is the peg shaver I use. The block next to it is the gripper I use for end-pins. The endpin blank is right next to the shaper. The small ebony block between the shaper and fingerboard is the nut blank. The larger ebony block midway along the fingerboard is the saddle blank. The fingerboard has the shape laid out that I intend to carve away, and the gouges and scrapers on the right are the tools with which I did it.
So, one of the first things I did was to make sure my tools were sharp, then I went all around the edges of that trough shape, carving away small chips of ebony to produce a shallow trench all around the edge. Then I carved as best I could with the gouges, until I decided it was time to get the planes into the fight. The little Ibex plane worked well, but the little wooden homemade plane actually worked better, because it has a deeper curve in the sole. It was made of a small section of a broken hammer handle, a piece of scraper blade, and a threaded steel plate to adjust tension and hold the blade in place.
Fingerboard ready for installation. This part took me about an hour. Ebony is hard stuff.
Saddle
Next I worked on the saddle: I cut my saddles with radiused front edges, so as to avoid saddle cracks, which are extrmely common in violin-family instruments…partly, I am convinced, because virtually everyone makes them with square corners, which adds a huge stress-riser to that location in the spruce. To me, that is asking for a crack. I try to avoid suich things.
Saddle footprint with curved front corners.
Some luthiers try to avoid cracks by leaving a small gap on the ends…that makes good sense, too, but why not eliminate the “notch” altogether? Just my opinion…. Either way, you have to remove the wood of the violin front plate to receive the ebony saddle. I use a thin knife to slice through the spruce, and then a flat chisel to loosen the piece being removed. I set aside the piece in case it turns out I made an error of some kind, and need to put some back. It is a whole lot easier to match grain from the piece you just removed, rather than from some random piece of spruce.
Once the saddle fits the mortise perfectly, leaving a small gap on each end (about the thickness of a business card), I glue the saddle in place, and forget about it. Here is a photo of the finished saddle. I didn’t take photos while I was carving. I get pretty wrapped up in what I am doing and forget to take pictures.
Saddle and endpin
Another view of the saddle and endpin. (Pretty ribs, huh?) Varnish touch-up still has to happen.
Pegs
The next issue was the pegs. I wanted them done before I installed the fingerboard, simply because I wanted to be able to set the instrument aside so that the glue under the fingerboard could dry, and not feel that I was being prevented from working.
I had earlier drilled pilot holes in the pegbox, so that I would have guides to help keep the holes perpendicular to the centerline. So I reamed out those holes, all to approximately the same size, using the same reamer (1:30 taper) as I used for the endpin.
Then I sliced a shallow groove next to the collar, on each peg, all the way around, using a very fine razor-saw, to avoid breaking off the collar. (Doesn’t always work, but it seems to help.) I shaved the pegs until they fit the holes, at nearly the right depth, then “greased ’em up” with peg dope, and worked them in, so that the holes and pegs fit perfectly. Later I trimmed off the excess length of each peg on the far side of the pegbox, domed and polished the cut ends, so they would look nice, and put the pegs back in place.
Saddle and pegs installed.
Fingerboard Installation
Last, I installed the fingerboard…I had marked ahead of time the exact location where the nut and fingerboard were to meet; so now, all I have to do is put the fingerboard exactly where it was before (against that line) and glue it in place. I positioned it using a single spring clamp and aligned the upper end as closely as I could, then aligned the lower end as well, and added a large spring clamp in that location. Finally, I re-adjusted the upper and lower clamps until both ends were perfect.
Then I removed the lower clamp, and, using a thin palette knife, I ladled hot hide glue into the space between the neck and fingerboard, sliding the blade up the neck as far as it would comfortably go, and replaced that clamp so that it squeezed out hot hide glue all around. I cleaned up the excess quickly, and double checked to make sure that the position was again perfect.
Then I removed the upper clamp, and repeated the gluing routine, but this time, as I cleaned up, I kept adding more clamps, removing a previous one, and wiping carefully, until I had four clamps in place and no glue drops where they did not belong.
Fingerboard installed with hot hide glue and spring clamps.
That was pretty much the end of the day. My hands were tired and hurting, and I had other things that needed to be done. Much later, I got back and removed the clamps:
Side view with fittings.
Back view with fittings.
The nut will have to wait until the fingerboard has been planed and scraped to exactly the right curvature, and polished smooth. We call that “dressing” the fingerboard.
After that it will be “set-up” time.
My next post will show the finished fiddle, strings and all.
Thanks for looking.
If you found this post helpful, please share with your friends!
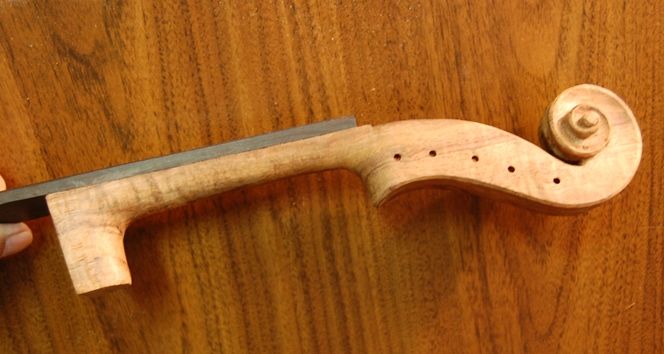
Last week, I had left the scroll nearly finished, but still lacking the outer fluting under the neck, and still pretty rough. (Honestly, I continue “fine-tuning” scrolls right up ’til I begin varnishing.) So, the first thing was to get the scroll and neck completed well enough that I could set the neck.
Completed scroll and neck
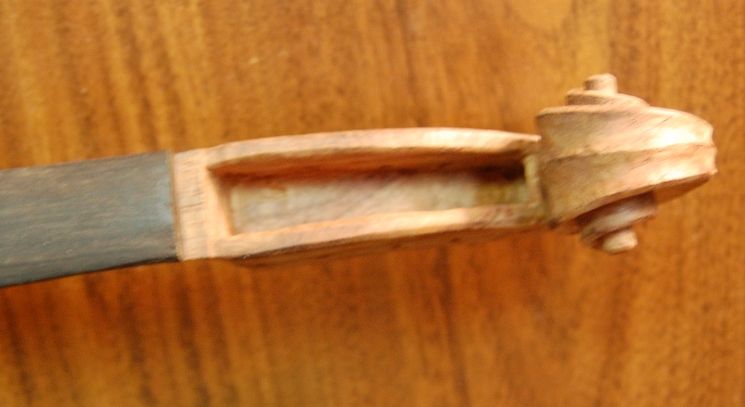
Completed pegbox
I am never fully satisfied with my work, but I have to decide at an appropriate point that it is OK to move to the next step. However, scroll and neck carving is much more difficult after the neck is set, so I want to have them pretty close to how I want the finished product to look, before I begin setting the neck.
Setting the Neck
Setting the neck begins with careful layout of the heel “footprint” on the neck block of the violin body (often called “corpus”). I already had the centerline of each laid out, so it was a matter of transferring lines accurately, and then cutting along those lines so that when the wood was carved from between the saw-cuts, the heel of the violin neck should fit, snug and straight, into the prepared neck-mortise. I always leave a little extra, so that the mortise is too small to begin with: it is much easier to take off a little more, than to replace wood.
I did not take pictures of this procedure– simply wasn’t thinking about photographs, and I forgot. It went very smoothly, this time, though, and I think I had it ready to fit in around 30 minutes, or a little more. (Usually it takes me longer.)
Here’s the neck mortise, ready to receive the neck:
Completed neck mortise
Side view of neck mortise
And here is the neck, dry-fitted into the mortise:
Dry-fit neck
Once I knew that everything fit the way it ought, and that it was going to be straight, tight, and at all the correct angles, I was ready to glue. The things I have to check are five points of measurement:
The distance from the upper end of the fingerboard (where the nut will be) to the upper edge of the top plate (both sides) has to be 130 mm.
The neck has to be measurably straight, so that the centerline of the neck and scroll are a continuation of the centerline of the corpus.
The neck can’t be twisted (rolled side to side)…it should be level with the plane of the ribs, side to side.
The height of the upper edge of the heel of the neck (underside of the fingerboard) should be 6 mm above the top plate.
The height of the end of the fingerboard above the top plate should be between 19 mm and 23 mm, with 21 mm being optimum.
I realize that there are different ways of approaching virtually everything in lutherie, and there are sure to be experts reading this, who are shaking their heads, but: this is the way I was taught, and it has worked well for me.
I prepared the hot hide glue, and brushed it into the mortise, and onto the bottom of the neck-heel, and along the edges of the heel. Then I quickly rammed the neck heel home in the mortise, and checked to make sure all my measurements had held (primarily the height of the fingerboard above the plate.) All was in order, so I set it aside to dry. Here is the completed neck joint, with the glue squeezing out around the joint:
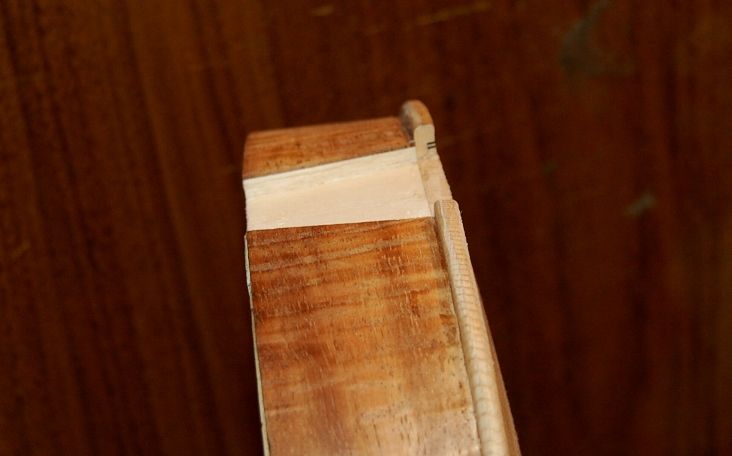
Glued neck-joint
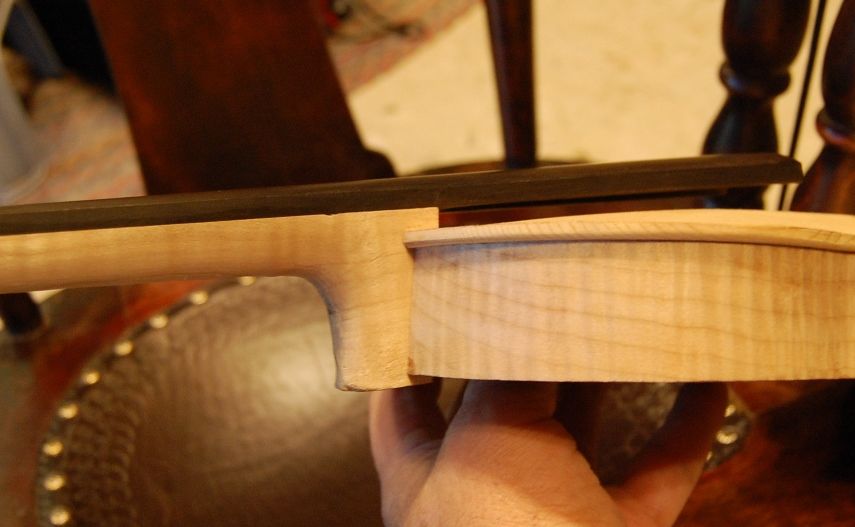
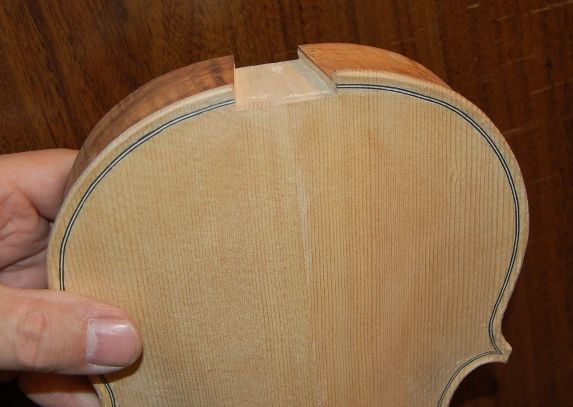
Side view. You can see that I will have to plane off the back of the neck-heel so that the back plate will fit.
Back view. When the glue is dry, I will remove the mold and trim the blocks.
After the glue dried, I planed the neck heel flat, then removed the mold by breaking the glue-joint at each block (six places) and simply lifting out the mold. Then I trimmed the blocks and was ready for the back linings.
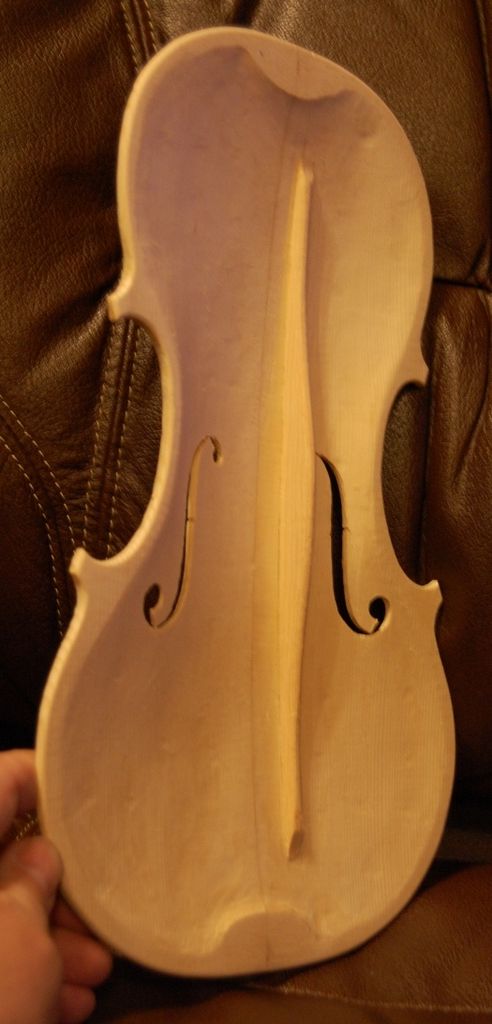
Inside view, ready for back linings.
Exterior view: Looks good, doesn’t it? But it still has a long way to go.
Installing the Back Linings
The first thing I do to prepare for installing linings is to cut mortises in both sides of each block, into which to insert the linings. I use a thin knife and a very small chisel to cut the mortises.
I make the linings by first sawing the chosen wood to about 2 mm thick, in 2-3″-wide “planks”, about 18 inches long, and then using a wheel-style marking gauge to cut off strips 7 mm wide. I wet each strip and bend them around a hot bending iron, until I can fit them into the corpus. I want them to fit tightly. The center bout linings are bent in such a way that without clamps they would tend to buckle away from the ribs, so I use small spring clamps to dry-fit them. The upper and lower bouts will stay put on their own.
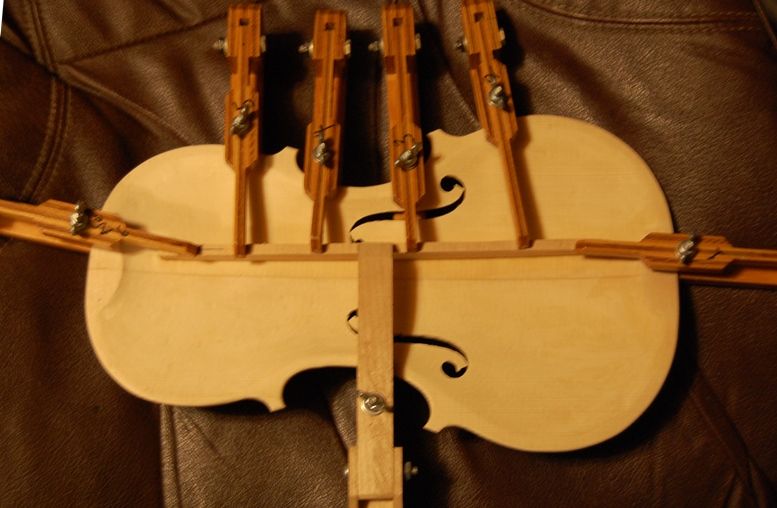
Linings, dry-fit.
Then, one by one, I remove each lining and brush hot hide glue along the portion of the rib that will receive it, as well as on the lining itself, making sure the ends are liberally coated, as well as the full length and width of the gluing surface. I quickly re-insert the rib, and clamp it in place with as many small spring clamps as I can fit along its length.
Linings glued and clamped in place.
That is it for today. I’m tired, and 3:45 AM will come all too early (back to work tomorrow).
The next step will be to level the back surface of the ribs and neck heel, and then trace the back plate from that pattern, so that it will fit perfectly. (The neck heel is still not in the correct finished shape, but the back plate button and the neck heel will be shaped as one piece, after the back plate is glued in place.)
Next time we’ll start carving the back.
Thanks for looking.
If you found this post helpful, please share with your friends!

 Follow