
 Follow

How to complete the assembly of the cello
Remove the mold and clean up the interior of the corpus.
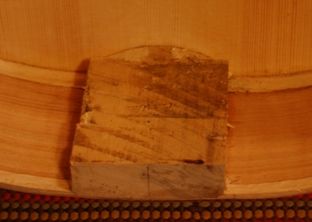
In my case, since the mold is collapsible and comes apart in several pieces, it is pretty convenient to get the mold out. I use a small electric screwdriver to remove eight drywall screws, and back off twelve more, and the thing just comes right out…no fuss. The twelve that were just backed out are the ones securing the corner blocks and neck and end blocks in the mold. So, here is the corpus, fresh off the mold, with all the blocks still square and rough, and the linings only roughly trimmed, not scraped.
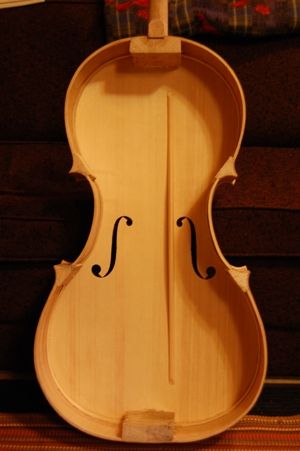
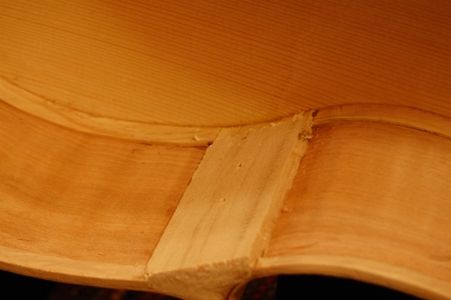
So– the next hour or so was spent chiseling, planing and scraping all those blocks to their final shape, and scraping the linings as smooth as I could get them. Here is what it looked like afterward:
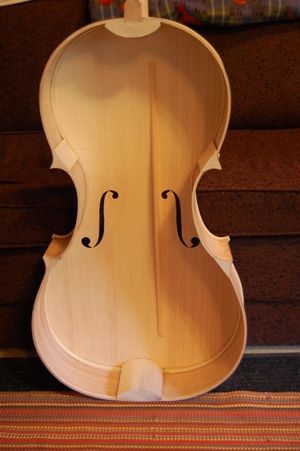
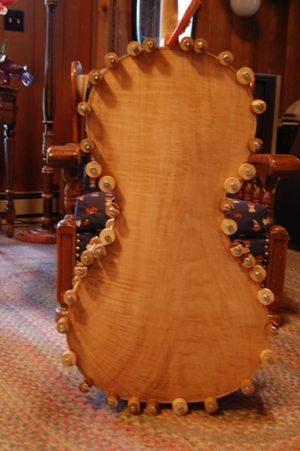
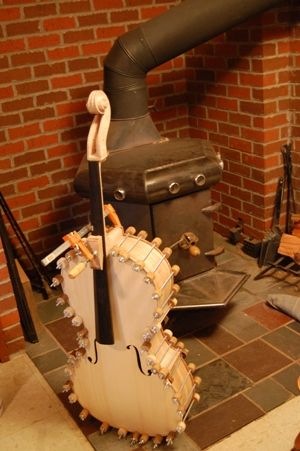
Install the Back Plate
So, the next step is to get the back plate in place. I aligned it carefully, checking all the margins to see that the overhang was fairly even all around, then clamped it in place, dry, using spool clamps. After I was satisfied that the overhangs were correct AND the elevation of the fingerboard was correct (an easy thing to mess up, as the corpus is quite floppy at this point), then I clamped everything solidly, and began removing a few clamps at a time, and inserting hot hide glue, using a palette knife. I washed off the excess glue with hot water, and re-tightened all the clamps.
Here the cello is in all its spool clamps, with one bar clamp to secure the button to the heel of the neck.
Final edge-work, scraping, preparation for varnish
After the glue was thoroughly dry, I removed all the clamps and began trimming edges, and perfecting the scroll and heel. The heel was almost a half inch high (which I expected…we leave extra, so that the heel and button are trimmed and shaped together, and match perfectly when we are done.) The scroll was still quite rough. I spent the rest of the day and late into the evening, scraping and planing, and trying to get the cello ready for finishing. Finally ran out of steam about nine PM, but it is nearly complete. Here is what it looks like tonight:
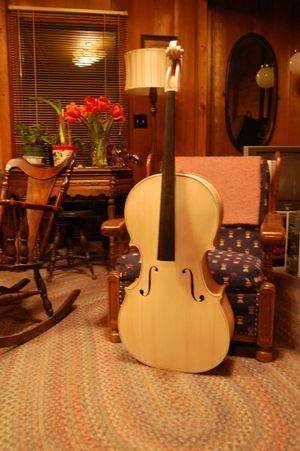
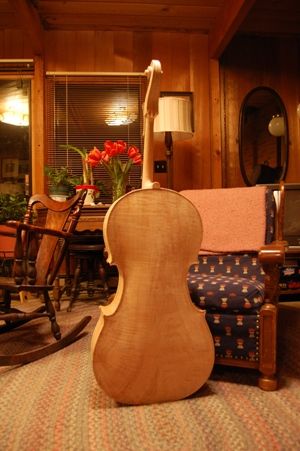
Actually, I typically use a very weak water-base stain first, which will make the spruce a tan color, instead of cream-colored. Then I will sand it lightly with fine micromesh, seal it, and start applying varnish. (On the home-stretch, now!)
For those wondering about the pegs, saddle, nut, etc.; I wait until the varnish is complete before adding those fittings.