Final assembly of a Davidov model cello

Please share with your friends!

How to complete the assembly of the cello

Remove the mold and clean up the interior of the corpus.

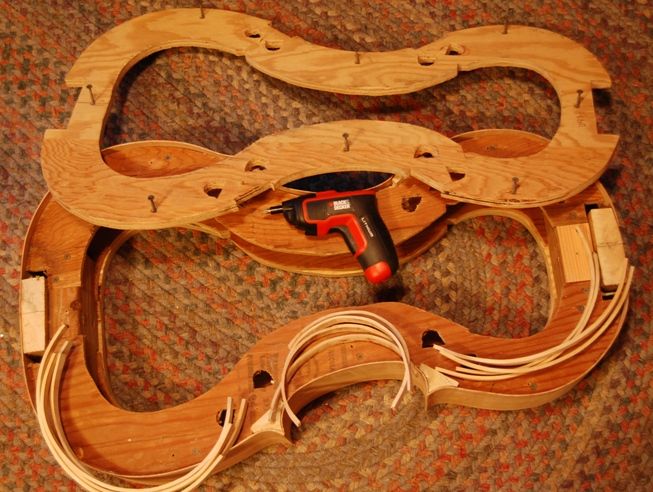
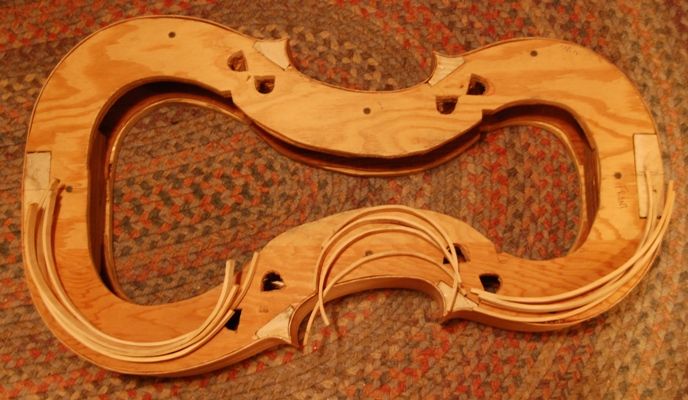
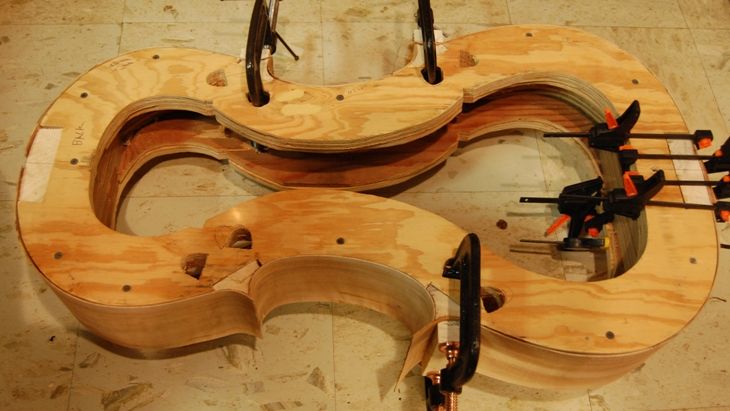
In my case, since the mold is collapsible and comes apart in several pieces, it is pretty convenient to get the mold out. I use a small electric screwdriver to remove eight drywall screws, and back off twelve more, and the thing just comes right out…no fuss. The twelve that were just backed out are the ones securing the corner blocks and neck and end blocks in the mold. So, here is the corpus, fresh off the mold, with all the blocks still square and rough, and the linings only roughly trimmed, not scraped.
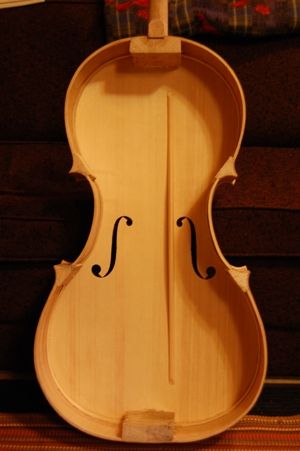
Rough cello interior
Cello interior immediately after removing the mold. All the blocks are still rough and square. Linings still need final scraping.
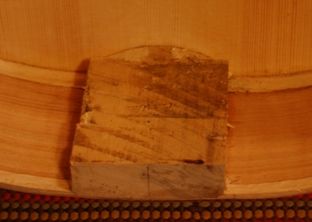
Rough cello end block
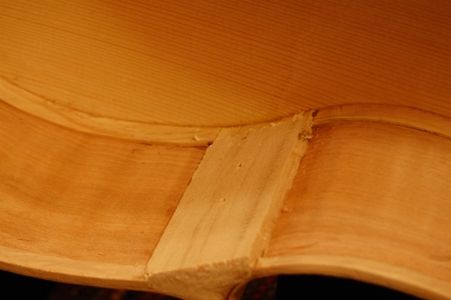
This is the end block. You can see the rounded part that I shaped before installing the front plate, so that I would not risk damaging the front plate while shaping it. The rest of the block was out of reach in the mold. Now it is time to shape all the blocks.
Rough cello corner block and linings.
Here’s what the corner blocks and linings looked like. The linings had been trimmed with a knife, but not scraped.

So– the next hour or so was spent chiseling, planing and scraping all those blocks to their final shape, and scraping the linings as smooth as I could get them. Here is what it looked like afterward:
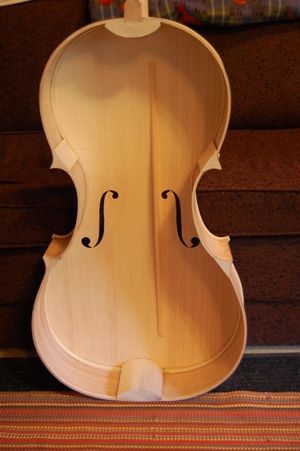
Cleaned cello interior, just before closing.
I tend to make my neck and end blocks a little oversize. I have seen blocks split and break, because they were too small…it seems an easy way to insure against that sort of thing. All the blocks are now the size and shape I want them, and scraped smooth.

Install the Back Plate

So, the next step is to get the back plate in place. I aligned it carefully, checking all the margins to see that the overhang was fairly even all around, then clamped it in place, dry, using spool clamps. After I was satisfied that the overhangs were correct AND the elevation of the fingerboard was correct (an easy thing to mess up, as the corpus is quite floppy at this point), then I clamped everything solidly, and began removing a few clamps at a time, and inserting hot hide glue, using a palette knife. I washed off the excess glue with hot water, and re-tightened all the clamps.

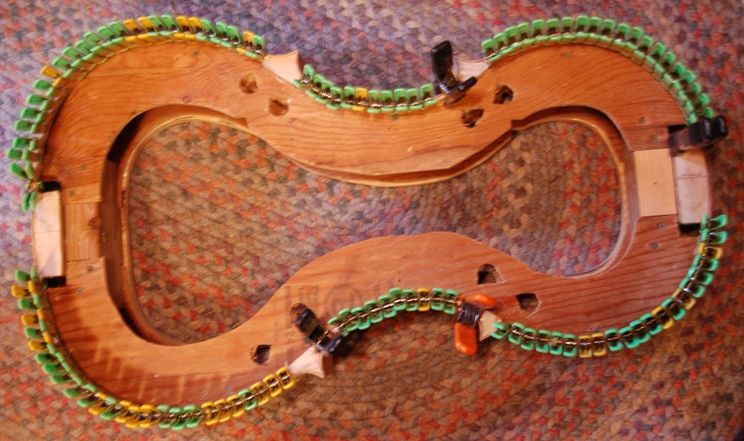
Here the cello is in all its spool clamps, with one bar clamp to secure the button to the heel of the neck.
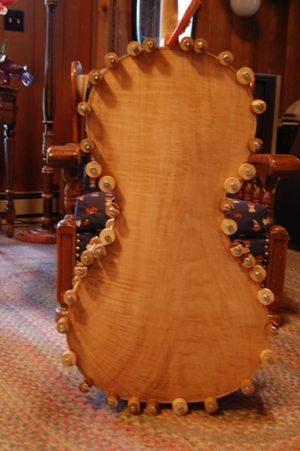
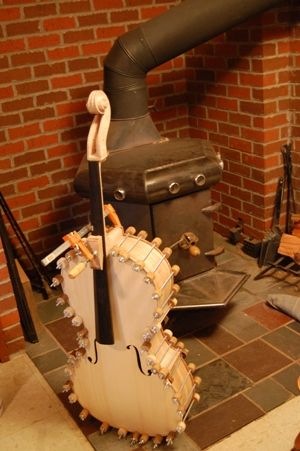
Callo back installed with hot hide glue and spool clamps.
The cello back is fully installed, with hot hide glue and spool clamps. The bar clamp secures the back button to the neck heel.
Cello glue drying by woodstove.
The house was pretty cold this morning, so I decided that the cello would dry faster in a warm room. Close to the woodstove (but not too close) is the best place I could find.

Final edge-work, scraping, preparation for varnish

After the glue was thoroughly dry, I removed all the clamps and began trimming edges, and perfecting the scroll and heel. The heel was almost a half inch high (which I expected…we leave extra, so that the heel and button are trimmed and shaped together, and match perfectly when we are done.) The scroll was still quite rough. I spent the rest of the day and late into the evening, scraping and planing, and trying to get the cello ready for finishing. Finally ran out of steam about nine PM, but it is nearly complete. Here is what it looks like tonight:
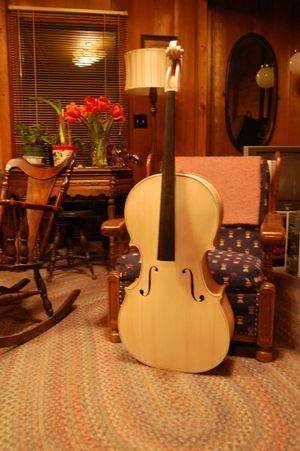
Cello in the white from front side.
Cello in the white, from the front. A little more edge-work to do, tomorrow morning, and I can begin the finish work.
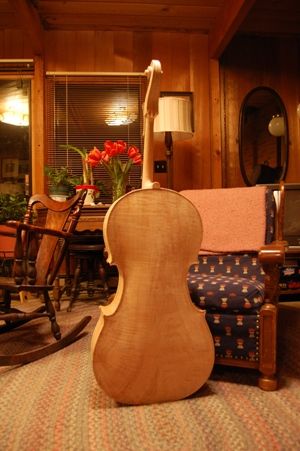
Cello back in the white.
And there is that one-piece back…it has come a long way since that big slab we started with, hasn’t it? I still have some final smoothing of edges, etc. to do, then it is time for varnish.

Actually, I typically use a very weak water-base stain first, which will make the spruce a tan color, instead of cream-colored. Then I will sand it lightly with fine micromesh, seal it, and start applying varnish. (On the home-stretch, now!)

For those wondering about the pegs, saddle, nut, etc.; I wait until the varnish is complete before adding those fittings.

If you found this post helpful, please share with your friends!

Cello garland lined, and Back plate cut out

Please share with your friends!

Cello linings completed; One-piece cello back plate traced and cut out…ready for arching

Back linings completed first

This morning I got up early and installed the back linings on the cello. While the hot hide glue dried, I set up a violin for a friend, whose grandfather had left it to him.

Tracing the plate

Once the glue was dry, I removed all the clamps, planed the ribs to be fairly level, and traced the outline of the back plate, using a very short section of aluminum tubing (5mm long, 25mm diameter, 3.5mm wall thickness) and a ball-point pen, to trace around the ribs and mark the maple slab from which the back was to be cut. The tubing is tall enough (5mm) to never slide under the edge of the ribs, even if there is an irregularity on either the ribs or the plate, and the 25mm diameter rolls along steadily and easily along the side of the garland itself, making it a fast, pleasant task.

Cutting out the plate and refining the edges

I cut the plate out on a bandsaw, only using a scroll saw for areas too difficult to access on the bandsaw. Then I smoothed all the edges on an oscillating spindle sander. I do not use many power tools, but the saw and the sander are two that I consider indispensable at my age. They save me a lot of wear and tear on my joints. I have built instruments using all hand tools…no power tools at all…but I do not consider it a virtue, and probably will never do it again, if I can help it. I still have the bow-saw I built for that fiddle project, and all the files, planes and scrapers. The only one I no longer use at all is the bow-saw. It hangs on the wall reminding me of that early violin.

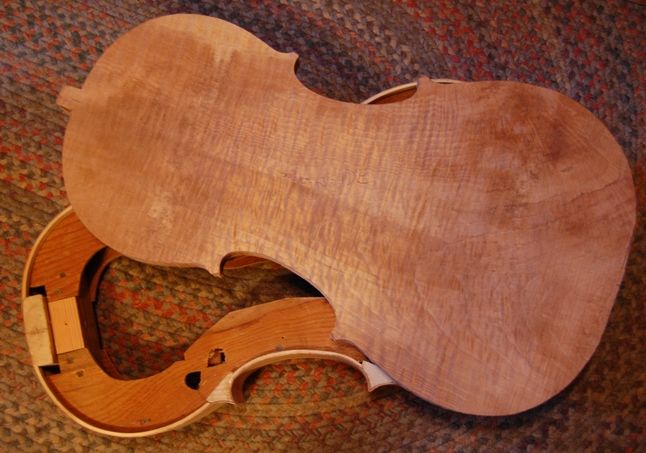
So…now the cello garland (still on the collapsible cello mold) and the back plate look like this:

One-piece cello back plate with garland on mold
Cello garland on mold, with one-piece maple back plate

Arching is next…but I am pretty tired, so I don’t think I will start today.

If you found this post helpful, please share with your friends!

Cello linings installed (front)

Please share with your friends!

Willow cello linings installed, glued and clamped.

Purpose of the collapsible cello mold:

My cello mold is built with a front and back “spacer”, each of which is removable to allow installation of linings. Each is held in place by a few drywall screws. I got tired of the repetitive motion of turning the screws by hand, and bought a very cheap  electric screwdriver, barely sufficient for the task. I will later make a special attachment for it so that it can turn the tuning machines on double basses…that’s another task that wears out my wrists. Anyway– in less than two minutes I removed the front spacer, and the cello looked like this:

Cello mold with ribs installed, linings ready to install--front spacer removed.
Cello mold with front spacer removed and linings ready to install.

Dry-fitting the linings:

Then I cut the mortises into the blocks, fitted the linings (that I had bent earlier) into their respective places, and prepared for gluing. So, with the linings dry-fitted and ready for gluing, it looked like this (notice that only the center linings have clamps at this point; that is because they want to relax away from the rib, while the upper and lower linings straighten and tighten against the rib):

Willow cello linings dry-fitted, ready for gluing.
Cello linings (willow) installed dry, ready for gluing.

You can see the importance of the linings, by comparing the two photos above: without the linings, the ribs are only about 1.5mm thick…not very strong, nor is there sufficient gluing surface on that thin edge. So, with the linings in place the edge is about 5.5mm thick, which significantly strengthens the edge, and more than triples the gluing surface.

Hot Hide Glue and lots of clamps!

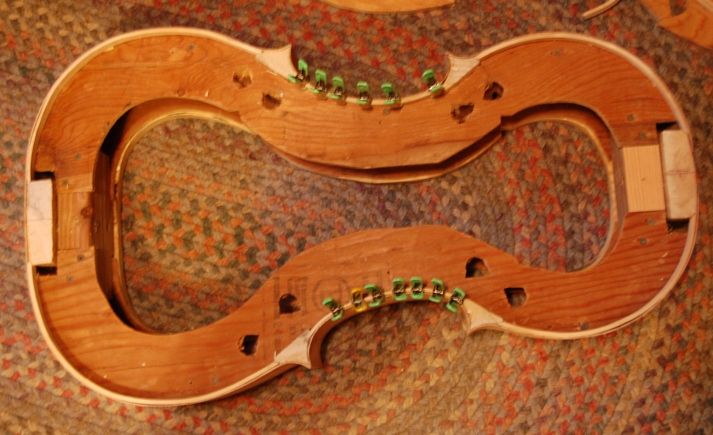
Once all the linings fit correctly, I heated up my glue, prepared a container of hot water, and my various brushes and palette knife, and, one by one, I brushed on the hot hide glue and clamped each lining in place. Those little spring clamps work pretty well. I got them from Home Depot, and they have served this purpose to my satisfaction. Occasionally there is a reluctant joint that needs more pressure, in which case I use a larger clamp, or one of those little f-clamps. (You can never have too many clamps!) After gluing and clamping, the cello looks like this:

Cello linings glued and clamped in place.
Cello linings glued and clamped.

Once these linings dry, I will remove the clamps and repeat the process on the back side. the back has a slight taper, from tail to neck. At the bottom block, the ribs are about 113mm tall. At the neck they are about 108mm tall. So I will want to plane the ribs to those approximate dimensions before I install the linings. One thing you can’t see in the photos is the fact that I fit the linings just a little high…slightly “proud” above the rib edge. I want to make sure that whatever planing needs to be done is primarily removing willow, not curly maple. I will accomplish final leveling with a sanding board, however, just before tracing the shape of the plates, from the shape of the completed rib garland.

If you found this post helpful, please share with your friends!

Bent Willow Cello Linings

Please share with your friends!

Cello Linings, Willow, bent and ready to install

The linings I sawed up yesterday are now bent and ready to install.

While the bending iron was warming up (which takes about 20-30 minutes, especially in cold weather), I used a very small hand plane to smooth the edges of the linings, since some were still a little rough, especially if they had been the outside edge of the strips I cut from that beat-up 4 x 4 I brought home.

Once the iron was hot enough to make water droplets dance on its surface, I dampened each lining strip one at a time, and used a metal bending strap to force the wood against the hot surface of the (aluminum) “bending iron”. These linings are about 4mm thick, so I gave each segment a full 15 seconds to heat up, or 20 in the case of the c-bout linings which were to endure a tighter bend. As I heated one section, forced against the flattest curve of the iron, I counted seconds, then shifted the wood sideways to heat the next section, still maintaining the curve of the first, and so on, until the entire lining strip had the curve I wanted it to have. You can see that I deliberately over-bent them: I do so because it is pretty easy to straighten them out a little, to adjust them to fit tightly against the ribs.

Here is what they look like now:

Bent willow cello linings ready to install.
Bent willow linings, ready to install with hot hide glue.

Tomorrow evening, depending on how tired I am when I get home, (or probably Friday, since I have to go to bed very early Thursday in order to get up at 2:30 AM and go teach a code clinic class before my regular work begins on Friday morning) I will remove the front section of the mold (notice the screws holding it), which will allow room for the linings to be installed. I will cut the little mortises in each side of each block, to receive the ends of the linings, then brush hot hide glue onto each rib and lining, one set at a time, and clamp them in place with little spring clamps. After the front linings are dry, I will repeat the process with the back linings.

Starting to look more encouraging, now.

If you found this post helpful, please share with your friends!

Cello progress

Please share with your friends!

Cello ribs installed in the mold, glued and clamped to the blocks.

Yes, you have to keep the wood warm!

The weather outside persisted in temperatures hovering just above freezing, so I brought the project indoors, heated the joints with a heat-gun, brushed hot water, slathered hot glue and clamped ’em home. Good glue squeeze-out all around; should be very good joints.

All ribs installed–glued to the blocks in the mold. Next step is linings.

Next Step: Linings

Actually, the very next step is to trim the excess rib length off the corners, and smooth them so that they are square-ended and straight along the edges…and parallel to one another. But that is a small enough task that I will combine it with installing the linings. The linings are a pretty easy, pleasant step in cello building…they are easy to make, easy to install, and the work goes quickly. That is what is next, and I should have it done pretty soon. Nice weather or no. 🙂

Thanks for looking.

If you found this post helpful, please share with your friends!