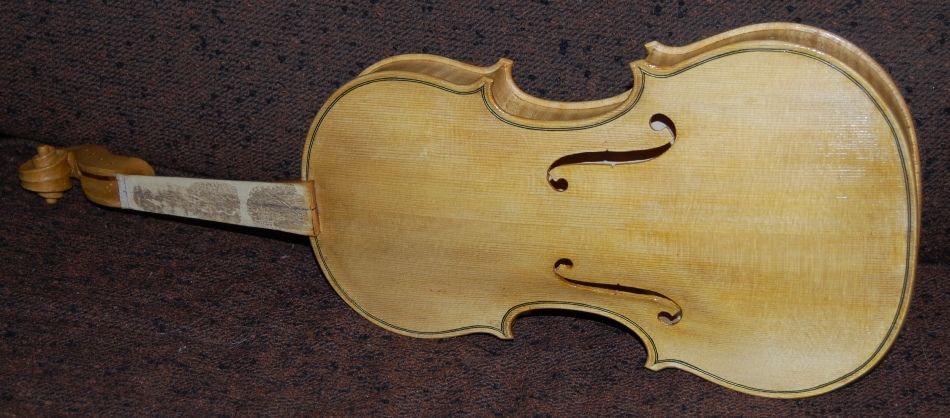
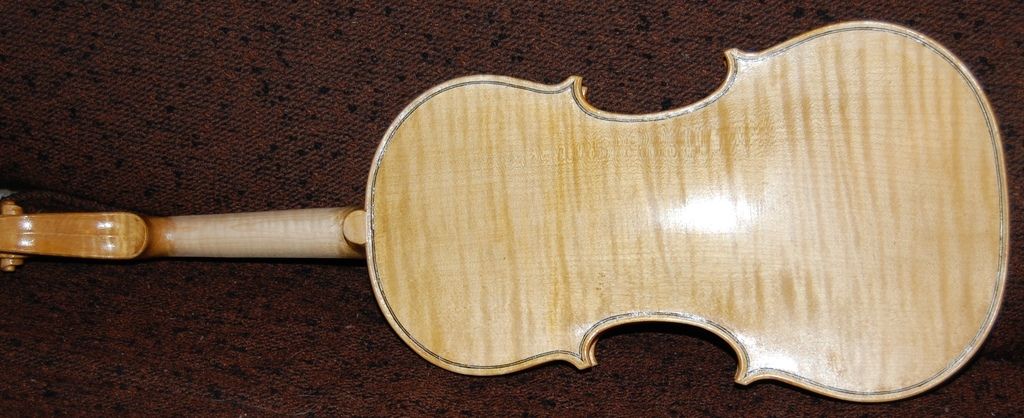
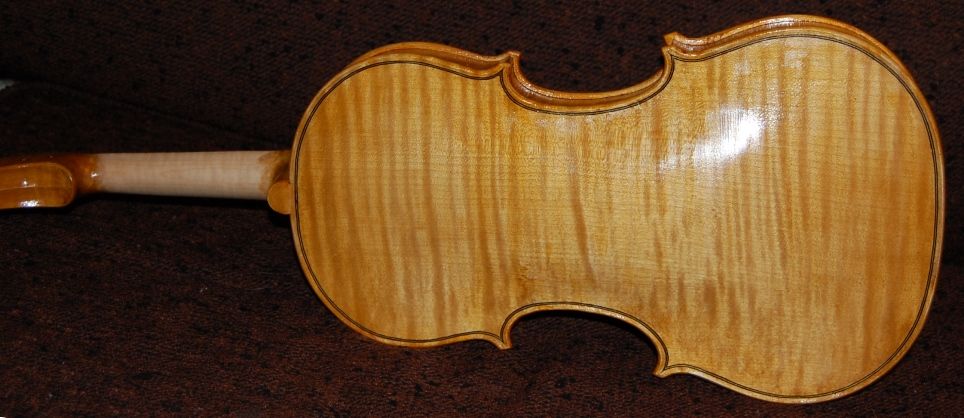
Two Bass Bars

Please share with your friends!

Two Bass Bars

How I install bass bars:

The bass bar in a violin-family instrument serves to support the bass-foot of the bridge, and the bass-side of the front plate (also called the “table” or, the “soundboard.”) Without adequate support in the proper place anong that side, the bass tones will sound quite flabby and unconvincing. The following is only a description of how install the bass-bar, not telling anyone else how it ought to be done.

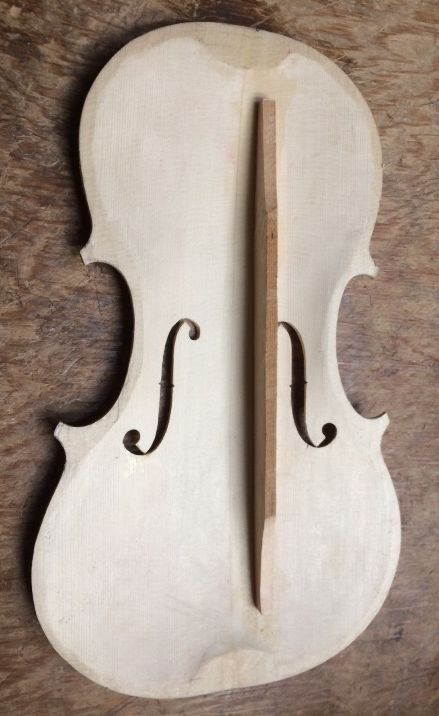
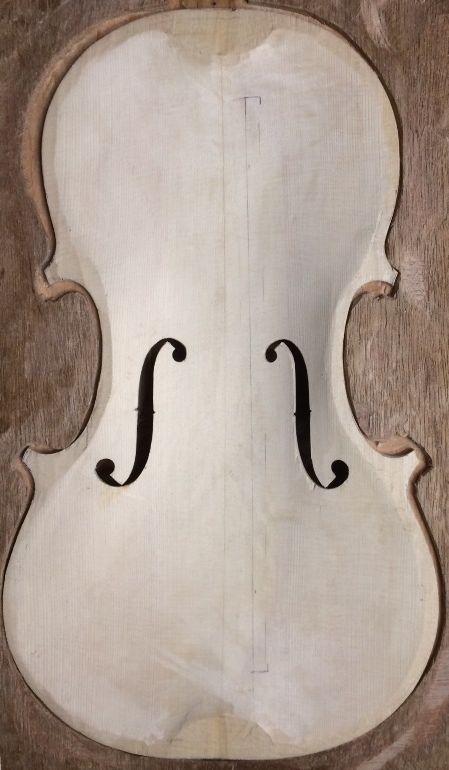
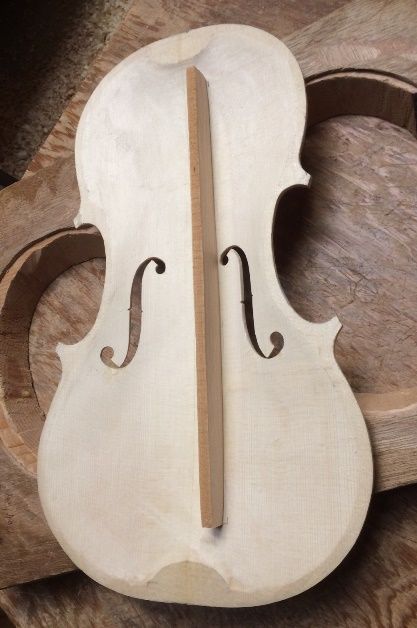
We always make the bass bar of European spruce, with the grain vertical to the plate; thus, flat-sawn to the bass-bar, itself. I begin by laying out two locations, one seventh of the distance from the center seam to the widest part of the bass-side edge at both upper and lower bout. That usually translates into about 15 mm off the center, at the widest point of the lower bout and 12 mm off center for the same place in the upper bout. I strike a line through those points , checking to see if it is far enough away from the inner eye of the bass-side f-hole to actually accommodate the completed bass-bar If it is not, then I move the line over a couple of millimeters, as needed, to gain clearance at the f-hole. Then I measure 40 mm inboard along the line from the upper and lower edges of the plate, to designate the end locations for the bass bar.

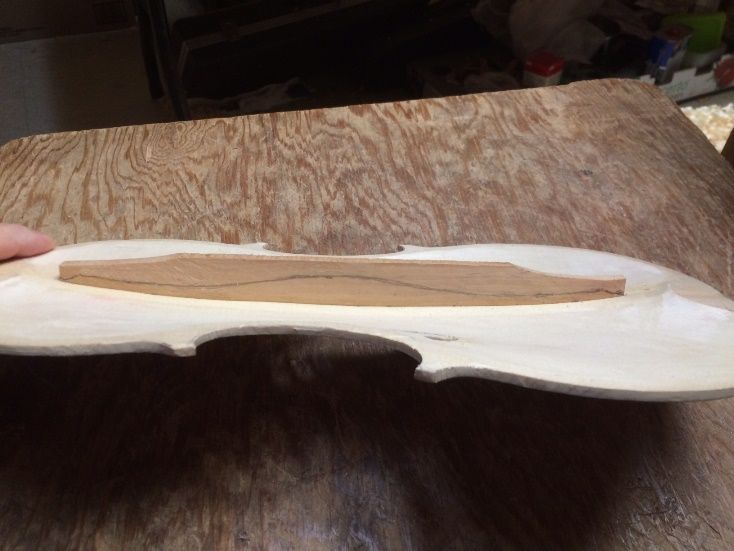
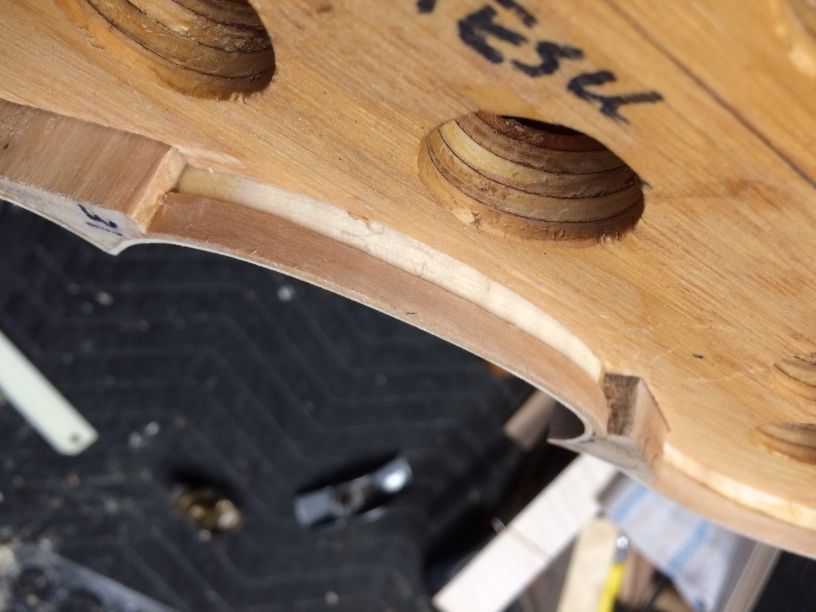
I cut the bass-bar blank to length, and plane it to the appropriate thickness, then hold it on the lines I have laid out, essentially perpendicular to what will be the plane of the ribs. I use a compass, set to the maximum gap at the bottom center of the bassbar, to scribe the contour of the plate onto each side of the bass bar. (Notice that, due to the compound curves of the violin plate, the two marks will not be the same. This is important.) Once I have both sides traced in accurately, I carve away the excess wood outside the line, to follow the line as closely as I can manage. I try to achieve a straight line between the two, regardless of where the two lines go, because that will follow the complex curves of the plate.

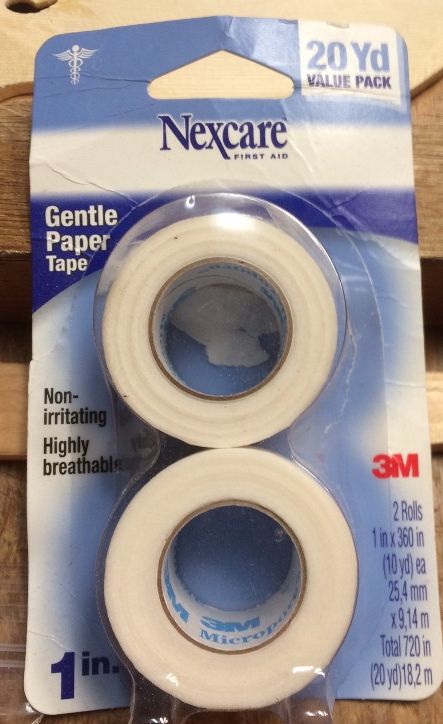
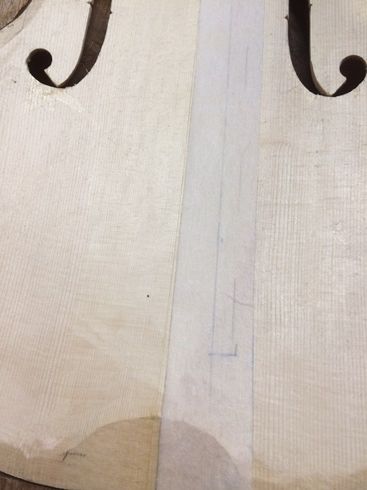
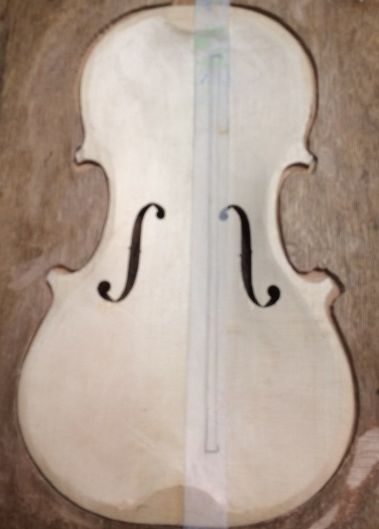
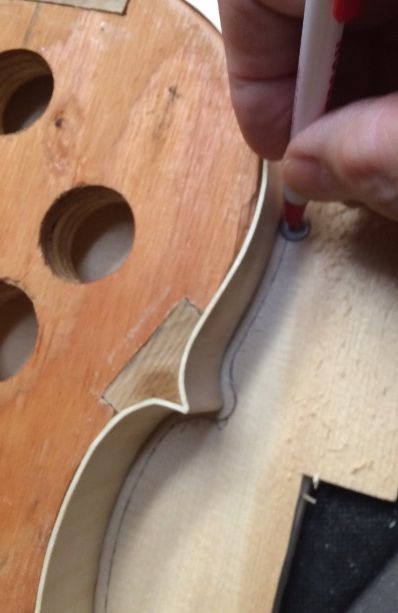
I double-check the bass-bar against the plate, and usually it is surprisingly close to fitting, at this point. So I use a strip of the paper-gauze tape available in pharmacies, about an inch wide, to cover the layout lines I had scribed into the plate, and then proceed to chalk-fit the bass-bar on top of that tape. The tape is very thin, so that I can see the lines through it (although I do trace them again onto the tape, to make them even easier to see.) But the tape is also so thin that, if I can get a perfect fit on the tape, when I remove the tape, I will have a perfect fit on the plate, as well, and no chalk residue to remove.

The hardest thing for me to learn in chalk-fitting, was to only remove the transferred chalk and the wood immediately under it, not the whole area. Frequently the culprit in an imperfect fit is actually quite a small area, so it is counter-productive to remove too much wood.

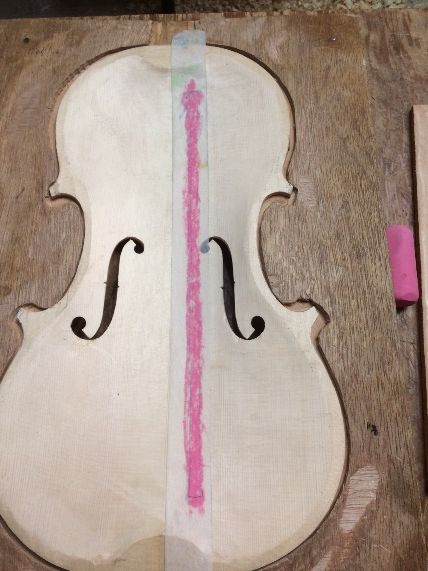
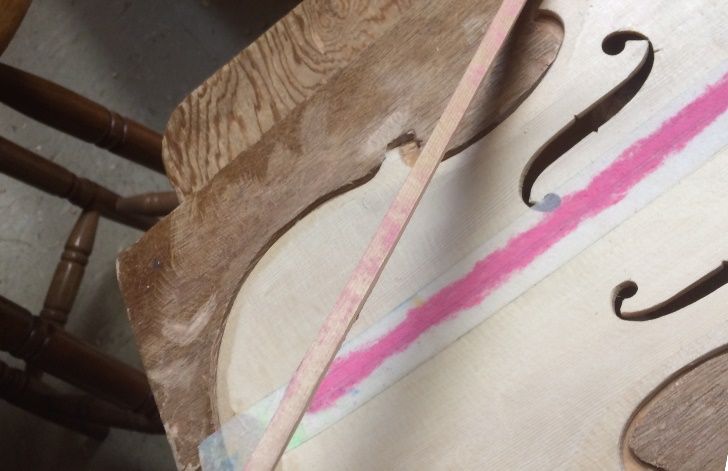
I chalk the tape, along the layout lines, and then press the bar into place, sliding it lengthwise a few milimeters back and forth to pick up some chalk;. I plane or scrape off the high spots where the chalk transferred, then try again. When I get a more or less full transfer of chalk from tape to bass-bar, I know the fit is acceptable. Then I carefully remove the tape, and (finally) glue and clamp the bar into place. Usually, I trim the bar a little, first, so it is nearly the correct shape on the top surface, so the clamps will fit more easily.
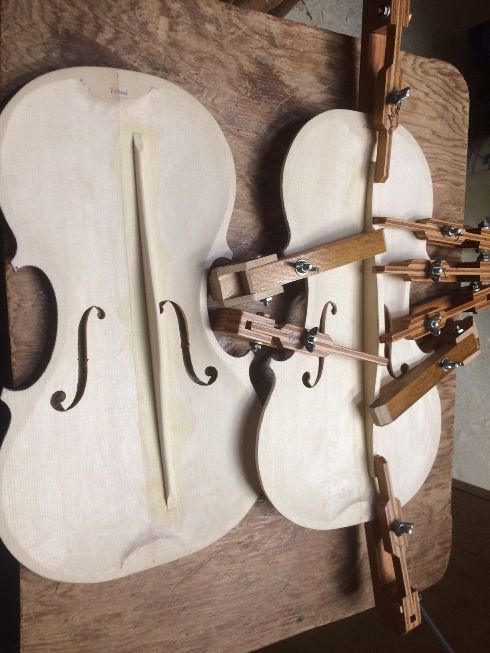
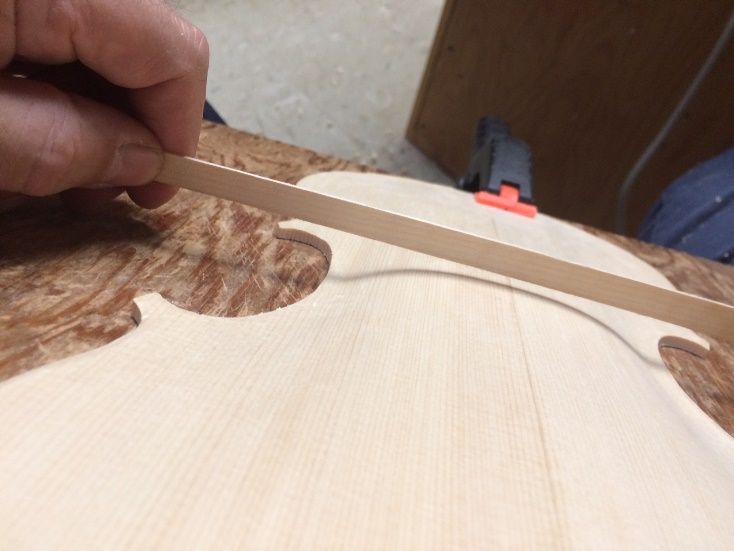
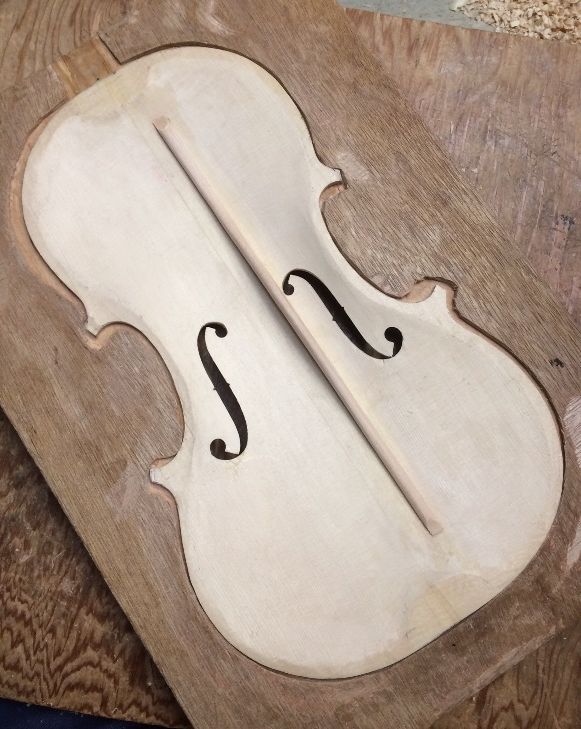
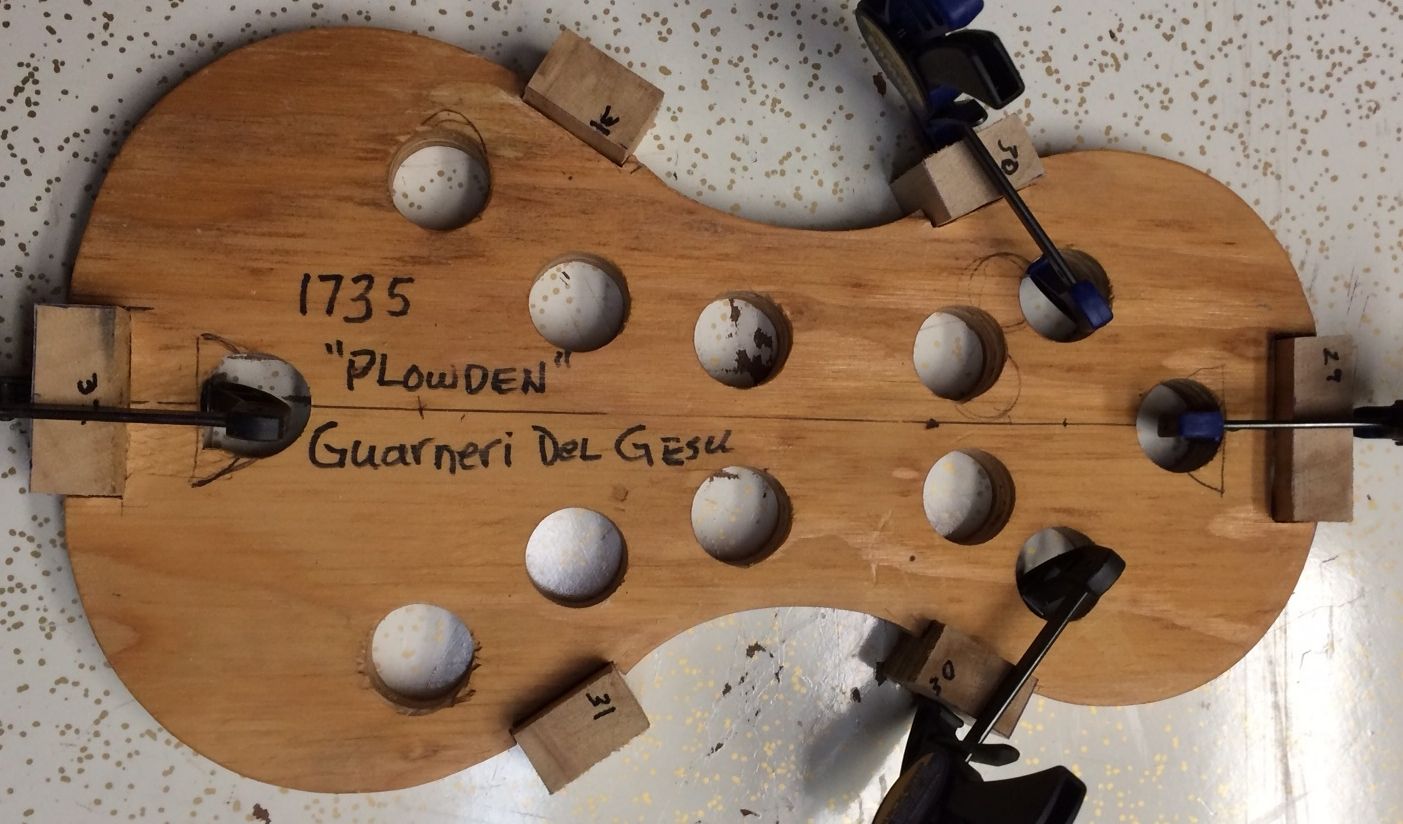
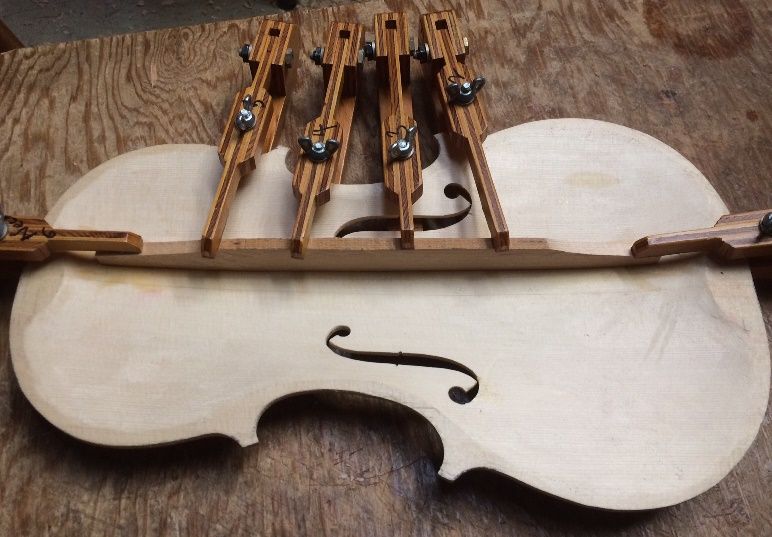
One bass bar is complete: the other has only been trimmed to make it easier to clamp.


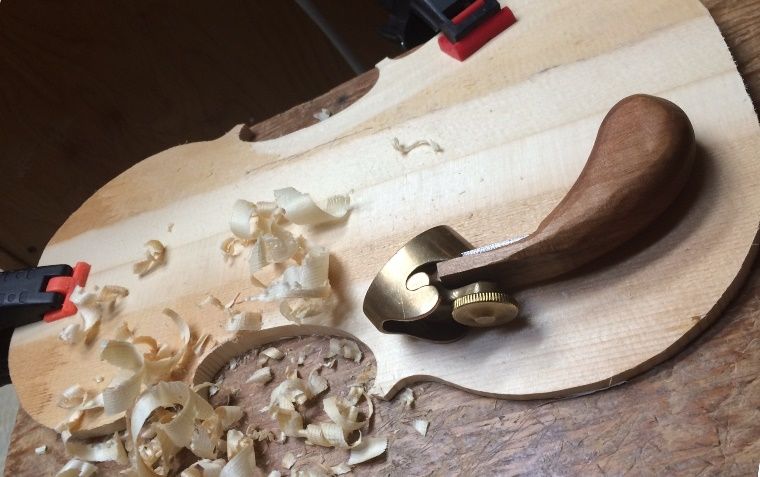
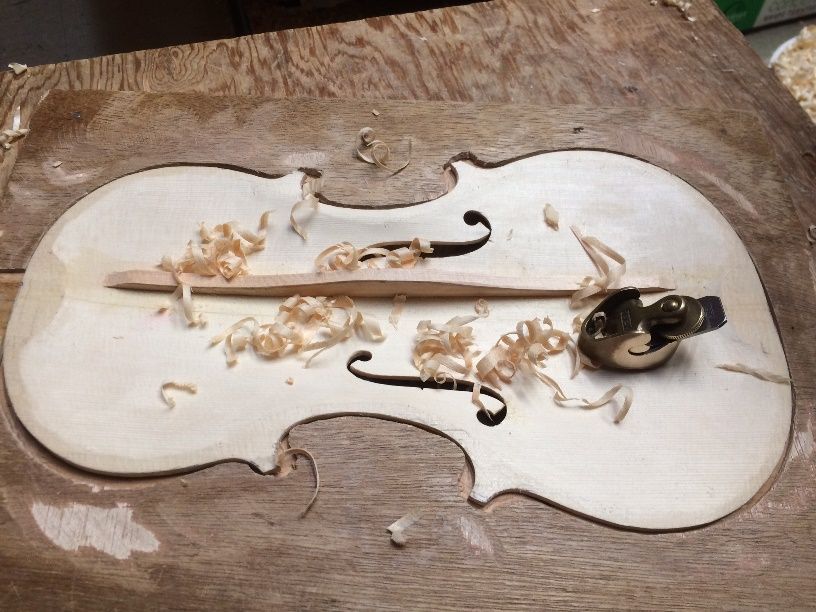
After the glue has dried and the bar is rigidly secured, I use finger-planes to trim the bar to the size and shape I want.
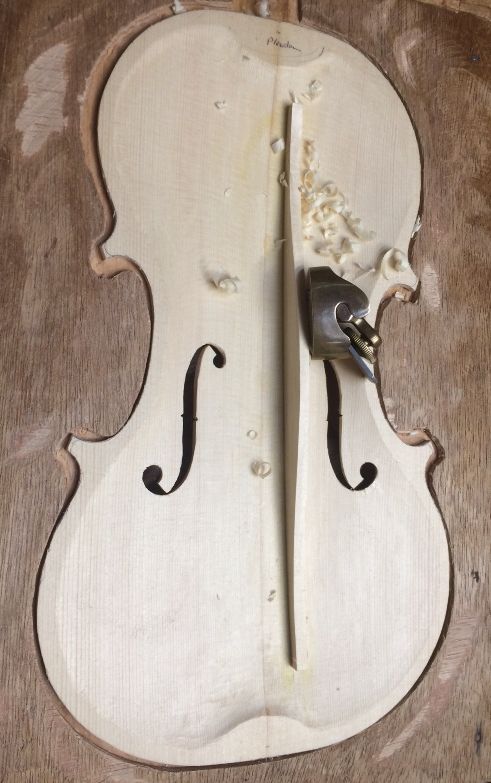
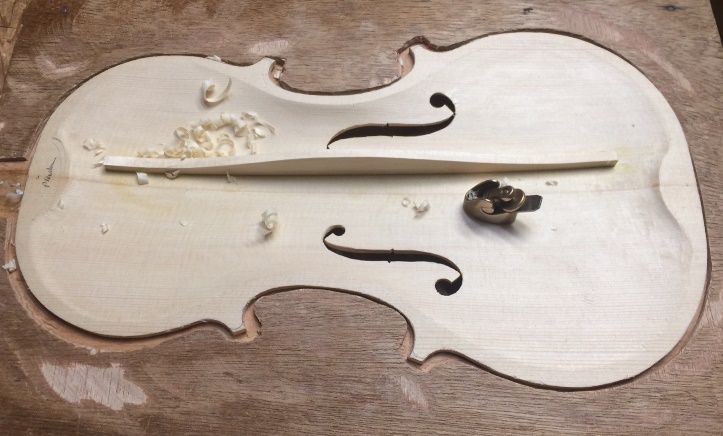
Beginning with a medium-sized finger-plane.


Finishing with a small finger-plane.


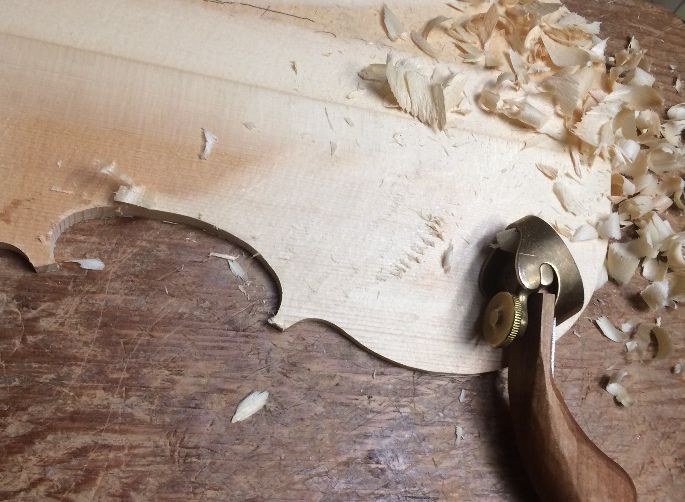
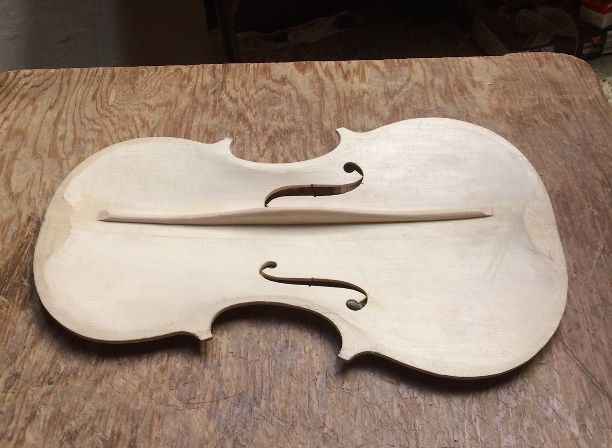
Final touch-up with small plane and scrapers.
Final touch-up with small plane and scrapers. The camera angle is what is making the two bars look so different.


Installing the top plates

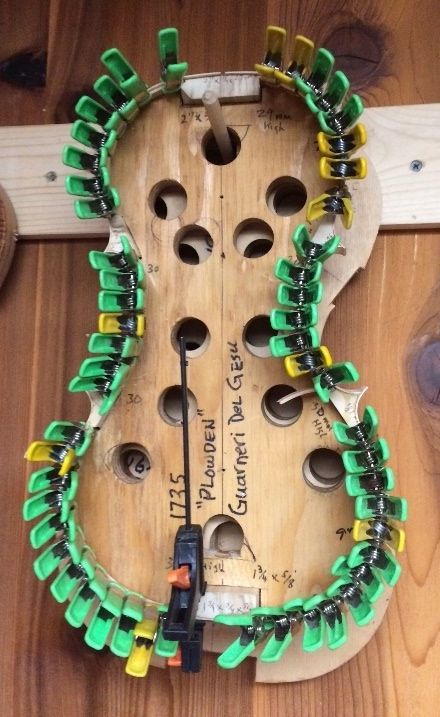
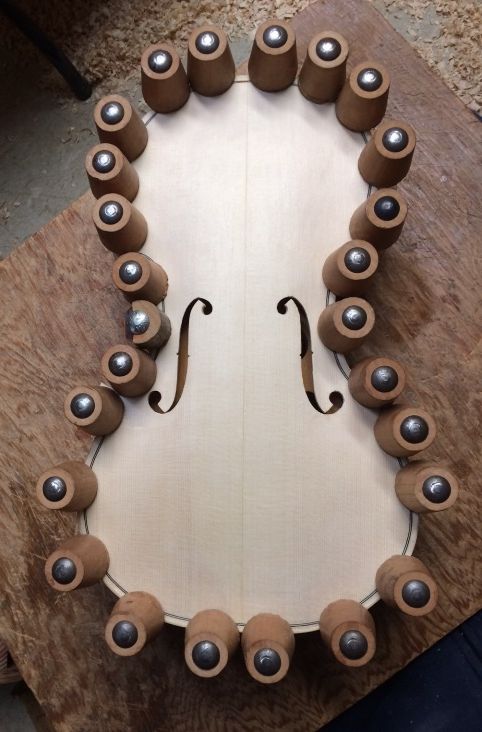
So, the next task is to complete the inner edgework, and then install the top plates on the rib garlands. I plane a tiny bevel around the edge of the plate that will face the ribs; then file it to a curve, nearly quarter-round, flush with the outer rim of the plates. Then I position the plate on the garland as precisely as possible (sometimes things seem to have moved a bit, so I have to compromise a little.) Finally, I loosen a few of the spool clamps at a time and slip hot hide glue into the joint, using a thin palette knife. I clean up all around, so as to not leave glue on the outside of the violin.
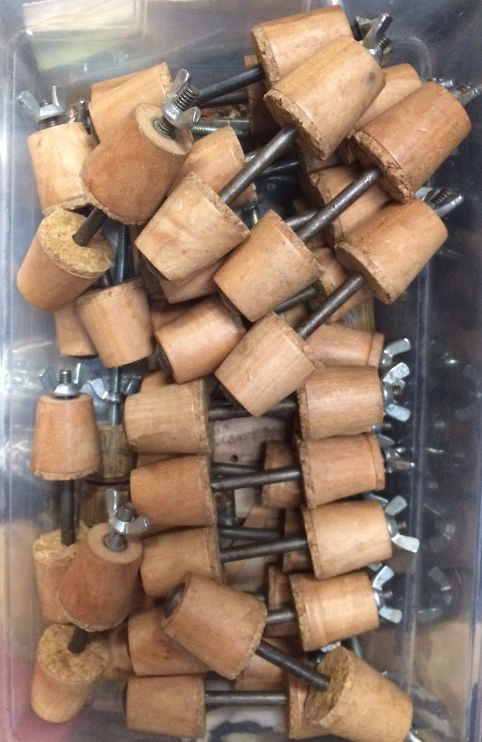
Spool-clamps.
Spool clamps can look like these, or even more simple: sections of closet rod with all-thread bolts. There are a lot of possible options.


Finally, the plate is fully glued and clamped, and I wait for it to dry.
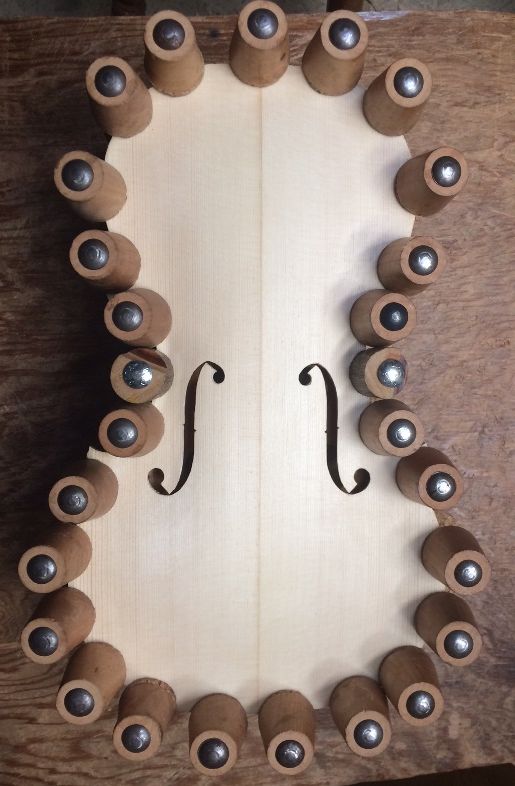
Guarneri copy top plate installed with hot hide glue and spool clamps.

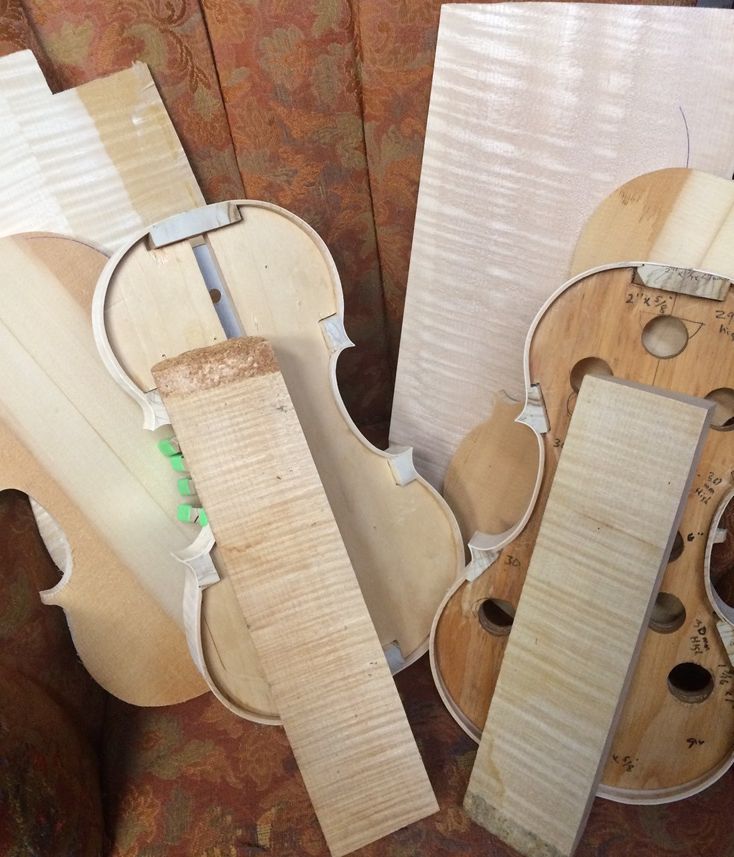
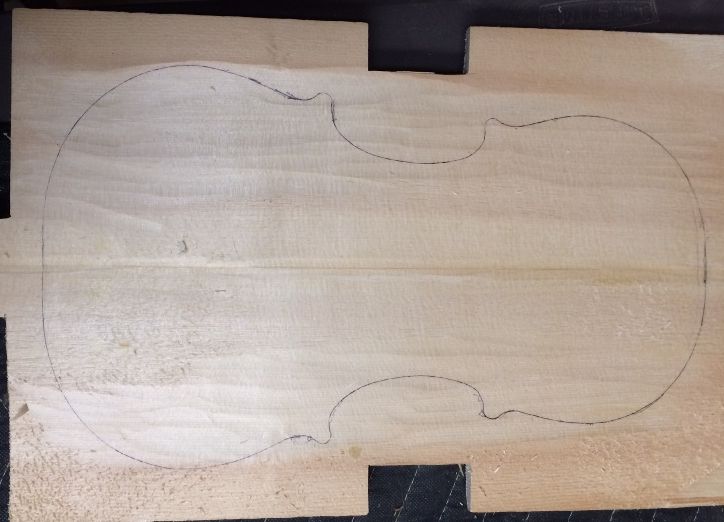
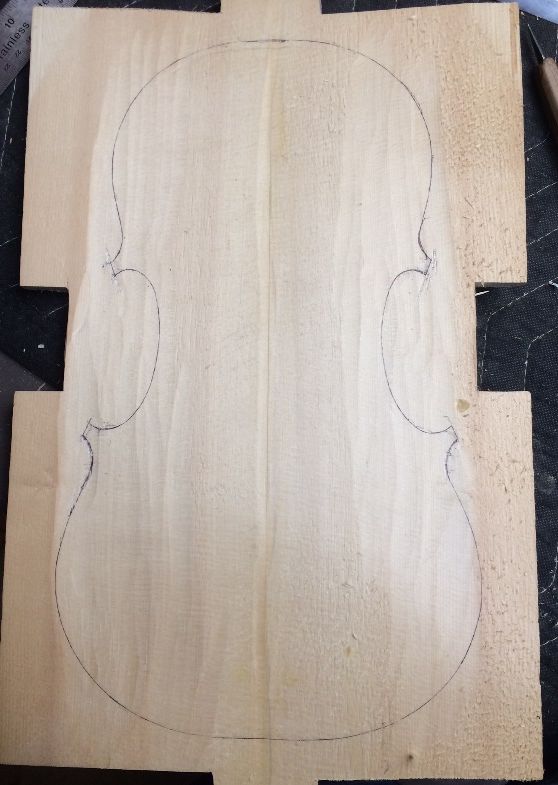
After the top plates are installed, I trace the European Maple back plates and cut them out. Here are the two garlands with the top plates installed and the back plates cut out:
Completed Garlands with plates.


Next stop will be arching the back plates.


Thanks for looking.


If you found this post helpful, please share with your friends!

Two Plates

Please share with your friends!

Two Plates

Top Plates First

Not every violin maker follows exactly the same path. I not only make my front plates first; I install the front plate before I install the purfling…and install the neck and fingerboard before removing the form (or mold.) After removing the mold and leveling the back of the garland, including the neck-heel, I can install the back plate.

I used to install purfling before installing the plates, too, because I was taught to do it that way. But I consistently had trouble with the plate overhang not being even, around the perimeter of the instrument, and it finally occurred to me to try doing the purfling after installing the plates, and after having established the final shape of the plates, so that the purfling followed the final edge of the plate, rather than installing the purfling first, and later finding that the garland has changed shape slightly, so that the plate no longer fits perfectly, and I have no option to modify the plate, because the purfling has permanently determined where the edge is supposed to be. Ah, well…I am just a slow learner, I guess. 🙂

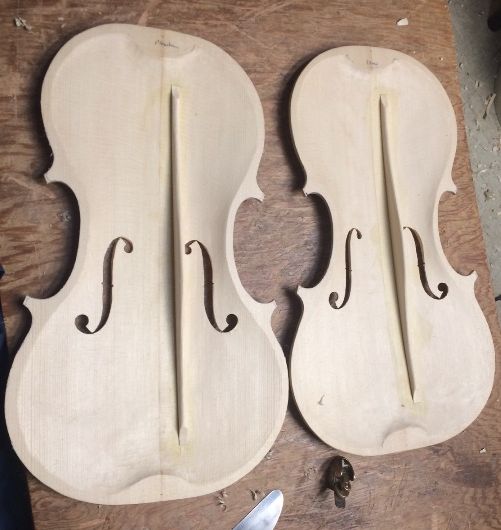
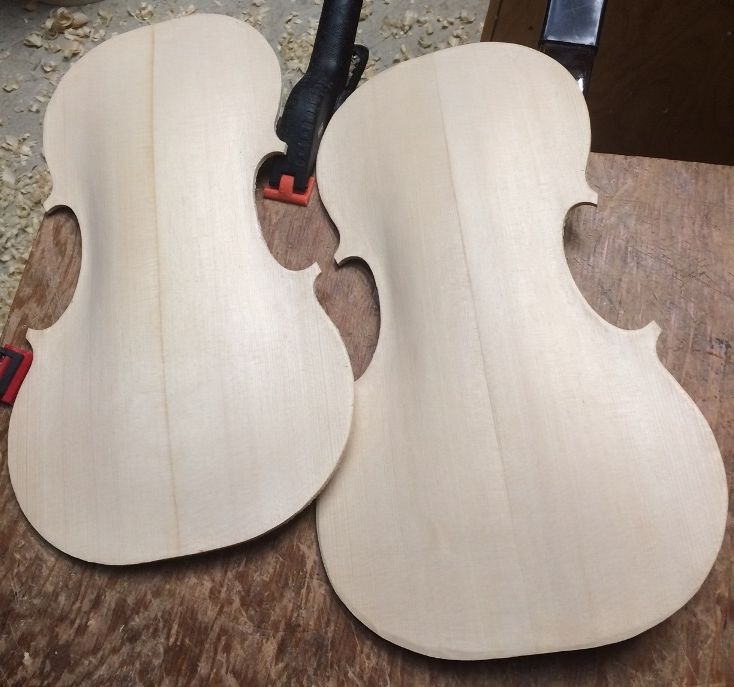
So, here is a sort of “after and before” picture: the one on the right has been arched close enough to correctly, that I will be ready lay out and incise the f-holes next. The one on the right has only been traced and cut out, so all the carving remains to be done.


“After and before”: one plate fully arched, the other ready to carve.


Arching the Top Plates

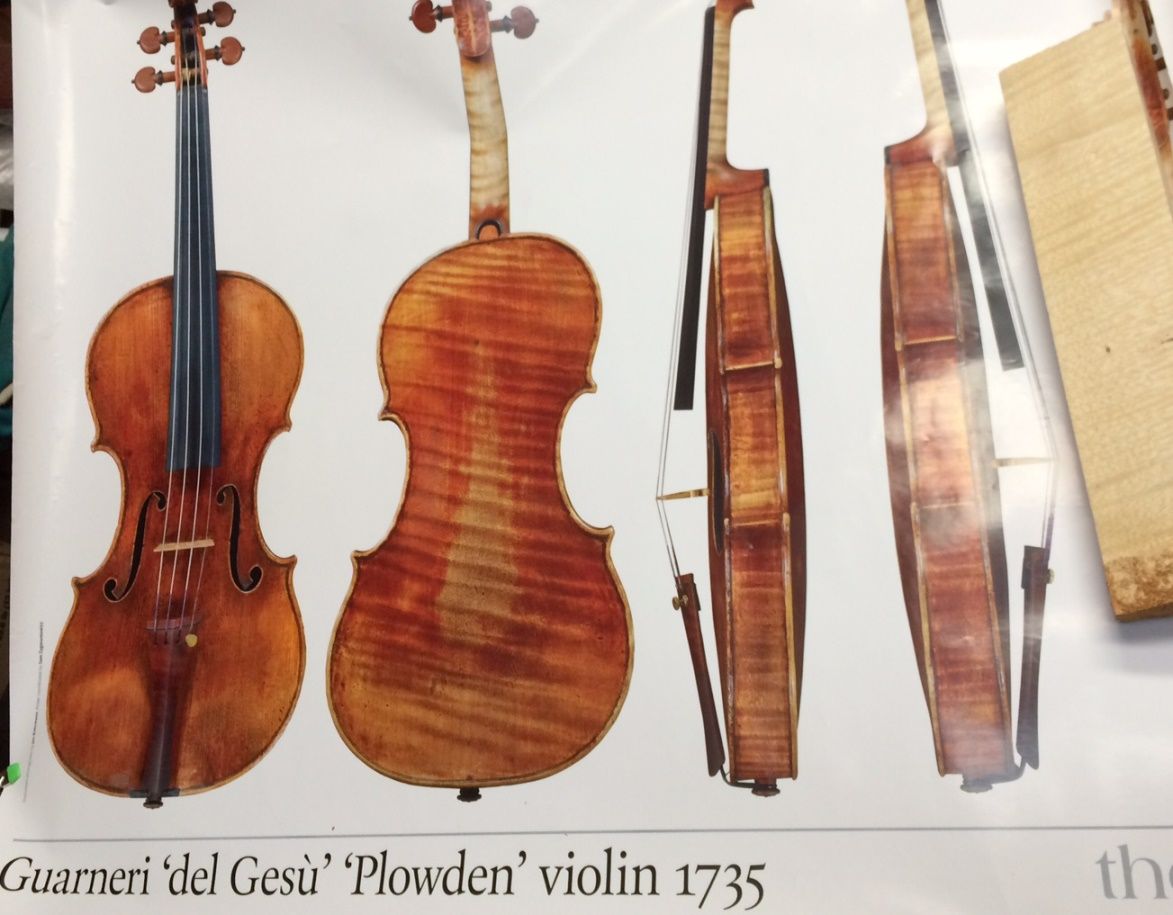
I derived my arching-plan from the “The Strad” magazine posters. On this particular pair of posters, there are not only the traditional photos and line drawings, but they actually printed out CT scan images so that one can see exactly the shape and thickness of all parts of the violins.

I first mark the edges at 4mm thickness, then plane down to the lines. Most makers use gouges for this part, but I prefer small finger planes. I am sure that there are many good reasons to use the gouges instead, not the least of which would be speed in making, and I have certainly carved plates that way…but I prefer the planes. So, here is the carving of the second plate:

Second plate beginnings.


Rough Arching
Rough Arching


I use shadow lines to check the actual shape of the cross-sectional arching.
Using shadow lines to check the actual shape of the cross-sectional arching.


Finally, I use sharp scrapers to renove any lines or dents left by the planes, and narrow bamds of shadow to check the actual cross-sectional shape of the archings. I may still make later improvements, as I add the f-holes and the bass-bar, and, of course, after I install the purfling. But the archings of the two top plates are very nearly complete, so, the next time I post, it will be about f-holes.

So, here are the two plates, ready for f-hole incision, before being carved from the inside to be exactly as thick as I require. Other than the F-holes, bass-bars and purfling they are nearly complete. 🙂

Two Plates, with completed arching.


I will try to keep going on photos.

Thanks for looking

If you found this post helpful, please share with your friends!

Beginning Two New Violins

Please share with your friends!

Beginning Two New Violins

First Things First:

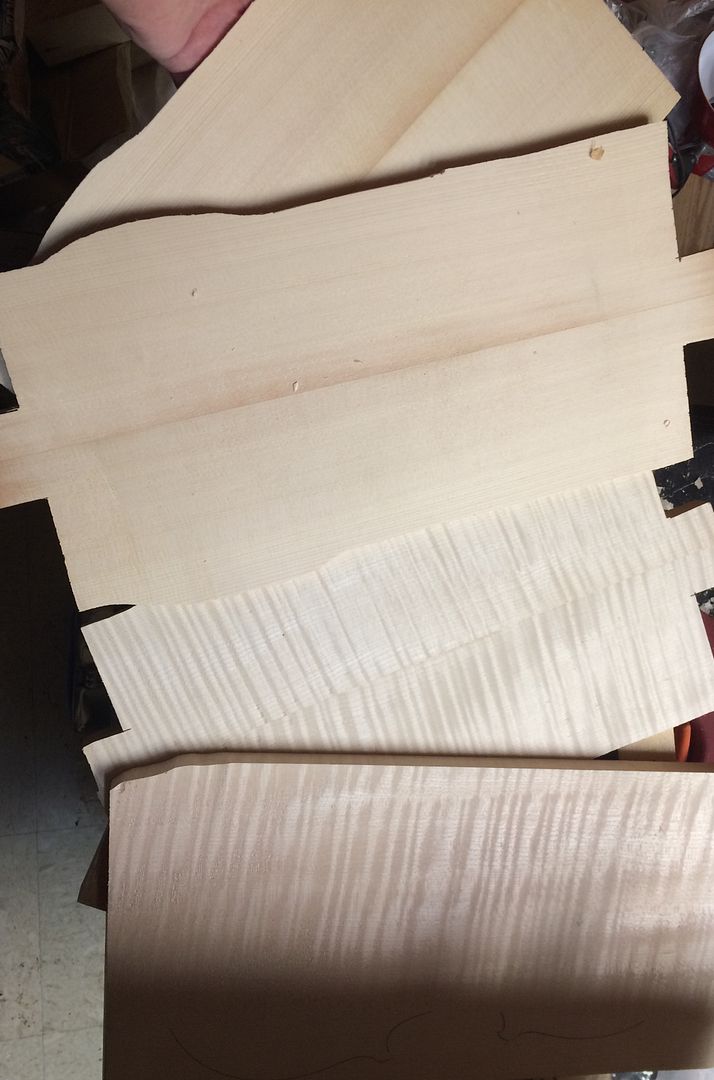
I began by making sure that I had appropriate wood for both instruments: I wanted a one-piece back for the Guarneri model instrument, with deep flames sloping downward from left to right, and I wanted a heavily flamed two-piece back for the Stradivari model…both of European Maple, with ribs to match them, and European spruce tops. I had them, all right, so I bookmatched the two spruce tops, and the back for the “Titian” Strad attempt, and left them to thoroughly dry. Afterward, I visited my son’s guitar shop and used his power planer to flatten the plates, and bring them each down to the thickness I wanted for the arching height.

Prepared plates: European Maple and Spruce


Working Vacation

I took a week off from work, intending to “get a lot done” on the violins, but ended up sick for most of the week. Besides, Winter is coming on, and we needed to get firewood in, so Ann and I loaded and hauled and stacked firewood for a couple of days, and I got about two good days of work on the violins. During that time, I installed blocks in the molds, shaped them to receive the ribs, thinned and bent the ribs, and installed them. Last, I installed linings, to add stiffness to the edge of the rbs, and additional gluing surface. The ribs, like the back plates, are European Maple, but the blocks and linings are willow…not sure what variety. I like weeping willow the best, because it carves and bends so nicely, but other willows work well, too, sometimes.

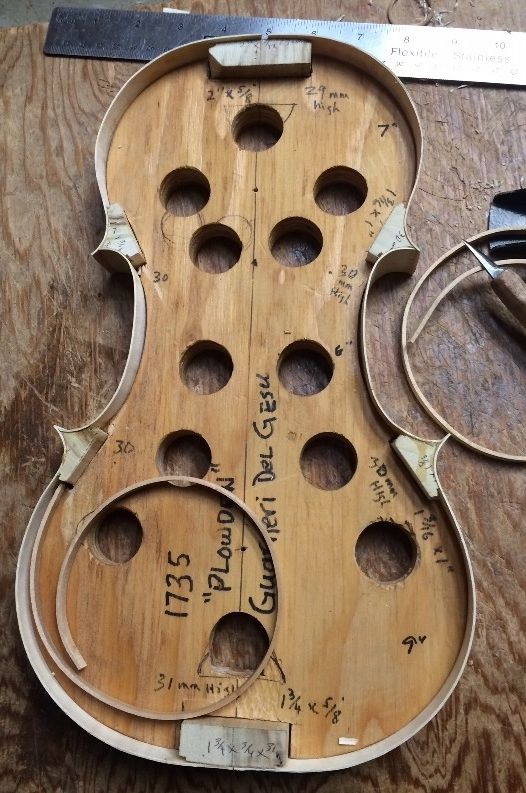
Guarneri form with blocks and ribs.


Ribs shortened
Ribs shortened


Adding linings.
Adding linings.


Linings installed, glued, and clamped.


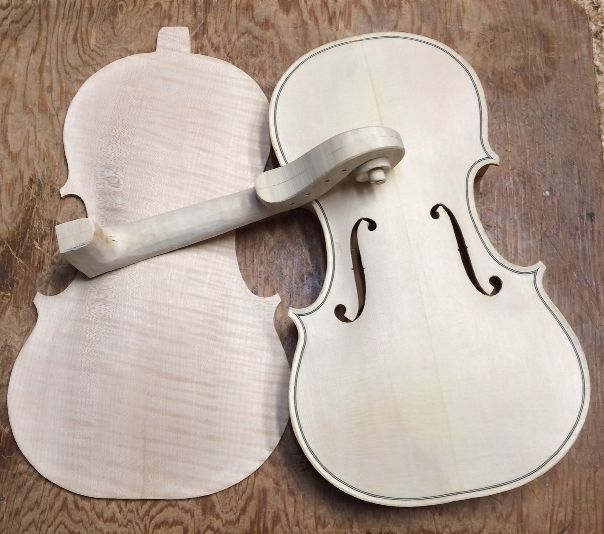
Then, once I had the linings in place, I trimmed the rib corners to their final shapes, and flattened the front face of garlands, after which I used the garlands themselves to trace out the shape of the top plates. Finally, I cut out the top plates and shaped them to the exact outlines I wanted, and I was ready to begin arching. I will do the same thing for the back plates later.

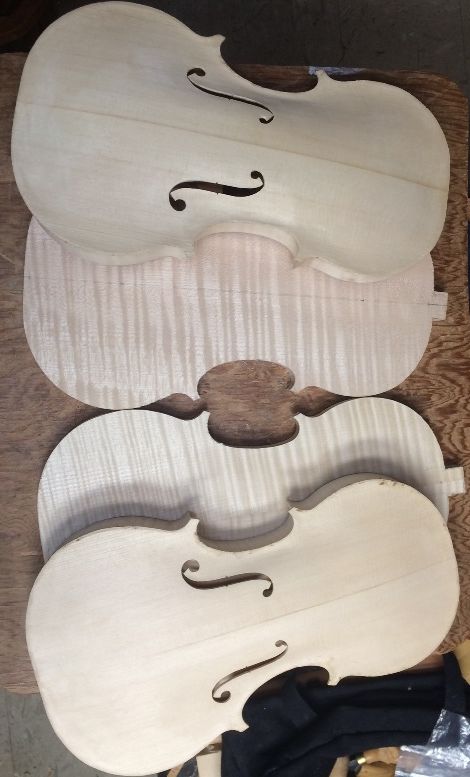
All four plates, both garlands, with neck blocks.
All four plates, both garlands, with neck blocks. Strad model on the right, Guarneri on the left.


Slow Start

I didn’t get much of anything else done, this week, as I was at work, mostly, annnd, Thursday, some fellow failed to yield on a roundabout, and totalled my wife’s car, as she was coming home from the grocery store. The roads were very wet, which may have contributed to why he was unable to stop, and why the impact spun her car around, 180 degrees, and hurled it off the road, into a field, next to the roundabout.

Ironically, she had also just gone to DMV, and had paid $193 to renew the DEQ testing, and registration, as well as filling her gas tank, to the tune of $40. So all that was wasted, too, but she is completely unhurt, for which we are deeply grateful. Guess it is time for her to get a newer car. 🙂 There was also a dented can of beans, and two squashed bananas…but I ate the bananas, and tonight we ate the beans. No loss there. 🙂

This evening, however, I got home fairly early, and I got most of the arching done on the Stradivari-model top plate, so at least that feels better, in terms of productivity. I will try to complete it tomorrow and repeat the effort on the Guarneri top plate.

I will post more pictures later.


Thanks for looking


If you found this post helpful, please share with your friends!

Bass Bar, Fingerboard and More

Please share with your friends!

Bass Bar, Fingerboard and More

Bass Bar Completion

When I last posted, I had installed the bass bar, and left it to dry overnight. (I did remove clamps too early one time…not good.) We needed to chauffeur a family member to the airport, in the morning, but before we left, I did get the clamps off and the bass bar completed. The rest of the day was occupied with other things.

Clamps removed: Bass bar still in raw condition.


Bass bar shape sketched
I sketched the general shape and size I wanted the bass bar to end up.


Bass bar profile planed.
Then I planed the profile shape, using an Ibex plane. Notice the Sitka  Spruce color is lightening up, as I plane away the older surface wood.


Bass bar complete, footprint view
Bass bar complete, footprint view; after planing and scraping.


Profile view of completed bass bar.


Front Plate Preparation and Installation

Once the bass bar was completed, I rounded the inner edge of the front plate, all the way around, to about a 2mm radius. I checked everything one last time, and then carefully fitted the completed front plate to the completed garland, exactly where it was supposed to line up. I held it in place with six spool clamps: one at each block. Double-checked everything, then began removing a single clamp, one at a time, and inserting hot hide glue not only at that block, but as far in each direction as the blade would fit between the plate and garland. Then I re-tightened that clamp and added more spool clamps, side by side, repeating the operation umtil the whole perimeter was fully glued and clamped, like this:

Garland and front plate assembled.
The completed assembly of front plate and garland. (Remember, the mold is still in there, too!)


After I took the clamps off (several hours later,) the whole assembly looked like this with the back and neck:

Back, neck, garland and front plate.


More Scroll Work

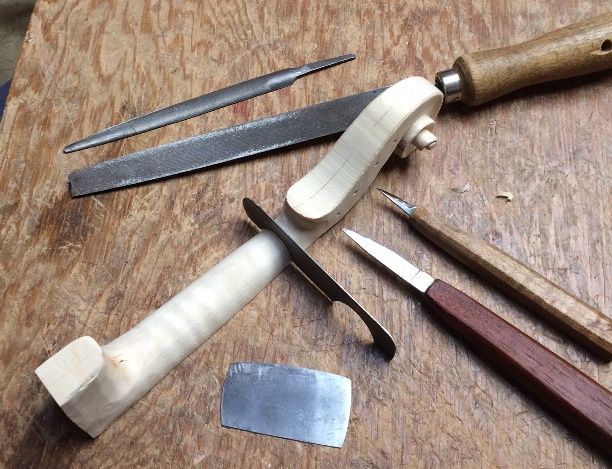
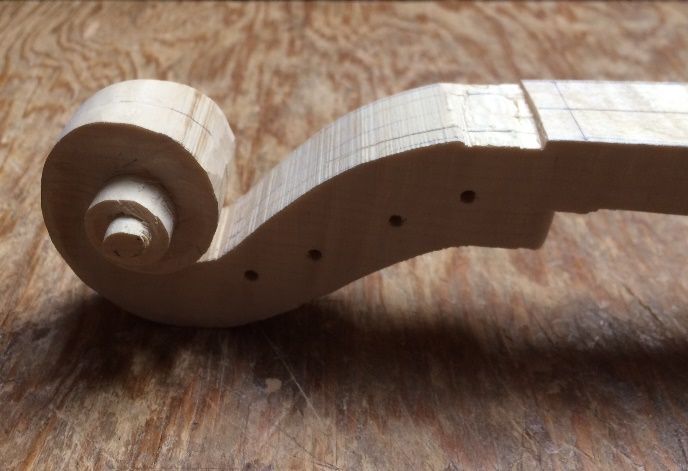
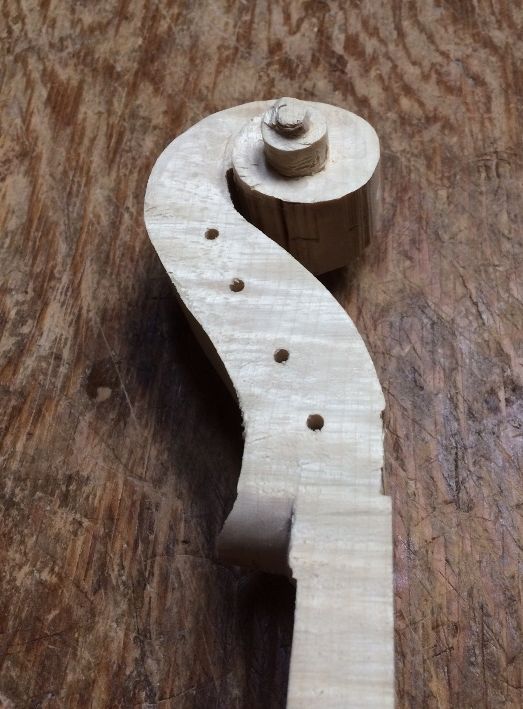
While the glue dried between the garland and front plate, I completed the neck carving. There are still things to do: I have not carved the volute, yet, nor even the pegbox (usually I complete it before adding the fingerboard), but I was anxious to get the fingerboard installed, so that I could set the neck sometime soon.

Completing the neck and scroll.
Completing the neck and scroll. That gauge, with the cutouts, sizes the neck, top and bottom.


Fingerboard Preparation and Installation:

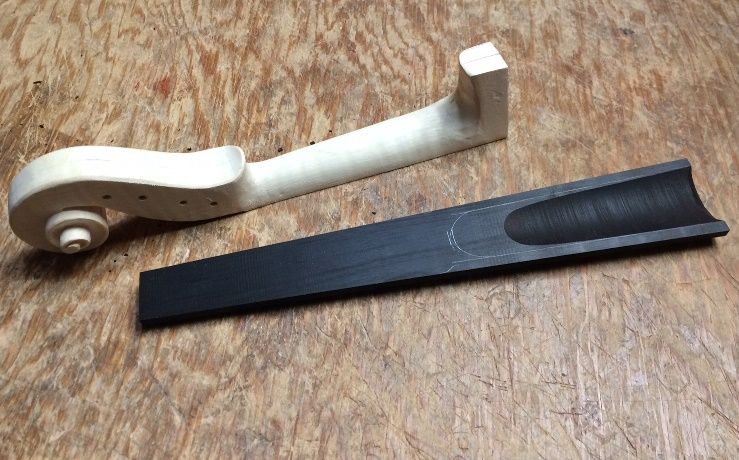
Once I was satisfied with the neck and scroll, I decided to begin the fingerboard. I first planed it until the edges were a consistent 5 mm thick. Then I  laid out the shape of the hollowed portion underneath the fingerboard, so that I could carve it out. I wanted the hollow to end just a few millimeters from the lower end of the neck, and be about 5mm thick all over.
 

Fingerboard prep
The hollow is laid out after the fingerboard has been planed to proper thickness.
 

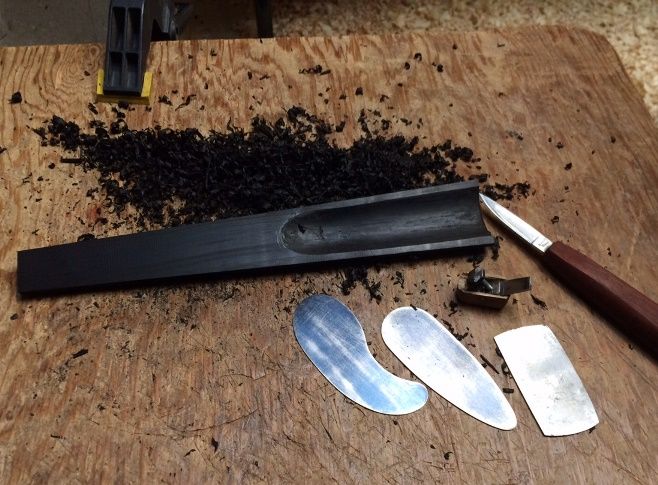
More fingerboard prep
I carved, planed and scraped away the ebony until the hollow was the size and shape I wanted it to be.
 

Fingerboard temporarily attached to the neck.
Fingerboard temporarily attached to the neck, with three dots of hot hide glue.


Temporarily attaching the fingerboard allows me to complete the shaping of the handle portion of the neck and the fingerboard together, as a unit. I will then set the neck with the fingerboard still in place, but pop the fingerboard back off while I varnish the violin.

So…that is as far as I got today, but I feel relatively satisfied with the progress.


Thanks for looking.


If you found this post helpful, please share with your friends!

More Progress: Plates and Scroll.

Please share with your friends!

More Progress: Plates and Scroll.

Completing the Back Plate

I continued planing away wood from the inside of the back plate until it was very nearly correct, then switched to scrapers, and completed the inside surface, so that it looks to be a smooth continuum of curves, transitioning without a ripple. The  plate will require no further attention until I am ready to install it. Unlike the front plate, I intend to install the purfling later, after I am completely sure how the garland will respond to having the mold removed (sometimes they can move, and change shape a little.)
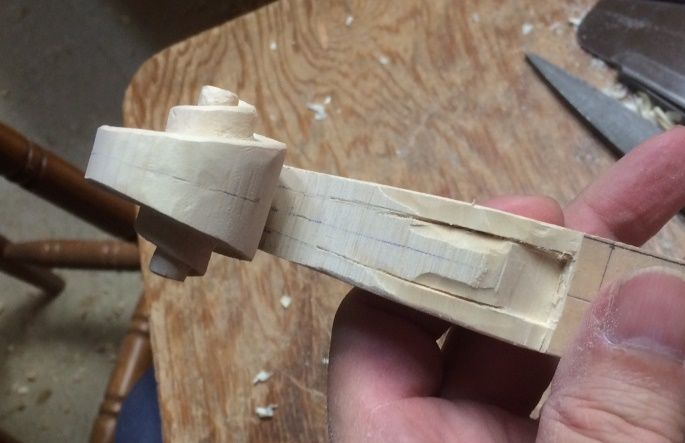
Back Plate Graduation complete.


Scroll Progress

I also continued working on the scroll. My hands were getting pretty tired, so I took a break from that. It is still quite rough, but, here’s how it looked at break time:
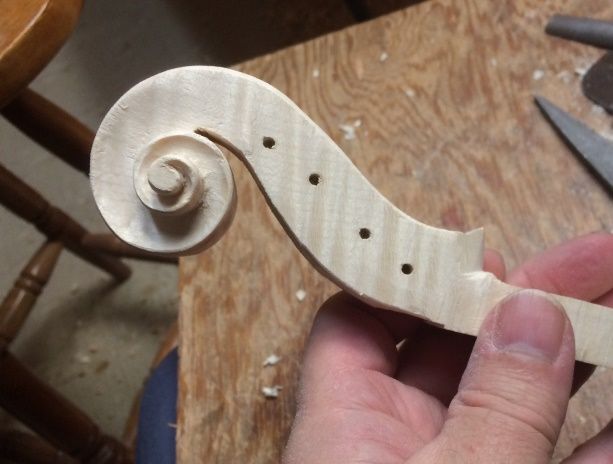
scroll beginning
Long way to go.


scroll progress
On the right path, but “miles to go before I sleep.”


Bass Bar Fitting

To fit a bass bar, I begin with a completed front plate, and lay out the position of the bass bar, so that the distance from the center to the bar, level with upper and lower bouts at maximum width, is 1/7th the full distance from centerline to the edge at those respective points. Usually, that means that the lower point will be about 15mm from the centerline and the upper one about 12mm (as it is in this case.) I lay out a line through those two points, and observe where it is, nearest to the bass-side f-hole. If it is too close, I “fudge” it away, a bit, trying not to change the angle. (The bass bar has to clear the f-hole.) Then I mark the two ends, 40mm away from the ends of the plate, and that is the place to fit the bass bar: the “footprint”, so to speak.

Bass bar position laid out.


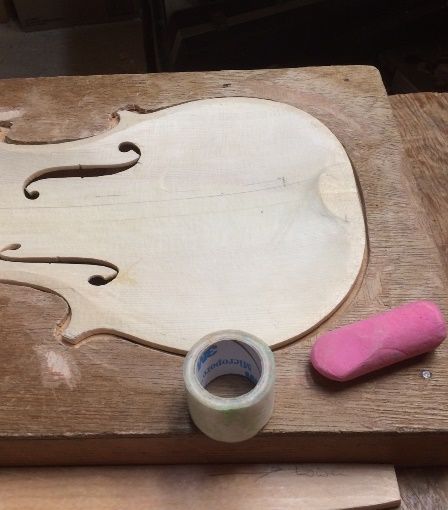
I use chalk to fit my bass-bars. I have never had a good enough eye, and a sure enough knife-hand to accurately fit a bass-bar without the use of chalk, though I have known master makers who regularly did so…perfectly. (Sorry… I’m not good enough for that.) On the other hand, I have had some nasty experiences with the residue of blue chalk mingling with the yellowish hide glue when installing a bass bar: it left a very ugly green stain…and it never completely came out. So…what to do? In the first place, I switched to pink chalk. If a little chalk is left, the glue will simply make it look a bit orange. (No problem.) But, I really don’t want chalk residue at all.

A friend showed me the paper “gauze” tape available in pharmacies. It is thin enough to completely conform to the surface of the plate, and  produce a good fit, and, it is slightly translucent, so I can see my layout lines through the tape, and keep the chalk on just the path of the bass bar. I first use a compass to mark the general shape of the bottom of the bass bar, and then trim it with a knife and a small plane. That gets me “in the ball-park,” so to speak. After that, it is chalk-fitting time.

The front plate is made of European spruce, but I chose Sitka spruce for the bass bar. There is quite a contrast in color between relatively fresh European spruce, and well-aged Sitka spruce. It actually made it a little difficult to see the pink chalk against the dark wood. But it worked.

Bass bar blank, knife-trimmed after tracing the shape with a compass.


paper gauze tape
This is the paper gauze tape I use for chalk-fitting.


Paper gauze tape and pink chalk
Paper gauze tape and pink chalk, ready to begin chalk-fitting.


Layout lines visible through the tape.


Layout lines traced over on the tape, to make them more visible.
Layout lines traced over on the tape, in pencil, to make them even more visible.


Chalk on tape.
Chalk on tape.


Chalk transferred to bass bar


The idea, in any chalk-fitting procedure, is to press the fitted part (being fitted) into the chalked surface to which it is being fit, then trim away only the portions where the chalk transferred. So, in the case of the bass bar, I need to press it into the chalked top plate, and then check the bottom of the bass bar blank, to see where to cut. I trim off the obvious spots, and try again. Ideally, every time I try, I will get a broader transfer of chalk. When the whole area gets a light dusting of chalk at one time, the fit is as close to perfect as I can get it. I remove the tape, wipe off any chalk residue, slather the hot hide glue onto the bottom of the bass bar, and clamp it home. On a good day, it takes me a half-hour. On a bad day? Don’t ask… 🙂  This time wasn’t bad, though.

Chalk-fitting complete; Dry-clamped to check fit.

Chalk-fitting complete; Dry-clamped to check the fit.


Tight fit
The fit is good!


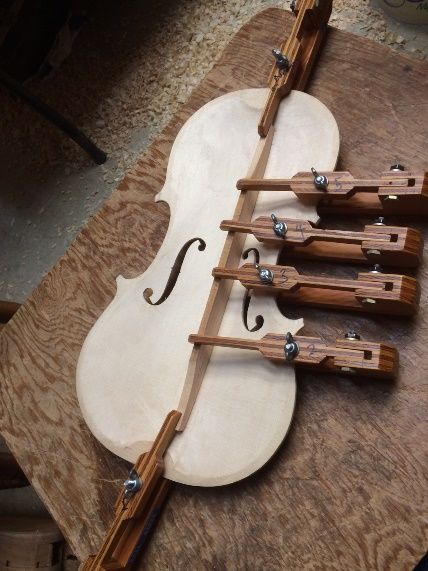
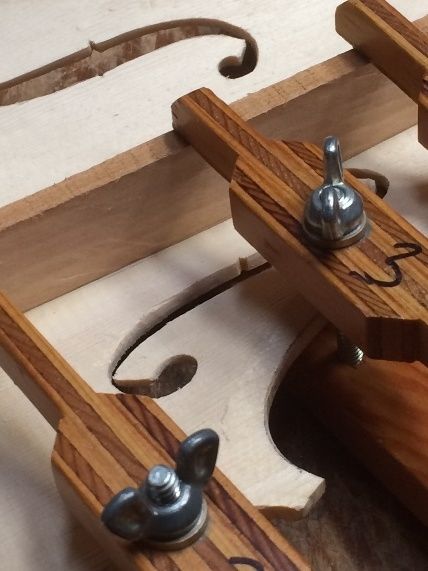
Glued and clamped

Glued and clamped. 

More Scroll Progress

While the glue was drying on the bass bar, I went back to work on the scroll. It was looking verrry rough when I had to take a break, so it is nice to see it progressing better, now. There is still a lot to do. I have to excavate the pegbox, and cut the fluting in the volute. But this is as far as I am going tonight. I am glad to call it a night, and let my hands rest.

More scroll progress
More scroll progress: there is still a long way to go, but it is looking better.


Scroll partly complete.
Final status for tonight. Looking a lot better, and more encouraging to see.


I have other things to do tomorrow, so I may or may not get to work on the violin. At the very least, I expect I will be able to trim the bass bar to the shape I want it, but beyond that, I don’t know.


Thanks for looking.

If you found this post helpful, please share with your friends!

The Plates

Please share with your friends!

The Plates

Shaping the linings

Last time, I had the Garland complete, except for trimming (shaping) the linings, and levelling the front of the garland so I could trace the shape of the plates from the completed garland. I shaped the linings, using a small sharp knife and a scraper:

Shaped linings
The linings are shaped using a small sharp knife to cut the taper, and then scraped smooth, using a scraper.


Leveling the Garland and Tracing the Plates

I leveled the garland by rubbing it on a sanding board (coarse abrasive cloth glued to a flat aluminum plate, in this case), and then used a washer to trace the shape onto the front plate. The washer adds 3 millimeters around the perimeter of the garland, to allow for the plate overhang on the finished instrument. I still have to shape the corners separately, as the washer simply makes them round:

Tracing the plate perimeter
Tracing the plate perimeter, using a washer and a ball-point pen.


The Front plate perimeter as initially traced: notice the round corners.
The front plate perimeter as it was initially traced: notice the round corners.


Corrected corner shapes.
Now the corners have been refined and corrected. I am deliberately leaving them on the long side; I will trim them later.


Cutting out the Plates

I used a bandsaw to cut out the plates, as close to the lines as I could, without touching them. Then I used a spindle sander to bring the perimeter exactly to the lines, and, finally, I used files to smooth out any ripples left by the sander. I am really not comfortable looking at these extra-long corners, but, once the garland is glued to the plate, it is very easy to trim them to the exact length I want; and much more difficult to put wood back, if I remove too much.

Front plate cut out.
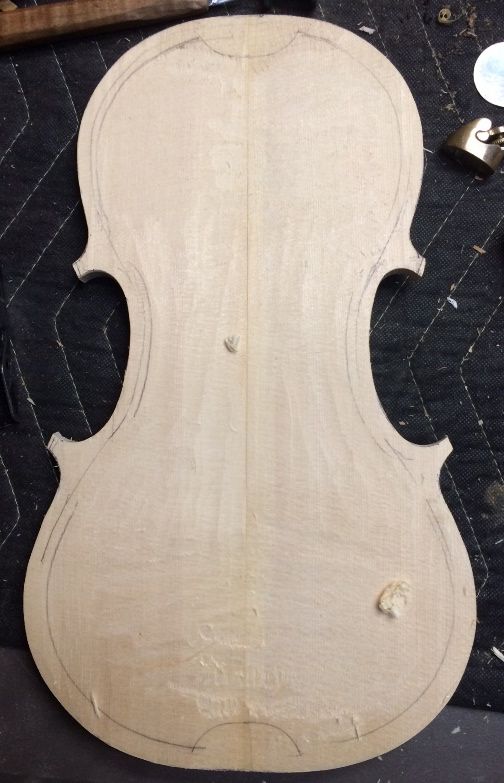
Front plate interior, cut, refined, and ready for carving. The lines show the margins, and the corner and end-blocks’ shapes.


I am deliberately leaving my corners abnormally long, as one of the problems noted by my teacher is that I have had a pattern of making rather short corners. (Ironically, I had only done so as an over-correction to an early tendency to make my corners too long. Sigh…)

I handled the back plate in similar fashion to the front, and completed it next. It was very important that I remember to trace the front plate off the front of the garland, and the back plate off the back. The two look very similar, and will match very well when complete, but they are not precisely symmetrical about the centerline, so; if I forget and trace them both from the same side, then one of them will definitely not fit. (Ask me how I know….)

Now I am ready to begin plate-carving. I will begin with the front plate, simply because it is easier on my hands. Furthermore, the pattern of building I follow requires that the front plate be completed first anyway. But, honestly, the older I get, the more it stresses my hands to carve the maple, so it is nice to have the front plate completely done, and to feel good about that while I begin to tackle the back plate.

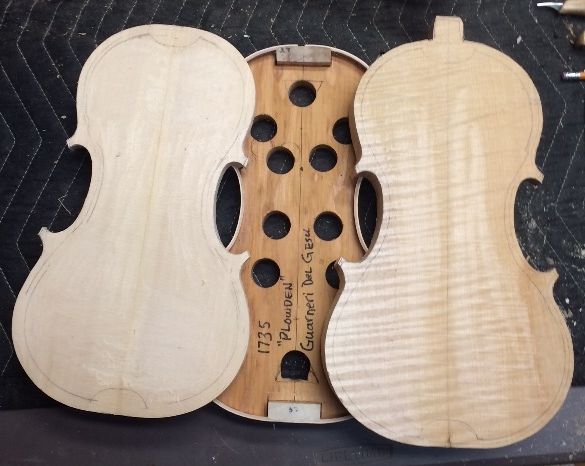
Both plates, along with the completed garland.
Both plates, along with the completed garland. Looking at the interior of each plate, and the front side of the garland.


To you sharp-eyed observers, the reason the slant of the “flame” on the back is going up from left to right, instead of down from left to right, is that you are looking at the inside of the plate. When I turn it over and carve the outside, you will see that it slopes the same way as the one in the poster.

Over the next few days, I will move toward completing the carving of the front plate. Then…well, you can follow along and see. 🙂

Thanks for looking!

If you found this post helpful, please share with your friends!

New Project!

Please share with your friends!

New Project!

“Pellegrina-esque?” Violoncello da spalla?

I had been pondering (glumly) what to build for the next show at Marylhurst University, and had nearly decided upon one of two “niche-market” items…either a very large “violoncello da spalla”, or an emulation of David Rivinus’s “Pellegrina.” I had spoken to Mr. Rivinus a couple of years ago, and he told me that, for years, he had encouraged other luthiers to use his design, as a partial solution for some of the “work-related injuries” associated with playing large violas…but no one took him up on it, so he just produced them himself for the rest of his lutherie career, ultimately making 100, or so, of the odd-looking instruments. They were all sold, ultimately, and he has stopped taking orders, so I considered “taking up the mantle”, so to speak, and producing instruments modelled after his work. But, as I said, that really is rather a “niche-market” viola.

The violoncello da spalla is possibly even more specialized, as, though it is strung very much like a regular violoncello (cello), it has a fifth string (E), above the standard C-G-D-A of the cello, is only 19-20″ long on the body, and is generally played off the right shoulder, so that the lower bass-side bout is under the chin, and the bowing arm comes up from underneath, so that the player is nearly as comfortable as when playing a small viola, but the sound is that of a cello or extremely large viola–take your pick. Very little classical music has been written for these instruments, so I doubt there would ever be a lot of market for them, though I would love to build them.

But! in the midst of these ponderings, I had sent one of my teachers a couple of sets of photos of two of my recent violins, and, while he was quite encouraging and positive, he took the time to give me a carefully-considered, and quite detailed critique (what a treasure!) of both instruments, telling me what changes he would want to see, when comparing my work to one of the Old Masters (Guarneri del Gesu, in particular.) So! I changed course, and figured that I have just enough time to attempt another copy of the 1735 “Plowden” Guarneri del Gesu violin, of which I already have the “The Strad” poster, with actual CT-scans of the original instrument, and exquisite photos of the outside, along with technical drawings and tables of measurements.  Game on! New Project!

Guarneri del Gesu

(Bartolomeo Giuseppe Guarneri 1698 – 1744) was a violin maker  living and working in Cremona, Italy. He was one of the sons of Giuseppe Giovanni, and, though he was not very successful in his lifetime as a luthier (having to supplement his income by other means) compared to the more famous Antonio Stradivari, some of his later instruments are highly prized today, and sell for more than perhaps the very best Stradivari violins. Currently the very highest price (undisclosed, but reportedly in excess of $15M) was paid for the 1741 “Vieuxtemps” Guarneri del Gesu, on lifetime loan to Anne Akiko Meyers. I have never attempted an instrument modelled after the “Vieuxtemps”, but I have made two or three modelled after the 1735 “Plowden.” So that is the chosen model, again.

Starting from Scratch, Again

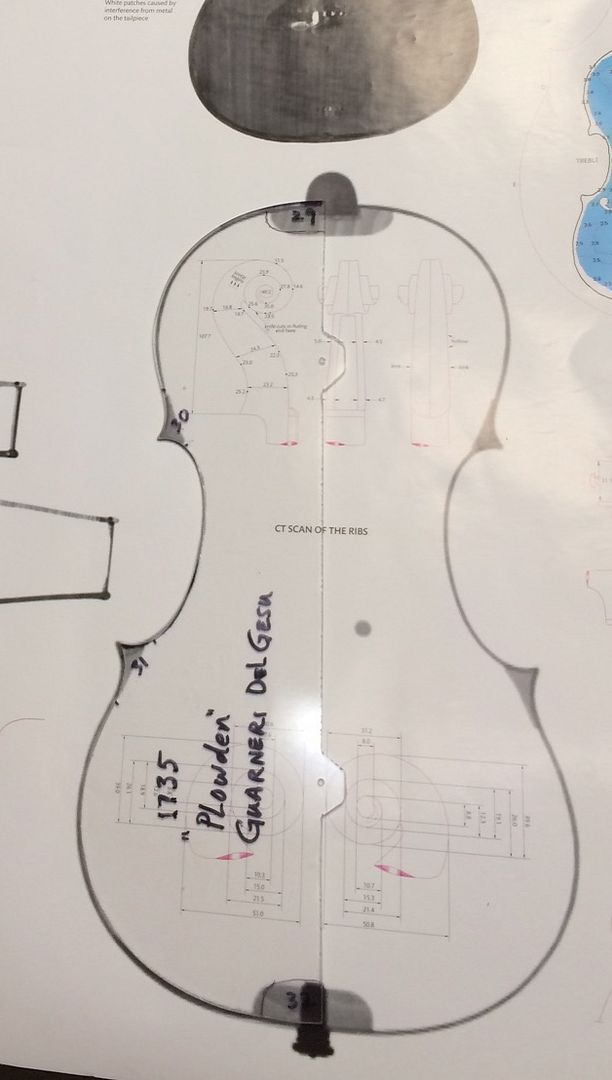
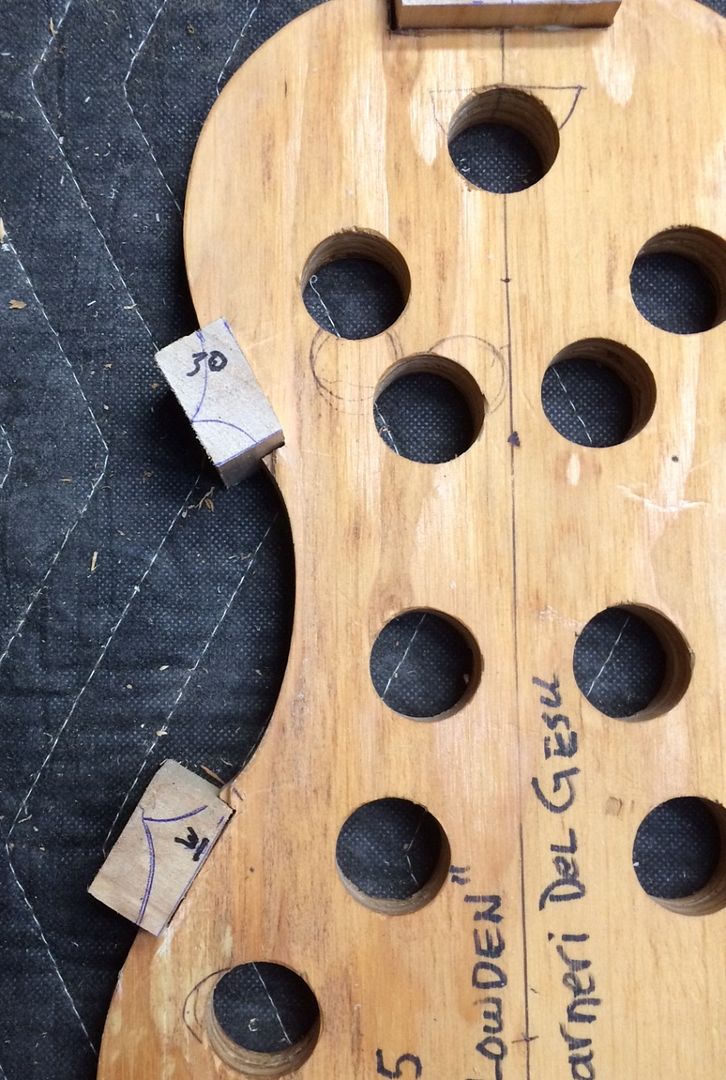
Checking the Mold Template against the Poster CT-Scan.
Checking the Mold Template against the Poster CT-Scan…I thought it had been exact, but there were some tiny discrepancies.


corrections
The black-marked edges are the places I corrected next. (Not much, really, but striving for perfection, here.)


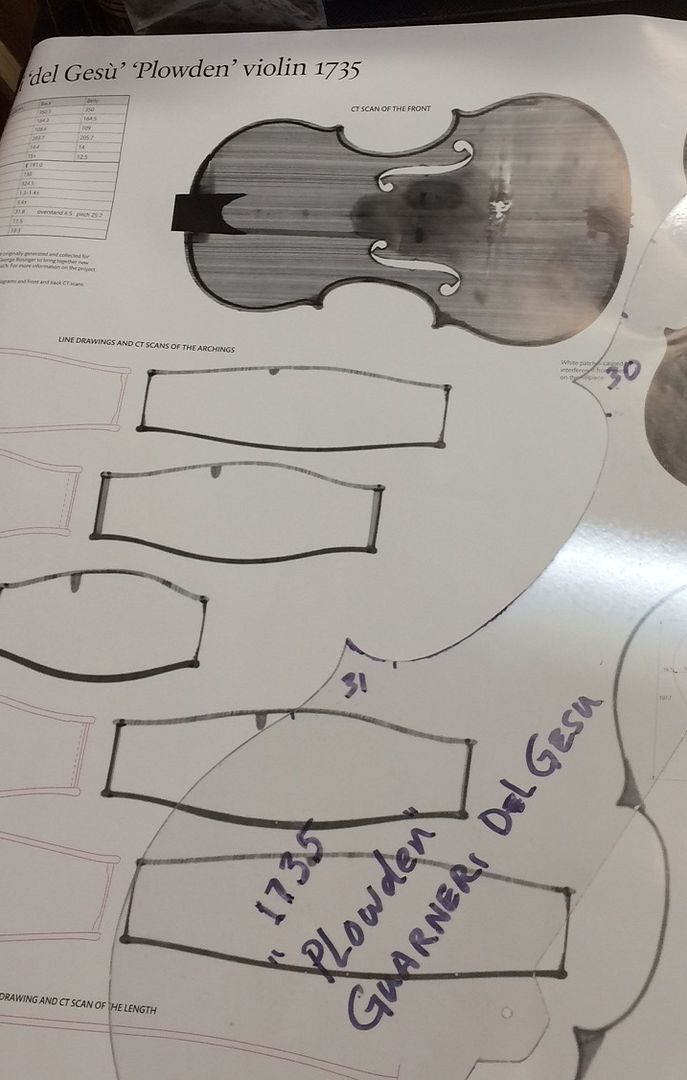
Strad Poster of the Plowden
These are the photos on the poster front. The poster does not want to lie flat– I store it in a mailing tube, to keep it undamaged.


Checking the mold.
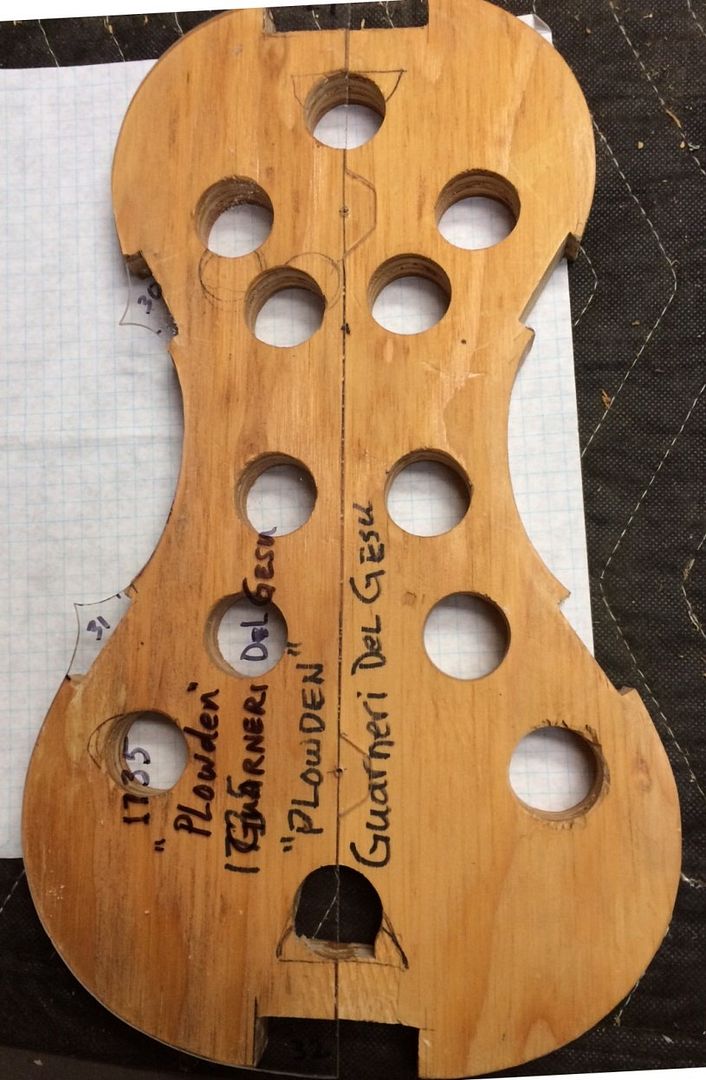
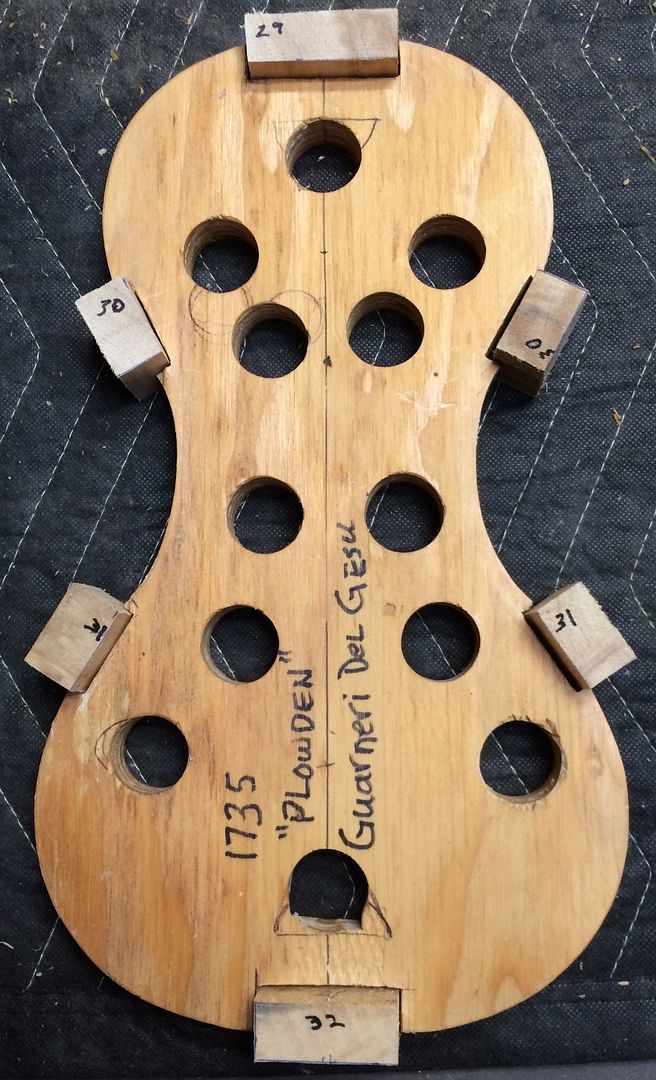
Checking the mold against the corrected mold-template: as it turns out, the corrections were all within the areas of the blocks– the mold is fine.


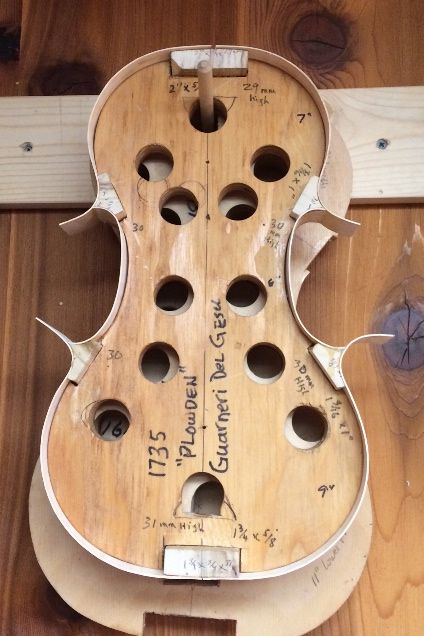
Blocks cut and fitted
Blocks cut and fitted…notice the differing heights, marked on the ends.


Blocks glued in place.
Blocks glued in place. I use Titebond for this task, but nearly nothing else.


Block shapes, as traced from the mold template.


The Wood for the New Violin

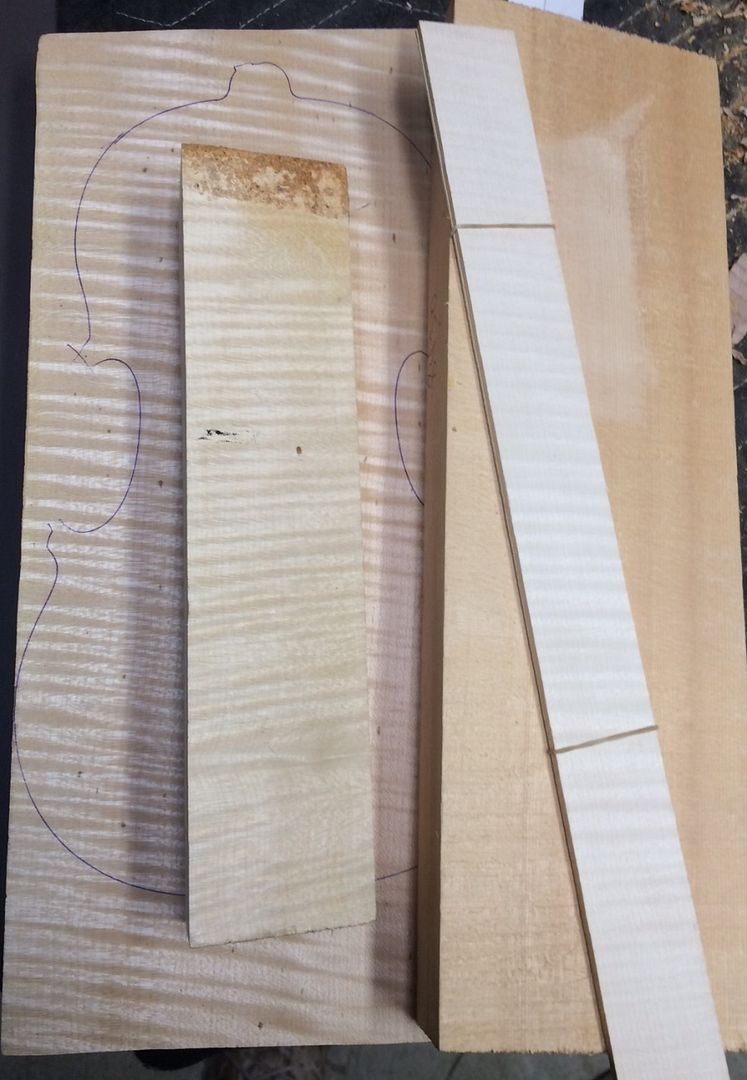
This will be a one-piece back of European Maple, neck and ribs matching the back, and a two-piece front plate of European Spruce. All were obtained from International Violin Co., of Baltimore, MD.

One-piece back, neck and ribs of European Maple, front of European Spruce.

That trace on the back plate was put there by the wood-source people…it does not reflect the shape of this violin at all.

So! That is the Beginning!

I will carve the inner curves of the center-bout blocks next, so that I can bend and fit the center ribs to match those curves. Afterward, I will carve the outer curves of those same blocks as well as the tail and neck blocks, before bending and fitting the upper and lower ribs.

As a precaution against accidentally gluing the ribs to the mold, I already rubbed a paraffin candle all over the edges of the mold, where the ribs will touch, so that if an accidental drop of hide-glue ends up there, it will not stick. (Been there…broke the rib, before I figured out what was amiss.)

This is as far as I am going today…I am still recovering from hernia surgery last week, and I find I still tire easily. But I’m on my way, and will try to keep you posted, with progress reports, here

Thanks for looking.

Chet Bishop


If you found this post helpful, please share with your friends!

Fractional Violin Progress

Please share with your friends!

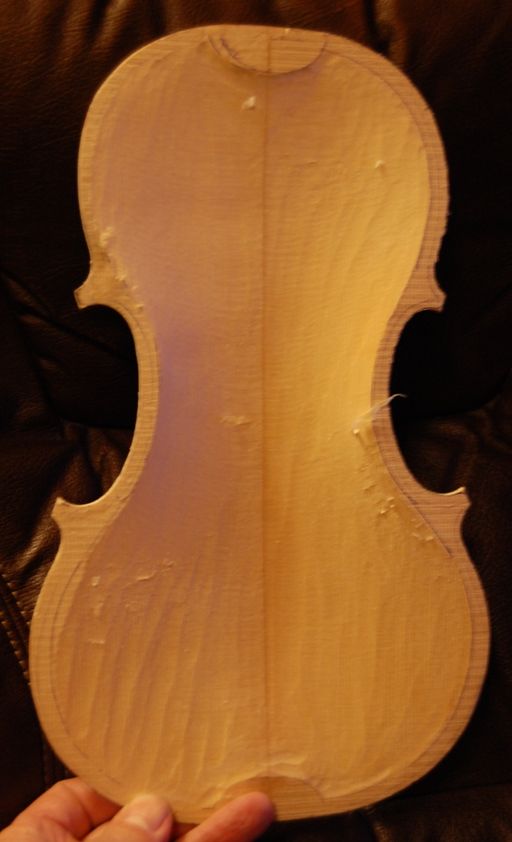
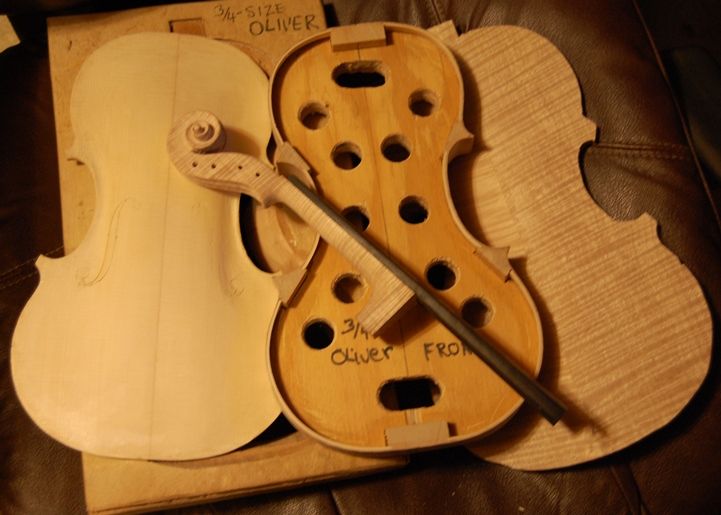
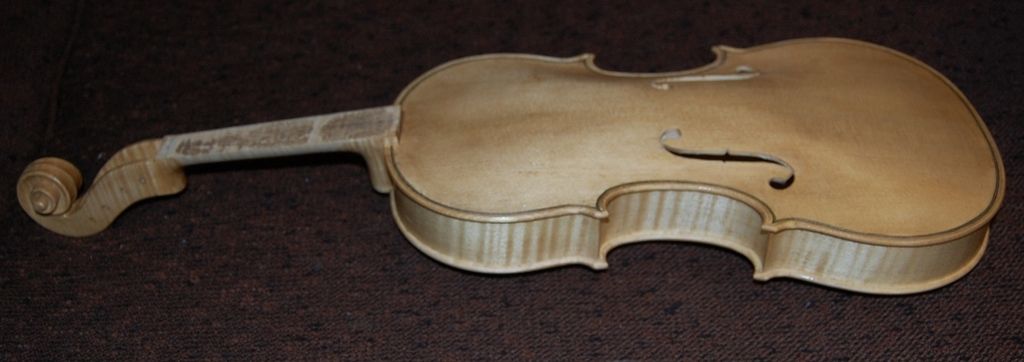
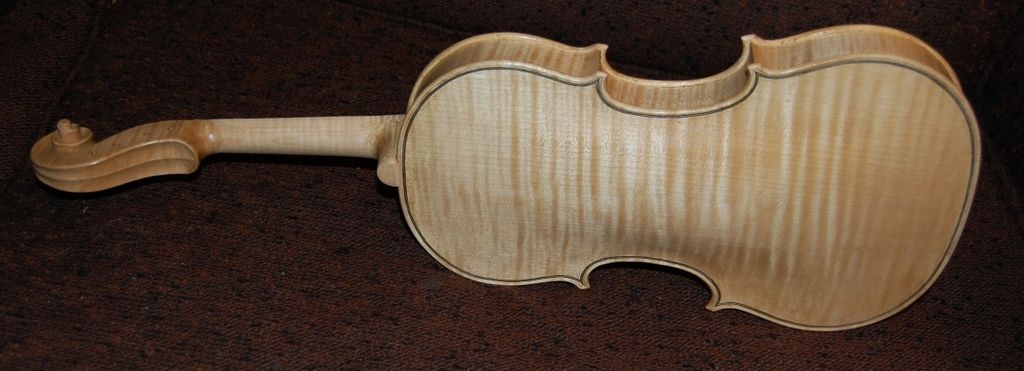
3/4-size Violin

3/4-size Violin Coming Along Slowly

Holidays are a hard time to be Productive. (No excuse; just a fact.)

I took off from work from the 21st of December through the 8th of January, partly because my daughter was going to be in town for that period of time, and partly because I hoped to get some work done at home. However, a couple of days ago  (12/29 and 30, 2016) were the first days I had occasion to work (almost) uninterrupted. It was quite a luxury. I had one more such day today (1/2/17), but I have not seemed to have much of my former stamina lately, so I did not accomplish as much as I had hoped. However, I did manage to:

  • Complete the Red Maple scroll,
  • Complete (and temporarily install) the Ebony fingerboard,
  • Complete the neck/fingerboard combination,
  • Dress the fingerboard (still a little more to do),
  • Complete the preliminary arching of the European Spruce front plate (still a little more to do, after purfling),
  • Trim the front linings and shape them, using a knife and scraper,
  • Layout and incise the f-holes (which facilitated the final correction of the arching), and
  • Begin the graduation of the front plate (inner arching).

Wood Choices

The back, neck, scroll and ribs are Michigan Red Maple, which I bought from Elon Howe, years ago: really nice stuff. The belly is European spruce, and feels quite crisp under the blade, as well as possessing a very clear bell-like ring, when tapped. It is certainly interesting to observe the differences in how one type of maple or spruce behaves as compared to another.

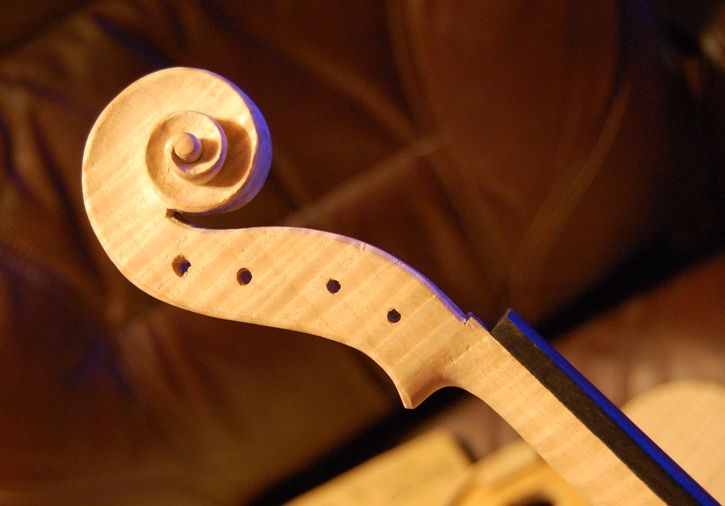
3/4-size scroll
The 3/4-size scroll as of January 2nd.


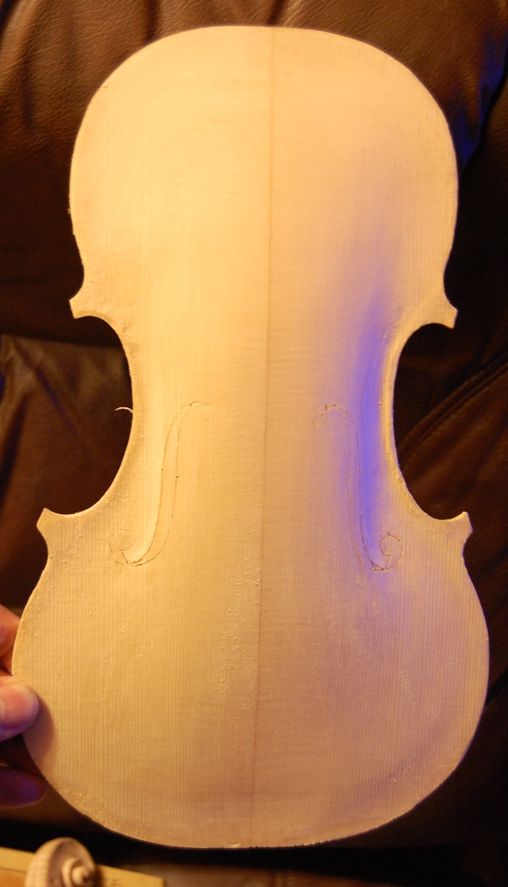
Arching and f-hole layout
Arching and f-hole layout.


Beginnings of Graduations


Overall Project Progress as of January 2nd.


Remaining Operations

Next, I hope to complete the graduations, cut out the f-holes, and install the bassbar. Then I will really be “on the home stretch”…or I will feel that way at least. I can install the front plate either before or after purfling it, then set the neck and remove the mold.

After that, I will install the back linings, shape them and the blocks, and complete the back plate.

Potential for Trouble

I accidentally left my gluepot turned on a couple of nights ago. Fortunately, all I lost was the glue. No damage to the pot or the glue jar, and no collateral damage. I’m still sort of kicking myself, though…it is a potentially dangerous mistake. My glue warmer only gets to about 145 or 150 degrees Fahrenheit, so there isn’t musch danger of a fire, but still….

I guess if that is my worst mishap for this violin, I will be doing well. No major setbacks, and no injuries, so far. (It doesn’t happen often, but when one works with razor-sharp hand-tools often enough, it is easy to have a “senior moment”, and nick oneself. Gotta be careful.) I have heard horror stories of serious injuries from other luthiers. So far, I have only needed stitches once, from a “slip” when carving the scroll to my #20 instrument, if I remember correctly. 🙂

Other Projects

During one of the several “hiatus occasions”, during the last two weeks, my wife and I built and installed a storm window in the utility room (we are expecting very cold weather, soon), and we hung curtains, too, among other things. Lots of visiting with family members and friends, of course. I did make a bentwood box for my daughter, too, but I already told about that project, of course. 🙂

As I said, holidays are not an easy time to get a lot of work done. But we keep trying. 🙂

Thanks for looking.

If you found this post helpful, please share with your friends!

Varnishing Sequence: Part One

Please share with your friends!

Varnishing a New Violin

Finishing Sequence: Sealer coat first

In the last post, I showed the photo of the violin with just the turpentine/pitch sealer coat in place, and not totally dry. Remember that this was applied over a coffee stain, and a mineral ground that I had rubbed into the wood.

Sealer coat.
Sealer coat.

When that coat was finally dry, I checked for any distortions (from the coffee stain, I guess) and corrected them with plain water, just moistening any low areas with a damp rag, and watching them come back to normal. Since I just barely moistened those areas, they stayed in the correct position after drying the second time. This has been a rare occurrence in my experience, but I was grateful that it turned out to be a relatively easy fix.

Then I sanded lightly with worn 400-grit, to remove any bits of loose debris and/or any little fibers of wood that had lifted above the smooth surface. I had already done this after staining (both times), but it always pays to go over things again.

First Coat of Varnish

The first coat on this instrument was a very blond spirit varnish; not my usual. I am not entirely pleased with the result, but it is acceptable.

first varnish coat
First varnish coat, side view.


First coat of varnish, back view.

Scond Coat: Darker Yellow

I sanded it lightly, again, and then applied a darker yellow varnish. Fortunately, spirit varnish dries very rapidly, so I can sometimes get two or three coats in one day, early in the sequence. As the varnish gets thicker, it dries more slowly. I assume that this is because it can no longer soak into the wood at all, so every bit of the drying has to happen from one side of the varnish film; but perhaps there is more to it than that. At any rate, as the instrument nears completion, I have to allow longer time for drying. The other side of the “fast-drying” coin (or two-edged sword) is that it is extremely sensitive to the next coat of varnish, as the solvent in the new coat can easily lift the previous coats, forcing me to completely start over, in some cases. I really need to be patient, and work carefully, applying many thinner coats, rather than fewer thick coats.

Second coat of varnish-- darker yellow-- side view.
Second coat of varnish– darker yellow– side view.


Yellow varnish second coat.
Lots of room for improvement, here– and that is how spirit varnish works. I keep adding color, and “evening things out” until it looks right.


Yellow varnish back second coat.
Yellow varnish back– still pretty pale-looking, after that second coat.

Third Coat: Red-Brown varnish

After the yellow varnish dried I began adding (several coats of) a darker red-brown varnish, allowing each coat to dry, and sanding lightly between coats, to make sure the finished result is good. This is the first coat of the red-brown varnish, so, actually the third coat, overall. It will get at least five or six more coats of varnish before it is done, but the differences become less and less obvious, as the varnishing nears completion. I am enjoying looking at the beautiful European maple and spruce. I ordered this wood from International Violin Company, in Baltimore.

third coat of varnish
Third coat, using red-brown varnish.


third coat of varnish on back
Back, with the third coat of varnish. (Quite an improvement isn’t it?) You can see the brush-marks in the varnish, but they will be sanded smooth before I apply the next coat.


The Plan:

As I continue to add coats of varnish, I am keeping an eye on the general “flavor” of the instrument. I may skip certain areas for several coats, to leave the varnish thin in those areas. I deliberately  try to emulate the look of some of the more gently-used “Old Master” instruments. I am not attempting to “fake age”, so much as attempting to capture some of the charm and appeal of those intruments. If anyone has a question about my motives, all one has to do is check the label: every instrument is signed, numbered, and dated. The date on the label is the day I actually closed the corpus, so, perhaps a few weeks prior to final completion, but no more than that.

I also may switch back to a yellow varnish at some point, to shift the color back toward gold, rather than just a red-brown. And, occasionally, I have stripped everything back off and started over. As the original maker, I have that option. and, invariably, the result the second time was far better.

I will post more varnish photos as the violin nears completion.

Set-up:

Once the varnishing is complete, I will replace the Fingerboard and begin the final fittings and set-up of the violin.

  • Fingerboard
  • Saddle
  • Tuning pegs
  • Nut
  • End Pin
  • Soundpost
  • Bridge
  • Tailpiece
  • Strings
  • Chinrest

Hopefully, all of that will be covered in the next post.

Thanks for looking.

If you found this post helpful, please share with your friends!