
 Follow

F-holes and Purfling
F-hole Layout
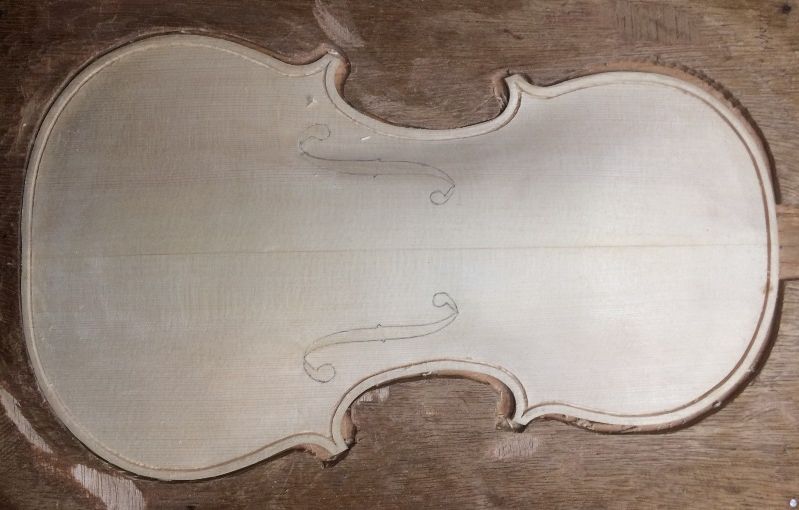
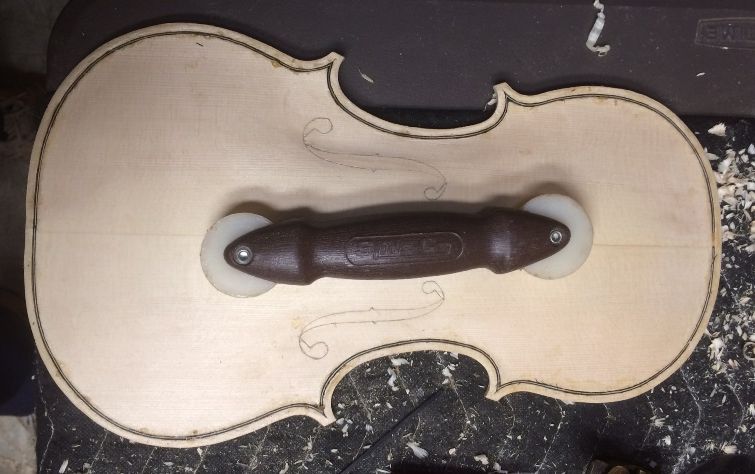
I had to make a new template for the f-holes of the Guarneri model. I thought that I had made one some time ago, but if I did, I guess I must have misplaced it. I measured the image on the poster, to make certain that it matched the dimensions of the technical data on the back, and it turned out to be quite accurate, so I procured a piece of thin, fairly stiff, clear plastic (also called “re-cycled blister pack” from some sort of hardware I had bought), and laid it flat on the poster, and traced the outline of the hole with a ball-point pen. Then I traced the lines with a small sharp knife, until I was able to pop the waste plastic out, leaving a very nice template.
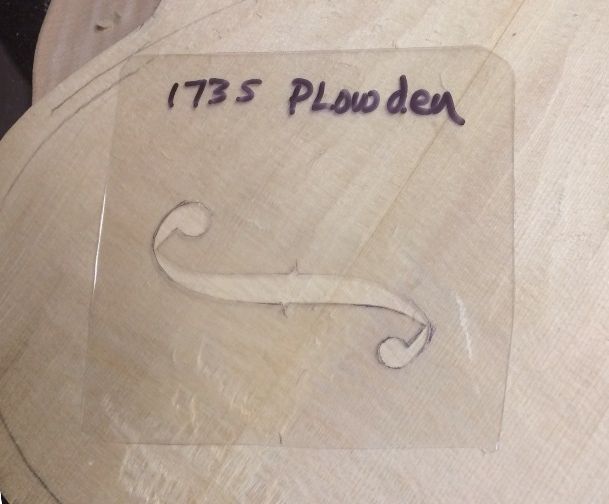
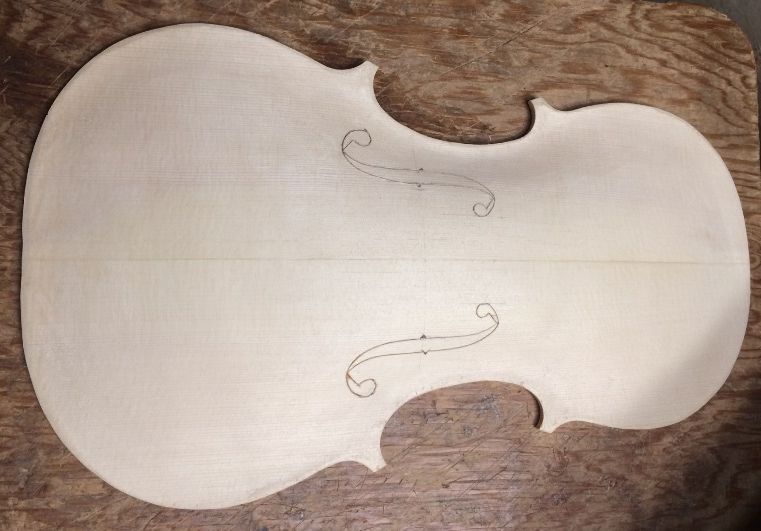
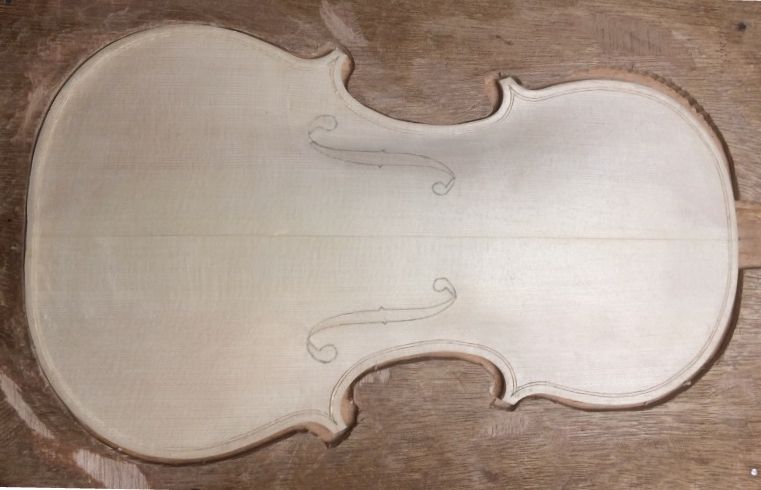
I laid out the “mensur” (sometimes called “stop-length”) on the front plate, for the bridge location, then began to lay out the relative positions of the upper and lower eyes. I had the data sheet to tell me how far apart they were to be, how far off center, and how far from the outer edges of the plate. I simply pushed it this way and that, until everything was according to the data sheet, and then traced the f-hole onto the plate, using a very sharp pencil. Then I flipped the template over and repeated the process on the other side. I double-checked everything, to make sure the layout was correct, cleaned up a few details, and was ready to incise the outlines of the f-holes.
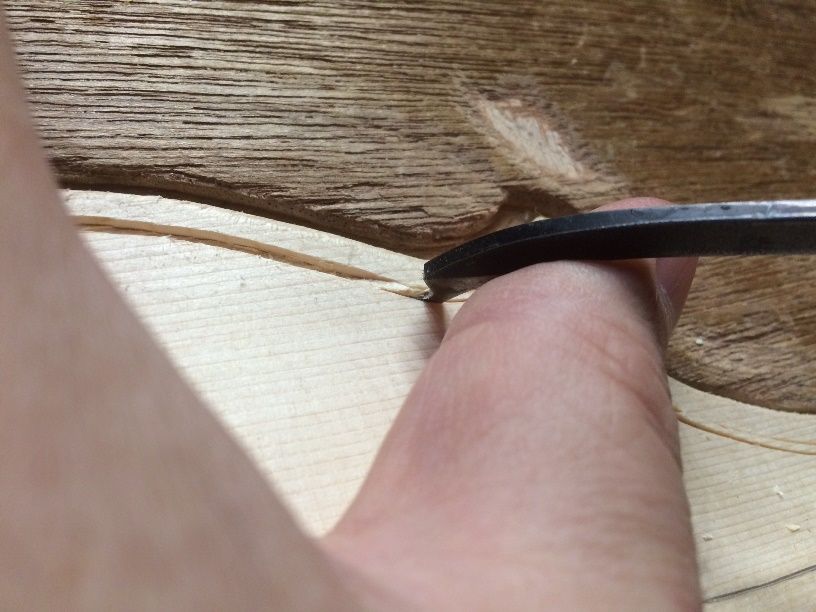
Incising the F-hole Outlines
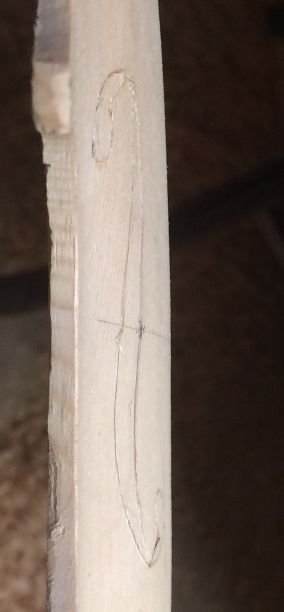
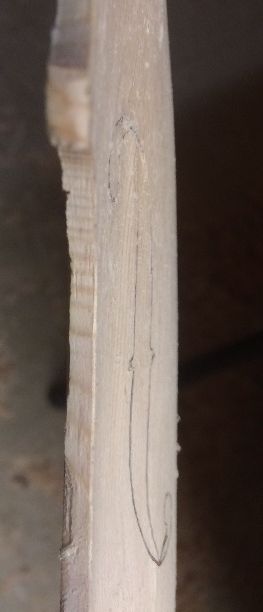
I am only incising the hole outlines at this point, not making any attempt to cut them out: I have found that there is always a small flaw in my archings, in that they are always a little too high at the lower end of the f-holes. The result is that, if I look at them from the edge of the plate, my f-hole outlines look like a letter “S”, laid on its side, whereas when I look at the side view of any of Stradivari’s or Guarneri’s instruments, the stem of the f-holes seem to be nearly parallel to the plane of the ribs. So, to correct this anomaly, I lay the holes out so that they are correct, looking from the front; then I incise my outlines deeply, and finally plane and scrape the “south” end of the holes until the stems look correct from the side. The front view remains unchanged, and now it looks good from the side as well. Here is a “before and after” comparison:
Beginning the Purfling Slot
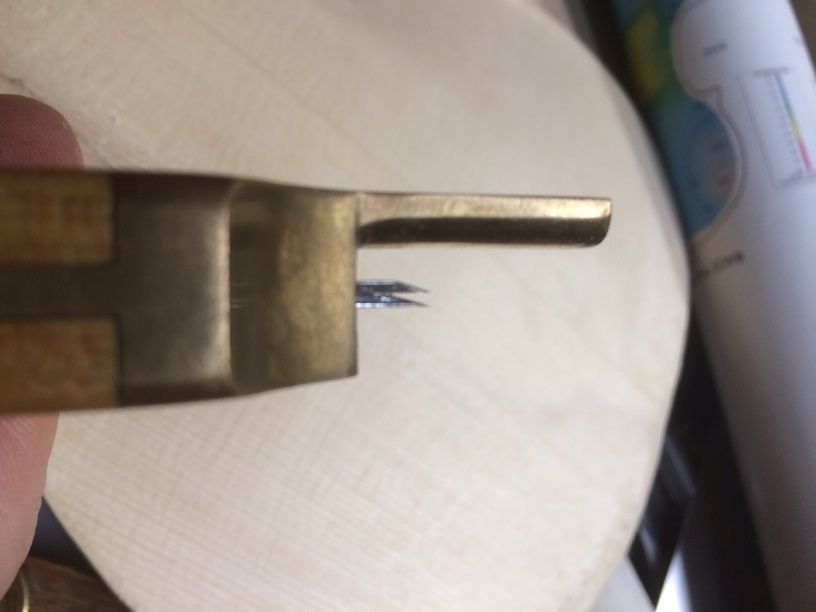
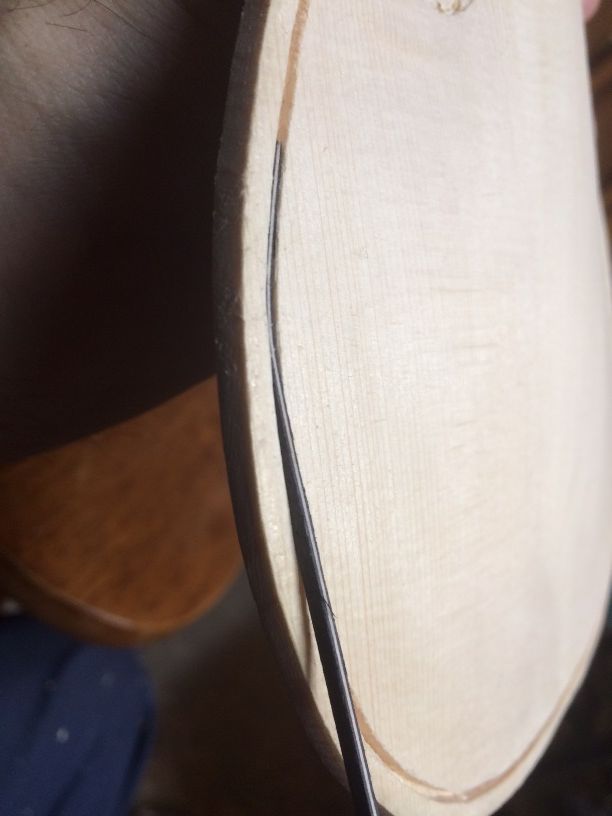
The tool used to mark the location and dimensions of the purfling slot is called a “purfling marker,” or, fairly commonly, a “purfling cutter.” I suppose that, because there are two sharp blades on the tool, which are carefully set to the correct distance apart for the width of the purfling slot, and the correct distance in from the edge of the plate, it probably seems logical to call it a “cutter.” But the fact is, the tool does not work well for that purpose, and it works very well for just creasing the surface of the plate, thus scribing a double line virtually all the way around the plate. Usually the corners themselves must be laid out separately, either by hand and eye, or, by using a special template. (I have done both.)
Here is the tool, viewed from the edge, so you can see the two blades. There is a pair of small set-screws that hold the position of the twin blades.
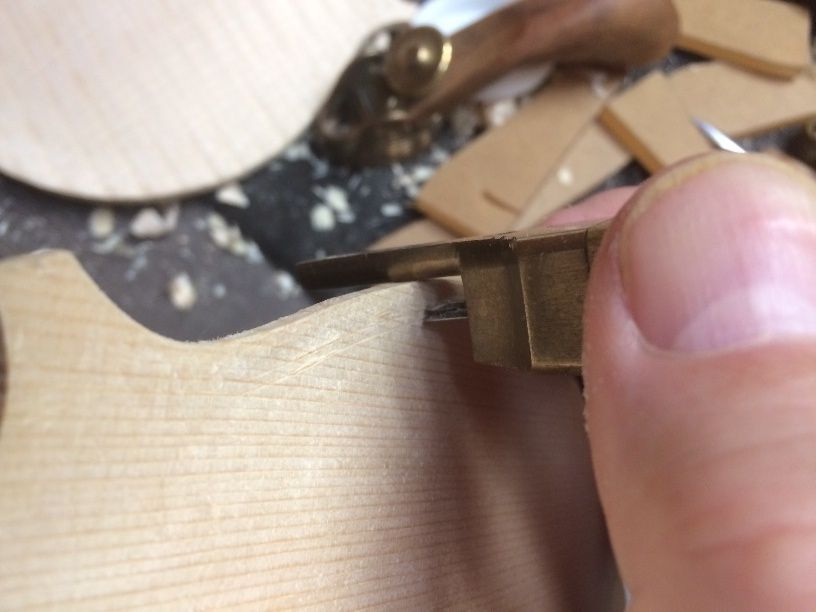
Once the slot is marked all the way around, and I am satisfied with the look of the corners, I begin incising the purfling slot. The first time around, I am barely deepening the lines left by the marker; essentially just “darkening” those lines. The second time around, I press a little harder, cutting a deeper path through the wood. After that, I can cut as aggressively as I need to, and not have to worry about the blade being “turned” by a hard winter-reed, and marring the plate. This practice is especially important on the front plate, which invariably of spruce: The summer grains in spruce are very soft and easy to slice. But the winter grains (or “reeds”, as they are called) are much harder, and it is very easy for a harder, winter reed to turn a blade that is trying to cut too deeply from the start. (Hard experience speaking, here.)

Picking out Waste Wood from the Purfling Slot
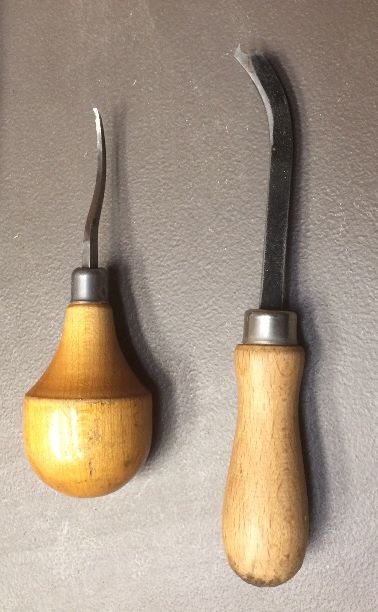
After cutting to the approximate depth I want the purfling slot, I use one of several tools to pick the waste wood out of the slot between the incisions: any of them could be called a purfling pick. One of them is actually a 1/16″ gouge, made by the now-defunct Millers Falls tool people (at least, if they are still in business, I have lost track of them.) One is a tool I made for myself, attempting to achieve an easier, higher-quality cut. (It’s not that great, but it works…I can’t find it, now anyway….) The third is an actual “purfling pick” made by a commercial tool-maker. (I have had other such tools, which were functional to varying degrees. Some I eventually set aside because of poor-quality steel. They wouldn’t hold an edge.) So here are photos of the two I regularly use:
The idea, ultimately, is to end up with a slot into which my purfling will easily fit, but with very little extra room. I want the glue to swell the wood a tiny bit, and make it fit tightly, when I glue it in place. I also want my corners to look good. There is a reason they are frequently called “bee-stings.” I want them to be sharp and clear, and pointed in the right direction.
Installing Purfling
I make certain the slot is the right width and depth, checking it with a piece of scrap purfling, then I cut and bend the purfling to fit, giving special attention to the mitered corners. Finally, I remove one section at a time, slip hot hide-glue into the slot, using a thin palette-knife, and quickly re-insert the section of purfling, using a special roller to press it to the bottom of the slot. Once I have all six (four on the back plate) sections installed, I clean up any excess glue, and set the plate aside to dry.
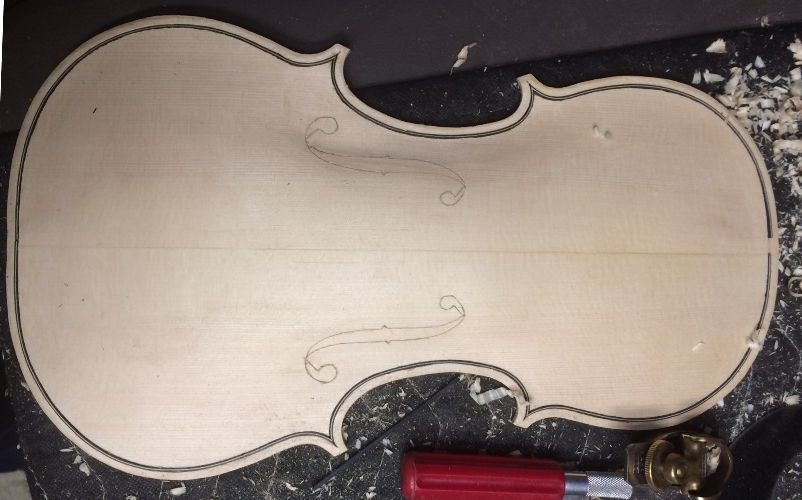
The back plate is prepared in exactly the same way, except that I like to make the upper and lower purfling sections in one piece on the back. On the front, the top and bottom will eventually be removed when I cut the neck and saddle mortices, so I stop the purfling near the center at the top and bottom of the front plate. In some ways, the back is easier, in that the blade does not tend to wander as easily; but the maple is just a great deal tougher, too, so it is more physically demanding.
Next time, we will (maybe) talk about the final edgework, marking the crest of the edges, and fairing the curve from the bottom of the purfling channel up onto the curvature of the arching. But perhaps carving out the interior would be more appropriate. 🙂
Thanks for looking.
Great lesson to teach new terms and methods.
Thanks, Ron!
This is such exacting work, Chet, and you really are so precise with it! I can’t imagine how stressful it must be to put that first knife mark in!! I love seeing those tools and thinking that they were last used on my dad’s beautiful cello! You certainly know your art and craft.
Thanks, Miss Maryanne!
One step at a time… 🙂