Five-String Futures!

Please share with your friends!

Two New Five-string Fiddles in the Works

Spousal Encouragement

My wife has been after me for some time to increase my output of 5 string bluegrass fiddles. (She’s probably right, but there are so many other things to do!) So…what to do? I made two new molds, a little broader in the middle bouts, which may improve the sound even more. I installed blocks in both molds and hope to build one five string fiddle of Oregon Myrtle-wood with a Port-Orford Cedar top, and another five-string fiddle of figured maple with a spruce top.

Improved Perspective

I had belly surgery last month (gall-bladder removal) and I am feeling much better. It makes me wonder whether that has been the main source of much of my “don’t feel good” problems for years. I feel so much more positive about work, lutherie and life in general, it is pretty amazing. (And, no, I am not on any “feel-good” meds, in case you are wondering… although, I’ve got to say, after the few days of Oxy-Codone, I can see why people get addicted to the stuff. But I got off it just a few days after the surgery, with just a few times going back for a day or two, to get over a hump, so to speak, when pain became a problem again.)

Progress Thus Far:

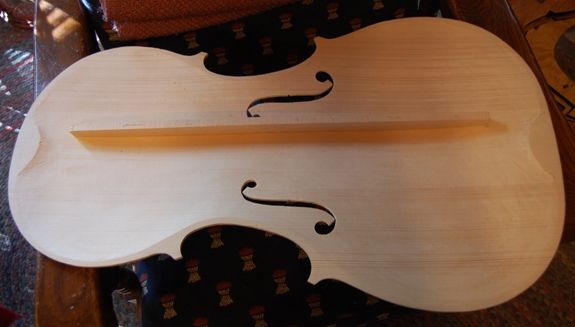
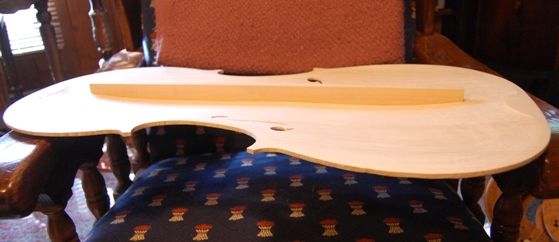
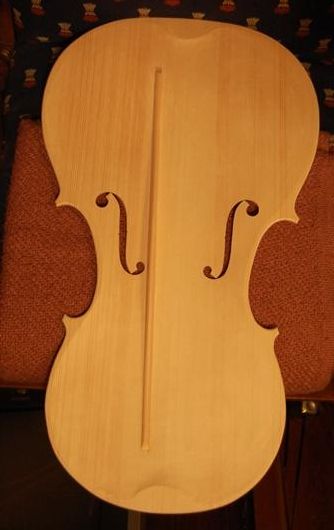
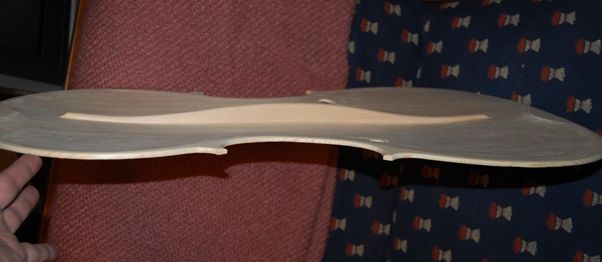
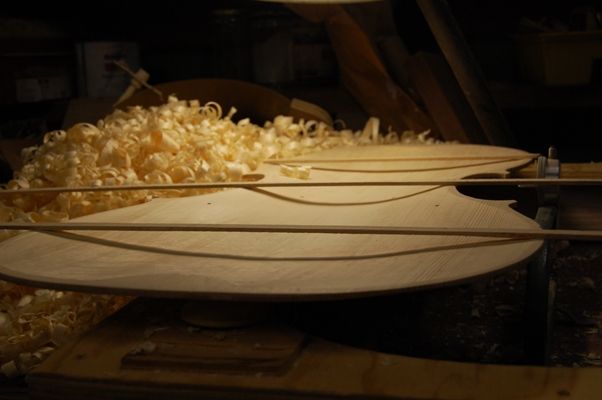
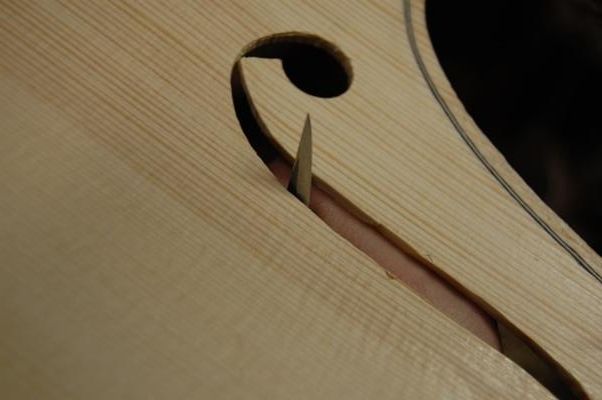
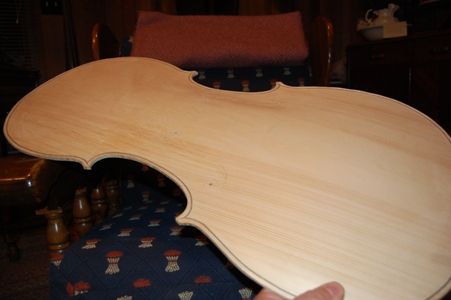
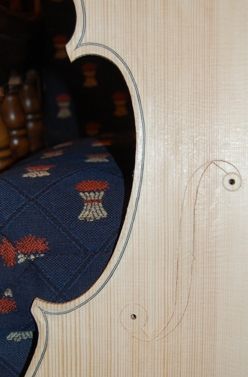
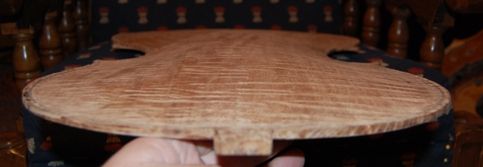
So: I have bent the ribs for the figured Oregon Mytrle-wood/Port Orford Cedar fiddle, but still have to join the plates both front and back. I installed the center bout ribs last night, and hope to get the upper and lower bout ribs installed today.

Wood for Myrtle-Port Orford Fiddle
Wood for Myrtle/Port Orford Fiddle with Douglas Fir Tree. There was a hard East wind blowing, and the ribs kept blowing away.
Close-up of wood for Myrtle/Port Orford Fiddle

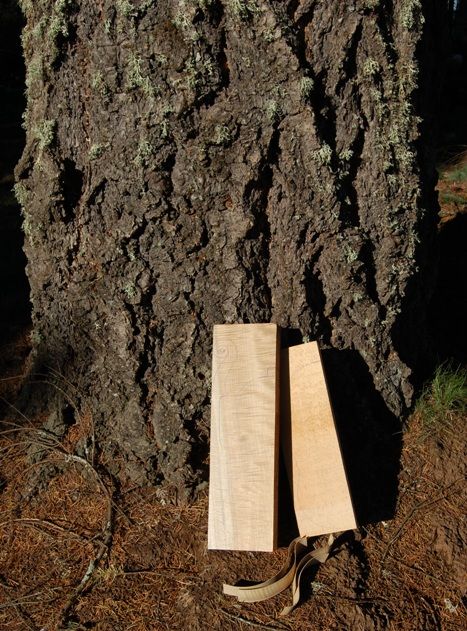
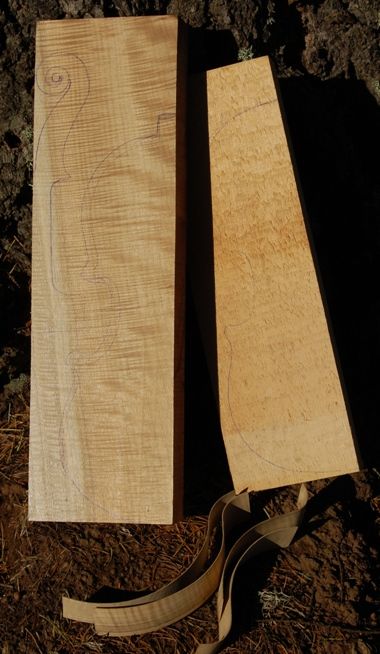
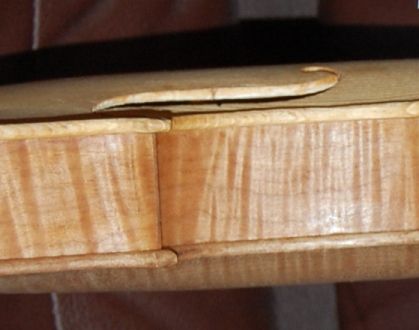
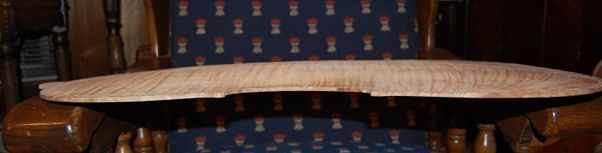
The plates for the Maple/Spruce fiddle are already joined, but the ribs are only cut– they still need to be thinned down to 1mm and cut to 35mm width. If I can get that done today, I will heat up the bending iron and try to get the ribs bent, and the c-bout ribs installed. After that I can work on getting the willow linings cut, bent and installed.

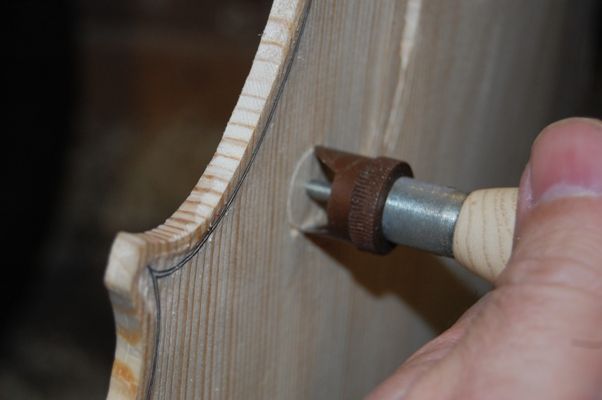
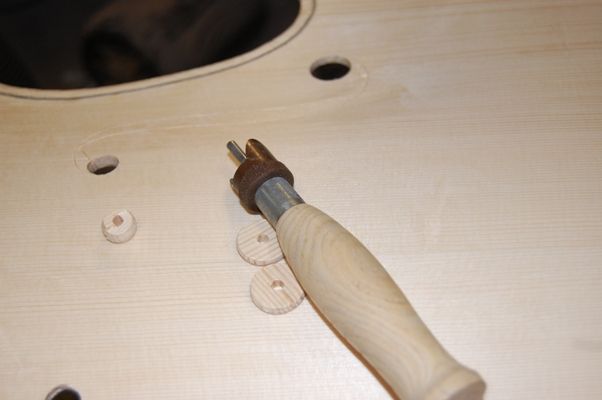
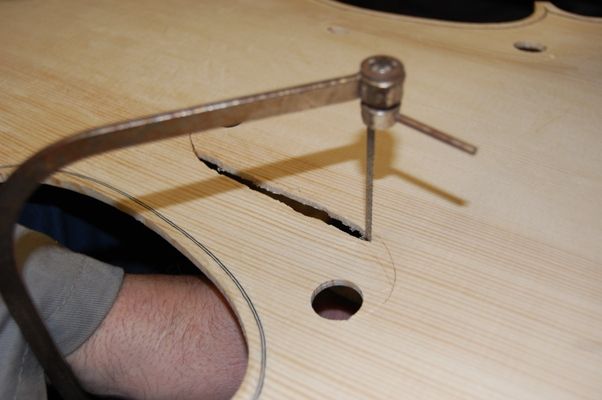
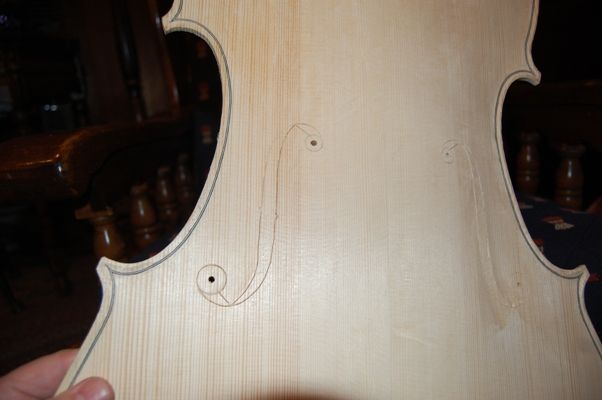
Both fiddles need the neck-blocks cut to shape, to prepare for carving. Neither have any plate-carving done, nor purfling,  f-holes, etc., of course.

Follow along as I complete the builds. If you decide you’d like a private look at one of them give me a call or an e-mail.

Goals:

The intent is to have two new five string fiddles ready in time for the Marylhurst University Musical Instrument Show in the Spring ( April 25th and 26th, 2015) My problem is that I also realllllly want to have a new hand-carved upright bass ready in time to attend the International Society of Bassists (ISB) competition in Fort Collins, Colorado, in the last week of May/first weekend of June. (Too many goals…need more energy and time!)

One drawback to the competition goal is that (I think) I will not be able to post progress reports, (photos, anyway) until after the competition. Ah, well… I’ll post other stuff, I guess.

Thanks for reading.

If you found this post helpful, please share with your friends!

Bass Bar installed and trimmed–F-holes refined. Edge-work begun.

Please share with your friends!

The Bass Bar is in place and trimmed. The F-holes have been refined, somewhat, and the edge-work is begun.

Bass-bar was #1 on the list!

I installed the bass-bar first thing this morning (chalk-fit to the inside of the plate in the exact location it was to be glued, then glued with hot hide glue).

Then, while the glue was drying, I went and did other things. Swept up the shop, changed the tires on my car (snow tires have to be off this weekend), and designed some display stands for the upcoming show at Marylhurst University. I had intended to begin the graduations on the one-piece cello back plate today, but after I did the tires, I was pretty worn-out, and hurting, so I decided it was time for a break, and, since the glue was dry, time to trim the bar.

Bass Bar in the rough

Here’s what the bass-bar looked like in the rough, when I took the clamps off:

Cello Bass-bar in the rough, viewed from the top.
Bass-bar in the rough, viewed from the top
Cello Bass-bar in the rough, viewed from the side.

Bass Bar Trimmed and finished:

And here is what it looked like after planing it to the shape I wanted it to be:

Finished cello bass-bar from front
Finished Cello Bass-bar from side

Edge-work and final prep for finishing

Although you probably really can’t tell in the photos, I have also scraped the entire plate, inside and out, under low-angle light, to get every dip and hump as smooth as can be.

Also, I began the edge-work; I first planed a small (3mm) bevel all the way around the inside edge, then rounded it with a file, to establish the inside curve of the edge. The outside will be treated the same way, after the plate is installed on the garland. It is much easier to manipulate the plate by itself, instead of the whole cello, so I want to do as much as I can before it is assembled.

I also spent time refining the f-holes; smoothing the inner edges, matching bass to treble shape, etc. That, too, is much easier before the plate is assembled with the garland.

Tomorrow I will try to graduate the back plate.

Gotta do taxes, too, though.  (Hooray for Turbotax!)

If you found this post helpful, please share with your friends!

Front Graduations Complete and F-holes Cut

Please share with your friends!

Cello Front Plate Graduation Completed

Smooth inside and out, and all thicknesses correct

It took me a couple of hours, I guess, to do the final graduation, planing and scraping the inside of the European Spruce  front cello plate to perfection (or nearly so). Here is the plate, with some pieces of willow lining stock across it, to form shadows so you can see the curves. The color is so neutral that without the shadows, the plate looks flat in photographs.

Completed graduation of cello front plate
Graduation complete!

The f-holes had been incised earlier, so all that was left to do is finish cutting them out. I used the f-hole cutter to cut the circular portions of each f-hole.

F-hole cutter in use
Finished result of f-hole cutter use
Finished result

Then I used a coping saw and a knife to complete the cutting. Each hole will still be refined and perfected, later, using a knife and a small file.

Cutting out the f-holes with a coping saw.

Finishing the F-hole shape with a knife.

Finishing the F-hole shape with a knife.

But the f-holes are essentially complete. the next step is to install the bass-bar.

Completed f-holes, ready for refinement.
If you found this post helpful, please share with your friends!

Front and back plates fully arched, f-holes incised

Please share with your friends!

Final arching is complete

Low-angle light and Scrapers

Today I used low-angle light to reveal all the humps and hollows, and used scrapers to bring all of them to a smooth continuum of curving wood.

“Flat F-holes”

Once I had the front plate fairly smooth, I laid out the f-holes, and incised them deeply. My reason for doing this is that every single instrument I have made, the arching proved to need correction, as revealed when I laid out the f-holes. Invariably the arching was too “puffy” around the lower ends of the f-holes, so I had to re-carve that area. Finally it occurred to me that if I cut the lines in, they would remain visible as I carved, and I would not have to lay them out over again. That turned out to work pretty well, so now I routinely assume I will have to correct the arching, and I incise the f-holes, then view the plate from the side: what I am aiming for is that the general shape of the f-hole will seem to lie in a plane parallel to that of the ribs when the instrument is assembled, rather than describing a lazy “S” from the side.

Here is an example from an unfinished viola, from several years ago:

Flat F-hole
Flat f-hole

It is not something “exact”, but more of a general impression. One way or another, it allows me to see when my arching is not right, and correct it.

So, here is the top plate with the f-holes incised. I will finish cutting them out after the inside carving (graduation) is nearly complete.

Cello Front Plate with f-holes incised
Cello Front plate with f-holes incised

Here’s an end-view…doesn’t show much:

End View of Cello Front Plate
End view of Cello Front Plate

And a sort-of  “3/4” side-view…trying to show the curves:

3/4 view of cello front plate
3/4 view of Cello Front plate

Here’s a close-up of the c-bout with the f-hole incision (I used a special f-hole cutting tool to incise the circular parts):

Cello C-bout with incised f-hole
C-bout with incised f-hole

Annnd the back plate: (still may be a bit puffy in spots…I will work on it more later. Right now my hands are hurting from all the scraping) That’s all for today! I’m worn out.

Side view one-piece Cello back plate
Side view one-piece Cello Back plate
End-view of one-piece cello back-plate
End view of one-piece cello back plate
If you found this post helpful, please share with your friends!