
 Follow

Another Progress Report on the 14 inch Viola
Mold Removal
When we last looked, I was ready to remove the mold but had not yet done so.
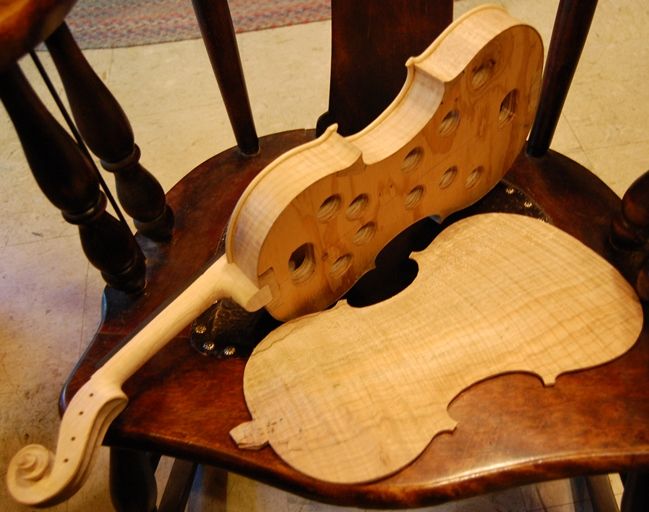
Removal of this sort of mold (French style) is very simple: I insert a tool (parting knife, usually) between each block and the mold, to break the glue that had secured the molds to the blocks, then I just gently lift the mold straight out.
Installing the Back Linings
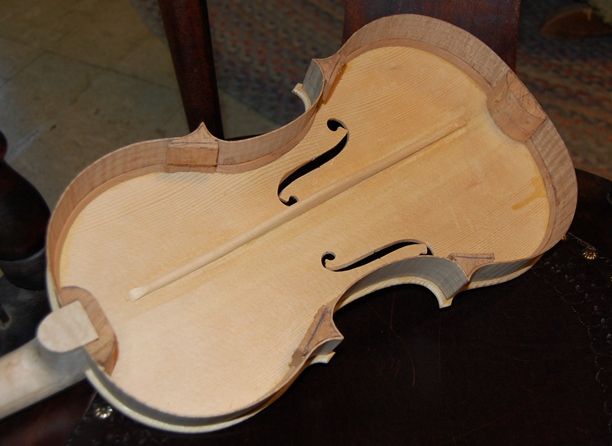
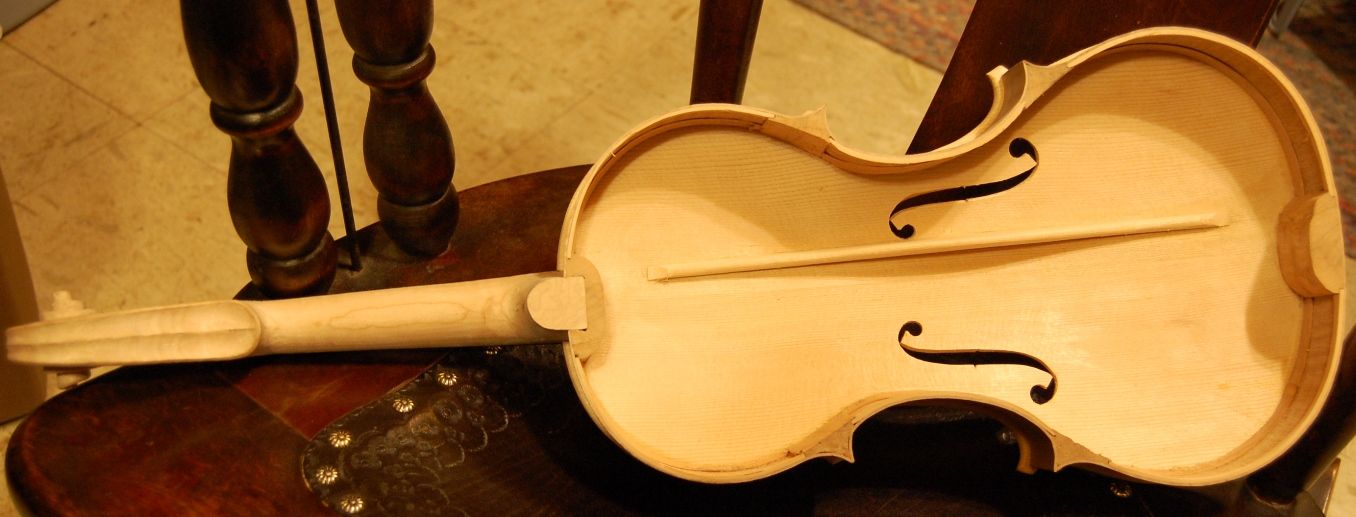
So, here is the viola body with the mold freshly removed:
The viola still needed the back linings, so, I cut a tiny mortise in each side of each block, to receive the linings, bent the linings to shape, and installed the linings.
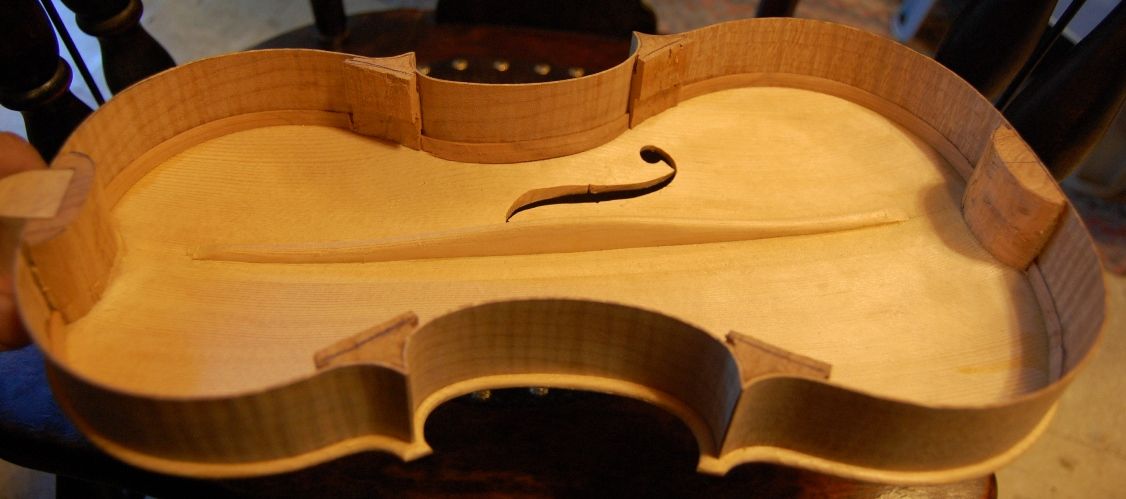
Shaping the Blocks and Linings
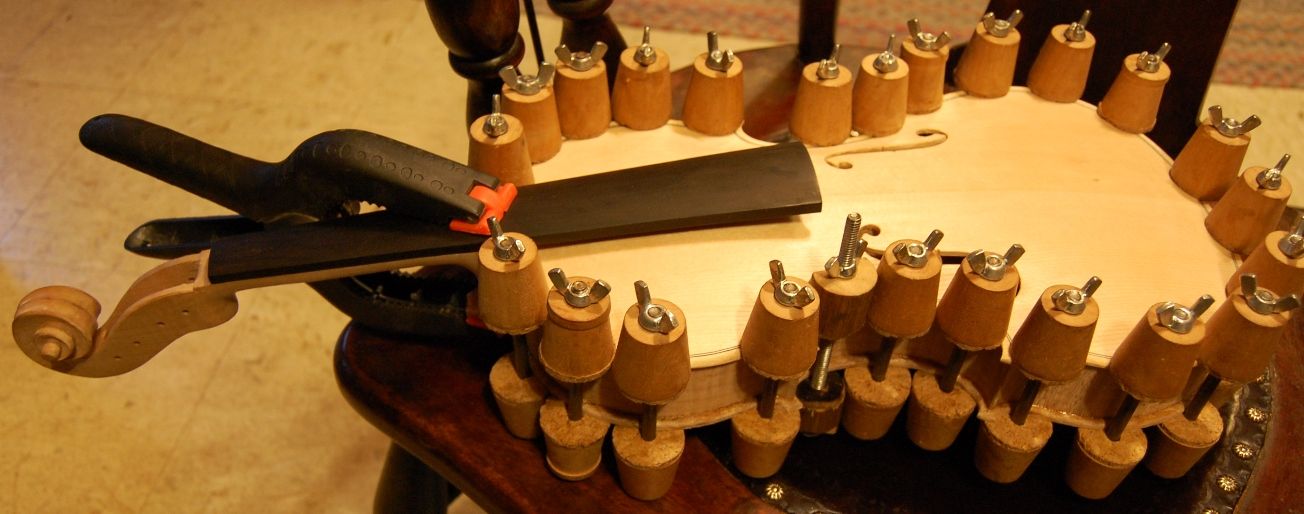
After the glue dried, I removed the clamps and shaped the linings and blocks. I carved the linings to a smooth taper, and scraped them to a clean, smooth curve. I sanded all of the inside to remove splinters, etc. I also leveled the back of the garland and the heel of the neck before moving on. It had to be dead flat and smooth:
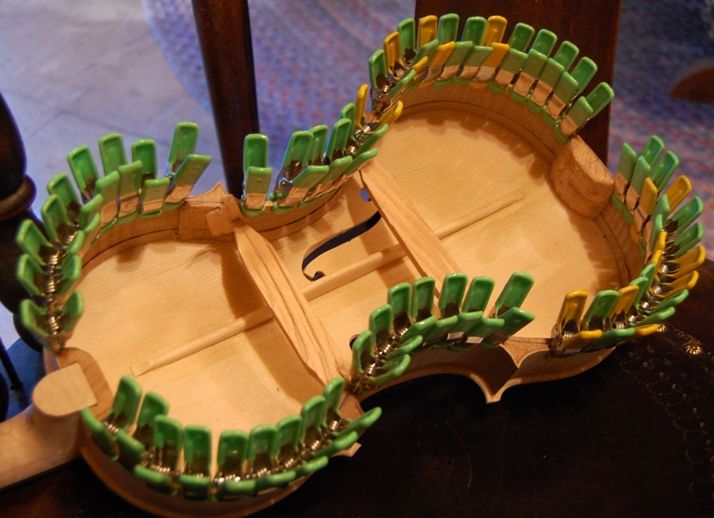
Installing the Back Plate
While the glue was drying, I had installed the label on the inside surface of the back plate, located so that it will be visible through the bass side f-hole. (Forgot to take a picture…sorry.)
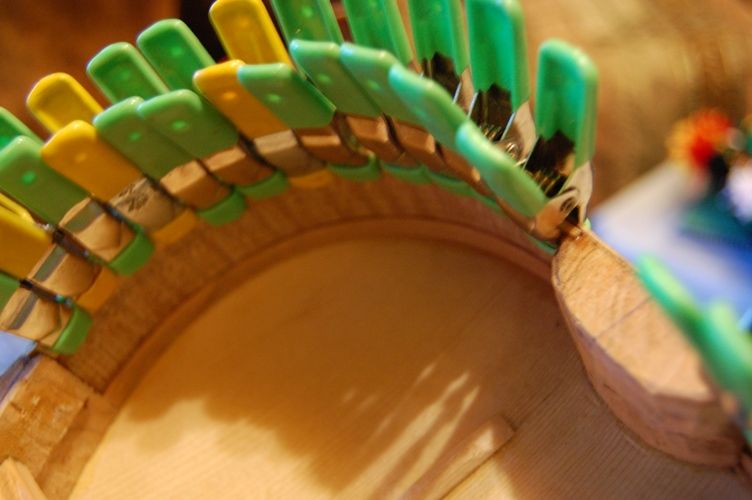
Once all was ready, I clamped the back plate in place, dry; then, using a thin-bladed palette knife, I inserted hot hide glue all around the perimeter; quite liberally at each of the six blocks, and clamped it up tightly. The last clamp to be applied was the neck block clamp. I checked the angle of the neck one last time before adding still more glue under the button, and adding that clamp. But here it is, all clamped and drying. My wife always says the clamps look like old-fashioned hair-curlers. (Yeah, I remember those things….)
I will try to get the back purfling done this weekend. Then we will be on the home stretch.
Thanks for looking.