
 Follow

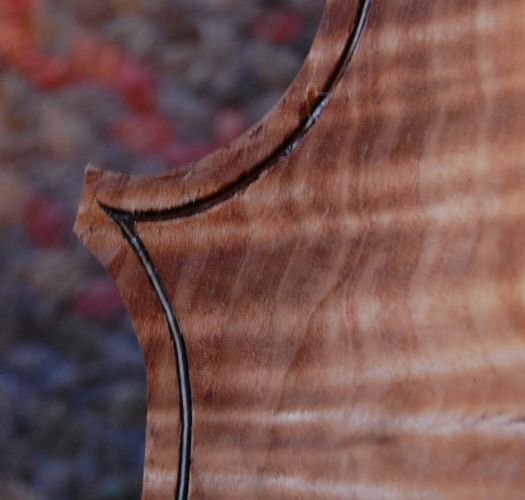
One-piece Cello back purfling complete.
Narrow (violin-style) purfling, like the original
Today I completed the back plate purfling. Though this is a cello, I purfled it with violin-style purfling, as it was pointed out to me by Jacobus van Soelen that the original instrument (1712 Davidov Stradivarius) had narrow purfling, like a violin, not the wide purfling I used on my first cello (and which I actually like to use on violins and violas, as well.) I just like the eye-catching appeal of the larger purfling as a rule. In this particular case, I must concede that the wood is so beautiful that it really does not need additional “eye-candy”.
The job starts with layout and measuring
Last night I laid out the corners, and marked the whole purfling channel using a purfling marker (sometimes called a purfling cutter— but I only use it for marking– I use a knife to actually cut out the slot for the purfling).
Then cutting and fitting
This morning I incised the whole purfling slot, using a small, home-made knife, and then cleaned the waste wood out of it with a purfling pick.
While I fitted purfling into the slot, and carefully fitted the corner miters, the glue-pot was heating up.
Gluing the purfling
When all the purfling seemed to fit correctly, I tipped each center-bout purfling strip up out of its respective slot, so that it pivoted up and out on the two corner miters, but left the ends in the slots, unmoved. I slipped hot hide-glue (quite thin) into the slot, using a palette knife, brushed hot water to flow the glue, and pressed the purfling strip back into the slot, forcing it deep into the groove with a special tool. (Sometimes I use my purfling pick for that job. Today I remembered that I have a plastic wheel on a sturdy handle, actually designed for forcing the rubber trim into screen window frames. It worked perfectly. :-)) Then I repeated the above process for the upper and lower bouts.
If I start toward the middle of a section of purfling, and work toward the ends, the glue is forced along under the purfling, and squirts out along the edges and, finally, out the ends, and the miters. The result is that all of the piece has adequate glue, even if some spots had been a little skimpy. Then I brushed more hot water to re-flow the glue, and wiped off the excess with a rag.
So– here is the completed back, ready for final arching, and for having the edge channel cut, etc. It will look pretty rough until the gouge slices along the channel, and trims that excess glue and damaged fibers off the top of the purfling strip. Then it will look very nice. (Purfling isn’t only for looks, by the way, on violins– it also helps stop a split from the edge from moving up into the plate…supposedly.) Anyway, this is how it looks for now:

The next step will be to mark an edge margin all the way around, locating the crest of the finished edges, after which I can use a gouge to carve the channel, and begin the final arching.
But, for today, I have a bow to re-hair, so this is as far as I am going with the cello.