5 String Progress Report #11; Back Plate Complete

Please share with your friends!

Five String Progress #11: Back Plate completed and installed.

Inside arching

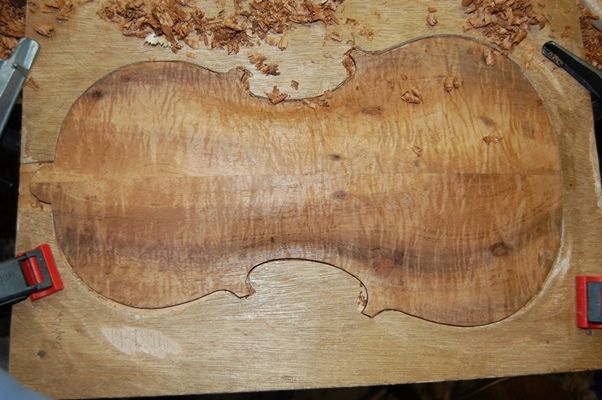
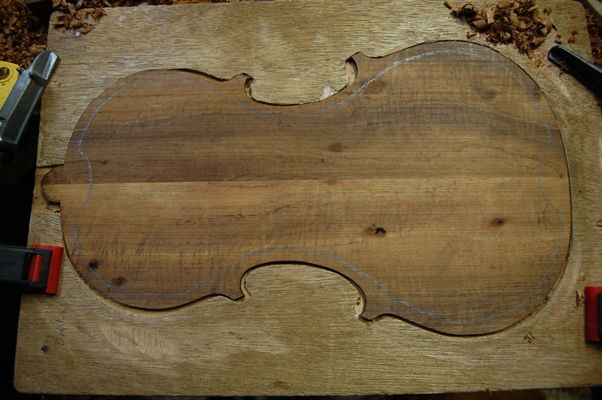
The inside arching took a lot of time and energy, but it is just part of the job. Once it begins to get closer to completion it is a lot more encouraging, but initially, it is just a lot of work.

Beginning the inside arching of the back plate.


Bit by bit, however, the project begins to take shape:
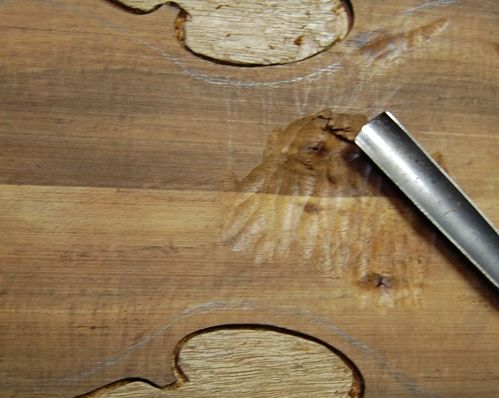
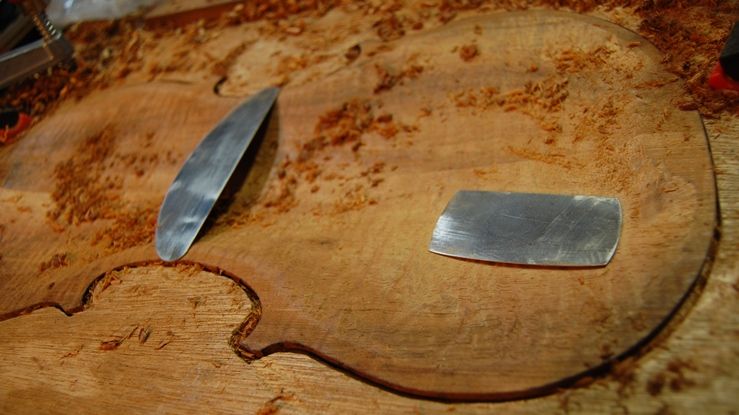
Back inside arching in progress.
Back inside arching in progress. I made those wooden handles for my Ibex planes so I would not blister my fingers using the planes.

Graduation:

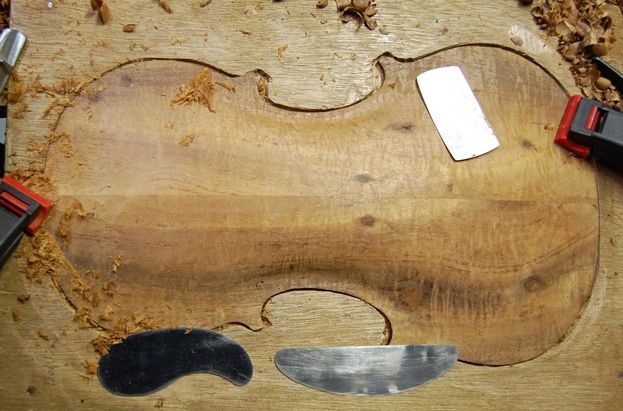
Here, you can see the curvature of the plate, but you can also see why I have to stop using the planes, relatively early, and revert to scrapers: the curly wood tears out badly under the plane.

I also have to measure the thickness over and over, using a graduation caliper, so as not to cut too deeply. This process is called “graduation”, I suppose, because the thicknesses have to gradually change from area to area. They are not entirely symmetrical, but there is a general plan and some practical limitations.
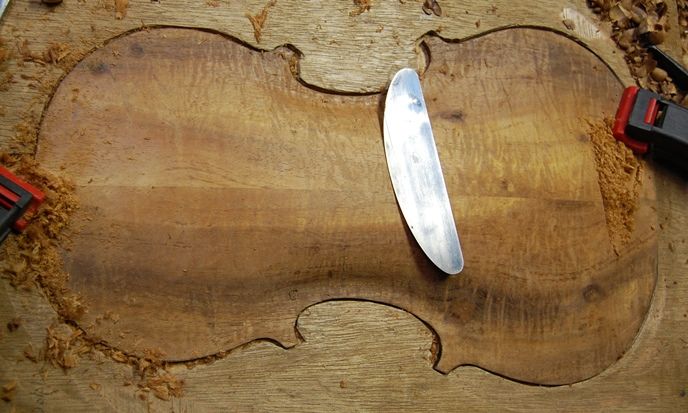
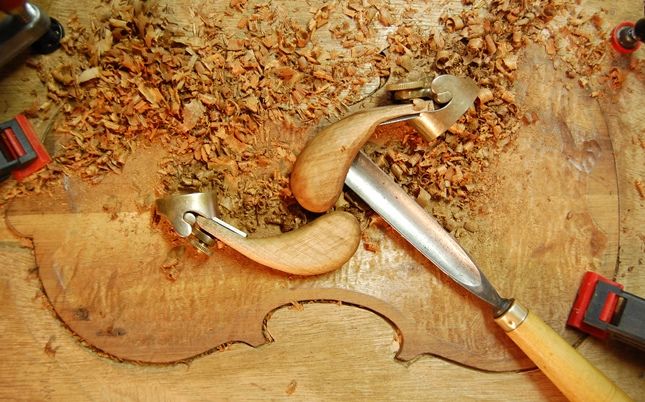
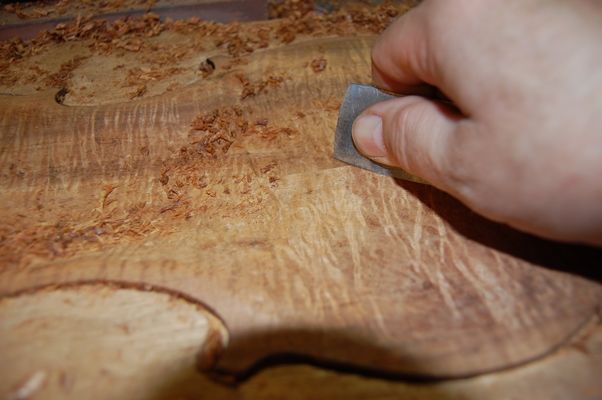
Inside graduations in progress.

Scraping:

Now we work with scrapers:

Scrapers and back plate.
Scrapers cut very smoothly, and usually without any tear-out. You can make the scrapers any shape you want, but you have to keep them sharp.


Scraping the back plate.
Scraping can be hard on the hands: some people make handles for them. I haven’t done that yet. My thumbs get pretty tired, though.

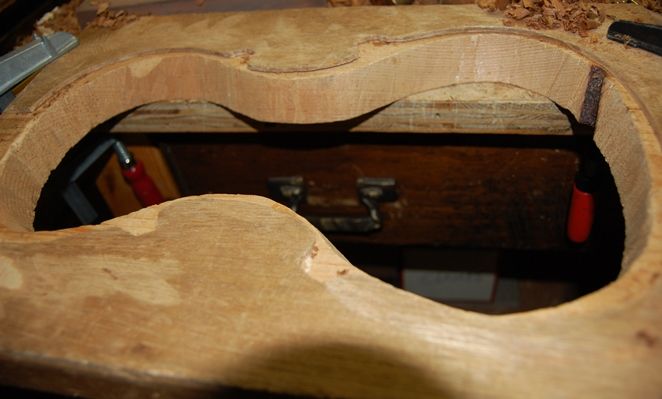
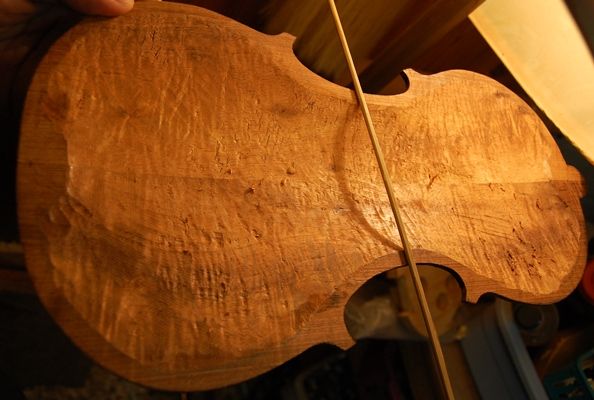
Final inside preparation for gluing:

I almost forgot to take pictures! At this point the plate is complete, except for purfling. In the past, I have always installed the purfling before attaching the plates to the corpus,  but on this instrument I decided to try purfling after plate installation. I think I like it. I have better control of my edge over-hang in terms of both size and shape.

So: the inside edgework has been done, the label is installed, and the plate is ready to be glued in place.
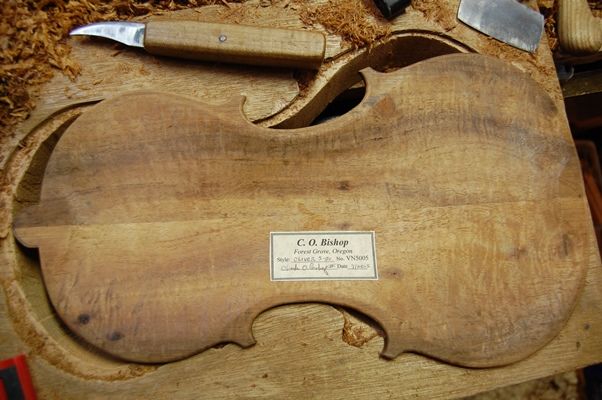
Back plate ready to install.

Plate installation:

What I do, nowadays, is to carefully dry-fit the plate to the garland so that it is exactly the way I want it, clamping securely over all the blocks (about eight clamps in all). Then I remove a couple of clamps at a time and slip hot hide glue into the joint, wipe it down with a rag and hot water, and re-clamp that area, adding as many clamps as will fit. I work my way all the way around the plate, and never have to hurry, or suffer any fear that something will get out of alignment while I am working.

For the first four of five instruments I made, I would apply glue all the way around the garland then engage in a panicky race to get the plate aligned and all the clamps in place before the glue gelled. Not good. Usually, about that time, the phone would ring, too… (sigh…).

This way is very peaceful, by comparison, but I have learned to be less compulsive about answering the phone while gluing, too.

And here is the completed corpus, with the back plate glued in place and secured with spool clamps:

Back plate secured with hide glue and spool clamps.


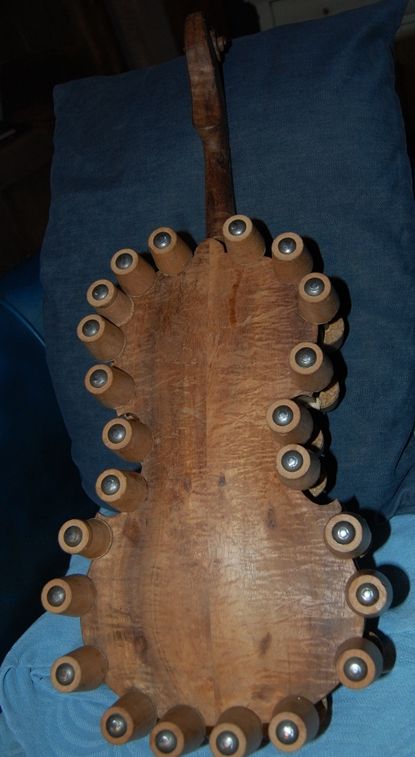
Once the glue is dry, I will be ready to begin purfling the back plate.

Thanks for looking.

If you found this post helpful, please share with your friends!

5-String Progress #10; arching the back plate

Please share with your friends!

Five String Progress #10: Arching

Completing the back plate arching

When I left off, last time, I was too tired to continue carving, so I took a break and completed other responsibilities for a few days. Saturday, I came back and spent some time carving and scraping:

Back arching done
Final outer carving complete–beginning scraping.


As you can see, the basic shape is complete. Scraping will be the method of moving wood from here on, on the outside… the inside is still a flat, rough plank. But I continued scraping for a while on the outside before beginning the inside.

Back plate with scrapers:
Back plate with scrapers: I used the “shmoo”-shaped scraper to clean around the inner bout edges and the others to establish the final shape of the outer curves.


Once the plate is essentially the exact shape I want it, (checking with low-angle lights, etc.) I move to finer scrapers– sharpened at 90 degrees, and used gently, flexing the blade to match the curvature of the plate.

Final scraping:
Final scraping: this is not to say that more scraping will not be done later, but that will be after the purfling is completed. This is about as far as I will go until then.


Beginning the inside arching and graduation

Now I can flip the plate over and begin carving out the inside of the back. Here is the cradle without the plate. Notice that the plywood cutout matches the shape of the plate fairly closely, while the thick pine board simply supports the plate while I am carving. The plywood is what holds it still, laterally. The spring clamps prevent the plate from flipping out of the cradle.

Working cradle for violins and five-string fiddles.
Working cradle for violins and five-string fiddles. The hollow shape allows the cradle to be used on both sides of the plate. The full-thickness cutout allows chips to drop through and not obstruct the work.


The back plate has already been marked for inside arching. I will have to monitor thickness constantly, but here it is, ready to carve:

Back plate ready for carving.
Back plate ready for carving. Notice the lines mapping out the general shape to be “excavated.”


And, the “fun” begins again. This Koa wood is by far the most difficult wood I have ever used on a back…but it has to be done, so, chip by gouged-out chip, here we go:

Beginning the inside arching.
Beginning the inside arching, using a gouge again.


I will post again when I am ready to install purfling.

Thanks for looking.

If you found this post helpful, please share with your friends!