Neck and Scroll Carving Procedure

Please share with your friends!

Two Hand-carved Five String Fiddle Scrolls in Progress

First: Lay out the Side Profile

I created a template for a five-string fiddle neck and scroll when I made my first 5 string blue-grass fiddle. The template is fairly crude; just a cutout of thin plywood (door-skin material). I have other templates I have made of aluminum, and still others of plexiglass plastic. But that is the starting place, regardless of template materials. I know how thick the billet needs to be, and how long, so I simply place the template on the billet of curly maple, and trace around it with a ball-point pen. (I used to use a pencil, but the ink is easier to see against the wood.)
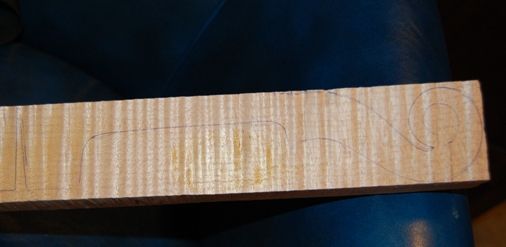
Violin neck billet laid out for cutting.
Violin neck billet with profile laid out. Notice that the pegbox is a little shorter, because it only has to accommodate four strings.

 Next: Cut out the Profile

I use a band-saw to cut out the profile of plates and necks. I do have a bow-saw that I made for such work, and I can use it if need be. but I find the bandsaw so much easier to control and so much faster, and the results are so much better, that I quit using the bow-saw after about two instruments. It looks nice, hanging on the wall.

Power Tools vs. Hand Tools?

Some people are insistent that the “only right way” to make a hand-made instrument is to use nothing but hand-powered tools. I have built one instrument using only hand tools. I will probably never do so again. There is a reason that bandsaws, drill presses, etc were developed: they not only save wear and tear on your body, they do better work, as a rule. Can they cause damage? Absolutely. So can any tool.

I use a practiced eye and steady hand to guide the billets through a bandsaw. I complete all the carving of each hand-carved instrument using gouges, planes, chisels, and scrapers.

The vast majority of my work is done using hand tools, but there are certain tasks for which I use the appropriate power tool, and make no apology for doing so. (By the way, I live eight miles outside a small town, and when I go to town, I drive…I don’t have a horse, and my time is too valuable (and limited) to walk that far just to satisfy some atavistic “back in time” quirk. I use electric lamps, etc., too, unless we have a power outage.) (sigh… OK, rant over…)
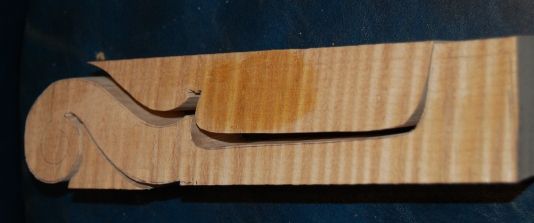
Violin neck billet with side profile cut out.
Here’s that same violin neck billet with the side profile cut out.

Lay out the Front and Back Shapes

I have a table of measurements I use, to lay out the front and back lines of the scroll and neck. The top of the neck is just over 24mm, the widest part of the pegbox front is 26mm, the distance from the leading edge of the nut to where the neck intersects the top plate is 130mm, and so forth.

I lay these out using a metric rule, a compass,  and a flexible straightedge. The main straightedge is just a stainless steel ruler with a cork backing that I bought from a fabric store. But I need a very flexible straightedge when I am laying out the curly portion of the scroll, so I cut a spiral strip out of a large soft-drink can (actually it was one of those oversized “energy drink” cans. Someone at work had it, and was going to throw it out, so I snagged it and made good use of the thin aluminum sides.) It is about 40mm wide, and long enough to wrap around the scroll, giving me a clean, smooth curve to scribe in with the pen. Aluminum flashing would work, too, but this was free. You can see the layout lines in the next step.

Cut off the Excess Wood from the Pegbox

I use the bandsaw, again, to trim all the waste wood from about two inches down the neck up to where the pegbox begins to disappear under the curve of the scroll. I leave the scroll and almost all of the neck full thickness, so that the billet will sit flat on the drill press table, and I can get the pilot holes for the pegs drilled parallel– perpendicular to the centerline of the neck.

Another nice thing about leaving the handle portion of the neck for last, is that it leaves me two parallel surfaces, so I can clamp the scroll in a vise, and use both hands to control the gouge, plane, saw, or other hand tool.
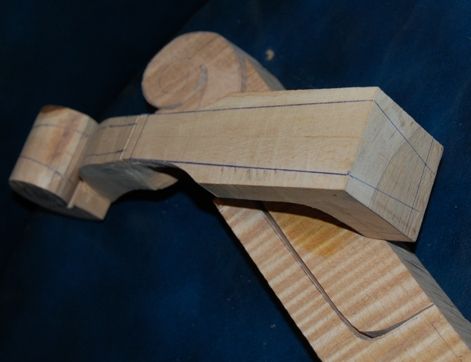
Front and back profiles laid out; excess wood trimmed from cheeks of pegbox.
Front and back profiles laid out– excess wood trimmed form cheeks. You can see, too, that I already began carving the heel (or chin) of the pegbox. Just a personal preference.

Layout and Drill the Peg Pilot Holes

Some people wait until the whole violin is completed, including varnishing, to drill the peg holes, but I find it too difficult to get them parallel with one another that way. If I can drill a 1/8″ pilot hole for each of them, using a drill press, so that they are exactly perpendicular to the center of the neck, I find it much easier to complete the neck later, than if I have to try to get them right with no flat surface from which to reference the perpendicularity of the holes. You’ll see these holes in the next blog post. So long as they get done before I cut the excess wood from the neck and scroll, I will be OK, because the neck will still sit squarely on the drill press table.

Carve the Pegbox

There are several ways to do this. A lot of makers use a drill to hog out the waste wood from the hole, and then use chisels and gouges to smooth and complete the work. I usually just use the chsels and gouges right from the beginning…one mistake with the drill, and the scroll becomes firewood.

I use a narrow, flat chisel to begin the work, and develop some depth, then use a wider, flat chisel to flatten the inside of the pegbox “cheeks,” and to deepen the box floor. I have to be careful to not go too deep. I have (once) cut so deep that, later, when I cut the fluting (volute) from the outside, I cut through into the interior of the pegbox. That is another good way to transform a nice scroll into firewood. Pretty sad when that happens.

I tend to begin by carving the outside of the pegbox heel… it makes me feel better about the scroll, if something about it is already starting to look like a finished scroll.
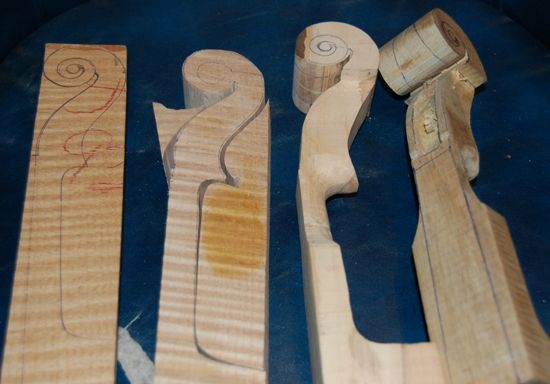
Four preliminary steps shown all together.
Here you can see all four of the preliminary steps, including the beginning of carving out the pegbox. You can see, too, the extra length in the five string fiddle pegboxes (on the right).

I will show photos of the succeeding steps in the next blog post. What you see above, though, is the beginning of all those nice violin, viola, cello, bass and five string fiddle scrolls you have enjoyed looking at.

Thanks for reading.

If you found this post helpful, please share with your friends!

Five String Fiddle (slowly) Handmade in Oregon

Please share with your friends!

Five String Fiddle Progress

Life is what happens while you are making other plans, they tell me. This season has been loaded with distractions. I worked a lot of late hours at Gunderson, Inc. where I was teaching classes on Welding Supervision.

Two young fellows were coming to the house a couple of times per week to work on instruments they were building. One was working from a kit, but had zero experience with tools, so it required a great deal of personal attention; the other built from scratch, and is nearly finished with a very nice 15-5/8″ viola, a fairly faithful copy of the 1580 Gasparo da Salo viola. (Funny, when those young fellows are here, I don’t get a thing done on my own work.) I did begin three 5-string fiddles, months ago, but have only made measurable progress on one; the Spalted Maple 5 string fiddle.

I took two weeks vacation between Christmas and New Years, but ended up being sick nearly the whole time. Besides, my daughter was home from school for that two weeks, so I had reason to be distracted. 🙂 I did get a couple of work days in, but it has been a struggle.

Finally, I have several repair jobs going, each of which really needs to be done, so, to make a long story slightly shorter, things haven’t turned out as planned.

Double Purfling Complete, Including Purfling Weave on Back

The maple for the one-piece back is some Oregon Big Leaf Maple that was given to me by a local landowner and forester a few years ago. This is the third instrument I have made from that tree. It is a relatively soft maple, and has had a very nice tone, so far, in my experience. I have made one five string fiddle from it, so far, and one cello.

The Spruce is Sitka– a one-piece sitka front plate–  only the second time I have ever seen one, and it is some of the toughest spruce I have ever worked with, which I think will make a good, thin, top plate for the instrument, as I have made one instrument before with very similar spruce, and it turned out a winner, as a bluegrass, celtic and country fiddle. But it was not fun cutting the double purfling by hand, as every “winter grain” was so hard it would catch the knife blade and try to turn it.   However, here is the progress so far:

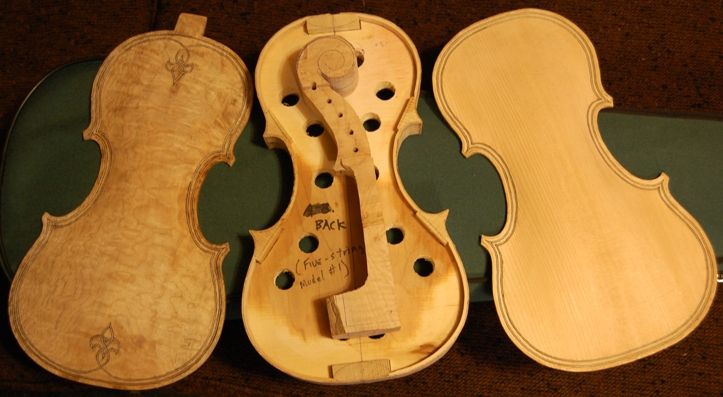
Progress on 5 String Fiddle
Progress on Five String Fiddle

Today I will make the final corrections on the front and back arching and cut in the f-holes (I hope), then begin graduating the front plate. Hopefully, by next week, I can have the corpus nearly completed. Maybe somewhere in there, I can get a good run at the other two fiddles, as well. I really need all three completed by the time of the show in April. There will be about 500 people per day, coming through that show, and some of them will be fiddlers. 🙂

We will see; I am feeling somewhat less than optimistic, however, after the experiences of the last three months.

Thanks for looking.

Chet

If you found this post helpful, please share with your friends!

Beginning Three New Five-string Fiddles

Please share with your friends!

Three 5 String Fiddles On the Way

Different Molds

I decided to make two new molds, so that I could have more than one handmade five-string fiddle in the works at any given time. The new molds are made from the same half-model template, so they are very similar in character, but I did notice that somehow my original mold had been a little narrower in the center bouts than I had intended (don’t know how it happened), so the new ones are wider there, which may make the sound even more deep and clear. The instruments from the first mold have all been very good, so I am hoping the ones off the new molds are even better.

Different Materials

The original Oliver 5-string mold has the ribs and linings in place, and the chosen material for ribs, back and neck is spalted maple. This is an unusual choice, from a classical perspective, but a five-string fiddle is an unusual instrument, and I think it will prove a good choice. I really like the looks, so far. The second and third Oliver Molds (essentially identical, otherwise) have higly figured Oregon Big-leaf maple and Oregon Myrtle, respectively, for the backs and ribs. The Myrtle is a two-piece back, and the neck on the Myrtle fiddle is Big leaf maple; otherwise all the fiddles have matching ribs, backs and necks. The other two are each a one-piece back, also.

I am planning to use Port Orford Cedar for the two-piece front plate on the Myrtlewood  fiddle. This will be the first time I have used anything other than spruce for a violin top, but I have been told it is exceptionally good for other types of instruments, and a friend gave it to me to try in a fiddle. I plan to use Sitka Spruce for the on-piece top of the curly big-leaf maple fiddle, as well as for the spalted maple fiddle. I am hoping to experiment with front plates made of Alaskan Yellow Cedar sometime soon, too.

Different fittings

Depending on the way they look when completed, I may vary my fittings a little, too…haven’t decided yet. I tend to like simple fittings, but I have used fancier fittings, once, and they did look nice– I am just not sure they belong on a bluegrass five string fiddle. Perhaps I can get a set of Oregon Mountain Mahogany pegs, or something. Mountain Mahogany is a very hard wood native to Oregon, but much lighter in color than Ebony, so it adds a different look.

Same Workmanship

I intend to use the same methods as always, including the double purfling that adorned the previous five-string fiddles. I will still use a scraper for the final contour and texture, though perhaps I will leave a little less “corduroy” texture on these than on some others. Some people like less.

Same Varnish

I will use the same Spirit varnish that have always used on all three fiddles, as well as the same graduation scheme and internal arrangements (bass-bar shape and size, etc.), so the sound should be the same.

Same Strings

I will use the Helicore five-string sets, as usual, though I have found some other combinations that work remarkably well.

Progress reports to come

As things progress, I will post photos, so you can see each of the three fiddles grow from a small stack of wood to a completed instrument.  Each will emerge as a brand-new, handmade bluegrass 5 string fiddle when complete.

Stay tuned… (no pun intended). 🙂

If you found this post helpful, please share with your friends!

Completed 16-1/2″ Oliver model Lion Head Viola

Please share with your friends!

Pinterest

The Lion-head Viola is Finished!

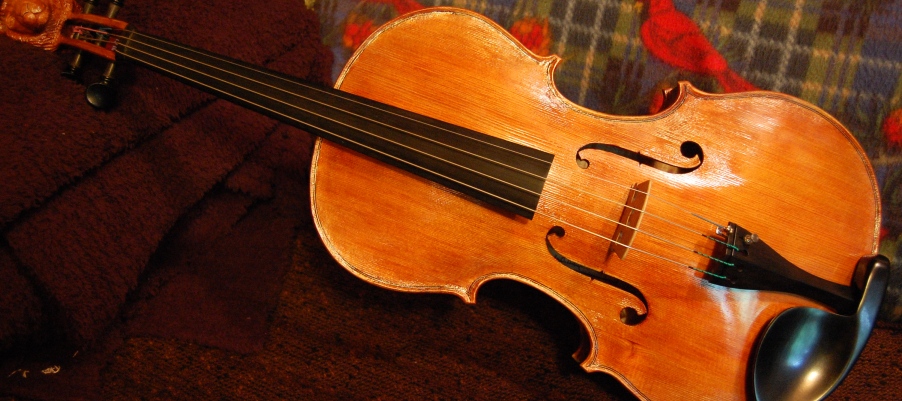
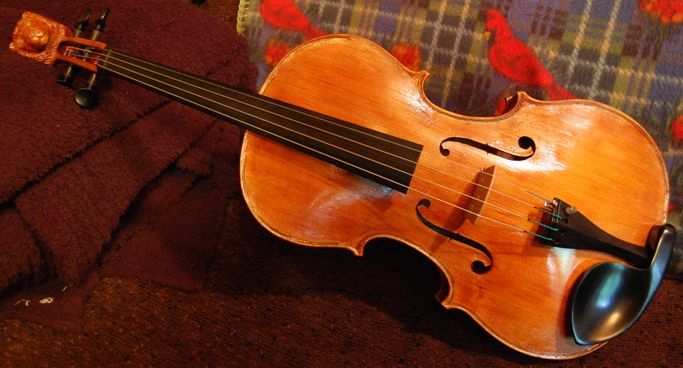
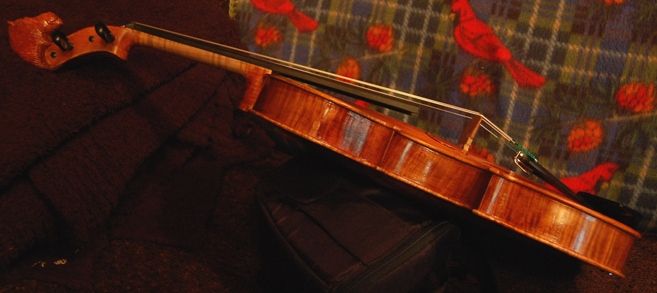
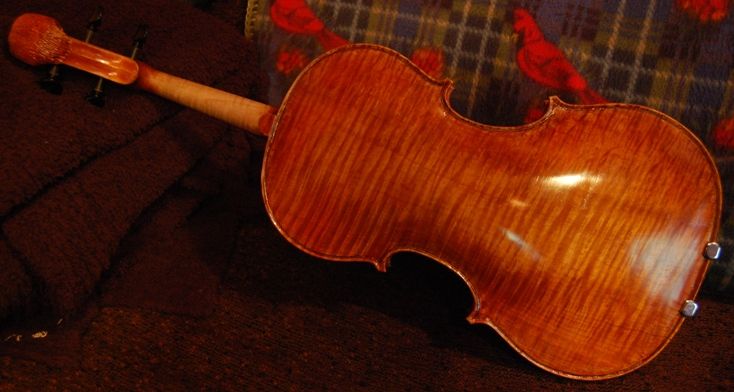
As always, I am sure there are things I may do differently next time, particularly with the hand-carved lion-head, but, overall, I am satisfied with the results on this viola. It plays easily, has a big, deep voice, and is becoming more responsive day by day. Here are some photos:

Completed lion head viola, front view.


Side view Lion-head viola


Back view Lion-head viola


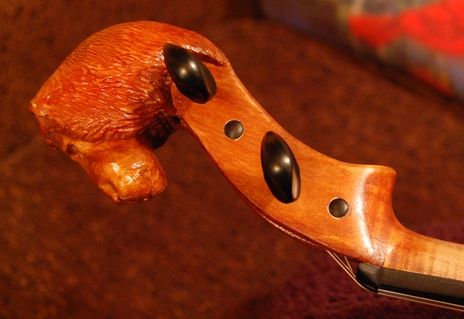
Treble-side Lion-head Scroll


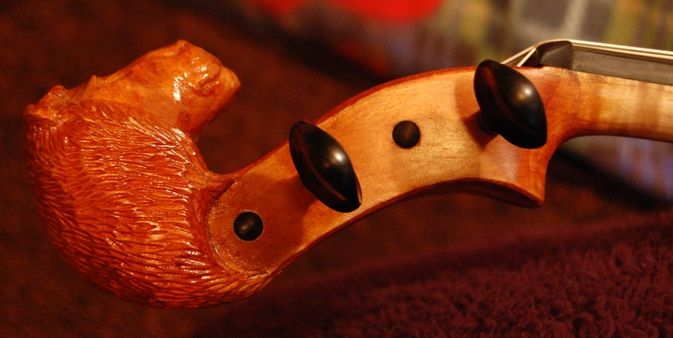
Bass side Lion-head Scroll


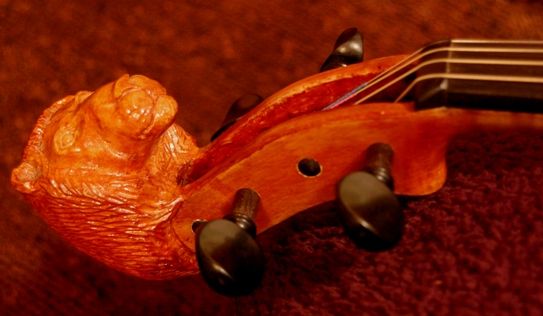
Three-quarter view Lion-Head Scroll


The style is closely related to the Andrea Guarneri “Conte Vitale”, but has been changed significantly enough that it is simply my own design, hence the “Oliver” model designation. It definitely qualifies as a large viola, so only players who are comfortable with a big viola will like it, but, that being said, it is a relatively easy-playing viola, too.

I realize that lion-head scrolls are not terribly conventional, but I also remind myself that Jacob Stainer made a few lion-head instruments, and a whole bunch of German copyists followed his lead…still they are maybe one in a thousand.  I changed one last thing and attempted a little more realism. Perhaps it will be difficult to sell; I don’t know. But it is one of the best violas I have made, and I trust someone will eventually see it as the one they have been waiting for. 🙂

Thanks for looking. Feel free to contact me.

If you found this post helpful, please share with your friends!

Lion-Head Viola Progress.

Please share with your friends!

Lion-Head Viola Progress:

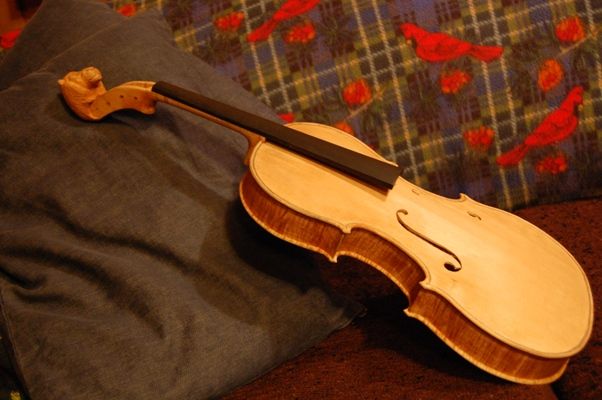
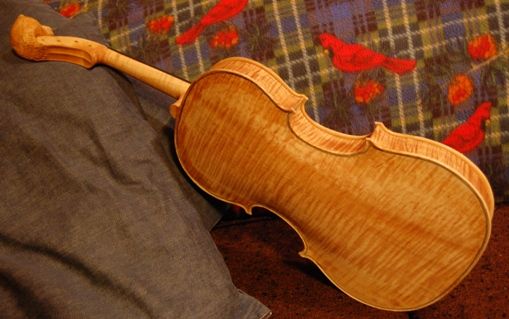
OK, here are some photos of the way things ended up tonight: The color is due to a fresh coat of strong coffee…I had intended to take the pictures before I soaked the whole thing in coffee, but slipped a cog, there, somewhere, so this is what you get.

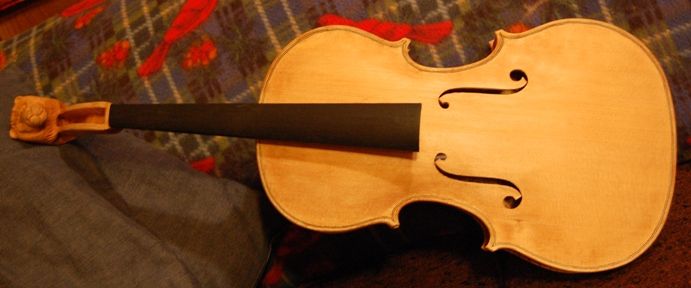
Front view Lion-head viola before varnishing


side view lion-head viola before varnishing


back view lion-head viola before varnishing


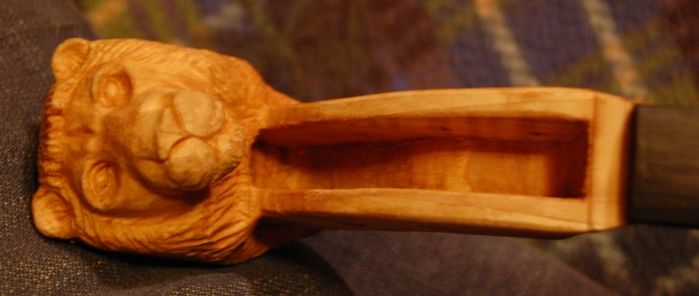
front view lion-head scroll


side-view lion-head scroll


You can tell I got my peg holes a little off– I will have to move them, or my strings will definitely end up rubbing on the adjacent pegs.

I hope to be varnishing by this weekend. I will keep you posted.

If you found this post helpful, please share with your friends!

Lion-head viola in progress

Please share with your friends!

Not your “typical” Lion-head viola

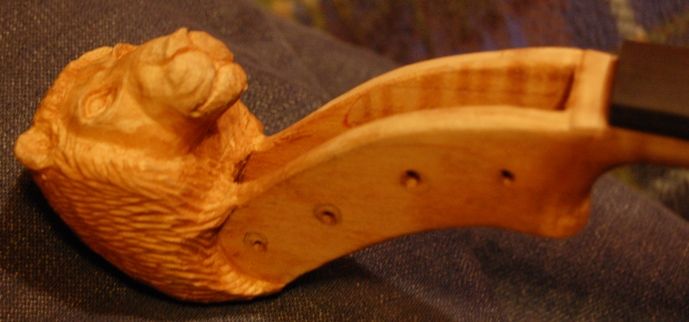
So many of the “lion-head” instruments of the past have been either so highly stylized that they were unrecognizable, or so poorly carved as to achieve the same result, or, when done in a completely recognizable fashion, were representative of a snarling, dangerous beast which I find difficult to associate with a viola. I wanted the dignity and power of the lion– the majesty, to coin a cliché, and not the predatory beast.

Grafted Scroll

I wasn’t even sure I could carve such a head, so, rather than risk a perfectly good neck-billet on a gamble against my questionable artistic ability, I decided to plan a grafted scroll. I have done this in the past, but this is the first time it was planned. Usually, a scroll graft is a repair, or a major alteration. In some (relatively rare) instances, a maker will perform a scroll graft in the new-making process, so that the new instrument will seem to be old. (No deception involved, it is just that virtually all instruments made before 1850 now have a scroll-graft, as a result of a shift in musical demands, and changing construction styles. Most of the “baroque” instruments were re-worked in this way, so that very few have the original neck.) The scroll-grafts I have done were repairs, up until now.

Knowing that there was a very good chance that my lion-head might not turn out well, I chose a very hard, even-grained maple block for the head, and only enough of the pegbox area to permit a graft. When/if the head turns out acceptably, I have a viola neck billet prepared to graft into the hard maple head, and after that it can be treated as any other scroll/neck for a viola.

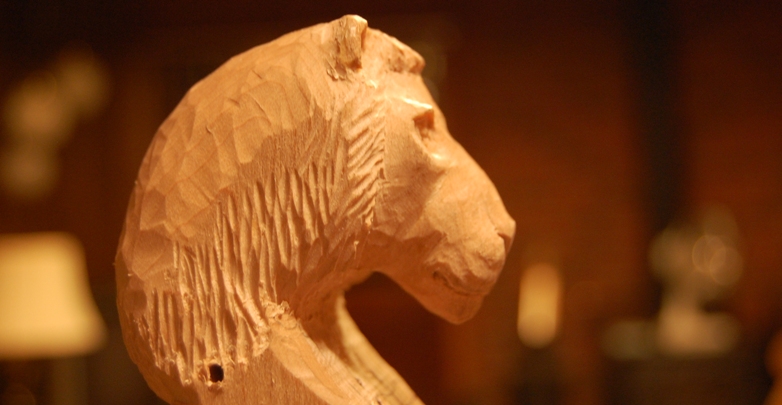
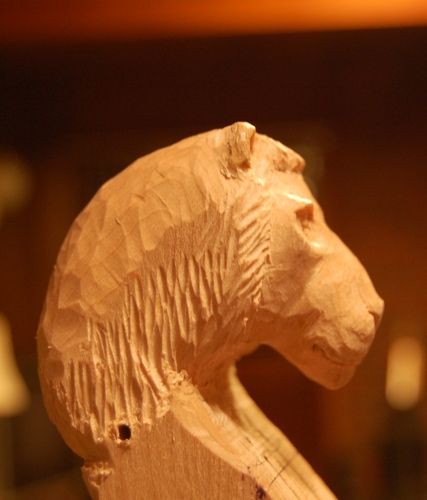
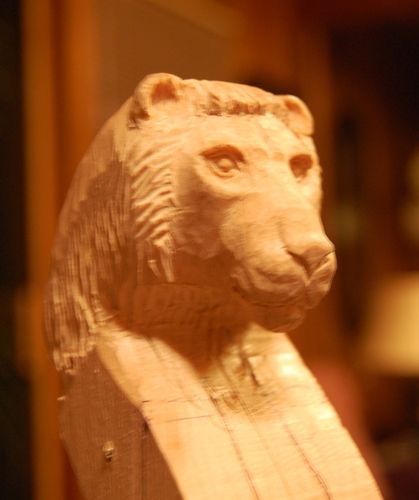
Lion-head in the making

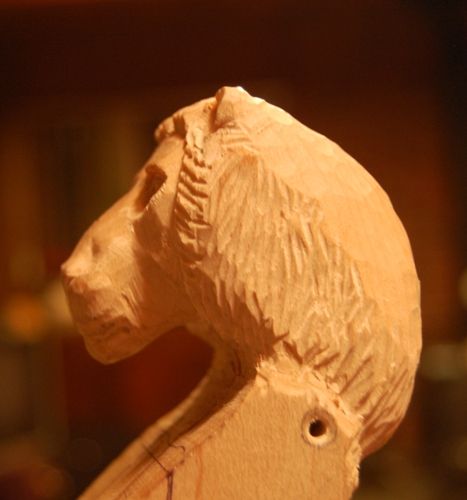
This is how the Lion-head looks for the moment. The mane will have to fair into the cheeks of the pegbox–(which haven’t been sawn out, yet, as full-width is easier to hold in the vise.) That will have to happen soon, to finalize the shape of the head and mane.

Oliver Lion-head Scroll (unfinished)
Lion-head scroll from bass side


Oliver lion-head scroll (unfinished)
Lion-head scroll front quarter
Oliver Lion-head scroll (Unfinished)
Lion-head scroll from Treble side

16.5″ Oliver Viola

The proposed viola is 16.5″ on the body, with a one-piece big-leaf maple back, and Sitka spruce top. The neck is big-leaf maple, except for the hard-rock maple head. (BTW, that hard-rock maple really earns its name– it was really hard to carve). As the viola is one of my own design, it is labelled an “Oliver” viola (my middle name, and that of my Dad and Grand-dad.) I use that name for all the instruments I design myself. Any design I copy from someone else’s work, I label as “Modelled after…”

The other violas I have made to this design (same body as #11 Oliver Viola– see the chronology) have had very good tone…I seriously doubt that the lion-head will affect the tone significantly for better or worse. But some people like a traditional scroll and will not like the lion. Others may find the lion attractive. We’ll see how folks respond. So far, I like it.

If you found this post helpful, please share with your friends!