
 Follow

More 14-inch Viola Progress
As I work by myself, I frequently fail to take pictures. I did take a few, though. (If you are impatient, you can scroll down and peek at them.)
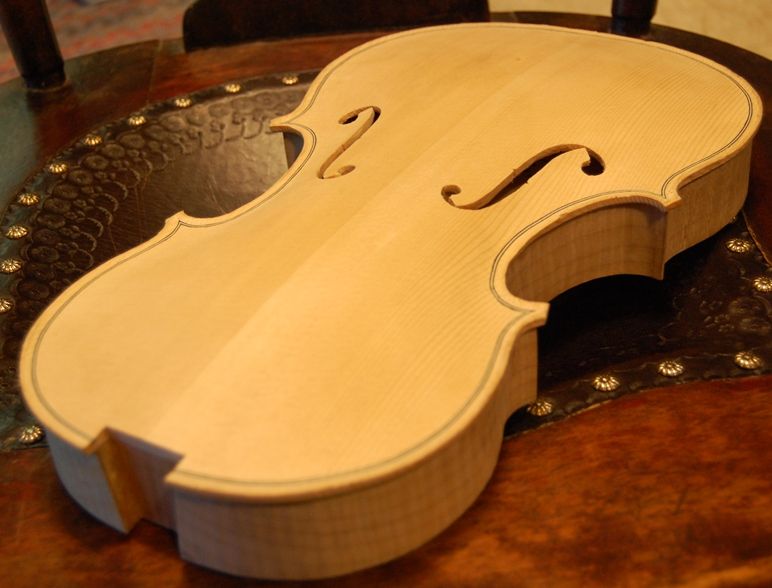
F-holes Cut Out
I used a special tool to begin the cutting out progress: It is called an “f-hole drill”, but all it really amounts to is a specialized twin-blade hole-cutter. My children bought it for me, one year, and it has been a wonderful tool. In the first place, obviously, it is a time saver, but the biggest difference is that I can now make the upper and lower eyes of my f-holes perfectly round, to begin with, and work any special shaping in, starting from the already round holes.
I remove the waste wood from the uprights of my f-holes with a small sharp knife—many makers use a saw, and I have done so as well, but I eventually reverted to the knife. Just personal preference, I suppose.
Bass Bar
Once the f-holes are cut out and close to perfect (always allowing for later nit-picking), I install the bass bar. The bass bar is a gently-arched brace supporting the bass-side foot of the bridge. Guitars have a whole collection of similar bracing, supporting what amounts to a nearly flat (and very thin) plate. The violin family instruments depend primarily upon the compound curves of the arching to supply strength, and only need the one brace to support the bass-side bridge-foot. The other side of the bridge is supported by the soundpost, which, while it is not directly under the treble-side bridge-foot, it is very close to it, and is in a location on the treble side matching the lateral position of the bass-bar on the bass side.
I lay out the position of the bass-bar, and then use a compass to transfer the shape of the inside of the front plate to the bass-bar blank. Then I use a knife to remove most of the waste-wood, and begin checking the results against the inside curve of the front plate. When the fit is getting close to correct…close enough that it is becoming difficult to see what needs to change…I apply a strip of paper-gauze adhesive tape (available in pharmacies) to the inside of the plate, covering the bass-bar position, and I rub blue chalk into the tape. I happen to use a product sold as “sidewalk chalk;” they are big sticks of chalk, and supposedly are easy to wash off of sidewalks. But they work well for me, and the blue is high-enough contrast that I can see it easily.
I press the nearly correctly-shaped bass-bar into the chalked tape, and check to see where the chalk transferred. I cut, plane or scrape just the chalked places from the bass-bar, repeating until, finally, when I press the bar into the tape, the whole thing comes up lightly coated with chalk. Then I remove the tape, clean off any remaining chalk from both pieces of wood, and install the bass-bar, using hot hide glue and clamps. I have a specialized set of wooden clamps made for this task.
When the bass bar glue is completely dry, I remove the clamps and trim the bar to the desired shape. I make my bars a little higher than most luthiers do, in the center, but tapering to about 5-6mm high for the last few centimeters of both ends. (I will take some pictures after I remove the inside mold, so you can see the final shape.)
Edge Preparation
It is much easier to do the inside edge-work if I do it before I install the plate on the garland. So, I use a tiny finger-plane, along with round and flat files, to round the inner edge of the plate, all the way around the perimeter. I may have to do a little correction later, but I want it as close to perfect as is possible, before gluing the plate to the garland.
Installing the Front Plate
I line up the plate on the garland as accurately as I can, matching the center-line of the plate to the centerline of the garland, and then use spool-clamps to hold it in place. I was originally taught to use tiny pins to assure good placement, but eventually discontinued the practice. We know for a fact that the old masters did this, as we can see the remnants of those wooden pins in their violins, still today. Perhaps I will eventually resume using pins. For now, I do not.
Once I have the plate perfectly aligned and securely clamped, using a very thin palette knife, I slip hot hide-glue into the joint between plate and garland, and then add more spool clamps to draw the joint closed. This is a very “stress-free” way to glue plates in place. I used to experience near-panic every time I installed a plate, racing to clamp the joint before the glue gelled, but now it is a very easy and relaxed task.
Purfling
As you may remember, I have not yet installed the purfling. I wait until the plate is on the garland before purfling nowadays, because the purfling “locks-in” the location of the plate edge, and I have had problems in the past with the rib garland changing shape a little, between my tracing the plate and trying to install it. so, after gluing the plate to the garland, the first step is to double check my over-hangs, to see that they are all pretty close to the same. If I need to change them, I do so: I am free to adjust the shape of the plate to match the garland again. When the overhangs are all acceptable, I begin purfling.
Purfling is fairly simple-sounding:
- mark the groove location
- cut the groove,
- fit the purfling,
- glue the purfling,
- mark the edge crest, and
- cut the channel.
It sounds easy, but I still find it a hard job to do perfectly. I want my miters perfect, my bee-stings clean and sharp, and all my borders parallel. This is my 30th instrument from scratch, and I am still finding it to be challenging. Guess I am a slow learner. 🙂
Cutting the Channel
Before I begin cutting the channel I use a compass to mark a line all the way around the instrument, 1.6 mm in from the outer edge. Then, using a sharp, curved gouge, I cut my channel to that edge crest line, trying to cut the whole channel to intersect the surface of the purfling and that pencil line.
Fairing in the Channel to the Arching
Once I have the purfling completed and the channel cut, I still have to fair-in the surface of the rest of the plate to match the curvature of the channel. I do not want there to be any sudden changes; humps and hollows catch the eye of the person looking, and call into question the skill of the maker. (Besides, I think they are ugly….) I use a very sharp finger-plane to begin shaping the surface of the plate and approximating the final curves I want. Finally I use sharp scrapers to bring the curvature of the whole plate to its final shape. I use a low-angle light to cast shadows from any humps or hollows, so that I can spot them and scrape them away. At this point, the scraper has to be sharp, and I have to use a gentle touch. The changes I am making are frequently much thinner than a piece of paper.
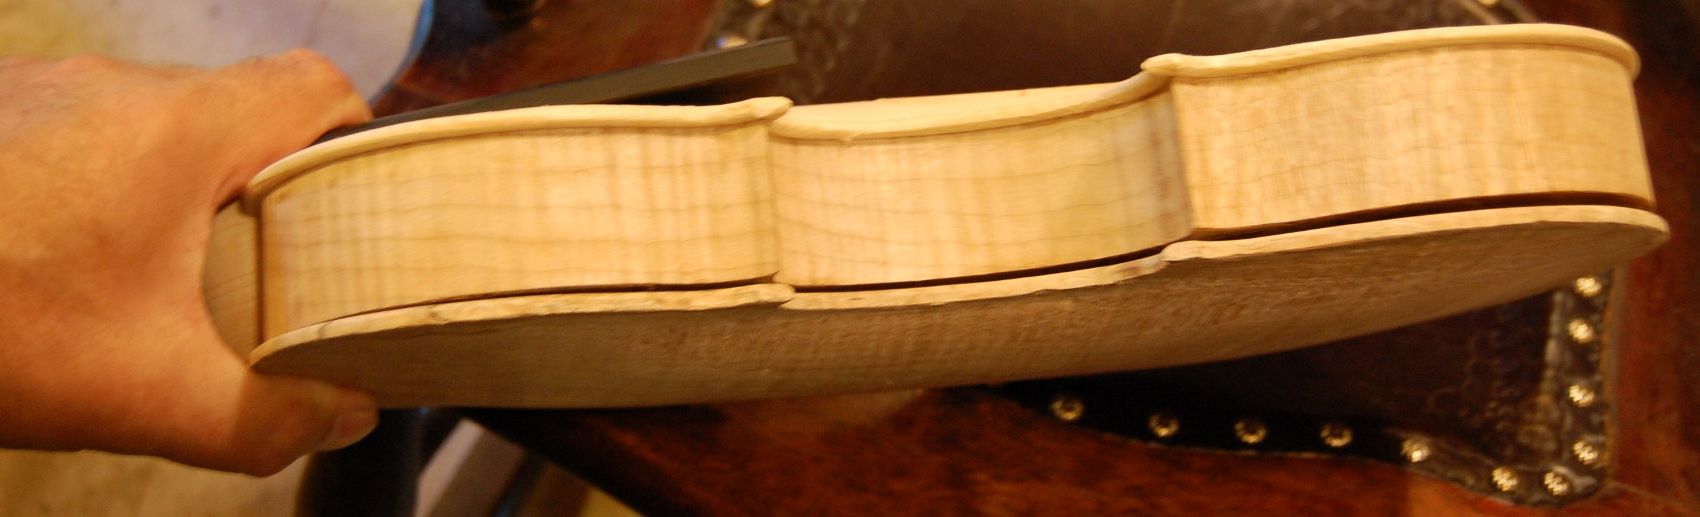
Outer Edgework
After the whole plate is the shape I want, the last task is to shape the outer edge. I begin by using a tiny finger-plane to take the outer corners down at a 45 degree angle, then use half-round files to shape the edge all the way around, bringing the curve of the outer edge up to just intersect the edge-crest line I established earlier. I get it as smooth and even as I can, using a file, but I know when I stain the wood with coffee, it will raise the grain terribly along these edges, so I will eventually re-smooth all of them, using abrasive paper of some sort. In this particular case, I did the outer edgework after setting the neck. No special reason…that is just what I did.
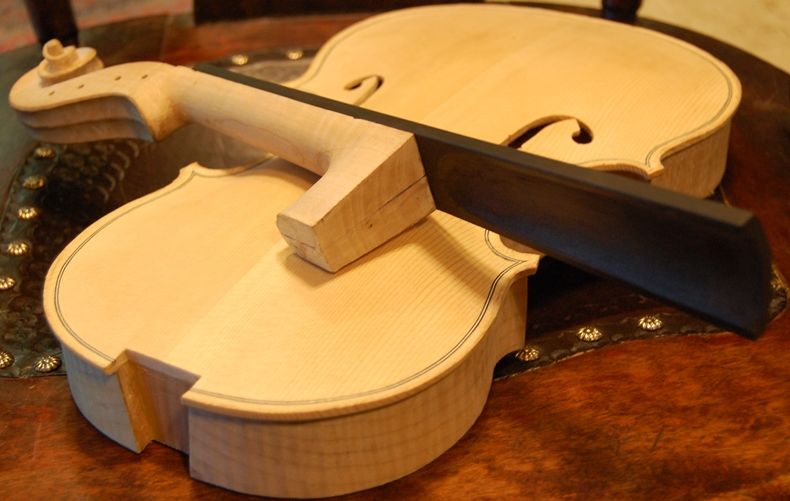
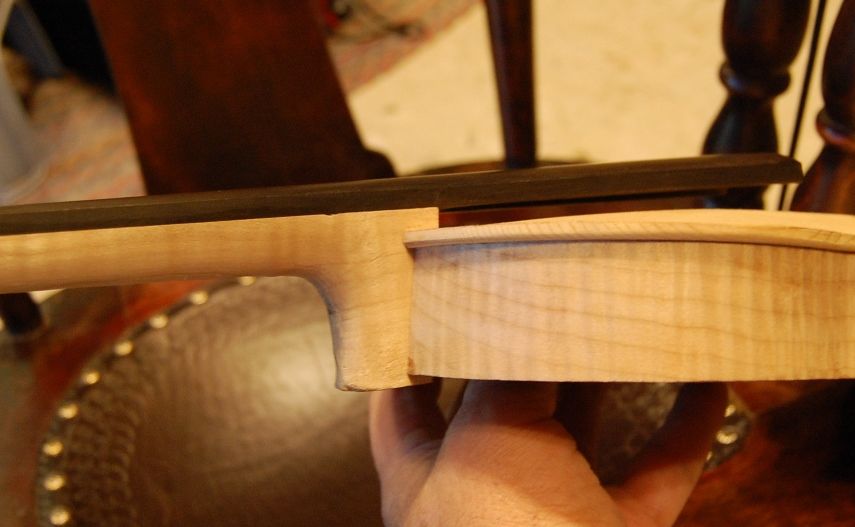
Neck Set
I measure carefully, and cut the tapered mortise using a razor-saw, then use a sharp chisel to remove the waste wood of the mortise. If I do the job correctly, it works very well. I check the sides and bottom to the mortise to see that they are flat and straight, then begin attempting to fit the neck. I have already joined the fingerboard to the neck and have shaped the heel where it will join the neck-block. So, from this point forward, all the shaping and adjustment will be done to the mortise, not the neck. When I am satisfied that the fit is correct, the neck will have to be centered. straight with the centerline of the front plate, straight with the centerline of the end block (not twisted at all), and at the correct angle to place the end of the fingerboard at the right height. Also, of course, the neck has to be set so that the distance from the nut to the edge of the front plate is correct. I check and re-check, until everything works correctly. Since I set the neck before installing the back plate, I want the heel of the neck to protrude past the back end of the neck-block. I will plane it flush after the glue is dry.
When every measurement is correct simultneously, and the fit is tight, I remove the neck one last time and slather hot hide glue into the neck mortise. Immediately I jam the neck into place, and quickly check all those measurements again. Bingo! They are all correct, and I can relax while the glue dries! Once the glue is dry, I plane off the neck heel overhang, flush with the neck-block.
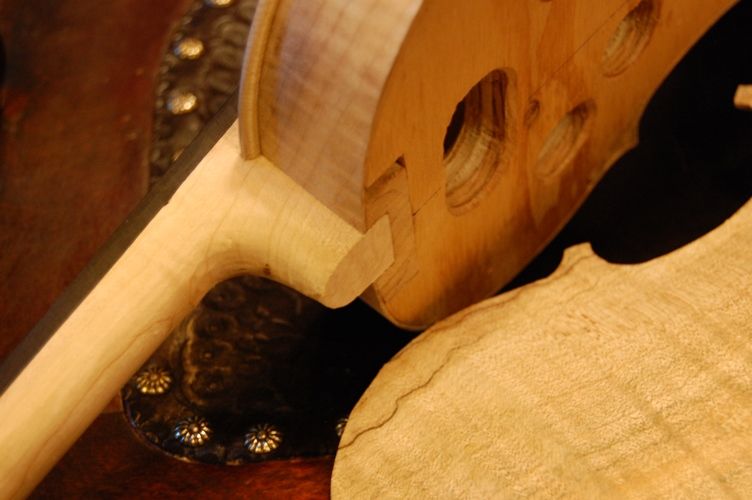
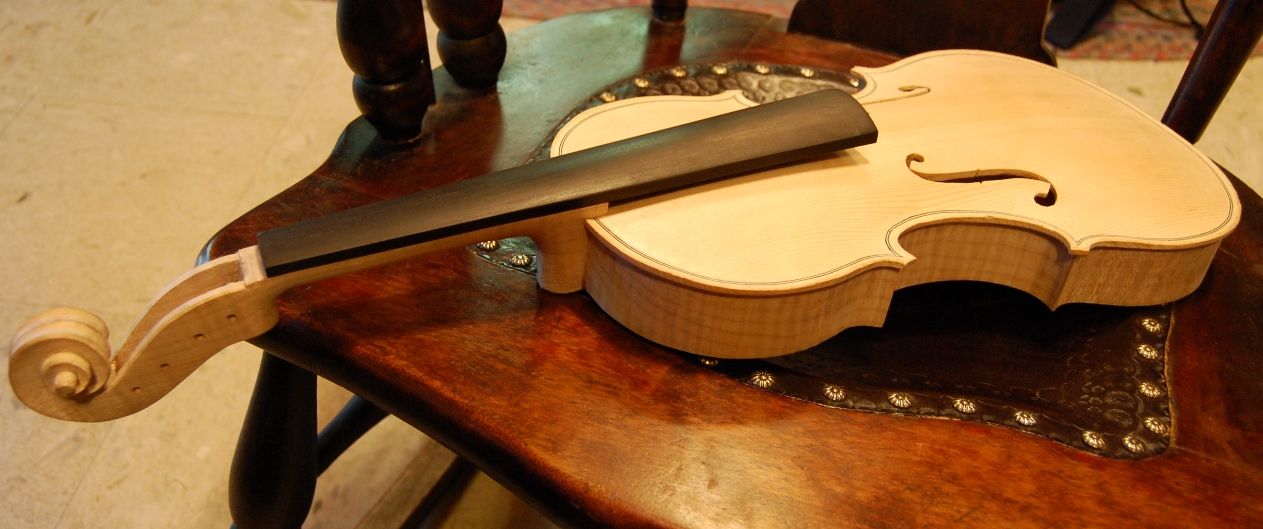
In this picture, I have filed the outer edge curvature already, and, though you can’t see it in this photo, I have also completed the graduations on the back plate, and have filed its inner edges, so it is ready to install. But; before I can do that, I have to remove the mold and add the back linings.
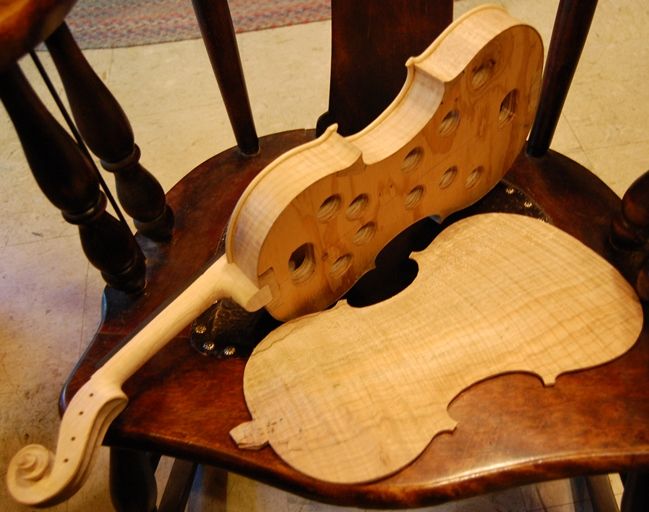
I am getting tired, though, and have some other things that need doing, so the viola will have to wait until another day to move any further toward completion.
Thanks for looking.