Scroll, pegbox and Neck-set

Please share with your friends!

Scroll and Pegbox completion: and Neck-set

Scroll and Pegbox Completion:

When I last posted, I had just temporarily attached the fingerboard to the neck, but had not carved the pegbox, nor the fluting on the back and top of the scroll. In the past I have completed those before attaching the fingerboard, but this time I was anxious to get going, and it seemed a good idea at the time….

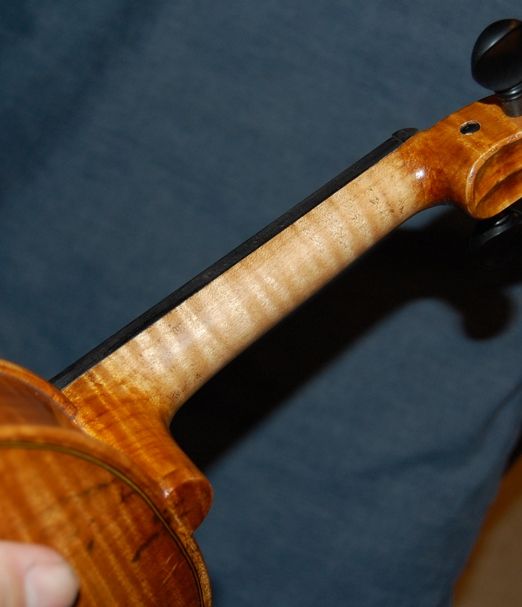
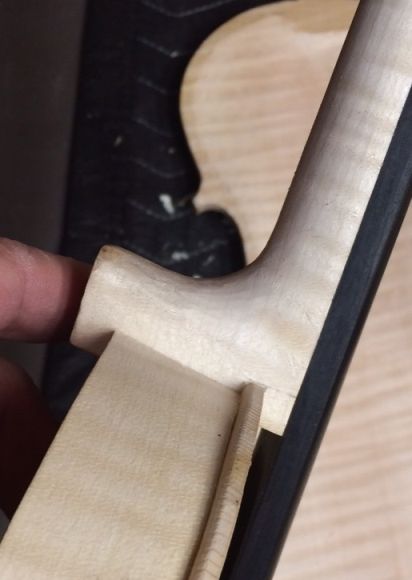
So…I first shaved the fingerboard sides to fairly closely match the handle portion of the neck, and then began carving the pegbox.

Carving the pegbox.
Carving the pegbox.


Carving complete: scraping and filing to follow.


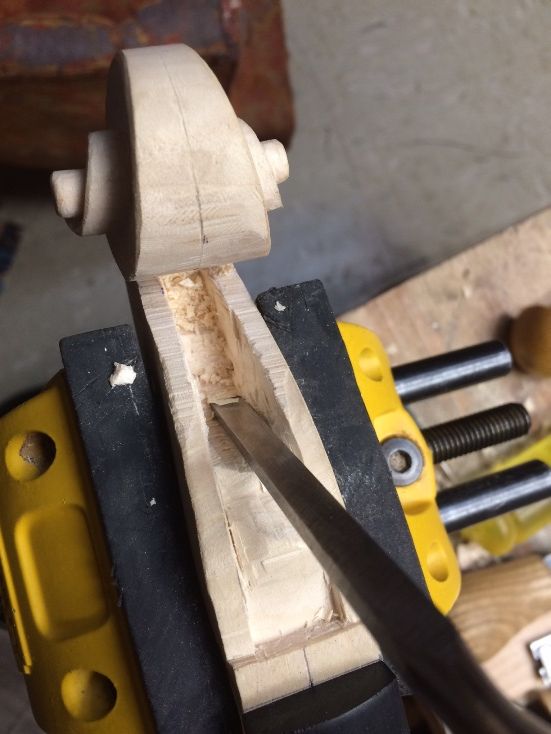
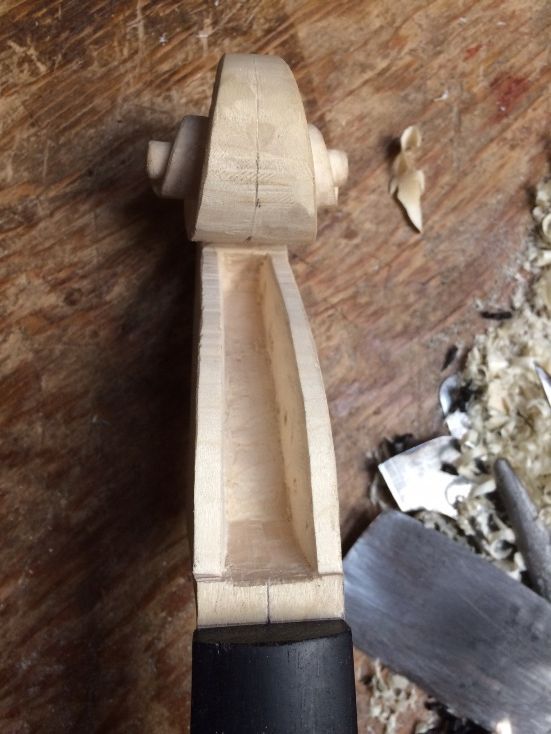
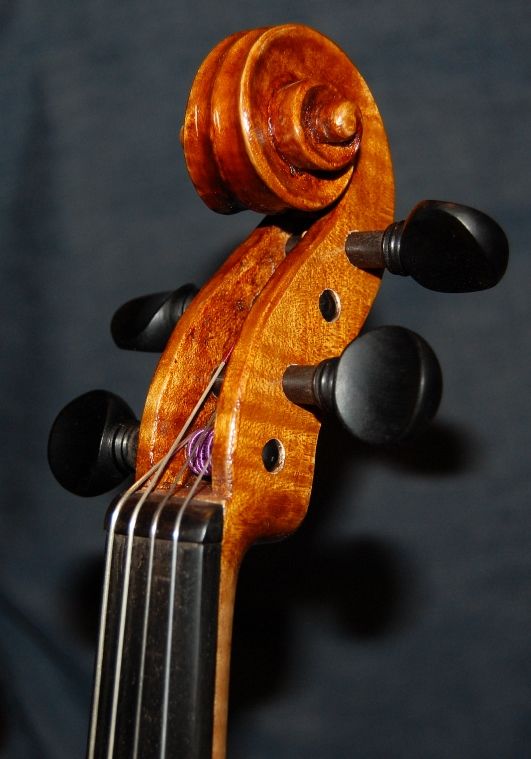
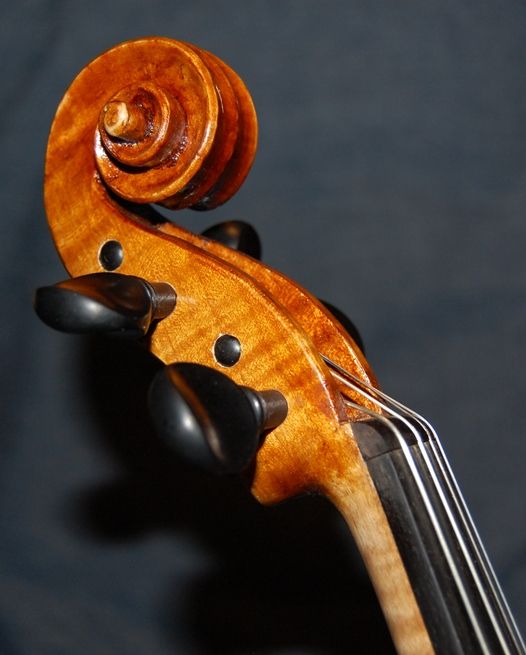
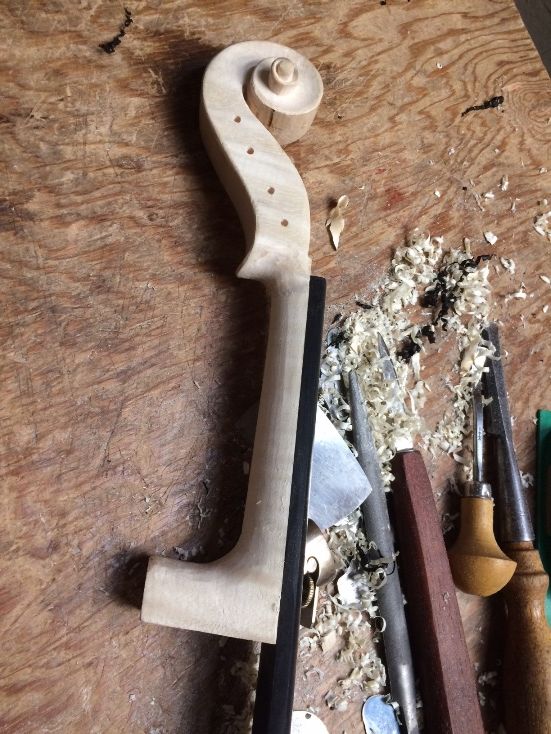
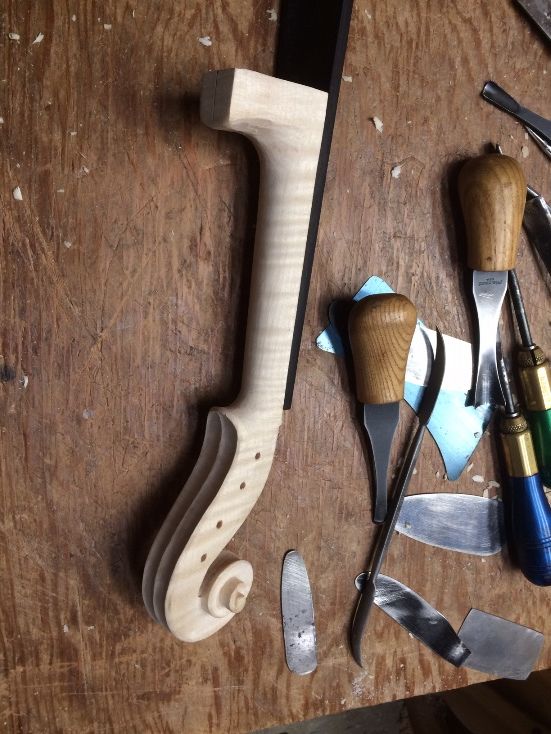
Then I could complete the outside of the pegbox, finish tapering and scraping the handle portion of the neck, and carve the fluting on the scroll. I still had the centerline I had scribed when I first cut out the scroll, so I worked from there, and tried to “color inside the lines.”

Nearing completion.
Neck is nearing completion, outside and inside of Pegbox are pretty much complete. No fluting yet.


Fluting nearing completion...back view.
Fluting nearing completion…back view.


Fluting nearing completion: front view.
Fluting nearing completion: front view. Lots of scraping left to do.


Neck Mortise

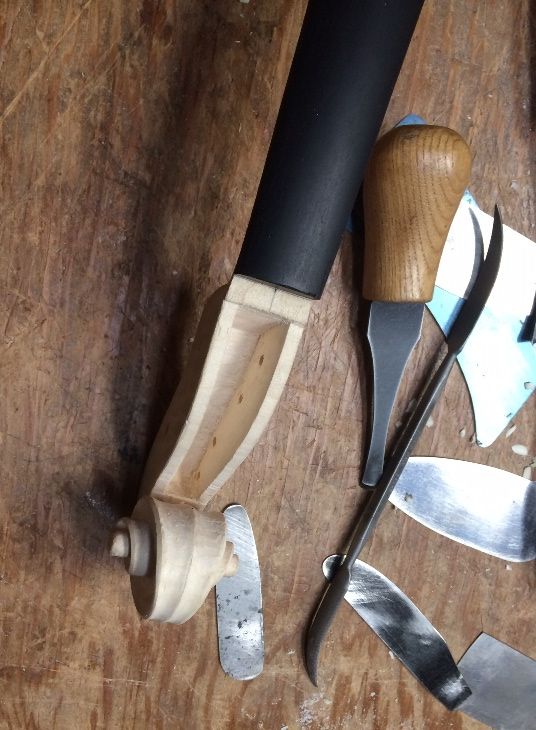
Before I can set the neck, I have to lay out the exact footprint of the neck heel on the centerline of the corpus, where I will cut the mortise through the ribs and into the neck-block. I have deliberately left the heel long, so that I can set it through the neck-block, and not have to worry about fitting against the back button, because I haven’t installed the back plate yet. I will trim the heel afterward, and, when I level the back of the corpus, just before installing the back plate, I will level the heel right along with the linings and blocks.

So here is how the neck mortise went:
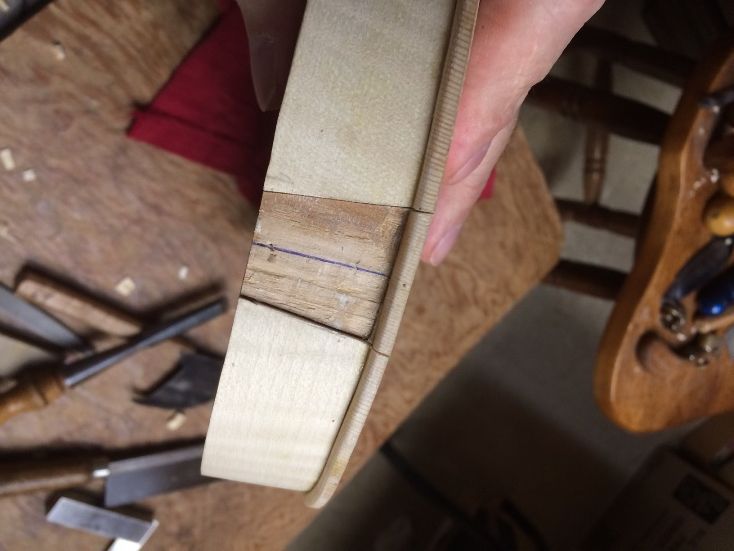
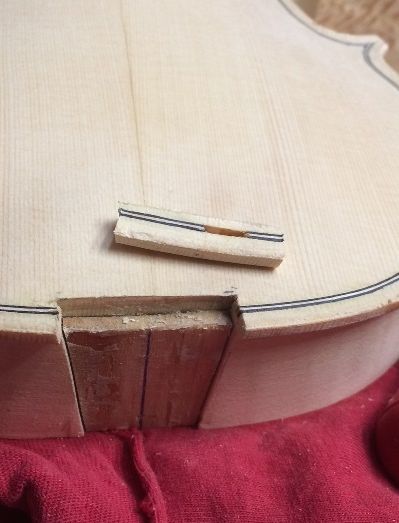
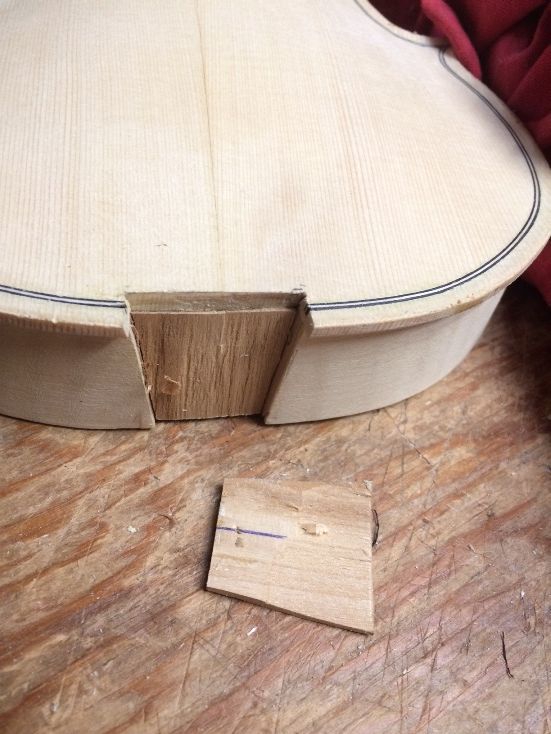
Mortise layout
The mortise is laid out off the centerline, which you can barely see in this photo, because one top rib nearly obscured it.


mortise beginning
First, I removed the rib ends, and double-checked my layout lines.


Front plate cut out.
Then I removed the waste wood from the edge of the front plate.


Mortise carving
Then I began chiseling away the block wood, to open the mortise.


Neck-set

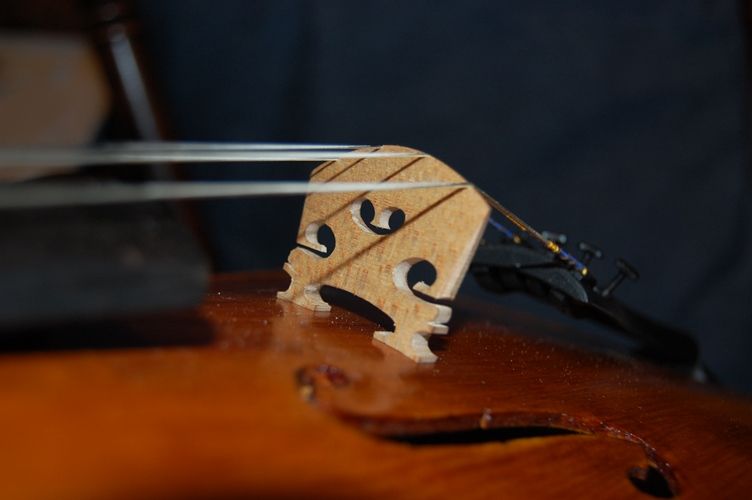
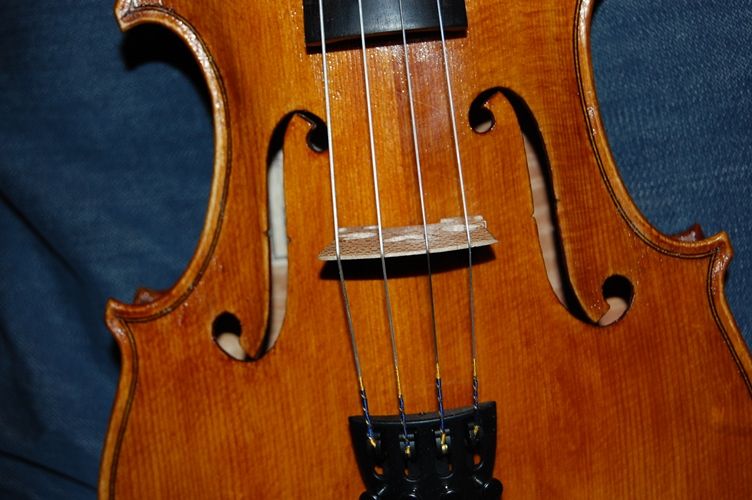
The mortise has to fit the neck in every respect: It has to be the right width and shape, so that the neck goes to the correct depth. (I wanted a 6mm overstand at the edge of the front plate.) It has to be the right depth so that the distance from the front edge of the nut, to the top of the front plate will be exactly 130mm. The sole of the mortise has to be flat, so as to fit tightly against the end of the neck, but at the correct angles, both laterally and fore-and-aft, so that the neck is not twisted in relation to the corpus, the centerline of the neck is in line with the centerline of the corpus, and the projection angle is either exactly right or just a shade high. I have had instruments change fairly rapidly after they have been strung at tension for a while, due to the top bulging a little as it is compressed by the string pressure, so, I deliberately set the projection angle just a tiny bit high, anticipating that it will change a bit under string tension.

Dry-fit neck-set.
Dry-fit neck-set. No glue, yet. Just the final check of all measurements and angles.


Dry-fit check of overstand mark and neck length mark.
Dry-fit check of overstand mark and neck length mark. Both are correct.


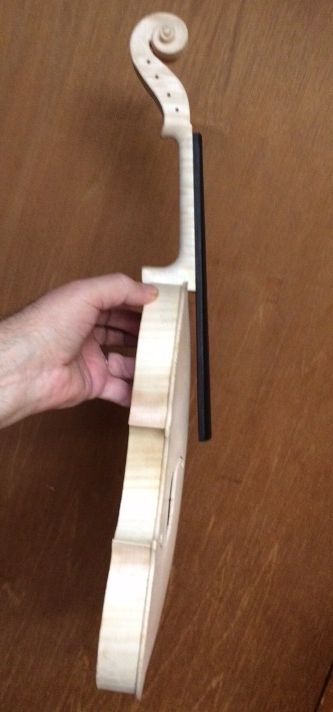
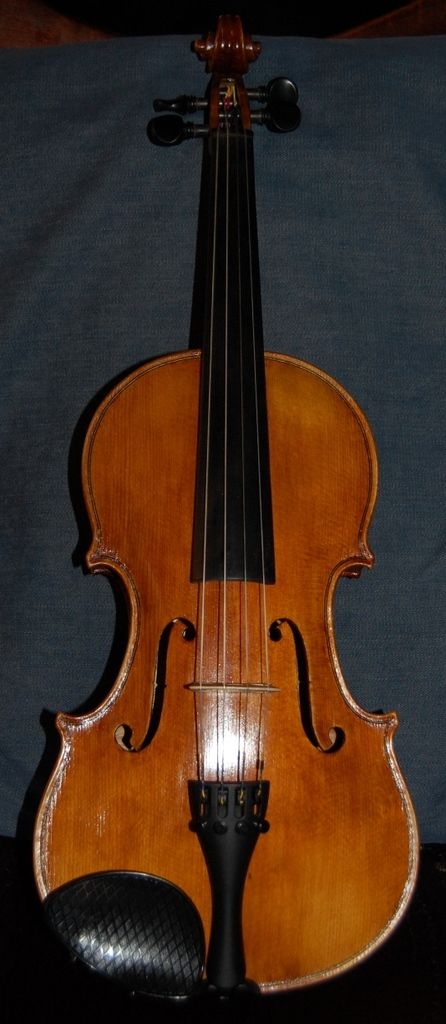
When I am finally satisfied that all is correct, I remove the neck one last time, slather the hot hide glue into the mortise, and shove the neck home for good. I quickly check all measurements, to make sure I got it in correctly. I only have a few seconds before that glue sets up permanently. Fortunately, all was still good, and I applied a single clamp to hold it until the glue dries.

Neck-set, glued, and clamped.


What’s Next?

You can see that I have about 10mm of extra heel hanging out behind the back of the neck block. I will saw that off, nearly flush, plane it as close to flush as I dare, then, after removing the mold, installing the back linings, and trimming the linings and blocks, I will level the entire back of the corpus, including the heel, on a “sanding board.” When all is perfectly flat, I will install the back plate, and the violin will begin to take on a life of its own.

For some reason, after I close the corpus, or thereabouts, I cease to see the instruments I make as a “project I am building”, and simply see them as an instrument I am working on. I am working on a violin, at that point, not just something that will become a violin. It is a strange feeling, but it has happened on every instrument.  A student, who built his first instrument under my guidance, put it another way: as the instrument came together, he suddenly said, “This is getting real!” I knew exactly what he meant.

Next time I will remove the mold, install the back linings, shape the blocks, and maybe get this thing closed up!


Thanks for looking.


If you found this post helpful, please share with your friends!

Small Viola Set-up

Please share with your friends!

Setting Up the 14-inch Viola

What is “Set-up?”

Set-up can include a fairly wide range of things not related to the actual building of the instrument:

  • Dressing the fingerboard
  • Adjusting the string-height at the nut
  • Fitting the bridge
  • Fitting and adjusting the sound-post
  • Fitting (or lubricating) new tuning pegs
  • Installing strings, tailpiece and chinrest
  • Final adjustments for sound and playability
    • Height of strings above the end of the fingerboard
    • Balance of tone across the strings (adjusted at the soundpost)

Usually the instrument already has the fingerboard and saddle when “set-up” begins.

This Instrument

In this particular case, I had already installed, but not dressed the fingerboard, so I still had to:

  • Dress the fingerboard,
  • Install and finish the tuning pegs,
  • Drill the holes in the tuning pegs for the strings,
  • Fit and install the nut
  • Cut the slots in the nut, to receive the strings,
  • Drill and ream the hole for the end button, and fit the end button
  • Fit the soundpost, to a preliminary position,
  • Fit the bridge and adjust it for height,
  • Install the tailpiece, strings and chinrest.
  • Perform any “final touches”, to repair small varnish flaws, etc.

I have been swamped with other responsibilities, so, this time, I made no effort to record the process as it was being done. If anyone is interested, one can search the archived articles on this site, to see photo-essays of set-ups. Here is the completed instrument, from various views:

Completed saddle, end-button and tailpiece
Completed saddle, end-button and tailpiece: notice the curved ends on the saddle.
Completed 14-inch viola front side
Completed 14-inch viola front side: sitka spruce.
Side view of 14" Viola
Side view of 14″ Viola. Notice the deep ribs.
Completed 14-inch viola back.
Completed 14-inch viola back. That big-leaf maple is pretty stuff. This was from the log  donated by Terry Howell.
Completed neck;
Completed neck; If you check back a few posts, you can see how different the neck looks before and after polishing and sealing.
Completed treble-side scroll.
Completed treble-side scroll. This big-leaf maple, for the scroll and neck, was cut in my wife’s parents’ yard, some time ago.
Completed Bass-side scroll.
Completed bridge, from the tailpiece side
Completed bridge, from the tailpiece side. Those are Helicore strings, and a Josef Teller bridge.
Bridge viewed from the fingerboard side.
Bridge and sound-holes viewed from the front of the instrument.

So! That is the 14-inch Viola! I will add a chinrest in the morning, but I wanted to get these pictures posted.

So far the sound is good. It is a little unfocused on the C string, but I usually expect some of that at first. I adjusted the soundpost to enhance the C-string, and tomorrow I hope it will have improved. I could tell it was opening up within 20 minutes of hard bowing, so I expect it will be a very good viola. These strings are Helicore: I would prefer orchestral strings, I think, but it is difficult to find a good C-string for a 14″ viola.

This will make a very good viola for some player with small hands.

Thanks for looking.

(Edit: Here is the finished instrument WITH the chinrest. And, as I hoped, it sounds even better this morning. 🙂 It has a good, open, rich C-string and good balance across all strings.)

Completed 14-inch viola with chinrest.
If you found this post helpful, please share with your friends!