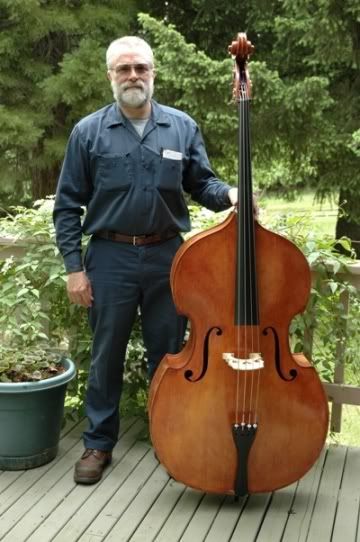
The Northwest Handmade Musical Instrument Show will be this weekend, May 4th and 5th, at PCC Sylvania campus, from 12 noon to 5 PM, Saturday and Sunday.
My newest two violins will be there, to try out, along with about eight other violins, violas, five-string fiddles, and one cello.
I really hope to see you all there.
If you found this post helpful, please share with your friends!
That Double Bass I began (quite some time ago) has sat in the corner of my shop, sneeringat me every time I look that way. That has to stop…but the only way to stop it is to finish the project. (sigh…)
One of the things that was holding me back is that my old home-made bending iron simply wasn’t good enough. So, the first step toward completion is to make a new, hotter, smaller diameter bending iron. The old one was heated with a propane torch, but it was quite large, and it took a long time to get it barely hot enough to function. This one will have an electric element for heat, and much smaller diameter, as well as much less mass. I hope it works well. Another maker shared how he made his bending iron, and I am attempting to emulate his example. If that works, I can get moving and complete the bass this fall.
Another Cello
A few years ago, I had salvaged some curly Big Leaf maple from a very large tree that was being removed from my wife’s childhood home. I promised I would build her a cello from the wood, so she would have a treasure from her childhood. So, the wood is fully dry and seasoned, now, having sat out in my shop for several years. It has humidity-cycled through the changing seasons, and should be quite stable, now. A friend (Steve Stevens, now deceased) had given me a cello top set of Red Spruce, so that will go into the mix as well, making it a treasure to both of us.
What I hope to do, is to give special attention to getting good pictures of every step of the construction and finishing of this cello, so as to post a running commentary and tutorial as I work. On every project thus far, I have had a tendency to get engrossed in the work and forget all about pictures. So, I may recruit Ann to take the pictures, so that I can keep rolling.
A Large Viola…or maybe a Viola da Spalla
I haven’t decided just how large, yet…the largest violas I have made in the past have been 16-1/2″ on the body, which is pretty good sized, and already too big for some folks. But I am considering either a 17″ (or larger) viola, or a “Viola da Spalla”, sometimes called a violoncello da spalla, or a small Violoncello piccolo. The Viola da spalla is played off the right shoulder, so that the chin is over the bass lower bout, but not on a chinrest. A strap holds the instrument up under the player’s chin, and the bowing hand reaches up from beneath, to access the strings. Frequently they are made as a five-string cello, and that is how I would approach it. Tuning, then, is in the same range as a cello, but adding one higher string: C, G, D, A, E.
Either way, I realize I am probably building something I will never be able to sell, as there isn’t much market for either instrument. (Ah, well… some things we do out of love.) Anyway, this one is not a very high priority.
Another Violin
The last violin I made received good reviews, but I can see things I could improve, so…I will probably make another one soon. (This lutherie stuff is addictive!)
Coming Soon
I hope to begin at least two of the projects soon, and begin posting photographs.
Thanks for looking.
If you found this post helpful, please share with your friends!
Bending and Installing Bass Ribs and Linings: Part 1
Gamba-corners versus Violin-corners
When I built my first bass, ten years ago, I built a bass rib bending “iron” of heavy aluminum pipe, and it worked acceptably for that bass, primarily because it was a “gamba-cornered” bass:
Gamba-cornered bass: no recurve at the corners.
The gamba-cornered basses derive their name from their earlier predecessors, the viols. (Some people still refer to them as “bass viols”.) The violas da gamba were a medium-sized viol, intended to be played in a sitting position, gripped between the knees, like a cello without an end-pin. Their corners had no recurve, so the basses with similarly shaped corners are called “gamba-cornered.”
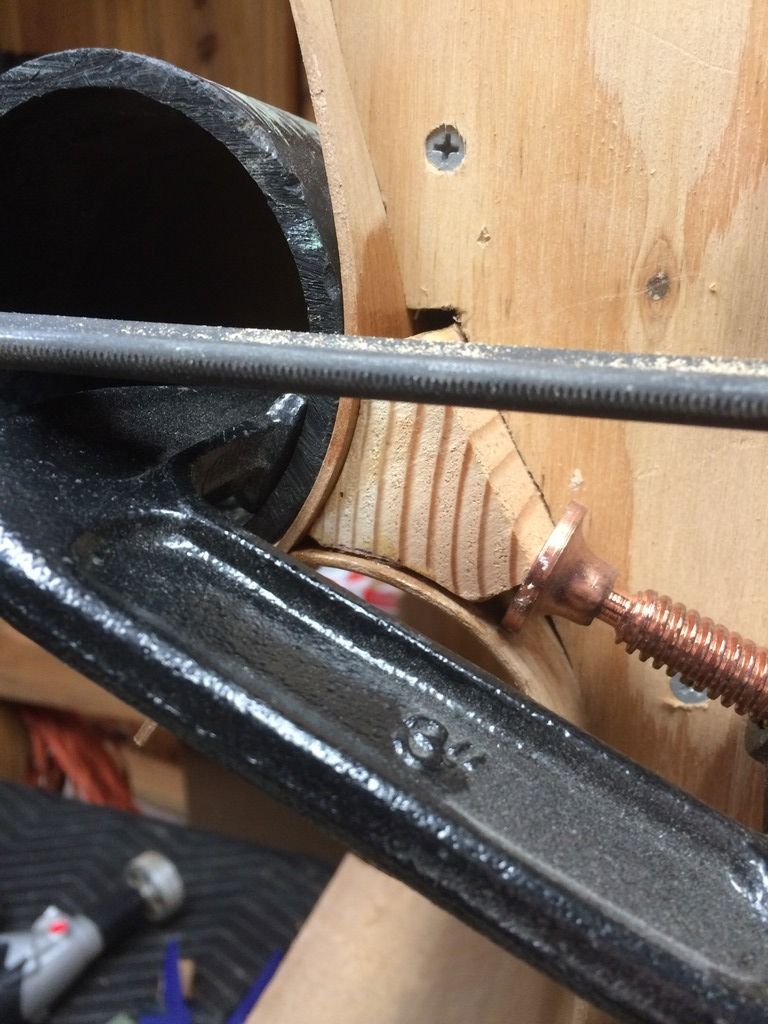
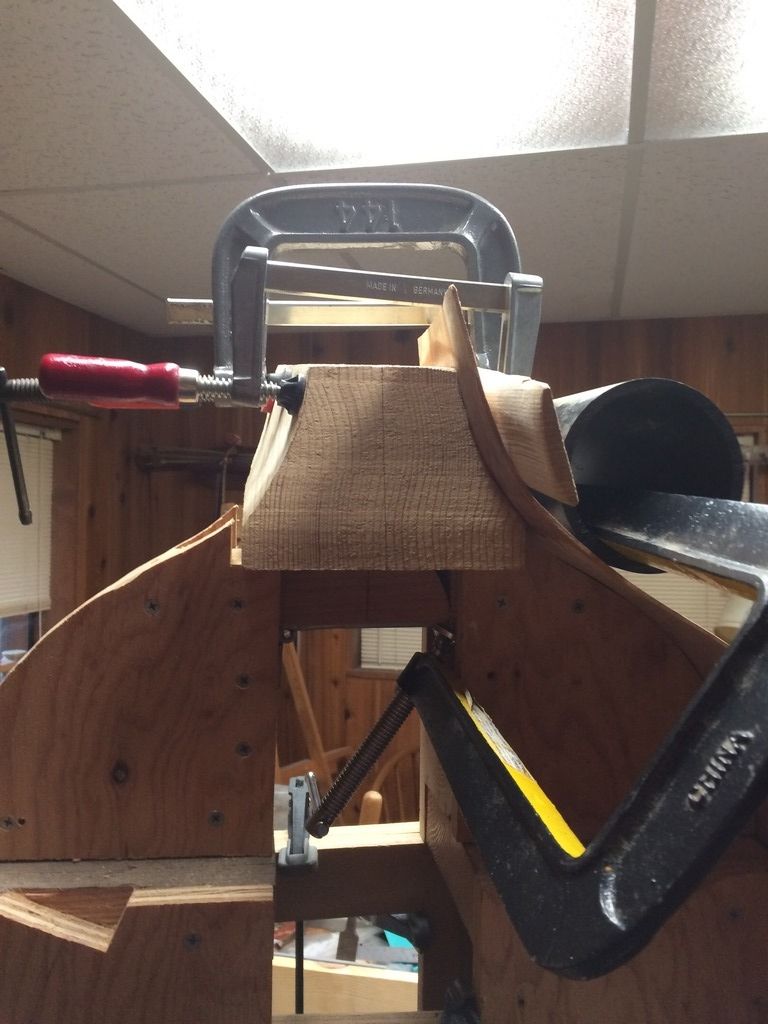
But this bass, in addition to having a removeable neck, will be a “violin-cornered” bass, with sharp recurves at each corner. And, as it turned out, the old bending iron just wasn’t going to work. So I improvised by clamping a piece of 4″ ABS pipe to the workbench, draping a wet rag over the rib in progress, and “pressing” it with a clothes-iron. Surprisingly, it actually worked, just not all that well. I could get a rib flexible and roughly bent the way I hoped, but then had to quickly clamp the floppy rib into the mold and let it cool and dry there, and regain some rigidity.
Again; it actually worked… just not very well. It was a very frustrating process, and clumsy, much as if I had never built a bass before. I can tell that, before I build another bass, I need to build a better bending iron…and maybe streamline my mold a bit, as well– this one is a real tank, and inconvenient to use, as I did not use good foresight regarding where clamps would fit, so as to actually use the mold. (sigh…)
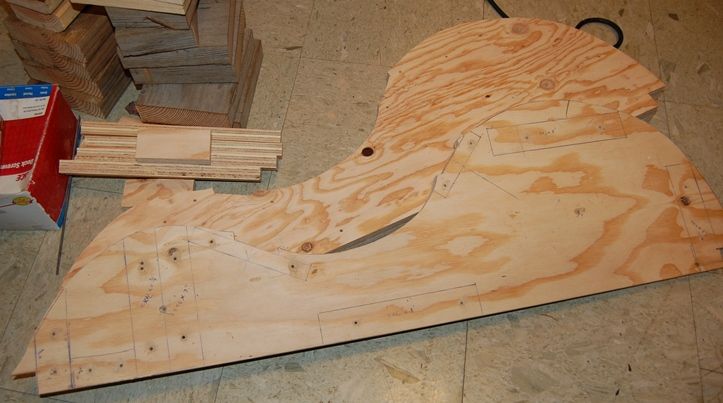
So, when I last posted photos (16 months ago…things have been busy) I had the mold prepared and the ribs ready for bending.
Bass mold with blocks installed and shaped. The mold will be removed, leaving only the blocks as part of the finisnhed Bass.
Bass ribs ready for bending. The blocks were not shaped yet, in this picture. I ended up removing that neck block and replacing it with Spruce.
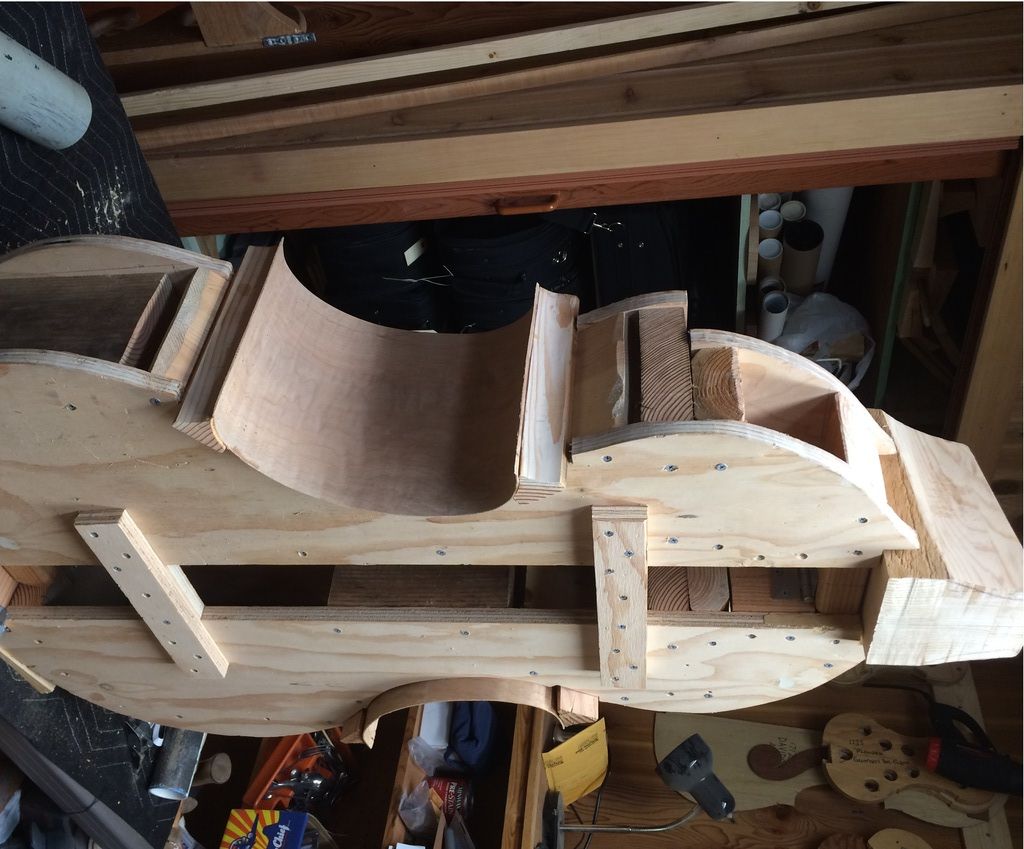
Bending and Installing the Ribs and Linings:
I always install the center bout ribs first–usually called the c-bout ribs. When the glue has dried on the c-bout ribs, they can be trimmed to match the outer curve of teh corner blocks, and the upper and lower ribs can be installed.
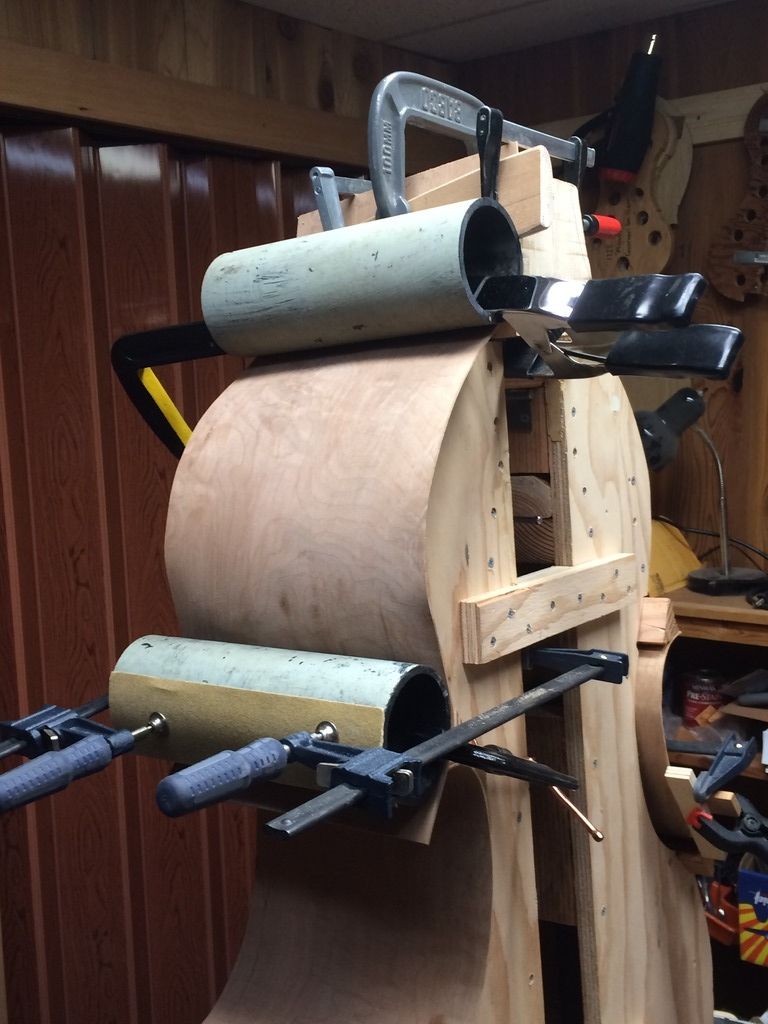
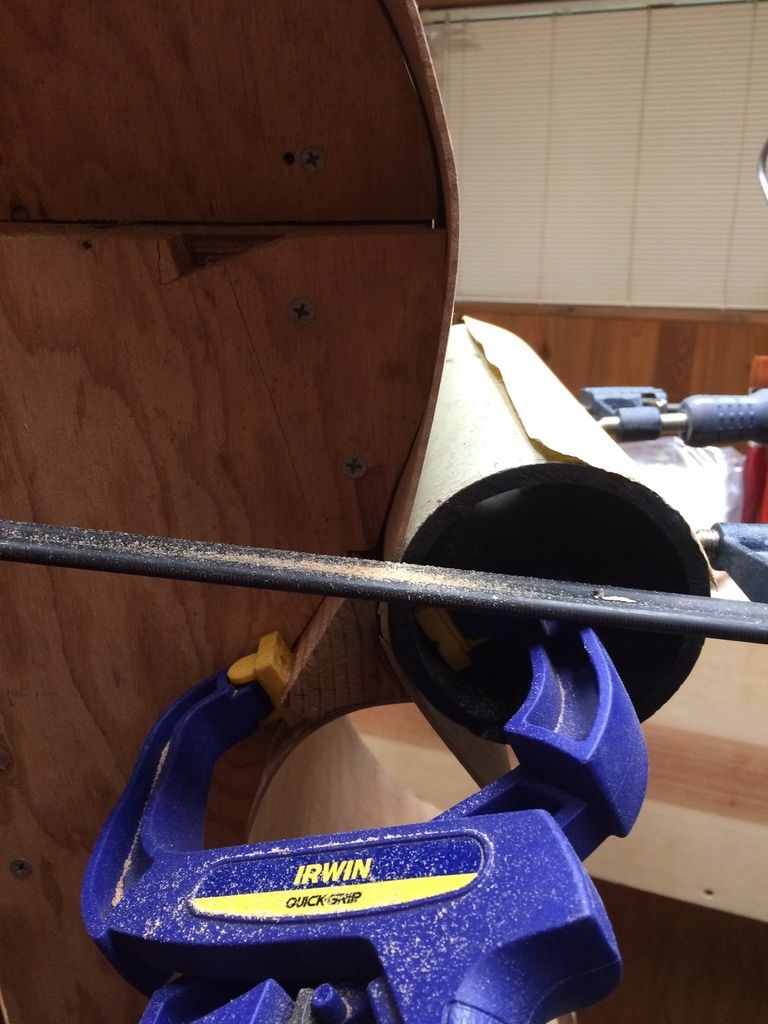
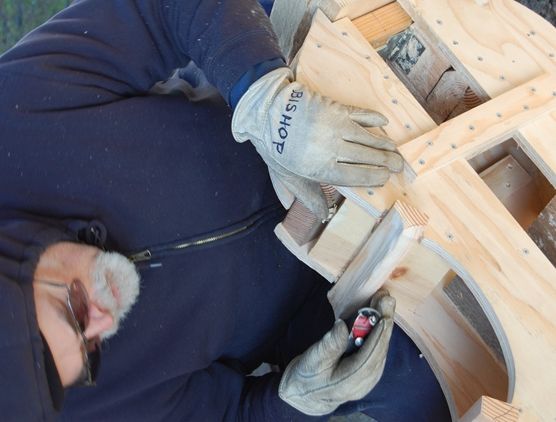
The C-bout ribs have been installed and trimmed. I used salvaged ABS pipe for clampling cauls, and any sort of clamp I could lay hands on.
I really will have to improve my clamping arrangement before building another bass. Probably will have to make major improvements on the mold, too. I bend the upper ribs one section at a time, and clamped them to the mold to cool and dry, before making the next bend:
Beginning to form the upper bass-side rib.
Bass side upper rib fully clamped.
Clamping nightmare.
More nightmares! Those pipes tended to roll, throwing off the clamps. (sigh…)
And still more nightmares! those sloping surfaces encouraged the clamps to slide off.
But finally, things began to shape up, one step at a time:
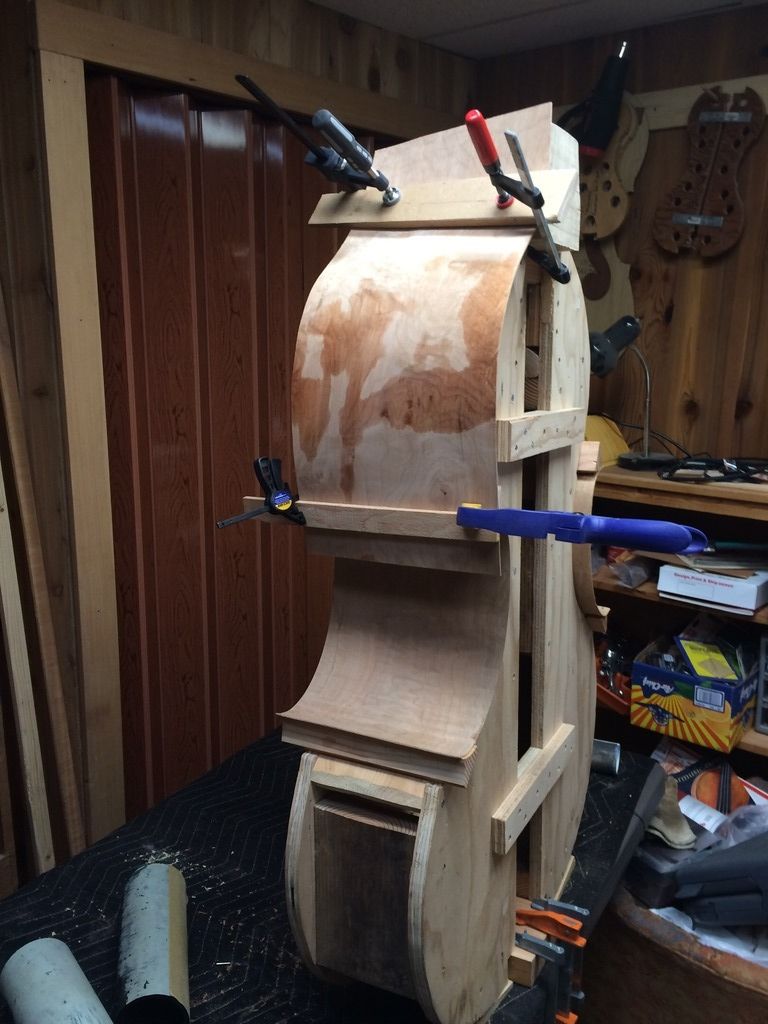
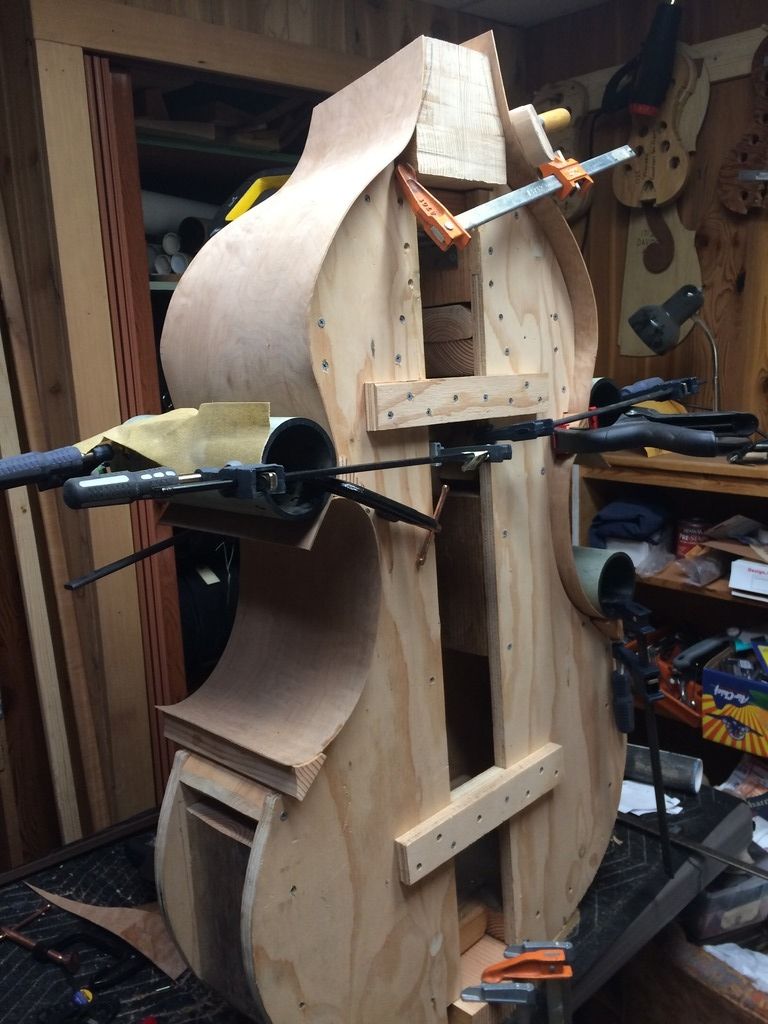
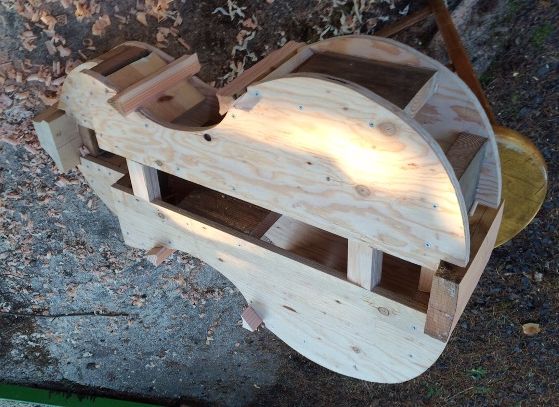
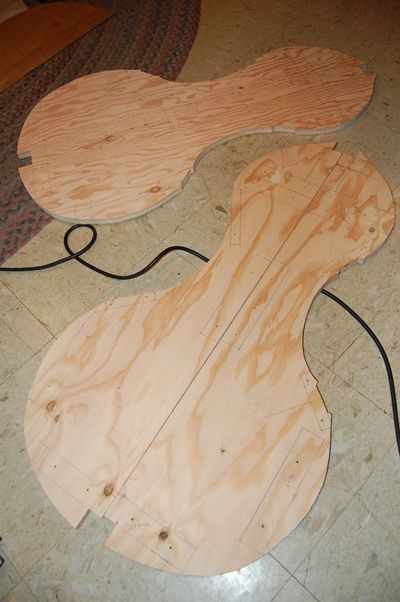
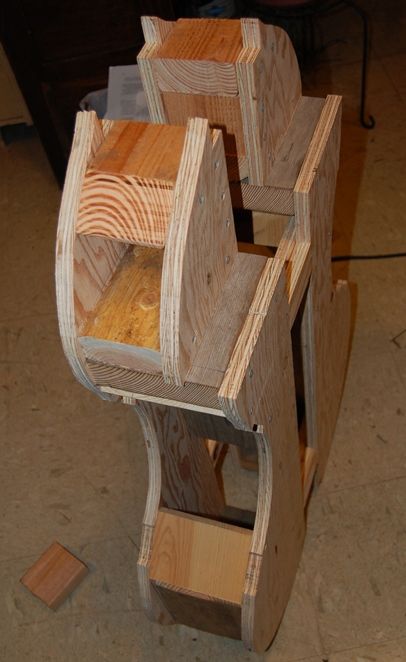
Once both upper ribs are in place it begins to look roughly like a bass.
Upper and C-bout ribs installed and trimmed. The bass is clamped to a table-top, so it looks huge, but it is only about 42″ tall.
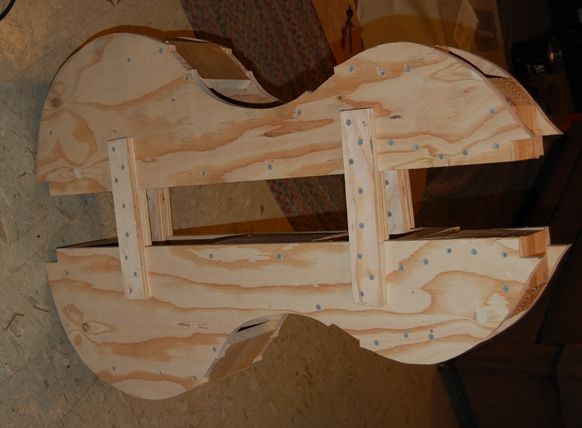
So, the next step is the lower ribs; but I was uncomfortable handling the mold with the unprotected ribs, so I will install the upper and center linings before attempting to turn the mold over so I can install the lower ribs. The linings stiffen the edges of the ribs, as well as tripling the gluing surface presented to the front and back plates.
I installed the upper linings before trying to up-end the bass and install the lower ribs and linings:
The linings begin as straight strips of weeping willow, as shown. I bend and trim them to fit, then attach with hot hide glue.
I only have sufficient clamps to attach one side at a time. You can see that I have already installed the bass side linings.
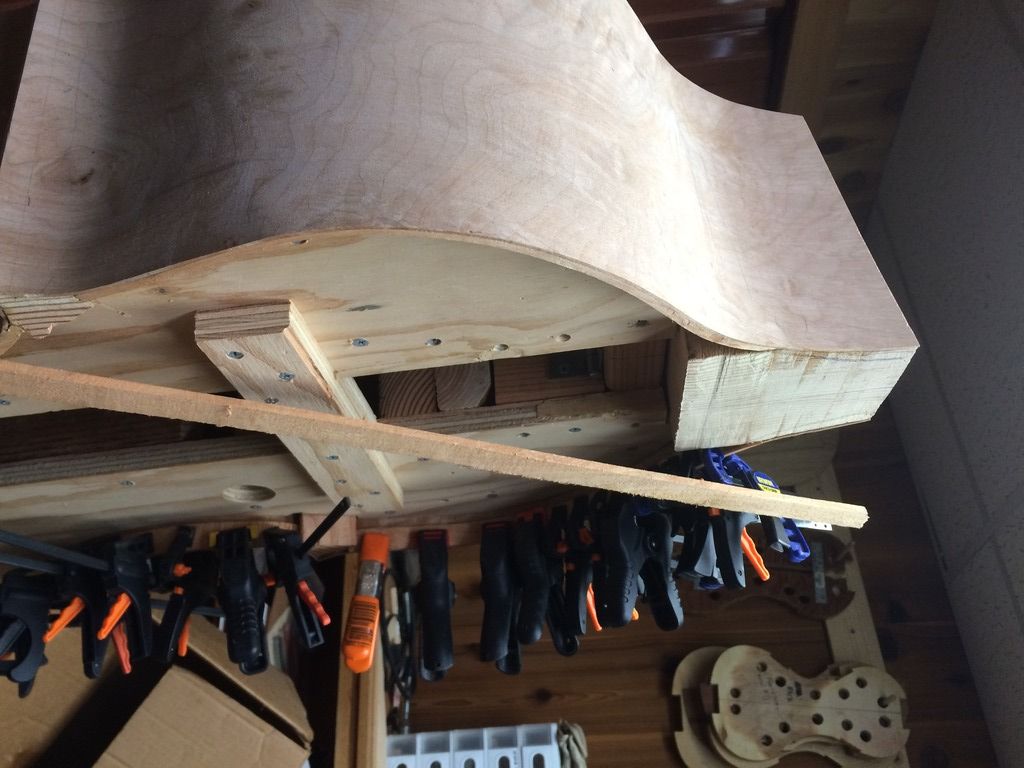
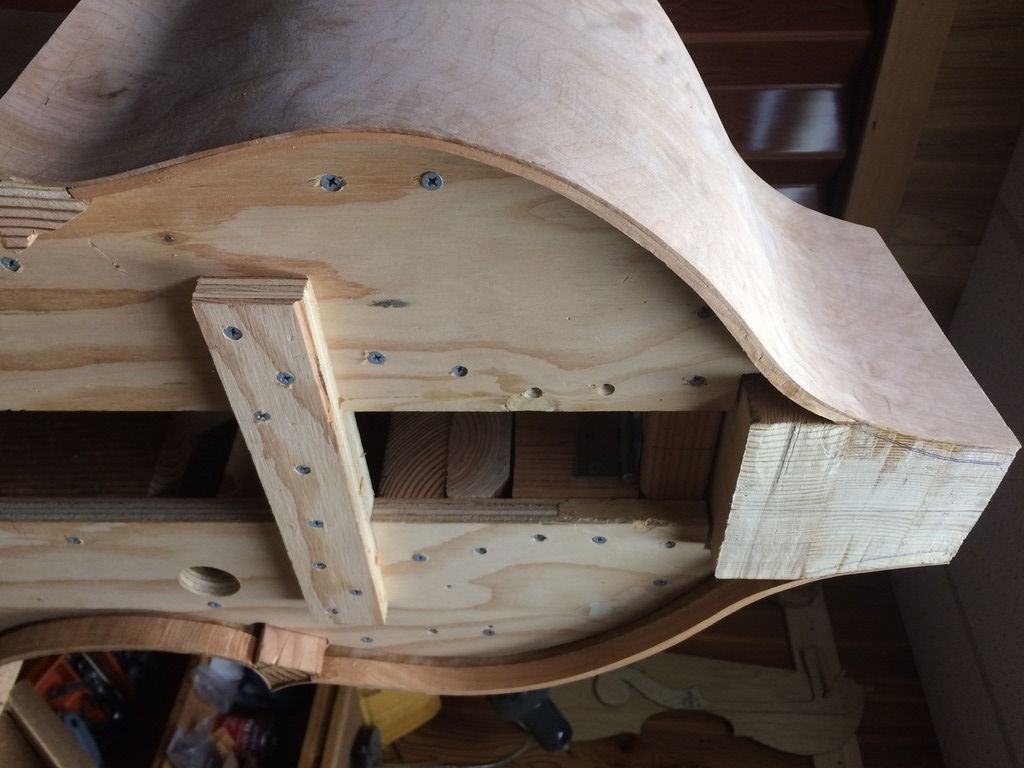
No linings at all on the back side, yet…that will be the next step. See how thin the ribs really are!
Upper and center linings completed on front side.
That is all I am going to post for now…the lower ribs and linings are next, but I have to create a fixture that will allow me to turn the bass to a variety of angles in order to work on it. I think I have a plan figured out: we will see how it turns out.
Meanwhile, anotherproject has arrived on my doorstep. A lady sent me a cello begun by her dad, but which was still incomplete when he passed away 9 years ago. My assignment: resurrect that dream-cello! It will have to wait until May 1st, I think, but I am anxious to get started on it. It is made of beautiful bird’s-eye maple and what seems to be Red Spruce. I hope it turns out to be a great cello. Looking forward to the challenge. 🙂
Thanks for looking.
If you found this post helpful, please share with your friends!
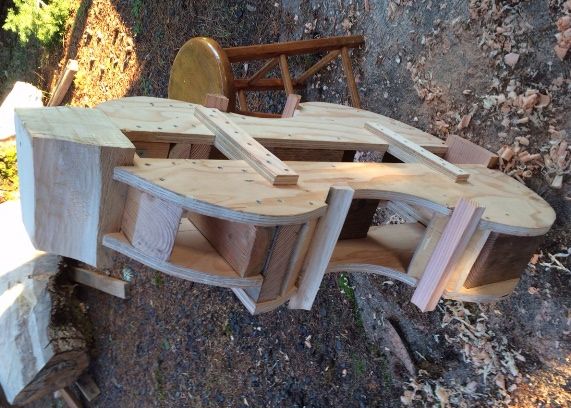
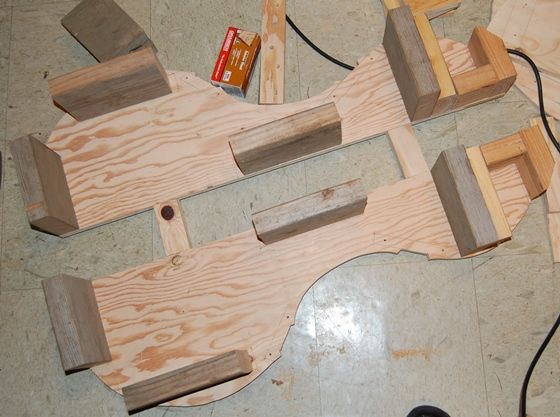
As you may recall from the previous post, the blocks on this upright bass were pretty huge, compared to what they needed to be, so there was really a lot of wood to remove.
Mold with blocks and ribs. Blocks are still way oversized, and the ribs are still straight. Gotta change all that.
“Kutzall” Tool
So! A drastic need makes for drastic measures. Ordinarily, on a smaller instrument, I would use the bandsaw and oscillating spindle sander to shape the blocks, but this mold is reeaaalllly heavy (over-built, I think…oh, well, it will be removed and the bass will be normal), even though it is a soloist bass, so I can’t see trying to manhandle it around on my big bandsaw. The saw could handle it, but the table for the saw is not big enough to hold the mold steady, and I am not strong enough to just hold it up there by sheer strength…. So… what to do?
This tool (carbide abrasive disc) is something my wife bought for me a year ago (Christmas), but I had never used it much. It is called a “Kutzall”, and it tears away wood incredibly rapidly, without loading up, and without burning the wood. So I used it to remove the large rough sections, then used the plane to remove the torn surface, and finally, to shape the blocks:
Kutzall disc, with 5″ DeWalt angle grinder: Not for the faint of heart! Absolutely wickedly effective, but not as dangerous as the Lancelot tool.
Stanley #100-1/2 Squirrel-tail Plane
It was about 37 degrees, F, outside, but the sun was bright, so I worked outside.
Smoothing and shaping the corner blocks, using a Stanley “Squirrel-tail” #100-1/2 hand-plane.
The little plane is somewhat hard to control, because the curvature of the sole is so extreme, but, if it is sharp and if the blade is set for a very shallow cut, it works well.
It does have to be sharp! (Time to sharpen….)
Stanley # 100-1/2 curved-sole plane…for those of you who are unfamiliar with it.
I was able to shape the blocks pretty close to finished shape with the little plane, but there are some irregularities. I have another tool for that problem.
The bottom block was planed entirely with a low-angle plane (also Stanley– can’t recall what number.) but it worked very well, and the bottom block was easy…I didn’t use the grinder at all on this one. So here are all the blocks, pretty close to finished:
Bottom block planed with a small, flat-sole, low-angle plane.
And, here you can see the finished blocks, ready for sanding:
All the blocks, ready for coarse-sanding. The small plane leaves ripples. The sanding tool should remove them all.
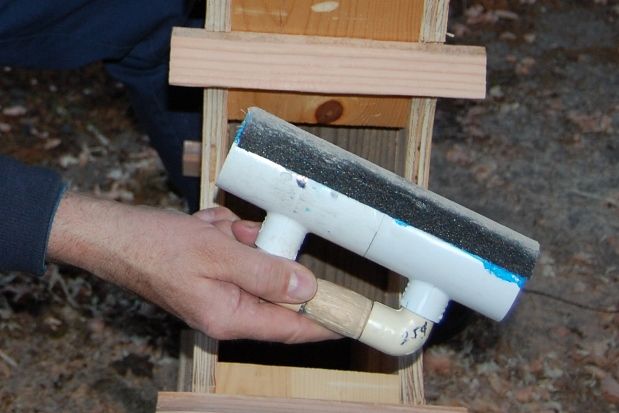
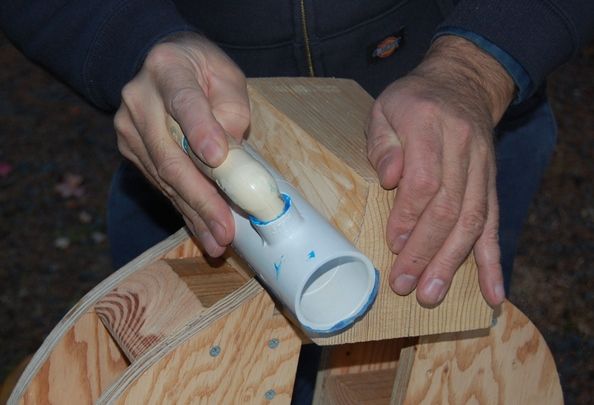
Homemade PVC Sanding Tool
As I mentioned earlier, the oscillating spindle sander I have would not be tall enough for these blocks even if I could manhandle the mold up onto the machine. So, I made this little sanding tool out of re-claimed PVC fittings from the “Habitat for Humanity Re-Store”, and spent more on the little can of PVC cement from the hardware store than I did on all the other materials…about $2.50 at the Habitat store. I used PVC cement to affix the abrasive cloth to the pipe, too, and bound it up with strips of plastic bag until the solvent outgassed and the cement was set.
Sanding block fabricated from four PVC fittings and a 2″ section of 2″ PVC pipe, with a little piece of wood for the handle grip. Comfortable, efficient, and cheap.
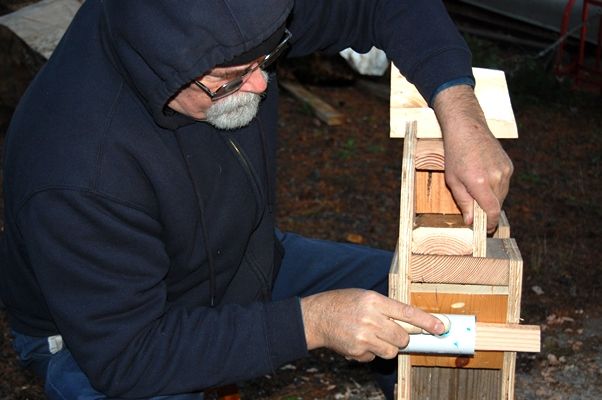
The homemade sanding tool worked extremely well for the small corner blocks, and did very smooth work. On the neck block I used it cross-grain, holding the tool parallel to the “trough” of the curvature, and sliding it up and down the curve. It worked well, there, too, just not as perfectly as on the corner blocks. All in all, it is a very satisfying tool.
Sanding the corner blocks.
Sanding the neck block, I kept the block parallel to the “trough” of the curve, and pushed it up and down, across the grain to get a smooth surface.
Change of Plans
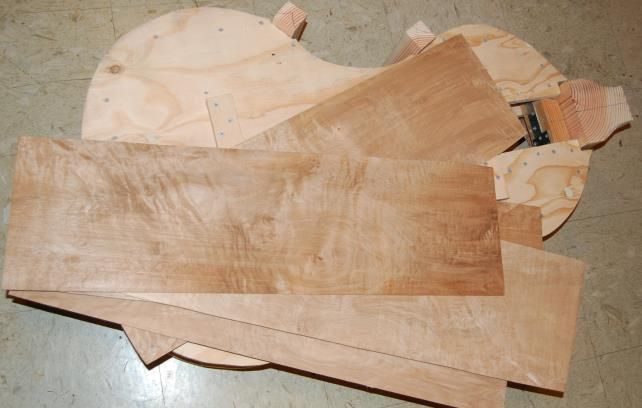
You may have noticed that, though I had planned to use Willow for blocks and linings, those blocks are not willow: the corner blocks and end block are all Douglas Fir, and the neck block is laid up of three layers of clear, vertical grain Sitka Spruce. It was a matter of availability. I do have willow for the linings, and, as that in my preferred wood when I have a choice, that is what I will use. It cuts easily, bends easily, and is very pleasant to work with for both linings and blocks.
I have really felt that I was “spinning my wheels” on this project. It is large enough that I feel the necessity to work outdoors whenever possible, but the weather has not cooperated very well…it rained nearly every day for the last month. In addition, I have been struggling with a cold or some such virus. Today I was cold in the house when the thermometer read 75 degrees, so that is not normal. I finally felt a little better, this evening, and went outside for the few minutes it took me to sand the blocks, but it has been cold out, so I didn’t stay long.
Ah, well, that’s life. I’m grateful to be back on the project again.
Thanks for looking.
If you found this post helpful, please share with your friends!
I designed this upright bass mold to be collapsible and to allow me to affix the blocks to the mold with screws, so that there is no glue to have to separate later. I also wanted the mold to be slender enough from front to back that I could install the front and back linings without running into the mold, so I gave myself a 1″ clearance between the front and back faces of the mold and the front and back edges of the ribs. Since the back will taper in the upper ribs, losing two inches of depth between the middle of the upper bout rib and the top rear edge of the neck heel block, I had to accommodate that taper as well: I simply made a 2″ “step” in the mold to allow the taper to occur.
Finally, I wanted the mold to be stout enough to allow me to handle it without fear of damage. So, the construction is of 3/4″ plywood, spaced by blocks of 2 x 6 and (in the upper half of the upper bout) blocks of 2 x 4. The corner block mounts are of 1 x 6, so I do not have to use large screws to affix the corner blocks. The neck and tail block mounts are of heavier stock; 2 x 4, and removeable, to allow the mold to collapse laterally, and clear the ribs for removal.
Using the Mold Template
In the last post, I had completed the mold template, and had commented that I would use it to make the mold, and then, later, to establish the shape of the blocks. So this is how that works:
I bought two quarter-sheets of 3/4″ plywood from Home Depot. That is a pretty expensive way to buy plywood, but it solved two problems:
I really don’t need a whole sheet of plywood, and
Even the quarter sheets were difficult to get into my car…but not impossible.
I took the quarter-sheets home, and positioned the mold-template flush with one end of one of those sheets, and offset by two inches. I am building a collapsible mold, and I want 4″ clearance between the mold halves. I don’t need that much for mold removal, but I do need enough for my hands and forearms to reach up inside the mold and remove the screws holding the molds to the blocks. So a 2″ offset on the template will result in a 4″ gap down the center of the mold.
I traced the mold template onto the quarter-sheet, and it looked like this:
Template design traced onto mold plywood.
You can see that I also laid out the location and outline of the instrument blocks, the block mounts and all the spacer blocks that would become part of the mold. This took less than half of one of the quarter-sheets of plywood, so I sawed the sheets into strips, 11″ wide , and about 39″ long, and stacked them into a “sandwich” of four pieces, held together with two screws, countersunk flush with the surface. Then I sawed the whole sandwich out on the bandsaw, and smoothed the edges with the oscillating spindle-sander.
I cut all the needed blocks to complete the mold, and I was nearly ready to begin assembly.
All the mold parts–the four mold quarters are still screwed together in one piece.
It was tempting to take the mold quarters back apart at this point, but, fortunately, it occurred to me that I could do all my drilling at once, so things would line up, and so that I only had to drill each hole once. So I made a drill bit out of a welding rod and drilled every screw location through all four plywood quarters. (Welding rods are way too soft for most uses; they use extremely low-carbon steel for the core wire of welding rods, but it was OK for this soft plywood.)
All the holes in one step.
Finally I separated the quarters, and countersunk all the screw-holes.
Separated mold-quarters.
Assembling the Mold
I laid the mated pairs side by side, and lined up perfectly, then transferred the block locations and lines to each panel so that I could see where the blocks were to fit, on all four pieces.
Transferring the lines– it looks kind of funny, because the center 4″ is missing.
Then I assembled my spacer blocks and installed them:
Front and back with spacers.
Once the spacers were attached with screws, the front and back were pretty stable and I could begin assembly. The back plate still needed to be cut off at the beginning of the rib taper, so it could accommodate the taper, but I began by assembling (as many as possible of) the internal members to the front plate of the mold. It turned out to be pretty easy.
Beginning mold assembly process.
Then I positioned the back plate pieces on the internal blocks and screwed it down tightly. I have used no glue in the mold, so, if I need to make modifications it will be easy to do.
Front plate of the (nearly) completed mold.
Bass mold showing back plate “step”, and corner block mounts.
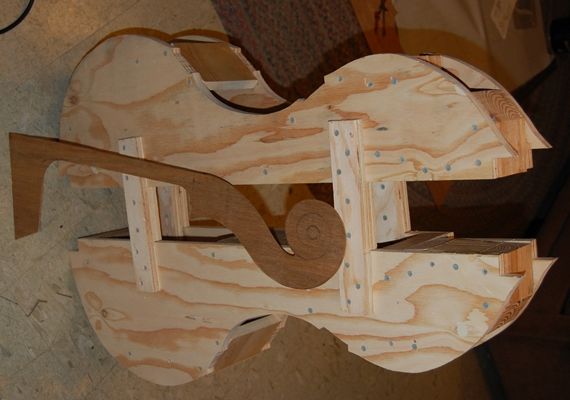
Bass mold with neck template for size comparison. Upper and lower block mounts are not yet installed.
The way by which I had intended to attach the upper and lower block mounts does not appear to be workable, so I will have to re-think that part. I had planned to install them on hinges, and to be able to screw down a steel bracket on one end to secure them, but it turns out that it will be too difficult to access the screws, so I will have to give it some thought and re-design that aspect of the mold.
At any rate; that is where the project stands for now.
I called the wood supplier, and they assured me that my European Spruce should show up today or tomorrow. No problem, really, but I want to get those plates joined soon. (I already have the local Big Leaf Maple in my shed, waiting to be used.) By this weekend, I hope to have the blocks installed and shaped, the front and back plates joined and the ribs cut. We’ll see how it works out.
Thanks for looking.
(P.S. : The wood showed up this evening… Good looking stuff!)
If you found this post helpful, please share with your friends!
I knew a few things from having built a previous bass, but I still lacked confidence. So when the International Society of Bassists had their recent convention/competition in Fort Collins, I attended and took a few photos, and tried to observe as much as I could, so as to absorb information I badly needed.
Matthew Tucker was there, which was another reason I wanted to attend. He and I built our first basses simultaneously, but he went on to excel at making basses, while I reverted to smaller instruments for the next ten years. I kept telling myself I wanted to build another bass, and even bought wood and patterns, etc. but it is such a huge, daunting project that I never got started.
My first bass was a “gamba-cornered” bass, modeled after an instrument by William Tarr. Ironically, when I went to Ft. Collins, that particular bass was there! Mine was only loosely modeled after that instrument, not a true copy, but I had worked from a book by Peter Chandler, and there were photos in the book of that bass, and, sure enough, it was at that show. I didn’t particularly care for flatback basses (still don’t), so I had modified the plans and made my “Tarr” model a carved-back bass, otherwise very much like his great bass. It was only my sixth instrument, and there were lots of things I wished I had done differently, but it played very well, and was moved to Illinois with the family for whom it was made, so I never saw it again.
That first bass. Notice I didn’t even know what the little white felt things were for… 🙂
That first bass was a nice start, but I was pretty much “flying by the seat of my pants”: I did what the book said, and called the author a few times, to get more specific instructions, but when it was done I was amazed that it actually worked well…there was virtually no planning; just muddling along and plugging away until it was done. It had an “E-flat” neck, but I didn’t even know what that meant, much less how to achieve a “D” neck, which evidently is more popular. But the youngster for whom it was built was thrilled with it, and I am told that he is still playing it today.
Choosing a Design
I had bought several plans for famous basses, and may still eventually copy one of them, but Matthew Tucker filled me in on how to design a neck to be a “D” neck, and the ten years of building smaller instruments (2 cellos, five 5-string fiddles and a host of violas and violins) gave me some practical insight as to proportion, aesthetics, and varnish. So, after seeing all the makers there at the ISB convention, and seeing the prize-winners, I decided to actually give it a go, and design my own bass, aiming for a soloist bass, as opposed to an orchestral bass.
The orchestral basses tend to be big all over, and harder to access for repertoire work, though they sound great. The one I am designing will be smaller in the upper bouts, to make it easier to play, but still pretty full in the lower bouts, and deep in the ribs, for big sound. I wanted a more graceful scroll than the one on my first instrument, so I designed that as well, and followed Matthew’s instructions to get a “D” neck.
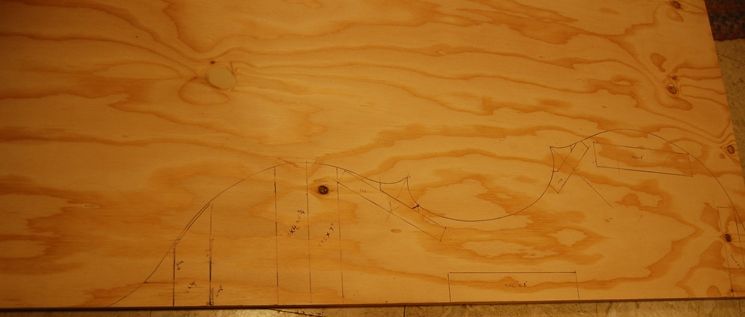
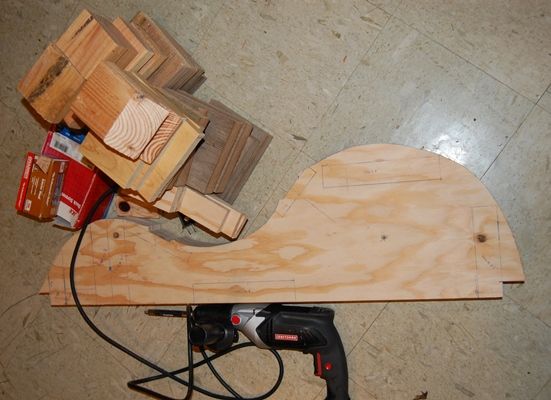
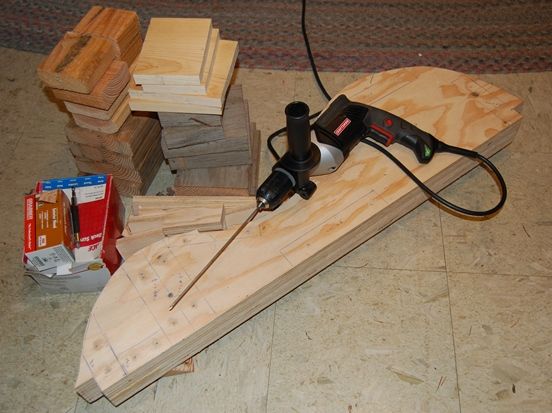
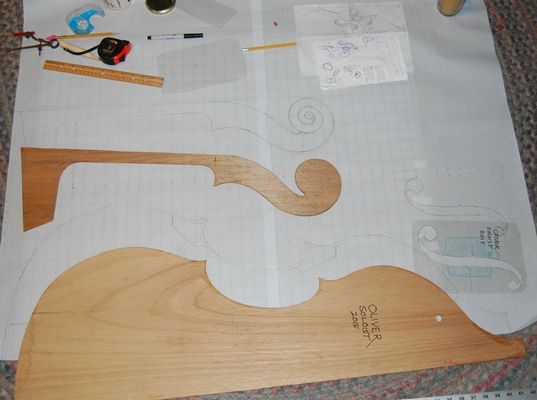
I spent many hours sketching, erasing, and sketching again, using 1/4″ graph paper, so that when I finally came up with something I liked, I could more easily transfer it to “engineers grid paper.” It took two 24″ x 36″ pages taped together to get one sheet big enough to work with. I transferred all my sketches to the big sheet, then used a small, needle-point awl to punch through the paper into the door-skin (1/8″ plywood) of which I would make the actual templates. Then I cut out the templates, filed and sanded them to the exact smooth shape I wanted, and coated the edges with wood-glue to add some stability. (The thin plywood is pretty fragile, but inexpensive, so I tend to use it.)
I made the F-holes a good deal larger than some instruments have, hoping for better mobility of the bridge area, as well as easy flow for air. The f-hole template was cut from thin clear plastic, flexible so that it can be formed around the front plate to transfer the shape. Also, this will be a “violin-cornered” bass, as opposed to “gamba-cornered”. It is more difficult to build, but I like the looks better. 🙂
I already have the maple for back, neck and sides, and I ordered European spruce for the belly and bass-bar. All I really accomplished today was the completion of the mold template, the neck and scroll template and the f-hole template:
New Templates with sketches and tools
But– the game has begun! Now I can use the mold template as I build the actual mold, get blocks in the mold, and shape the blocks to receive the ribs. One step at a time! I will keep you posted.
Thanks for looking.
If you found this post helpful, please share with your friends!
What is a “Luthier” (definition)? What is “Lutherie”?
So…What IS a Luthier?
The old French word simply meant “a lute-maker”. And his business was called lutherie.
“Loot-yeh” is pretty close to the French pronunciation. We Americans have a cheerful disregard for the pronunciation rules of the languages from which we borrow our vocabulary, so we typically pronounce it “Loothy-er”. The work of a luthier, lutherie, is usually pronounced “looth-er-y”
What does it mean Today?
The meaning has shifted, over the years, to cover the builders of all stringed instruments. Lute-makers are still luthiers, but so are guitar-makers, ukulele-makers, mandolin makers, and, of course, violin-makers. Violas, basses, cellos, five-string fiddles and dulcimers are also made by luthiers. Banjos, pianos, violas da gamba and harps, among others, are also built by luthiers. And the process of building and/or repairing stringed instruments is also called “lutherie”.
Usually when one is looking for a luthier, they are not looking for someone who made one guitar for a summer project, or something of that sort– they are looking for someone who is at least a competent worker, and who can reliably repair an instrument, without further damage. That takes some training and experience.
Some people have the privilege of attending a full-time, extended training program, or serving a term as an apprentice, under a master maker. This last is still likely the best training, although some fine schools are now available. Some cannot take the time from their established responsibilities to go away to school for an extended period, and learn from books, and/or piecemeal from a variety of teachers.
Workshops are now available in many parts of the United States, wherein one can begin to learn the skills to make guitars, violins, bows, etc. (Incidentally, one who makes violin-family bows is called an “archetier”… another French word.)

 Follow