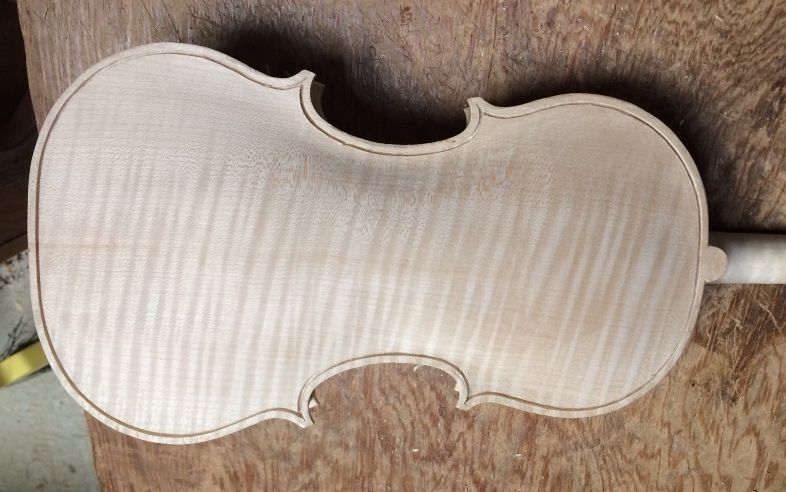
When I installed the back plate, the heel had been trimmed flush with the back of the garland, but the upper surface of the heel was still quite irregular, and the upper end of the button was ridiculously oversized. The excess wood made it easy for me to install a clamp, and get the back plate glued on securely. So…when I removed all the clamps, this is what it looked like:
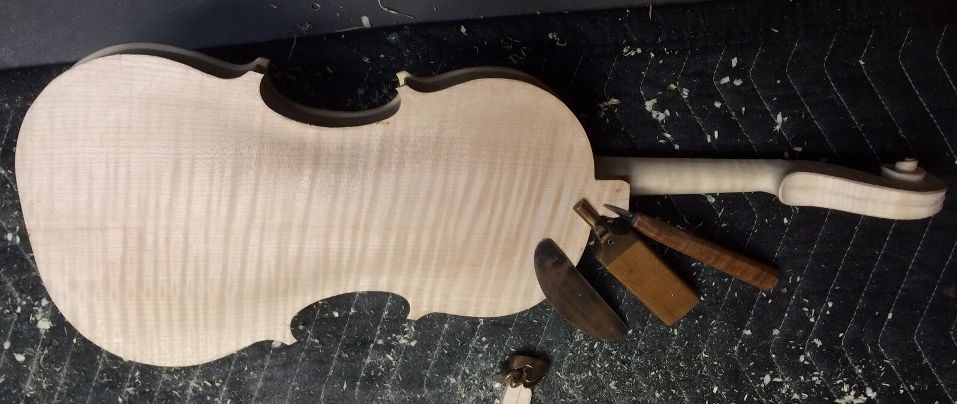
Back plate installed; button and heel not yet trimmed.
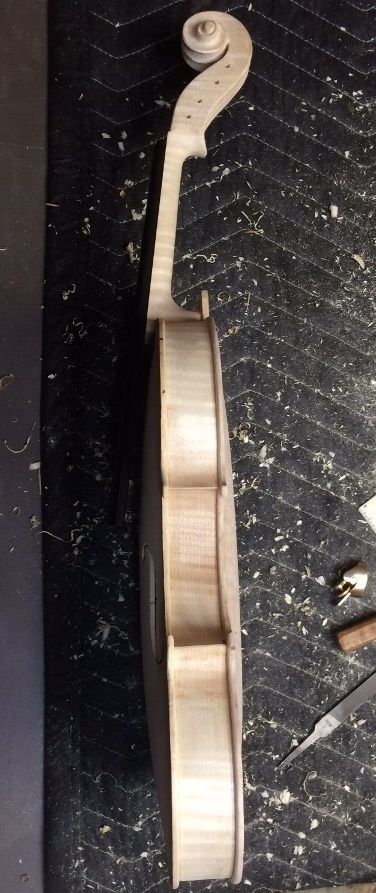
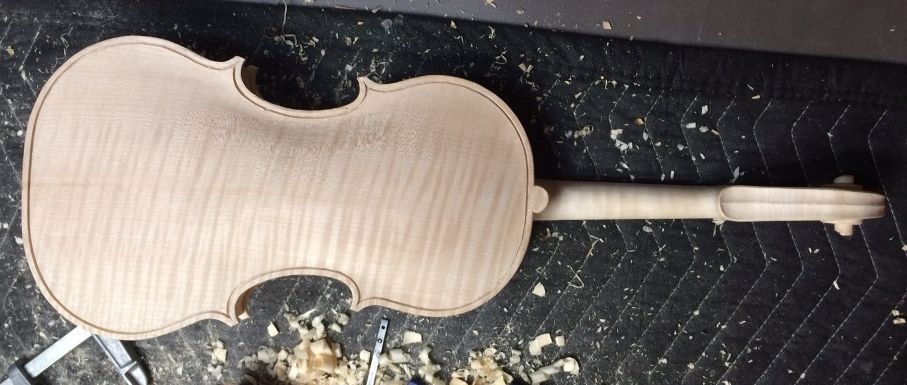
Next, I will trim the button and heel, then add purfling, then scrape. These are the tools I will use.
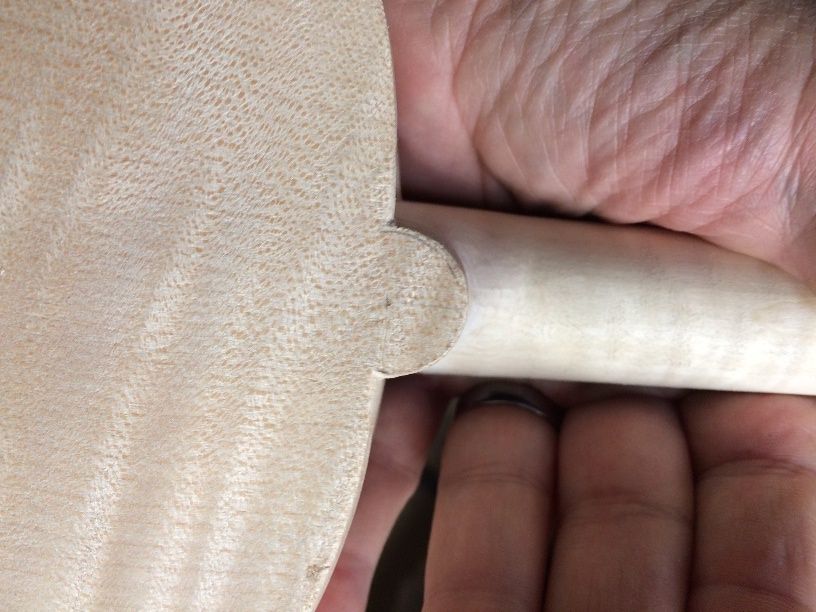
This is roughly the shape the button will be, but a little more refined, I hope.
Side view of the heel and the button. The closeness of the camera warps the picture a little.
Installing the Purfling
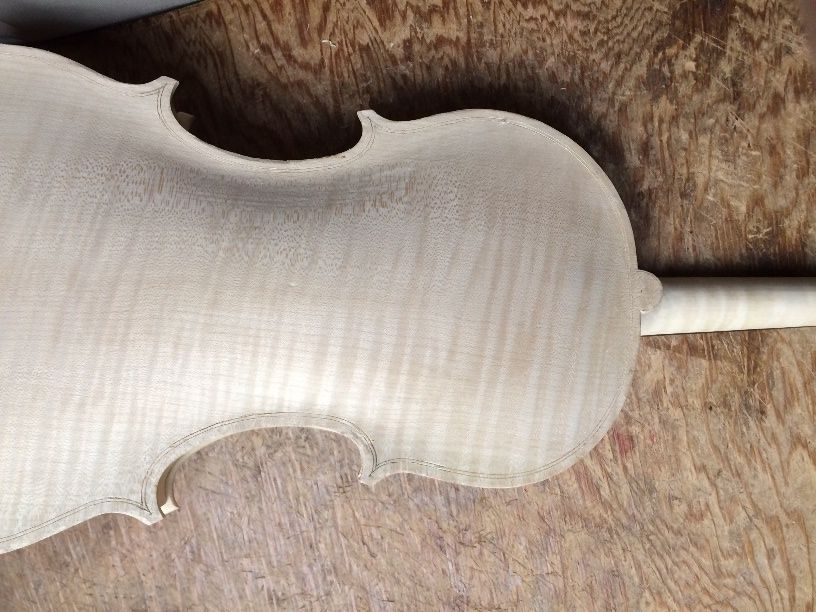
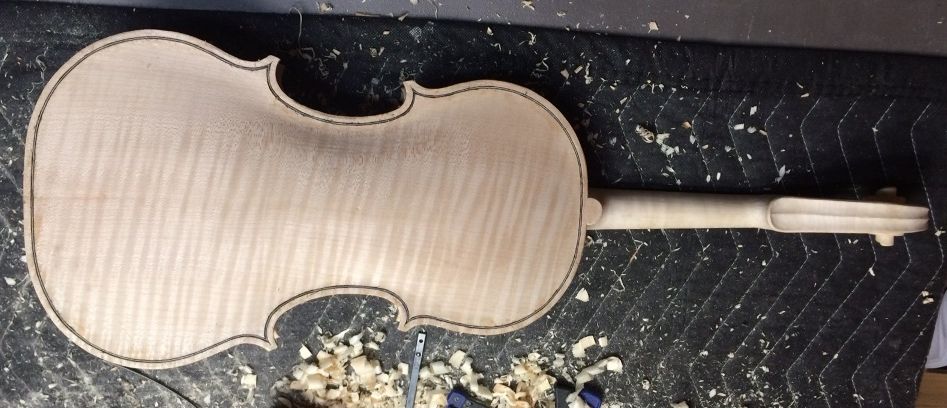
The next thing was to scribe in the purfling slot. I used the purfling marker to scribe the double line exactly 4mm from the outer perimeter of the plate, except the corners, where I used a sharp pencil to sketch the “bee-stings” in by hand. Then I incised the lines all the way around, just barely deepening the lines, so that they are more visible, and a little easier to follow with the blade of my small knife.
Purfling slot lines lightly incised.
Then I slice in pass after pass, trying to get the lines deep enough for the purfling I will install. I usually find that, especially on the hard maple, I have to cut the slot in two layers: the first gets about half the depth I want, and the second finishes the slot. Here is the slot at half-depth:
It looks good, but it is not deep enough.
Purfling slot ready for purfling.
Back purfling installed…glue still wet. 🙂
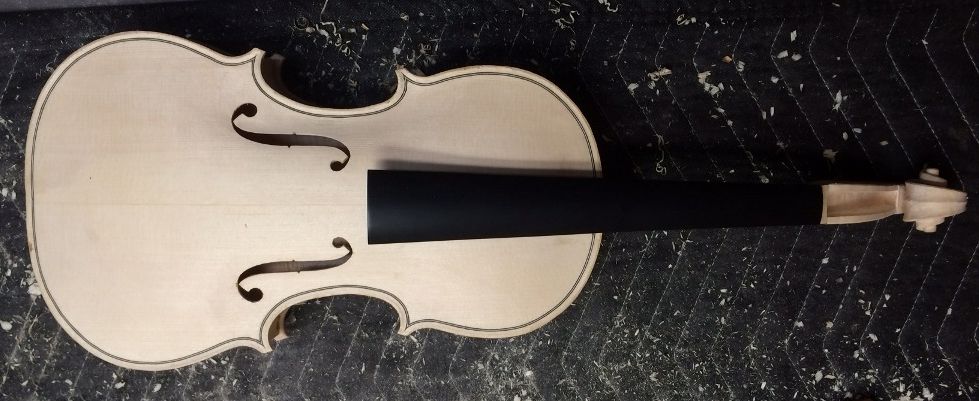
And the Front!
Back to Work!
As most of you know, I had undergone hernia surgery, just after Christmas, and had a 6″ x 8″ polypropylene mesh patch installed in my abdomen. I have been convalescing, and just this week, have finally been feeling better. So…I just received word that I will return to my work at Gunderson, Inc., tomorrow at 6AM. I think I had better call it a day, and try to get some sleep. 3:30AM comes at the same time, every morning, whether I am ready or not. I will get home sometime after 4PM, I expect. Maybe I can jump back in where I left off. 🙂
Tomorrow evening, then, I hope to complete the purfling channel and the outer edgework of both the front and back plates, and begin the final scraping in preparation for varnishing. Any little glitch, regardless of how tiny, will be very visible under the varnish. So this part has to be done with great care.
Thanks for looking.
If you found this post helpful, please share with your friends!
It has been a while since I felt that I could afford the time to work on the bow…I would go by and look at it, sometimes, but I had other things to do– cleaned the chimney, took apart the wood stove and re-cemented gaskets, etc. It’s funny–the commercial chimney sweeps all tell me that my chimney is too dangerous, and they will not touch it– (very steep roof– 12:12 pitch– and quite high). So I have to do it myself every year. Ah, well…it gives me something to grin about…and leaves me sore for a few days every year. I’ll be 60 this month: the irony that I have to go clean the chimney that men half my age refuse to attempt is not lost on me.
Making a Stainless Steel Bow-tip Plate
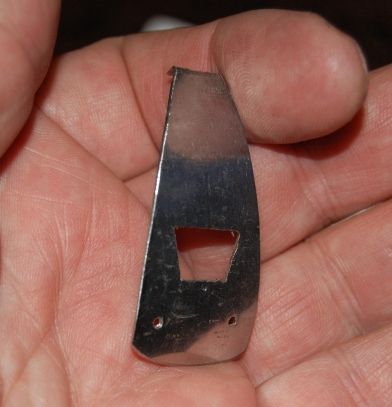
Anyhow, I finally took apart one of the stainless utensils I had bought for a dollar at a resale shop, and hacksawed out the rough shape of the tip plate. Drilled holes for pins, cut out the trapezoidal window for the tip mortise, and bent the little tab on the end of the tip plate. Felt pretty good about it…bent it to fit the curve of the bow tip. Looked pretty nice.
First try at making a stainless steel tip plate for a bass bow.
Making the Ebony Liner for the Bow Tip
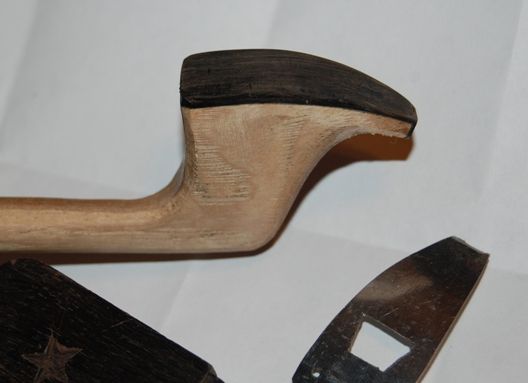
I had a terrible time bending ebony to fit the bow tip (probably a little too thick), but I managed to do it, and even got it fitted, glued, and trimmed to size:
Ebony lining with stainless tip plate, for Bass Bow.
Fitting the Tip Plate
Then, I had hoped to glue the tip plate in place, and even went to the auto-parts store and bought some black epoxy that is supposedly “specially formulated to glue all metals”. But when I got home and looked more carefully, trying to fit the tip plate to the ebony liner, it turns out that I had used up all my tolerances on the stainless and it was just a little too small to fit the bow correctly. (Rats!) That left me two choices:
Modify the bow to fit the stainless tip plate, (which would be dumb) or
Go make another tip plate and be more careful this time. (sigh…)
So I will do that later. (This is not a new thing for me– I have a long history of trying to make something a perfect fit, and finding out that I went just a bit too far…thus proving the wisdom of the adage, “measure twice, cut once.”)
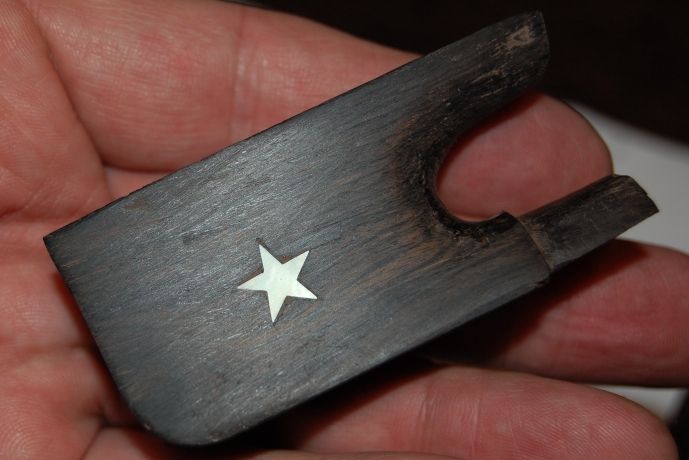
Gold Star Inlays for the African Blackwood Frog
I decided to work on inlaying the little (10 mm) gold stars I had bought from Andy DePaule. I laid out the locations as accurately as I could, then lightly glued the stars in place with a tiny dot of superglue. When the glue was hard, I used an X-acto knife to scribe around the stars, cutting as accurately as I could, into the African Blackwood of the frog. Then, using a small flat gouge, I popped the mother of pearl stars back off, and began to carve out the cavities for the inlays.
Inlay in progress
I cut around the perimeter as deeply as I could with a tiny chisel, then scooped out the excess wood with an even tinier chisel, and finally used the tip of the X-acto blade to clean out the sharp corners. When (many attempts later) the star finally dropped into place , I put gel-style superglue under the shell, and pressed it into place. One has to be gentle with the shell. It will not stand much pushing around before it snaps–it is quite brittle. So one has to simply try and try again until the piece fits as deeply as if needed, with hardly any pressure.
As soon as the superglue gel hardened I added some ebony dust to the very small grooves around the stars where I did not get a perfect fit, then dropped a drip of water-thin superglue into the area, and sanded it flat.
Finished inlay of Gold star on Bass Bow Frog
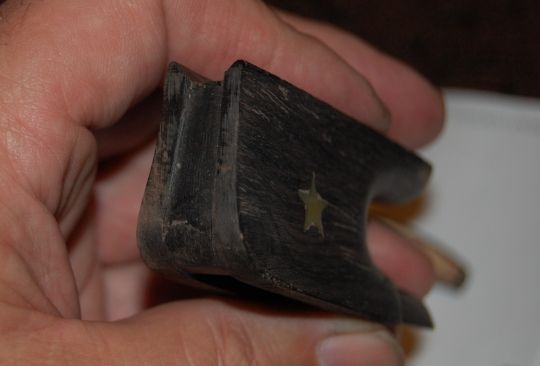
It is interesting to see how the different light reflects differently. Those gold stars can just look pale, or they can shine like real gold, in the right light. Here’s sort of an end-view of the frog:
End view of unfinished Bass Bow Frog.
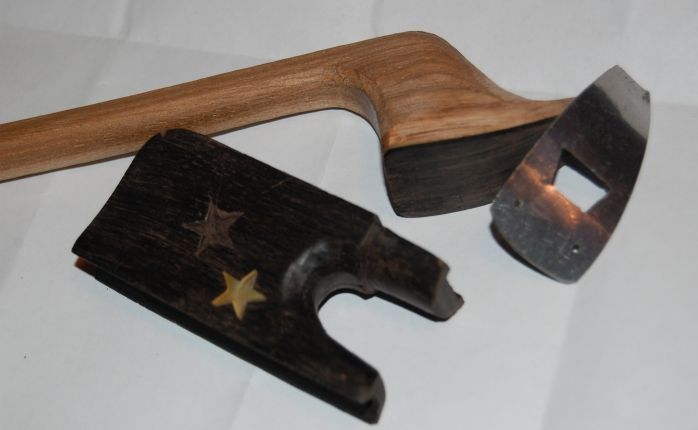
So– that’s the progress report: I will install the second star, make a new tip plate, and complete the frog and button, then I can hair the bow and see what I have got. Here’s the pile as it stands:
A work in Progress.
I will post more photos when I get a little further along.
Thanks for looking.
If you found this post helpful, please share with your friends!
Of course, some people just call them “bowmakers”. (This is, of course, not to be confused with a bowyer: Those guys make bows for archers.) An archetier (yes, yes… bowmaker!) is someone who makes bows for instrument players– violins, violas, cellos, basses, and so forth.
Violinmakers are seldom bowmakers, and vice versa. The two are not necessarily mutually exclusive, it is just that they are definitely two complimentary but very different skills. Few people actively pursue both.
However, Paul Schuback, who is an extraordinarily fine violinmaker, was also trained in bowmaking during his apprenticeship in France. There he met a young woman, Lynn Hannings, who was training as a bowmaker. She followed on in that discipline and became a well-known professional bowmaker, and Paul went on to be a famous violinmaker (luthier).
Both have been my teachers, though briefly, and I have long desired to try to learn bowmaking as well as violin-making. I had taken Lynn’s class once, in California, just to learn to correctly re-hair a bow; but as I watched her other students building bows from scratch, I found myself wanting more and more to try my hand at that discipline.
So…you guessed it! I am trying to build a bow. I decided to try a bass-bow, simply because I think they are likely a little more forgiving in terms of exactitude (not much, but a little), and because they are bigger, thicker, and probably easier for me to handle. (I could be wrong….)
For anyone with similar interest, here is a link to a priceless list of resources.
Wood selection:
By far, the most ideal wood for violin-bows is Pernambuco, from the Amazon rain-forest in Brazil. But…that wood is now an endangered species, and illegal to cut or ship, so it will be harder and harder to acquire. There are tons of it already cut and dry, but it is difficult to get. Other woods include Brazilwood, Snakewood (also called “Amourette”), Ipé, and Bloodwood.
I am told that they are experimenting with farming Pernambuco in Brazil, planting the Pernambuco seedlings interspersed with the rubber trees on rubber plantations; but we won’t know for some time how that will work out. So, in the meanwhile: I can experiment with domestic woods, such as Osage Orange and Hickory and learn the hand/eye skills, then try some lesser tropical hardwoods, such as Ipé and Bloodwood. If I like it, and the bows turn out well (probably requiring a second (and third, etc.) “bout” with Lynn Hannings), then I may buy some pernambuco blanks and try some “real” bows. But Pernambuco is selling for around $200 per stick, now, so this is not for the faint of heart!
I ordered some Osage Orange, which is commonly used for archery bows (and sometimes double-bass bows), and while waiting for it to arrive, decided to experiment with hickory (also sometimes used, though not usually considered optimal). This time, however, I happened to have a select piece of straight, clear, vertical-grain hickory, about 20+ years old (OK, OK… it was a broken-off splitting-maul handle…but still: it was everything I just described), so it seemed a good way to get started.
Building Process:
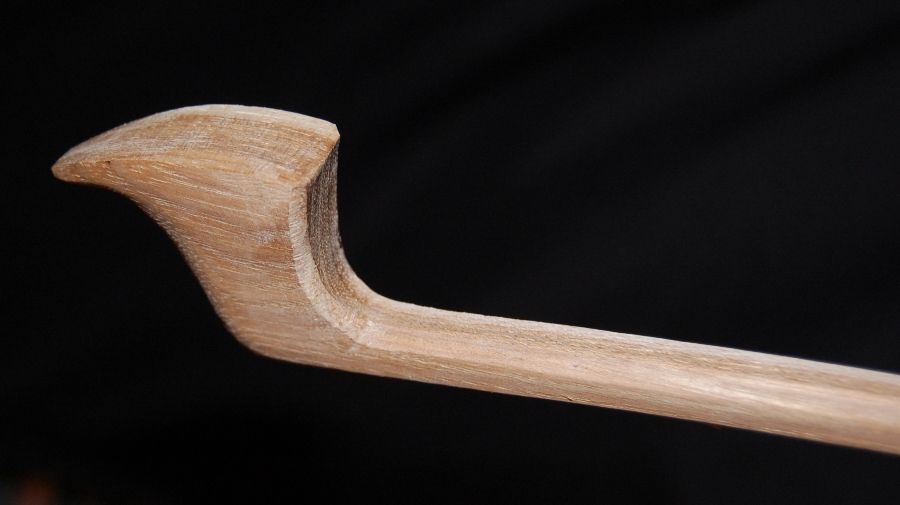
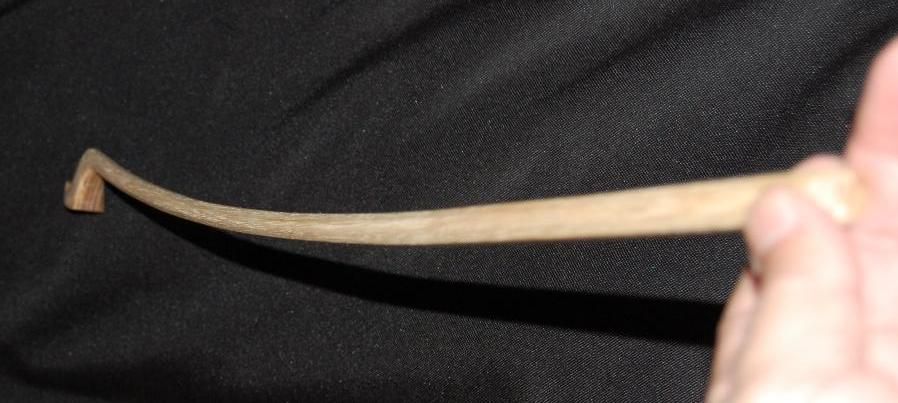
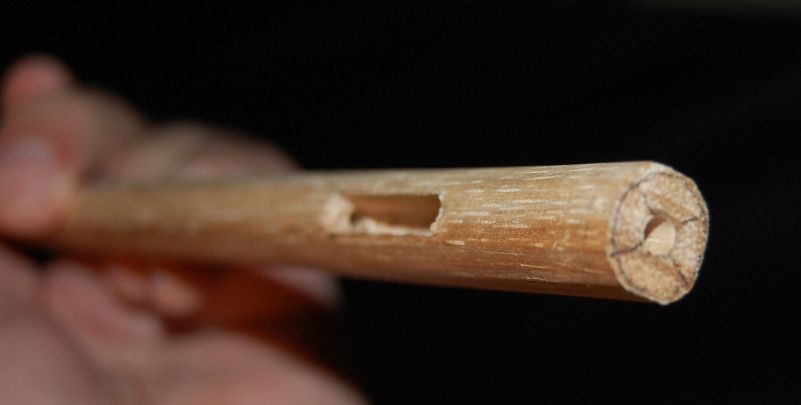
I began by “cutting away everything that didn’t look like a bass-bow”, and tapering it as I thought it should be. I heated it with a heat-gun, and cambered it (bent it to the correct arch). Then I drilled the screw-way and carved the eyelet mortise.
Still rough, but this is the general shape of the bow-head. Still have to cut the mortise and attach the metal tip, etc.The bow-stick is cambered by heating it all the way through, and then bending it in my gloved hands. It has to be really hot all the way through to bend easily, without breaking.The mortise is to allow the frog eyelet to travel smoothly back and forth as the player tightenes or loosens the hair. The Screw-ways is the channel through which the screw passes, to reach the eyelet.
The Frog:
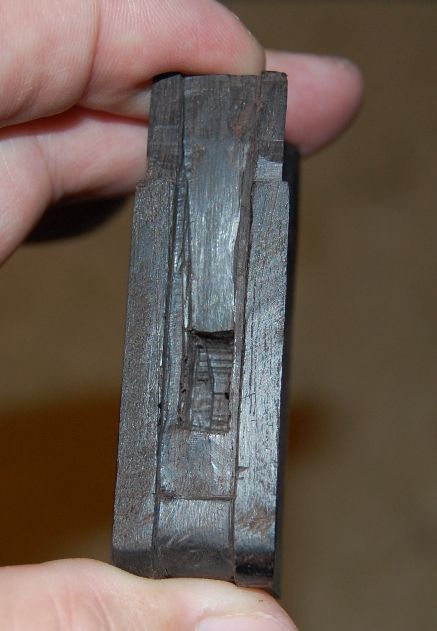
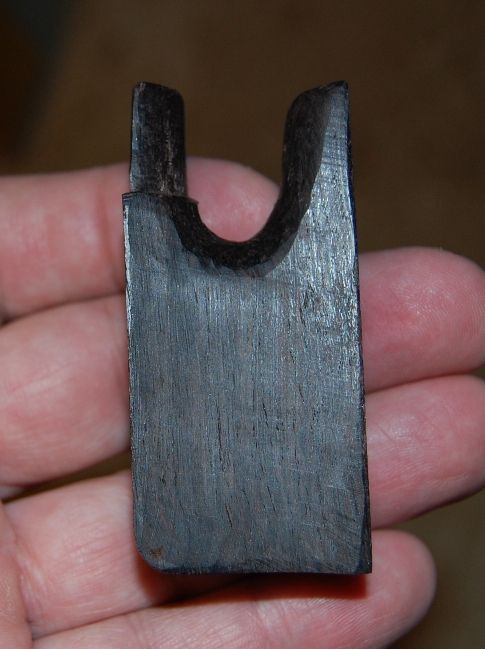
Then I began a frog: I bought some African Blackwood remnants from a local hardwood dealer, and carved one into a bass-bow frog–still very rough-looking, but I am not done with it yet. I kept looking at a good frog someone gave me, to see what needed to be done next. There is still quite a long way to go, but I am waiting on some parts I ordered.
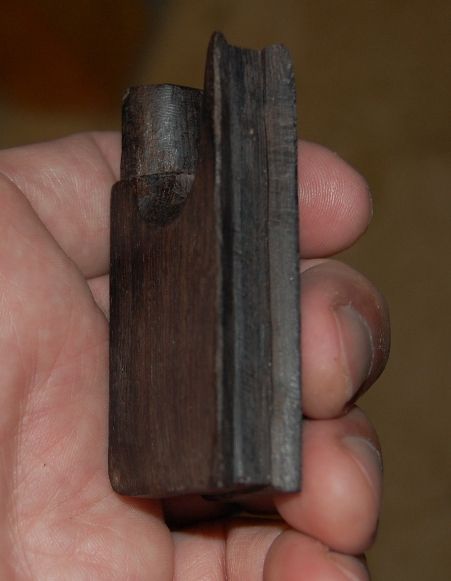
This is the interior of a very roughly carved bass-bow frog, made of African Blackwood–similar to Ebony, but heavier and harder, I think.Side view of same frog…still a long way to go.Underside of the same frog. I intend to line it with stainless steel, since I haven’t any Nickel or Silver. (Should wear well!)
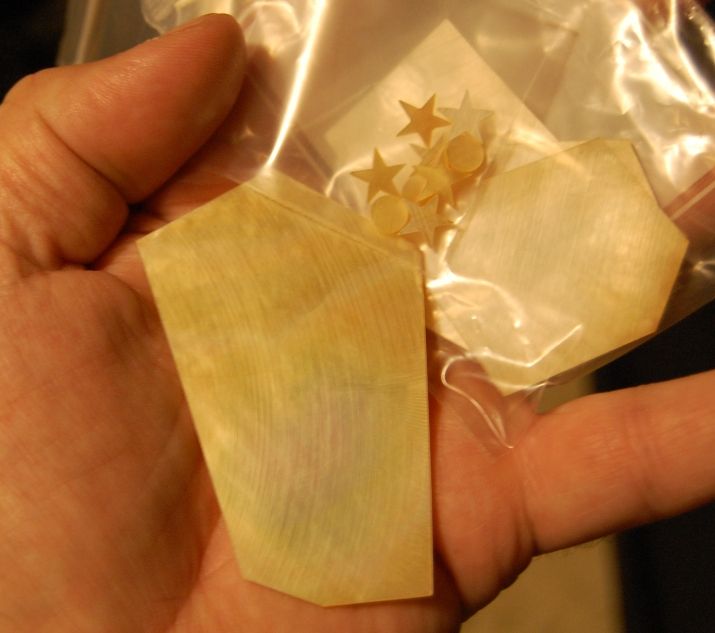
I ordered some gold MOP (mother of pearl) from a local supplier, and hair, screw and eyelet from a more distant supplier. (Here is a photo of how it looks so far:
The pearl slide will be cut from the blank stock. On a whim, I decided to inlay gold stars on the sides of the frog. The dot will go in the end of the bow-button.
(The hair and screw and eyelet were all ordered from the same distant supply place, and have not yet arrived.) I chose stainless steel for the ferrule and underslide, because it was readily available. (I went to a resale shop and bought some pieces of cheap stainless steel flatware in the thicknesses I needed…total outlay: $3, for enough metal to build several bows.)
How did it turn out? Not done yet. Tune in later for a progress report!
If you found this post helpful, please share with your friends!

 Follow