
 Follow

F-Holes and Graduations
F-hole Incision and Final Arching
In my last post, I told you I would “talk about F-holes, next time”…and we are doing so. But final arching, as well as graduation have to be completed before we actually cut out the f-holes, so, first things first:
I lay out and incise the f-holes after the arching is (mostly) completed, but before beginning any graduations. (I had a few mishaps years ago, when I graduated first, and subsequently discovered that my plates were actually too thin where the f-holes were to be laid out. I learned from the error, and I check the thicknesses around my already-in-place f-hole incisions, before beginning graduation, now.)
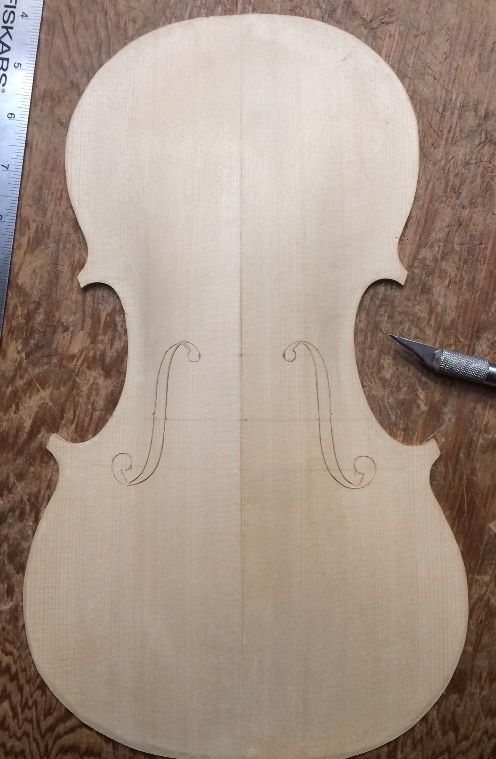
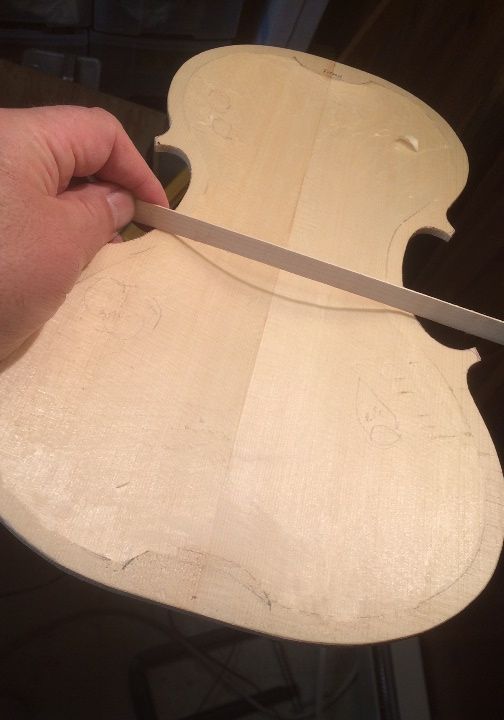
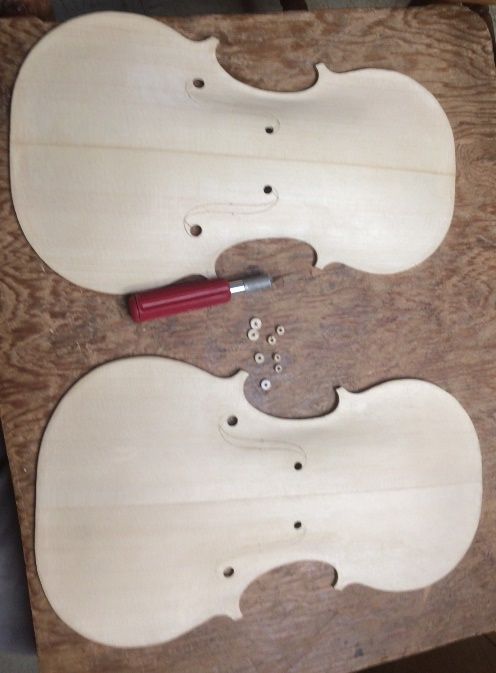
I laid out the distance from the upper edge of each plate to where the bridge would go. That is where the inner “nicks” of the f-holes will go. I measured back from there to find where the inner edges of the upper eyes of the f-holes would go, and laid out not only that longitudinal position, but the lateral distance off center, to the inner edge of each eye. Then I repeated that process for the inner edges of the lower f-hole eyes, and I was ready to use a template to scribe in the actual perimeters of the f-holes. I simply aligned the clear plastic template (traced off the full-size photos of the original instruments) so that the inner nicks were on the bridge line, and the inner sides of both upper and lower eyes were at their correct locations. I pressed the template firmly, so that it followed the curvature of the plate, and traced with a very sharp pencil.
I try to bear in mind that the pencil line will actually be “inside” the actual footprint of the f-hole, and I will remember to adjust it later. For now, however, I incise the perimeter of both f-holes fairly deeply, so that the marks will not disappear as I complete the final arching. (In the photo below, I had also traced around the incision with a very sharp pencil, to highlight the cut, so I could see it from any angle. Otherwise it can be hard to see.)
Final Arching
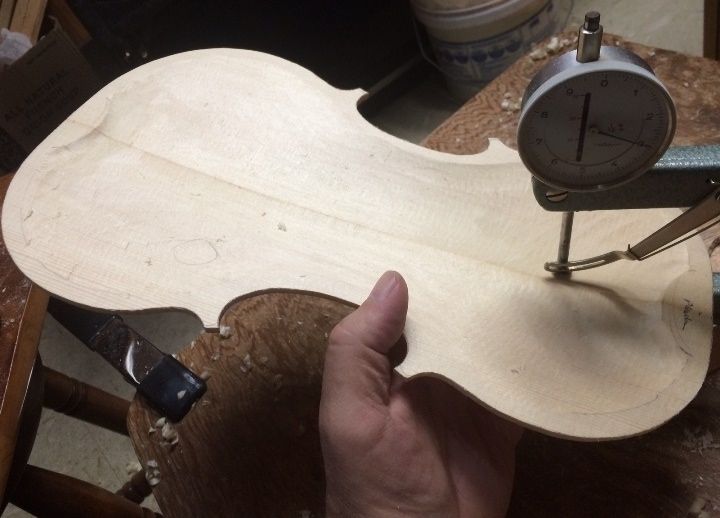
I have learned that arching is one of the most important factors in violin sound. I use two “markers” for determining the final arching.
The first: I can see that, when viewed from the side of the instrument (at least, the ones I am concerned with), the f-holes on the old master instruments appear to have the main stem nearly parallel with the plane of the ribs. I have no idea whether that is truly important as far as aesthetics, but, I have also observed that, when left to my own instinct (or lack thereof) as to proper arching, my f-holes invariably end up resembling an “S” laid on its side. So, it is a “marker” that tells me my arching is a bit “off”, if nothing else. That is why I incise the f-hole perimeters deeply enough so that I can adjust the arching to get the stems of the f-holes parallel to the rib-plane, and be fairly sure that, at least that part is better than it was before.
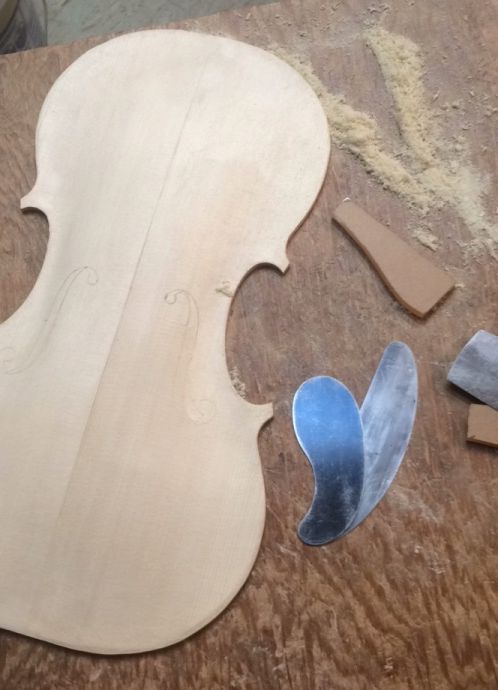
The second “marker” is even more mundane: I made “arching templates,” traced from the posters, so that I can actually check and see that my arching closely follows that of the old masters. It is fascinating to me, to see them drop into place, one by one, as I carefully plane and scrape away the last few “humps”. I know that many makers are convinced they do not need such a “crutch”, but I see it as only a tool. I would never claim to be able to draw a perfectly straight line by eye and hand alone, and I shamelessly use a straight-edge for such a task. Arching templates are the same thing, in my estimation. Whenever I use them, even on a plate that I thought to be very close to correct, I invariably discover that it was not as good as I thought it was.
The truly-completed arching is not terribly different than the rough-arching I had completed before incising the f-holes, but that sort of difference can make the difference between “acceptable” and “extraordinary” sound. When I first began using such templates, I immediately got a different response from players. They said, “This one is different! Whatever you did on this one, do it again!” (Okay…will do!) So…now I do it on every single instrument, and try to make each one better than the one before.
Graduation
What we call “graduation” is simply the process (and results) of carefully carving the inside arch to match the outside arch, leaving a specified thickness between, which could all be the same, or they could vary according to some sort of deliberate scheme designed to project well, or to give superior sound in some other way. Or it could be following a “general plan,” but, beyond that, be fairly random. There are all sorts of patterns and plans.
In this case I attempted (at least in a general way) to mimic the graduations of the original old master instruments whose pattern I was attempting to follow. (In case you have not read the previous installments, these two are to be modeled after the 1715 “Titian” Stradivari instrument and the 1735 “Plowden” Guarneri del Gesu instrument, respectively.) Their graduations are pretty thin, so this is a little scary, to me. I hope it works well.
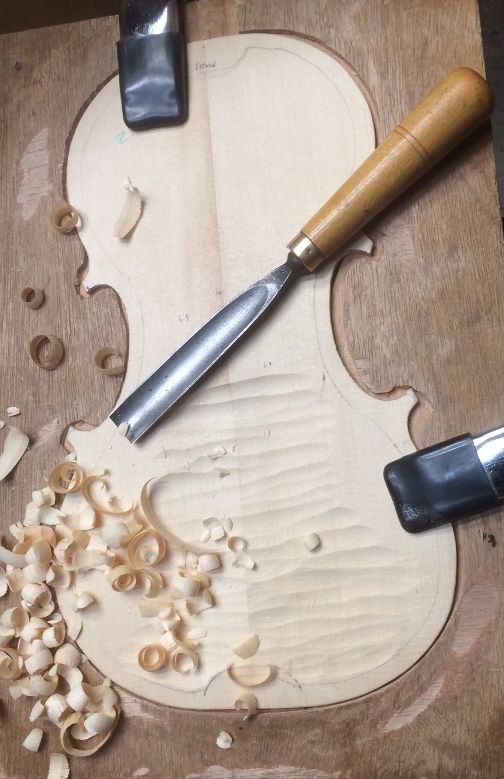
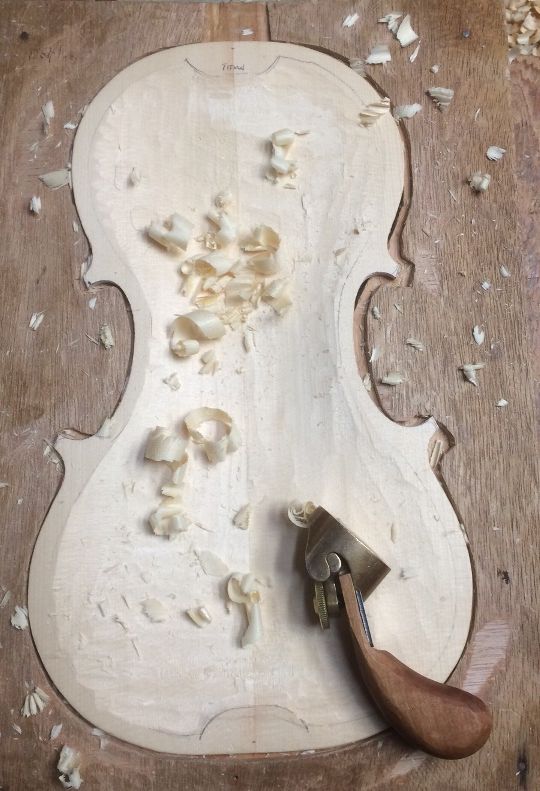
I use a gouge to rapidly carve out the rough wood, until I am approaching the proper thicknesses, but then I switch to a toothed finger-plane for rapid, but controlled, wood removal. When I am getting close enough that I am fearful of going too far, I switch to a non-toothed curved-sole finger plane and carefully bring the thicknesses down to my target measurements.
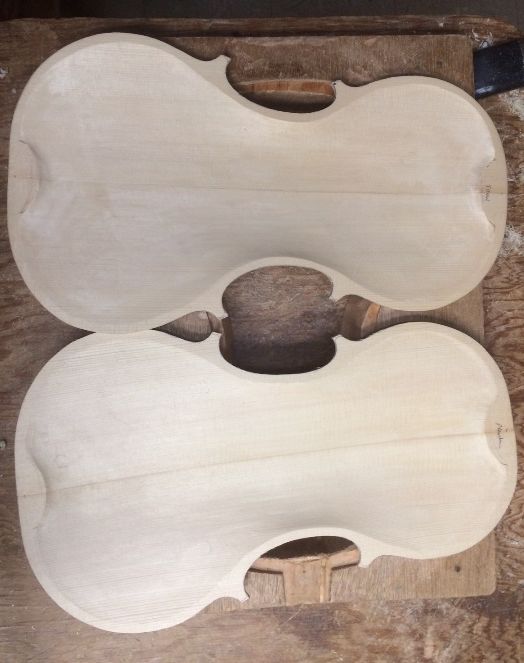
F-Holes
The F-holes are pretty much “locked-in,” now; the only thing remaining is to actually remove the wood inside the f-hole lines. The first order of business is to remove the circular portions at the upper and lower eyes of each f-hole. For this, I use a tool called an “f-hole drill”, which my grown children purchased for me a few years ago. It makes perfectly round holes, ranging in size from 5.5 mm up tp 10 mm in diameter, in 1/2 mm increments. I center a 3/32″ diameter hole in the center of the round portion of each eye, and then, using the correct bit, I insert the guide pin into that hole and gently rotate the tool to incise the hole, forst from the outside, and then from the inside, to prevent splintering, but completing the cut from the outside, so that in case any splintering does occur, it will be on the inside.
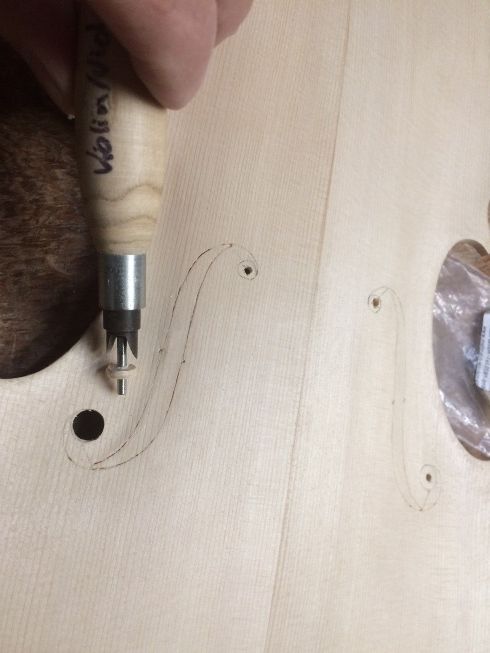
Then I use a very thin, sharp knife to complete the incisions around the perimeter until the wood pops out cleanly.

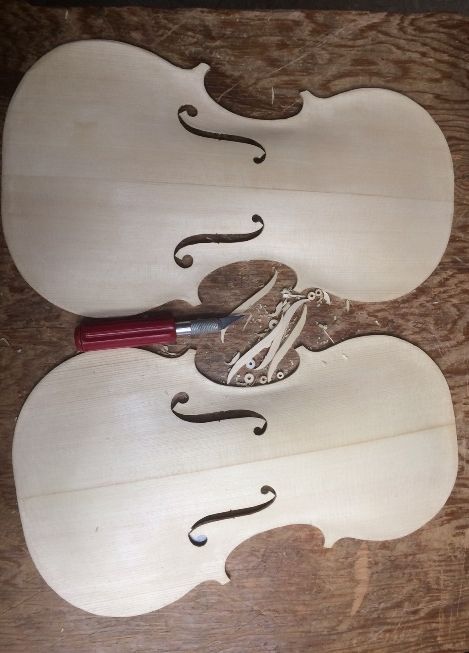
I will continue to fine-tune the shape of the f-holes up until I begin varnishing, but, for now, they are complete.
The next thing will be the bass-bar in each top plate. The bass-bar supports the bass-side foot of the bridge, and the bass side of the plate. It is necessary in order to achieve the rich deep tones on the bass side of the violin range. So…next time: bass-bars!
Thanks for looking.