Two Plates

Please share with your friends!

Two Plates

Top Plates First

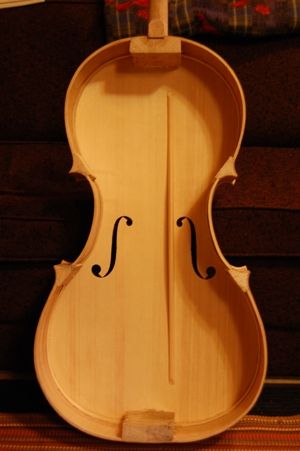
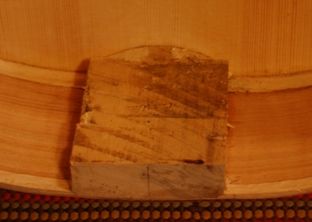
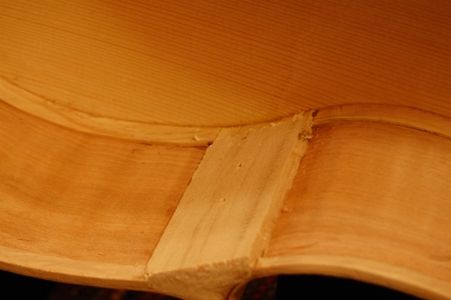
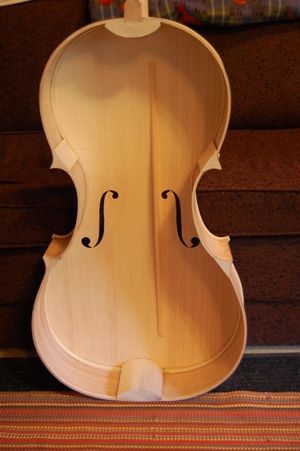
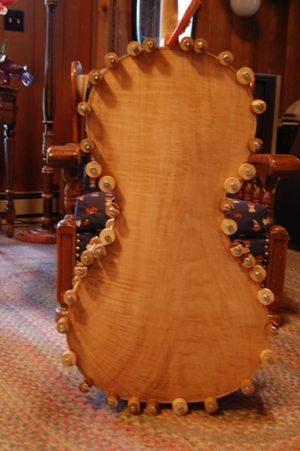
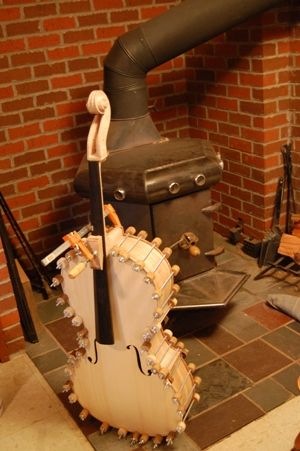
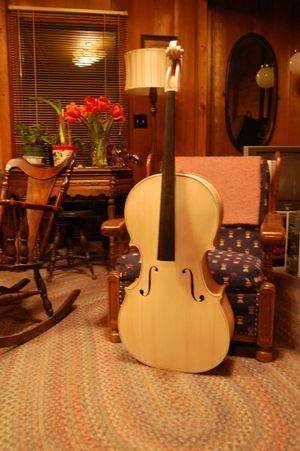
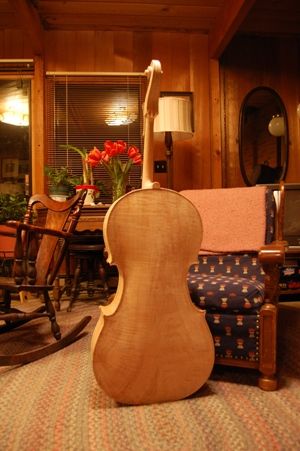
Not every violin maker follows exactly the same path. I not only make my front plates first; I install the front plate before I install the purfling…and install the neck and fingerboard before removing the form (or mold.) After removing the mold and leveling the back of the garland, including the neck-heel, I can install the back plate.

I used to install purfling before installing the plates, too, because I was taught to do it that way. But I consistently had trouble with the plate overhang not being even, around the perimeter of the instrument, and it finally occurred to me to try doing the purfling after installing the plates, and after having established the final shape of the plates, so that the purfling followed the final edge of the plate, rather than installing the purfling first, and later finding that the garland has changed shape slightly, so that the plate no longer fits perfectly, and I have no option to modify the plate, because the purfling has permanently determined where the edge is supposed to be. Ah, well…I am just a slow learner, I guess. 🙂

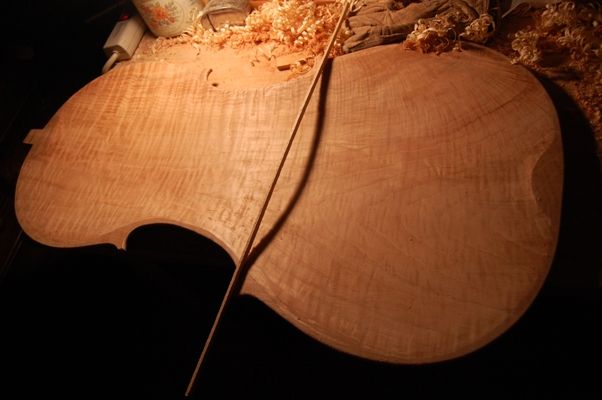
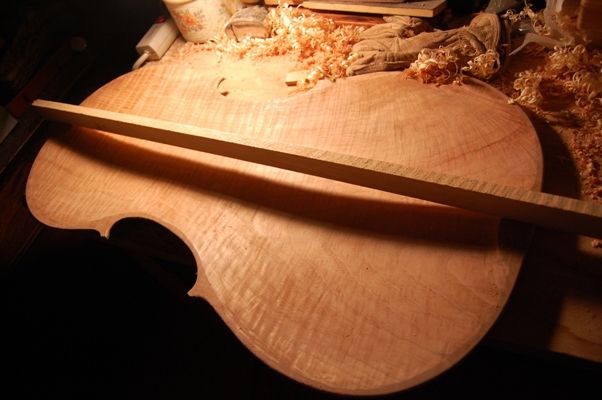
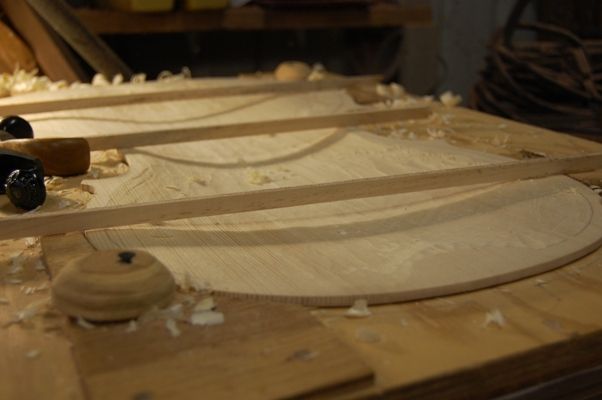
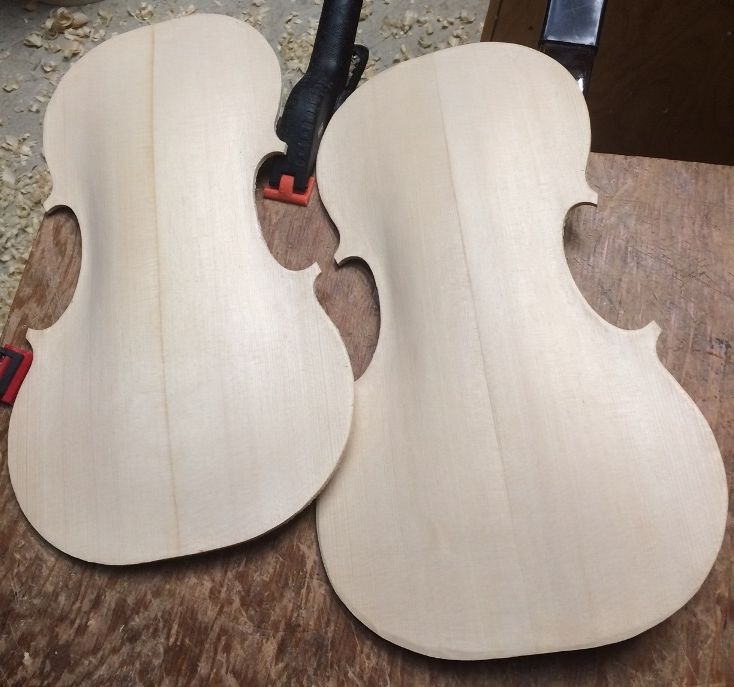
So, here is a sort of “after and before” picture: the one on the right has been arched close enough to correctly, that I will be ready lay out and incise the f-holes next. The one on the right has only been traced and cut out, so all the carving remains to be done.


“After and before”: one plate fully arched, the other ready to carve.


Arching the Top Plates

I derived my arching-plan from the “The Strad” magazine posters. On this particular pair of posters, there are not only the traditional photos and line drawings, but they actually printed out CT scan images so that one can see exactly the shape and thickness of all parts of the violins.

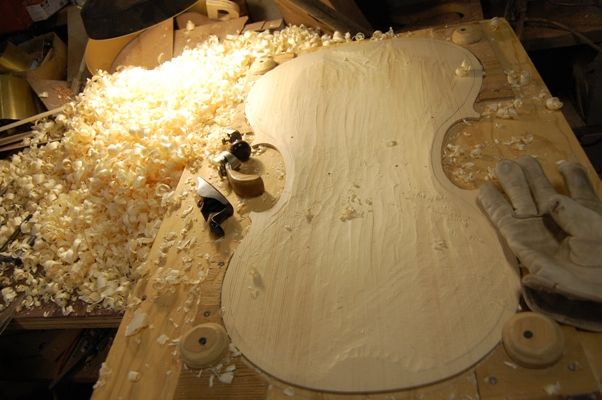
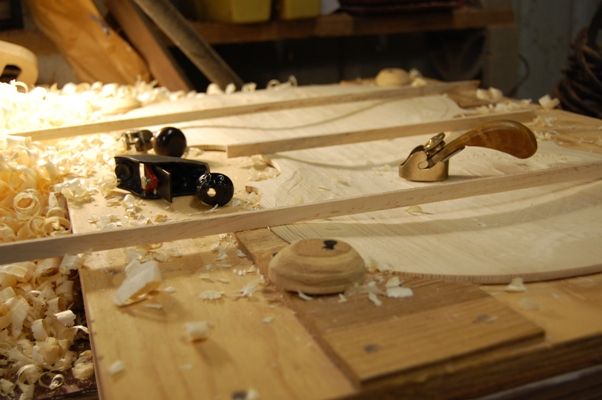
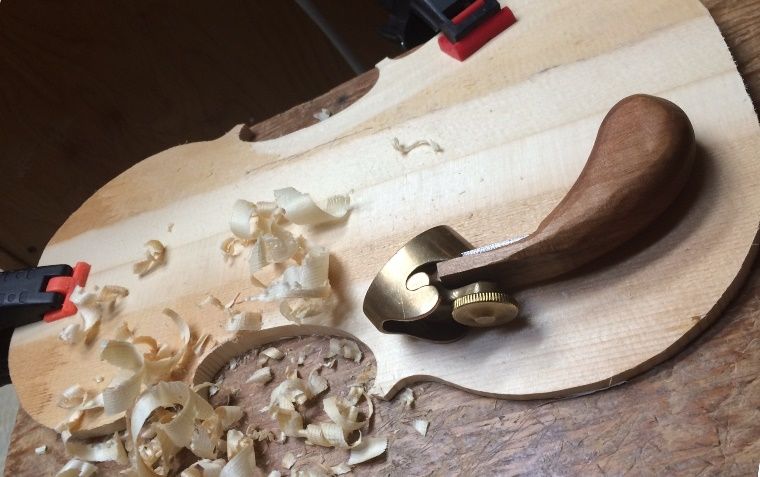
I first mark the edges at 4mm thickness, then plane down to the lines. Most makers use gouges for this part, but I prefer small finger planes. I am sure that there are many good reasons to use the gouges instead, not the least of which would be speed in making, and I have certainly carved plates that way…but I prefer the planes. So, here is the carving of the second plate:

Second plate beginnings.


Rough Arching
Rough Arching


I use shadow lines to check the actual shape of the cross-sectional arching.
Using shadow lines to check the actual shape of the cross-sectional arching.


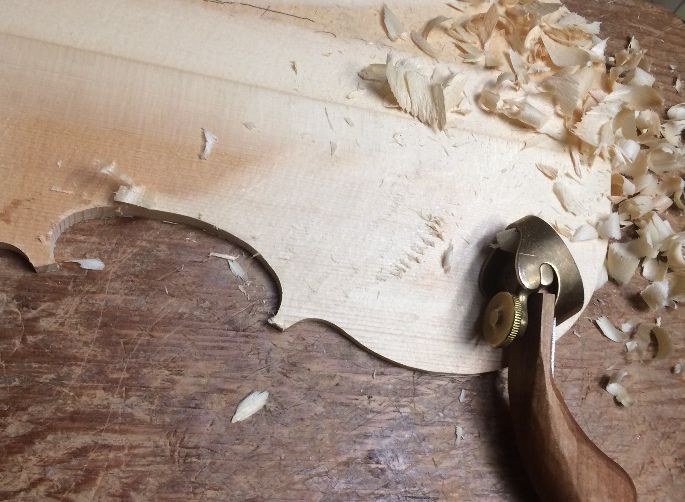
Finally, I use sharp scrapers to renove any lines or dents left by the planes, and narrow bamds of shadow to check the actual cross-sectional shape of the archings. I may still make later improvements, as I add the f-holes and the bass-bar, and, of course, after I install the purfling. But the archings of the two top plates are very nearly complete, so, the next time I post, it will be about f-holes.

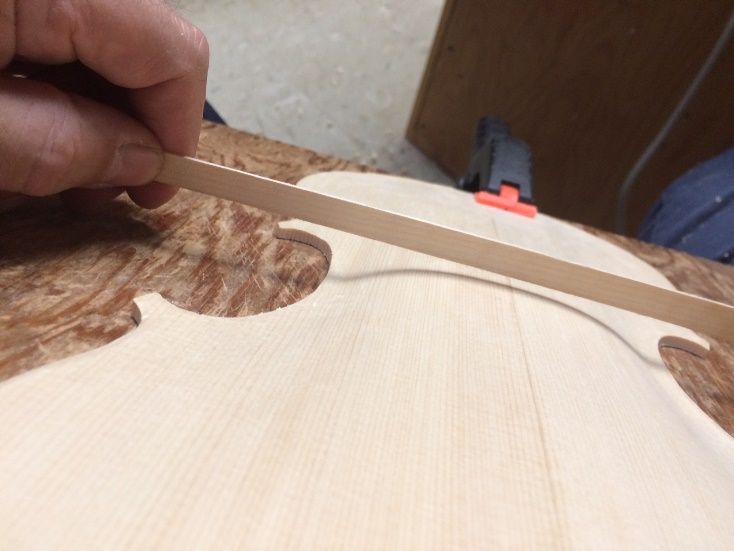
So, here are the two plates, ready for f-hole incision, before being carved from the inside to be exactly as thick as I require. Other than the F-holes, bass-bars and purfling they are nearly complete. 🙂

Two Plates, with completed arching.


I will try to keep going on photos.

Thanks for looking

If you found this post helpful, please share with your friends!

Final assembly of a Davidov model cello

Please share with your friends!

How to complete the assembly of the cello

Remove the mold and clean up the interior of the corpus.

In my case, since the mold is collapsible and comes apart in several pieces, it is pretty convenient to get the mold out. I use a small electric screwdriver to remove eight drywall screws, and back off twelve more, and the thing just comes right out…no fuss. The twelve that were just backed out are the ones securing the corner blocks and neck and end blocks in the mold. So, here is the corpus, fresh off the mold, with all the blocks still square and rough, and the linings only roughly trimmed, not scraped.

Rough cello interior
Cello interior immediately after removing the mold. All the blocks are still rough and square. Linings still need final scraping.
Rough cello end block
This is the end block. You can see the rounded part that I shaped before installing the front plate, so that I would not risk damaging the front plate while shaping it. The rest of the block was out of reach in the mold. Now it is time to shape all the blocks.
Rough cello corner block and linings.
Here’s what the corner blocks and linings looked like. The linings had been trimmed with a knife, but not scraped.

So– the next hour or so was spent chiseling, planing and scraping all those blocks to their final shape, and scraping the linings as smooth as I could get them. Here is what it looked like afterward:

Cleaned cello interior, just before closing.
I tend to make my neck and end blocks a little oversize. I have seen blocks split and break, because they were too small…it seems an easy way to insure against that sort of thing. All the blocks are now the size and shape I want them, and scraped smooth.

Install the Back Plate

So, the next step is to get the back plate in place. I aligned it carefully, checking all the margins to see that the overhang was fairly even all around, then clamped it in place, dry, using spool clamps. After I was satisfied that the overhangs were correct AND the elevation of the fingerboard was correct (an easy thing to mess up, as the corpus is quite floppy at this point), then I clamped everything solidly, and began removing a few clamps at a time, and inserting hot hide glue, using a palette knife. I washed off the excess glue with hot water, and re-tightened all the clamps.

Here the cello is in all its spool clamps, with one bar clamp to secure the button to the heel of the neck.

Callo back installed with hot hide glue and spool clamps.
The cello back is fully installed, with hot hide glue and spool clamps. The bar clamp secures the back button to the neck heel.
Cello glue drying by woodstove.
The house was pretty cold this morning, so I decided that the cello would dry faster in a warm room. Close to the woodstove (but not too close) is the best place I could find.

Final edge-work, scraping, preparation for varnish

After the glue was thoroughly dry, I removed all the clamps and began trimming edges, and perfecting the scroll and heel. The heel was almost a half inch high (which I expected…we leave extra, so that the heel and button are trimmed and shaped together, and match perfectly when we are done.) The scroll was still quite rough. I spent the rest of the day and late into the evening, scraping and planing, and trying to get the cello ready for finishing. Finally ran out of steam about nine PM, but it is nearly complete. Here is what it looks like tonight:

Cello in the white from front side.
Cello in the white, from the front. A little more edge-work to do, tomorrow morning, and I can begin the finish work.
Cello back in the white.
And there is that one-piece back…it has come a long way since that big slab we started with, hasn’t it? I still have some final smoothing of edges, etc. to do, then it is time for varnish.

Actually, I typically use a very weak water-base stain first, which will make the spruce a tan color, instead of cream-colored. Then I will sand it lightly with fine micromesh, seal it, and start applying varnish. (On the home-stretch, now!)

For those wondering about the pegs, saddle, nut, etc.; I wait until the varnish is complete before adding those fittings.

If you found this post helpful, please share with your friends!

Back Graduation Complete

Please share with your friends!

The Inside carving (Graduation)on the one-piece Cello back is complete.

Planes and scrapers ruled the day

Here is what it looks like now:

Inside one-piece cello back with shadow to show curves.
The scrap of lining material is only there to cast a shadow so you can see the curves.
Inside curve (longitudinal) of cello back
Same thing again, but with a bigger stick. 🙂

Again, you can’t see it very well, but I also rounded the edges, beginning the edge-work that is so important to the finished product. I do the inner edge first, as it is hard to access once the plate is installed. I began with a tiny plane, and cut a narrow bevel all the way around the edge, at a 45 degree angle. Then I used a file and a scraper to round it into what is essentially a quarter-circle curve.

This plate is ready for installation.

I will try to close the corpus this week, and then scramble to complete the neck and scroll.


If you found this post helpful, please share with your friends!

Graduation Progress

Please share with your friends!

Carving the Inside of the Front Cello Plate


All with planes, this time.

I probably should have used gouges, but the planes are so easy to control and the spruce is so easy to carve, that I chose to use these three planes: (I may still use gouges to get the areas around the end block platforms correct.)

Carving inside of cello top plate
Carving inside of cello top plate: Two hours work, and not done.

As you can see, the plate is not yet done, but I was pretty tired to start with, today, and now I am even more so.

Cello front plate with tools

Keeping the Goal in View

Here is how deep the graduations are, so far. I hope to have the thickness of the whole center area at about 5.5mm, fading to 4mm up the center on both ends, and 3mm on the upper and lower “flanks”, for lack of better word.  Right now the center is 6mm, and the areas up the center are still about 7mm…the areas out in the skirts are way too thick, still: 10-12mm. It takes a fair amount of care, graduating a cello plate: I have to stop every few minutes and check the thickness with a dial caliper, to avoid making the plate too thin.

Depth of partial graduation--correct in center; unfinished elsewhere.
Depth of partial graduation–correct in center; unfinished elsewhere.

Perhaps I will have it finished and ready for the bass bar by Tuesday. Tomorrow is busy, and I will work late Monday, so…probably Tuesday. That’s OK: it will give my hands time to recuperate.  They are pretty worn out…and that one-piece maple cello back will be much tougher to carve.

I did, however, complete the refinishing of the viola I built back in November. It looks pretty nice, now. So I will have that for the show, as well.

If you found this post helpful, please share with your friends!