
 Follow

The Final Varnishing Steps:
Color Coats Application; Shading, etc.
Choices:
There are as many individual styles for violin-family instrument finish as there are makers, it seems, but most makers still face the same sorts of decisions:
- What kind of varnish? There are so many variants on this one that I am not even going to try…
- The biggest division, though, is the choice between “Spirit Varnish” or “Oil Varnish.”
- Basic color scheme: Red, Brown, Amber, or Orange? Or somewhere in between?
- And, how do you achieve those colors? With synthetic dyes, natural pigments, or something else? Some people induce color in their varnishes by the making or cooking processes. Some add color afterward.
- Thick or thin varnish: one can go too far in either direction.
- Too little varnish, and it has a “dry”, thin look.
- Too much, and it can look as though it has been dipped in marmalade, and it will deaden the sound, as well.
- “Straight” varnish (sometimes called “Full” varnish) or “Antiqued?”
- If Antiquing is chosen, how far will you take it?
- Just a gentle shading, emulating minimal wear, from careful use? or
- Real damage, carefully repaired, “distressing” the instrument, to look as though it has survived several wars and a flood?
- Or somewhere in between?
- If Antiquing is chosen, how far will you take it?
My Choices on This Viola are as Follows:
- Spirit Varnish
- Golden brown, leaning toward reddish brown
- Thick enough varnish to stop looking “dry” or “thin”…just enough to give a sense of “depth” as one looks at the grain of the wood.
- Gentle shading on the “antiquing,” adding darker color in the “no wear” areas, and leaving the “worn” areas a little thinner. I doubt it really looks like an old violin, but it has some of the general look and charm…I hope. 🙂 I have done straight varnish a few times, and, while it looks nice, I prefer the minimal antiquing.
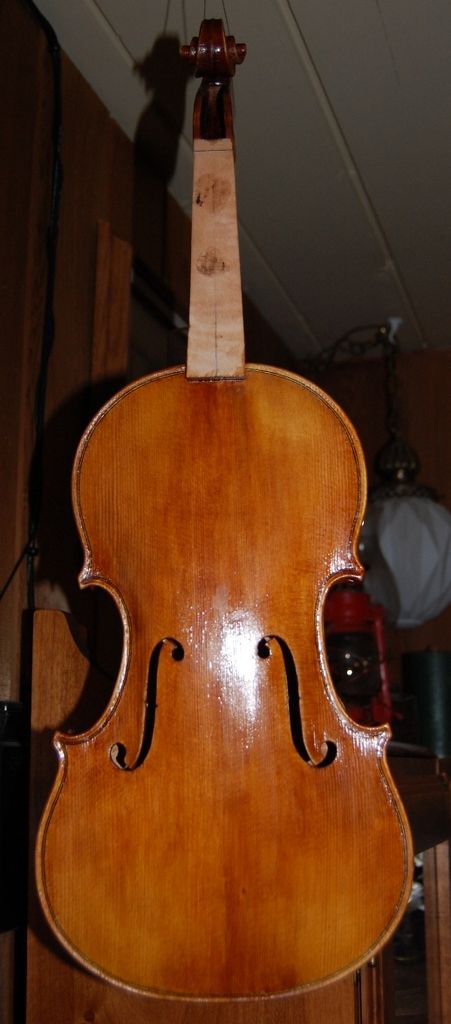
So…when I last posted, I showed you the viola with the first four coats of varnish:
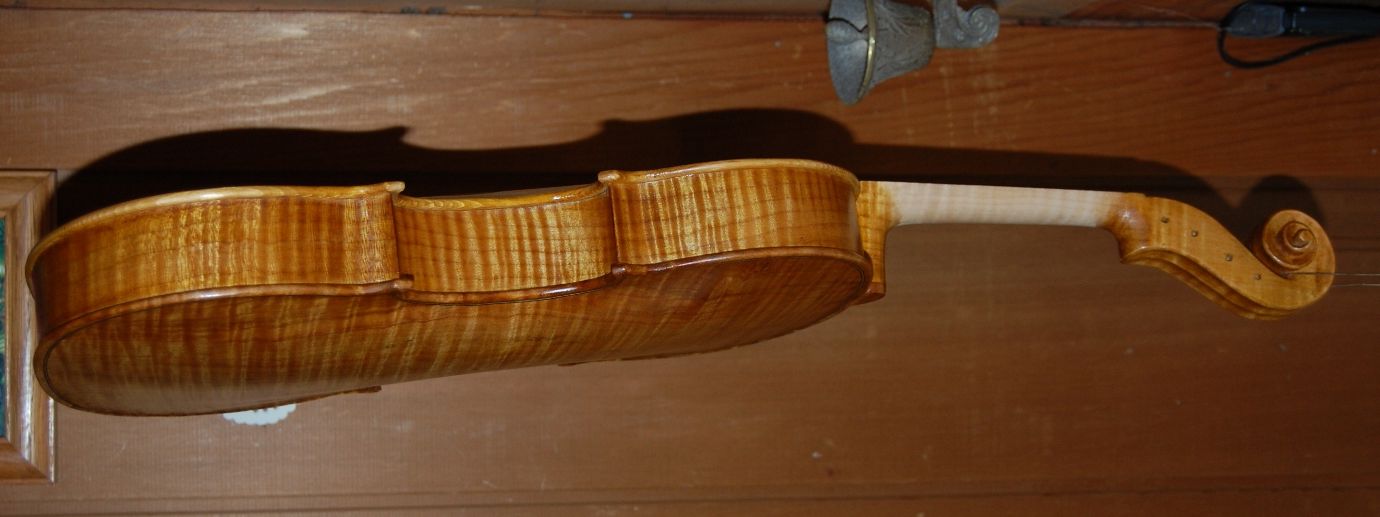
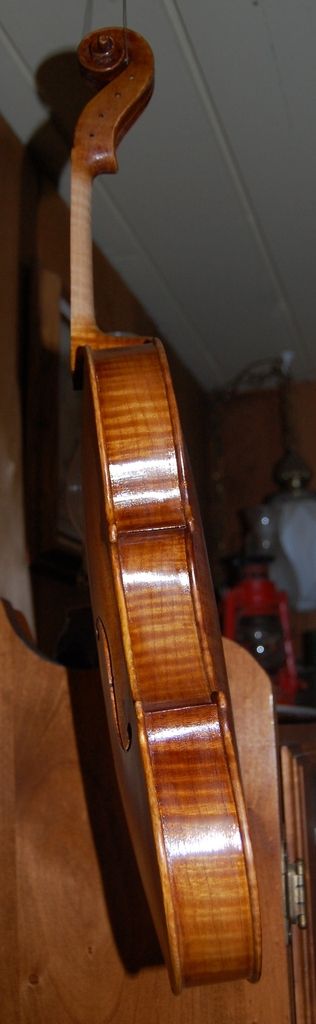
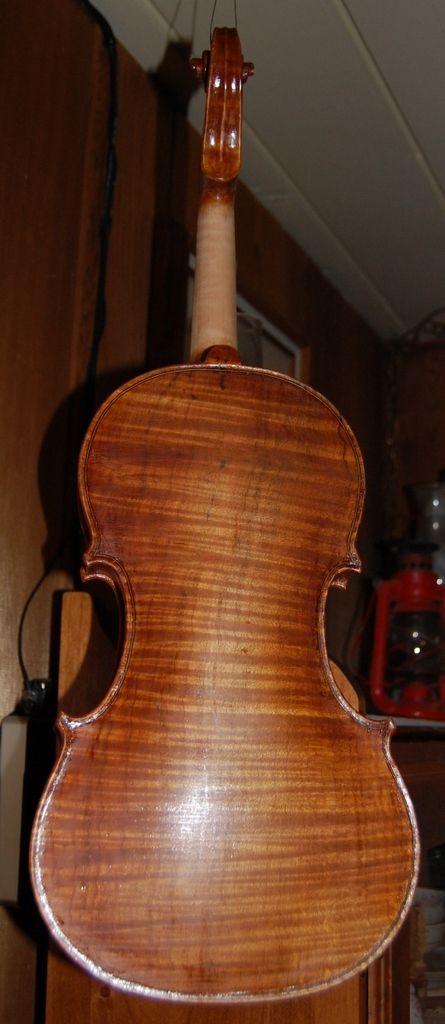
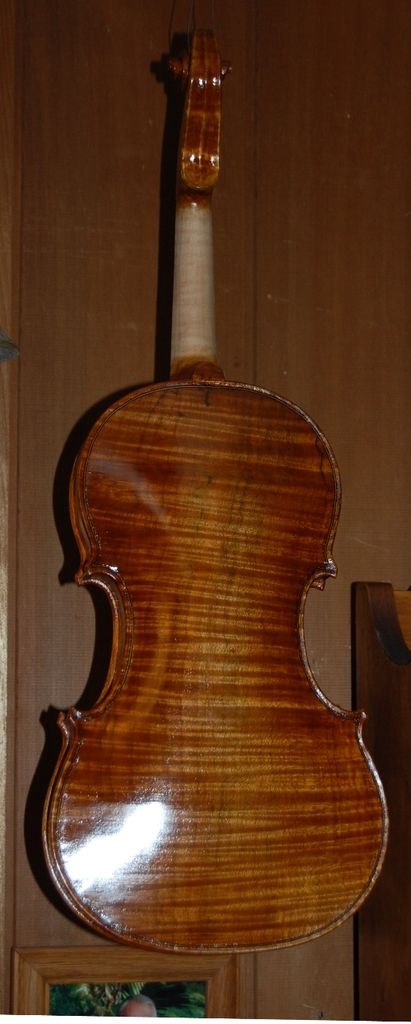
Here is the Viola with Six Coats of Varnish:
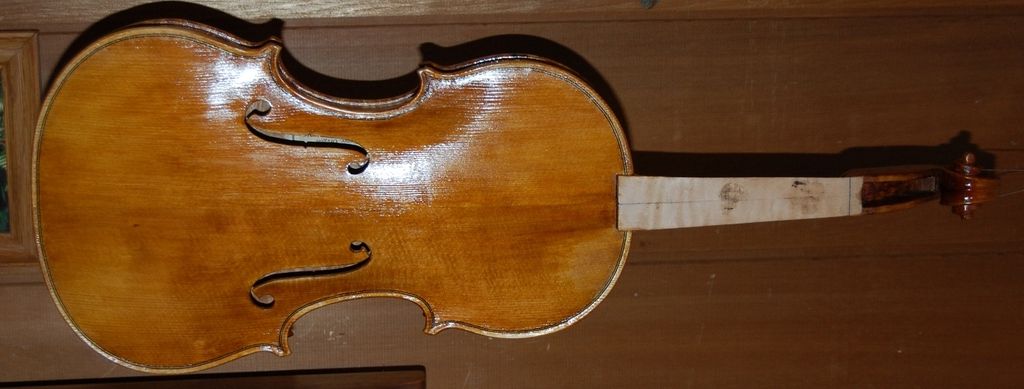
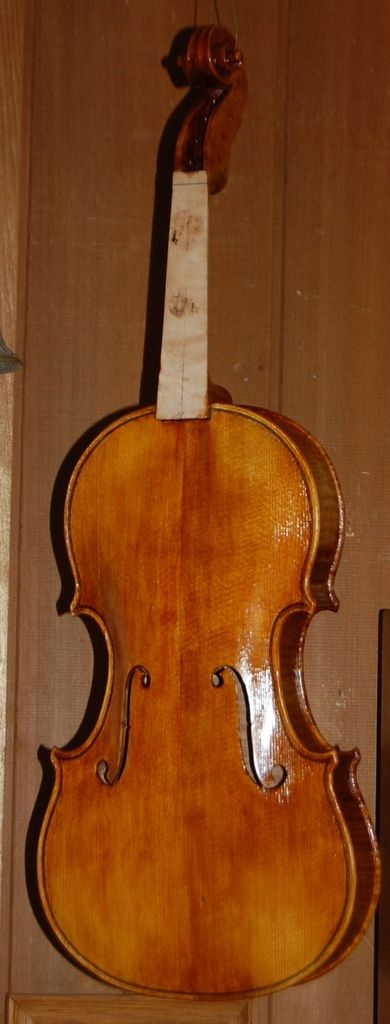
More Color Needed! Here it is with Eight Coats:
It looks pretty good in the above photos, but the camera does some odd things to the color, and it needed a little more, yet. So, here it is with eight coats:
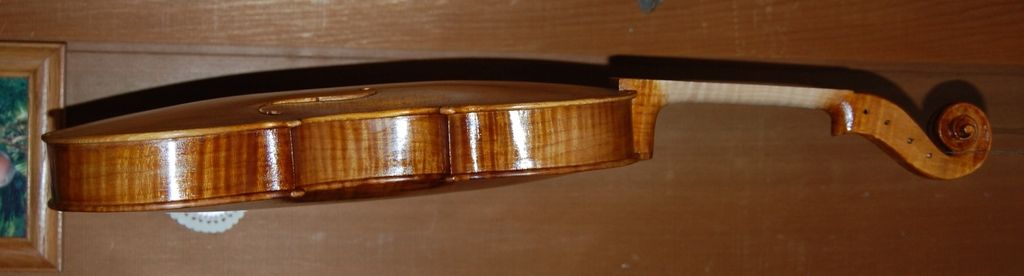
Final Sanding before Final Coat of Varnish
A careful rubdown with very fine, worn abrasives precedes the final coat of varnish, so that brush-marks, irregularities of any other sort, and rough areas can be reduced as much as possible.
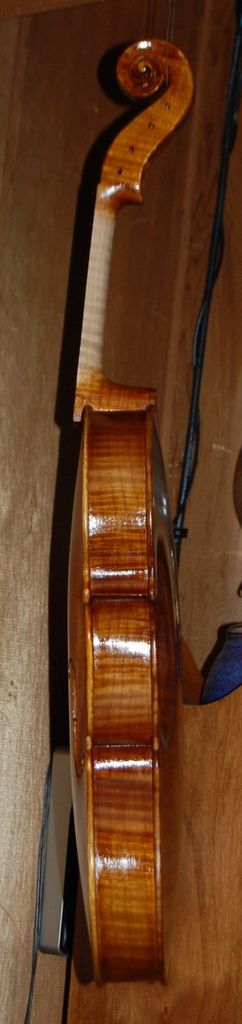
By the way, that tiny brown dot in the middle of the lower front plate is a tiny knot in the spruce. It is in the wood, not the varnish. It doesn’t hurt a thing, and adds a bit of character, I think. (Real Spruce wood! It had branches originally! 🙂 ) I regularly use wood with “character.” Several of my early instruments have ribs with a pattern of tiny “pin-knots” in them. Those ribs were all cut from the same billet, and doled out one instrument at a time. I still have a few from that billet, and will use them eventually, as I really like them. Here is the side and back:
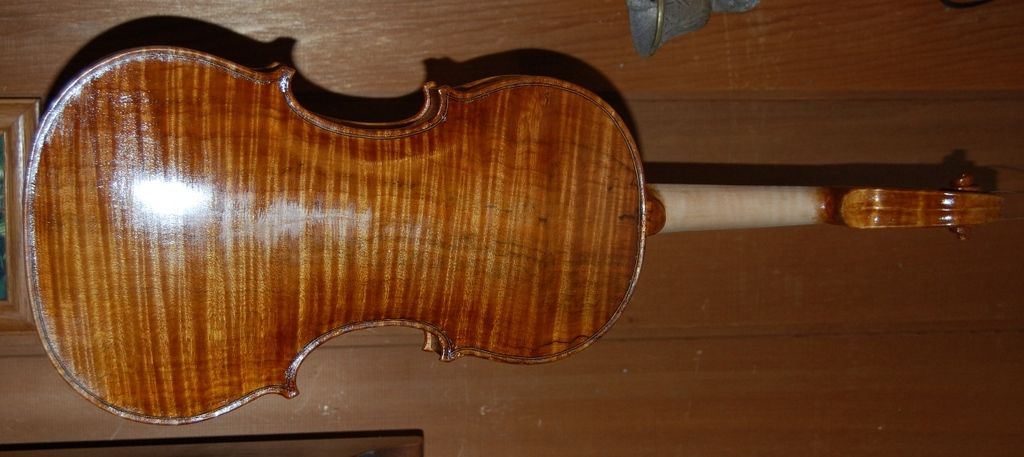
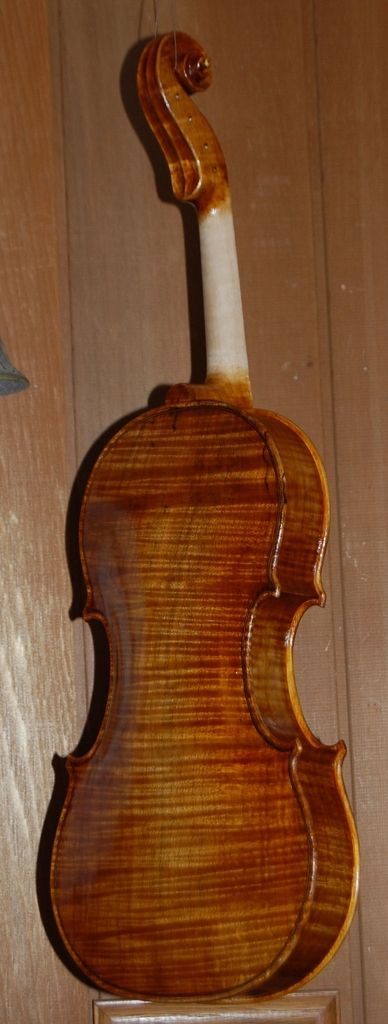
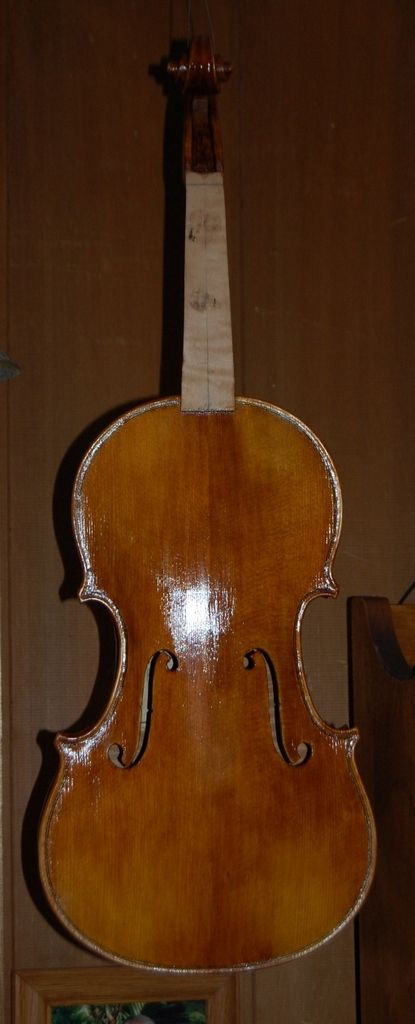
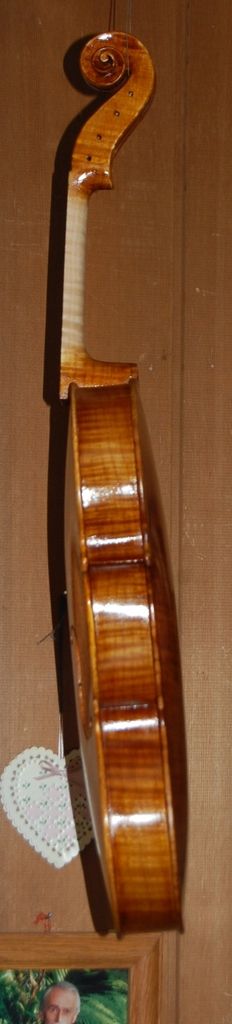
Here is the Final Look Before Adding the Fittings:
This is the final coat of yellow varnish…very thin…to achieve the look I wanted. There will still be a final rubdown and polishing, later on, but this is the last of the varnishing.
What is left to do?
I will add the saddle and end-pin next, then re-install the fingerboard, fit the nut and tuning pegs, re-touch whatever damage is done to the varnish in the above-mentioned work, then set up the viola, with sound-post, bridge, tailpiece and strings. I’ll add the chin-rest when everything else is in its final state, and, as a very last step, seal and polish the “handle” portion of the neck.
Thanks for looking.