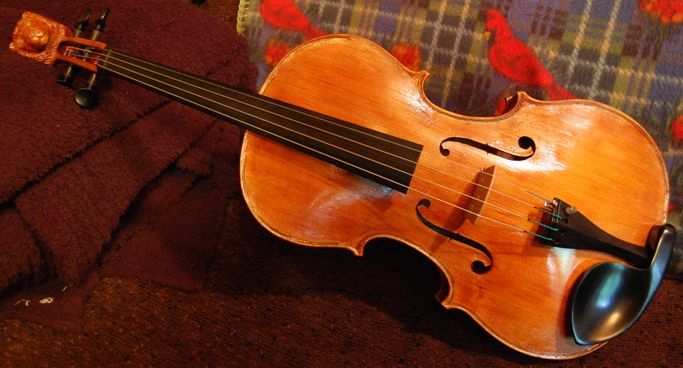
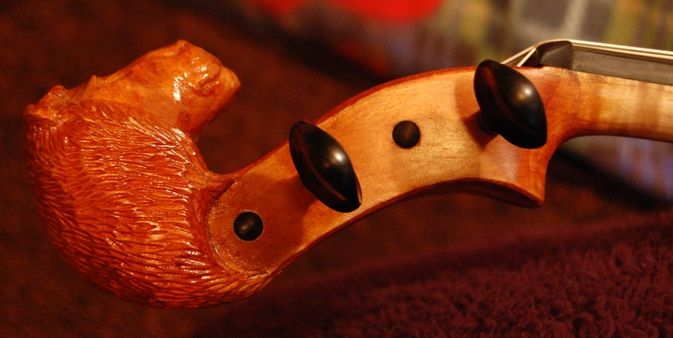
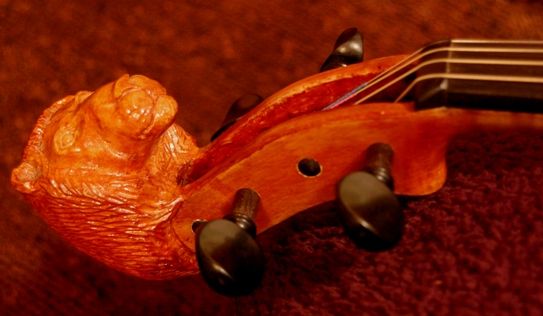
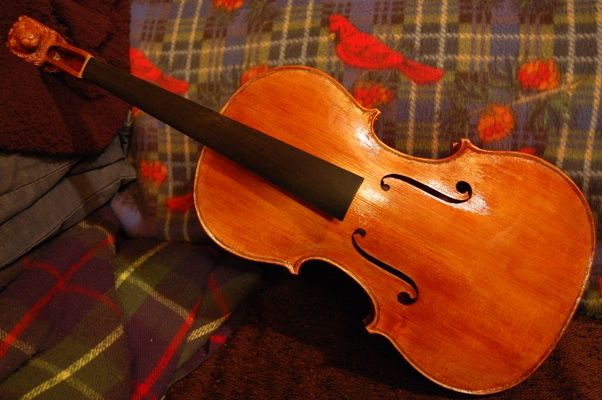
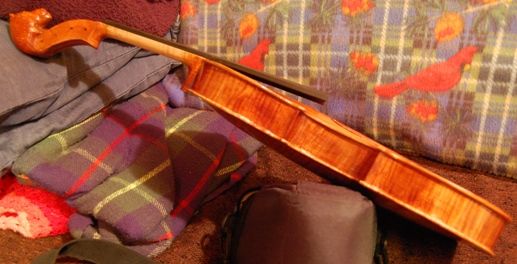
5 String Report #16: Adding the Fittings

Please share with your friends!

Five String Report: Adding Fittings

End pin

I failed to take any photos of this, but– it is pretty simple: I centered a hole on the center joint between the lower ribs, and centered between the plates. I drilled it first to 1/8″, then to 7/32″, and finally reamed it with a 1:30 tapered reamer… the same one I use for tuning pegs. I shaved the endpin blank to the correct size and taper using my peg-shaper, while gripping the endpin with a special homemade gripper. I shaved the endpin until it would just barely fit into the hole, leaving a little clearance between the collar and the rib surface. (There is a photo of it later on…)


Fingerboard:

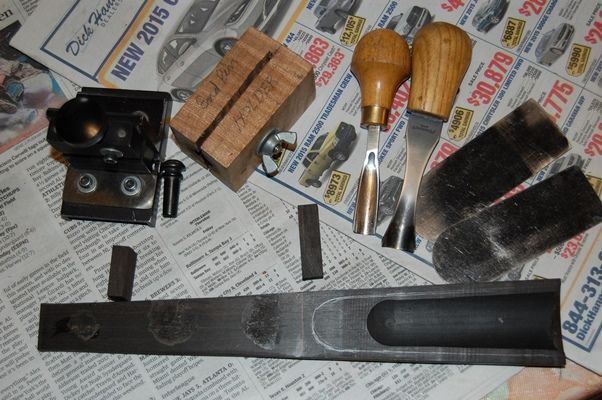
In the photo below you can see some of the tools I used to fit the ebony fittings to the violin. Looking at the fingerboard, you can see the three “dots” of glue that secured it to the neck while I was shaping both the neck and the fingerboard. When I re-install the fingerboard, there will be glue on the whole faying surface. The carved out portion will help to lighten the fingerboard, and apparently helps tone.
Fittings waiting to be shaped and installed
Fittings waiting to be shaped and installed.

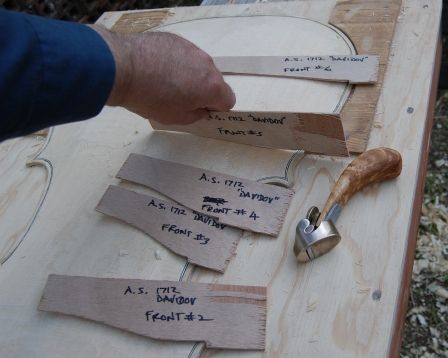
The black mechanism is the peg shaver I use. The block next to it is the gripper I use for end-pins. The endpin blank is right next to the shaper. The small ebony block between the shaper and fingerboard is the nut blank. The larger ebony block midway along the fingerboard is the saddle blank. The fingerboard has the shape laid out that I intend to carve away, and the gouges and scrapers on the right are the tools with which I did it.

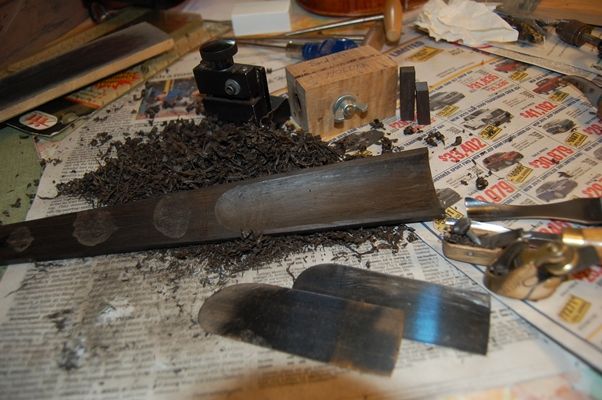
So, one of the first things I did was to make sure my tools were sharp, then I went all around the edges of that trough shape, carving away small chips of ebony to produce a shallow trench all around the edge. Then I carved as best I could with the gouges, until I decided it was time to get the planes into the fight. The little Ibex plane worked well, but the little wooden homemade plane actually worked better, because it has a deeper curve in the sole. It was made of a small section of a broken hammer handle, a piece of scraper blade, and a threaded steel plate to adjust tension and hold the blade in place.
Fingerboard ready for installation.
Fingerboard ready for installation. This part took me about an hour. Ebony is hard stuff.


Saddle

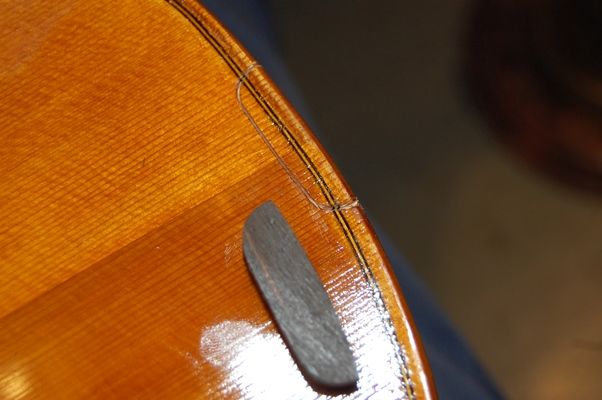
Next I worked on the saddle: I cut my saddles with radiused front edges, so as to avoid saddle cracks, which are extrmely common in violin-family instruments…partly, I am convinced, because virtually everyone makes them with square corners, which adds a huge stress-riser to that location in the spruce. To me, that is asking for a crack. I try to avoid suich things.
Saddle footprint with curved front corners.

Some luthiers try to avoid cracks by leaving a small gap on the ends…that makes good sense, too, but why not eliminate the “notch” altogether? Just my opinion…. Either way, you have to remove the wood of the violin front plate to receive the ebony saddle. I use a thin knife to slice through the spruce, and then a flat chisel to loosen the piece being removed. I set aside the piece in case it turns out I made an error of some kind, and need to put some back. It is a whole lot easier to match grain from the piece you just removed, rather than from some random piece of spruce.

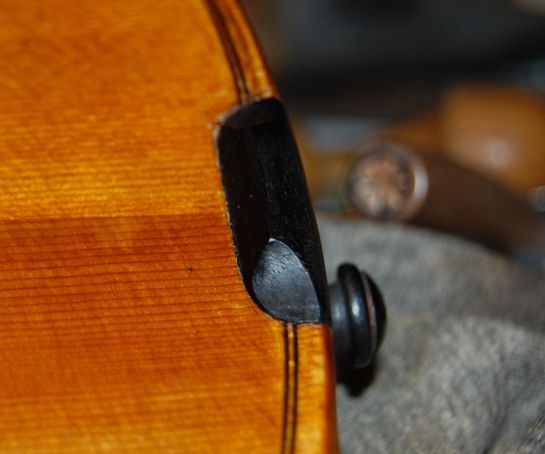
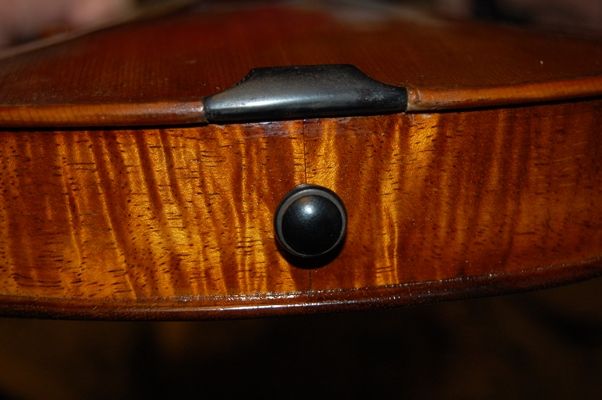
Once the saddle fits the mortise perfectly, leaving a small gap on each end (about the thickness of a business card), I glue the saddle in place, and forget about it. Here is a photo of the finished saddle. I didn’t take photos while I was carving. I get pretty wrapped up in what I am doing and forget to take pictures.
Saddle and endpin
Saddle and endpin


saddle and endpin
Another view of the saddle and endpin. (Pretty ribs, huh?) Varnish touch-up still has to happen.


Pegs

The next issue was the pegs. I wanted them done before I installed the fingerboard, simply because I wanted to be able to set the instrument aside so that the glue under the fingerboard could dry, and not feel that I was being prevented from working.

I had earlier drilled pilot holes in the pegbox, so that I would have guides to help keep the holes perpendicular to the centerline. So I reamed out those holes, all to approximately the same size, using the same reamer (1:30 taper) as I used for the endpin.

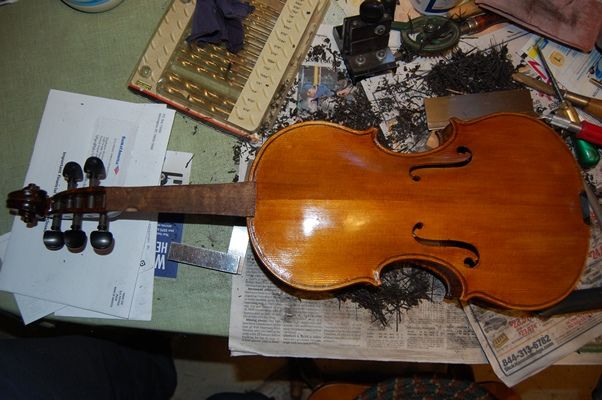
Then I sliced a shallow groove next to the collar, on each peg, all the way around, using a very fine razor-saw, to avoid breaking off the collar. (Doesn’t always work, but it seems to help.) I shaved the pegs until they fit the holes, at nearly the right depth, then “greased ’em up” with peg dope, and worked them in, so that the holes and pegs fit perfectly. Later I trimmed off the excess length of each peg on the far side of the pegbox, domed and polished the cut ends, so they would look nice, and put the pegs back in place.
Saddle and pegs installed.


Fingerboard Installation

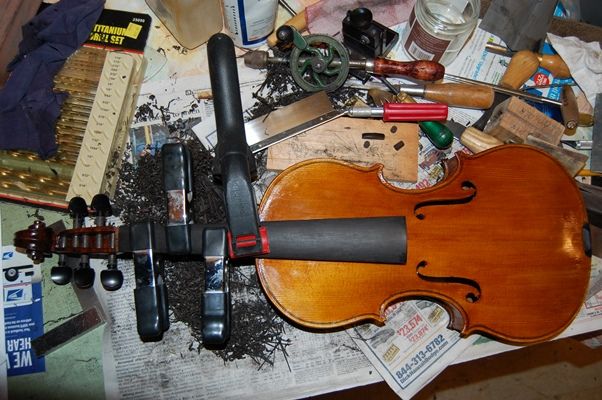
Last, I installed the fingerboard…I had marked ahead of time the exact location where the nut and fingerboard were to meet; so now, all I have to do is put the fingerboard exactly where it was before (against that line) and glue it in place. I positioned it using a single spring clamp and aligned the upper end as closely as I could, then aligned the lower end as well, and added a large spring clamp in that location. Finally, I re-adjusted the upper and lower clamps until both ends were perfect.

Then I removed the lower clamp, and, using a thin palette knife, I ladled hot hide glue into the space between the neck and fingerboard, sliding the blade up the neck as far as it would comfortably go, and replaced that clamp so that it squeezed out hot hide glue all around. I cleaned up the excess quickly, and double checked to make sure that the position was again perfect.

Then I removed the upper clamp, and repeated the gluing routine, but this time, as I cleaned up, I kept adding more clamps, removing a previous one, and wiping carefully, until I had four clamps in place and no glue drops where they did not belong.
Fingerboard installed with hot hide glue and spring clamps.

That was pretty much the end of the day. My hands were tired and hurting, and I had other things that needed to be done. Much later, I got back and removed the clamps:
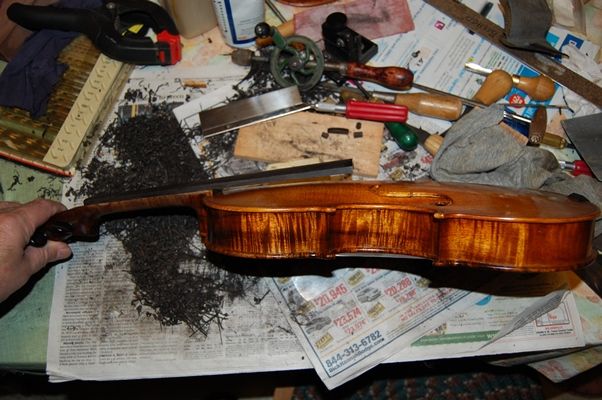
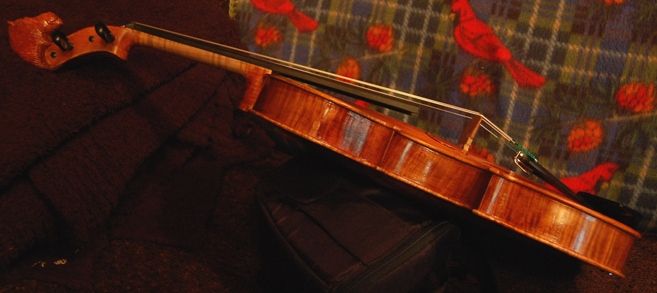
Side view with fittings.


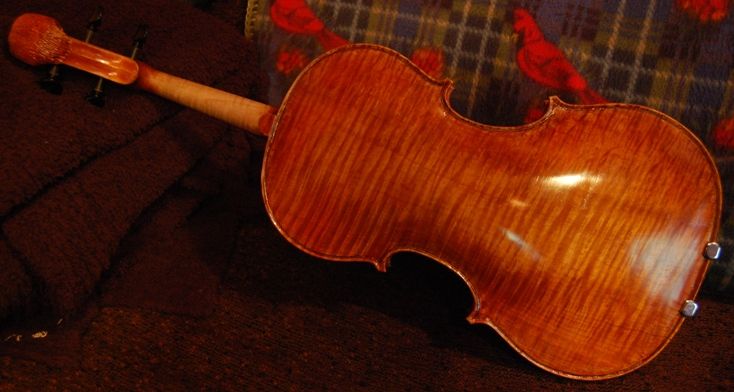
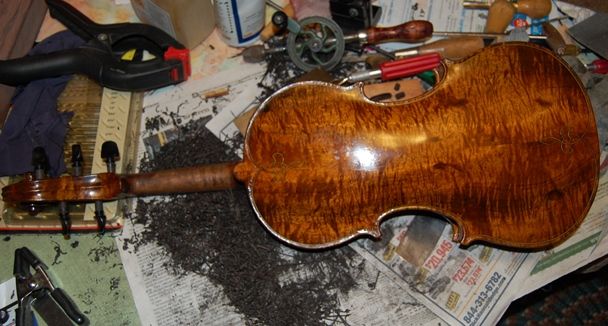
Back view with fittings.

The nut will have to wait until the fingerboard has been planed and scraped to exactly the right curvature, and polished smooth. We call that “dressing” the fingerboard.

After that it will be “set-up” time.

My next post will show the finished fiddle, strings and all.

Thanks for looking.

If you found this post helpful, please share with your friends!

Building a Cello–Step #9

Please share with your friends!

Step #9–Arching the Plates

Arching the Plates

If one looks at a violin-family instrument from the side, to see the front and back longitudinal arches simultaneously, it is easy to observe that the front and back are not arched the same. Some may argue that they began identical, but that since the stresses on front and back are not the same, the wood has crept, and the Old Master instruments are no longer the same shape they were when they were new. OK…I wasn’t there 300 years ago, so I don’t know…and if I had been, I’ll bet I wouldn’t remember. But we can see that, however they were back then, they are not the same now, and the best instruments have certain things in common: The back is essentially a circular curve; perhaps more accurately a curtate cycloid curve, or, possibly a catenary curve. The Curtate Cycloid seems to fit the best…it is sometimes called a hypocycloid, too. But the front is different– there is an area in the high middle that is nearly flat, by comparison with the back. The area between the f-holes and between the bouts flattens out considerably, compared to the back. This is an important difference, and is critical to the sound. Go online and look at a bunch of side-view photos of fine old violins. Once you see it, it is unmistakable.

Until a maker masters this aspect, it is really wise to make a set of longitudinal and cross-arching templates, and use them religiously until you can see the arching and tell whether it is right or wrong by personal experience. The archings will keep you out of trouble, just as using a map keeps a person from getting lost.

Make the templates and Use them!

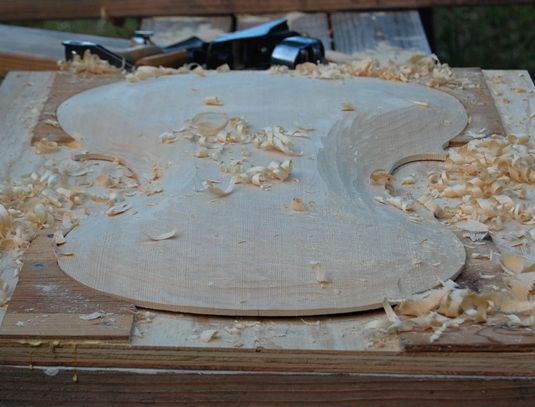
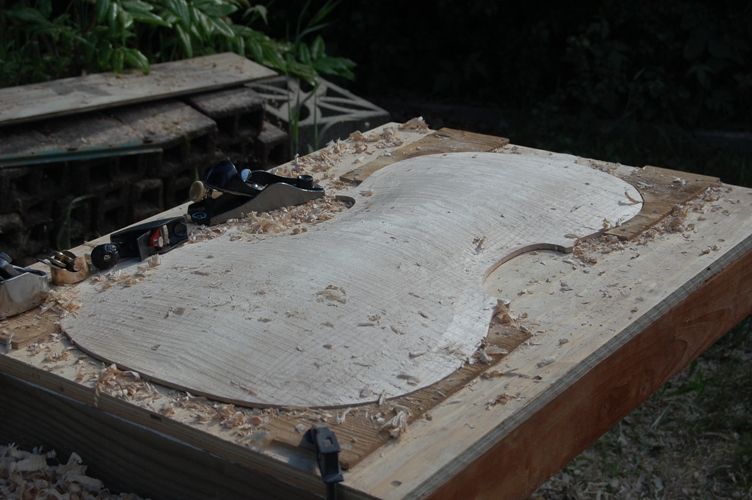
I used the drawings on the back of the Davidov poster to trace and cut out a set of arching templates. I have enough experience to start out without the templates, but not enough that I trust my eye to just cut the arches by instinct, or something of that sort. Here is the rough arching before I used the templates…you can sort of see the “table” area in the middle, where the shavings are sitting.

Rough Front arching, showing the Semi-flat area in the center.
Rough Front arching, showing the Semi-flat area in the center of the Sitka Spruce Cello Top.

I rough out the front and back, using gouges and planes, and get the area around the edges pretty close to exactly the thickness I will want the finished edge. Then I intall purfling (which we talk about in the next topic), and use templates to finalize the arching. I have made a few instruments, so I have the confidence to get pretty far along in my arching before using a template. There is nothing wrong with using them from the first attack.

Here is the back, ready for purfling, but before using the templates. Still too “puffy” in places, but looking like a cello back.

Rough Back arching cello
Rough back arching, showing the curvature of the Oregon Big-leaf Maple cello back


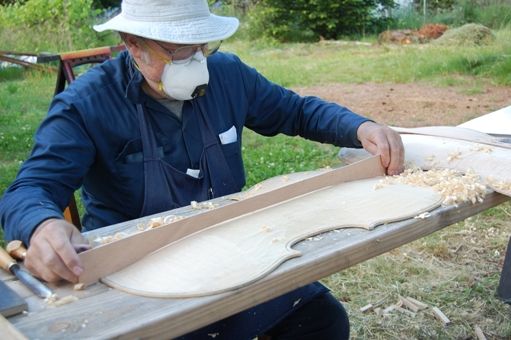
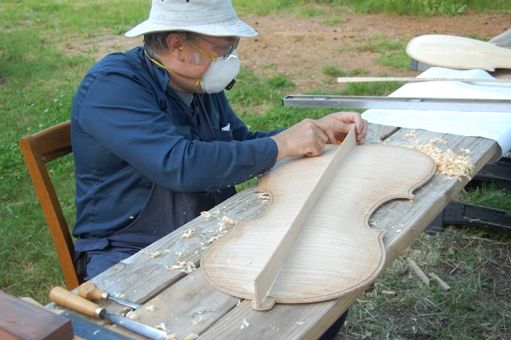
Here are the templates in use (notice the purfling is in place).

Front arching Template in use

Front arching Template in use

Back arching template in use

Here are the transverse arching templates: they are used in the same manner.

Transverse arching templates

When the arching matches the templates as closely as I can manage, I begin using scrapers to smooth and give final shape to the plates. Then it is time for inside arching. But first, we need to talk about purfling, since that was done in the middle of this article.

If you found this post helpful, please share with your friends!

5-String Fiddle Finally Complete

Back view of Oliver 5 string fiddle
Please share with your friends!

Five String Fiddle completed…just in time for the Show!

The Maryhurst University Musical Instrument show is this weekend,  Saturday and Sunday, the 3rd and 4th. Admission is only $3 … this is a really good deal, and a great “peek” at up-and-coming makers, as well as the more well-established ones.

Last year there were two banjo-makers, three or four mandolin makers, one double-bass maker, one maker of traditional Persian instruments, one maker of electric Kalimbas, one maker of traditional Mexican instruments, three or so Ukulele makers, possibly  ten makers of violin-family instruments, a couple of cigar-box ukulele makers, one orchestral harp maker and probably fifty to sixty guitar makers, of all varieties.

Handmade Bluegrass fiddle took months to complete

I have had more discouraging setbacks on this instrument than in any instrument of the last ten years, probably. I got sick early in the making, and was very busy with work as well, so that slowed things down. Twice I made errors and had to scrap the neck and start over. (Boy, is that frustrating!) Then I somehow got a serious muscle spasm in my back, and could hardly walk for several weeks.

However, perseverance pays off, and I finally completed the five string fiddle last night. There are still some spots to touch up on the varnish, and some other cosmetic issues, but for purposes of practicality, it is complete– and playing very well.

Oregon Bigleaf Maple and Sitka Spruce

The maple wood is from the same log  from which I made last year’s five string fiddle. The flame is not quite as spectacular, as it came from a different portion of the log, but still definite eye-candy–the back looks like a cloudy golden sunset in the right light.

If you’d like to try it out, please come to the Marylhurst show this weekend. Meanwhile, here are some photos:

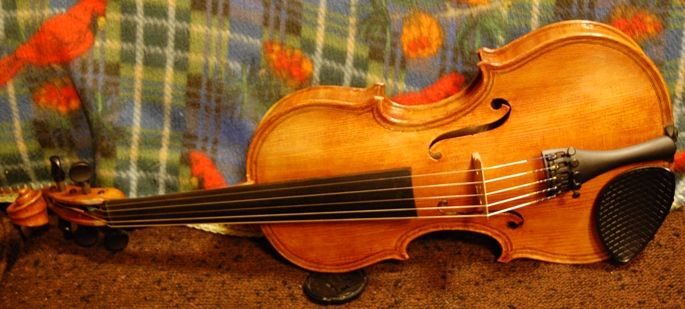
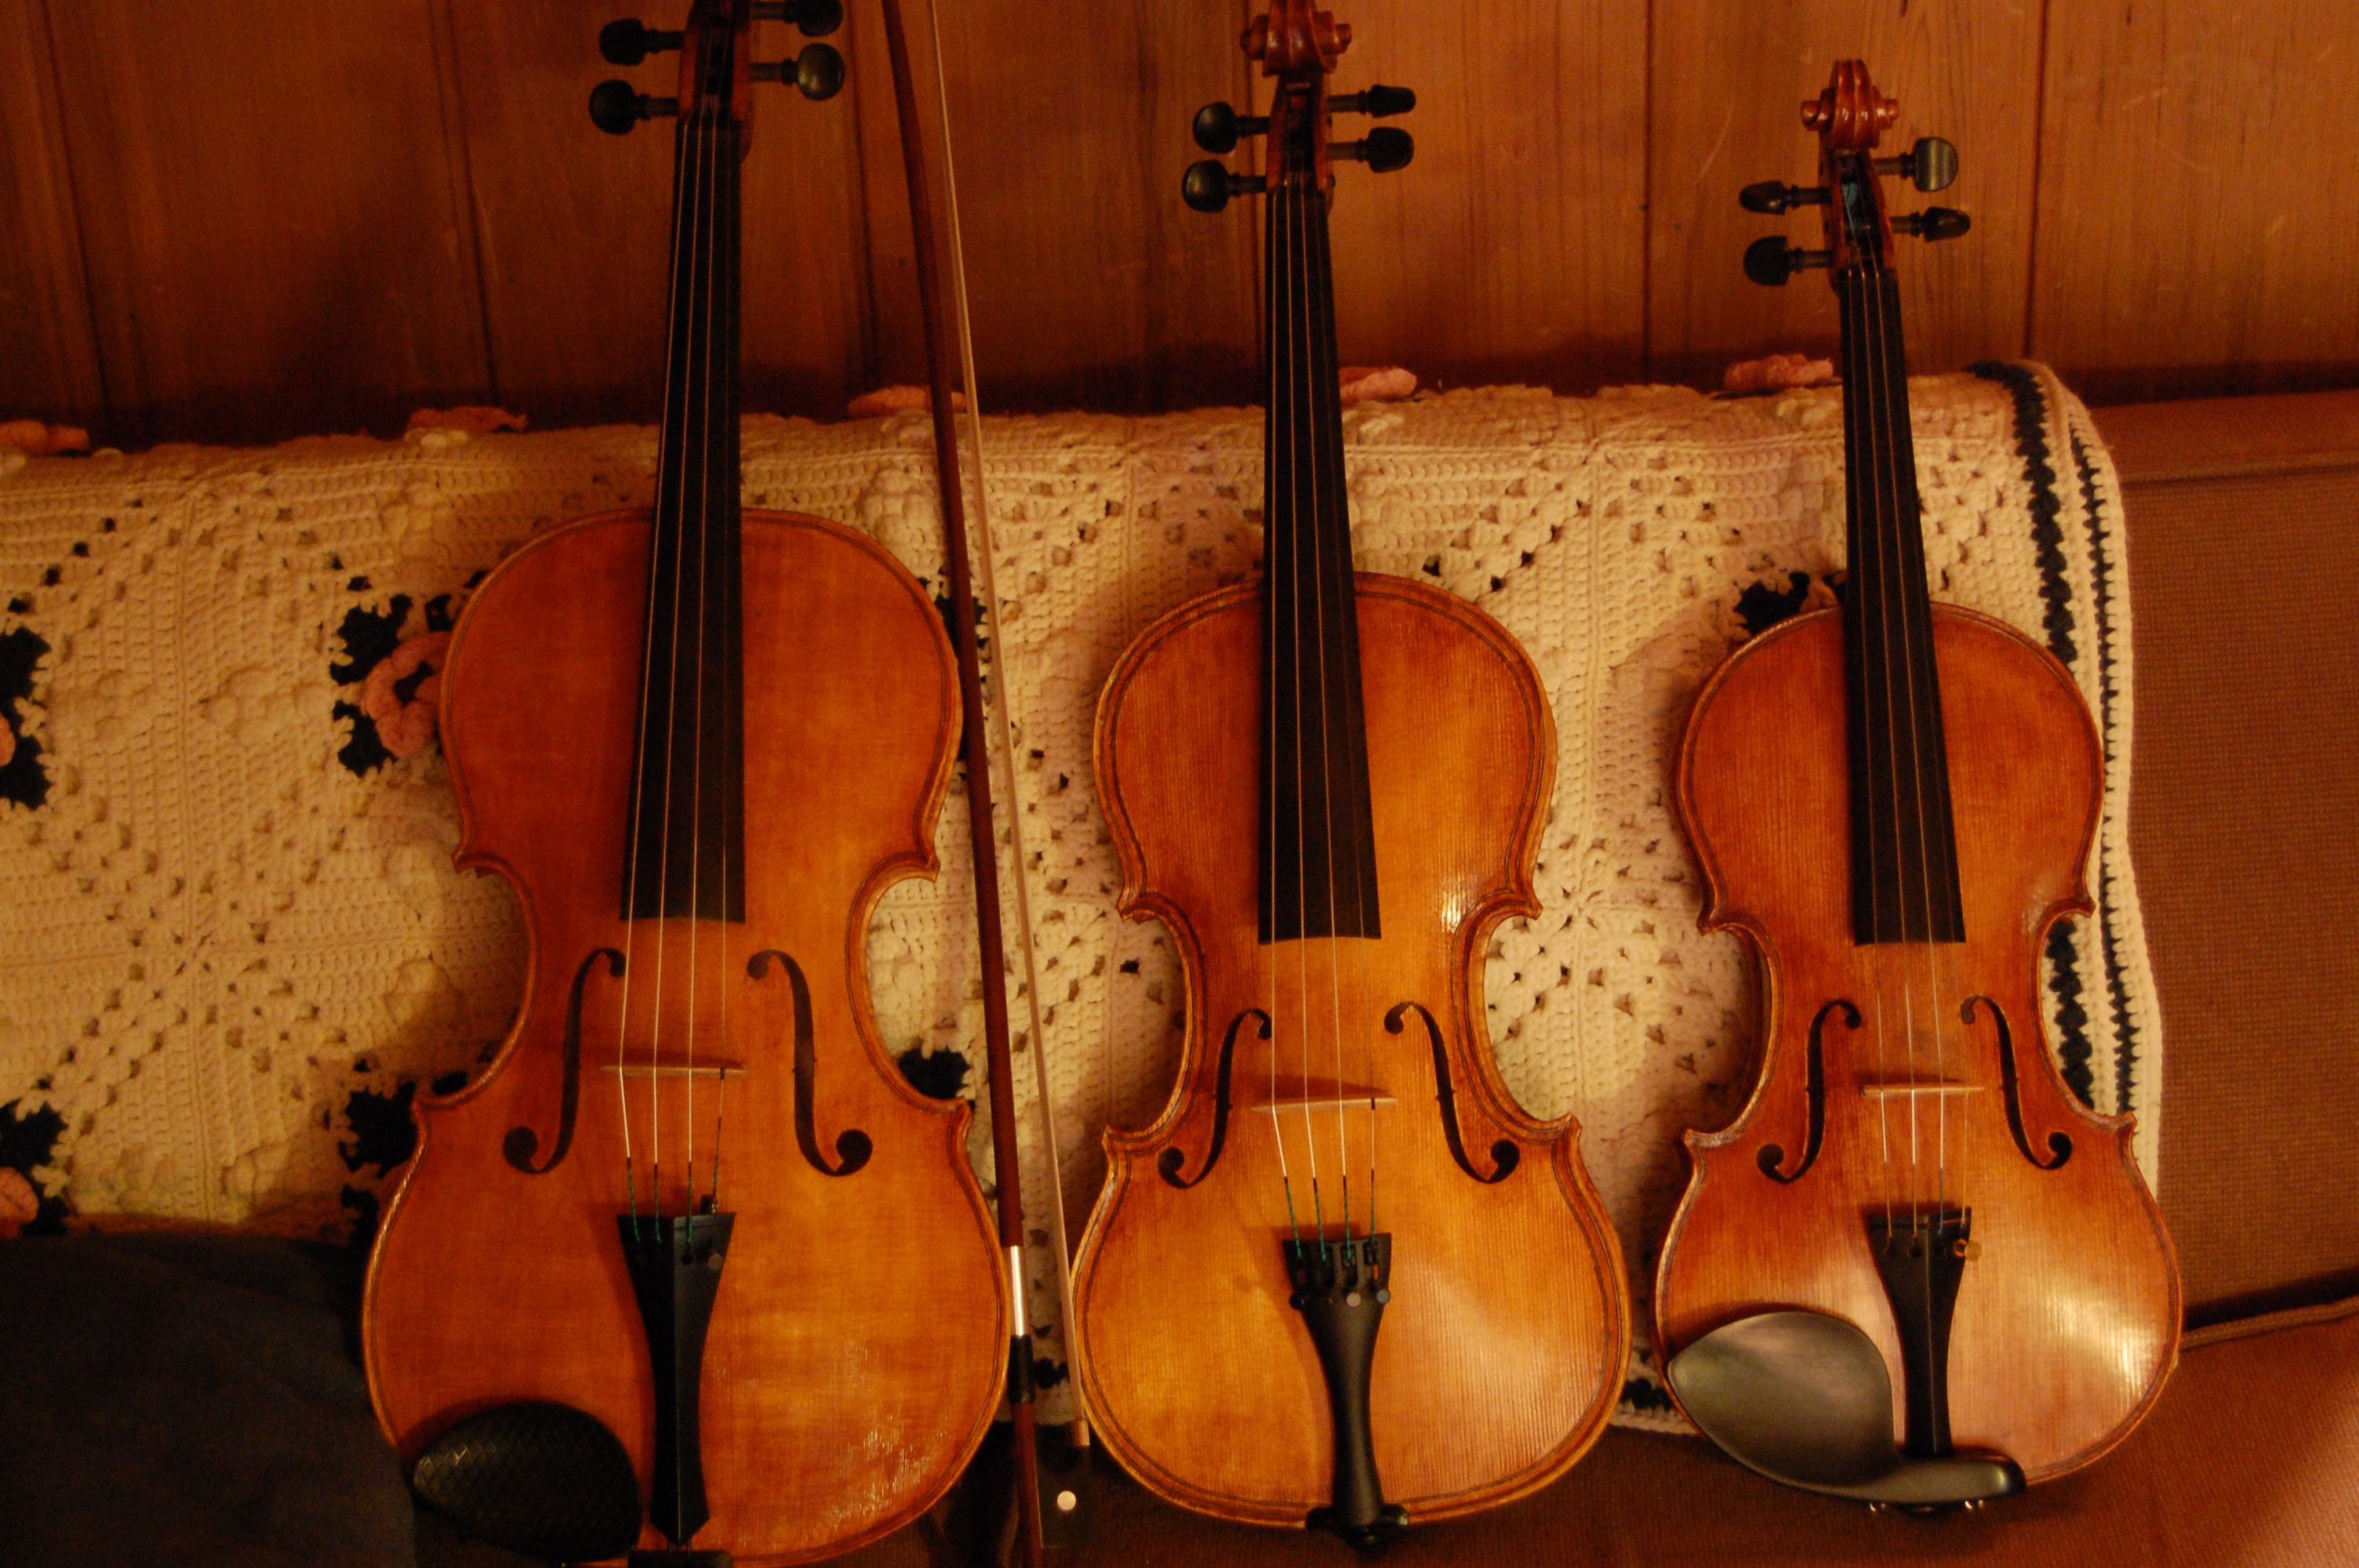
Front of Oliver Five String Fiddle
Front of the fiddle– colors are close, but in person it is more brown/red…less yellow.


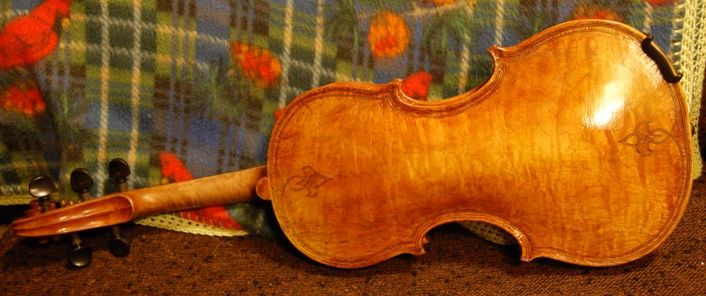
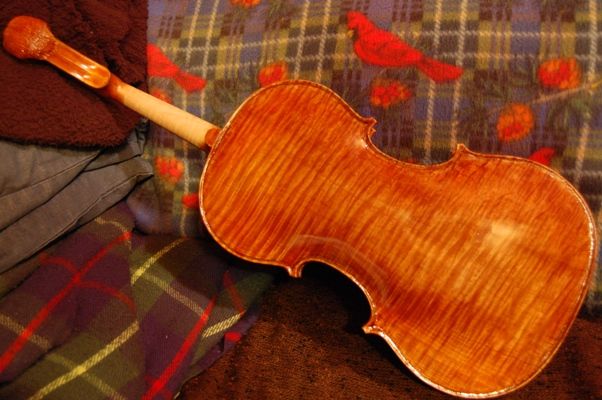
Back of Oliver 5-String Fiddle
The back looks pretty good, but it is better, of course, in person…you can see the flame better.
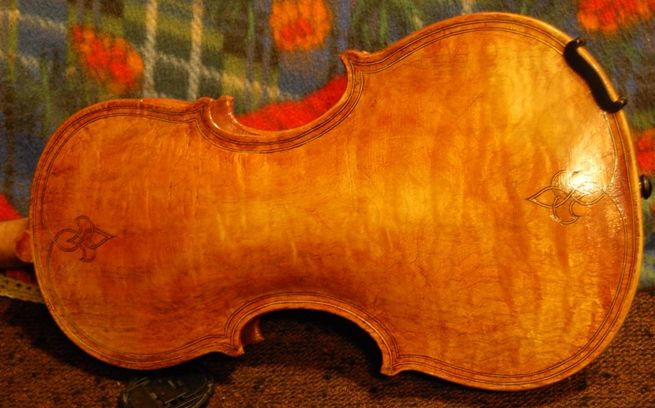
Close-up of Oliver 5-String Fiddle Back
Here is a closer view of the grain of the back. It really requires the changing angle of the light, to get the best view of it.
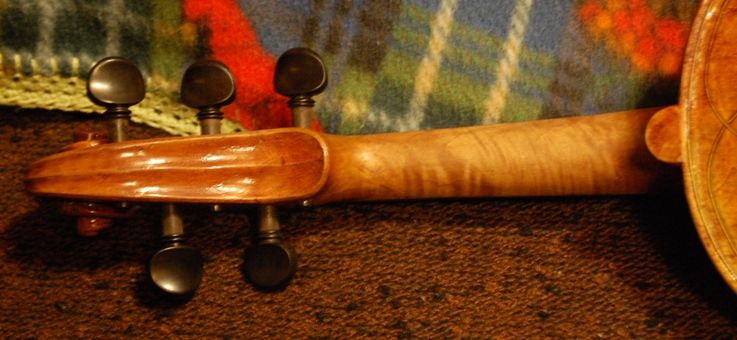
Back of Oliver Five-String Fiddle neck
Here’s the back of the scroll. I really like the flame in the neck.
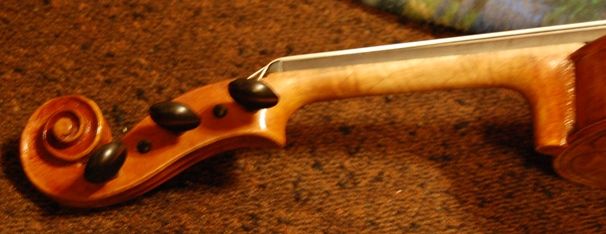
Side View of Oliver Five-string Fiddle scroll
And, finally, the side of the scroll itself. Not much flame in the wood, but I like the way it turned out, anyway.

Come and try it out at the show. I’ll hope to see you there.


If you found this post helpful, please share with your friends!

Five String Fiddle (slowly) Handmade in Oregon

Please share with your friends!

Five String Fiddle Progress

Life is what happens while you are making other plans, they tell me. This season has been loaded with distractions. I worked a lot of late hours at Gunderson, Inc. where I was teaching classes on Welding Supervision.

Two young fellows were coming to the house a couple of times per week to work on instruments they were building. One was working from a kit, but had zero experience with tools, so it required a great deal of personal attention; the other built from scratch, and is nearly finished with a very nice 15-5/8″ viola, a fairly faithful copy of the 1580 Gasparo da Salo viola. (Funny, when those young fellows are here, I don’t get a thing done on my own work.) I did begin three 5-string fiddles, months ago, but have only made measurable progress on one; the Spalted Maple 5 string fiddle.

I took two weeks vacation between Christmas and New Years, but ended up being sick nearly the whole time. Besides, my daughter was home from school for that two weeks, so I had reason to be distracted. 🙂 I did get a couple of work days in, but it has been a struggle.

Finally, I have several repair jobs going, each of which really needs to be done, so, to make a long story slightly shorter, things haven’t turned out as planned.

Double Purfling Complete, Including Purfling Weave on Back

The maple for the one-piece back is some Oregon Big Leaf Maple that was given to me by a local landowner and forester a few years ago. This is the third instrument I have made from that tree. It is a relatively soft maple, and has had a very nice tone, so far, in my experience. I have made one five string fiddle from it, so far, and one cello.

The Spruce is Sitka– a one-piece sitka front plate–  only the second time I have ever seen one, and it is some of the toughest spruce I have ever worked with, which I think will make a good, thin, top plate for the instrument, as I have made one instrument before with very similar spruce, and it turned out a winner, as a bluegrass, celtic and country fiddle. But it was not fun cutting the double purfling by hand, as every “winter grain” was so hard it would catch the knife blade and try to turn it.   However, here is the progress so far:

Progress on 5 String Fiddle
Progress on Five String Fiddle

Today I will make the final corrections on the front and back arching and cut in the f-holes (I hope), then begin graduating the front plate. Hopefully, by next week, I can have the corpus nearly completed. Maybe somewhere in there, I can get a good run at the other two fiddles, as well. I really need all three completed by the time of the show in April. There will be about 500 people per day, coming through that show, and some of them will be fiddlers. 🙂

We will see; I am feeling somewhat less than optimistic, however, after the experiences of the last three months.

Thanks for looking.

Chet

If you found this post helpful, please share with your friends!

Beginning Three New Five-string Fiddles

Please share with your friends!

Three 5 String Fiddles On the Way

Different Molds

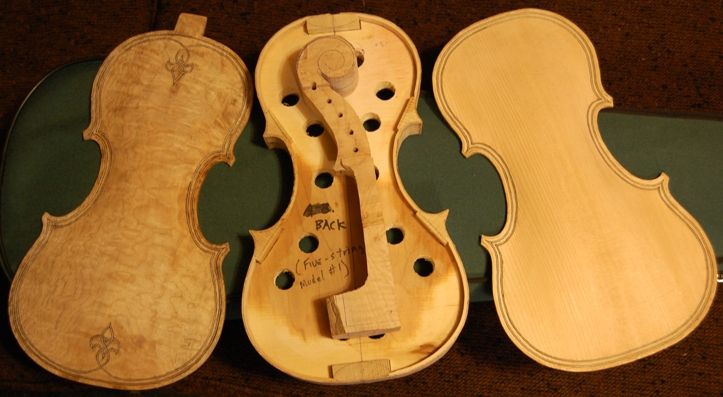
I decided to make two new molds, so that I could have more than one handmade five-string fiddle in the works at any given time. The new molds are made from the same half-model template, so they are very similar in character, but I did notice that somehow my original mold had been a little narrower in the center bouts than I had intended (don’t know how it happened), so the new ones are wider there, which may make the sound even more deep and clear. The instruments from the first mold have all been very good, so I am hoping the ones off the new molds are even better.

Different Materials

The original Oliver 5-string mold has the ribs and linings in place, and the chosen material for ribs, back and neck is spalted maple. This is an unusual choice, from a classical perspective, but a five-string fiddle is an unusual instrument, and I think it will prove a good choice. I really like the looks, so far. The second and third Oliver Molds (essentially identical, otherwise) have higly figured Oregon Big-leaf maple and Oregon Myrtle, respectively, for the backs and ribs. The Myrtle is a two-piece back, and the neck on the Myrtle fiddle is Big leaf maple; otherwise all the fiddles have matching ribs, backs and necks. The other two are each a one-piece back, also.

I am planning to use Port Orford Cedar for the two-piece front plate on the Myrtlewood  fiddle. This will be the first time I have used anything other than spruce for a violin top, but I have been told it is exceptionally good for other types of instruments, and a friend gave it to me to try in a fiddle. I plan to use Sitka Spruce for the on-piece top of the curly big-leaf maple fiddle, as well as for the spalted maple fiddle. I am hoping to experiment with front plates made of Alaskan Yellow Cedar sometime soon, too.

Different fittings

Depending on the way they look when completed, I may vary my fittings a little, too…haven’t decided yet. I tend to like simple fittings, but I have used fancier fittings, once, and they did look nice– I am just not sure they belong on a bluegrass five string fiddle. Perhaps I can get a set of Oregon Mountain Mahogany pegs, or something. Mountain Mahogany is a very hard wood native to Oregon, but much lighter in color than Ebony, so it adds a different look.

Same Workmanship

I intend to use the same methods as always, including the double purfling that adorned the previous five-string fiddles. I will still use a scraper for the final contour and texture, though perhaps I will leave a little less “corduroy” texture on these than on some others. Some people like less.

Same Varnish

I will use the same Spirit varnish that have always used on all three fiddles, as well as the same graduation scheme and internal arrangements (bass-bar shape and size, etc.), so the sound should be the same.

Same Strings

I will use the Helicore five-string sets, as usual, though I have found some other combinations that work remarkably well.

Progress reports to come

As things progress, I will post photos, so you can see each of the three fiddles grow from a small stack of wood to a completed instrument.  Each will emerge as a brand-new, handmade bluegrass 5 string fiddle when complete.

Stay tuned… (no pun intended). 🙂

If you found this post helpful, please share with your friends!

Tool-making is part of the game, too!

Please share with your friends!

Biggest Little “Thumb-plane”

(OK, it is too big to be a thumb-plane, but I was simply making a larger copy of one of my thumb-planes (also called “finger-planes”) so I thought of it as a large thumb-plane.)

Handmade tools are part of the Luthier’s Trade, too.

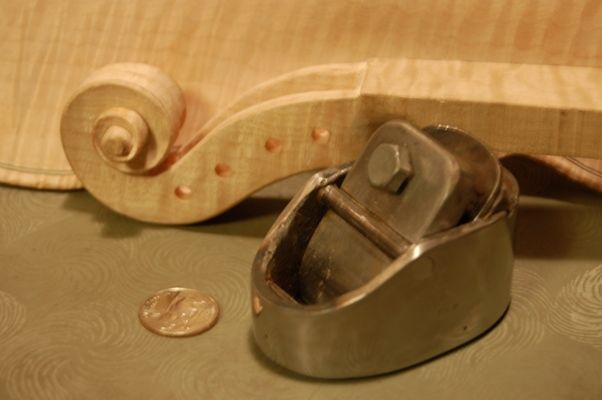
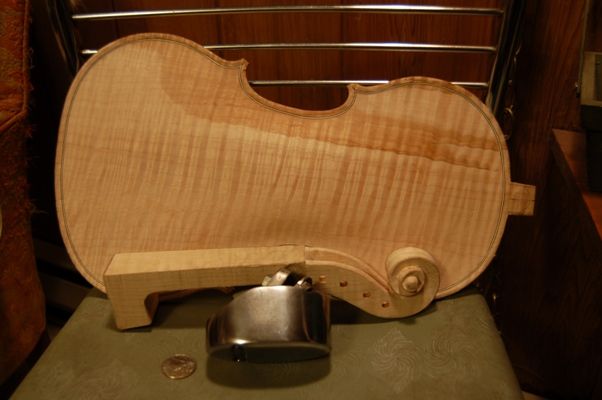
The tool shown here is a curved sole plane specially made for carving the inside of a compound curve—in this particular case, the inside of an upright bass viol—sometimes called a double bass. (That’s a standard violin scroll beside it, and a twenty-five-cent piece, to compare size) Many such thumb-planes are made of cast brass—this one is all steel. It features all welded construction, and a hardened high-carbon steel blade.

I began with a short piece of scrap 2.5″ I.D. steel pipe. I mashed it to the oval shape in a hydraulic press, welded the sole in place, added the plane bed and blade retainer pin, and hand-crafted the chip-breaker to fit.

The blade was made of a cast-off piece of a commercial scraper blade. I think it would benefit from a thicker blade, but it works well as it is.

New Hand-Plane with vVolin Scroll
New Hand-Plane with Violin Scroll


The sole of the plane is curved laterally, as well as longitudinally, to allow the blade to smoothly follow the surface of an inside curve. The blade, also curved to match the sole, is adjusted by loosening the keeper bolt and manually repositioning the cutting edge. In two tries, I had it shaving smooth ribbons of maple from the inside of the bass.
 

Curved Sole of Hand Plane

The plane weighs in at about two pounds, so it is not a featherweight, but the extra mass seems to make it cut more smoothly. On the other hand, it gives your deltoids a good workout…but that is part of woodworking.

First Bass Project

2006 Double Bass Project

And then, there’s the project itself…. When complete, that bass will be 6’-3” tall—with the endpin retracted. But it will weigh only 20 pounds or so. The curved-sole plane is what allows the control to make the plates so thin—4.5mm in many places—9mm at the thickest. (Bass was completed and sold in 2006; I hope to build another one soon.)

Here is what the finished handmade double bass looked like:

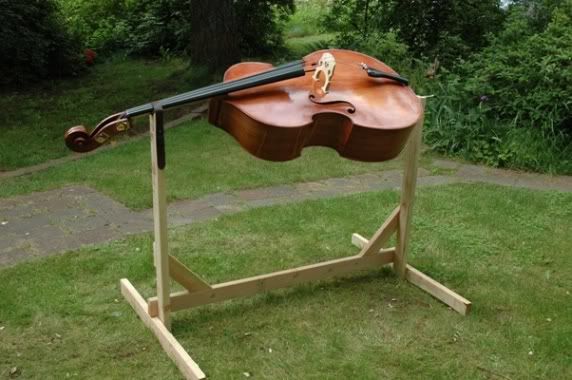
Double Bass in Varnish Stand


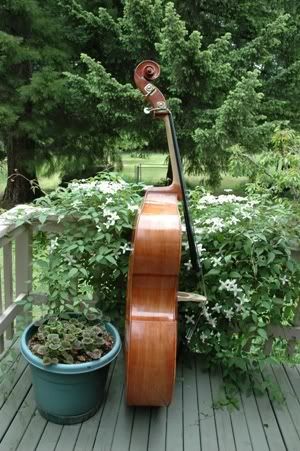
Double Bass Side View


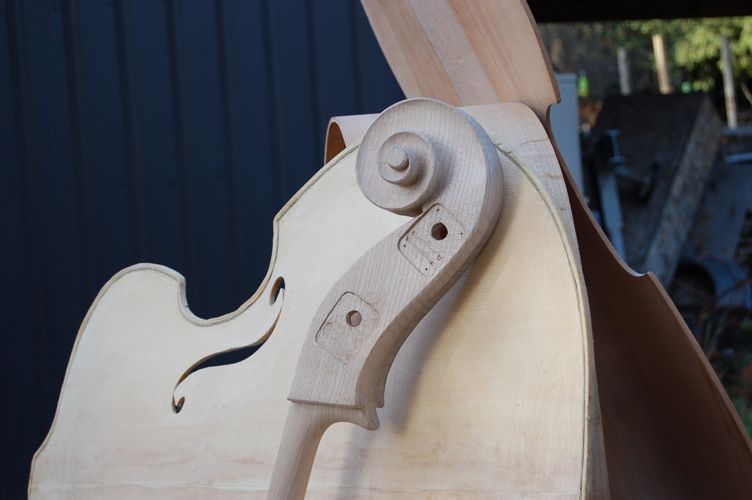
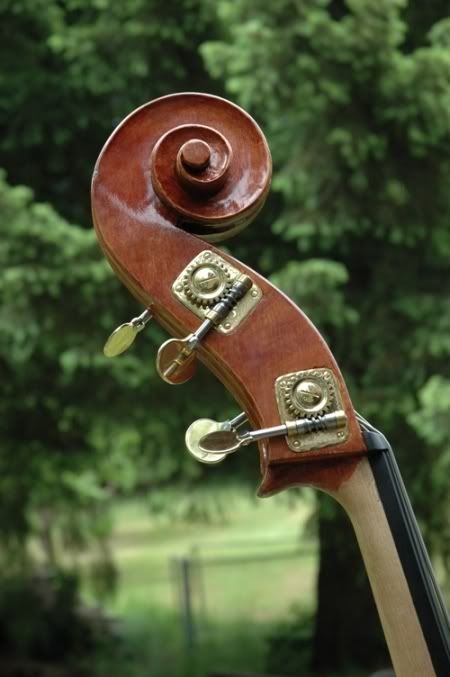
Double Bass Scroll
Double Bass Scroll


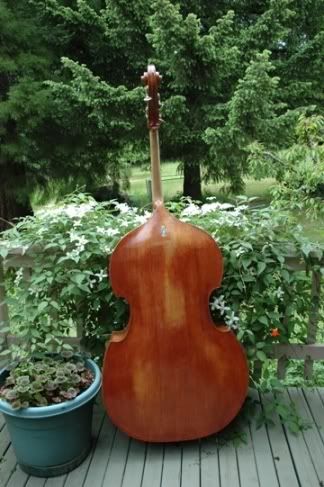
Double Bass Back View
Double Bass Back Detail


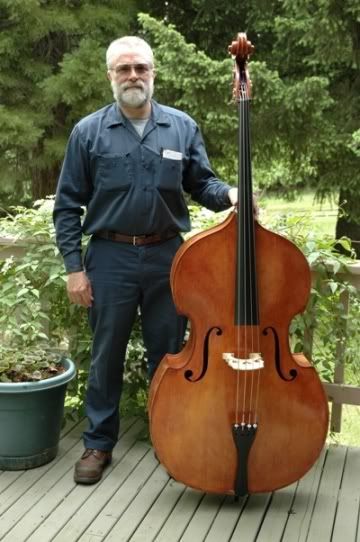
Double Bass Front View

Yes, I know now that the little white felt pads go on the inside of the tailpiece…but the photograph recorded my ignorance at the time, so I will let it stand.

This Double Bass was handmade in Oregon. It plays very well, with a huge powerful tone. It was sold and now lives somwhere in Illinois, I am told. This was a “William Tarr” model, built from plans obtained from Peter Chandler. My next Double Bass will be a “Panormo” model, modelled after a bass by Vincenzo Panormo, and using drawings by the late Peter Chandler.

All my Double Basses are of Oregon Big Leaf Maple and Sitka Spruce.

If you found this post helpful, please share with your friends!

Completed 16-1/2″ Oliver model Lion Head Viola

Please share with your friends!

Pinterest

The Lion-head Viola is Finished!

As always, I am sure there are things I may do differently next time, particularly with the hand-carved lion-head, but, overall, I am satisfied with the results on this viola. It plays easily, has a big, deep voice, and is becoming more responsive day by day. Here are some photos:

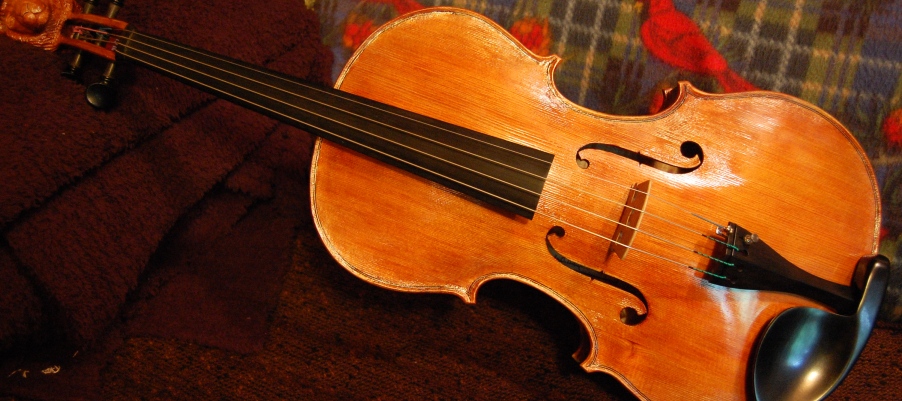
Completed lion head viola, front view.


Side view Lion-head viola


Back view Lion-head viola


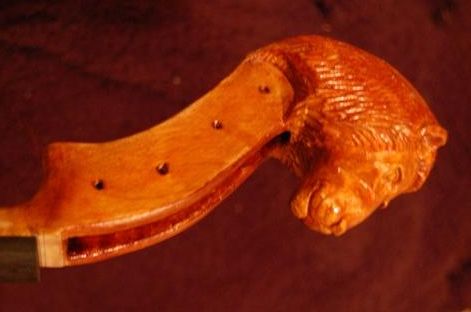
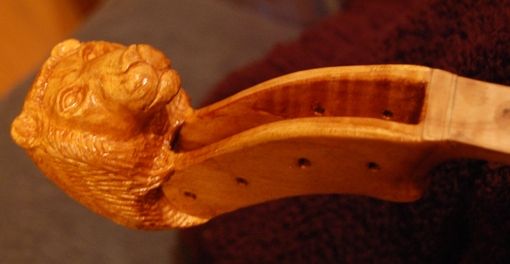
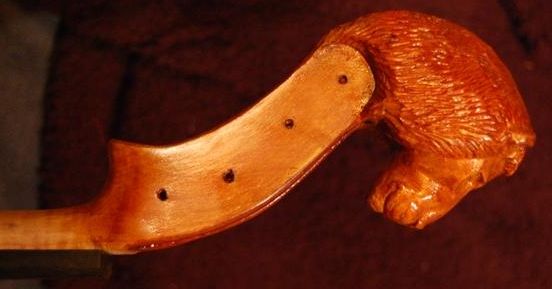
Treble-side Lion-head Scroll


Bass side Lion-head Scroll


Three-quarter view Lion-Head Scroll


The style is closely related to the Andrea Guarneri “Conte Vitale”, but has been changed significantly enough that it is simply my own design, hence the “Oliver” model designation. It definitely qualifies as a large viola, so only players who are comfortable with a big viola will like it, but, that being said, it is a relatively easy-playing viola, too.

I realize that lion-head scrolls are not terribly conventional, but I also remind myself that Jacob Stainer made a few lion-head instruments, and a whole bunch of German copyists followed his lead…still they are maybe one in a thousand.  I changed one last thing and attempted a little more realism. Perhaps it will be difficult to sell; I don’t know. But it is one of the best violas I have made, and I trust someone will eventually see it as the one they have been waiting for. 🙂

Thanks for looking. Feel free to contact me.

If you found this post helpful, please share with your friends!

Completed Varnish on Lion head Viola

Please share with your friends!

Varnish is complete on the Lion-head viola.

I will still have to complete the rubbing out of the varnish and the final setup of the instrument, but I expect to have it playing by Friday. Here are some current photos:

Front of lion head viola with final varnish


Side of lion head viola with final varnish

Side of lion head viola with final varnish
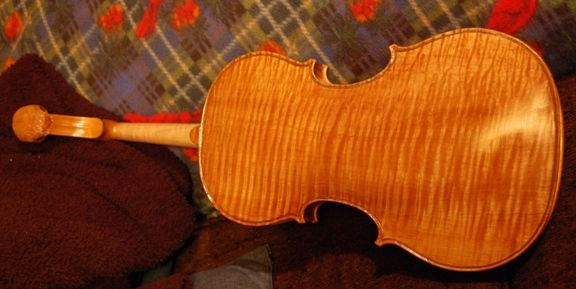
Back of lion head viola with final varnish
Scroll of lion-head viola with final varnish
Side of lion head scroll with final varnish

I am sure there will be minor retouches to do after everything is complete, but this is pretty much what it is going to look like. I like the way the big leaf maple is glowing under the varnish, and even the hard rock maple scroll seems to glow a little. I hope it plays well. 🙂


If you found this post helpful, please share with your friends!

Lion-head viola with three coats varnish

Please share with your friends!

Lion-head viola looking good, with three coats of varnish, but far from finished.

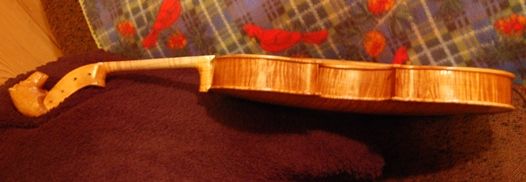
Here are a few pictures of the viola with three coats varnish. I definitely intend to go darker, but it is looking sorta nice. I especially like the way the heavily flamed one-piece Oregon Maple back is beginning to show its inner glow.Back with three coats varnish 
Side with three coats varnish


Scroll with three coats varnish

I may not get much done on it tomorrow. I need to clean the chimney and move firewood.


If you found this post helpful, please share with your friends!