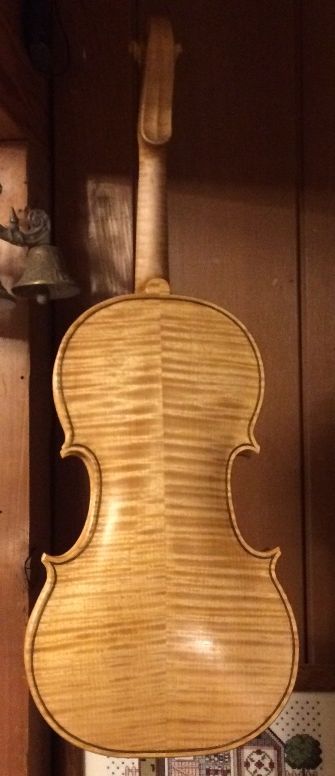
When I last posted, I had only the yellow, base coats of varnish in place, so the violin looked like this:
Yellow varnish
I added a rapid series of color coats; very thin, deeply-tinted varnish, and then it looked like this:
Color coat, front; emulating the wear patterns on the original 1715 “Titian” Stradivarius violin.
Color coat, back. Sorry for the poor quality photo…I used the zoom on my phone. Bad choice.
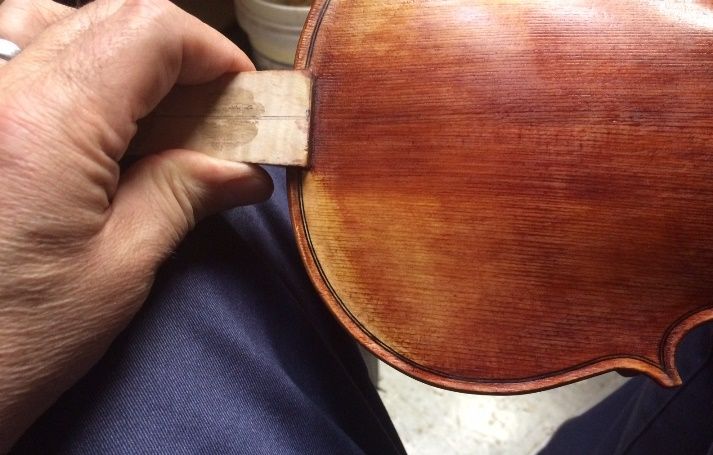
After that coat was good and dry, I continued to build the color in the areas that needed more, and trying to leave it appropriately light in the areas where the Old Master instrument had the most severe wear. I also noticed that there was a “bump”–a ridge in the spruce, near the purfling, which I had not been able to see in the clean, fresh wood, but which, under a reflective layer, became quite apparent. (Sigh...) So, I used a sharp scraper to bring the ridge down flat, and then began rebuilding the varnish layers to match the rest of the area.
Corrective “surgery”…removed a ridge in the spruce that I had missed earlier. Rebuilding the varnish, now.
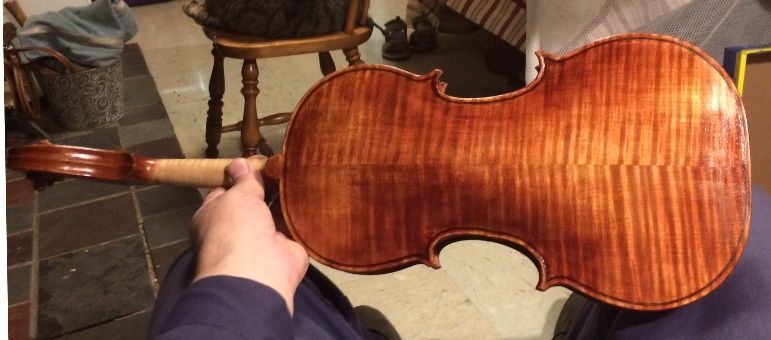
The back was looking pretty nice, though:
Back nearly complete.
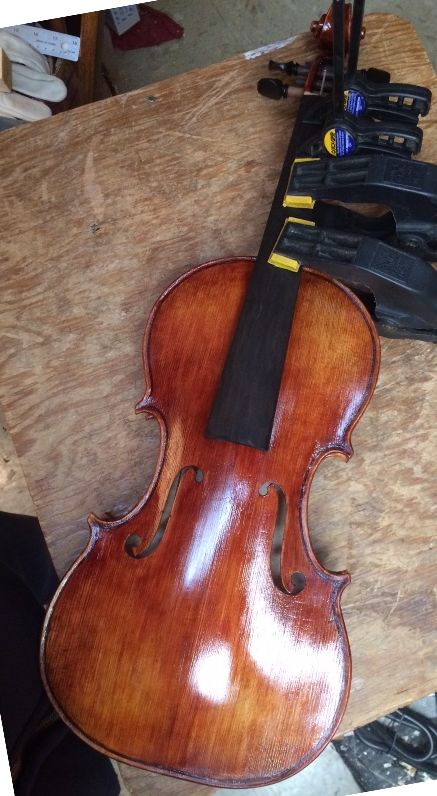
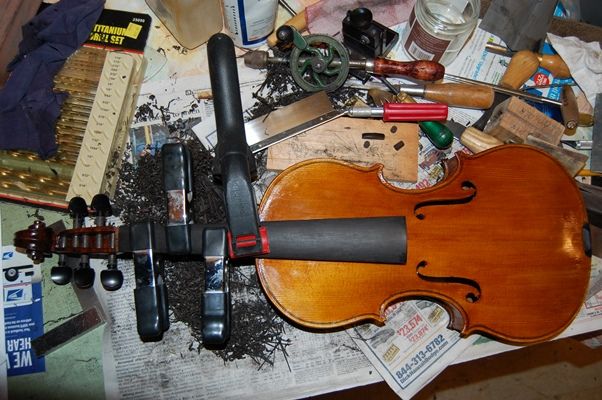
And, today, I installed the soundpost, and then applied two coats of clear varnish. Afterward, I installed the end-pin, the tuning pegs, and the fingerboard. Here it is with the clamps still in place.
End-pin, fingerboard and pegs installed; pegs still need to be trimmed to length.
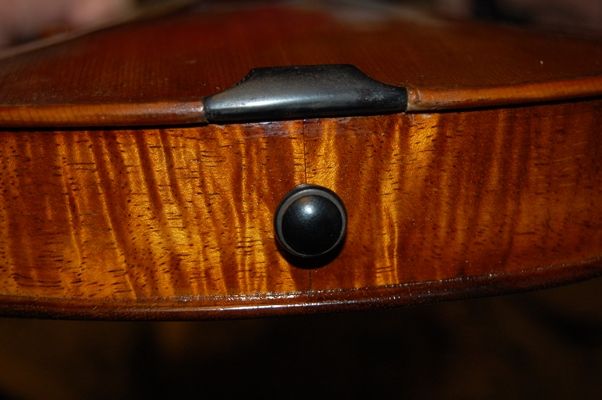
Endpin couldn’t be seem in the previous photo…here it is.
Violin front, prior to set-up.
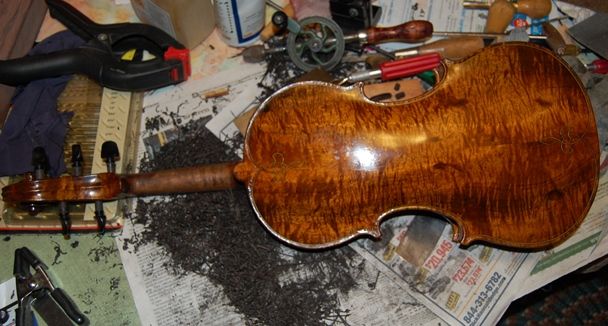
Violin back, prior to set-up.
So: That’s as far as I got, today. Next time; the saddle, the nut and final set-up. This violin is nearly completed!
Thanks for looking.
If you found this post helpful, please share with your friends!
Well– as I said in an earlier post, one of the decisions that has to be made is whether to “antique” a new instrument. As a rule, I try to go easy on this, doing minimal shading and light wear patterns; but it really does pay to do something to satisfactorily darken the bare wood before beginning varnishing. Otherwise, I will regret it later on, when I can see the bright wood through the dark varnish, and there isn’t much I can do to make it look right.
As you may recall from the first post on varnishing this violin, I was not very happy with that first coat of varnish–it was too light in color. I should have stripped it off and started over, but I kept thinking “just a little more varnish!” Well…it wasn’t working. Especially under bright light, the light wood just grinned at me from behind the varnish.
So, not really wanting to strip it and start over, I used a different ploy: I coated the entire instrument (except the handle area of the neck) with a very dark pigment, allowed it all to dry, and then sanded it back off, knowing that I would damage my lovely varnish in the process, but alsoknowing that the dark pigment would only remain in the low areas of the grain, and that, if I was careful, there would still be a fair amount of the varnish left, but with bits of the dark pigment remaining, looking like the accumulated dirt and skin-oils from hands, ground into the wood over the years….hopefully.
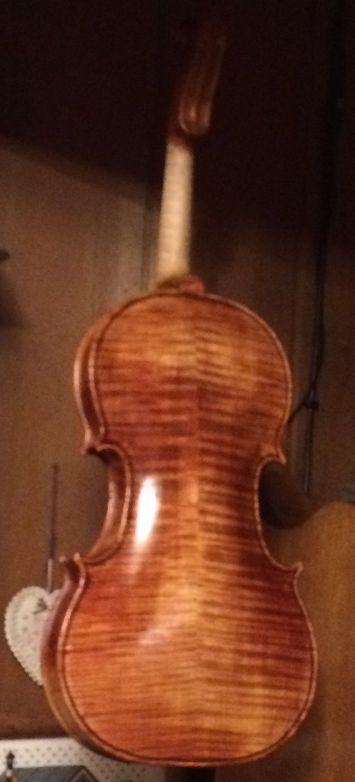
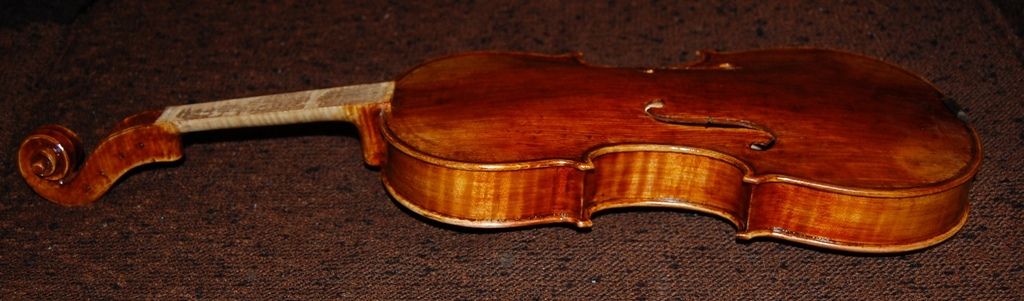
And, it seems to have worked. That foundation looked a little better…more believable, I suppose; so I went with it, and here are the results:
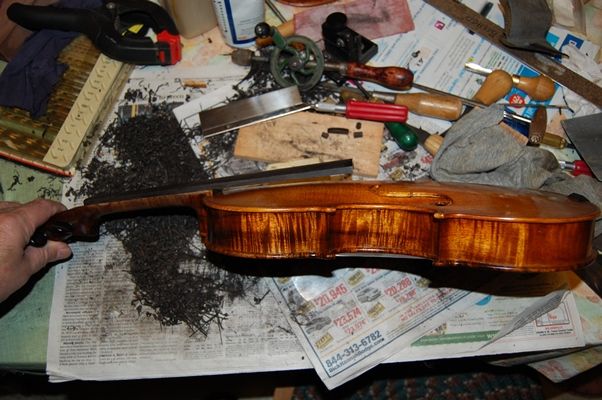
Antiqued side view.
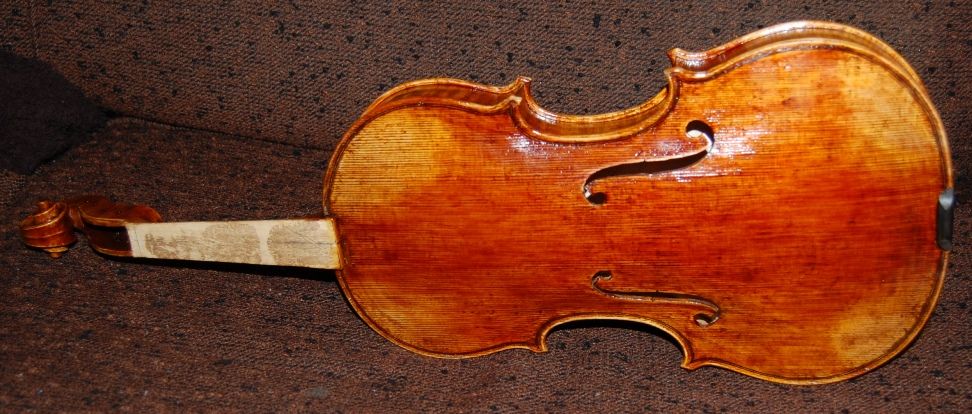
Front view, antiqued, and saddle installed.
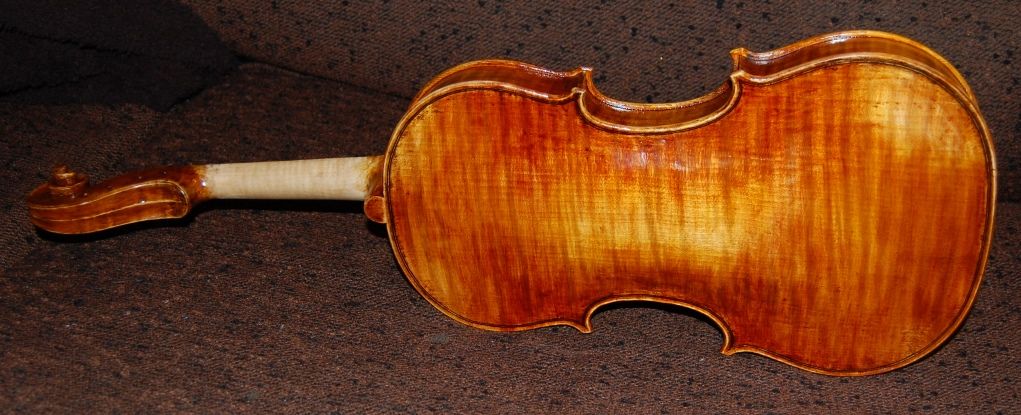
Back side antiqued.
I am not showing the intermediate steps…they really put the “ugh” in ugly, for about a day or two, there. But after the pigment was sanded back off, and the varnish cleaned up; using a rag, I rubbed a seal-coat of very light spirit varnish into the whole fiddle, to lock down the pigment and clean off any loose stuff left from the sanding off of the pigment. Then I began re-varnishing with the dark red-brown varnish, thinning with alcohol as needed, to get it to flow well. It took a couple of days to get it to a point I felt happy with, but I am much more satisfied with it now than before. I’m sure some will disagree and hate it, but: sorry, that is the way this one had to go. Perhaps the next one I will try something a bit different, and get it right the first time.
Rationale Behind “Antiquing”
Meanwhile, here is something to consider, regarding “antiquing”: I had a professional violinist (Adam LaMotte) tell me, “Chet, we players all want an old master violin. If we can’t afford one, then we want our violin to looklikean old violin.” A famous violin-shop owner in England (Charles Beare) put it this way: “An unattractive violin simply does not get played…it gets no attention from customers. There is absolutely no reason you should consider ‘antiquing’ your instruments, unless, of course, you actually want them to sell!” That is fairly succinct. Evidently even the “big boys” recognize this odd little fluke in the violin market. I have never understood the market trends that drive people to buy pre-distressed (worn-out) blue-jeans, either, but someone has made a lot of money doing just that.
Ah, well…at least the “wear” on the violins usually does not hurt them at all. (Although I have known of people deliberately cracking and re-gluing instruments, and it is fairly common to bush and re-drill peg-holes on a brand new fiddle, to make it look old. And some go as far as a scroll-graft, knowing that virtually all pre-1850 violins have had a neck-graft, and a genuine neck graft is usually a sign of a genuine old violin. Sigh… not anymore. I have done neck-grafts, but only when there was a cause, and it was a needed repair. Same for peg-bushing. I have done lots of them, but only in repairing old instruments.)
So– the bottom line, to me, is that I really like them to look at least a little like an old, gently worn violin. And sometimes even, a very old, heavily worn violin. (This one fits into the latter category, except no cracks, and no bushed peg-holes.) There are certainly people who won’t like it…but there will definitely be those who fall in love with it, too, so I’m not too worried. There are better ways to darken the wood without hurting it, though, and next time I will try to do so. (Some people have tried certain chemical treatments which looked remarkably good, but, as it turned out, destroyed the structural integrity of the wood.)
Saddle
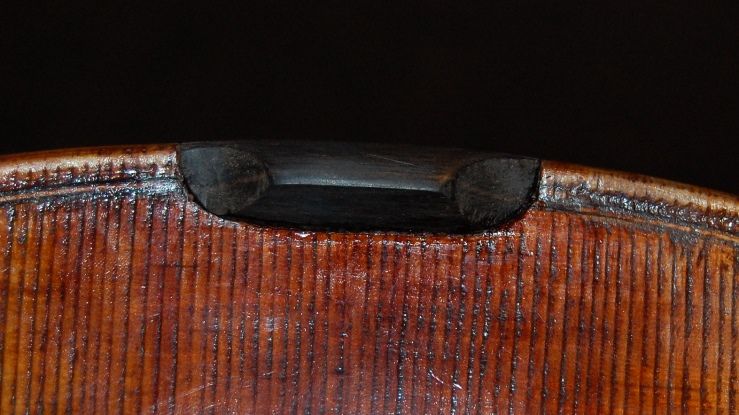
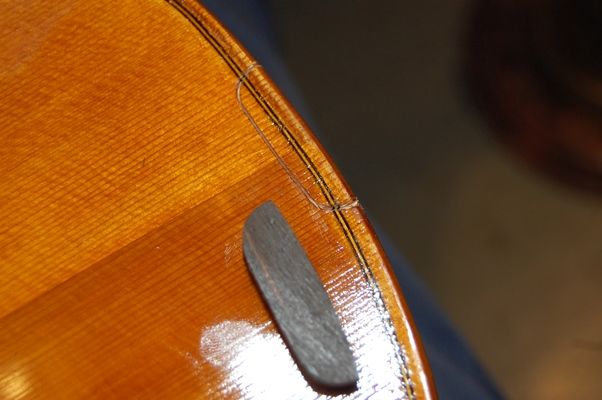
You will also notice that the saddle has been installed. This is another thing I do a little differently: I round the corners of the saddle, thus eliminating the stress-risers built into square mortises.
Here is the saddle, installed…still could use more polishing. Notice the round corners.
The saddle still needs a little more scraping and polishing to get it looking right, but this is how it looks from the side.
Why Rounded Corners?
Ever notice the shape of the windows in airliners? Ever wonder why they haven’t any square corners? (See Comet Disaster) Here’s a partial quote: “In addition, it was discovered that the stresses around pressure cabin apertures were considerably higher than had been anticipated, especially around sharp-cornered cut-outs, such as windows. As a result, future jet airliners would feature windows with rounded corners, the curve eliminating a stress concentration. This was a noticeable distinguishing feature of all later models of the Comet“
At any rate… the intent of the rounded corners is to prevent saddle cracks.
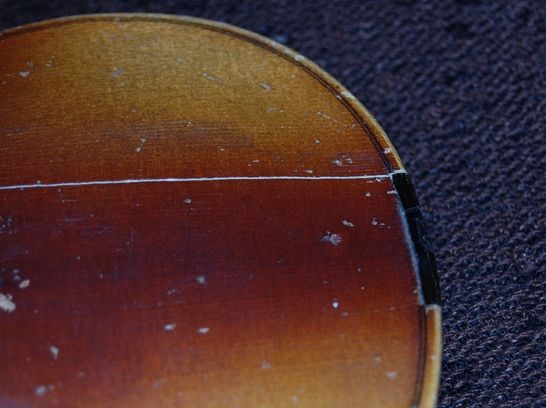
Saddle crack in a cheap fiddle. Notice that it emanated directly from the square corner of the saddle mortise.
So far, my practice of rounded saddle corners has proven quite successful. Also, though you can’t tell it from the photos, there is a tiny gap at the ends, to allow for plate expansion and/or contraction. It isn’t much, but it is there.
Fittings
The saddle is ebony, as will be the fingerboard, nut and tuning pegs on this violin. I haven’t decided yet whether to use an ebony tailpiece and chin-rest, but I probably will do so. (Tradition, you know….) 🙂
The next post will complete the set-up procedure.
Thanks for looking.
If you found this post helpful, please share with your friends!
I failed to take any photos of this, but– it is pretty simple: I centered a hole on the center joint between the lower ribs, and centered between the plates. I drilled it first to 1/8″, then to 7/32″, and finally reamed it with a 1:30 tapered reamer… the same one I use for tuning pegs. I shaved the endpin blank to the correct size and taper using my peg-shaper, while gripping the endpin with a special homemade gripper. I shaved the endpin until it would just barely fit into the hole, leaving a little clearance between the collar and the rib surface. (There is a photo of it later on…)
Fingerboard:
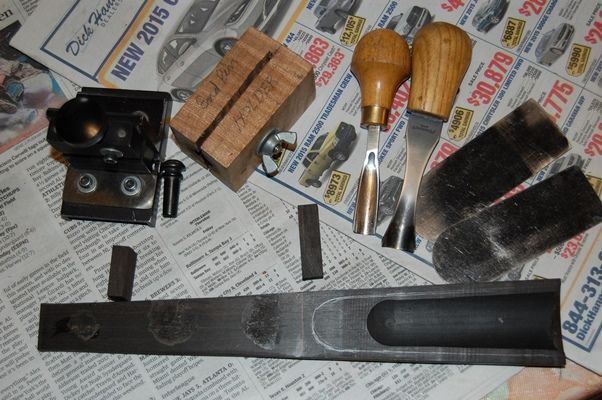
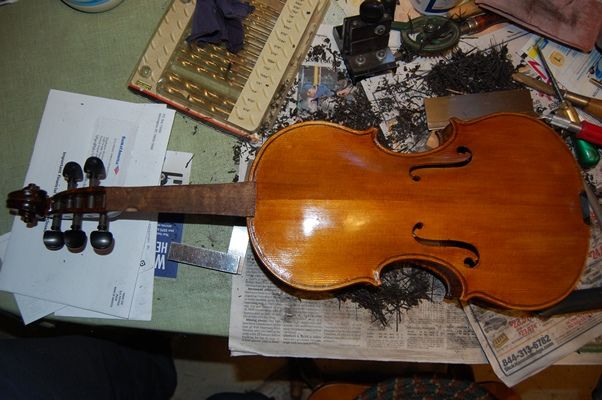
In the photo below you can see some of the tools I used to fit the ebony fittings to the violin. Looking at the fingerboard, you can see the three “dots” of glue that secured it to the neck while I was shaping both the neck and the fingerboard. When I re-install the fingerboard, there will be glue on the whole faying surface. The carved out portion will help to lighten the fingerboard, and apparently helps tone.
Fittings waiting to be shaped and installed.
The black mechanism is the peg shaver I use. The block next to it is the gripper I use for end-pins. The endpin blank is right next to the shaper. The small ebony block between the shaper and fingerboard is the nut blank. The larger ebony block midway along the fingerboard is the saddle blank. The fingerboard has the shape laid out that I intend to carve away, and the gouges and scrapers on the right are the tools with which I did it.
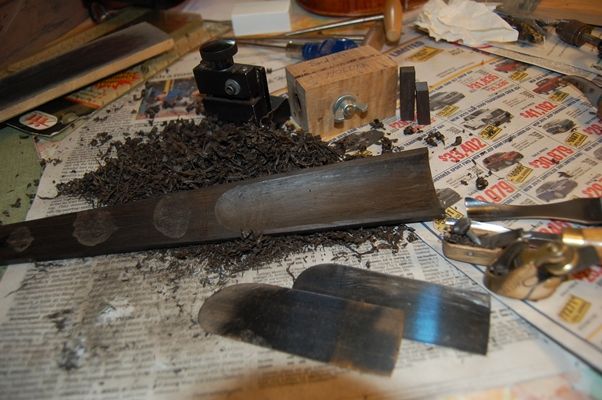
So, one of the first things I did was to make sure my tools were sharp, then I went all around the edges of that trough shape, carving away small chips of ebony to produce a shallow trench all around the edge. Then I carved as best I could with the gouges, until I decided it was time to get the planes into the fight. The little Ibex plane worked well, but the little wooden homemade plane actually worked better, because it has a deeper curve in the sole. It was made of a small section of a broken hammer handle, a piece of scraper blade, and a threaded steel plate to adjust tension and hold the blade in place.
Fingerboard ready for installation. This part took me about an hour. Ebony is hard stuff.
Saddle
Next I worked on the saddle: I cut my saddles with radiused front edges, so as to avoid saddle cracks, which are extrmely common in violin-family instruments…partly, I am convinced, because virtually everyone makes them with square corners, which adds a huge stress-riser to that location in the spruce. To me, that is asking for a crack. I try to avoid suich things.
Saddle footprint with curved front corners.
Some luthiers try to avoid cracks by leaving a small gap on the ends…that makes good sense, too, but why not eliminate the “notch” altogether? Just my opinion…. Either way, you have to remove the wood of the violin front plate to receive the ebony saddle. I use a thin knife to slice through the spruce, and then a flat chisel to loosen the piece being removed. I set aside the piece in case it turns out I made an error of some kind, and need to put some back. It is a whole lot easier to match grain from the piece you just removed, rather than from some random piece of spruce.
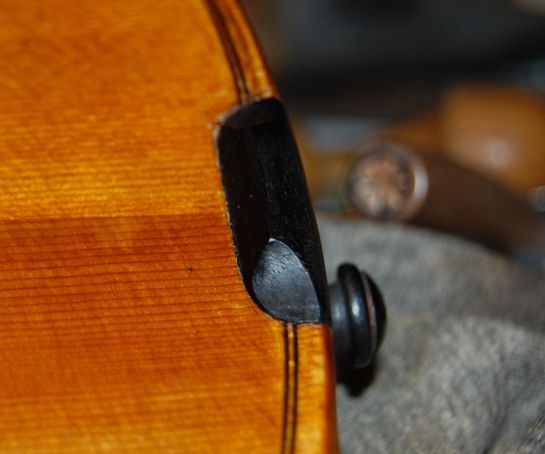
Once the saddle fits the mortise perfectly, leaving a small gap on each end (about the thickness of a business card), I glue the saddle in place, and forget about it. Here is a photo of the finished saddle. I didn’t take photos while I was carving. I get pretty wrapped up in what I am doing and forget to take pictures.
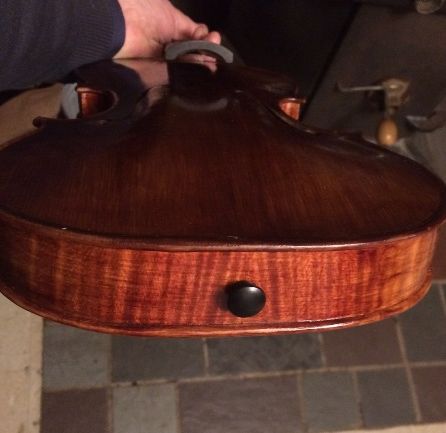
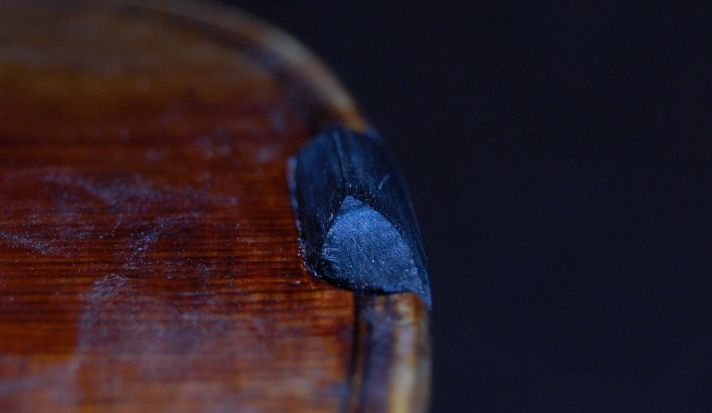
Saddle and endpin
Another view of the saddle and endpin. (Pretty ribs, huh?) Varnish touch-up still has to happen.
Pegs
The next issue was the pegs. I wanted them done before I installed the fingerboard, simply because I wanted to be able to set the instrument aside so that the glue under the fingerboard could dry, and not feel that I was being prevented from working.
I had earlier drilled pilot holes in the pegbox, so that I would have guides to help keep the holes perpendicular to the centerline. So I reamed out those holes, all to approximately the same size, using the same reamer (1:30 taper) as I used for the endpin.
Then I sliced a shallow groove next to the collar, on each peg, all the way around, using a very fine razor-saw, to avoid breaking off the collar. (Doesn’t always work, but it seems to help.) I shaved the pegs until they fit the holes, at nearly the right depth, then “greased ’em up” with peg dope, and worked them in, so that the holes and pegs fit perfectly. Later I trimmed off the excess length of each peg on the far side of the pegbox, domed and polished the cut ends, so they would look nice, and put the pegs back in place.
Saddle and pegs installed.
Fingerboard Installation
Last, I installed the fingerboard…I had marked ahead of time the exact location where the nut and fingerboard were to meet; so now, all I have to do is put the fingerboard exactly where it was before (against that line) and glue it in place. I positioned it using a single spring clamp and aligned the upper end as closely as I could, then aligned the lower end as well, and added a large spring clamp in that location. Finally, I re-adjusted the upper and lower clamps until both ends were perfect.
Then I removed the lower clamp, and, using a thin palette knife, I ladled hot hide glue into the space between the neck and fingerboard, sliding the blade up the neck as far as it would comfortably go, and replaced that clamp so that it squeezed out hot hide glue all around. I cleaned up the excess quickly, and double checked to make sure that the position was again perfect.
Then I removed the upper clamp, and repeated the gluing routine, but this time, as I cleaned up, I kept adding more clamps, removing a previous one, and wiping carefully, until I had four clamps in place and no glue drops where they did not belong.
Fingerboard installed with hot hide glue and spring clamps.
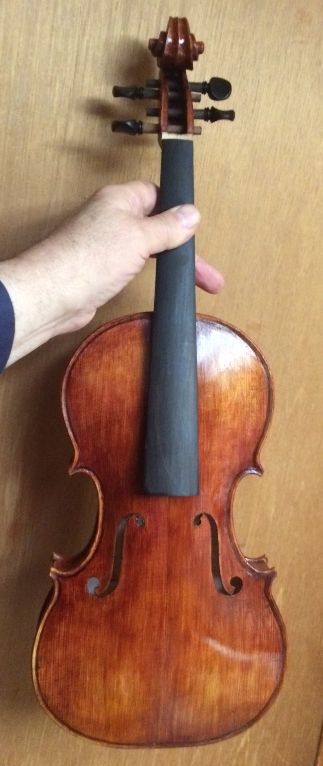
That was pretty much the end of the day. My hands were tired and hurting, and I had other things that needed to be done. Much later, I got back and removed the clamps:
Side view with fittings.
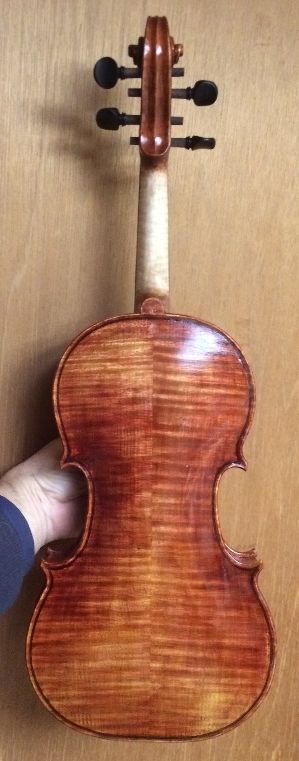
Back view with fittings.
The nut will have to wait until the fingerboard has been planed and scraped to exactly the right curvature, and polished smooth. We call that “dressing” the fingerboard.
After that it will be “set-up” time.
My next post will show the finished fiddle, strings and all.
Thanks for looking.
If you found this post helpful, please share with your friends!

 Follow