
 Follow

Violin Progress
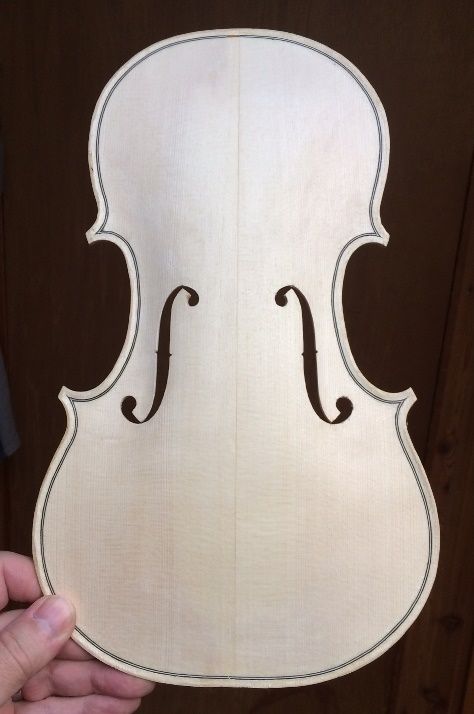
The Front Plate is Complete, except for the Bass Bar
This morning I got back to work on the scraping, and completed the outside of the front plate. The interior is also essentially complete, but still lacks the bass bar, so there is still that to do. I spent some time cleaning up the f-holes, and I am somewhat satisfied with them, but undoubtedly will do some tinkering later, just because I always do, and am never quite satisfied with them.
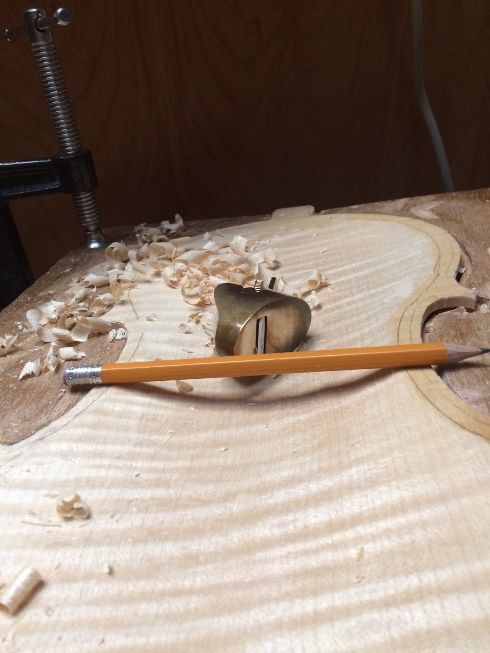
Back Plate Graduations have Begun
I knew I probably needed to get going on the neck, but I really wanted to begin the back plate graduations, so I started in. This is about as far as I got. I will probably complete it tomorrow, but my hands were getting tired, and I needed to do something easier for a bit.
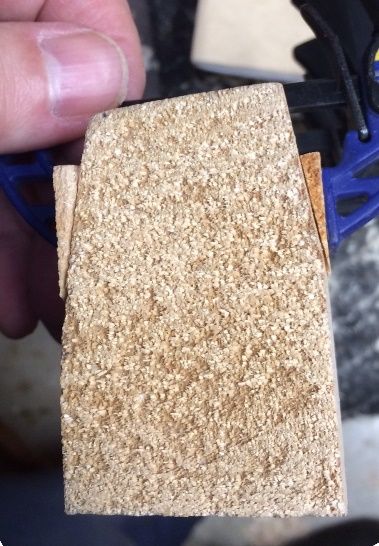
Neck Beginning
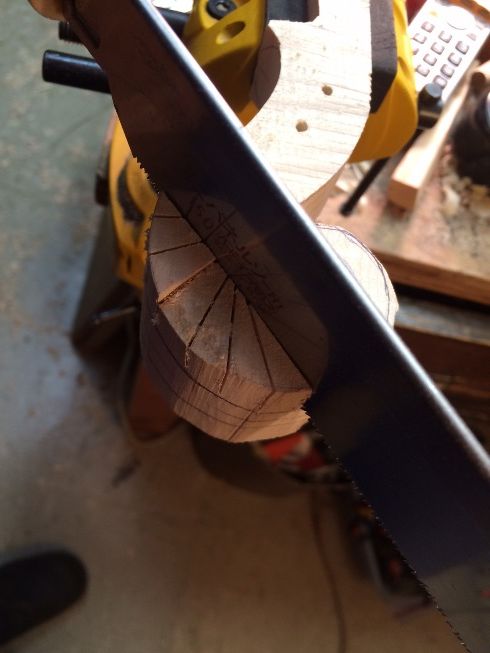
You may recall that the neck block had been delivered to me in a trapezoidal cross-section. This is quite common, but it poses a problem for me, because, once I have the side profile of the scroll and pegbox laid out, I prefer to drill a pilot hole for each peg, using my small drill-press, so that the holes are all perpendicular to the centerline of the scroll. That is hard to do, with a sharp angled shape. So, I set my bandsaw for 1/4″, and sawed off a triangular slab from each side of the big end of the trapezoid, reversed them, and glued those slabs back onto the sides, near the thinner end of the trapezoid. I checked with my little square, to make sure I had them at an appropriate location, then clamped them home. Once the glue dries, I will square up the block, lay out the neck, drill the holes, and get going on carving the neck. Those wedges will be completely removed, long before the neck is done.
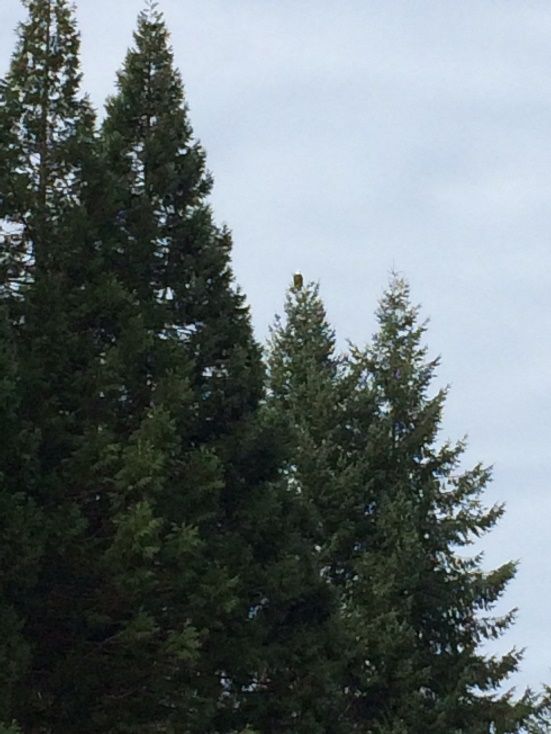
A Break-time Treat
Ann and I decided to take a break and go for a walk, as Spring seems to have arrived early. As we neared home again, a pair of Bald Eagles passed by, flying low over our place, and landing in the trees at the front of the property, on the far corner. I had never before heard eagles “chatting” with one another. It was interesting hearing their clear, high-pitched chirps, and whistles, as they “talked” back and forth.
One of them almost immediately re-located to a thicker stand of trees across the road, but the other obligingly remained in sight, preening herself, until a passing hawk began diving at her, and she, too, moved into the thicker cover. I only had my cell-phone, but I did manage to get one photo.
Back to Work:
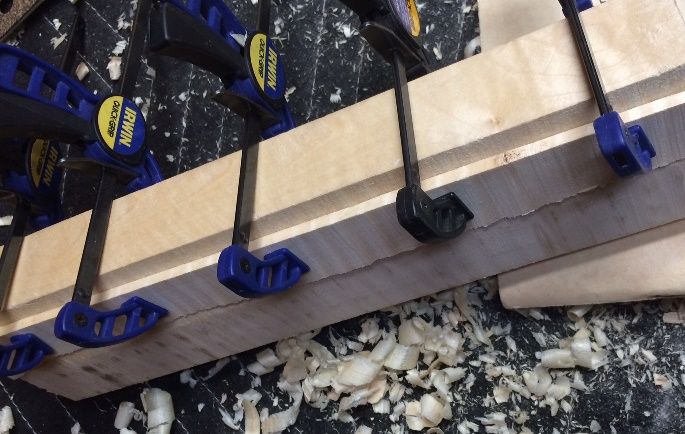
Squaring the Neck Billet
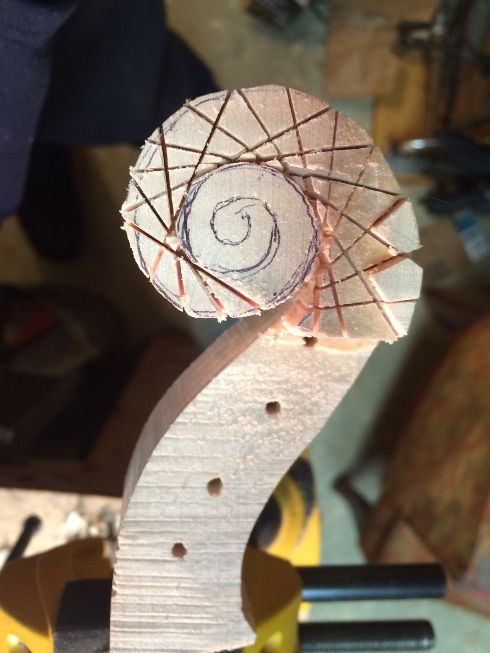
Once the glue was dry, I could square the billet, by sanding or planing off excess wood. Removing those slabs had left me with a few milimeters extra on the thickness, and much more on the depth, from front to back. So, since I had tried to plane it, but it tore out badly (as curly maple frequently does) I straightened the sides using the oscillating spindle-sander, and then laid out the neck details. I have made a new neck template, but it is just thin plastic. I will eventually make a light aluminum template which will be more durable. I first laid out one side, including the locations for the peg holes. Then I drilled the 1/8″ pilot holes for the pegs and cut the profile out on my small band-saw. After that, I was able to lay out the other side, and all the rest of the details; including the width of the heel, the width of the button, the width of the neck at the nut, and the taper of the pegbox into the actual scroll.
I forgot to take photos during that step (sorry) so all I can show you is the sawing procedure I used to remove the excess wood from the scroll:
I will try to complete the back plate, the bass-bar, and the neck/scroll tomorrow. If I get that far, I will feel as though I am “on the home stretch,”, as the neck-set will then be the only difficult step left to do. We’ll see, though. There may be other priorities to pursue.
Thanks for looking.
It is looking so beautiful, Chet! That picture of the scroll is so interesting! I had no idea they were carved in segments like that. What exacting work to make each side the same. The wood looks like butter! This will be one fine instrument. And those eagles!! A good omen, I think. This violin should be called, “The Eagle” in honor of those mighty and glorious visitors to your forest! Or maybe, “The St. John” to honor the eagle image of John the Evangelist! (OK — I’ll stop naming your violins, now…)
🙂
I never name instruments: I leave that for the players who purchase them. The only exception was my first commission, a double bass. The young fellow for whom it was built was thrilled to find his name prominently inside.
I’m glad you named your cello the Swan, but, mainly because of the “ugly duckling” story, rather than the beautiful musical composition…though that is a favorite for me, too.