
 Follow

The Garland
Shaping blocks and Bending ribs:
Inner curves of corner-blocks, and both end-blocks, first
I learned to shape only the inner curves of the corner blocks, initially, as well as the outer curves of the end blocks, because if I shape both curves on each corner block, then there exists the possibility that, when I clamp the center-bout ribs in place for gluing, the tips of the blocks may deflect outward, instead of holding their respective shapes.
Also, after the c-bout ribs are glued in place, when I shape the outer curves, in preparation for receiving the upper and lower ribs, I shape the ends of the c-bout ribs at the same time, so that they simply continue the curvature of the blocks, to a feather-thin end condition, before gluing the upper and lower ribs in place. Then, when I trim the upper and lower ribs, it is easy to make the glue-lines between the c-bout ribs and the upper and lower ribs completely invisible, matching the corner of the trimmed ribs at the corners of the instrument garland.
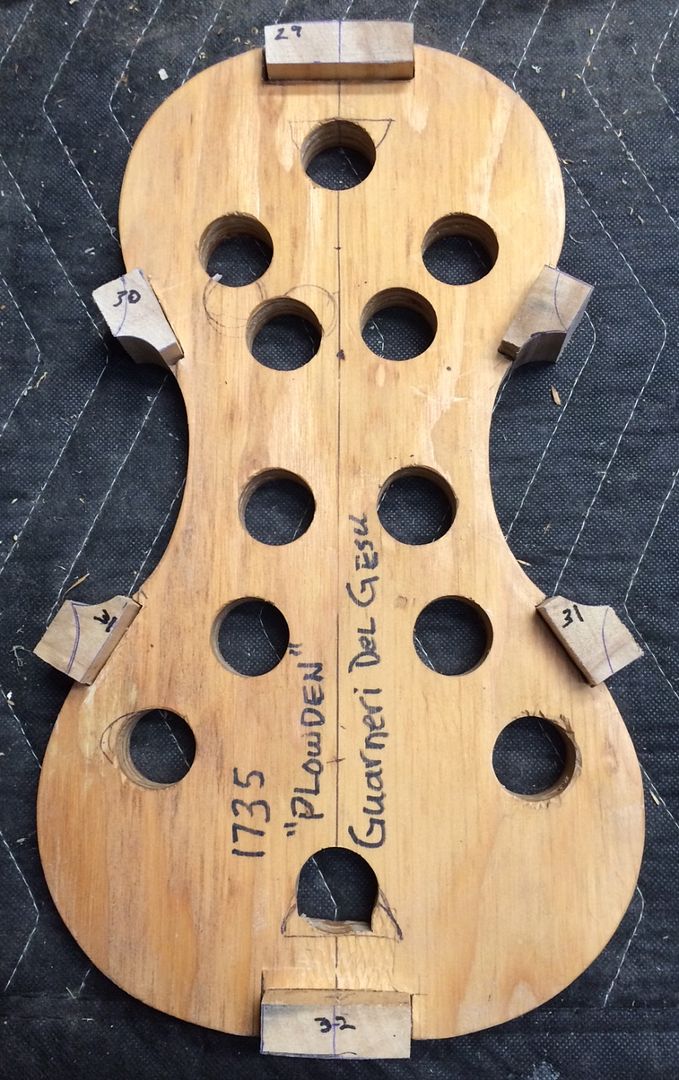
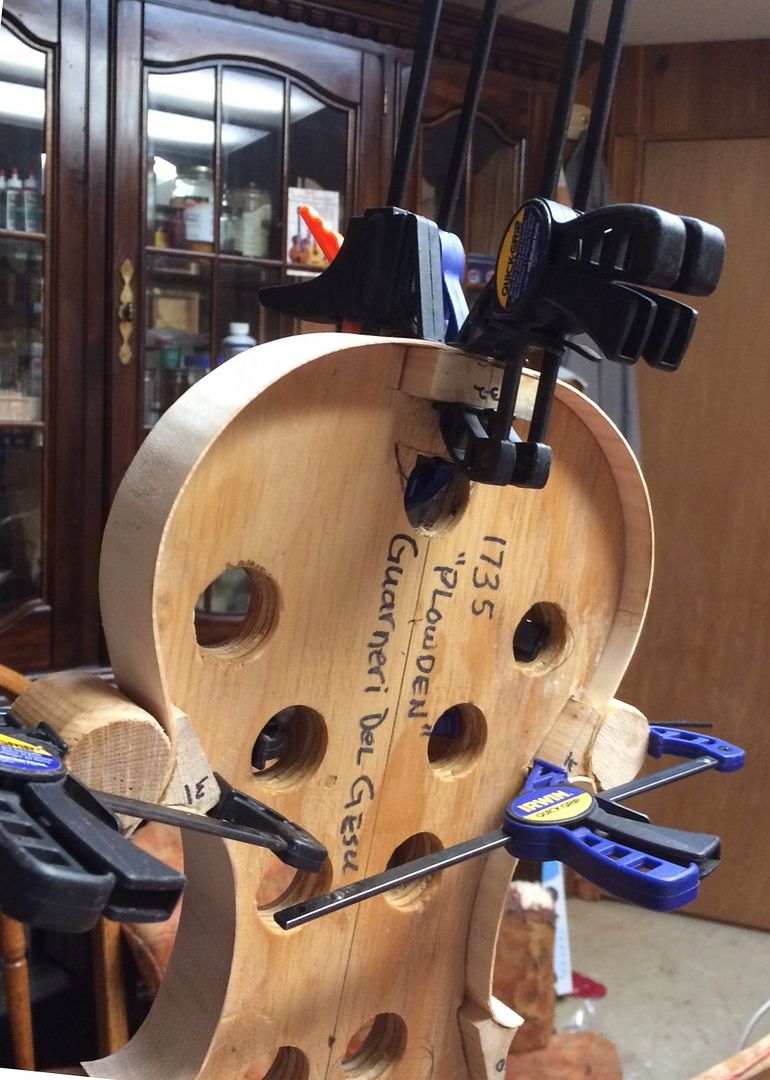
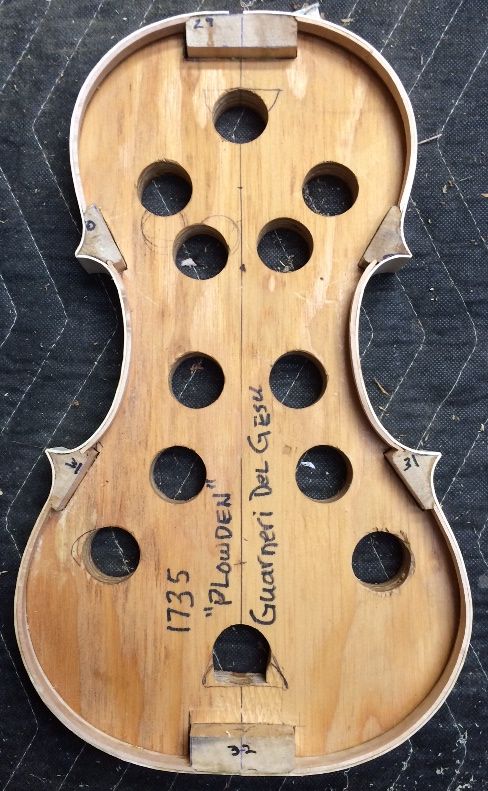
So, here is the mold with the blocks shaped as described above:
Ribs are Next
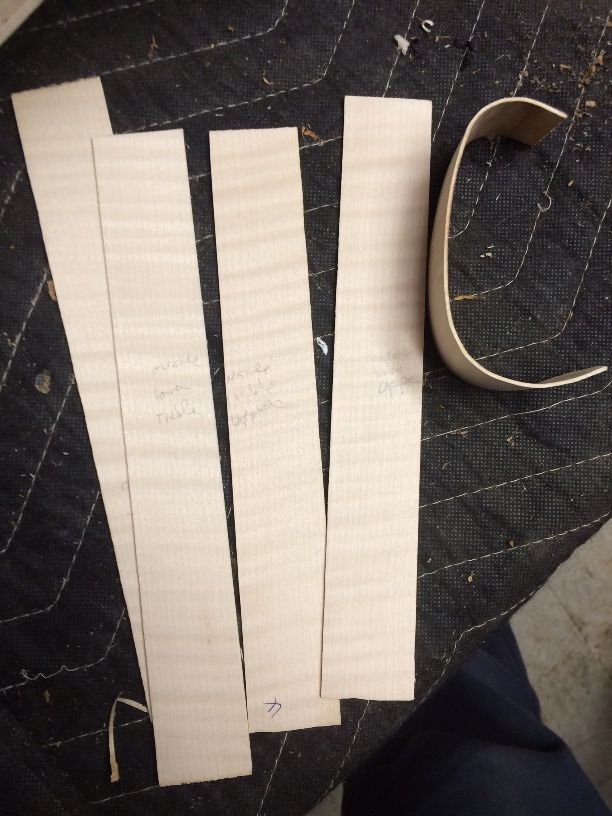
When using figured wood, I have to make a determination as to which angle the figuring will follow on the instrument. I thought I could just copy whatever the Old Master (Guarneri del Gesu) had done, but, as it turns out, he used highly figured wood for the ribs, all right, but the flame (curl) in the maple went directly across the rib at nearly exactly 90 degrees, whereas mine is quite slanted. So, I have to make a decision: Will I have the curl slant “up” (north) from the back side to the front, or the other way– from front to back?
Really, I simply have to make it consistent, on both the treble and bass sides. Some makers have the slant in the C-bouts going the opposite direction from that of the upper and lower bouts. Some, also, have used a single rib across the two lower bouts, and thus had the flame slanting one way on the bass side and the other way on the treble, and then matched the center and upper bout rib curl to the lower bout rib, so that the grain was consistent all the way around, instead of being mirrored between the two sides.
That sounds good: but, in the first place, I haven’t enough rib wood to pull it off correctly; and, in the second place, it can potentially cause problems later on, if the plates shrink (they are made of wood, remember!) and the ribs have to be shortened a little, to match. If there is already a joint at the center, it is relatively easy to simply shorten each side by a millimeter or so, as needed, and re-shape the end-pin hole. But if the bottom wood is all one piece, the repairer will have to cut through that bottom rib, and establish a new center joint; so the two halves will no longer match perfectly, though it will be pretty close.
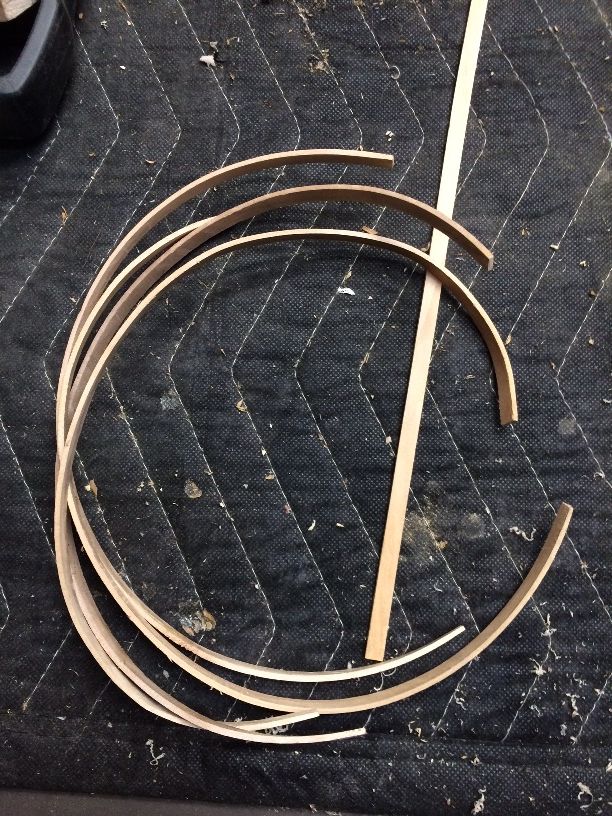
Anyway: I usually would first thin the ribs to a consistent one millimeter thickness, and then cut them to length, carefully laying them out as to location and orientation, before bending. This time, I consulted with one of my teachers, who assured me that Guarneri ribs were a little thicker. So, since the ribs came to me at 1.3 mm, I will consider that to be the ideal thickness for this particular instrument.
Then I can bend all the ribs, individually, and set them aside ready to be used. In the case of the C-bout ribs, I clamp them into the mold, where they will cool, and stabilize, in exactly the correct shape. Afterward, I used a small brush to slip glue into the joints, and secure the C-bout ribs permanently to the corner blocks.
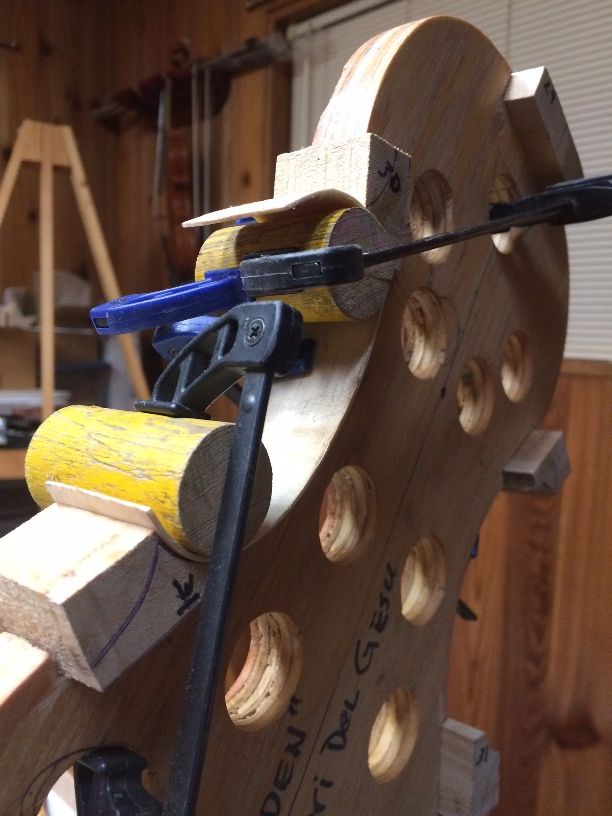
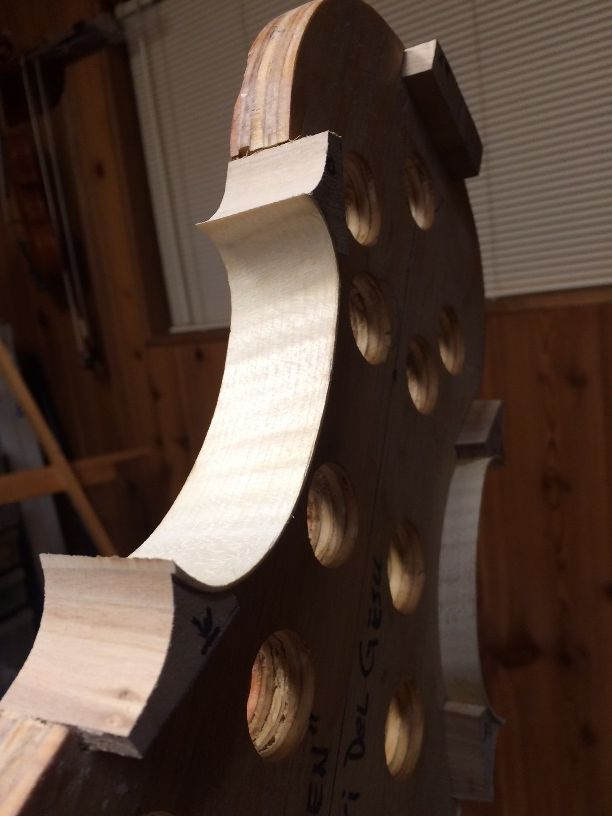
When the glue holding the C-bout ribs had dried sufficiently, I shaped the outer curves of the corner blocks appropriately: You can see, in the photograph, below, that the center rib-ends have been shaped along with the outer curves of the corner blocks, so that they will cleanly fair into the curves of the upper and lower ribs.
I then immediately installed the upper and lower ribs in their respective places. In this particular case, I chose to install the lower ribs first. After the glue dried for a few hours, I installed the upper ribs.
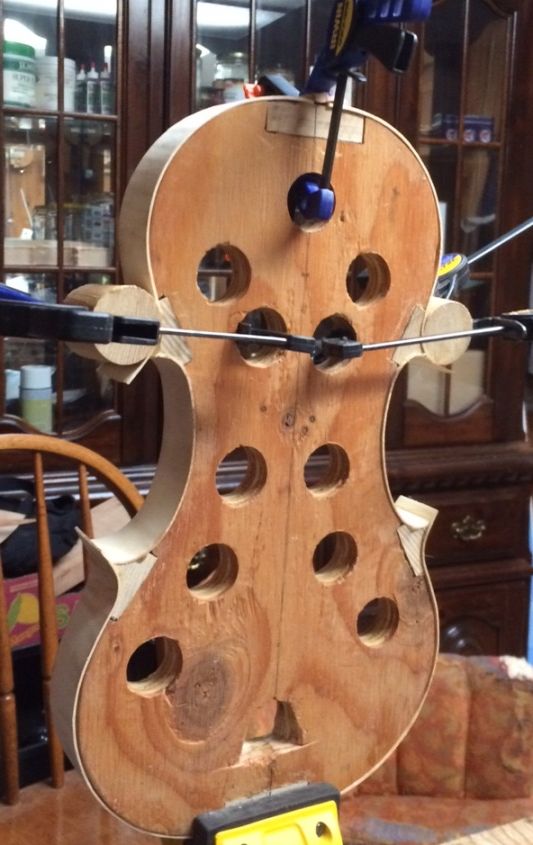
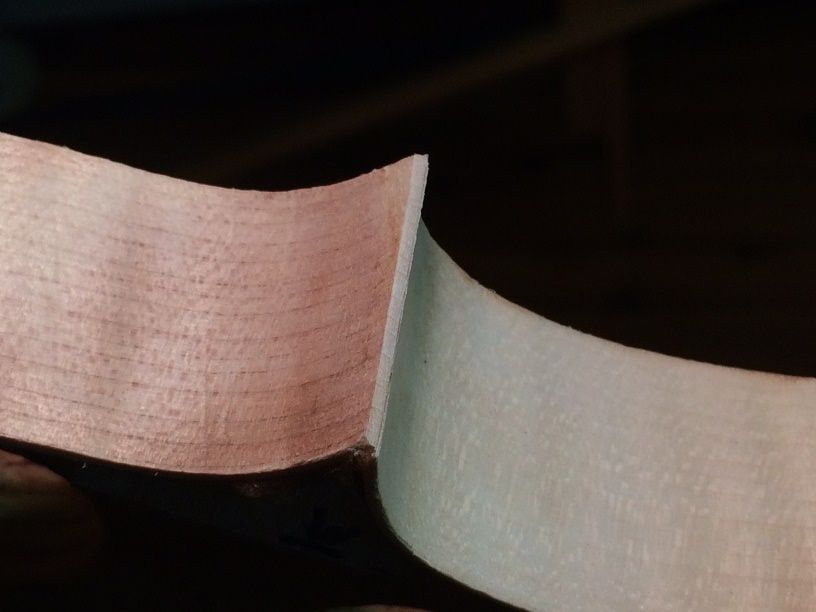
When the glue holding the upper and lower ribs had dried sufficiently, I trimmed the ends to the correct length, and filed them smooth. The only “end-grain” showing will be the ends of the upper and lower ribs at each of the corners. I try to make them square with the centerlines of the corner blocks, so that it gives the inpression of a “mitered”corner, but with no apparent glue-joint: the joint is exactly along the corner of the squared-off rib end. The first priority is to have the rib end at the right angle, so it will appear to be perpendicular to the plane of the garland. The next is to file them to look “square” with the corner, as I explained above. Finally, some creative scraping of the C-bout rib-ends will usually move the glue joint to be exactly on the corner of the upper or lower rib, and make it essentially invisible. This one is close:
Linings
The only thing left to complete the garland is to install linings on both the front and back sides. The way I have chosen to use my mold (“French” method…ribs flush to one side of the mold) precludes my adding the back linings until after I remove the mold. That is fine: I also intend to leave the mold in place until after I have set the neck, so I have quite a way to go on that step.
Not everyone installs the neck while the corpus is on the mold. I began doing it when building my first cello, and it helped so much with neck-setting that I have continued it ever since. I deliberately allow the heel to “run wild”, in terms of length (or height, depending on how you are looking at it), so that it protrudes past the back of the neck block a little bit. When all my other items (angles, measurements, etc.) are exactly correct, I glue the neck in place, and before installing the back plate, I simply trim the back of the neck-heel flush with the back of the corpus. Then the back plate fits perfectly, and I am not struggling to get that joint tight. But… I am getting ahead of myself…. 🙂
I cut strips of willow to the appropriate dimensions for linings and then plane them smooth; then bend them to fit the curves of the violin, and finally, cut them to the appropriate lengths, and install them. Willow responds very well to both bending and carving, which is why I prefer it for lining material. I can bend all the linings in just a few minutes, and they will all hold their shape until I am ready to use them.
After the corners are all dry and secure, and trimmed, I cut two small mortises in each block, to receive the linings; then cut the linings to exactly the right lengths for a tight fit. The linings serve two purposes: they strengthen the edge of the ribs, which would otherwise be quite fragile; and they triple the gluing surface area bewteen the rib garland and the plates.
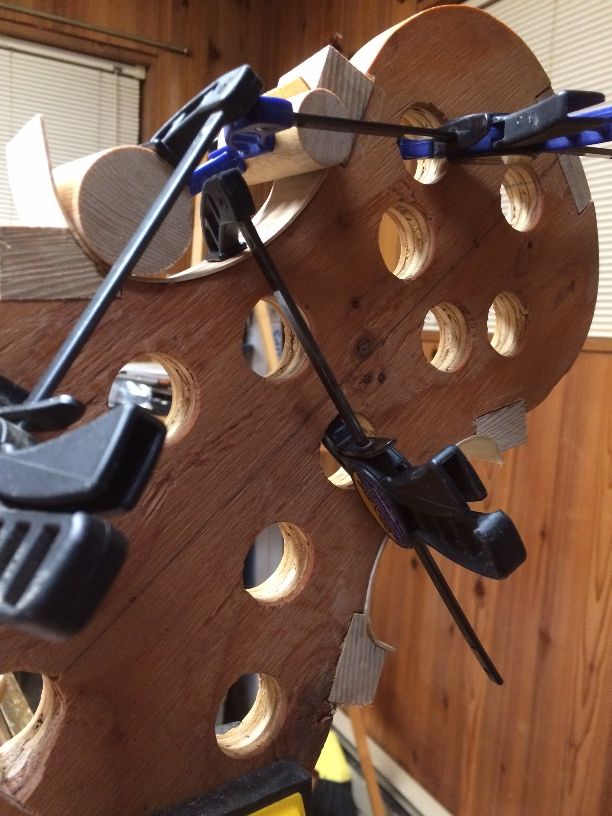
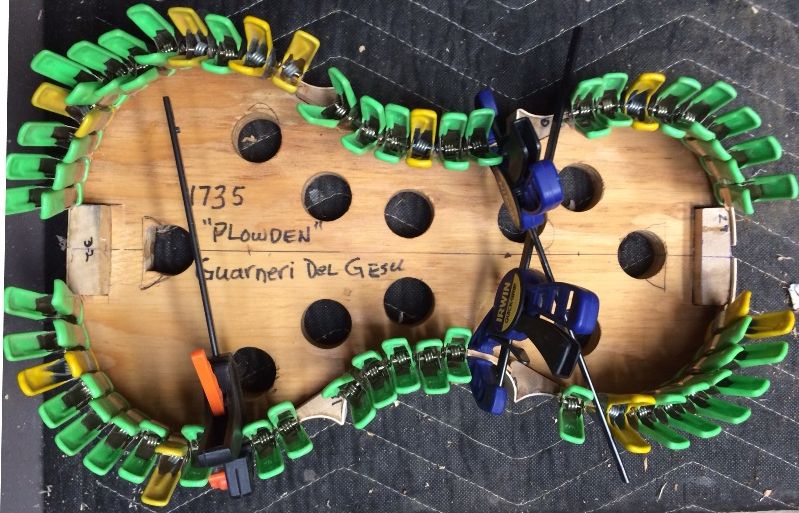
When I have all the linings fitted correctly, I remove them one at a time, apply hot hide glue, re-insert the linings, and clamp them in place, using tiny spring clamps. Sometimes one or more areas are more stubborn, and require a heavier clamp. Then I use something with more authority.
So: there is the garland (rib-structure), essentially ready to use! Next time we will level the garland, and use it to trace the shape of the front plate. At some point before attaching the front plate, I will also trim the linings to a triangular cross-section, so that the inner edges taper to a thin transition, and do not add a stress-riser to the ribs. I’m not certain whether it would affect sound, but the Old Masters did it that way, so I will follow their example. The corner blocks also will be trimmed back to be fairly minimal. I will carve away the end-blocks to each be the shape of half an ellipse, but I will leave them fairly robust, for strength.
You can still see traces of ink and glue on the blocks, looking like gaps…that will all go away when I level the garland.
Thanks for looking.
Chet, until I read this, I had not appreciated the added considerations regarding the direction of the flaming. It is so easy to see a beautiful piece of wood in a rib, and not think about all the choices the luthier has had to make, preliminary to the actual building of the instrument. That corner looks so perfect! If only Kai Jensen could see your work through these wonderful images! He would have been one of your fans! Thank you for sharing these extraordinary photos! Maryanne
Ah, thanks, Miss Maryanne!
I was feeling fairly discouraged today; your comment was a blessing to read. (Still trying to recuperate, and I may have exerted myself a bit too much yesterday.)
Thanks again,
Chet