
 Follow

Beginning of the Finish
We looked last time at the viola with the edgework incomplete, and final scraping not done.
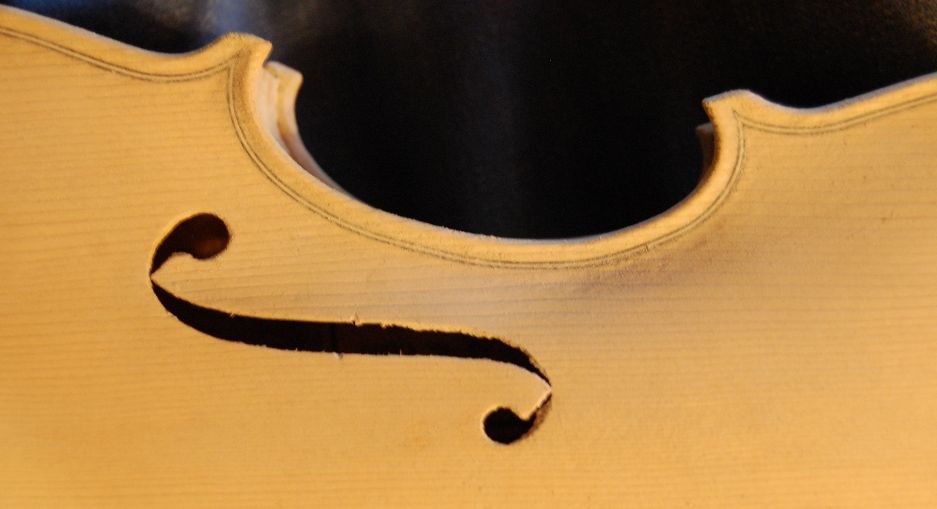
Edgework
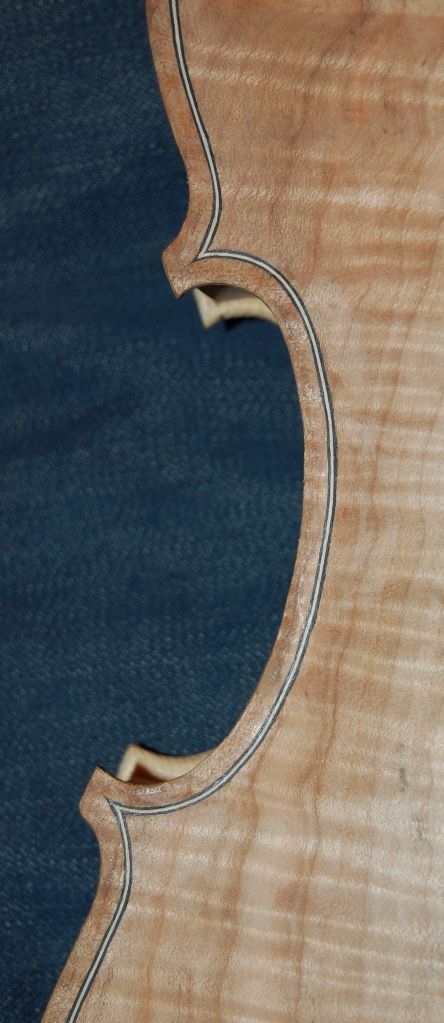
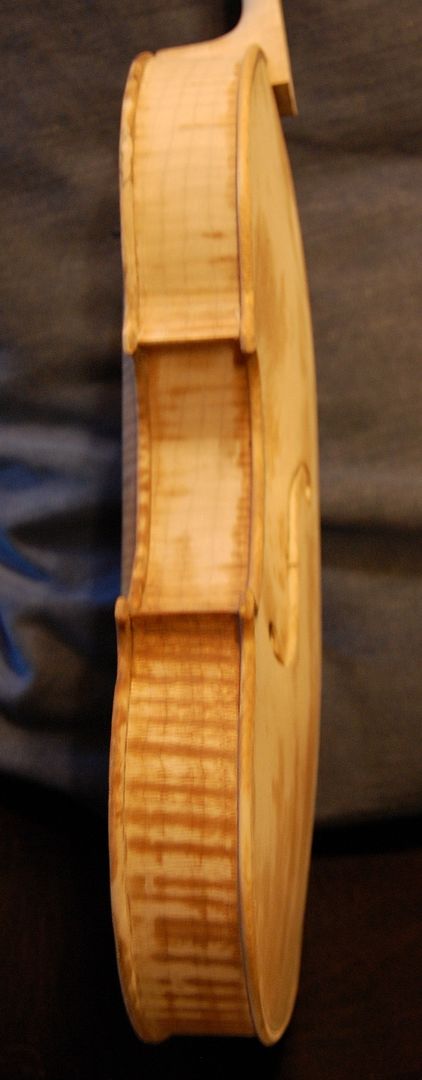
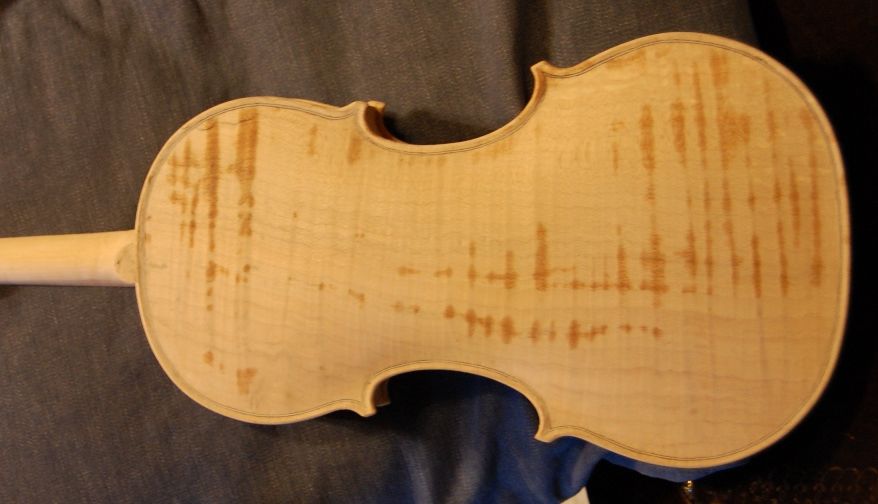
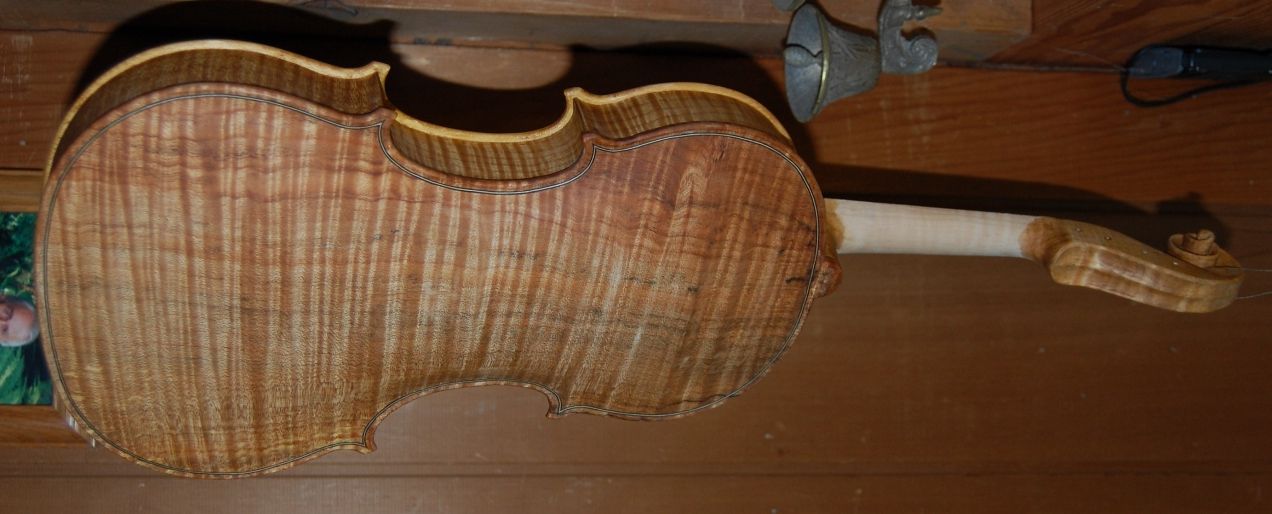
Here is the viola with the edgework done. Notice that the outer edges have been rounded inward to meet the edge crest, so that the junction between edge crest and purfling channel makes a clean ridge around the perimeter of the viola. This is just something I do, because I like it…as far as I know, it has no functional value. Many old master instruments have a much less clearly defined crest.

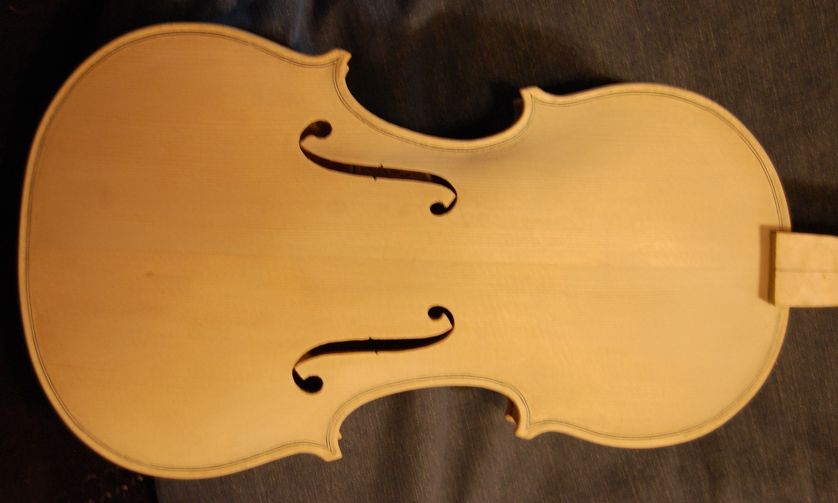
Coffee Stain and Re-smoothing
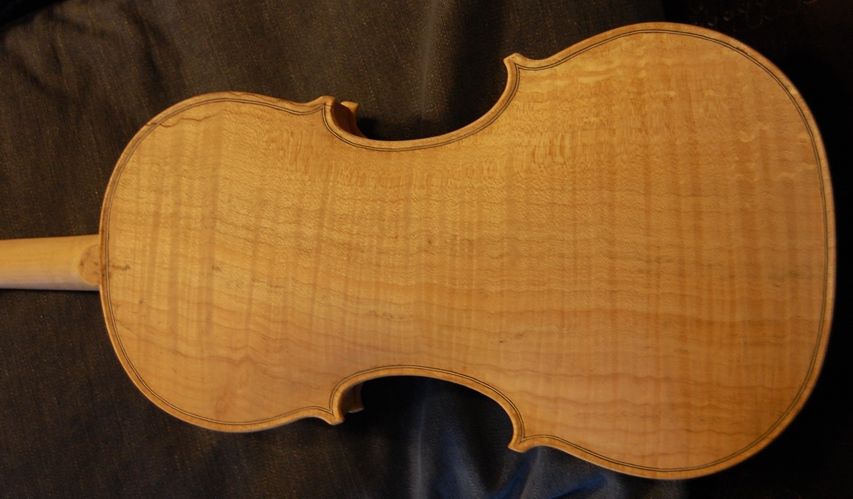
Then I wet the fiddle down with coffee, to raise the grain and add some color. One result is that my edgework all needs to be reworked with a small, sharp scraper. The other is that the whole instrument needs to be re-sanded, using 400-grit sandpaper. The water in the stain raises the grain, so that every random fiber that is not closely tied to the surface will swell, and raise up, making the whole surface very rough. So I deliberately raise the grain, and then scrape or sand off the rough surface. Using a very sharp scraper, very lightly, just “brushing away the rough stuff” is probably the best way to do this. I use a scraper for the areas where I want detailed, clean edges, and 400-grit abrasive paper for the broad surfaces. I perform this step at least twice, before moving on to the mineral ground. The result is a surprisingly light, yellow-tan color, all over. Almost just a cream-color. It will darken up nicely under varnish, though, and not glow white from under the varnish.
Come to think of it, the above photos already have the coffee stain, too. I forgot to take photos of just the edgework, I guess. So–those photos are right before I applied the mineral ground.
Mineral Ground
This is a suspension of very fine particles of gypsum…in a coffee-solution, because I still want to add more color, if I can. Other people use other minerals–finely ground mica, finely ground glass, microscopic beads of glass, clay, volcanic ash or other non-organic nano-particles. Some omit this step entirely. Roger Hargrave shared this as having had an important effect on his sound, so I have tried it, for the last several instruments, with what seem to be positive results.
I keep the solution well-stirred-up, and brush it on liberally, then rub it into the wood with my fingers, as vigorously as I can. Finally, I wipe off as much of the excess as I can, using a rag. The stuff goes on looking brown, because of the coffee, but dries to a chalky-white film. I don’t particularly want it on the wood– I want the microscopic particles to fill the pores in the wood, so that the varnish will be less likely to soak deeply into the wood, and deaden the sound of the viola.
The ground dries rapidly, leaving the whole viola a chalky-white, ugly object. I go over the dry instrument, checking everything, and scraping or sanding off all the excess ground. When I can see the grain of the wood everywhere (though dimly) through the gypsum film, I apply the sealer coat.
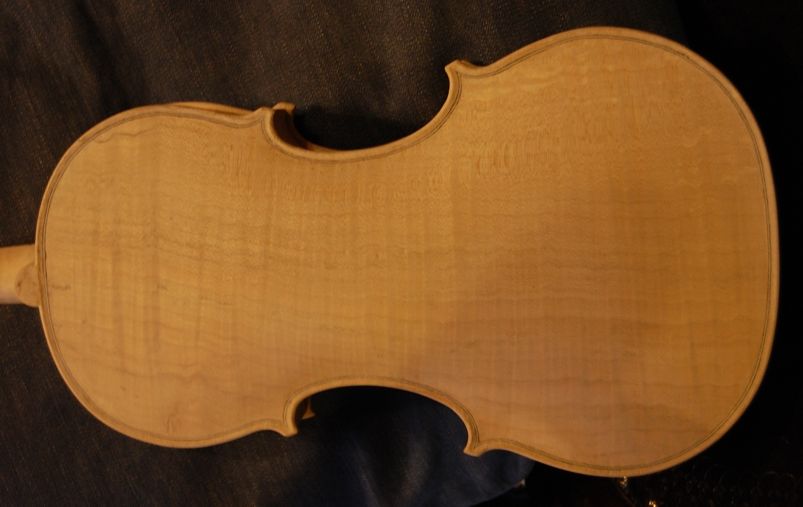
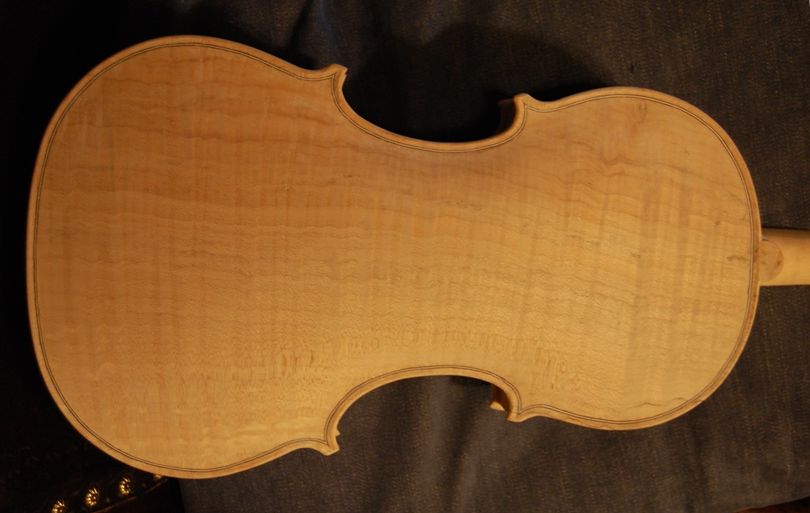
All that excess gypsum had to come off. It took a while, but I got it ready to seal:
Sealer–What kind?
Different makers use different sealers:
- Some use a very thin varnish.
- Some use Rosin-oil (I’m not even sure what it is….)
- Some use shellac.
- Some use commercially available sealers.
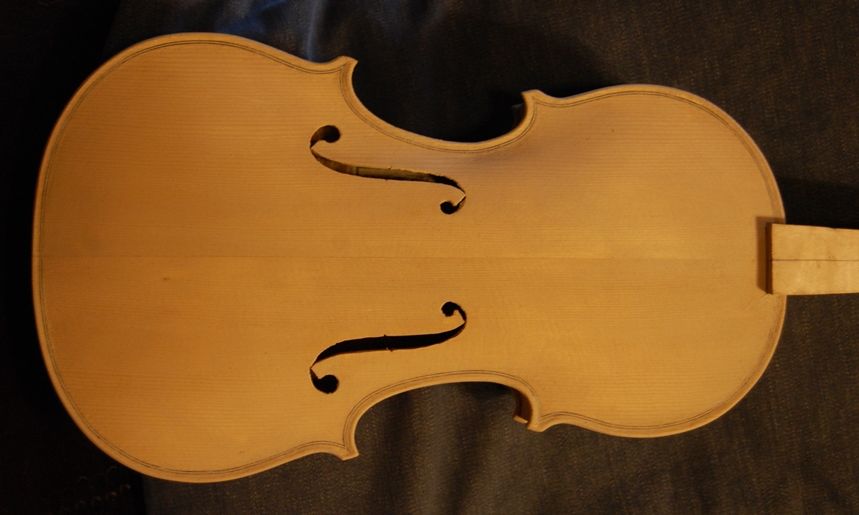
Currently, I am using a very thin mixture of pine pitch and turpentine, with a little alcohol. The alcohol and turpentine cause the mix to penetrate deeply. The pine-pitch goes into the wood along with the solvents, and remains there. It is interesting to watch the sealer going on…the chalk-white gypsum instantly turns transparent, and effectively disappears, leaving the natural color of the wood, along with whatever staining was added.
Without adding any color to the sealer, this would leave the wood a somewhat pale color. Usually, I have been satisfied to add color later. I added a little amber color to the sealer, this time, though, because my last instrument was a little too light-colored, initially, and I didn’t like the result.
The alcohol evaporates nearly immediately, while the turpentine takes a few days to evaporate, and (I am told) it leaves a bit of residue, as well. But that is OK. Turpentine is a natural wood extract, and I don’t mind it being in the wood.
The pitch dries in the wood, locking the gypsum in place, and sealing the wood against any other substance. Again, the pine-pitch is a natural wood extract, which eventually dries hard, and I don’t mind it being in the wood. Besides, it smells nice. 🙂
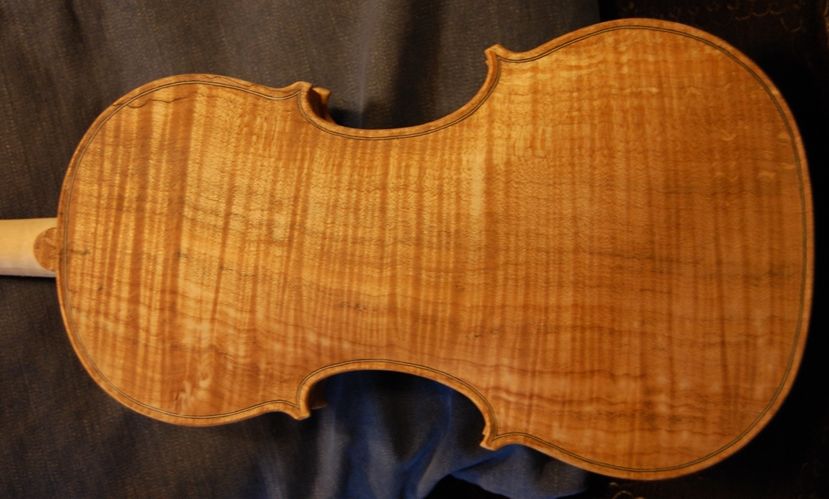
Here is the viola with just the sealer. I will show the varnishing sequence in the next post.
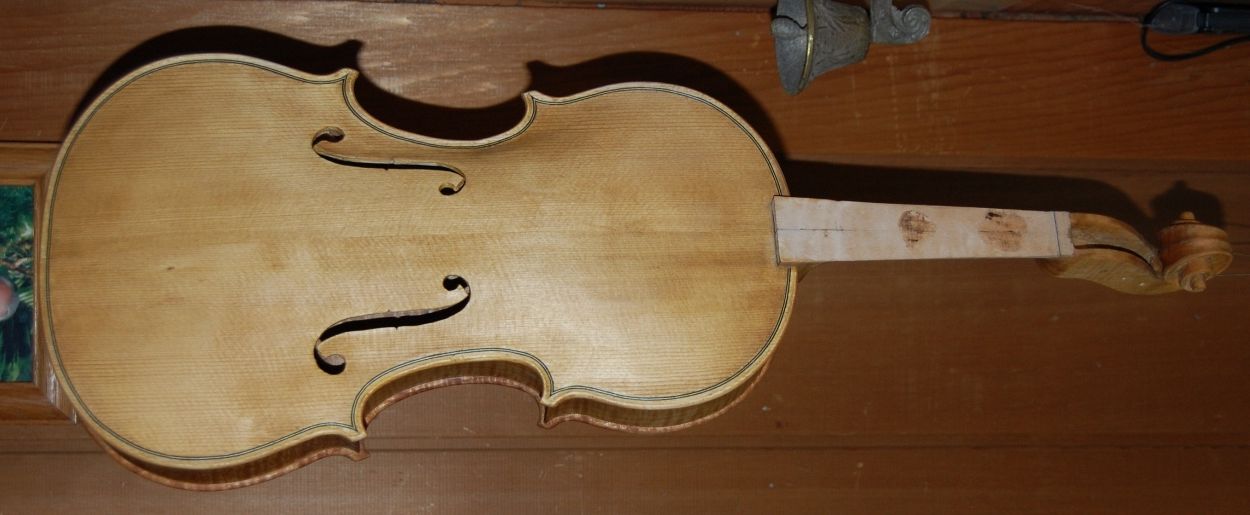
The wood will change color just a little as the sealer dries. But it will never go back to the dull-looking finish where the grain is obscured again. The varnish I apply will enhance, not obscure the figure in the wood…I hope. 🙂
Varnish (coming…)
I use a spirit-varnish, currently, though I have used oil varnishes in the past, and undoubtedly will again. I will start off with a yellow varnish to enhance the figure in the wood, then use darker coats to finish. I use enough coats to get the color the way I want it, including whatever shading I choose to do, then add enough clear coats to give it the depth and sparkle I want. Usually 6-8 coats, I guess. I sand lightly after virtually every coat, to reduce any bumps, sags, runs, or brush-marks, as well as looking for brush hairs or bugs, stuck in the varnish film (it happens….)
Finally I rub the surface with extremely fine abrasive (12,000-grit micro-mesh), and then polish it all over, using the dry skin of my palm, or thumbs, rubbing hard enough that the varnish gets uncomfortably hot. This takes away the “glittery” look of the fresh varnish, and leaves the glow of hand-rubbed work. Pictures in the next weblog post.
Thanks for looking.
Hi Chet, great work. How are you preventing grain burn from the coffee before sealing the spruce ? I have found that if I put ANYTHING on the spruce with color in it before sealing I get awful grain burn. Your spruce looks like it was sealed before the coffee.
The coffee was the first thing on it. Some “burning” of the end grain is unavoidable, but it evens out later. I just accept whatever happens with it and don’t worry about it. 🙂