
 Follow

Beginning with the Design of a Double Bass
Baby Steps: Learning to Walk
I knew a few things from having built a previous bass, but I still lacked confidence. So when the International Society of Bassists had their recent convention/competition in Fort Collins, I attended and took a few photos, and tried to observe as much as I could, so as to absorb information I badly needed.
Matthew Tucker was there, which was another reason I wanted to attend. He and I built our first basses simultaneously, but he went on to excel at making basses, while I reverted to smaller instruments for the next ten years. I kept telling myself I wanted to build another bass, and even bought wood and patterns, etc. but it is such a huge, daunting project that I never got started.
My first bass was a “gamba-cornered” bass, modeled after an instrument by William Tarr. Ironically, when I went to Ft. Collins, that particular bass was there! Mine was only loosely modeled after that instrument, not a true copy, but I had worked from a book by Peter Chandler, and there were photos in the book of that bass, and, sure enough, it was at that show. I didn’t particularly care for flatback basses (still don’t), so I had modified the plans and made my “Tarr” model a carved-back bass, otherwise very much like his great bass. It was only my sixth instrument, and there were lots of things I wished I had done differently, but it played very well, and was moved to Illinois with the family for whom it was made, so I never saw it again.
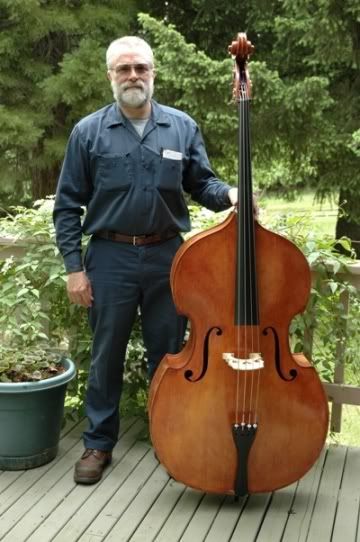
That first bass was a nice start, but I was pretty much “flying by the seat of my pants”: I did what the book said, and called the author a few times, to get more specific instructions, but when it was done I was amazed that it actually worked well…there was virtually no planning; just muddling along and plugging away until it was done. It had an “E-flat” neck, but I didn’t even know what that meant, much less how to achieve a “D” neck, which evidently is more popular. But the youngster for whom it was built was thrilled with it, and I am told that he is still playing it today.
Choosing a Design
I had bought several plans for famous basses, and may still eventually copy one of them, but Matthew Tucker filled me in on how to design a neck to be a “D” neck, and the ten years of building smaller instruments (2 cellos, five 5-string fiddles and a host of violas and violins) gave me some practical insight as to proportion, aesthetics, and varnish. So, after seeing all the makers there at the ISB convention, and seeing the prize-winners, I decided to actually give it a go, and design my own bass, aiming for a soloist bass, as opposed to an orchestral bass.
The orchestral basses tend to be big all over, and harder to access for repertoire work, though they sound great. The one I am designing will be smaller in the upper bouts, to make it easier to play, but still pretty full in the lower bouts, and deep in the ribs, for big sound. I wanted a more graceful scroll than the one on my first instrument, so I designed that as well, and followed Matthew’s instructions to get a “D” neck.
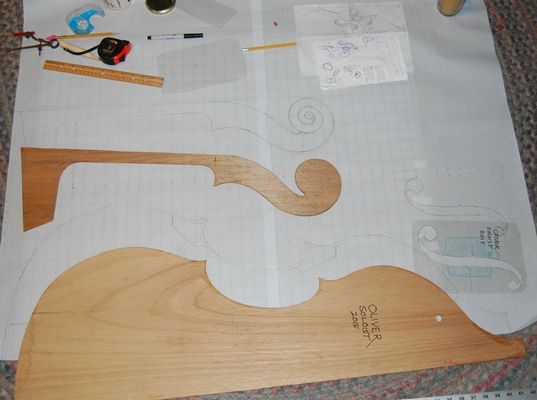
I spent many hours sketching, erasing, and sketching again, using 1/4″ graph paper, so that when I finally came up with something I liked, I could more easily transfer it to “engineers grid paper.” It took two 24″ x 36″ pages taped together to get one sheet big enough to work with. I transferred all my sketches to the big sheet, then used a small, needle-point awl to punch through the paper into the door-skin (1/8″ plywood) of which I would make the actual templates. Then I cut out the templates, filed and sanded them to the exact smooth shape I wanted, and coated the edges with wood-glue to add some stability. (The thin plywood is pretty fragile, but inexpensive, so I tend to use it.)
I made the F-holes a good deal larger than some instruments have, hoping for better mobility of the bridge area, as well as easy flow for air. The f-hole template was cut from thin clear plastic, flexible so that it can be formed around the front plate to transfer the shape. Also, this will be a “violin-cornered” bass, as opposed to “gamba-cornered”. It is more difficult to build, but I like the looks better. 🙂
I already have the maple for back, neck and sides, and I ordered European spruce for the belly and bass-bar. All I really accomplished today was the completion of the mold template, the neck and scroll template and the f-hole template:
But– the game has begun! Now I can use the mold template as I build the actual mold, get blocks in the mold, and shape the blocks to receive the ribs. One step at a time! I will keep you posted.
Thanks for looking.
Hi
Your bass project looks very fine. Have you any other postd to tell More Your bass project.
Br. Pekka
The uncompleted bass still sits in the corner of my workshop, sneering at me in disgust every time I look at it.
I have been sidetracked by other projects, and have not returned to that bass. I have completed 33 instruments, now, and my skills are still improving, so my hope is that I will not only go back and complete the bass, but that it will be a spectacularly successful bass. (Isn’t that what we all do? Hope?)
Thanks for looking.
Chet Bishop