
 Follow

Here’s how I set the neck of a Cello
I’m quite sure it is virtually identical to how other makers do it, with one possible exception: I set the neck while the corpus is still on the mold, with only the front plate installed.
Cello corpus on the mold; front plate installed;
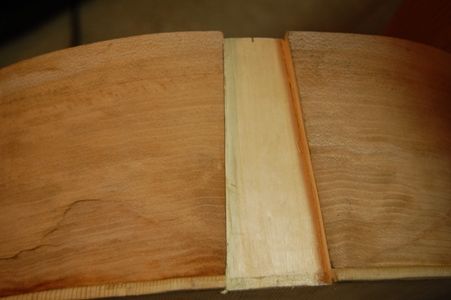
Lay out the mortise outline.
I lay out the center of the neck block, and perform the remaining layout from that centerline. The heel is to be 30mm wide, and the front of the neck where it joins the corpus is 42mm wide. So I mark 15mm to each side of the centerline at the heel, and 21mm to each side at the front plate. Double-check everything. It is a real pain trying to put wood back.
I check my measurements, and mark the location on each side of the neck where the front plat should sit when all is complete– 280mm from the top of the fingerboard, and 20mm down from the top of the neck at the front.
Then begin cutting.
I have five measurements in mind, which I check constantly:
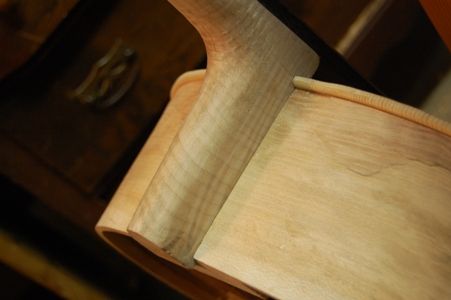
- I want the neck centered, obviously, but in terms of simple location, I accomplished that by careful layout– I want it centered, in that the fingerboard will be centered on the corpus, and the centerline of the scroll will be in line with the centerline of the front plate, as well.
- I want the neck straight, in the sense that it is not rolled to one side or the other. I can check this by sighting across the “ears” of the scroll at the edge of the front plate. If they seem parallel, I am satisfied.
- I want the neck the proper length. That 280mm mark I put on each side of the neck will let me know when I am getting close.
- I want the front of the neck the right height off the front plate. That was the 20mm mark I put on each side of the neck.
- Finally, I want the neck angle to be such that the bridge will be an appropriate height. I aimed for 65mm at the end of the bridge, so as to arrive at an 82mm projection at the bridge– the bridge, then would be roughly 90mm tall at center. There is some flexibility on this one, but not a great deal. In reality, all five of these measurements simply have to be within tolerance, or the instrument will not work right.
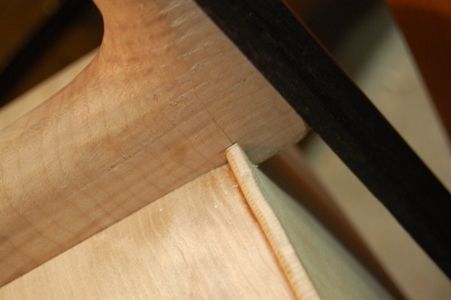
So, with all of that in mind, I measure from the 280mm mark to the end of the neck, to see aproximately how deep the neck mortise must be at the front, then use a Japanese pull-saw to slice along my layout lines to nearly that depth. I stay inside all my layout lines, as I want to leave a little room for adjustment.
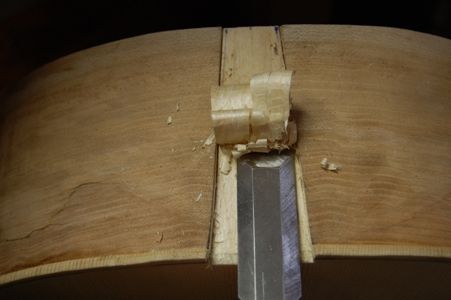
The blue lines you can see in the above photo remain from my initial layout when I bent the ribs. I wanted to make sure they were long enough. (It was close!)
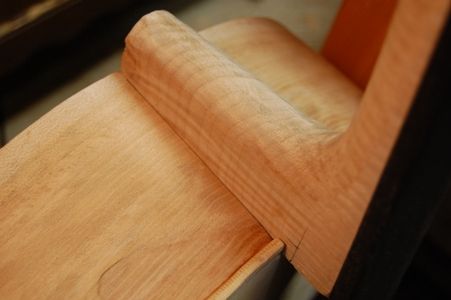
Notice that the heel is overhanging the back of the block by nearly 5 mm. That is fine– I will remove that excess wood when I flatten the back of the garland, and the back plate will be the last major component installed.
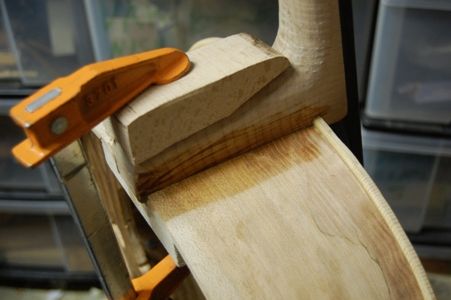
That clamping block in the photo above was just a scrap of wood– I cut it to the correct angle, then hollowed out a curved opening to fit the cello neck-heel. I glued a pad of 1/8″ cork into the cup, and it works very well.
And that is pretty much all I got done today. Cooked a roast… fed the cat, brought in the newspaper…that’s about it. Pretty tired.
Later tonight, if I still feel like it, I will remove the mold, and begin the final cleanup of the interior of the corpus. On the home stretch, now… well, almost! 🙂
(Edit: I did go back and remove the mold, but that was all for that night. 🙂 )
Looking Good!
Thanks, Steph!
Thanks for the photos. I am finishing my mold for my first cello and preparing to glue in the blocks. This kind of info sure helps me
Here is a place you might find helpful, then:
http://www.bluefiddles.com/2012/08/building-a-cello-step-3/
I use a collapsible mold. The blocks are not glued in, but held by drywall screws.