Follow

Five-String Fiddle Coming Along Fine!
A day off from work means a long day on Lutherie!
I got up at 5:45 AM (usually I get up at 3:45, so this was luxury), had breakfast, watered some fruit trees, checked e-mail, and got to work. I knew the outbuilding shop where my power tools are was going to get hot very rapidly today (99 deg. F predicted, I think), so I did all I could do out there while it was still cool, then worked in the basement shop for the rest of the day.
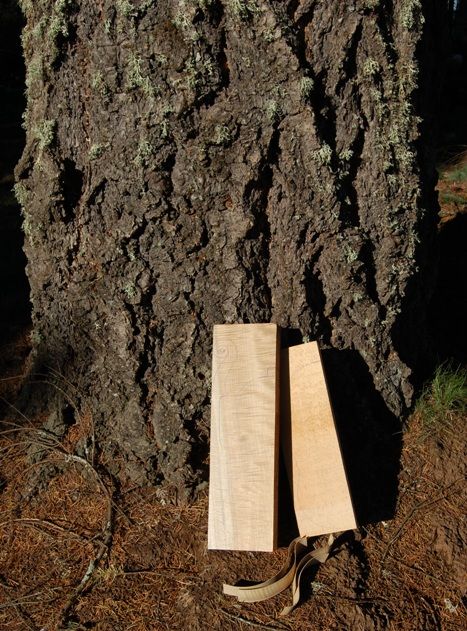
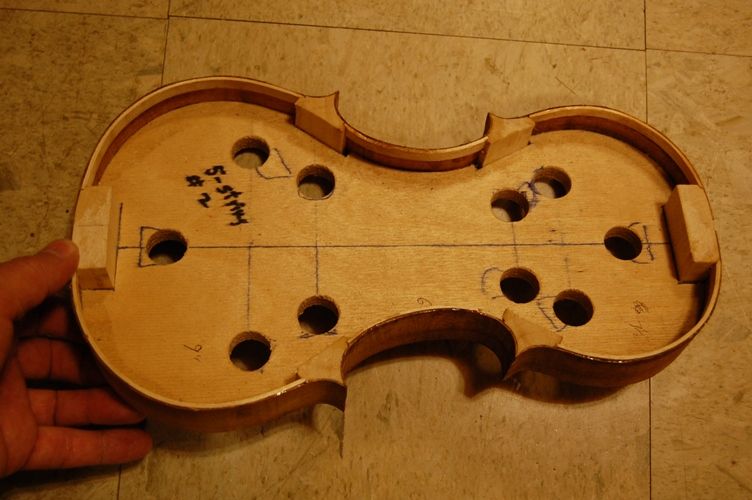
- I took those rough-sawn ribs and thinned them to 1mm all over, using a fixture I made for my oscillating spindle sander (one of the few power tools I use), and cut out the neck block using my small bandsaw. I have a large bandsaw for cutting up large pieces of wood, etc. That is what I used to divide the back block into the two pieces to be joined at the back center seam (next.)
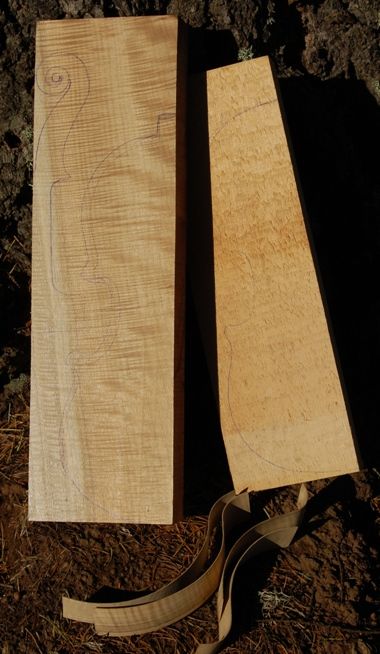
- I then cut out the back and front plate pieces, and joined them, book-matched, so that the grain is nearly symmetrical bilaterally, both front and back. It wasn’t easy this time. I don’t know why. I use a small hand-plane to flatten the edges until they fit nearly air-tight– definitely light-tight. I have a larger plane but this wood was so wild it required a very low-angle plane, set very light, or it tears out at all the curly grain.
- I glued the two halves of the front plate together using hot hide glue, and, while it was drying, I cut the ribs to the correct widths and lengths for each of the six pieces, planning as best I could to get the grain to line up appropriately at all junctions.
- Once the front plate was dry enough to remove the clamps, I glued up the back plate, in the same manner. Some people get a great center-join using a rubbed-joint method. I have done it that way, but I am more comfortable if I add three clamps after I do the rub.
- While the back dried, I planed the front plate to get it more or less level across the inner face.
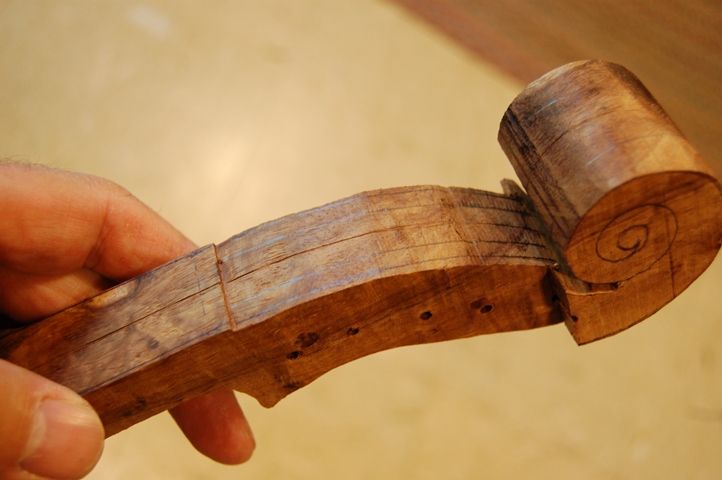
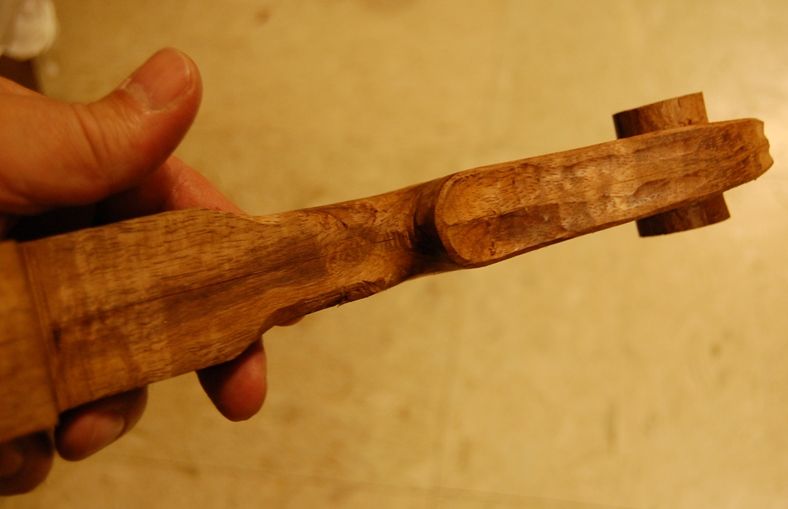
- I took the neck blank and laid out all the measurements on it, and began shaping it a little while I was waiting for other things.
About 11:00 AM I decided I was hungry, so I had a salad and some coffee, and took a picture of the work as it stood:

Back to Work!
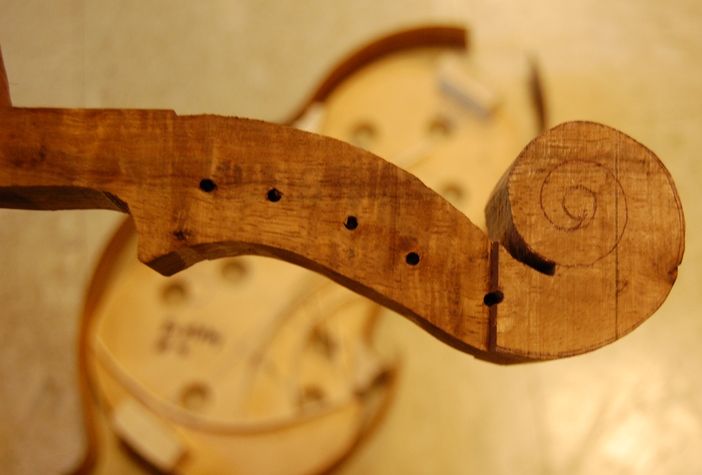
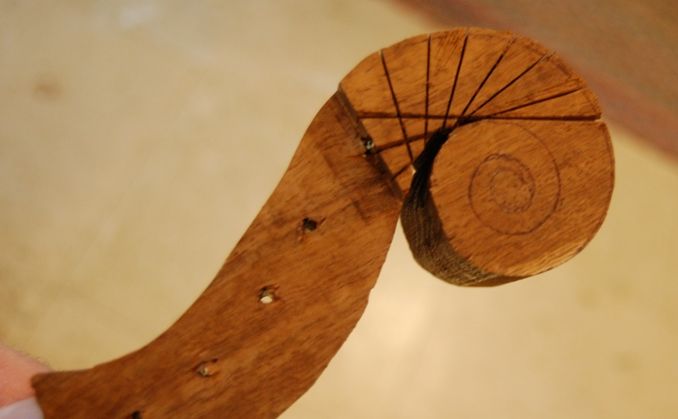
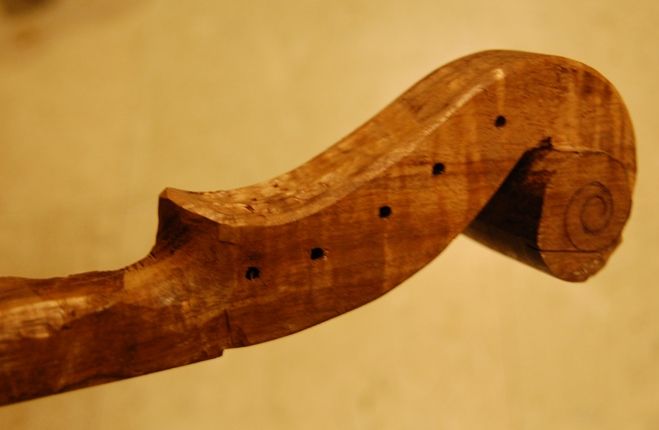
- I drilled 1/8″ pilot-holes in the scroll block for the pegs. When I drill them early like this I can use the drill press and get the holes perpendicular to the center line. My teacher does not do them this way– he says it risks sags in the varnish, and advocates drilling after all varnishing is complete. (He is probably right, but I can never seem to drill the holes correctly by hand, so I will risk the varnish issues.) I was right about working early in the outside shop– it is really getting hot out there now.
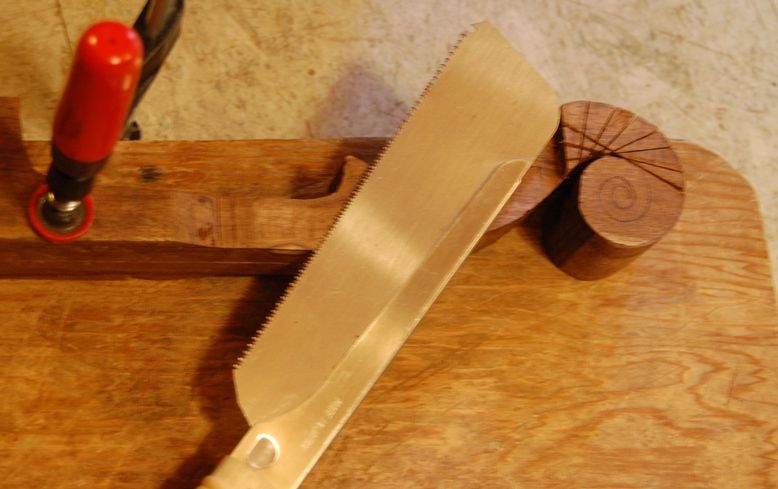
- I used the small bandsaw to cut the side cheek excess wood off the pegbox, and trued up the heel where it was too long. From here on out the scroll will all be hand-work.
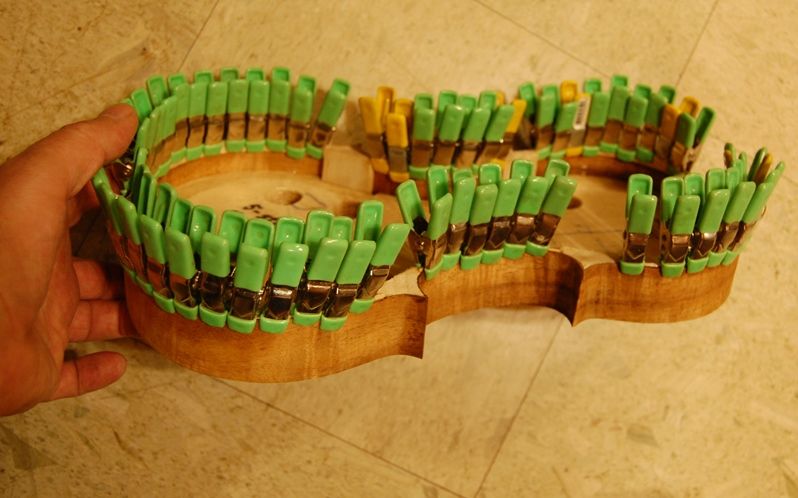
- I used the electric bending iron to bend all six ribs, as well as the front linings. I will have to make some more lining stock– this was all I had for the moment. Fortunately they are easy to make. The linings add strength to the edges of those 1mm ribs, which are otherwise extremely fragile. They also triple the gluing surface of the rib edges, so the joint between the ribs and plates are much more secure. I try to get as much done as I can while the iron is hot, and then turn it off; for one thing, it takes about 20 minutes to heat up: but also, if you forget and leave it on, and then forget it is hot, you can get a bad burn. I keep mine at about 400 degrees F.
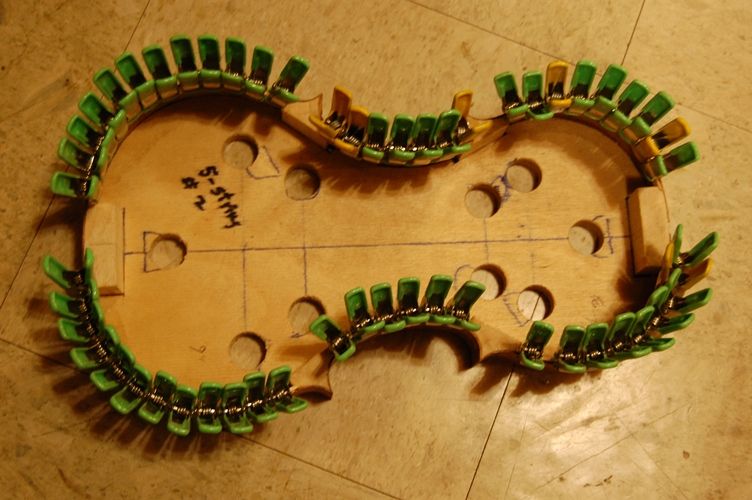
- I installed the C-bout (center) ribs, and glued them in place with hot hide glue, using wine-cork clamping cauls (donated by a friend) for the small-radius upper corners and broom-handle cauls for the lower corners. (This is really going to be a pretty instrument. The wood is gorgeous. I hope it plays well.) The upper and lower surfaces are an even larger radius, so they will be clamped using a section of large wooden closet rod. Sorry I didn’t take photos of these steps. Wasn’t thinking about pictures…I was just working.
More Pictures
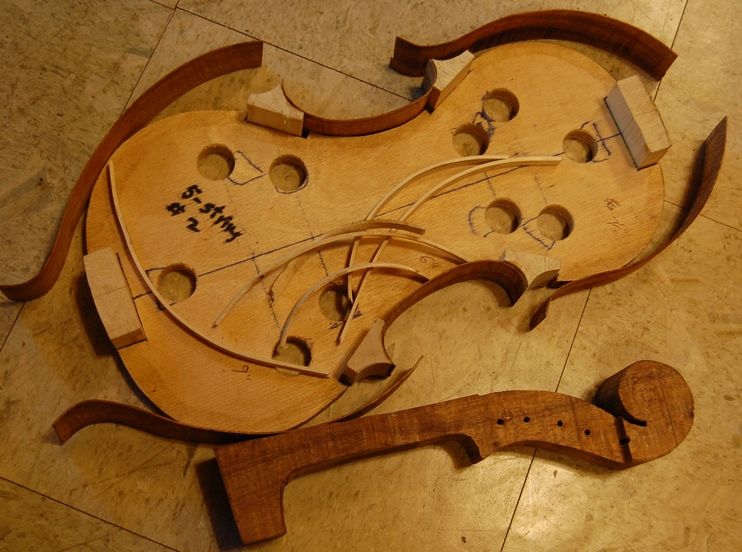
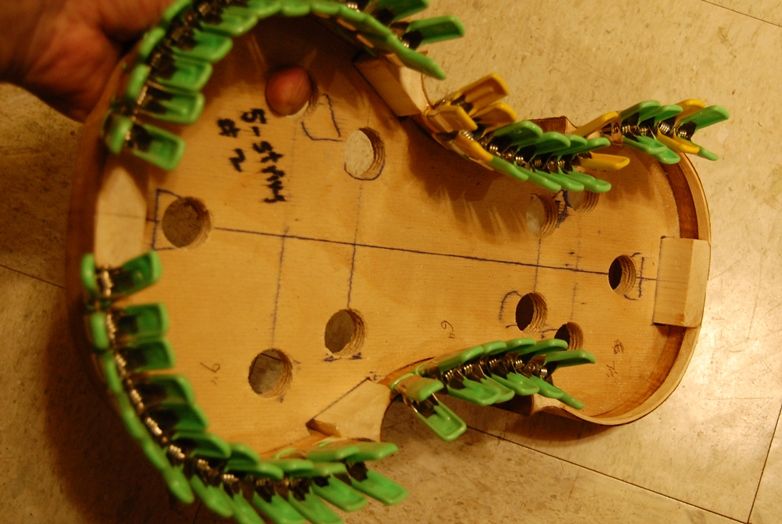
As you can see, the ribs sprang back quite a bit after being bent. I should have thought ahead and prepared a block to which to clamp them while they were waiting to be glued in place. I have such a block–I just didn’t expect the springback to be so severe.
As you can see above, after the glue was dry on the center ribs, I worked the final shape on the upper and lower surfaces of the corner blocks to ready them for the upper and lower ribs. Then:
- I installed the upper ribs, and, while the glue was drying on those ribs,
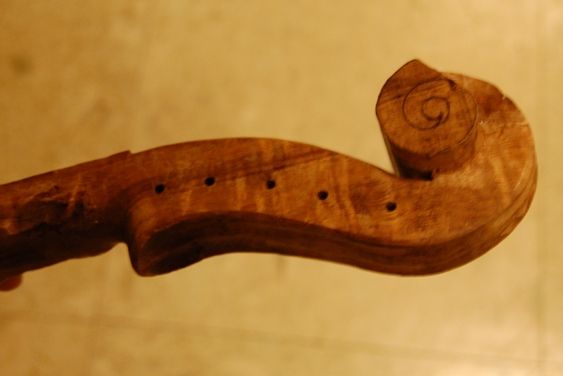
- I worked some more on the scroll. At this point the simplest way to begin removing excess wood is by cutting from the sides in to very near the layout lines for the scroll volute (the back of the scroll.) I do this by clamping the neck to a work-surface (in this case a lap-board.) and carefully starting the cuts, one at a time, spiraling up the scroll from each side. Usually I can then remove the waste wood with a knife or a flat wood-carving chisel, but the grain in this wood is too wild, so I had to try to follow the cuts around the scroll with the saw, then do the final cutting with sharp gouges and small planes.
Meanwhile, the glue was dry enough that I could remove the clamps from the upper ribs and install the lower ribs. When the lower rib glue was dry, I installed the front linings. These little spring clamps are really handy. I got them on a sale once, at Home Depot, for about 37 cents apiece, if I remember correctly. They are just right for this sort of work, and I bought over 100 of them…cleaned ’em out at Home Depot.
I had been working on the scroll between other tasks, so it is coming along, too, but I am getting pretty tired, so this is about as far as I expect to get tonight. Here are a few more photos:
And that is it for today! Too tired…gonna call it a night. It is 11:45 PM
Thanks for looking.
Chet