
 Follow

Moving Toward Completion
Removing the Mold
I have chosen to use the “French” method of inside-mold. Rather than have the blocks and ribs centered on the mold, as the “Italian” method entails, and which allows the maker to install the linings on both front and back sides before either removing the mold or installing a plate, the “French” method applies the blocks and ribs flush to one side, and requires mold removal before installing the second set of linings. The advantage of the “French” method is that it makes mold removal ridiculously easy and fast. The disadvantage is that, when the mold is removed, the ribs are extremely fragile while waiting for linings. I have sometimes used a two-part mold, which makes mold removal fairly easy, but allows me to install all the linings before removing the mold…but it can be a bother, too, so, for now, I have reverted to using the flush method.
To remove the mold, I brace the completed front plate tightly against my thigh, to support it and pad it, then use a sharp chisel and a light mallet to give a sharp rap to each of the joints between the mold and the blocks. I have been careful to only allow glue on the flat central surface of each block, and I also carefully waxed the areas of the mold where I did not want glue to stick (by vigorously rubbing a candle over those surfaces), so the sudden wedging action of the mallet and chisel in each joint usually pops them cleanly apart. I check each joint with my parting knife, though, to make sure they are really free, before attempting to remove the mold. Then, I simply hold the mold, with my fingers through the clamping holes, and tap on all the blocks with the handle of a chisel, and the garland slides smoothly off the mold.
I always feel a little anxious about “hammering” on the mold, so, this time, I thought perhaps I could just “trim the blocks” with a chisel, and loosen the mold that way, and avoid the mallet. You can see the cut marks on the one corner block and one end block…but that was fruitless, and I reverted to the mallet and chisel, which (as always) worked flawlessly. You can also see that, before removing the mold, I had taken the time to saw off the excess wood from the neck heel, so that it is very nearly flush with the back of the garland.

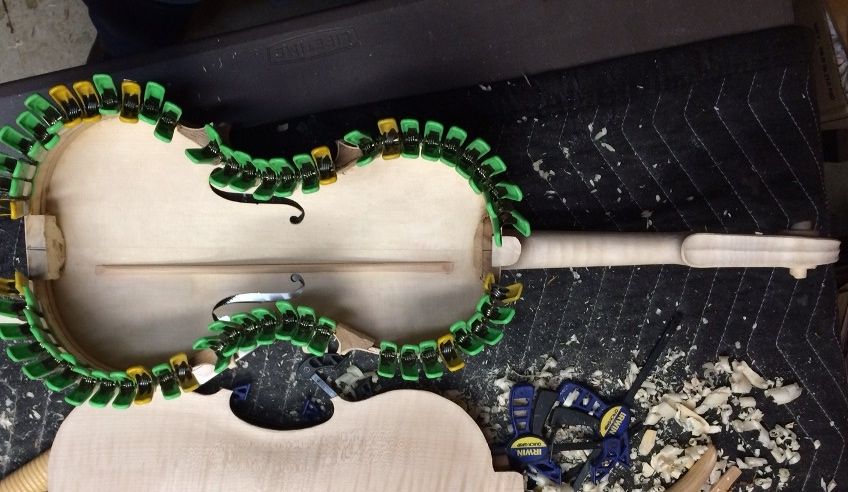
You can see how fragile the ribs look, without linings. So I bent a handful of linings, and installed them, using hot hide glue and small spring clamps.
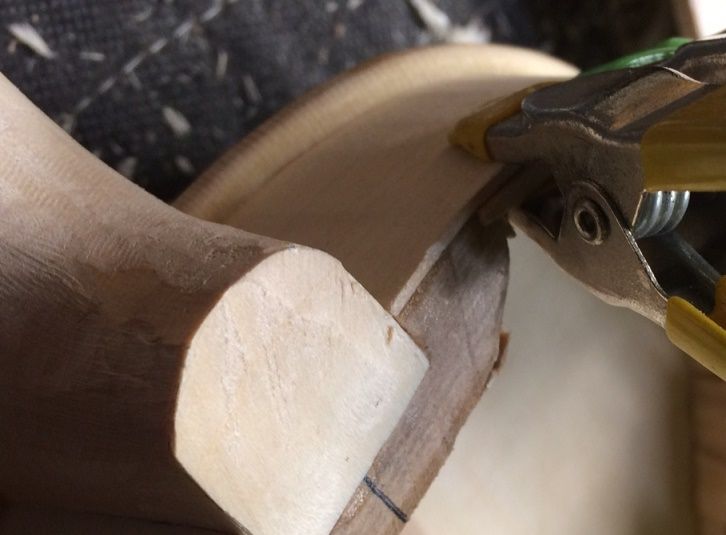
After the glue for the linings was dry, I removed the clamps, and planed the edges of the linings flush with the rib edges. Then I trimmed the inside of the linings to taper into the rib surface, and shaped the blocks to their final contour. I will still clean things up a little more, before closing, but it is getting close. There was a joint that did not get quite enough glue, so I inserted more hot hide glue and clamped it securely. I will wait until tomorrow to take the clamps off and close the corpus.
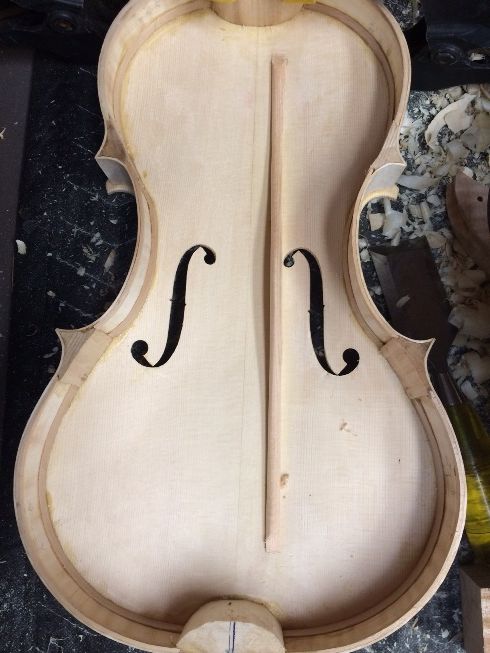
In the meantime, I spent some more time scraping the back plate smooth, inside and out. It really looks about the same, so I will not post more photos. There were just some discontinuities that I wanted removed. I went ahead and shaped the inner edge of the perimeter of the back plate, too, so it is ready to be glued to the corpus.
Since I can’t close the box until that glue dries, and the glue will not be dry until tomorrow, I guess I will post this, and then post again, tomorrow, after I close the corpus. (Frustrating, but that’s the way things go, sometimes.)
Thanks for looking.