
 Follow

Five string Fiddle Progress: Neck-set and more
Completing the Scroll
Last week, I had left the scroll nearly finished, but still lacking the outer fluting under the neck, and still pretty rough. (Honestly, I continue “fine-tuning” scrolls right up ’til I begin varnishing.) So, the first thing was to get the scroll and neck completed well enough that I could set the neck.
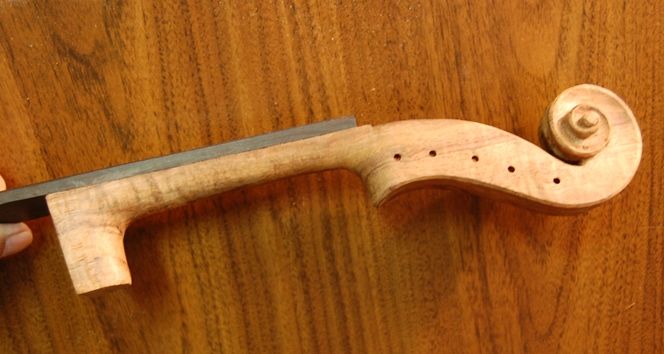
I am never fully satisfied with my work, but I have to decide at an appropriate point that it is OK to move to the next step. However, scroll and neck carving is much more difficult after the neck is set, so I want to have them pretty close to how I want the finished product to look, before I begin setting the neck.
Setting the Neck
Setting the neck begins with careful layout of the heel “footprint” on the neck block of the violin body (often called “corpus”). I already had the centerline of each laid out, so it was a matter of transferring lines accurately, and then cutting along those lines so that when the wood was carved from between the saw-cuts, the heel of the violin neck should fit, snug and straight, into the prepared neck-mortise. I always leave a little extra, so that the mortise is too small to begin with: it is much easier to take off a little more, than to replace wood.
I did not take pictures of this procedure– simply wasn’t thinking about photographs, and I forgot. It went very smoothly, this time, though, and I think I had it ready to fit in around 30 minutes, or a little more. (Usually it takes me longer.)
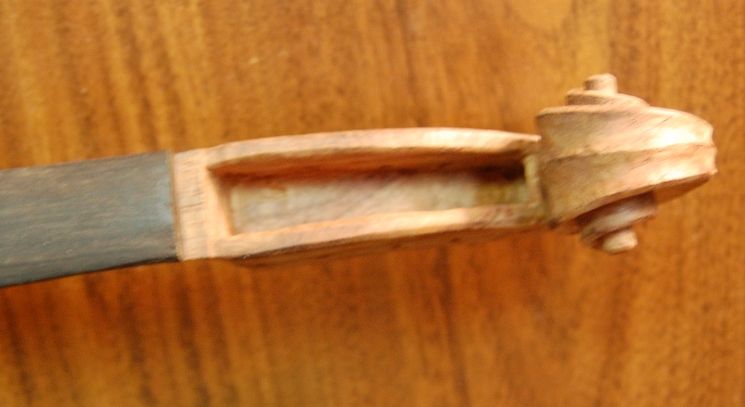
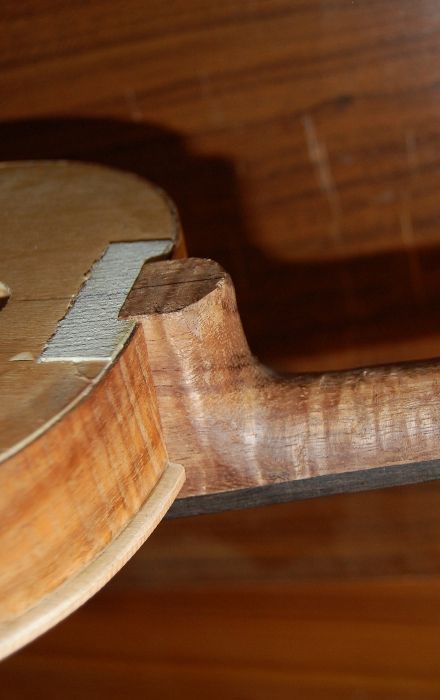
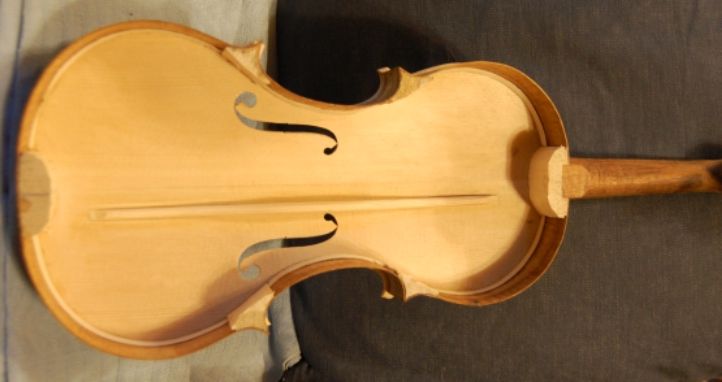
Here’s the neck mortise, ready to receive the neck:
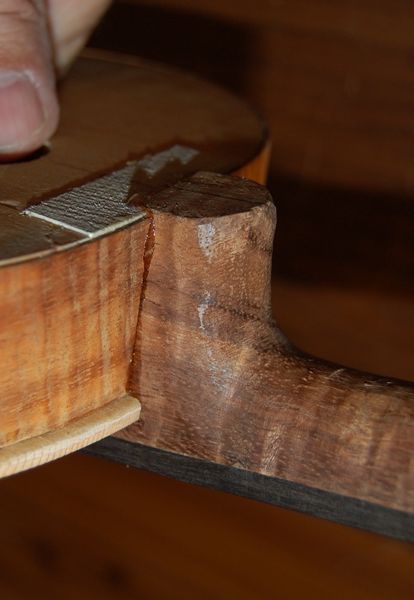
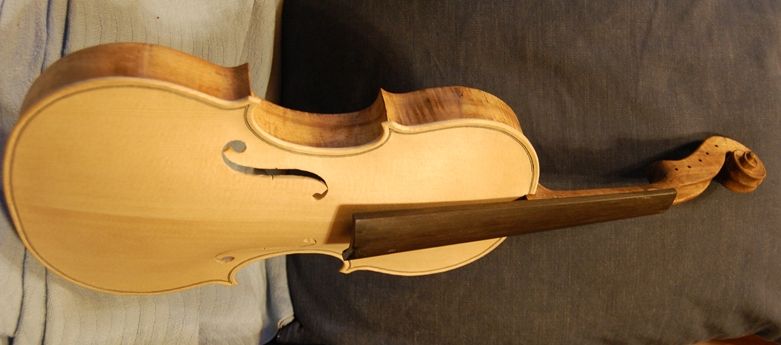
And here is the neck, dry-fitted into the mortise:
Once I knew that everything fit the way it ought, and that it was going to be straight, tight, and at all the correct angles, I was ready to glue. The things I have to check are five points of measurement:
- The distance from the upper end of the fingerboard (where the nut will be) to the upper edge of the top plate (both sides) has to be 130 mm.
- The neck has to be measurably straight, so that the centerline of the neck and scroll are a continuation of the centerline of the corpus.
- The neck can’t be twisted (rolled side to side)…it should be level with the plane of the ribs, side to side.
- The height of the upper edge of the heel of the neck (underside of the fingerboard) should be 6 mm above the top plate.
- The height of the end of the fingerboard above the top plate should be between 19 mm and 23 mm, with 21 mm being optimum.
I realize that there are different ways of approaching virtually everything in lutherie, and there are sure to be experts reading this, who are shaking their heads, but: this is the way I was taught, and it has worked well for me.
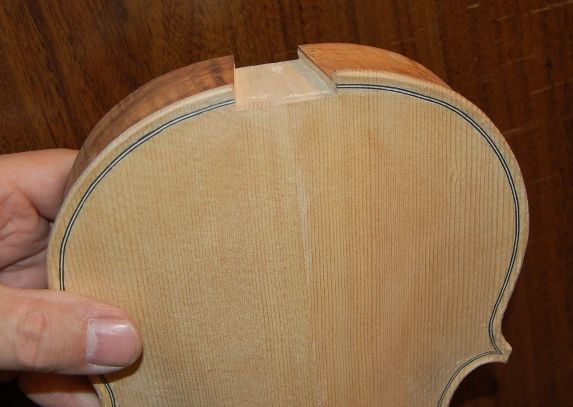
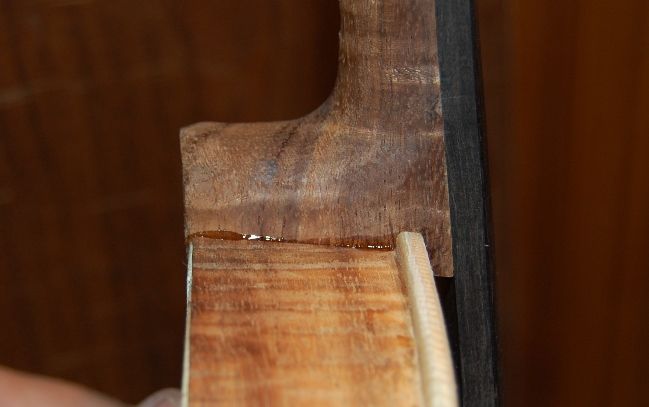
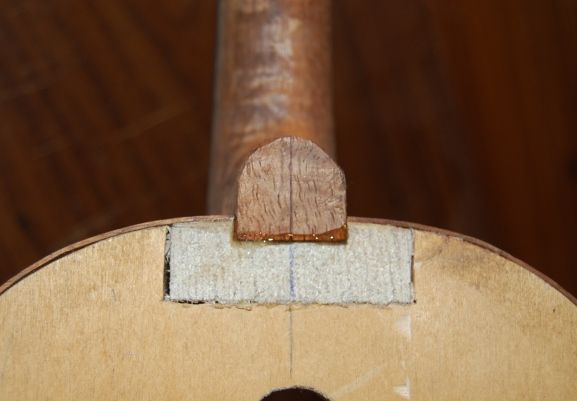
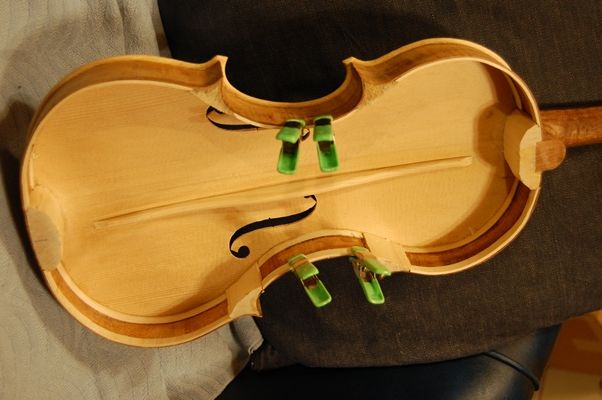
I prepared the hot hide glue, and brushed it into the mortise, and onto the bottom of the neck-heel, and along the edges of the heel. Then I quickly rammed the neck heel home in the mortise, and checked to make sure all my measurements had held (primarily the height of the fingerboard above the plate.) All was in order, so I set it aside to dry. Here is the completed neck joint, with the glue squeezing out around the joint:
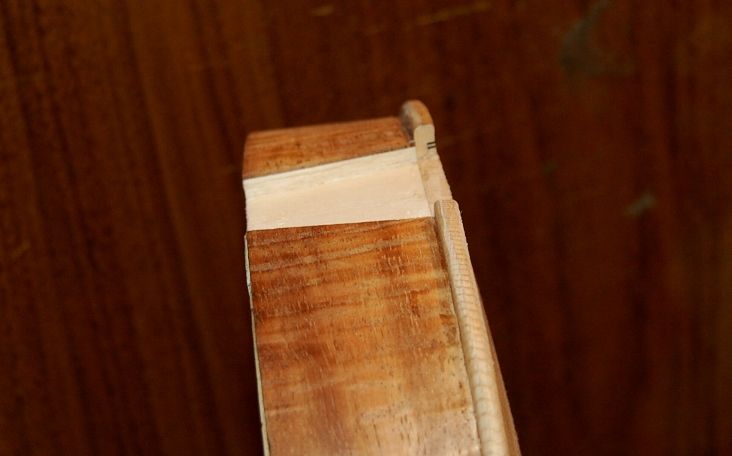
After the glue dried, I planed the neck heel flat, then removed the mold by breaking the glue-joint at each block (six places) and simply lifting out the mold. Then I trimmed the blocks and was ready for the back linings.
Installing the Back Linings
The first thing I do to prepare for installing linings is to cut mortises in both sides of each block, into which to insert the linings. I use a thin knife and a very small chisel to cut the mortises.
I make the linings by first sawing the chosen wood to about 2 mm thick, in 2-3″-wide “planks”, about 18 inches long, and then using a wheel-style marking gauge to cut off strips 7 mm wide. I wet each strip and bend them around a hot bending iron, until I can fit them into the corpus. I want them to fit tightly. The center bout linings are bent in such a way that without clamps they would tend to buckle away from the ribs, so I use small spring clamps to dry-fit them. The upper and lower bouts will stay put on their own.
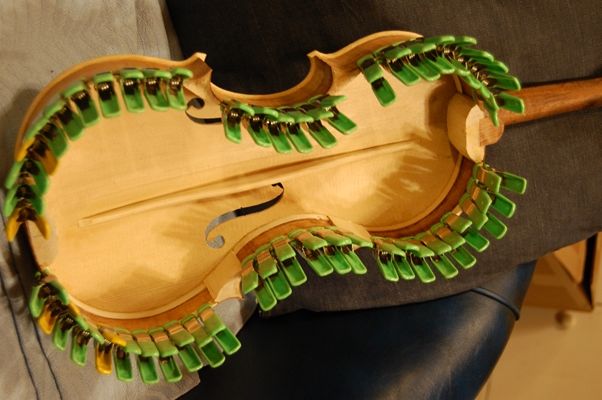
Then, one by one, I remove each lining and brush hot hide glue along the portion of the rib that will receive it, as well as on the lining itself, making sure the ends are liberally coated, as well as the full length and width of the gluing surface. I quickly re-insert the rib, and clamp it in place with as many small spring clamps as I can fit along its length.
That is it for today. I’m tired, and 3:45 AM will come all too early (back to work tomorrow).
The next step will be to level the back surface of the ribs and neck heel, and then trace the back plate from that pattern, so that it will fit perfectly. (The neck heel is still not in the correct finished shape, but the back plate button and the neck heel will be shaped as one piece, after the back plate is glued in place.)
Next time we’ll start carving the back.
Thanks for looking.