Carving the Archings

Please share with your friends!

Carving the Archings

Why are Archings so Important?

I wish I could give a scientific, rock-solid answer, based on the physics of sound, plate vibrations, etc., but I can’t: All I can say for certain is that the arching of the plates is possibly the single most important factor in producing good sound in a violin…with choice of wood being the closest other contender…maybe.

I was told that, during his career, Bob Bein of “Bein & Fushi” violins, could tke a single glance over the individual archings of a pile of violins, and immediately sort them into the “keep” pile and the “discard” pile…and he was consistently correct. The ones he kept became great-playing instruments and the others…well, who knows? They went elsewhere, and someone else struggled with them. But all he was seeing were the archings. These instruments were not even set up– and he was not thumping and listening (as I still do)…his eye told him what the possibilities were. I wish I could explain that, but I can’t.

In the last few years, mainly due to the research of other makers, I have become convinced that a particular curvature, predictable by mathematics, and, importantly, by mathematics that were completely available to the Cremonese makers, may be largely responsible for that sought-after sound. These curves are called either “hypo-cycloid” curves, or “curtate cycloid” curves.

Is it possible, still, that some “holy grail” of tonewood was the key? Sure…but other makers of the same period, using what seems to be the same wood, were not able to capture that tone. Furthermore, some modern makers have managed to acquire wood from that time period and area, and have made violins of it. Nothing remarkable resulted.

Could it still be the subsequent treatment of the wood…some arcane chemical treatment, that gives that special sound? I suppose it could be, but every time someone does chemical analyses of the tiny, precious chips of wood from those instruments, after repairs, all they seem to come up with is that it may have a mineral ground of some sort (jury is still out on that one), and that, otherwise, it simply has a varnish comprised of linseed oil and larch resin, or pine resin, or something similar. Nothing special there, either. Annnd, all the modern-day experiments done with rabbit urine, horse manure, potassium silicate, and a variety of unlikely-sounding candidates for “the secret” have all turned out pretty unimpressive, to the best of my knowledge. So…no secrets to reveal, today. Sorry.

Personally, I had finally come to the conclusion that the Cremonese makers simply were the best makers the world had ever seen. But the hypo-cycloid archings (also called “curtate cycloids”) may actually hold a key. I do know that, since I began attempting to use the curtate cycloid arching curves, players have picked out those particular instruments, and said “Whatever you did on this instrument, keep doing it! This one is the best!” (Or similar accolades….) And (so importantly) it turns out that virtually all of the Cremonese master instruments match these curves with amazing accuracy. (Just as if they planned it that way!)

So…No more “by guess and by golly!” I have done it with compass and straightedge and calculator, for my own models, but this time I lifted the arching template designs from the poster. Incidentally, when I take my arching templates directly off the posters, I get the same curves, so…I made the arching templates, both front and back, longitudinal and transverse, and I do try to use them.
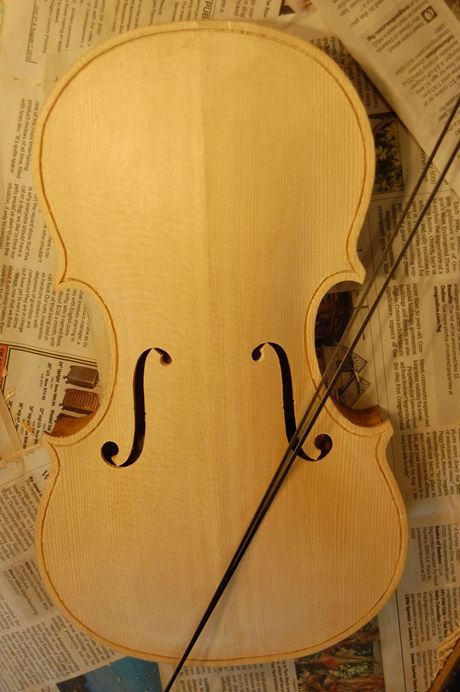
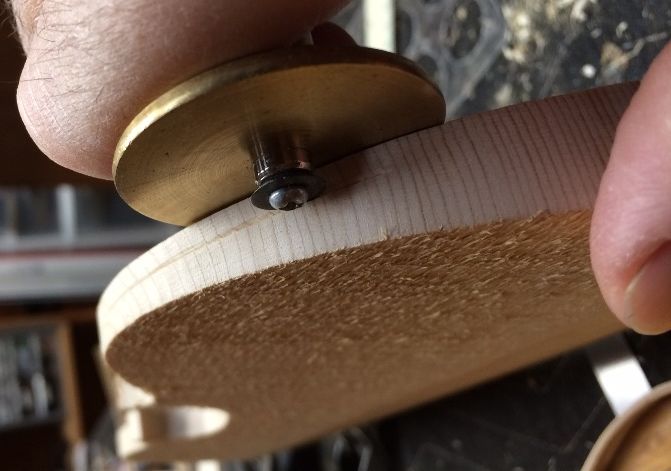
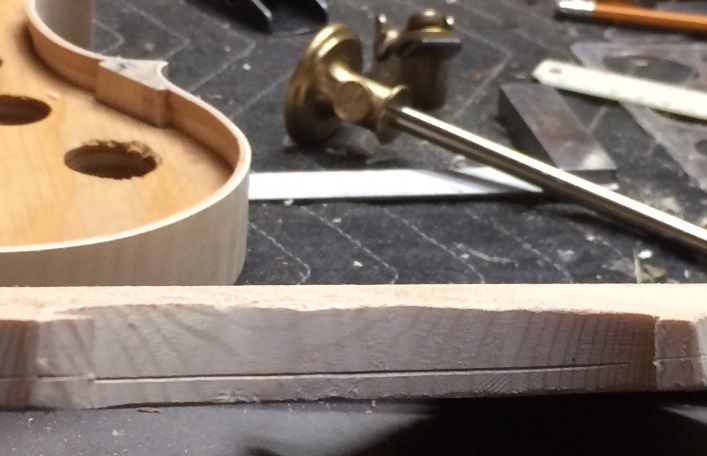
Edge Thickness:

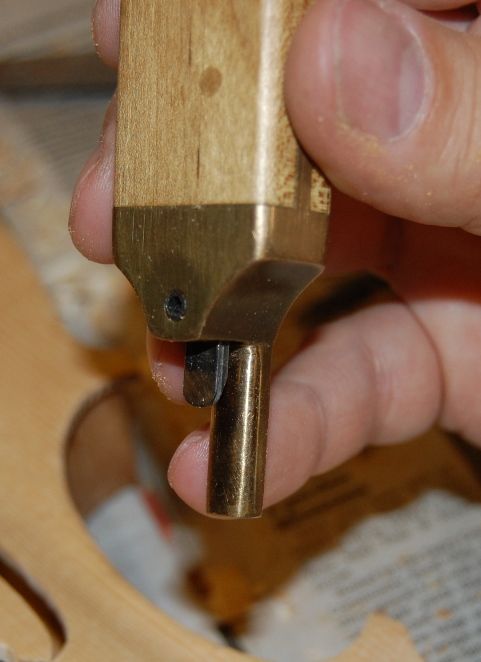
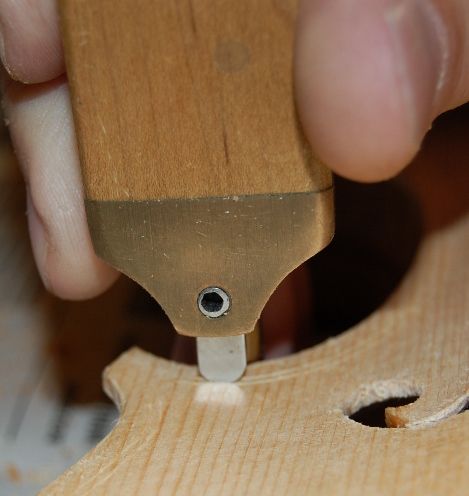
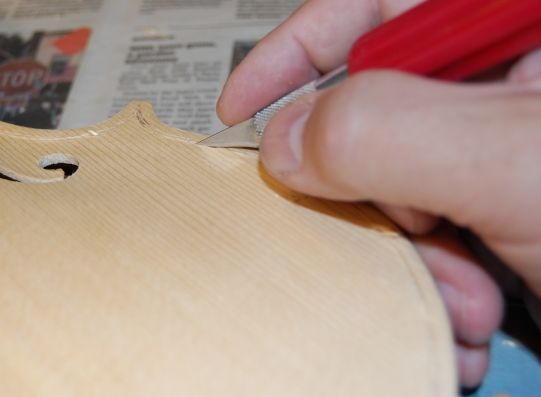
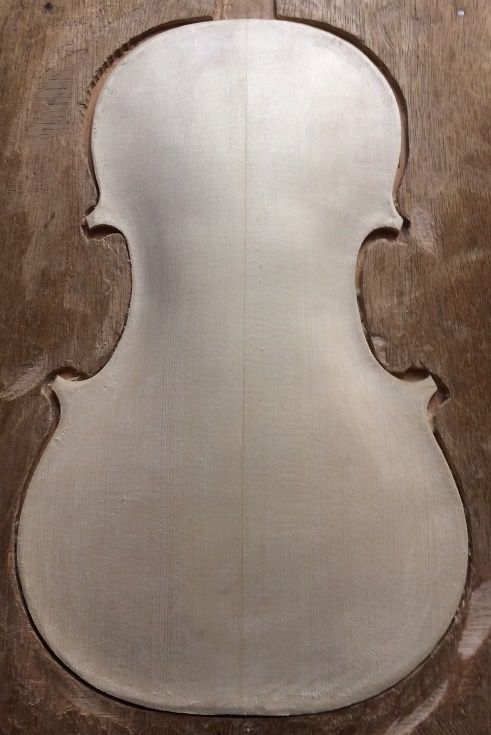
The beginning step is to establish the edge thickness. This particular Guarneri model seems to have begun with 4 millimeter edge thickness, which in some areas ended up more like 3.7 or 3.8. So, I set my wheel marking gauge to 4mm and scribed a line all the way around both plates:

Using a wheel marking gauge to scribe the edge thicknesses.
Using a wheel marking gauge to scribe the edge thicknesses. I moved my hand a little while taking the photo…the brass wheel is held tightly against the flat of the plate.


Resuts of edge marking
The result is a line parallel to the flat side of the plate, exactly delineating the right thickness for the edge.


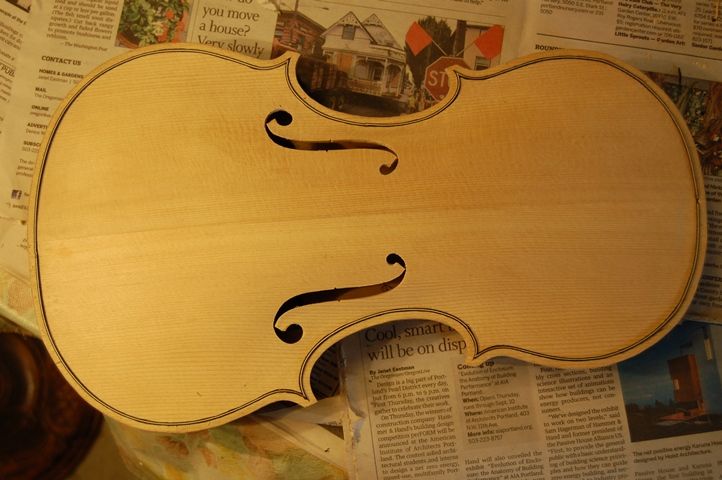
Arching, and Arching Templates

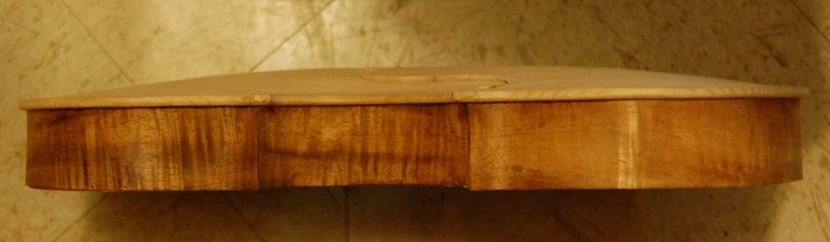
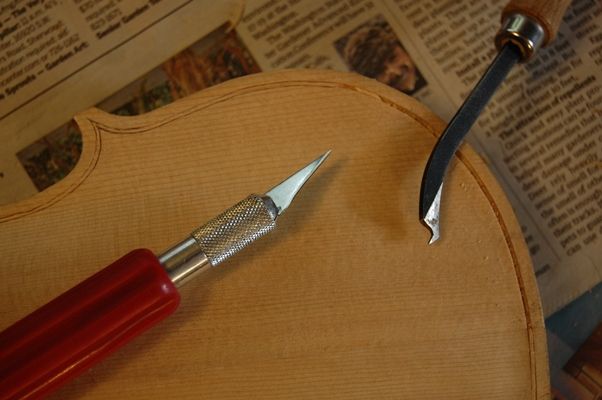
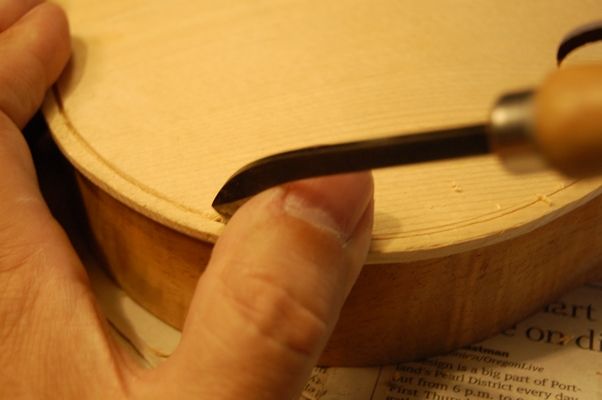
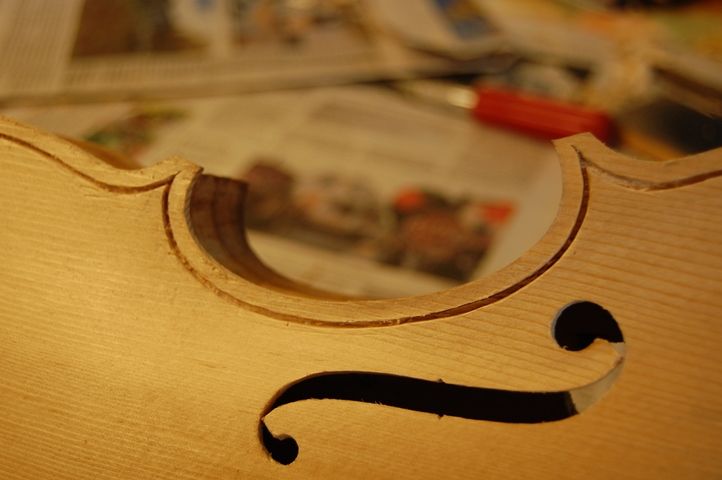
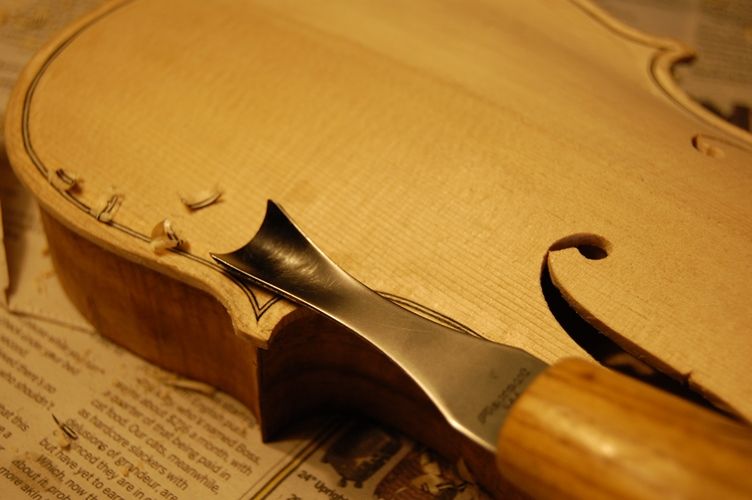
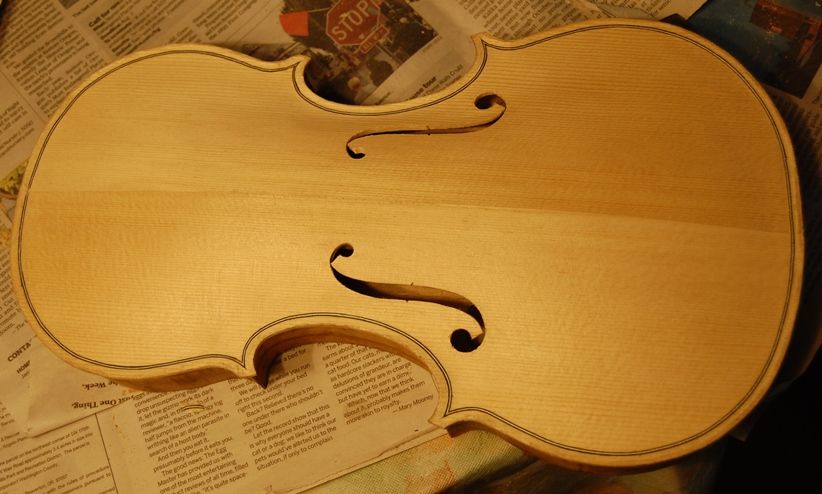
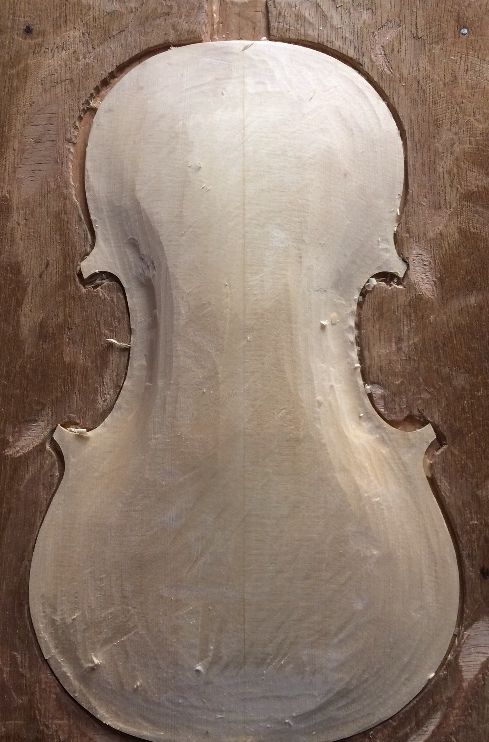
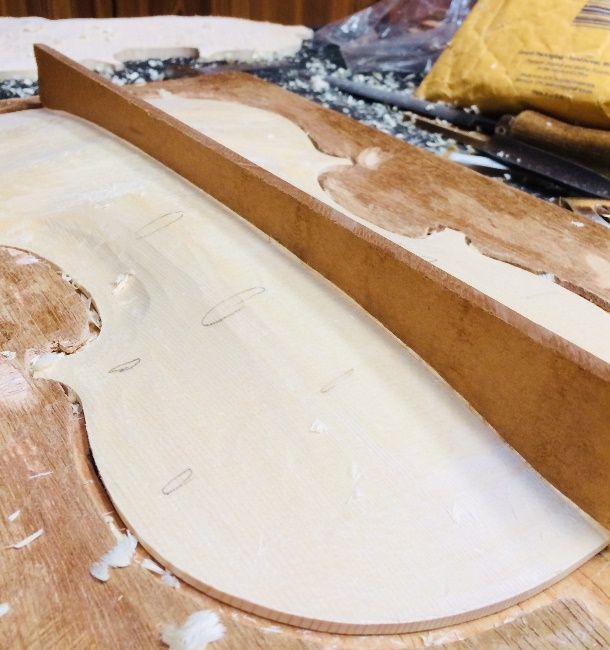
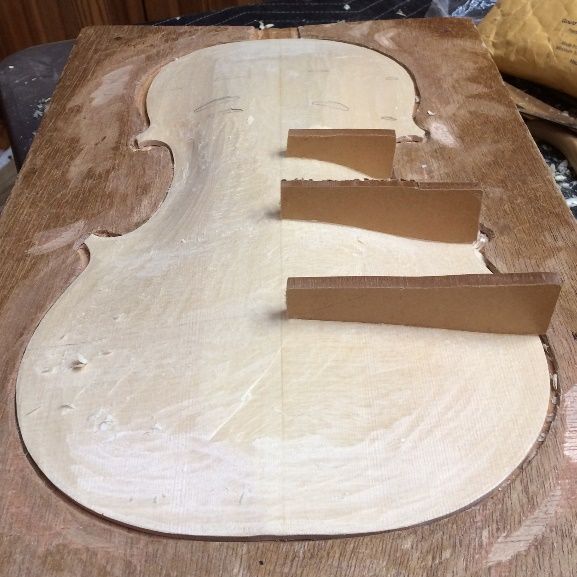
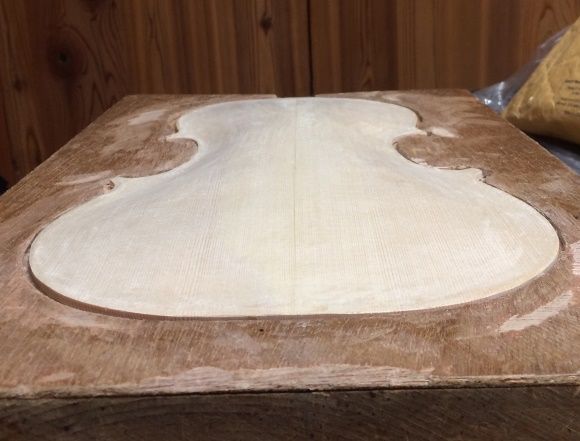
Then I carve away the excess wood, down to the line, making a flat area at least 10-12 mm wide, all the way around the perimeter of the plate, and begin carving away the excess thickness, curving up from that “platform,” up to the center high spot of the plate. At this point I know the arching is still far too high and puffy, but I will begin using arching templates, along with gouges and finger-planes, to bring it into some semblance of an ideal arch. The final shaping will be done using sharp scrapers and low-angle light, to reveal irregularities of any sort. Here is the (very rough) preliminary arching for the front plate:

Preliminary arching (very rough) of front plate.
Preliminary arching (very rough) of front plate. It is still far too high and “puffy”.


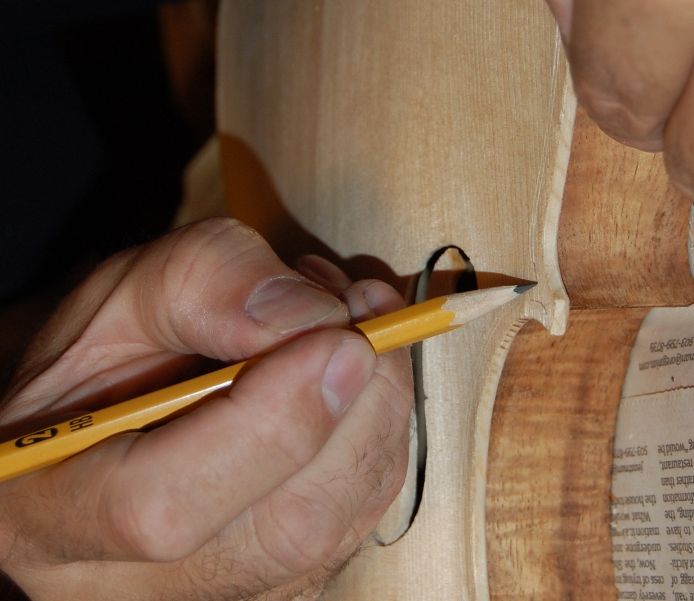
I use arching templates, either derived mathematically, or traced from a poster, to adjust the shape of the plates.

Longitudinal arching template.
This is the longitudinal arching template, specifically for the front plate. Once this curve is right, I can adjust the transverse archings.


Beginning the transverse archings.
Beginning the transverse archings. The fit has to be nearly perfect, to maximize the benefit of the arching plan.


Things are beginning to smooth out.
Things are beginning to smooth out. There are definitely a host of humps and hollows to remove, but I am pleased with the beginnings.


The view from the bottom of the plate.
The view from the bottom of the plate. It’s hard to see the curves, but they are looking pretty good.


The back plate arching, though different from the front, is accomplished in exactly the same manner. I will show pictures of it another day. I’m getting pretty tired. Once the outer archings are as close as I can get them, I will flip the plates over in the cradle, and carve the inside arching, carefully monitoring the thicknesses all over the plate. This pattern of thicknesses is called “Plate Graduation”, and they seem to be fairly important, too, though not nearly so much as the archings.

More later.


Thanks for looking.

If you found this post helpful, please share with your friends!

5 String Fiddle Progress Report #6: Front Plate Installation and Purfling

Please share with your friends!

Five String Fiddle Front Plate Installation

Back to Work!

It was fun working on the Sawmill, and just as we got that done our daughter came home (from Switzerland) for a visit, so, between that and all the overtime at work (teaching print-reading classes), it has been hard to get going again, but the fiddle has been patiently waiting on the dinig room table for me to get back to work.

Installing the Front Plate

I levelled the garland by scrubbing it back and forth on a sanding board, then aligned the plate on the garland and clamped it with spool clamps. After heating up the glue, I removed a few clamps at a time and inserted the glue with a thin pallete-knife, and re-applied the clamps. In this way, I can work my way around the perimeter, accurately and easily gluing the plate in place without fear that the glue will gel before I can get the plate clamped in place.

front plate with garland
Front plate glued in place

Ready to begin Purfling

The purfling is an inlay that is partially decorative, and to some degree a protection against cracks and splits– an edge reinforcement. There are some (usually very cheap) instruments that have the purfling simply painted on, so that it only looks good, but has no other function. They are usually seen as sub-standard, though, and I will not consider making an instrument that way…so, here is the beginning point: the purfling marker. Two blades set apart by the exact thickness of the purfling to be inlaid, and the distance from the edge set, as well.

Purfling marker
Purfling marker

Some people call this a purfling cutter, but it really does not workwell if you try to use it to cut the slot. I mark the slot with this tool and then cut the slot with a sharp, thin knife. In use, the purfling marker should be held exactly perpendicular to the plate, and tightly against the plate edge.

Purfling marker in use.
Purfling marker in use: see the double lines.

The purfling marker will not complete the corners, and they are fairly critical to the overall look, so I carefully sketch them in with a very sharp pencil.

Sketching the corners

Cutting the Purfling Slot

I usually use an X-acto knife to cut the slot, and pick the center out with one of several tools made for that purpose.

Purfling tools.
Purfling tools.

The first trip around the plate it is important to go lightly but very accurately, so that I am barely deepening the marks left by the purfling marker: after that I can cut more deeply.

Incising the Purfling Slot

Cleaning the Purfling Slot

After I am satisfied that the cuts are the correct depth all the way around, I carefully pick out the center of the slot and clean the slot, using a purfling pick. I have some that I made myself, but this one was given to me by Jake Jelley, and it works very well.

Purfling Pick in Use
Ready to Install Purfling

Installing the Purfling

Some people make their own purfling…maybe I will try it someday, but for now, I buy mine in three-ply strips. The strips are too brittle to bend, so I use a bending iron to make them flexible and to bend them to the correct curvature for the tight corners.

Purfling strips with prepared frot plate
Purfling strips with prepared front plate


I try to install the C-bout purfling first, then force the mitered ends of the upper and lower bout purfling against the mitered ends of the c-bout purfling. It takes practice to get good at this: I do not claim to have “arrived”. But it does seem to be getting easier. (I read the other day that someone asked Pablo Casals why, at 93 years of age, he was still practicing the cello for three hours a day. He said, “I think I am seeing some improvement!”) (Good one, Maestro!)

C-bout Purfling installed
C-bout Purfling installed dry

Then I install the rest of the purfling strips: I want the slots to fit snugly, but not so tight that I will struggle to install them once I apply the hide glue.

Purfling installed dry.
All Purfling installed dry. Spliced in some places, but after gluing the splices will be invisible.

Gluing and Trimming the Purfling

I lift each section up out of the slot, one at a time (tilting them, so as to try to leave the mitered ends in their places), and use the palette knife to slip thin hide glue into the slot, then press the purfling back into the slot, all the way down. I use a roller made for installing the rubber trim around window screens to force the purfling all the way home. The glue squeezes its way into the mitered corners, and secured them. The plastic roller is easy to clean afterward with hot water.

Once the purfling is glued in place, I mark a line around the margin of the plate, using a compass, with the pencil set to about 1.6mm (1/16″ or so), so that I have a guide to follow as I cut the “channel” (trimming the purfling below the surface into which it has been glued.) I want the wood surface and the purfling to make a smooth curve that begins near the edge of the plate, cycles down through the purfling, and sweeps back up to join the curve of the violin plate. I carve the channel with a gouge, then scrape to complete the curves. The faint pencil guide line can be barely seen in this photo.

Trimming the purfling and cutting the channel
Trimming the purfling and cutting the channel.

And there is the finished work, ready for the next step.

Completed Purfling.
All the purfling is trimmed, the channel is cut, and the scraping is complete.

The outer edgework will be completed after I install the neck. I used to wait and install the neck last, but I eventually decided that I prefer to install the neck and fingerboard while the front plate and rib garland are still on the mold, then trim the heel of the neck to be in plane with the back of the rib garland so that the back plate can be installed last. But that is a subject for another post….

If you found this post helpful, please share with your friends!