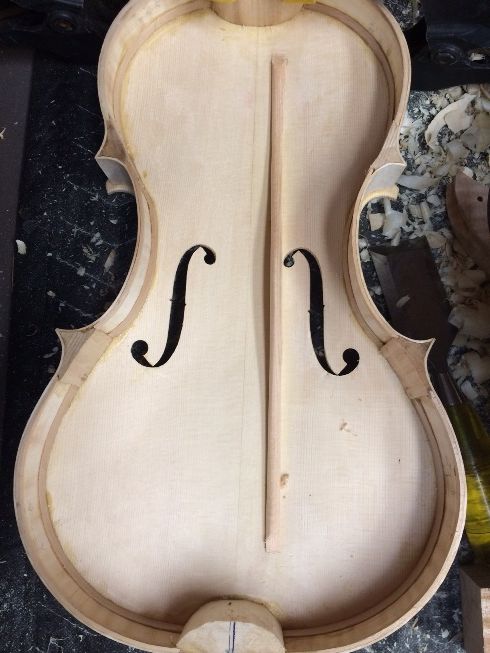
Last time I posted, I had installed the back linings, shaped the blocks and linings, and was nearly ready to close the box. It looked like this:
The blocks and linings are shaped…but the garland is not leveled, yet.
To the unassisted eye, the back of the garland really looked pretty flat. In fact, I had used a hand-operated abrasive tool (a Sandvik tool…they apparently went out of production, years ago…but I love the few I have) to try to level it all the way around, thinking it might be easier. But when I clamped it up, to test the plan, it was not even close to level…so, back to the sanding board!
To level the garland, I made pencil marks all around the mating surface of the garland, and then rubbed the entire structure on the abrasive surface until all the marks disappeared. Presto! Flat!
Installing the Back Plate
Then, while the glue was heating up, I carefully went over the perimeter and inner surface of the back plate and made sure the curves were smooth and consistent. Once I was satisfied with it, I carefully aligned the back plate on the garland, pushing and pulling a little to get the overhang even, all the way around. I clamped only at the blocks, initially, then began using a thin-bladed palette knife to insert glue into the joint. I removed the clamps at the bottom block, first, and inserted glue so that the joint between the bottom block and the back plate was fully coated, then slid the blade left and right, as far as it would go, spreading glue on the joints between ribs/linings and back plate. I quickly reapplied the clamps at the bottom block, and added more between there and the corners. Loosened the next set of clamps, and repeated the routine.
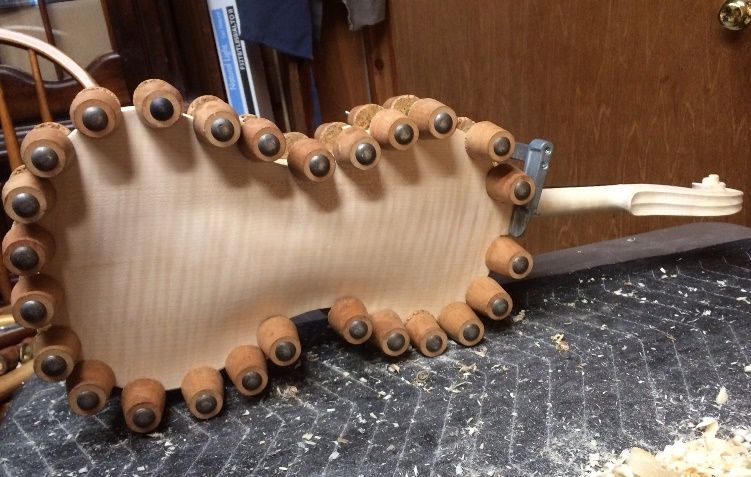
Once the entire perimeter was glued and clamped, with an extra clamp at the button-to-heel joint, I could set the whole assembly aside to dry. It is closed! (I really like looking at that one-piece European maple back.) 🙂
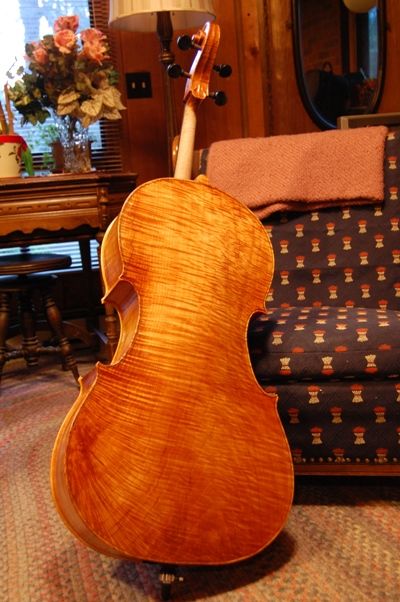
Closed corpus, back view.
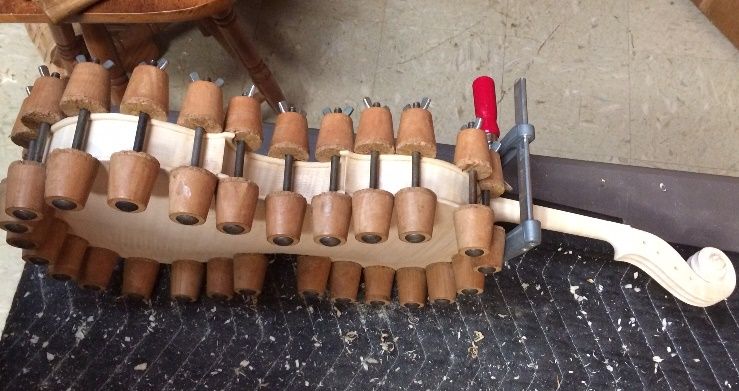
Closed corpus, side view.
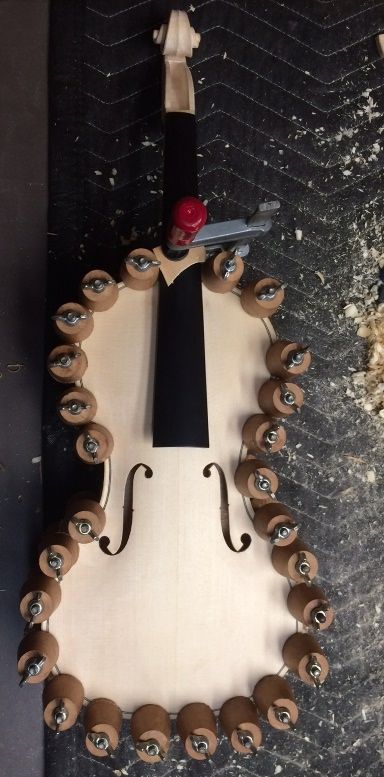
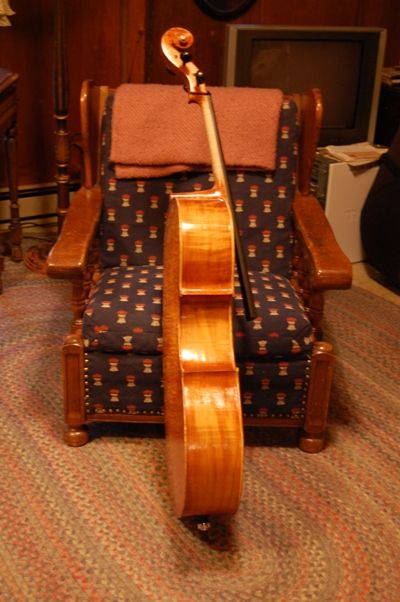
Closed corpus, front view.
I will let the glue dry overnight, then remove the clamps and trim the heel to the correct profile, trimming button to match the heel, so that they are shaped as one unit. Then I will carve the slot in the back plate for purfling, install the purfling, and, finally, prepare the whole instrument for varnishing. I hope to be ready to begin the finishing process by this weekend.
Thanks for looking.
If you found this post helpful, please share with your friends!
Progress on the Small (14-inch) Viola and the “Plowden” Guarneri model violin
Here are some photos of what is happening with these two fiddles. I decided to add a third instrument to the bench, so to speak, a 3/4-size violin (separate notes on separate thread), so it is slowing me down just a little.
Progress Checklist
Both the viola and the violin are moving along:
Arching is complete on the front plates of both instruments.
F-holes are laid out on both instruments, cut out and complete on the violin.
The bass bar has been fitted, installed and trimmed in the viola.
Graduation is nearly complete on the viola, complete on the violin.
The scrolls are partially carved…still a fair way to go.
The back plates are arched, but there is still some work to be done on each before I would call them absolutely complete.
The top plate has been installed on the violin, and purfling installed.
The violin top plate and rib garland are nearly complete…the edgework is done, but some refining will still happen.
You can see that I trimmed a couple of millimeters off the corners of the violin front plate. I will do the same on the other three plates as well.
Here are some photos:
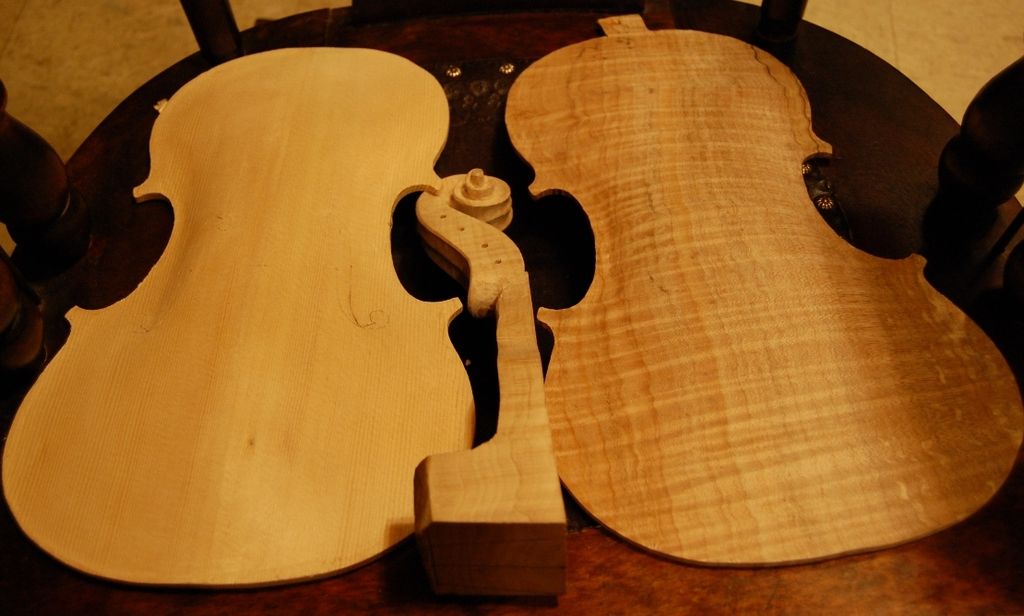
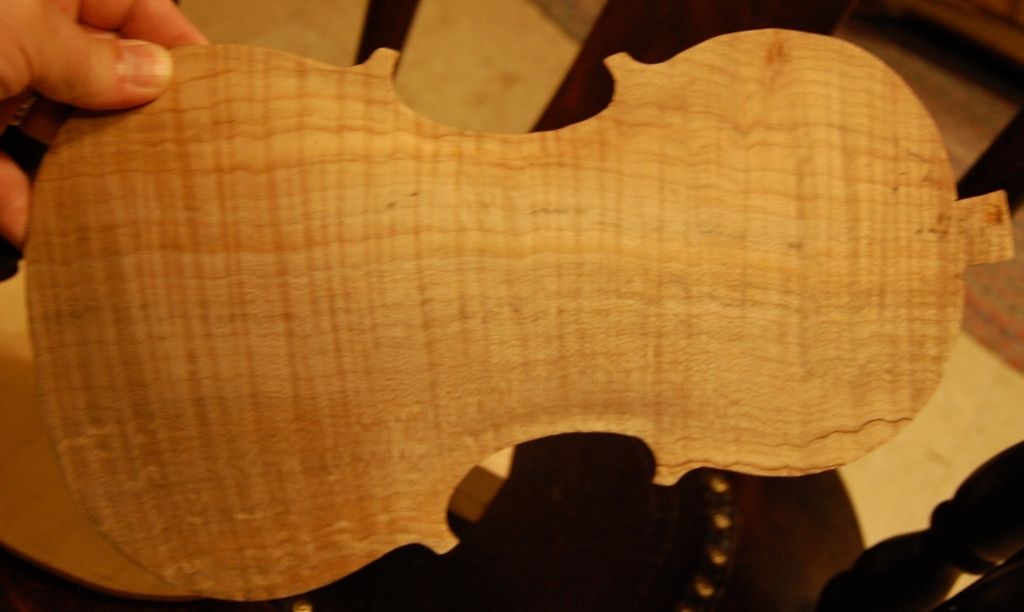
July 3rd status of Guarneri-model violin. (Wood for back, sides and neck is European Maple. Wood for top is European Spruce.)
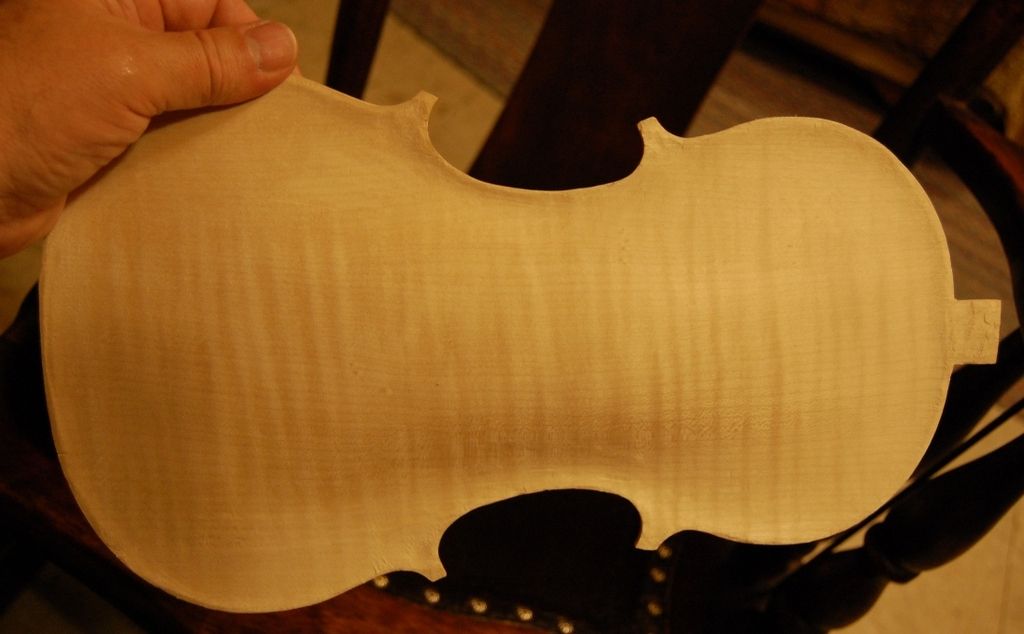
July 3rd status Guarneri-model one-piece violin back. Arching and graduation are nearly complete.
July 3rd status of Oliver 14″ Viola.
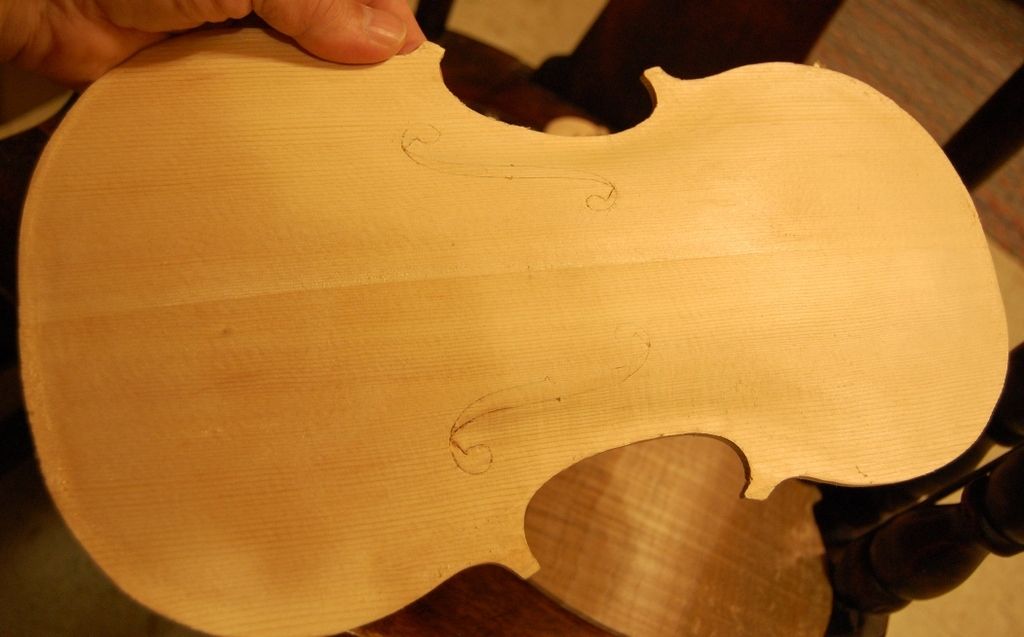
July 3rd status Oliver 14 inch Viola front plate. Arching and graduation essentially complete. F-holes laid out and deeply incised. (Wood is Sitka Spruce.)
July 3rd status Oliver 14 inch Viola back plate. Arching and graduation nearly complete. (Wood is spalted, highly figured Big Leaf Maple, harvested about five miles from my house.)
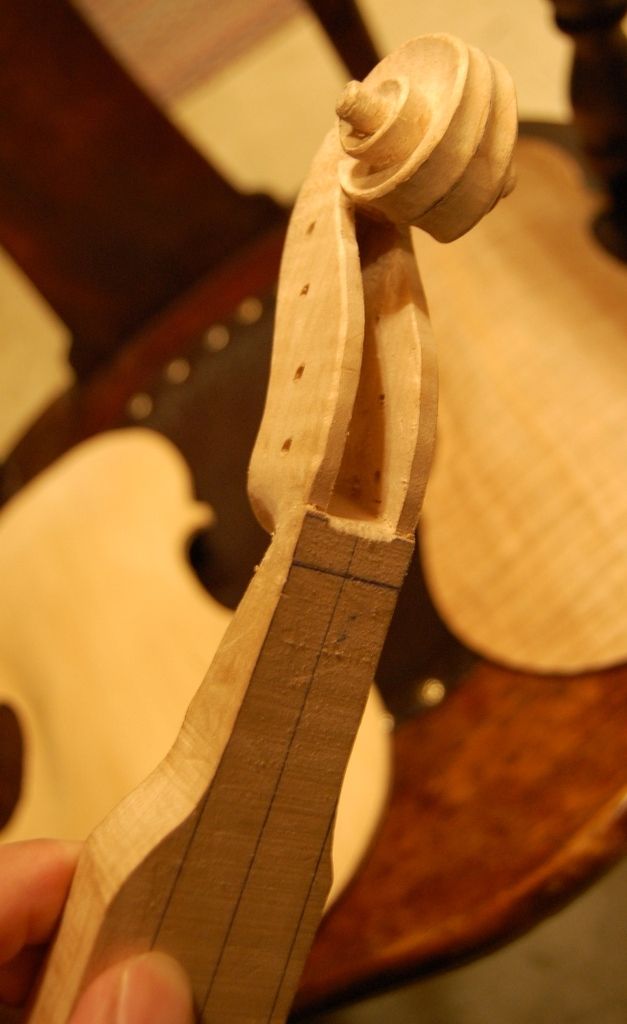
July 3rd status Oliver 14 inch Viola scroll and neck. (Wood is spalted Big leaf maple…from the same log as the back plate.)
Prognosis:
So…you can see that progress is happening. Not at a very exciting pace, but I hope the wait will be worthwhile.
My goal is to produce three very good instruments this summer/fall:
the 14-inch viola,
the Guarneri-model violin, and
the 3/4-size violin,
and then show them, along with a larger viola, to orchestra directors and teachers in the Greater Portland Area.
My rationale is that good small violas are hard to find, and so are good fractional sized instruments. If I can demonstrate to the teachers that I can produce very good instruments in smaller sizes, as well as the larger sizes, then perhaps they will recommend their students to me.
All I can do is try….
Thanks for looking.
If you found this post helpful, please share with your friends!
Progress Report on the 14″ Oliver Viola, and the Violin Modeled after the 1735 “Plowden” Guarneri.
“Life is what actually happens while you are making other plans.”
Well…company came and went, and the week didn’t happen exactly as I wanted it to; There were other things to do, and people to spend time with. My only daughter was here all week, which was nice– she flew in from Switzerland, with about a week’s notice. We went to the beach, Monday, and spent the day infiltrating all the art and clothing stores in Cannon Beach, then had fish and chips and headed home. 🙂
My younger brother dropped in for a surprise visit today, with my young neice. That was a nice visit. While they were here, a neighbor couple showed up, too. We ate and visited, and had a nice evening. Afterward, I helped Ann trim a hedge and haul the branches to the burning pile. All good things.
So! Progress report:
I am trying to keep the two instruments on parallel tracks for completion…hoping to keep them no more than a few hours apart in terms of progress.
Progress in building 14” Guarneri-model Viola and Violin:
(Hand-carved instruments begun on May 25th, 2016)
Cut and install the blocks. (May 25th)
Prepare the ribs, by sanding (using a plywood jig I made to use with my spindle sander). (May 25th )
Bend the ribs, using the bending iron, and install them on the blocks (several steps). (May 26th, 27th)
Prepare, install and shape the front linings. (May 27th, 28th)
Use the sanding board to flatten front of garland. (May 30th)
Prepare the plate stock (book-match and flatten inner side) (Front only—one-piece backs on both fiddles.) (May 30th)
Use the completed garland to establish the shape of the plates. (May 30th)
Cut the front plate exactly to size, including filing and sanding. (Only got the viola cut out. I will cut out the violin tomorrow night if it isn’t too hot when I get home. )
Lay out and cut out scroll and neck. (May 26th)
(Began carving both scrolls using gouges and small finger-planes—spent a good part of May 28th doing that, while waiting for bending irons to heat up, etc. More time as time and strength allow. That maple is tough stuff, and my hands tire quickly anymore.)
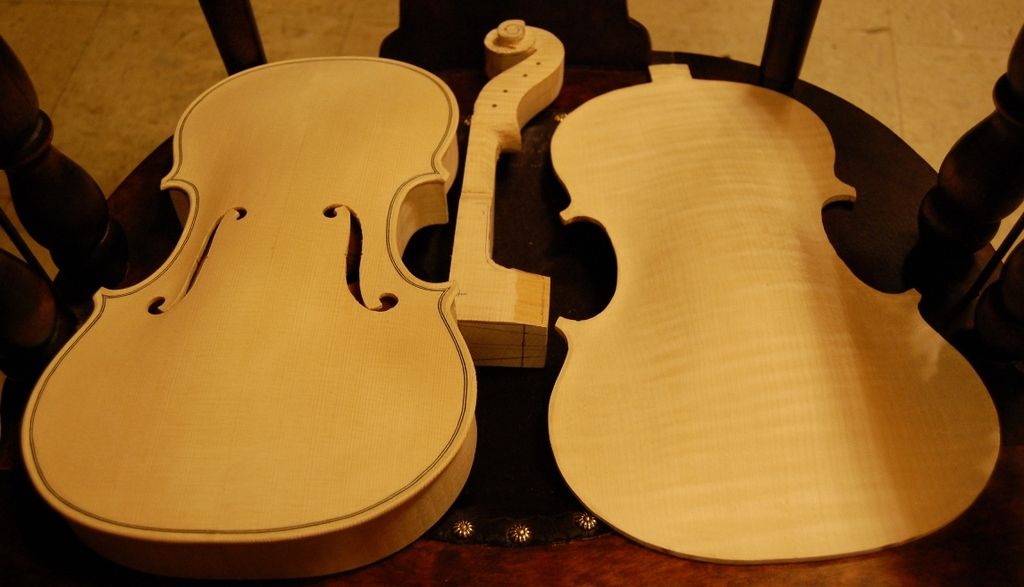
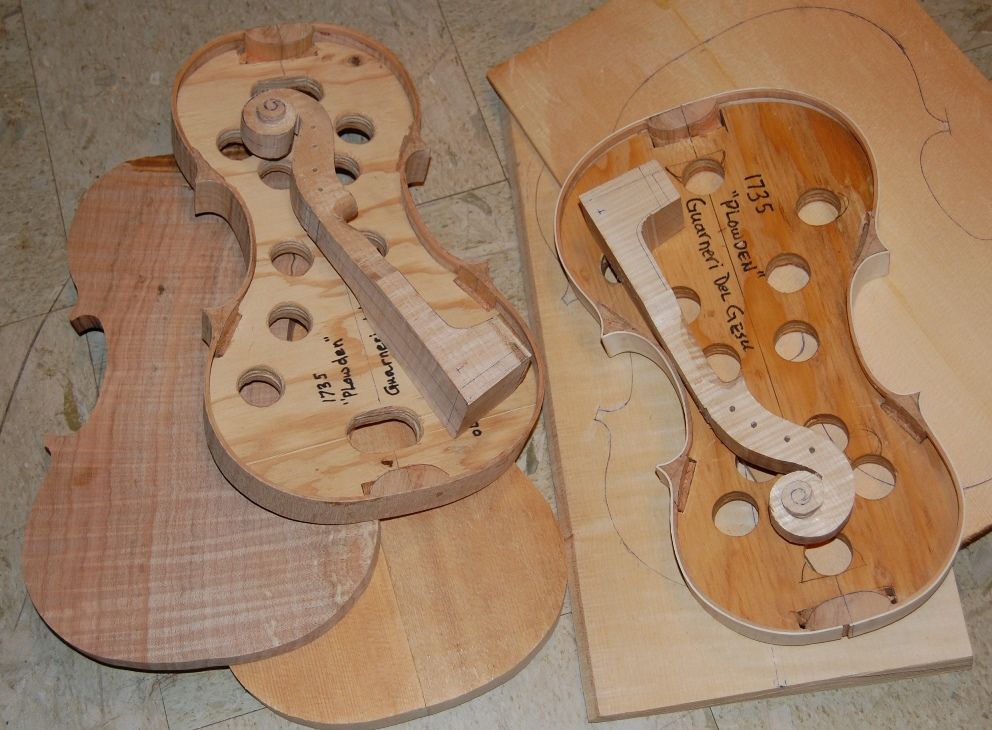
Here is the photo-evidence: Handmade in Oregon 🙂
May 30th Progress Report.
The instrument on the left is the 14″ viola, and is made of Oregon Big Leaf Maple, and Sitka Spruce. The one on the right is the violin, and is made of European Maple and Spruce. Both have blocks and linings of weeping willow.
I ran out of time and energy, so the cutting out of the violin plates will have to wait until later. Once they are cut out, I can begin arching the front plates, and get these things looking more like fiddles.
As you can see, I am trying corners that are a little longer, this time. I may end up shortening them after all, but I left extra in case I wanted them longer. Usually I make pretty short corners.
Vacation is Over– Back to Work!
That’s all I have to show, for today. I go back to work tomorrow. Classes are over for this term, but I still have to prepare certificates, and arrange make-up tests for those who need them.
(For those who don’t know, I teach Welding Supervision classes at Gunderson, Inc. where I have worked for the last nearly 30 years. I began there as a welder, but nowadays I mostly lecture. Print-reading classes, remedial Math classes, Welding Inspection classes, Safety, Metallurgy, etc. It is not as fun as making fiddles, but it is steady. :-))
Thanks for looking,
Chet
If you found this post helpful, please share with your friends!
Life is what happens while you are making other plans, they tell me. This season has been loaded with distractions. I worked a lot of late hours at Gunderson, Inc. where I was teaching classes on Welding Supervision.
Two young fellows were coming to the house a couple of times per week to work on instruments they were building. One was working from a kit, but had zero experience with tools, so it required a great deal of personal attention; the other built from scratch, and is nearly finished with a very nice 15-5/8″ viola, a fairly faithful copy of the 1580 Gasparo da Salo viola. (Funny, when those young fellows are here, I don’t get a thing done on my own work.) I did begin three 5-string fiddles, months ago, but have only made measurable progress on one; the Spalted Maple 5 string fiddle.
I took two weeks vacation between Christmas and New Years, but ended up being sick nearly the whole time. Besides, my daughter was home from school for that two weeks, so I had reason to be distracted. 🙂 I did get a couple of work days in, but it has been a struggle.
Finally, I have several repair jobs going, each of which really needs to be done, so, to make a long story slightly shorter, things haven’t turned out as planned.
Double Purfling Complete, Including Purfling Weave on Back
The maple for the one-piece back is some Oregon Big Leaf Maple that was given to me by a local landowner and forester a few years ago. This is the third instrument I have made from that tree. It is a relatively soft maple, and has had a very nice tone, so far, in my experience. I have made one five string fiddle from it, so far, and one cello.
The Spruce is Sitka– a one-piece sitka front plate– only the second time I have ever seen one, and it is some of the toughest spruce I have ever worked with, which I think will make a good, thin, top plate for the instrument, as I have made one instrument before with very similar spruce, and it turned out a winner, as a bluegrass, celtic and country fiddle. But it was not fun cutting the double purfling by hand, as every “winter grain” was so hard it would catch the knife blade and try to turn it. However, here is the progress so far:
Progress on Five String Fiddle
Today I will make the final corrections on the front and back arching and cut in the f-holes (I hope), then begin graduating the front plate. Hopefully, by next week, I can have the corpus nearly completed. Maybe somewhere in there, I can get a good run at the other two fiddles, as well. I really need all three completed by the time of the show in April. There will be about 500 people per day, coming through that show, and some of them will be fiddlers. 🙂
We will see; I am feeling somewhat less than optimistic, however, after the experiences of the last three months.
I decided to make two new molds, so that I could have more than one handmade five-string fiddle in the works at any given time. The new molds are made from the same half-model template, so they are very similar in character, but I did notice that somehow my original mold had been a little narrower in the center bouts than I had intended (don’t know how it happened), so the new ones are wider there, which may make the sound even more deep and clear. The instruments from the first mold have all been very good, so I am hoping the ones off the new molds are even better.
Different Materials
The original Oliver 5-string mold has the ribs and linings in place, and the chosen material for ribs, back and neck is spalted maple. This is an unusual choice, from a classical perspective, but a five-string fiddle is an unusual instrument, and I think it will prove a good choice. I really like the looks, so far. The second and third Oliver Molds (essentially identical, otherwise) have higly figured Oregon Big-leaf maple and Oregon Myrtle, respectively, for the backs and ribs. The Myrtle is a two-piece back, and the neck on the Myrtle fiddle is Big leaf maple; otherwise all the fiddles have matching ribs, backs and necks. The other two are each a one-piece back, also.
I am planning to use Port Orford Cedar for the two-piece front plate on the Myrtlewood fiddle. This will be the first time I have used anything other than spruce for a violin top, but I have been told it is exceptionally good for other types of instruments, and a friend gave it to me to try in a fiddle. I plan to use Sitka Spruce for the on-piece top of the curly big-leaf maple fiddle, as well as for the spalted maple fiddle. I am hoping to experiment with front plates made of Alaskan Yellow Cedar sometime soon, too.
Different fittings
Depending on the way they look when completed, I may vary my fittings a little, too…haven’t decided yet. I tend to like simple fittings, but I have used fancier fittings, once, and they did look nice– I am just not sure they belong on a bluegrass five string fiddle. Perhaps I can get a set of Oregon Mountain Mahogany pegs, or something. Mountain Mahogany is a very hard wood native to Oregon, but much lighter in color than Ebony, so it adds a different look.
Same Workmanship
I intend to use the same methods as always, including the double purfling that adorned the previous five-string fiddles. I will still use a scraper for the final contour and texture, though perhaps I will leave a little less “corduroy” texture on these than on some others. Some people like less.
Same Varnish
I will use the same Spirit varnish that have always used on all three fiddles, as well as the same graduation scheme and internal arrangements (bass-bar shape and size, etc.), so the sound should be the same.
Same Strings
I will use the Helicore five-string sets, as usual, though I have found some other combinations that work remarkably well.
Progress reports to come
As things progress, I will post photos, so you can see each of the three fiddles grow from a small stack of wood to a completed instrument. Each will emerge as a brand-new, handmade bluegrass 5 string fiddle when complete.
Stay tuned… (no pun intended). 🙂
If you found this post helpful, please share with your friends!
Once the varnish is finished and dry, I complete the final assembly of the cello.
Adding the Saddle
I do something a little different with my saddles: it is not immediately obvious, but the left and right corners of the saddles frequently are a source of cracks in the front plate. Many luthiers combat this tendency by adding a small gap on each side of the saddle, to allow the plates to shrink a little without stressing those corners. I take it a step further, and actually eliminate the corners by putting a significant radius (maybe 10mm) on each corner, so that they are smoothly rounded. Sharp corners are a stress riser, and eventually a crack will form there. A rounded corner adds much less stress to the plate, and, as I also leave the small gap for shrinkage, I anticipate that there will never be a saddle crack in these instruments.
The saddle is cut all the way through the plate, so that it rests upon (and is glued to) the end block. It extends 30mm on each side of the center line and 12mm into the plate. The saddle provides a hard bearing surface for the tailgut to rest upon, so that it does not dig into the soft spruce of the front plate. It is about 12mm high (above the block) at its highest point, but the point is not centered; it is about at the forward third , so that the pressure of the tailgut is transferred directly down into the block, and does not cause the saddle to flip over in either direction.
Adding the Nut
There are two different styles of cello nut: one style allows the contour of the nut to match that of the fingerboard, around the corners, and drops down to about 5mm thick over the corners of the pegbox cheeks. The other follows the contour of the fingerboard, but then extends that contour in a smooth curve down to the corners of the pegbox cheeks, so that the nut follows a smooth arc all the way across. I have done the first way in the past. this time I chose the second. I think I like it.
The nut provides a hard bearing surface for the strings to rest upon, and provides a tiny clearance over the fingerboard, so that the end of the string length is a clean sharp edge, and makes a clear sound.
Installing the pegs.
Once the nut and saddle were glued in place, it was time to start the pegs. I had drilled the pilot holes before beginning the carving of the pegbox, so now all I had to do was to ream them to the correct size with a peg-hole reamer, then shave the pegs to match, using a peg shaver. It sounds easy, but it is fairly laborious and time consuming; Cello pegs are pretty big, and we are shaving off an awful lot of wood. Same for the holes…there is a lot of work in those four little holes. Once the pegs have been correctly fitted, they are treated with a peg-compound that provides a heavy, stiff lubrication…the peg is not supposed to either slip or stick…it should hold the tension of the strings without failing, but allow the player to adjust the pitch smoothly and easily. Once the pegs fit correctly, they have to be removed and trimmed to the appropriate length, the ends polished, and holes drilled for the strings.
Installing the end-pin
Finally, the end-pin hole had to be drilled and reamed, and the end-pin shaved to fit the hole. Pretty much the same procedure as the pegs, with the exception that it is fairly ticklish toward the end…one twist too far, and the end-pin will be loose (guess how I know). If that happens you can use a spiral bushing to shrink the hole back down a tiny bit, and save the day.
I began by using a 5/8″ spade bit to drill a hole all the way through the end block, precisely at the center of the end seam, and perpendicular to the surface, there. Then I used a large tapered reamer to enlarge it into a tapered hole ready to receive the end-pin assembly. The final hole was about 7/8″ diameter at the outer opening.
Other tasks
I did build some cello stands a few days ago, and a rack to hold violins and violas (I settled on a capacity of six instruments). I still have to stain and finish those items, so I can pad them all and have them ready for the upcoming show.
But the cello is essentially done. All that remains now is to cut the string slots in the nut, drill the pegs for strings, fit a bridge and soundpost, and set it up. (Simple, right?) Anyway, here is how it looks today:
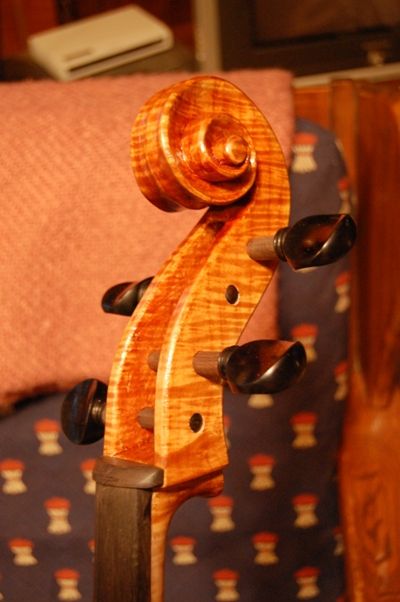
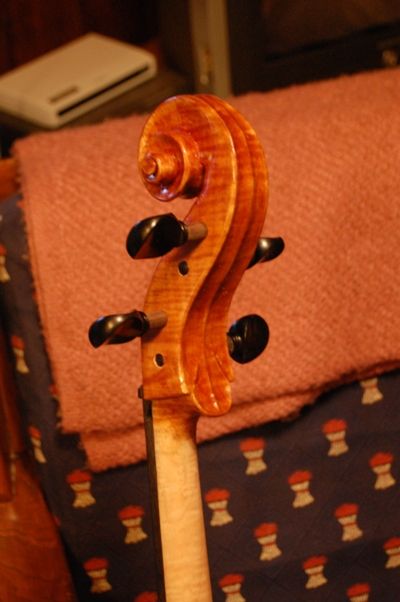
Cello front with nut, saddle, pegs and end-pin.Cello side with pegs and end pin.Cello back with pegs and end-pin.Cello scroll with nut and pegs.Cello scroll back with pegs.
I will still have to give a final polish to all the ebony parts and the varnish, of course, but the cello is very nearly complete. After everything else, I will stain and add a light finish to the handle portion of the neck, so that it does not look so white, and will not pick up dirt too badly.
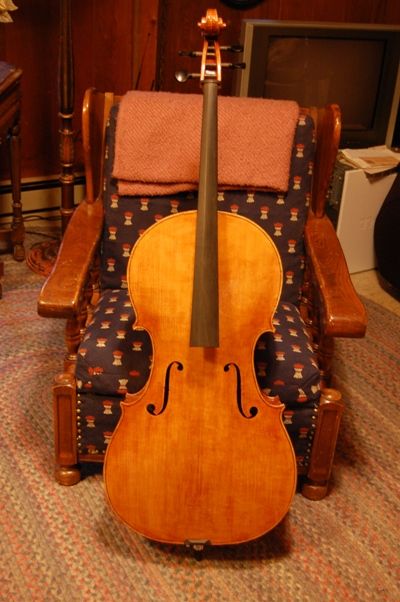
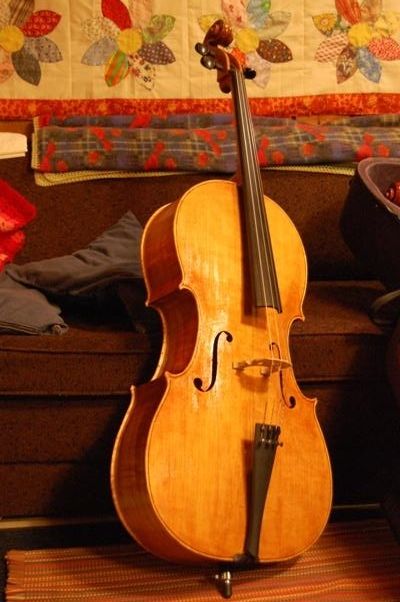
Here is the completed cello:
Completed Cello, modeled after the 1712 “Davidov” Stradivarius
The cello plays very well, and I trust I will find a home for it. I am not surprised that it responds well– this is modelled after the 1712 “Davidov” cello, by Antonio Stradivari…and the original is in professional use by Yo Yo Ma, today. I feel good about that pedigree…. Follow @ChetBishop
If you found this post helpful, please share with your friends!
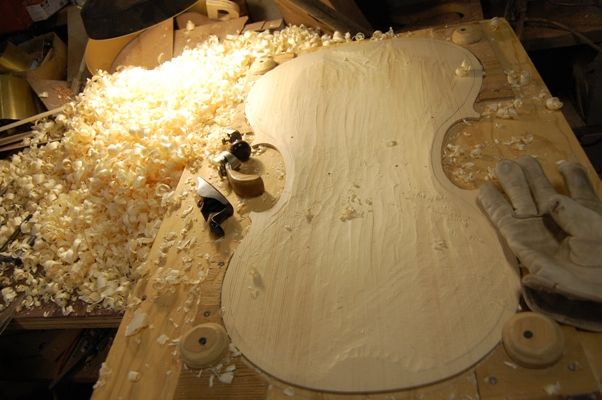
I probably should have used gouges, but the planes are so easy to control and the spruce is so easy to carve, that I chose to use these three planes: (I may still use gouges to get the areas around the end block platforms correct.)
Carving inside of cello top plate: Two hours work, and not done.
As you can see, the plate is not yet done, but I was pretty tired to start with, today, and now I am even more so.
Cello front plate with tools
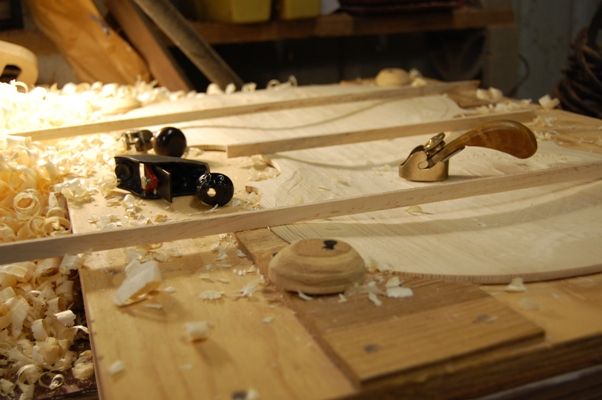
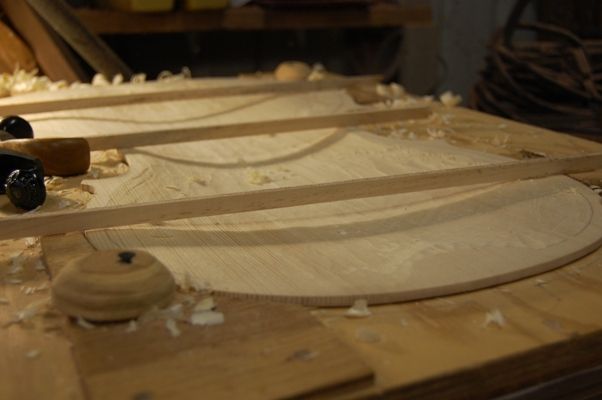
Keeping the Goal in View
Here is how deep the graduations are, so far. I hope to have the thickness of the whole center area at about 5.5mm, fading to 4mm up the center on both ends, and 3mm on the upper and lower “flanks”, for lack of better word. Right now the center is 6mm, and the areas up the center are still about 7mm…the areas out in the skirts are way too thick, still: 10-12mm. It takes a fair amount of care, graduating a cello plate: I have to stop every few minutes and check the thickness with a dial caliper, to avoid making the plate too thin.
Depth of partial graduation–correct in center; unfinished elsewhere.
Perhaps I will have it finished and ready for the bass bar by Tuesday. Tomorrow is busy, and I will work late Monday, so…probably Tuesday. That’s OK: it will give my hands time to recuperate. They are pretty worn out…and that one-piece maple cello back will be much tougher to carve.
I did, however, complete the refinishing of the viola I built back in November. It looks pretty nice, now. So I will have that for the show, as well.
If you found this post helpful, please share with your friends!
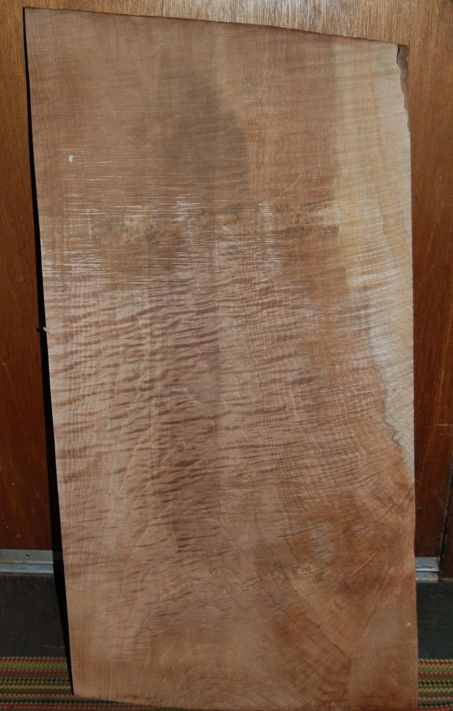
This will be another “Davidov” 1712 Stradivarius model, similar to the one on my Chronology page (instrument #16), but with a one-piece back. I like one-piece backs, but they are not very common on a cello. This wood (back, sides and neck) is from the same maple log as that from which instrument #19 (five-string fiddle #2) is made. The belly will be Sitka spruce. I plan to make the whole instrument darker than the last one was. Here is a photo of the slab from which the back will be made:
This is a slab of old-growth Big-leaf Maple heartwood. Not everyone will use heartwood, but I like it. I planed some of the rough surface off so that you can see the flame in the wood.
I will try to post photographs of the progress, as the cello emerges.
If you found this post helpful, please share with your friends!
Classical violin, modeled after the 1735 “Plowden” Guarneri del Gesu
December 2012;
For my 21st instrument, I decided to try a “copy” (rather a loose imitation) of a Guarneri del Gesu violin, the 1735 “Plowden”; it turned out very playable; well balanced, with good tone. It is made of European maple and spruce, purchased from International Violin Co., in Baltimore, Maryland.
I messed up the varnish and had to start over, so the varnish did not come out exactly the way I wanted it to…but it looks pretty similar to the original, even at that. So I am happy with it.
I’ll try this model again, soon. But the next thing on my list is another cello. 🙂
If you found this post helpful, please share with your friends!

 Follow