
 Follow

Beginning Graduation (inside carving)
How Thick?
This becomes another critical issue: How thick should the plate be at any given point? I will try to follow the poster to some degree, but it was only correct for that particular instrument, with that particular set of plates. The wood I have may not be anywhere close to the same stiffness or density, so I have to get into some sort of “ball-park” range, and then start making decisions based on this wood that I am carving. How it feels, how it flexes, how it sounds when I tap on it, all make a difference in my mind, though I am aware that there are some standard thicknesses to which many makers adhere.
Others measure the vibrations of the nearly completed plates using a frequency-generator, and try for certain frequencies to make a certain set of patterns (called eigenmode frequencies, and nodal patterns, or Chladni patterns). I have tried this and couldn’t get it to work for me. Then, one day at a workshop, one maker was haranguing me that I wasn’t graduating my plate correctly, and took me out to the plate-shaker thing, and demonstrated to his satisfaction that I had it “all wrong”. I had simply followed some graduation thickness numbers given me by a master maker (who does not want me mentioning his name), so I could not tell him that. I was feeling pretty glum about the whole exchange, when he looked up and saw another maker coming in, who he considered to be an expert at testing plates. He said “Ask him! He’ll tell you!”
So, the other fellow obligingly came over and began setting up the plate-shaker, while the first guy stalked off.
I noticed that the second guy did not set it up at ALL like the first guy had done, but I kept my mouth shut. He ran through the frequencies and numbers, and finally said, “It’s perfect! Don’t do another thing to it! Install the plate!”
So, I walked back into the work area, not intending to say a word, but the first fellow was waiting for me: “Well?! What did he say??” I repeated, verbatim, the second fellow’s verdict. The first guy said “What??!! How come I got the numbers I did??” I replied, “I couldn’t tell you! I don’t know how to run that machine!” No more interference that week… 🙂
So…the point is, there are a variety of ways to achieve the goal of good plate graduation. That experience convinced me that even just following a set of established thickness values can work just fine. And, ultimately, that is probably about what I will do, on this violin.
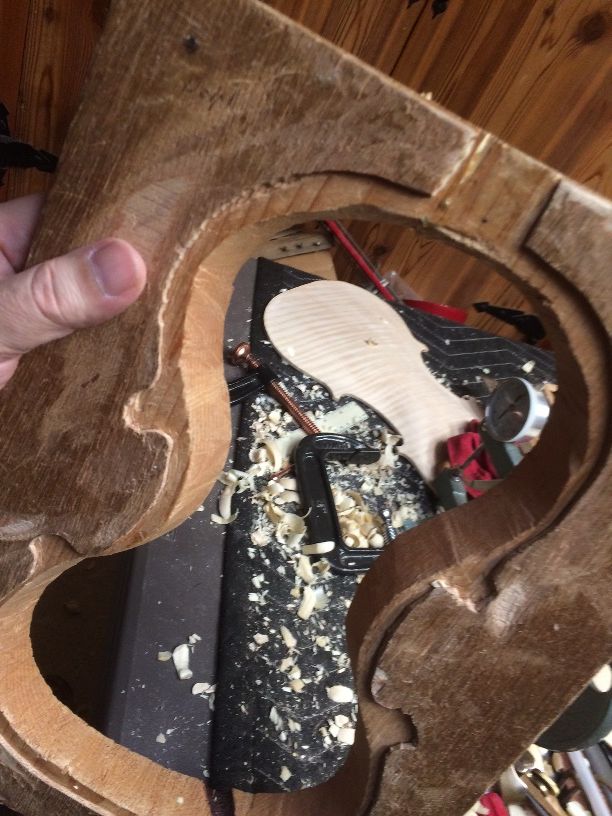
Moving Wood
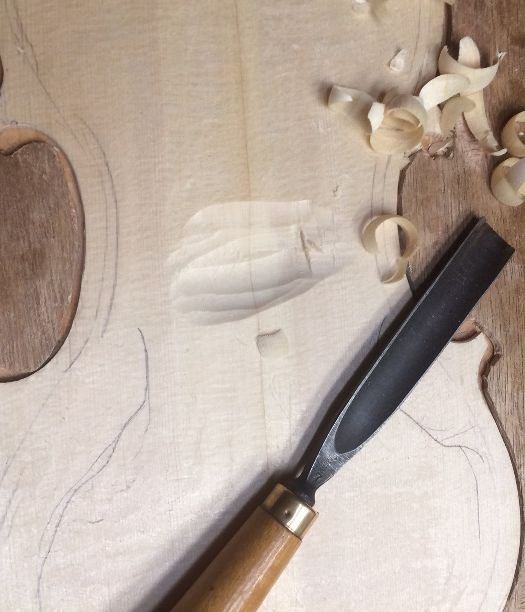
I began with a gouge, trying to get within a few millimeters of the right center thickness.
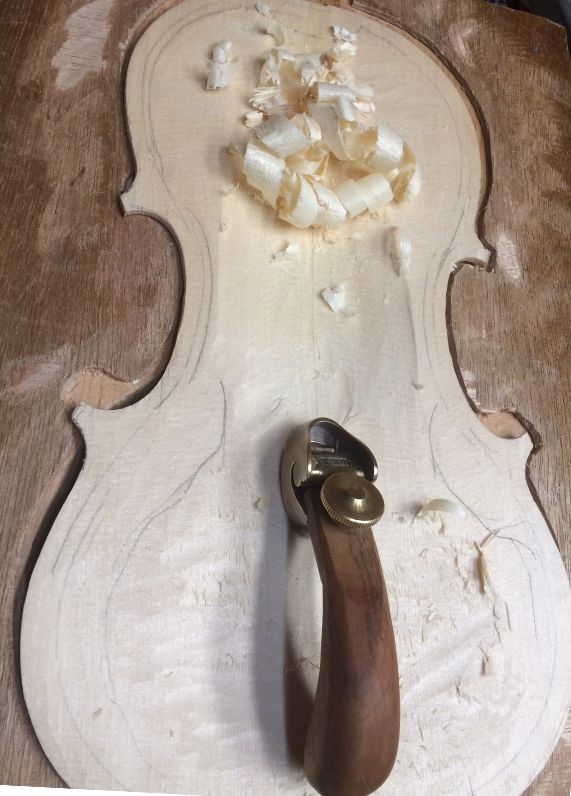
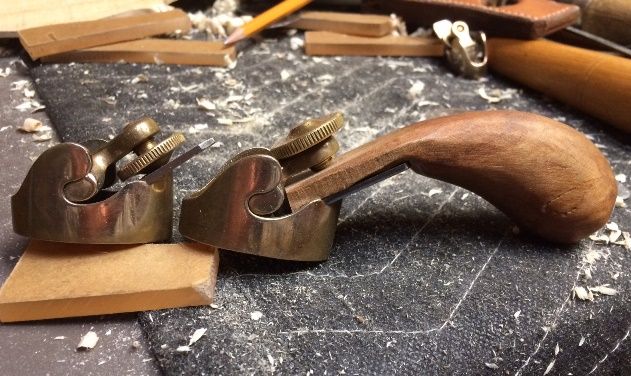
Then I switched over to a toothed plane, which I find more comfortable to use. The handle on it is a modification I added to shift the pressure to the heel of my hand instead of my thumb and forefinger.
Repairs
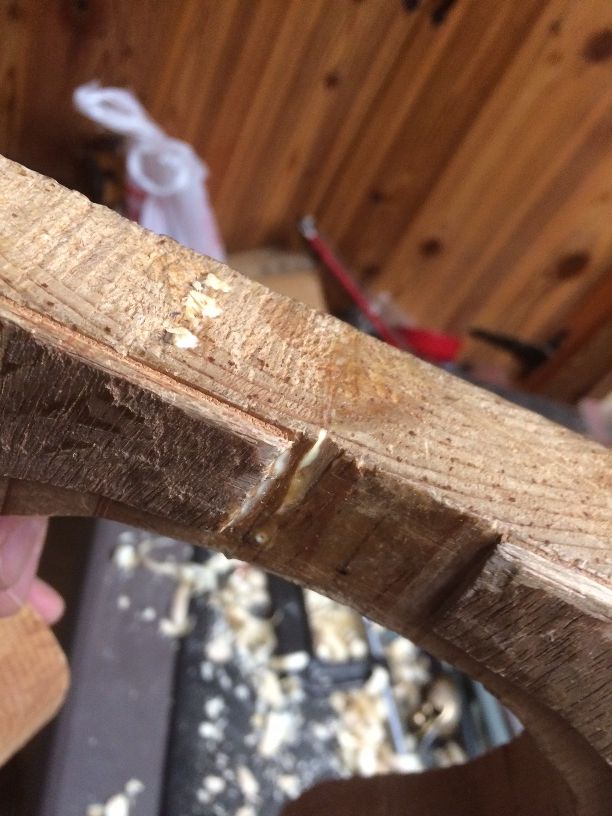
But then I heard a cracking sound: Not a good thing to hear when you are working on a violin. I looked the plate over and could find nothing amiss, so I went back to moving wood. Heard it again, louder. (Sigh…)
It turned out my work-cradle had broken! (What a relief!) Well, I made it 15 years ago, and it has served well, so I took the time to glue it and insert three dowels, diagonally, through the break, to hold the joint against further failure.
Back to work:
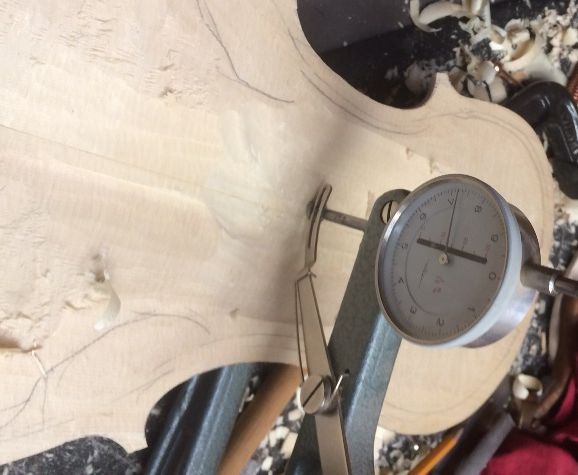
I am aiming for about 4 millimeters in the middle, and all over, which I will refine later to the specific measurements I want. In the photo, below, reading the dial on the caliper, you can see I am nowhere close. But…I’m tired, and I’m going to call it a night. By the way, in case anyone was wondering, those jagged-looking black pencil lines around the lower corners are outlining an area that was pretty close to the right thickness already: I don’t want to touch them until I am on the home-stretch where graduation is concerned. It is VERY easy to get too enthusiastic and carve too deeply in such an area, and ruin the plate.
So, next time, I hope to have the graduation complete, so I can cut out the f-holes and install the bass-bar.
Thanks for looking.