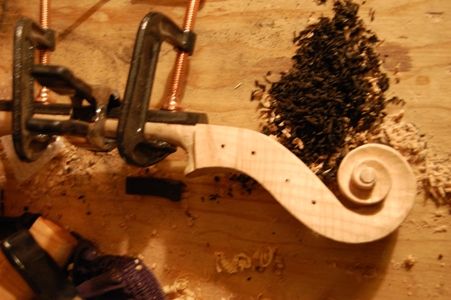
Final assembly of a Davidov model cello

Please share with your friends!

How to complete the assembly of the cello

Remove the mold and clean up the interior of the corpus.

In my case, since the mold is collapsible and comes apart in several pieces, it is pretty convenient to get the mold out. I use a small electric screwdriver to remove eight drywall screws, and back off twelve more, and the thing just comes right out…no fuss. The twelve that were just backed out are the ones securing the corner blocks and neck and end blocks in the mold. So, here is the corpus, fresh off the mold, with all the blocks still square and rough, and the linings only roughly trimmed, not scraped.
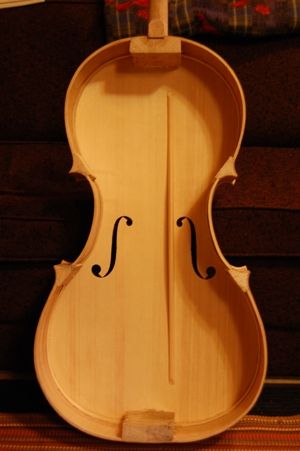
Rough cello interior
Cello interior immediately after removing the mold. All the blocks are still rough and square. Linings still need final scraping.
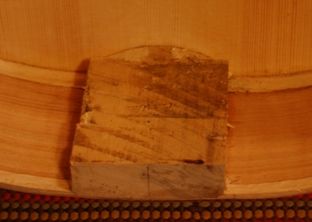
Rough cello end block
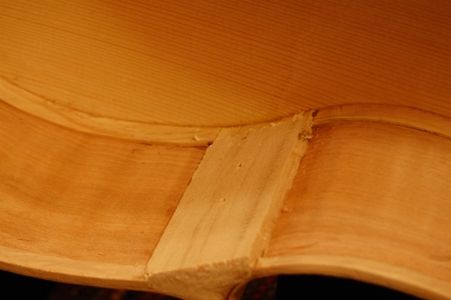
This is the end block. You can see the rounded part that I shaped before installing the front plate, so that I would not risk damaging the front plate while shaping it. The rest of the block was out of reach in the mold. Now it is time to shape all the blocks.
Rough cello corner block and linings.
Here’s what the corner blocks and linings looked like. The linings had been trimmed with a knife, but not scraped.

So– the next hour or so was spent chiseling, planing and scraping all those blocks to their final shape, and scraping the linings as smooth as I could get them. Here is what it looked like afterward:
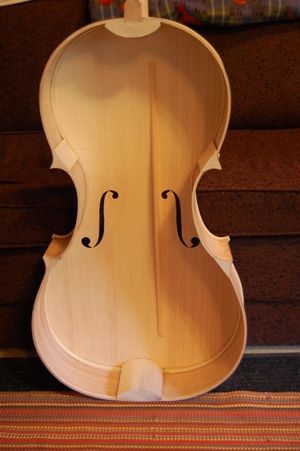
Cleaned cello interior, just before closing.
I tend to make my neck and end blocks a little oversize. I have seen blocks split and break, because they were too small…it seems an easy way to insure against that sort of thing. All the blocks are now the size and shape I want them, and scraped smooth.

Install the Back Plate

So, the next step is to get the back plate in place. I aligned it carefully, checking all the margins to see that the overhang was fairly even all around, then clamped it in place, dry, using spool clamps. After I was satisfied that the overhangs were correct AND the elevation of the fingerboard was correct (an easy thing to mess up, as the corpus is quite floppy at this point), then I clamped everything solidly, and began removing a few clamps at a time, and inserting hot hide glue, using a palette knife. I washed off the excess glue with hot water, and re-tightened all the clamps.

Here the cello is in all its spool clamps, with one bar clamp to secure the button to the heel of the neck.
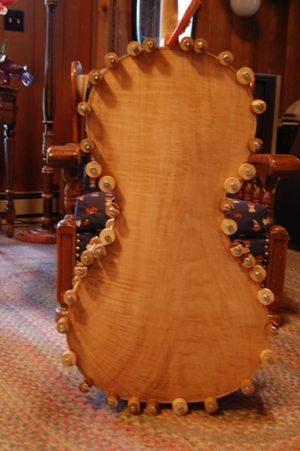
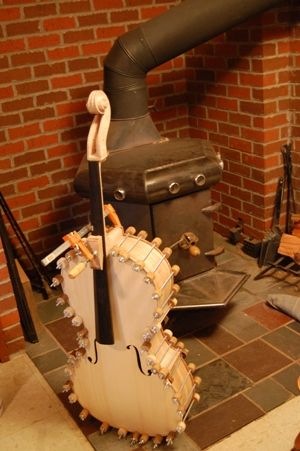
Callo back installed with hot hide glue and spool clamps.
The cello back is fully installed, with hot hide glue and spool clamps. The bar clamp secures the back button to the neck heel.
Cello glue drying by woodstove.
The house was pretty cold this morning, so I decided that the cello would dry faster in a warm room. Close to the woodstove (but not too close) is the best place I could find.

Final edge-work, scraping, preparation for varnish

After the glue was thoroughly dry, I removed all the clamps and began trimming edges, and perfecting the scroll and heel. The heel was almost a half inch high (which I expected…we leave extra, so that the heel and button are trimmed and shaped together, and match perfectly when we are done.) The scroll was still quite rough. I spent the rest of the day and late into the evening, scraping and planing, and trying to get the cello ready for finishing. Finally ran out of steam about nine PM, but it is nearly complete. Here is what it looks like tonight:
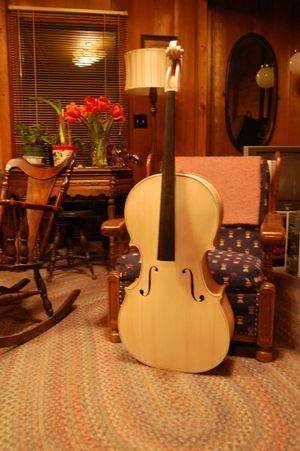
Cello in the white from front side.
Cello in the white, from the front. A little more edge-work to do, tomorrow morning, and I can begin the finish work.
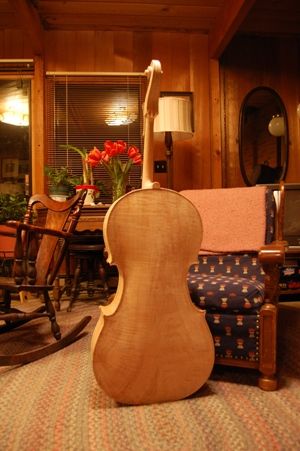
Cello back in the white.
And there is that one-piece back…it has come a long way since that big slab we started with, hasn’t it? I still have some final smoothing of edges, etc. to do, then it is time for varnish.

Actually, I typically use a very weak water-base stain first, which will make the spruce a tan color, instead of cream-colored. Then I will sand it lightly with fine micromesh, seal it, and start applying varnish. (On the home-stretch, now!)

For those wondering about the pegs, saddle, nut, etc.; I wait until the varnish is complete before adding those fittings.

If you found this post helpful, please share with your friends!

How I carve a Scroll

Please share with your friends!

Cello Scroll Carving Made Simple 🙂

There is nothing special about the way I carve scrolls. As far as I know, this is how everyone else does it, too, more or less. I am only sharing how I do it.

Start by tracing and sawing out the profile of the whole neck.

I don’t have a photo of the scroll as a simple profile, but I begin with the billet (About 6″ x 3″ x 20″), and trace my template onto it, then use a bandsaw to cut the shape of the profile. I use a oscillating spindle sander to remove the saw marks, and perfect the profile right to the line. While the profiled block is still “square”–that is, while the sides are still parallel, I lay out the peg hole locations and use a drill press to make 1/8″ diameter pilot holes where each peg will be. I drill all the way through, so that the holes are clearly marked, and are perpendicular to the center plane of the neck.

Next cut out the pegbox and at least a few inches of the neck

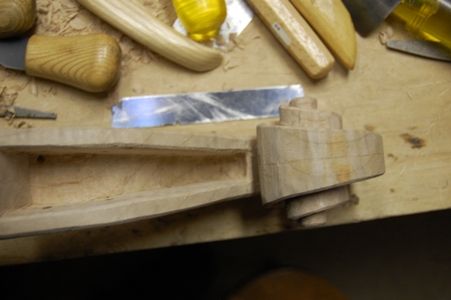
I hollow out the pegbox before carving the scroll proper. Some people use a drill to get started. I have done it this way, but it seems a little risky, unless you put some sort of limiter on the drill, to avoid going too deep– and even then it is easy to go out of bounds. I use a narrow chisel to remove most of the rough wood, then a wider chisel to smooth the inside cheeks of the pegbox. I also saw off the excess wood on the outside of the pegbox, and plane those faces flat.

Then draw the shape of the scroll itself.

Usually we use a template for this, as well. Some people plot out each scroll with a straight-edge and compass. I have neither the time nor the inclination. In this case, my templates came from a poster of the 1712  “Davidov” Stradivarius cello, now being played by Yo Yo Ma. Some information was lacking, and I filled that in from Henry Strobel’s book on cello making.

And begin cutting:

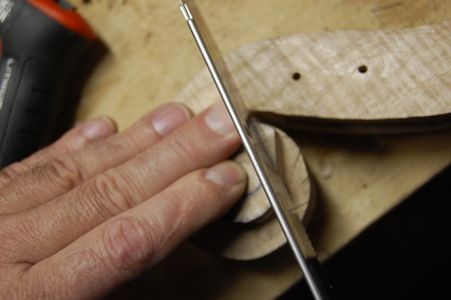
Once the scroll is drawn out, I clamp the neck to my workbench and, using a Japanese-style pull-saw, I begin cutting slots nearly to the layout lines of the volute. I rotate my position a few degrees, and make another cut. I have to be careful to avoid cutting too deeply, but this method allows me to chip away the waste wood rapidly, and the scroll begins looking like a scroll rather quickly.

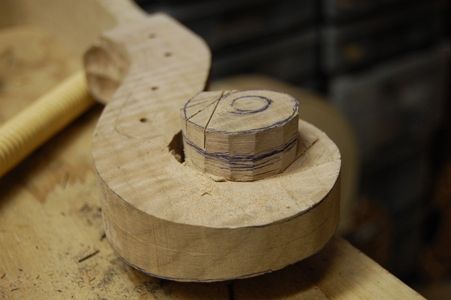
Beginning the scroll, proper.
Pegbox is complete, volute partially carved. The cut lines are visible on the portion of the volute that has already been carved. Now we will carve the scroll, proper.
Cutting more kerfs to remove wood.
Care must be taken to avoid drifting across the line into the turns of the volute.
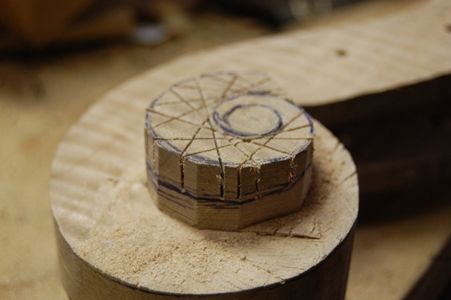
Cutting a series of kerfs for wood removal in carving a scroll.
You can see the direction this is going…I will continue to slice down nearly to the line, rotating a little each time, until I have gone all the way around.
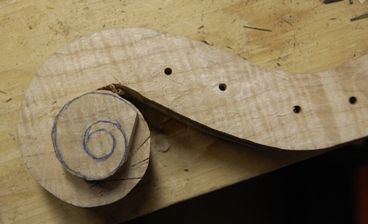
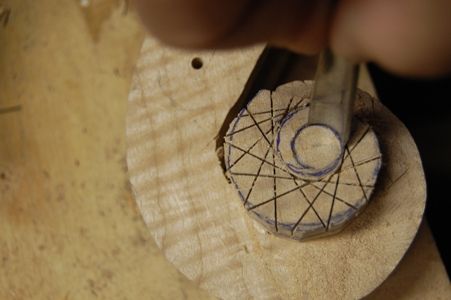
Using a gouge to outline the eye of the scroll.
Once the kerfs are all in place, and to the correct depths, I use a gouge to outline the eye of the scroll, so as not to damage it with the saw.
Kerfs in place, and eye of scroll deeply incised. Carving can begin.
All the kerfs are complete, and the eye is deeply incised with the gouge–I am ready to start carving.
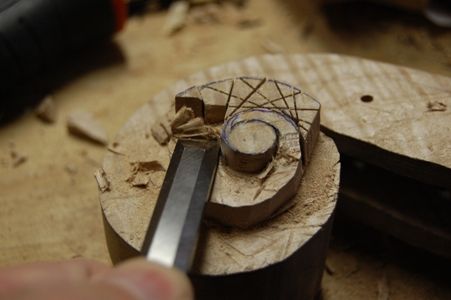
Use a flat chisel to remove the waste wood, and the scroll begins to emerge.
I use a flat chisel to remove the waste wood, and the scroll begins to emerge.
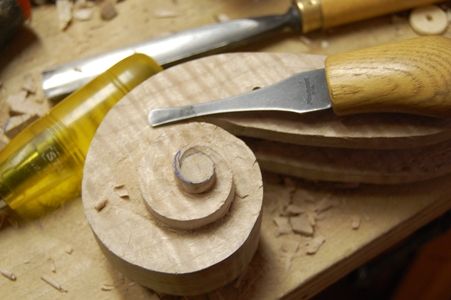
Once the waste wood is completely gone the
Once the waste wood is completely gone the “undercut” carving can begin.
Bi-lateral symmetry
I try to make sure the two sides match symmetrically, before beginning undercut. I do the outside fluting last, to avoid damaging it while carving other parts of the scroll.
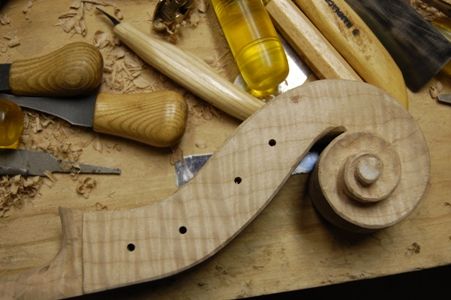
Bass side of cello scroll, nearly complete.
Here is the bass side of the scroll, nearly complete.
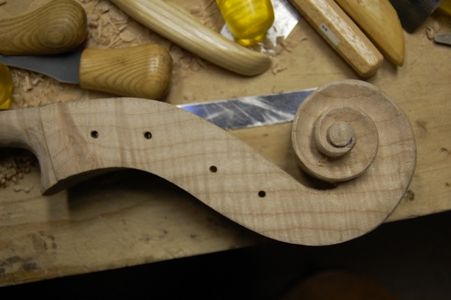
Treble side of cello scroll, nearly complete.
And, here is the treble side.
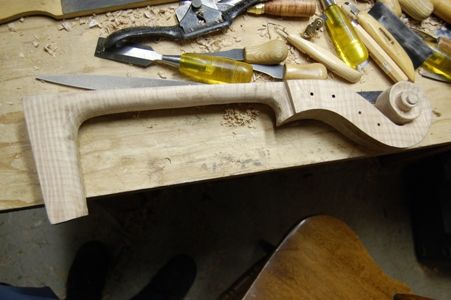
Cello neck and scroll, nearly complete.
The neck and scroll are nearly complete. I will continue to fine-tune and scrape the scroll, perfecting it as best I can, right up to the day I begin varnishing.
Fingerboard installed on Cello neck, with hide glue and clamps.
I have prepared the fingerboard, and now I have installed it, using hot hide glue and clamps.

So– that was entirely enough for today. Tomorrow I will continue to refine the scroll and neck, and try to get the neck set. If I succeed, then I can remove the mold and install the back plate.

If you found this post helpful, please share with your friends!