Final assembly of a finished cello.

Please share with your friends!

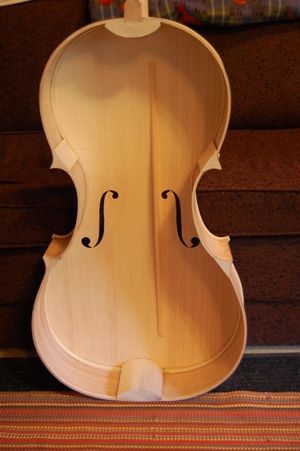
Once the varnish is finished and dry, I complete the final assembly of the cello.
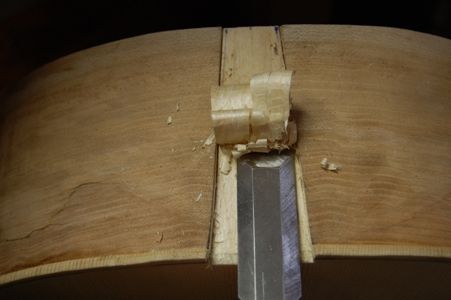
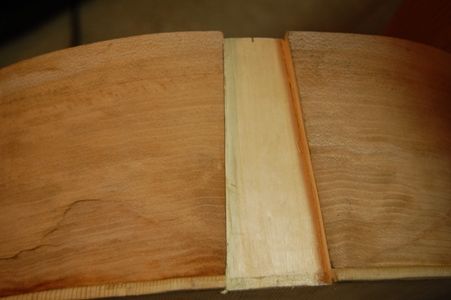
Adding the Saddle

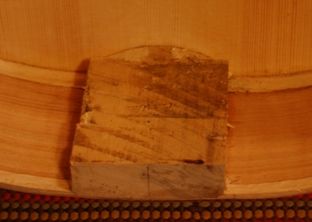
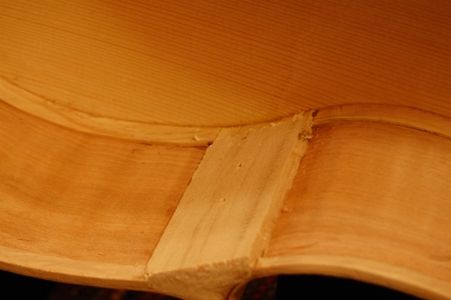
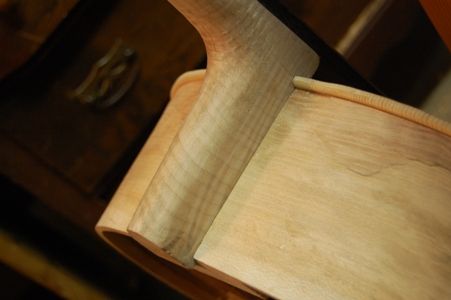
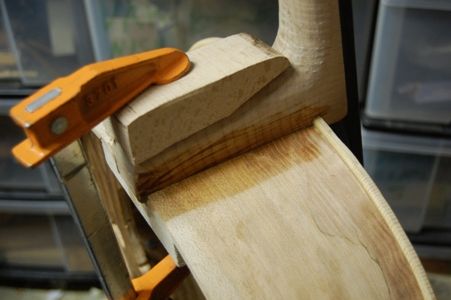
I do something a little different with my saddles: it is not immediately obvious, but the left and right corners of the saddles frequently are a source of cracks in the front plate. Many luthiers combat this tendency by adding a small gap on each side of the saddle, to allow the plates to shrink a little without stressing those corners. I take it a step further, and actually eliminate the corners by putting a significant radius (maybe 10mm) on each corner, so that they are smoothly rounded. Sharp corners are a stress riser, and eventually a crack will form there. A rounded corner adds much less stress to the plate, and, as I also leave the small gap for shrinkage, I anticipate that there will never be a saddle crack in these instruments.

The saddle is cut all the way through the plate, so that it rests upon (and is glued to) the end block. It extends 30mm on each side of the center line and 12mm into the plate. The saddle provides a hard bearing surface for the tailgut to rest upon, so that it does not dig into the soft spruce of the front plate. It is about 12mm high (above the block) at its highest point, but the point is not centered; it is about at the forward third , so that the pressure of the tailgut is transferred directly down into the block, and does not cause the saddle to flip over in either direction.
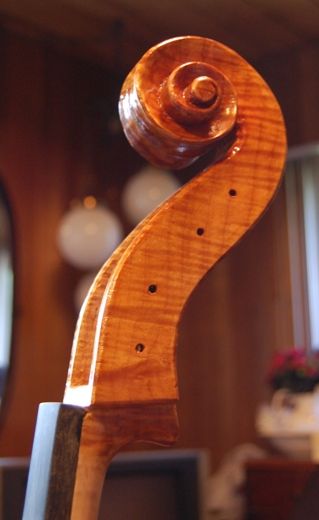
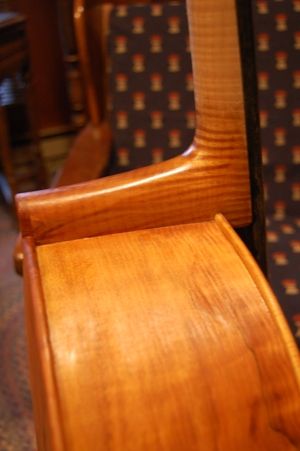
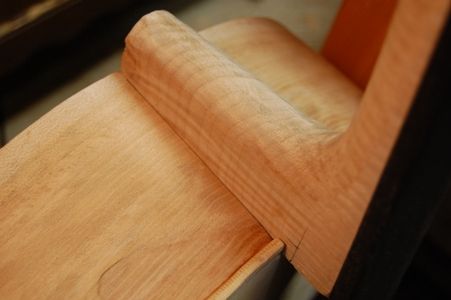
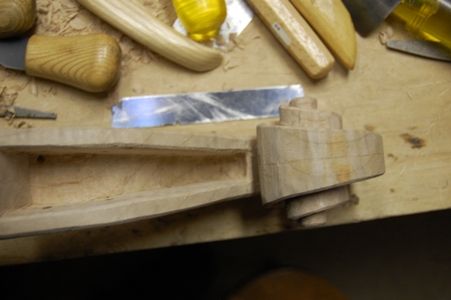
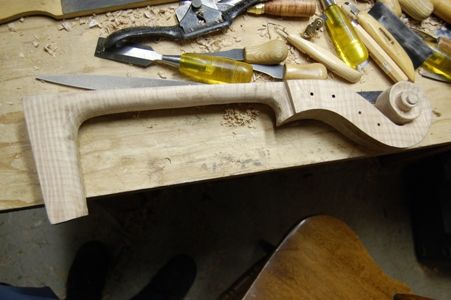
Adding the Nut

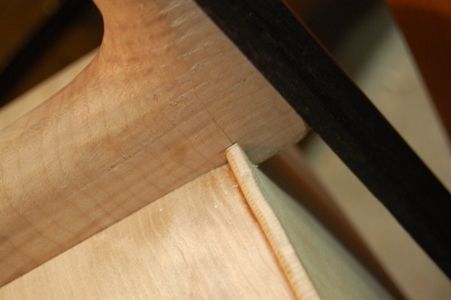
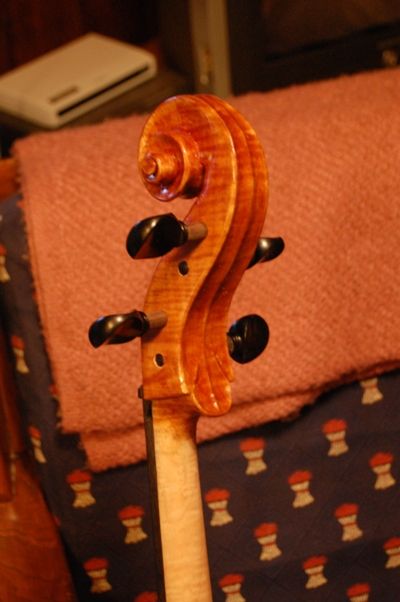
There are two different styles of cello nut: one style allows the contour of the nut to match that of the fingerboard, around the corners, and drops down to about 5mm thick over the corners of the pegbox cheeks. The other follows the contour of the fingerboard, but then extends that contour in a smooth curve down to the corners of the pegbox cheeks, so that the nut follows a smooth arc all the way across. I have done the first way in the past. this time I chose the second. I think I like it.

The nut provides a hard bearing surface for the strings to rest upon, and provides a tiny clearance over the fingerboard, so that the end of the string length is a clean sharp edge, and makes a clear sound.

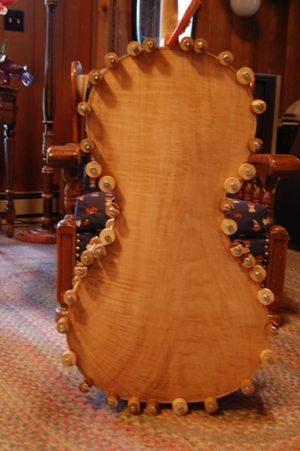
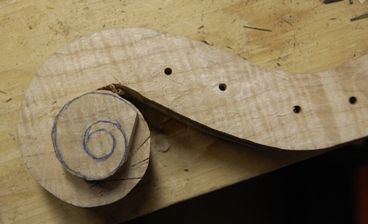
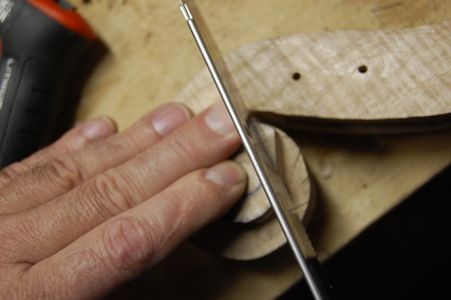
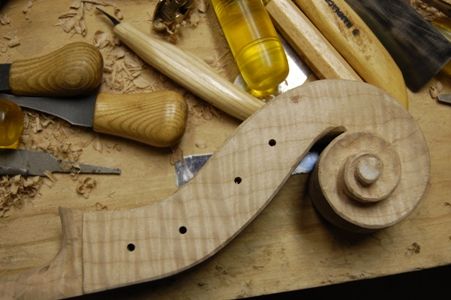
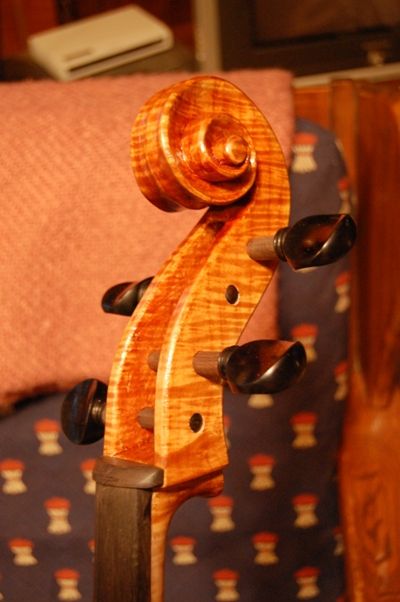
Installing the pegs.

Once the nut and saddle were glued in place, it was time to start the pegs. I had drilled the pilot holes before beginning the carving of the pegbox, so now all I had to do was to ream them to the correct size with a peg-hole reamer, then shave the pegs to match, using a peg shaver. It sounds easy, but it is fairly laborious and time consuming; Cello pegs are pretty big, and we are shaving off an awful lot of wood. Same for the holes…there is a lot of work in those four little holes. Once the pegs have been correctly fitted, they are treated with a peg-compound that provides a heavy, stiff lubrication…the peg is not supposed to either slip or stick…it should hold the tension of the strings without failing, but allow the player to adjust the pitch smoothly and easily. Once the pegs fit correctly, they have to be removed and trimmed to the appropriate length, the ends polished, and holes drilled for the strings.

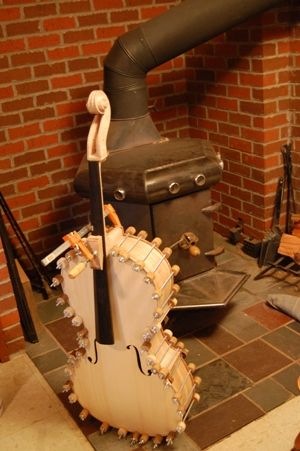
Installing the end-pin

Finally, the end-pin hole had to be drilled and reamed, and the end-pin shaved to fit the hole. Pretty much the same procedure as the pegs, with the exception that it is fairly ticklish toward the end…one twist too far, and the end-pin will be loose (guess how I know). If that happens you can use a spiral bushing to shrink the hole back down a tiny bit, and save the day.

I began by using a 5/8″ spade bit to drill a hole all the way through the end block, precisely at the center of the end seam, and perpendicular to the surface, there. Then I used a large tapered reamer to enlarge it into a tapered hole ready to receive the end-pin assembly. The final hole was about 7/8″ diameter at the outer opening.

Other tasks

I did build some cello stands a few days ago, and a rack to hold violins and violas (I settled on a capacity of six instruments). I still have to stain and finish those items, so I can pad them all and have them ready for the upcoming show.

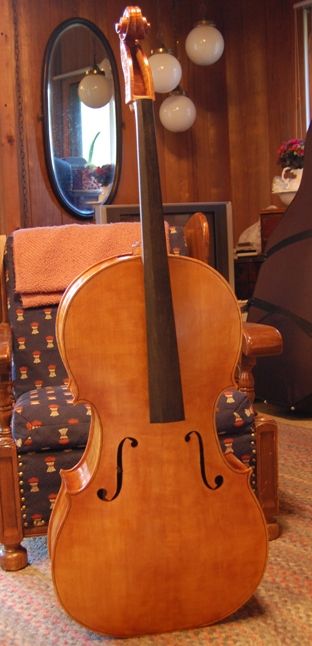
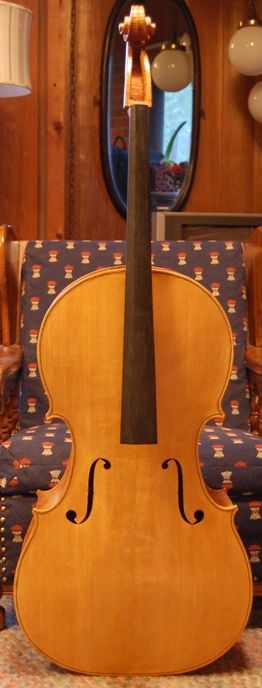
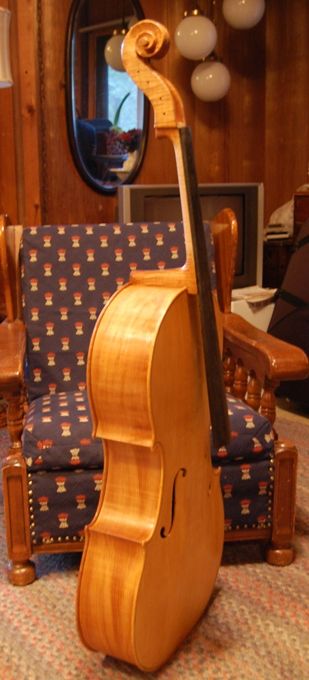
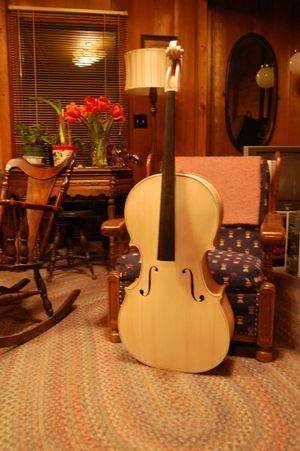
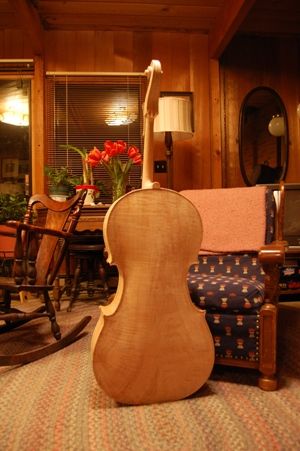
But the cello is essentially done. All that remains now is to cut the string slots in the nut, drill the pegs for strings, fit a bridge and soundpost, and set it up. (Simple, right?)  Anyway, here is how it looks today:

Cello front with nut, saddle, pegs and endpin.
Cello front with nut, saddle, pegs and end-pin.
Cello side with pegs and end pin.
Cello back with pegs and end-pin.
Cello scroll with nut and pegs.
Cello scroll back with pegs.

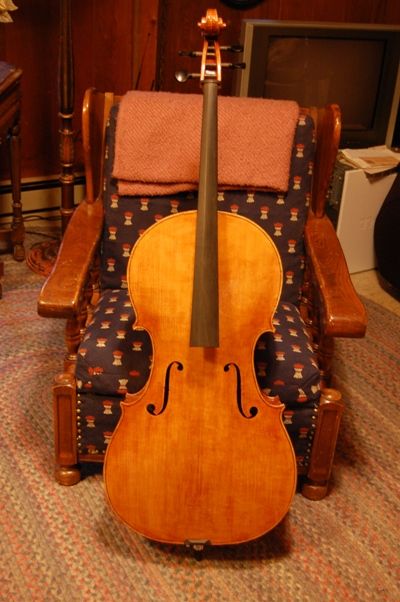
I will still have to give a final polish to all the ebony parts and the varnish, of course, but the cello is very nearly complete. After everything else, I will stain and add a light finish to the handle portion of the neck, so that it does not look so white, and will not pick up dirt too badly.

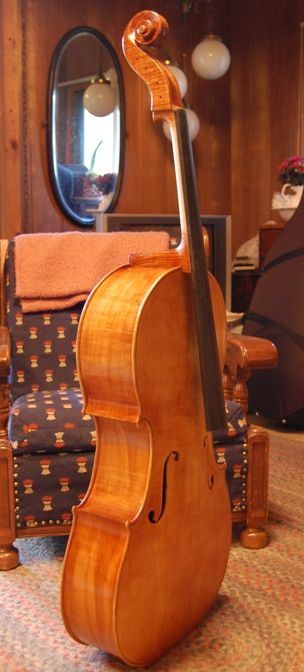
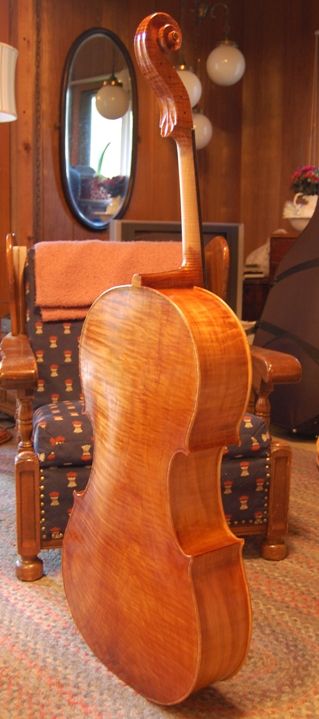
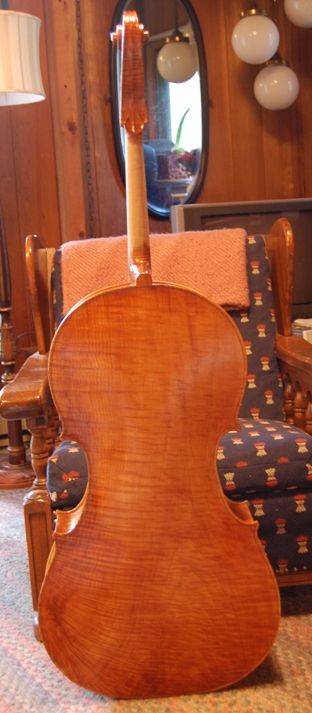
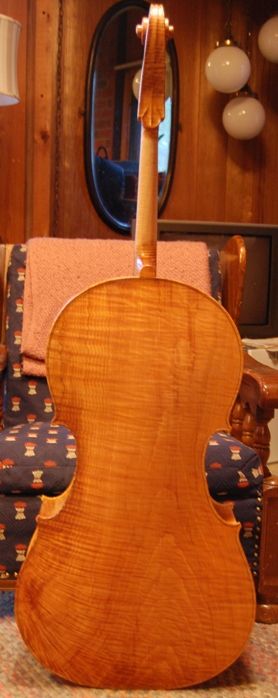
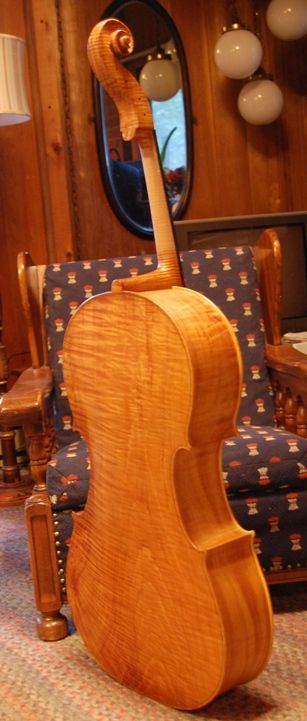
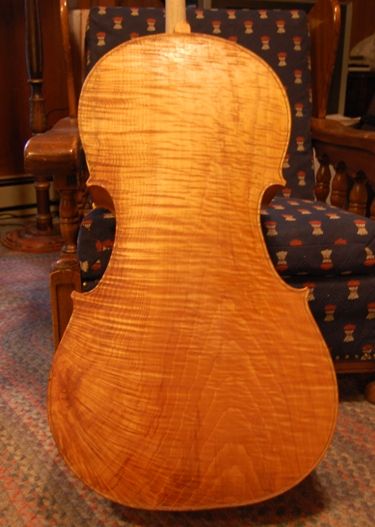
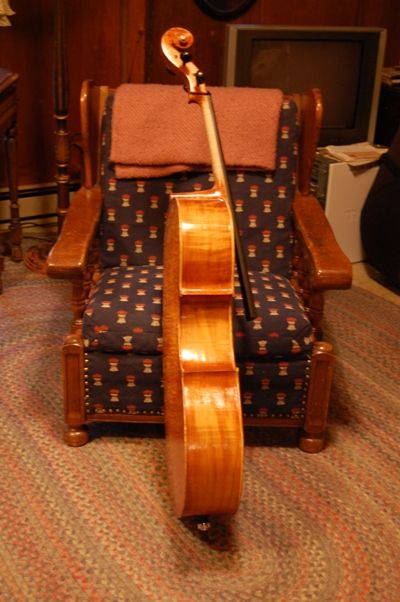
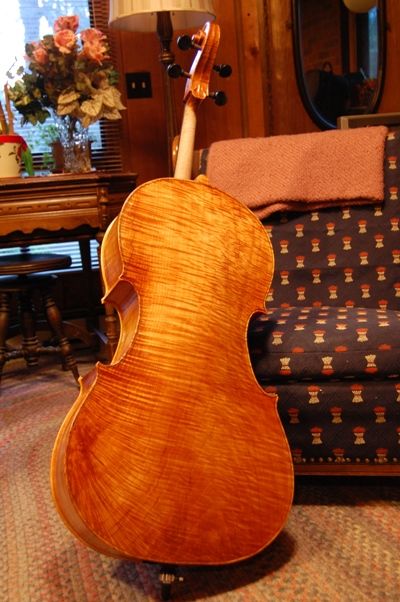
Here is the completed cello:

Completed Cello, modeled after the 1712
Completed Cello, modeled after the 1712 “Davidov” Stradivarius

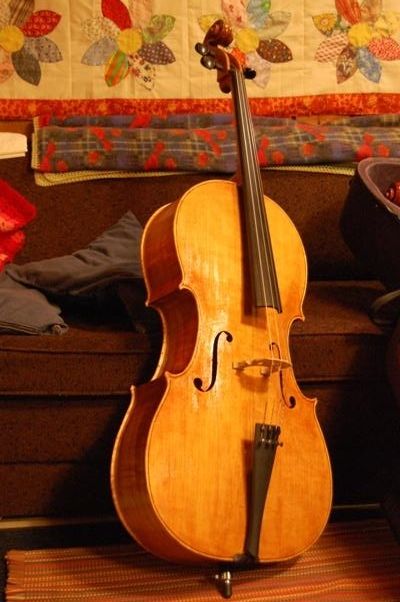
The cello plays very well, and I trust I will find a home for it. I am not surprised that it responds well– this is modelled after the 1712 “Davidov” cello, by Antonio Stradivari…and the original is in professional use by Yo Yo Ma, today. I feel good about that pedigree….

If you found this post helpful, please share with your friends!

How I Varnish a Cello (Part two)

Please share with your friends!

Continuing the Varnishing Process

Sand between varnish coats?

As a general rule, I sand between varnish coats, especially after the seal coat and first varnish coat. They tend to leave the surface very rough, possibly because each fiber of the wood surface that is not a firm part of the surface tends to stand up, completely surrounded by varnish. Once the varnish dries, all those little splinters, or whatever they are, are left sticking up everywhere, with the result being a very rough surface, literally like coarse sandpaper.

The phenomenon does not seem to repeat itself, so I think I am pretty close to correct, as far as explanation. If not, I would be happy to be corrected. But subsequent coats generally need very little sanding, provided the first one was really carefully smoothed before continuing. So…that is what I did, here. I very carefully sanded the entire instrument, which took a long time. Then I carefully wiped the instrument down with a soft rag, to remove all the dust, and used a cheap stiff brush to remove any dust in corners.

Adding Color Coats, then Clear Coats

One of the things I wanted was to add color in certain areas–shading, if you want to call it that. I added color especially in corners,  on the ribs near the miters, and near the neck, etc.  Also in the undercut portion of the scroll, and in the fluting on the back of the scroll. I am not going to “antique” the instrument, but I do like some gentle shading.

After the first color coat dried, I added another, not sanding between coats. Each color coat was very thin, only adding a tiny bit of reddish brown. I gently rubbed the whole instrument down with a foam-backed, well-worn, 320-grit pad, and then added my first full clear coat. That pretty much took up the whole day, so the following photos are what the cello looks like after four total varnish coats.

Cello front with four coats of varnish.
Cello front quarter with four coats of varnish.
Cello back quarter with four coats of varnish.
Back quarter
Cello back with four coats of varnish.
back view
Cello scroll with four coats of varnish.
Scroll
Cello f-hole and corners.
Sound hole and corner–you can see the gentle shading around the corners.

The varnish really needs to harden up before I continue– and, except for some small corrections of color, repair of varnish flaws, etc. the next thing will really be final assembly– it still needs a nut, a saddle, an end-pin assembly, a bridge, four tuning-pegs, and a sound-post.  Besides, the fingerboard still needs dressing. It does not have the correct camber, as yet.  So the next post may just be about final assembly. I might show more varnish pictures, but the changes you will be able to see in photos will be minimal. In person, yes, it makes a great deal of difference.

If you found this post helpful, please share with your friends!

How I varnish a cello (part one)

Please share with your friends!

Beginning the cello finishing process.

Preparation for varnishing

Once I am sure that all the construction, carving, assembling and scraping is done, I go over the entire instrument looking for “bumps”; tiny discontinuities that will definitely catch the eye after varnishing, but are difficult to see in the white. (Violin-family instruments in the unvarnished state are referred to as being “in the white”, as the color of the wood is very light cream colored, as a rule.)

I use low-angle, relatively dim light to make shadows, hoping that even tiny irregularities in the wood will make enough shadow that I can detect them and gently remove them with a very sharp scraper. In may case, my wife has a better eye for these sort of flaws, so I enlist her help, to find ones that I miss (and invariably, she does). Once the edges, corners and all other surfaces are as close to perfect as I can get them, I brush a weak water-based stain all over it…well…actually, coffee, as strong as I can make it, but it makes only a small change in the color of the wood. the spruce becomes a very light tan, after two coats have been applied and allowed to dry. Between coats, as the water swells the grain of the wood, I sand all over, very lightly, to remover little splinters and rough spots that the water raised up.  I happen to like the spruce grain slightly raised, so I am not trying to remove the “corduroy” effect. I just want it to be smooth to the touch, in spite of the ripples.

Seal coat(s)

I have been using rosin for a sealer…the last cello, I used rosin mixed with turpentine, which worked nicely, but took a few days to dry. This time I am running out of time, and do not have a few days…so I mixed the rosin with alcohol, and a tiny bit of yellow dye. I sealed the whole instrument except the handle area of the neck, using the rosin, allowed it to dry, and put on a coat of spirit varnish to complete the seal. The next step will be a color coat that I hope will define what the cello will look like. If that succeeds, then the remaining coats will be pretty much clear spirit varnish.

So here is what the cello looks like with just the seal coats, as described:

Cello front with one coat of varnish.
Here is the front, with the one coat of varnish over the rosin sealer.
One-piece cello back with one coat of varnish
And the one-piece back, with the grain beginning to show. Varnish does wonders, doesn’t it?
Front quarter view of cello with one coat of varnish
Here’s a front-quarter view with one coat of varnish over the rosin sealer.
Back quarter view of cello with one-piece back, and one coat of varnish.
Back quarter view, same light.
Showing the flame of a one-piece cello back, with one coat of varnish.
Showing the flame of that one-piece back.
Neck joint of cello with one coat of varnish.
Interestingly, the sides were actually cut from the same billet as the back, but that portion evidently had a good deal less flame. The neck is a different billet entirely. Nice flame, there.
Cello scroll with one coat of varnish.
And there’s the scroll. Funny, from this angle, I am seeing things I want to correct. It may be too late. I will have a close look at it tomorrow evening, and make a decision.

Anyway– there you have it. The varnishing process is begun. I use spirit varnish which dries very rapidly, so I may be able to make pretty rapid progress. I hope so– the show is in less than two weeks. 🙁

And after varnishing: final assembly and set-up!


If you found this post helpful, please share with your friends!

Final assembly of a Davidov model cello

Please share with your friends!

How to complete the assembly of the cello

Remove the mold and clean up the interior of the corpus.

In my case, since the mold is collapsible and comes apart in several pieces, it is pretty convenient to get the mold out. I use a small electric screwdriver to remove eight drywall screws, and back off twelve more, and the thing just comes right out…no fuss. The twelve that were just backed out are the ones securing the corner blocks and neck and end blocks in the mold. So, here is the corpus, fresh off the mold, with all the blocks still square and rough, and the linings only roughly trimmed, not scraped.

Rough cello interior
Cello interior immediately after removing the mold. All the blocks are still rough and square. Linings still need final scraping.
Rough cello end block
This is the end block. You can see the rounded part that I shaped before installing the front plate, so that I would not risk damaging the front plate while shaping it. The rest of the block was out of reach in the mold. Now it is time to shape all the blocks.
Rough cello corner block and linings.
Here’s what the corner blocks and linings looked like. The linings had been trimmed with a knife, but not scraped.

So– the next hour or so was spent chiseling, planing and scraping all those blocks to their final shape, and scraping the linings as smooth as I could get them. Here is what it looked like afterward:

Cleaned cello interior, just before closing.
I tend to make my neck and end blocks a little oversize. I have seen blocks split and break, because they were too small…it seems an easy way to insure against that sort of thing. All the blocks are now the size and shape I want them, and scraped smooth.

Install the Back Plate

So, the next step is to get the back plate in place. I aligned it carefully, checking all the margins to see that the overhang was fairly even all around, then clamped it in place, dry, using spool clamps. After I was satisfied that the overhangs were correct AND the elevation of the fingerboard was correct (an easy thing to mess up, as the corpus is quite floppy at this point), then I clamped everything solidly, and began removing a few clamps at a time, and inserting hot hide glue, using a palette knife. I washed off the excess glue with hot water, and re-tightened all the clamps.

Here the cello is in all its spool clamps, with one bar clamp to secure the button to the heel of the neck.

Callo back installed with hot hide glue and spool clamps.
The cello back is fully installed, with hot hide glue and spool clamps. The bar clamp secures the back button to the neck heel.
Cello glue drying by woodstove.
The house was pretty cold this morning, so I decided that the cello would dry faster in a warm room. Close to the woodstove (but not too close) is the best place I could find.

Final edge-work, scraping, preparation for varnish

After the glue was thoroughly dry, I removed all the clamps and began trimming edges, and perfecting the scroll and heel. The heel was almost a half inch high (which I expected…we leave extra, so that the heel and button are trimmed and shaped together, and match perfectly when we are done.) The scroll was still quite rough. I spent the rest of the day and late into the evening, scraping and planing, and trying to get the cello ready for finishing. Finally ran out of steam about nine PM, but it is nearly complete. Here is what it looks like tonight:

Cello in the white from front side.
Cello in the white, from the front. A little more edge-work to do, tomorrow morning, and I can begin the finish work.
Cello back in the white.
And there is that one-piece back…it has come a long way since that big slab we started with, hasn’t it? I still have some final smoothing of edges, etc. to do, then it is time for varnish.

Actually, I typically use a very weak water-base stain first, which will make the spruce a tan color, instead of cream-colored. Then I will sand it lightly with fine micromesh, seal it, and start applying varnish. (On the home-stretch, now!)

For those wondering about the pegs, saddle, nut, etc.; I wait until the varnish is complete before adding those fittings.

If you found this post helpful, please share with your friends!

Cello Neck-set

Please share with your friends!

Here’s how I set the neck of a Cello

I’m quite sure it is virtually identical to how other makers do it, with one possible exception: I set the neck while the corpus is still on the mold, with only the front plate installed.

Cello corpus on the mold; front plate installed;

Lay out the mortise outline.

I lay out the center of the neck block, and perform the remaining layout from that centerline. The heel is to be 30mm wide, and the front of the neck where it joins the corpus is 42mm wide. So I mark 15mm to each side of the centerline at the heel, and 21mm to each side at the front plate. Double-check everything. It is a real pain trying to put wood back.

I check my measurements, and mark the location on each side of the neck where the front plat should sit when all is complete– 280mm from the top of the fingerboard, and 20mm down from the top of the neck at the front.

Then begin cutting.

I have five measurements in mind, which I check constantly:

  1. I want the neck centered, obviously, but in terms of simple location, I accomplished that by careful layout– I want it centered, in that the fingerboard will be centered on the corpus, and the centerline of the scroll will be in line with the centerline of the front plate, as well.
  2. I want the neck straight, in the sense that it is not rolled to one side or the other. I can check this by sighting across the “ears” of the scroll at the edge of the front plate. If they seem parallel, I am satisfied.
  3. I want the neck the proper length. That 280mm mark I put on each side of the neck will let me know when I am getting close.
  4. I want the front of the neck the right height off the front plate. That was the 20mm mark I put on each side of the neck.
  5. Finally, I want the neck angle to be such that the bridge will be an appropriate height. I aimed for 65mm at the end of the bridge, so as to arrive at an 82mm projection at the bridge– the bridge, then would be roughly 90mm tall at center. There is some flexibility on this one, but not a great deal. In reality, all five of these measurements simply have to be within tolerance, or the instrument will not work right.

So, with all of that in mind, I measure from the 280mm mark to the end of the neck, to see aproximately how deep the neck mortise must be at the front, then use a Japanese pull-saw to slice along my layout lines to nearly that depth. I stay inside all my layout lines, as I want to leave a little room for adjustment.


Cello neck-set 1 of 6
I begin by removing the section of front plate affected by the neck mortise, then use a chisel to remove the waste wood from the mortise itself.

The blue lines you can see in the above photo remain from my initial layout when I bent the ribs. I wanted to make sure they were long enough. (It was close!)

Cello neck-set 2 of 6
I try to get the mortise nearly right on the first try, but deliberately leave some room for adjustment.
Cello neck-set 3 of 6
You can tell from the location of my layout marks that I still am far from done– but the neck fits fairly well, and I will be removing paper-thin shavings from here on, and checking every step of the way.
Cello neck-set 4 of 6
Now you can see that the layout lines are very close to what I wanted. In fact, I had deliberately marked my height at 21 mm, to give room for adjustment… and it is at 20 mm now, which is fine. The 280 mm mark is dead on target.

Notice that the heel is overhanging the back of the block by nearly 5 mm. That is fine– I will remove that excess wood when I flatten the back of the garland, and the back plate will be the last major component installed.

Cello neck-set 5 of 6
Here is a closer look– the length from the top of the fingerboard to the edge of the front plate is pretty critical. a good player will notice any variation. the overstand (height above the front plate) is less critical.
Cello neck-set 6 of 6
I checked and double- and triple-checked until everything was perfect, then slathered the hot hide-glue into the mortise and onto the neck, then rammed the neck home and clamped it tightly. I checked once more with the clamps in place, to see that the measurements were still OK. (Thankfully, they were!) Cleaned up with hot water and a brush. Now it just has to dry.

That clamping block in the photo above was just a scrap of wood– I cut it to the correct angle, then hollowed out a curved opening to fit the cello neck-heel. I glued a pad of 1/8″ cork into the cup, and it works very well.

And that is pretty much all I got done today. Cooked a roast… fed the cat, brought in the newspaper…that’s about it. Pretty tired.

Later tonight, if I still feel like it, I will remove the mold, and begin the final cleanup of the interior of the corpus. On the home stretch, now… well,  almost! 🙂

(Edit: I did go back and remove the mold, but that was all for that night. 🙂 )

If you found this post helpful, please share with your friends!

How I carve a Scroll

Please share with your friends!

Cello Scroll Carving Made Simple 🙂

There is nothing special about the way I carve scrolls. As far as I know, this is how everyone else does it, too, more or less. I am only sharing how I do it.

Start by tracing and sawing out the profile of the whole neck.

I don’t have a photo of the scroll as a simple profile, but I begin with the billet (About 6″ x 3″ x 20″), and trace my template onto it, then use a bandsaw to cut the shape of the profile. I use a oscillating spindle sander to remove the saw marks, and perfect the profile right to the line. While the profiled block is still “square”–that is, while the sides are still parallel, I lay out the peg hole locations and use a drill press to make 1/8″ diameter pilot holes where each peg will be. I drill all the way through, so that the holes are clearly marked, and are perpendicular to the center plane of the neck.

Next cut out the pegbox and at least a few inches of the neck

I hollow out the pegbox before carving the scroll proper. Some people use a drill to get started. I have done it this way, but it seems a little risky, unless you put some sort of limiter on the drill, to avoid going too deep– and even then it is easy to go out of bounds. I use a narrow chisel to remove most of the rough wood, then a wider chisel to smooth the inside cheeks of the pegbox. I also saw off the excess wood on the outside of the pegbox, and plane those faces flat.

Then draw the shape of the scroll itself.

Usually we use a template for this, as well. Some people plot out each scroll with a straight-edge and compass. I have neither the time nor the inclination. In this case, my templates came from a poster of the 1712  “Davidov” Stradivarius cello, now being played by Yo Yo Ma. Some information was lacking, and I filled that in from Henry Strobel’s book on cello making.

And begin cutting:

Once the scroll is drawn out, I clamp the neck to my workbench and, using a Japanese-style pull-saw, I begin cutting slots nearly to the layout lines of the volute. I rotate my position a few degrees, and make another cut. I have to be careful to avoid cutting too deeply, but this method allows me to chip away the waste wood rapidly, and the scroll begins looking like a scroll rather quickly.

Beginning the scroll, proper.
Pegbox is complete, volute partially carved. The cut lines are visible on the portion of the volute that has already been carved. Now we will carve the scroll, proper.
Cutting more kerfs to remove wood.
Care must be taken to avoid drifting across the line into the turns of the volute.
Cutting a series of kerfs for wood removal in carving a scroll.
You can see the direction this is going…I will continue to slice down nearly to the line, rotating a little each time, until I have gone all the way around.
Using a gouge to outline the eye of the scroll.
Once the kerfs are all in place, and to the correct depths, I use a gouge to outline the eye of the scroll, so as not to damage it with the saw.
Kerfs in place, and eye of scroll deeply incised. Carving can begin.
All the kerfs are complete, and the eye is deeply incised with the gouge–I am ready to start carving.
Use a flat chisel to remove the waste wood, and the scroll begins to emerge.
I use a flat chisel to remove the waste wood, and the scroll begins to emerge.
Once the waste wood is completely gone the
Once the waste wood is completely gone the “undercut” carving can begin.
Bi-lateral symmetry
I try to make sure the two sides match symmetrically, before beginning undercut. I do the outside fluting last, to avoid damaging it while carving other parts of the scroll.
Bass side of cello scroll, nearly complete.
Here is the bass side of the scroll, nearly complete.
Treble side of cello scroll, nearly complete.
And, here is the treble side.
Cello neck and scroll, nearly complete.
The neck and scroll are nearly complete. I will continue to fine-tune and scrape the scroll, perfecting it as best I can, right up to the day I begin varnishing.
Fingerboard installed on Cello neck, with hide glue and clamps.
I have prepared the fingerboard, and now I have installed it, using hot hide glue and clamps.

So– that was entirely enough for today. Tomorrow I will continue to refine the scroll and neck, and try to get the neck set. If I succeed, then I can remove the mold and install the back plate.

If you found this post helpful, please share with your friends!

Front Plate Installed

Please share with your friends!

Cello Front Plate Installed

Spool Clamps and Hot Hide Glue

I used to be terribly stressed, whenever installing plates– even violin plates. Now I clamp the dry plate in place with spool clamps, then, beginning with the corner blocks and C-bout ribs, I remove a few clamps and use a palette knife to insert glue before brushing the outside of the joint clean with hot water, and replacing the spool clamps. In this way, I can get the whole job done very quickly, and with no fuss.

Outside view of installed front cello plate
Outside view of installed front cello plate.


Error!

The fact is, as you see it, it looks as if everything is fine. The next photo shows what I did wrong, though.  If you look closely, you can see that I forgot to remove the front plate of the mold before installing the front plate of the Cello.

Forgot to remove front mold-plate before installing front cello plate.  🙁

So…it is a good thing I now install plates in such a stress-free way. Sure, it was disgusting to have forgotten such an important step. But it only required a few minutes with a heat gun to remove the front cello plate, as the glue was quite fresh when I realized my error. And, after using my handy electric screwdriver to remove all the screws, I slipped the mold-plate halves out and set them aside, and immediately re-installed the front cello plate.

So, what’s next?

I need to finish the scroll, now, and install the fingerboard. I like to set the neck while the cello corpus is still on the mold, so that, once everything is correct, and the neck is glued in place, I can simply plane the heel flush with the back side of the ribs, and install the back plate.  (Yes, I will remember to remove the rest of the mold first! … and clean up the interior, etc….) 🙂


If you found this post helpful, please share with your friends!

Back Graduation Complete

Please share with your friends!

The Inside carving (Graduation)on the one-piece Cello back is complete.

Planes and scrapers ruled the day

Here is what it looks like now:

Inside one-piece cello back with shadow to show curves.
The scrap of lining material is only there to cast a shadow so you can see the curves.
Inside curve (longitudinal) of cello back
Same thing again, but with a bigger stick. 🙂

Again, you can’t see it very well, but I also rounded the edges, beginning the edge-work that is so important to the finished product. I do the inner edge first, as it is hard to access once the plate is installed. I began with a tiny plane, and cut a narrow bevel all the way around the edge, at a 45 degree angle. Then I used a file and a scraper to round it into what is essentially a quarter-circle curve.

This plate is ready for installation.

I will try to close the corpus this week, and then scramble to complete the neck and scroll.


If you found this post helpful, please share with your friends!

Bass Bar installed and trimmed–F-holes refined. Edge-work begun.

Please share with your friends!

The Bass Bar is in place and trimmed. The F-holes have been refined, somewhat, and the edge-work is begun.

Bass-bar was #1 on the list!

I installed the bass-bar first thing this morning (chalk-fit to the inside of the plate in the exact location it was to be glued, then glued with hot hide glue).

Then, while the glue was drying, I went and did other things. Swept up the shop, changed the tires on my car (snow tires have to be off this weekend), and designed some display stands for the upcoming show at Marylhurst University. I had intended to begin the graduations on the one-piece cello back plate today, but after I did the tires, I was pretty worn-out, and hurting, so I decided it was time for a break, and, since the glue was dry, time to trim the bar.

Bass Bar in the rough

Here’s what the bass-bar looked like in the rough, when I took the clamps off:

Cello Bass-bar in the rough, viewed from the top.
Bass-bar in the rough, viewed from the top
Cello Bass-bar in the rough, viewed from the side.

Bass Bar Trimmed and finished:

And here is what it looked like after planing it to the shape I wanted it to be:

Finished cello bass-bar from front
Finished Cello Bass-bar from side

Edge-work and final prep for finishing

Although you probably really can’t tell in the photos, I have also scraped the entire plate, inside and out, under low-angle light, to get every dip and hump as smooth as can be.

Also, I began the edge-work; I first planed a small (3mm) bevel all the way around the inside edge, then rounded it with a file, to establish the inside curve of the edge. The outside will be treated the same way, after the plate is installed on the garland. It is much easier to manipulate the plate by itself, instead of the whole cello, so I want to do as much as I can before it is assembled.

I also spent time refining the f-holes; smoothing the inner edges, matching bass to treble shape, etc. That, too, is much easier before the plate is assembled with the garland.

Tomorrow I will try to graduate the back plate.

Gotta do taxes, too, though.  (Hooray for Turbotax!)

If you found this post helpful, please share with your friends!