
 Follow

Resurrecting an Old Fiddle
Basket-Case Fiddles
We frequently hear the term “basket-case” in reference to one’s mental-state, but it originated in the reality of all the parts of a dilapidated mechanism or household furnishing being literally placed into a basket and delivered to a craftsperson who (it was hoped) could put it back together and make it functional.
There have been a few times when I have received such a violin…usually either having belonged to the customer’s Great Aunt, or Grandfather, or something, or a relic from their own childhood (which they are trying to hang onto.) In some cases it is worse– the customer simply acquired the instrument at a garage sale (or some similar “depository of fine musical instruments”), in pieces, and wants me to make it work.
In all of the above cases, I try to kindly explain that the labor involved will cost far more than the instrument will be worth when completed, and they must decide whether they want the instrument badly enough to pay that much to have it playable. (We are not talking about a full restoration, just bringing a dead fiddle back to life.)
“Bread-Bag Fiddle”
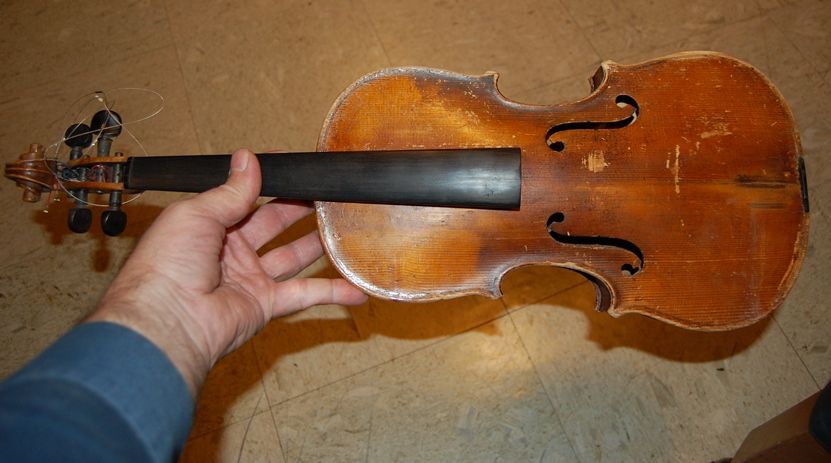
In the particular situation at hand, it was a mix: The violin was coming to pieces, and was literally in a bread-bag, with the mouth of the bag tied off, to prevent the escape of any pieces. BUT, the person who brought it to me was not asking me to fix it for him…he simply offered it as a potential “project” fiddle. I gave him what he had paid for it at a junk-shop (styled “Antique Shoppe”) and tossed the bagged corpse in a box to gather dust, thinking that perhaps someday I could do a photo-story of sorts with it, in a “sow’s-ear-to-silk-purse” type of story. (Given the relative quality, I should probably edit that to say, “calico-handbag” as opposed to silk purse, but that is another matter.)
A few months ago, however, a parent contacted me, asking whether I had an “old fiddle” (full-size) for sale at a reasonable cost, to replace her daughter’s fractional size violin. Initially, I told her I did not, but upon further reflection, it occurred to me that I had the “bread-bag fiddle”. I told her exactly what it was, to the best of my knowledge (I had not opened it sufficiently to see some of the surprises), and suggested that, if I could make it a reasonable player for a price she could afford, that perhaps it would meet her expectations.
I sent her some photos, so she could see that, at least for now, it sort of “put the ugh in ugly”, and that it would never win any prizes for looks, regardless of what I did.
But–some folks like old fiddles! As it turned out, she and her family were pleased with the prospect, and told me to carry on with the “restoration.” (I repeat…this is not a true restoration, but rather a “revival” or “resurrection” of a dead or nearly-dead violin.) I had another commission going at the time, and I let them know that I could not begin immediately, but they were not in a hurry, so it was agreed that their project was next in line. I was able to begin about a month later.
Diagnosis: YOW!
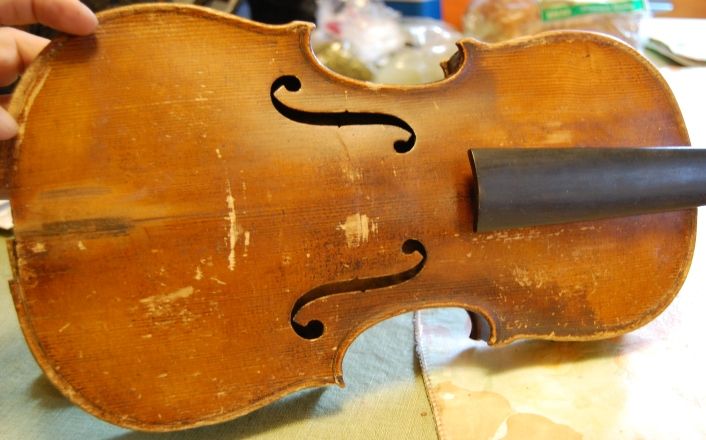
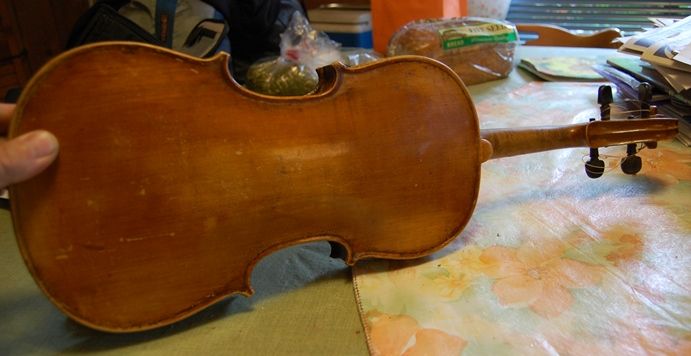
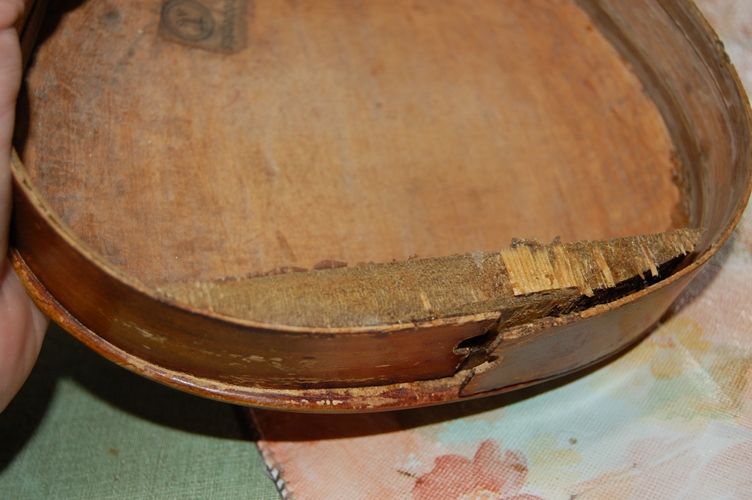
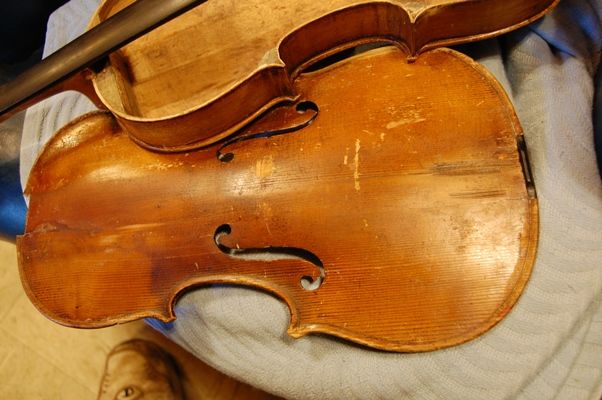
Outside
The back had come loose from the ribs, partway around, and the (monstrous) lower block was separated from the ribs, as well, and (despite my best attempts) would not fit together perfectly. (sigh…)
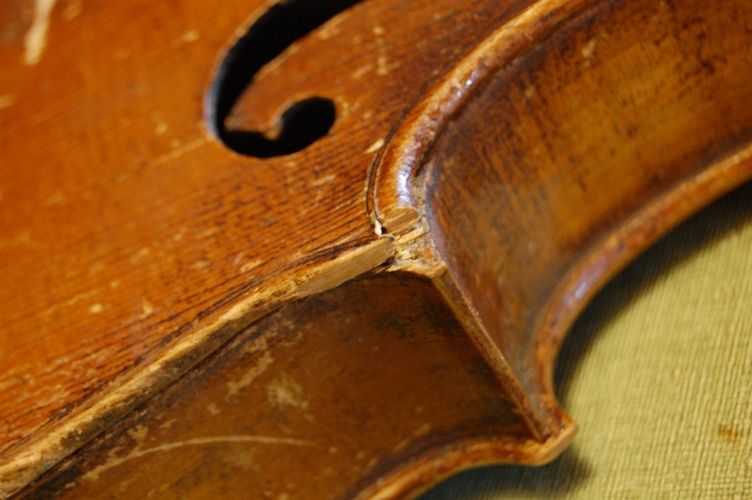
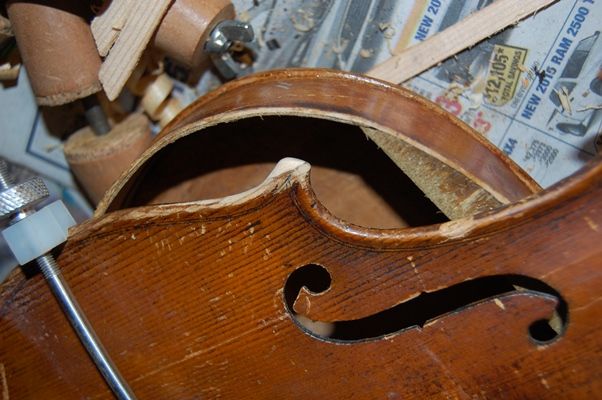
Three of the four corners of the spruce top had missing wood, along with one lower-bout edge. One of the three had wood broken off, not just chipped or worn.
Inside
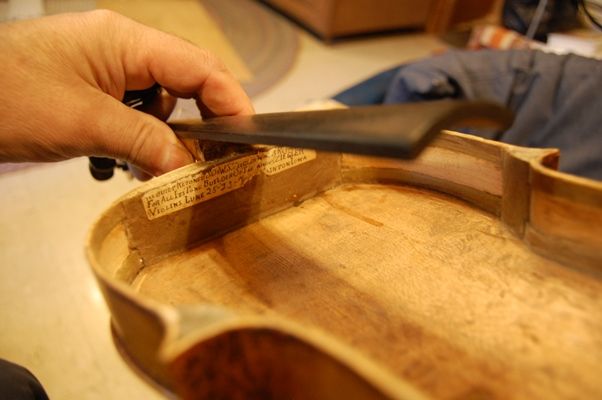
The exterior was bad enough, but when I opened the corpus I found the history, literally written on a label, and proudly claiming responsibility for the carnage within.
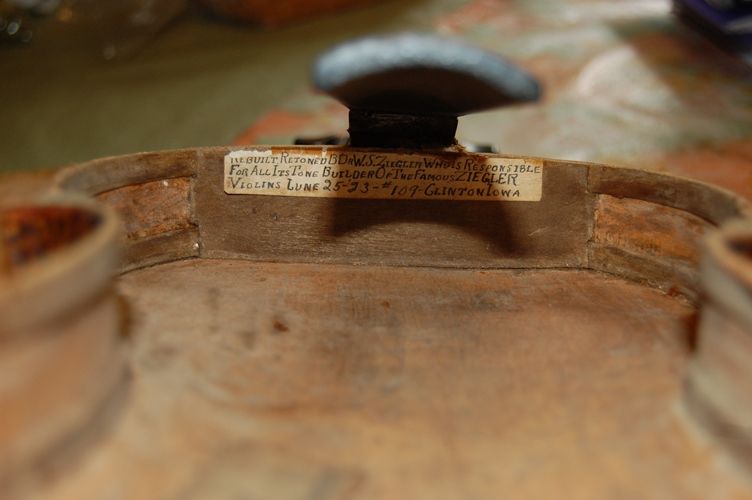
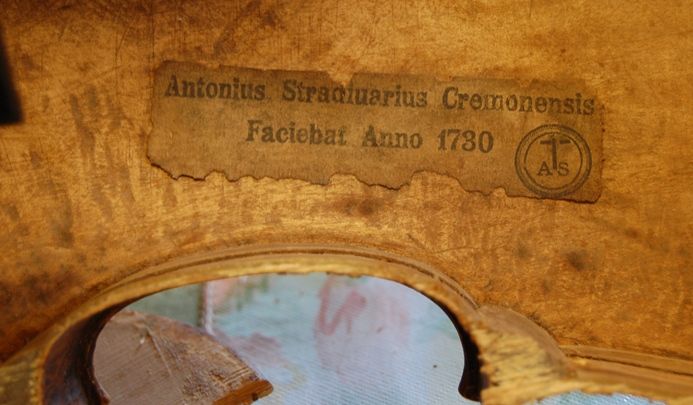
And, as usual, the “Tony Stradivari” label is there to confuse things further: I left it there, of course, and glued it down securely, so it would not fall out. 🙂
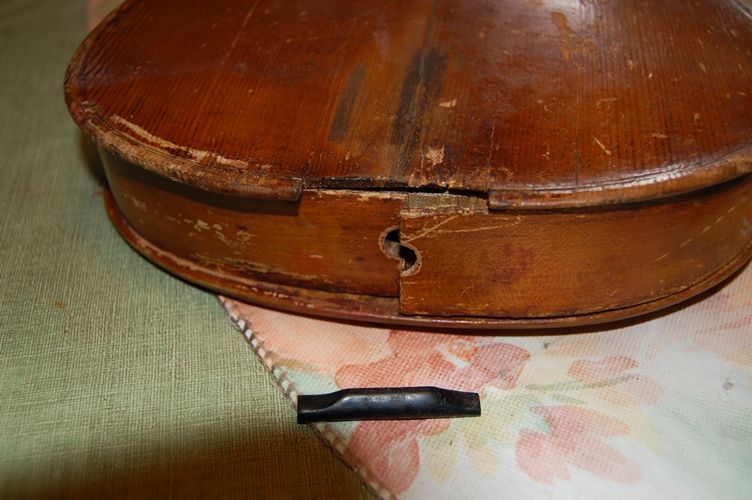
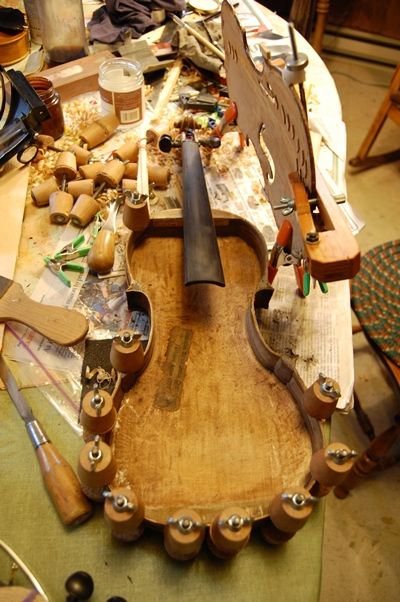
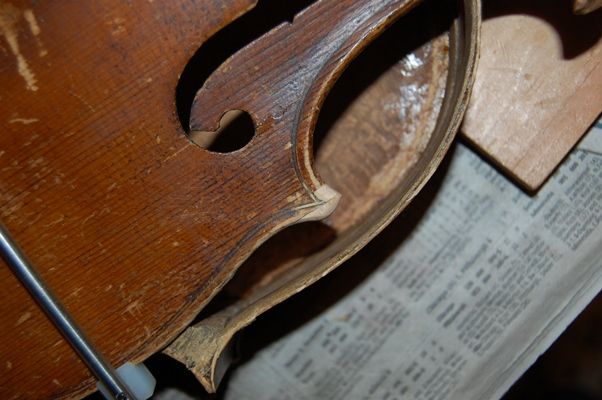
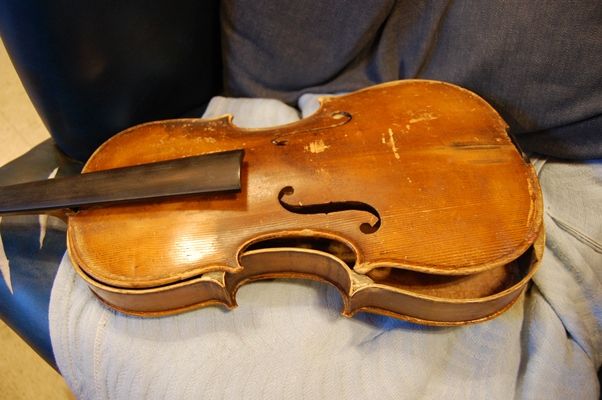
Here is a photo of the tail-block and loose ribs:
The “repairer-rebuilder-innovator” had removed the normal blocks and replaced them with very heavy, oversized, hardwood blocks. That was bad enough, but he had also (in response to a bass-bar crack) installed a bar at about a 20 degree angle across the longitudinal axis, rather than the 2 degree (or thereabouts) angle that is normal.
One thing to be observed, too, is the peculiar “mottled” look of the inside of the top plate, and how much fresher the wood appears here, than inside the back. From this, I see that this instrument was originally one of the very cheap fiddles for which the maker took not even the trouble of smoothing the inside of the top plate, but left it extremely rough, like chainsaw sculpture, in the knowledge that few, if any, would ever see it, whereas the back was very smooth inside, where any eye could glance inside and see the work. The “re-builder” smoothed all the rough gouge-work, removing the original “integral” bass bar (which had been carved in place, out of the same billet as the rest of the top, not carved separately and fitted to the plate), and had continued by adding the big blocks, slanting bar, etc.
How do I know? Because I have smoothed such an instrument myself, and that is how the top plate looks afterward. The areas where the most wood was removed are quite bright, whereas the places where only a little smoothing was in order are darker, showing the oxidation of the years. No harm done, there, and he did a fair job of it.
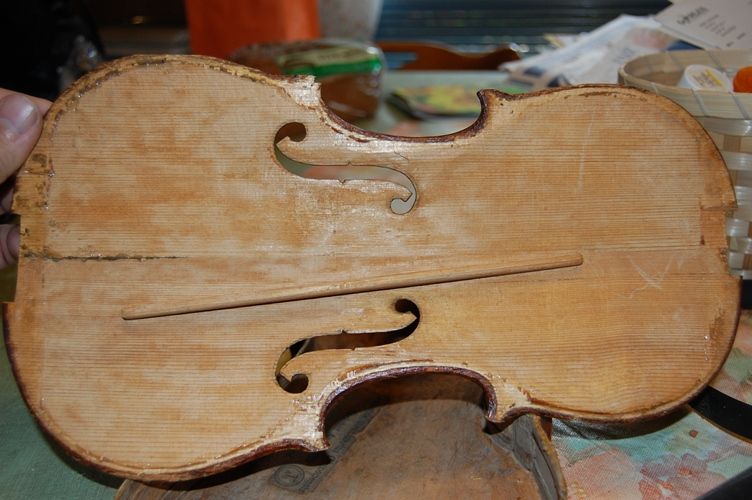
The ribs (as they came from the low-end European factory) were 2-3 times the thickness they should have been , in the upper bouts, though pretty close to normal in the lower and center bouts. There were several cracks. Some I had seen from the outside– some became obvious when I opened the box. Inside (due to inexpert top removals over the century or so of the fiddle’s existence), sufficient wood had been lost in the areas of the corner blocks that I felt it was necessary to replace wood there, as well.
First things First
Since the back was relatively undamaged, and it had to be re-secured to the blocks so that I would have a firm foundation from which to build, I reglued the blocks to the back, and
I scraped and scraped the block and ribs, to try to get the loose ribs to fit back in place perfectly, but, in the end, they still were pretty rough. I kept telling myself that this was not a restoration, just a resurrection.
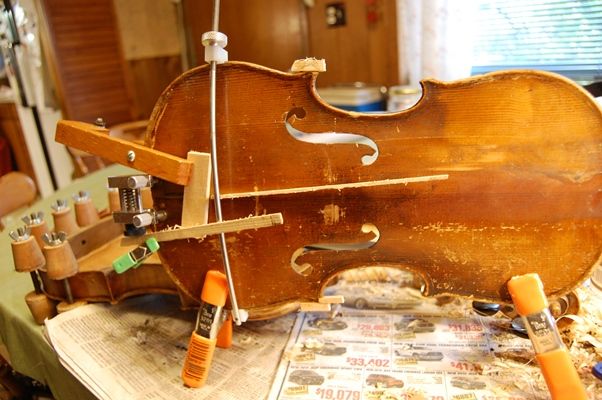
I soaked loose the old, dirty glue in the center seam, and pulled it together as tightly as possible, then re-glued and clamped it. I went ahead and glued as many cracks as I could manage at the same time, wedging them in or out, as was needed to make them flush on the outside and tight, edge-to edge. I added the orange clamps as two pairs of “legs”, so that the plate could stand on edge and not twist under its own weight and that of the clamps.
As you can see, I also began replacing the corners at that time; here is how it works:
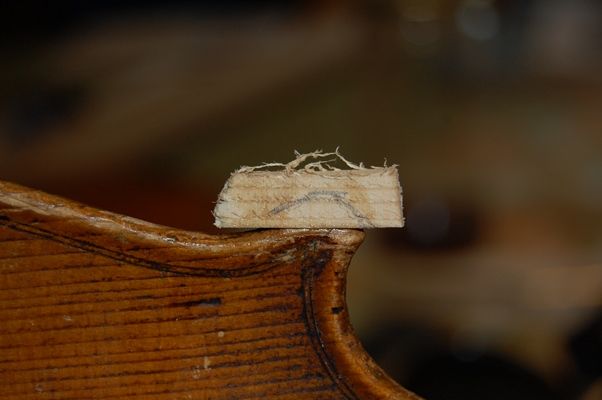
There was a third corner needing a minor wood-replacement, and a lower-bout edge worn (and splintered) off, as well. the procedure for replacement was the same in all cases.
After the glue was dry on the replaced corners, I carved and filed the new wood to match the old shape.
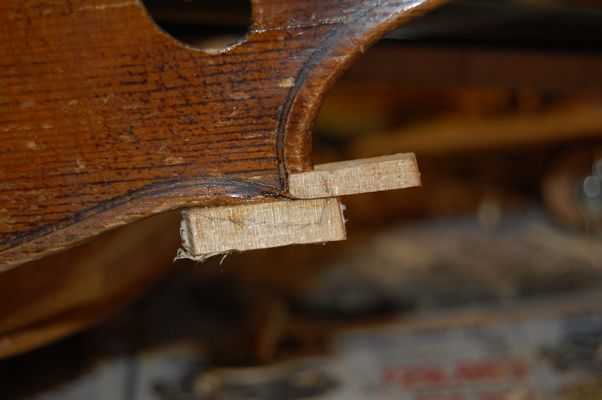
One lower bout had a missing edge, too, so I glued new spruce in place, and, after the glue was dry, I carved and filed it to match the original curve.
Later, I will stain the new wood to match the old, using coffee, dirt, and ash, then retouch the varnish to match the old varnish.
Heavy repairs
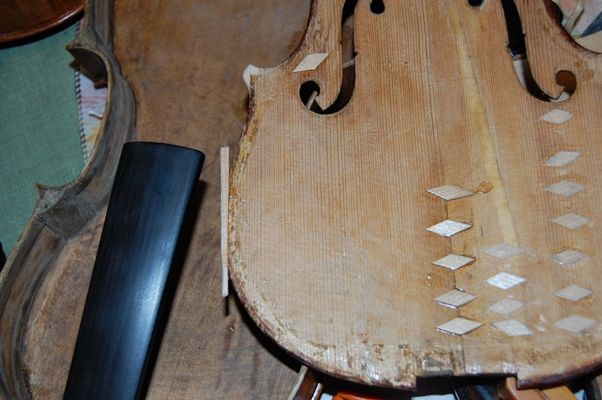
The bass-bar had to come out, so, after the glue had dried in the various cracks, I planed out the old bar, (and glued “cleats” on the inside along each crack) and prepared to fit a new bar. The bass-bar was going to have to be shorter than usual, as the huge end blocks crowded the normal position.
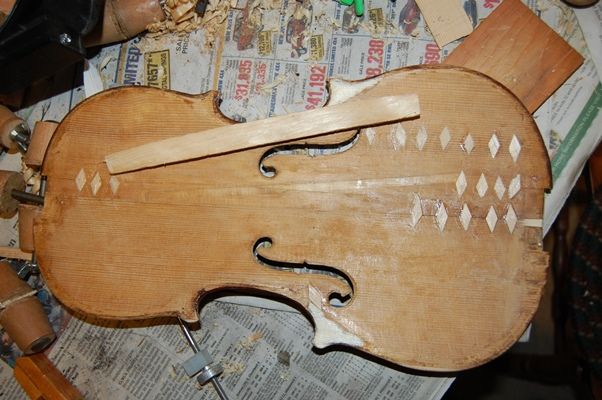
You can see that I had already begun replacing the wood missing from the inside corners: I sawed a 1 mm-thick “veneer” of clear, vertical grained spruce, glued it to the smoothed and flattened corners, and later planed it flush with the surrounding areas.
The bass-bar fitting went quite smoothly, using chalk on the inside of the top plate, and pressing the bar against the chalked area to disclose the high spots on the bar. I had it ready to glue in a pretty short time, and trimmed it the next morning, after the glue was dry.
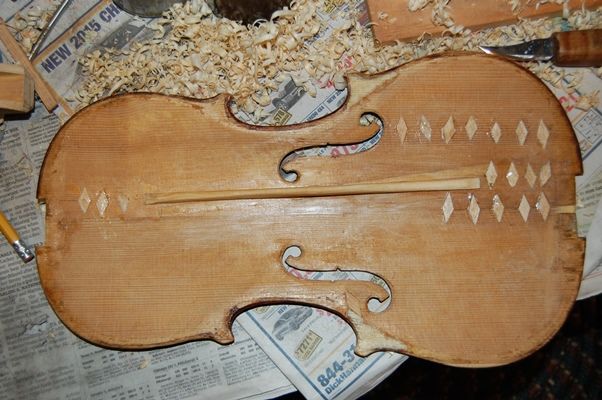
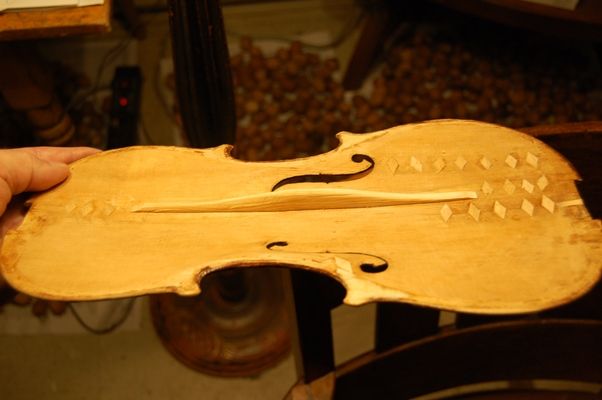
Almost Ready for Re-assembly
Once the entire interior was smooth, with all missing wood replaced, I could start thinking about closing up the body of the violin. I re-fit and glued in place the saddle that had come with the fiddle.
Meanwhile, I had checked the back and ribs for appropriate thickness– a few areas of the back were abnormally thick, so I planed and scraped a millimeter (or so) of wood out of those areas, then even more from the upper bout ribs, where the wood was three times the normal 1 mm thickness. Perhaps it will help….

So, I was ready to close:
I dry clamped the whole corpus (body) in exactly the way I wanted it to go together, using spool clamps, just like the ones used when I was gluing the back to the garland, above.
Then, when I was sure everything was right, I heated hide glue, and, loosening a few clamps at a time, I used a palette knife to carefully insert the thin, hot, hide glue between the front plate and the linings and blocks. Then I re-applied those few clamps and repeated the process with the next few clamps until I had glued all the way around. I seldom think to take photos of thsi process, so…there aren’t any. Sorry.
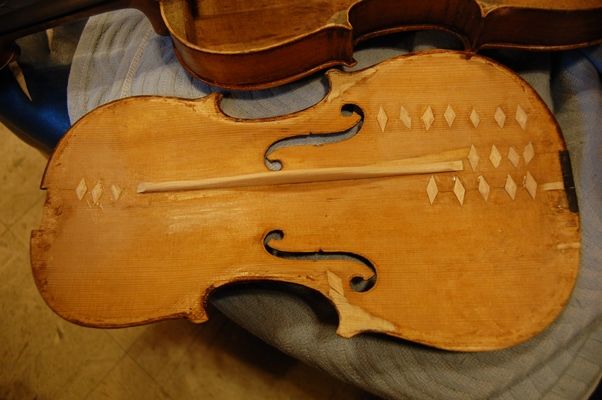
Once the glue was dry, I could take off the clamps and get ready to begin final touch-up of varnish, and general polishing.

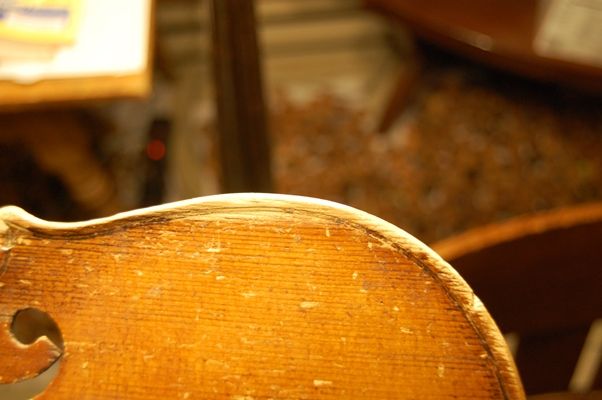
So, I spent a few evenings cleaning, and touching up varnish, so that nothing sticks out as damaged, nor as “new”. Not too shiny, but not too grubby, either. What I am attempting is “Old fiddle Chic.”
New Helicore strings because that is what the customer prefers. (Installed after the photos.)
Looks as though the bridge was a little crooked when I snapped the photos– it was straightened later, as well. 🙂
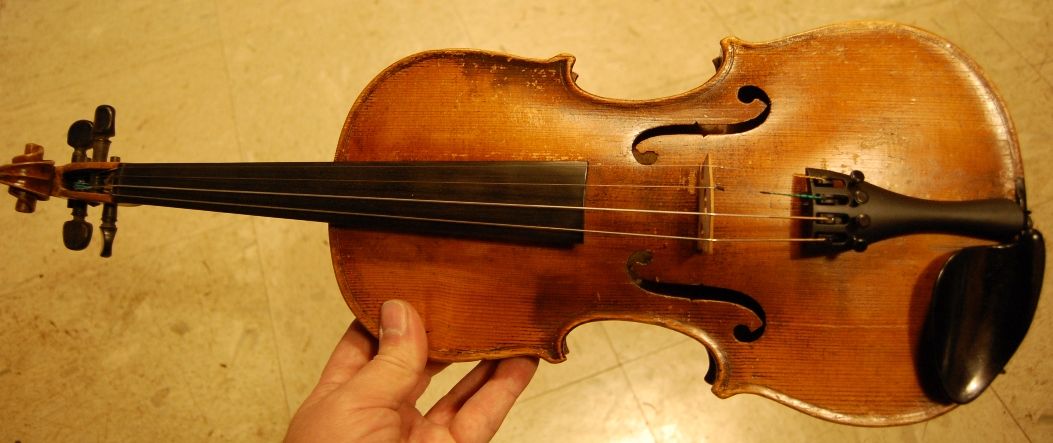
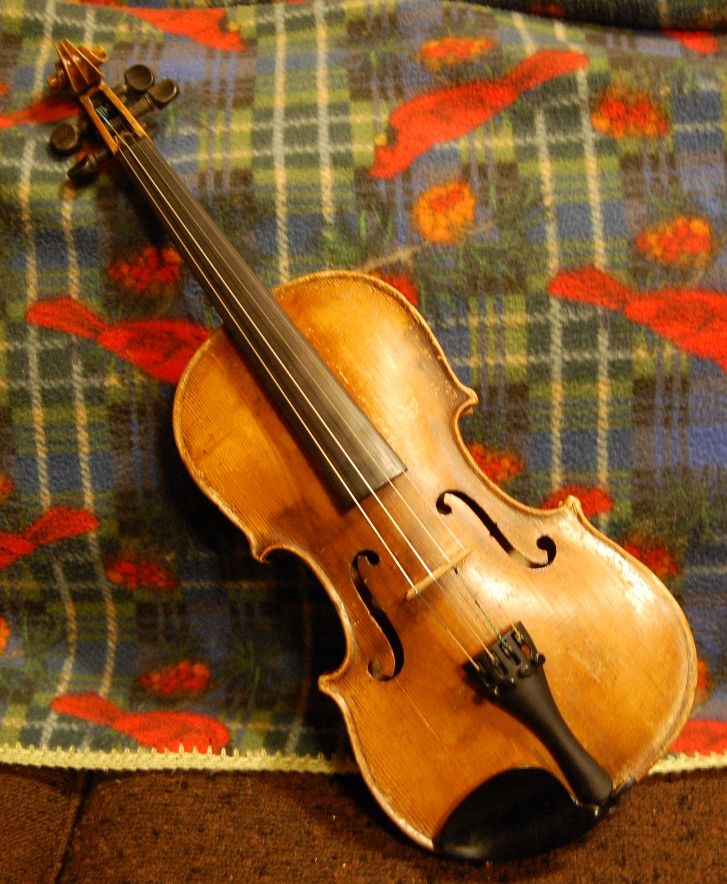
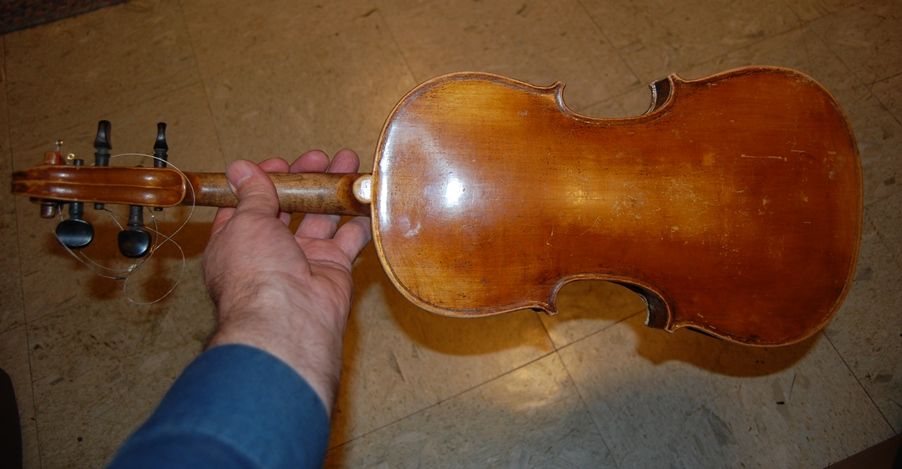
Not all of the old scars have become invisible (though some have)…some are a permanent part of this old fiddle’s character, and simply show that is has been well-loved and well-played. Future things will undoubtedly include a new fingerboard (someday) and new pegs (eventually). But for now, it is ready to sing.
The old fiddle turned out to have a rich, deep voice, and the new owners are very happy with it. I hope to hear the young lady play someday.
Thanks for looking.
You are doing masterful work Chet I am truly impressed this is not just a talent but an incredible art.
Thanks, Bill! Good to hear from you! Blessings upon you and your family!
Hey Chet,
I really enjoyed seeing your work–very inspirational! Seeing what you have done with this old instrument encourages the rest of us of the many possibilities. Keep showing us what you are working on.
Gary
Thanks, Gary! I’ll try to do so.
Wow, what an incredible talent. Good job for when you retire and can stay home at last…. Chris H.
Thanks, Chris…That has been the plan, all along: I had just hoped it would come together sooner. 🙂
Hi Chet,
I really enjoyed the pictures of the fiddle resurrection! Looking at it,some folks would have tossed it,but you did a phenomenal job. It looks like an American “factory” fiddle but I see the luthier’s label in a strange place??
Oh well, thanks for putting another nice old instrument out there for us to enjoy.
Regards,
Jan ♪
Hi, Jan;
Actually, I kind of thought it was German, especially since I could see that originally, it had been made with the incredibly rough interior to the top plate, but had been smoothed by the “repairer” whose label is in the strange place. He was certainly an American. I found a quote from an article he wrote, in which he basically said everyone else was stupid, and that he was the only one who knew how violins really worked. 🙂 He listed where he lived, and everything, beside the year he did the “repairs”.
I have another such repair coming up, that looks even worse (neck is broken off), but it it isn’t as bad as it looks…and it will be a lot prettier when it is done, as it was a little nicer to begin with.
Thanks for looking.
Chet