
 Follow

Five String Fiddle Front Plate Installation
Back to Work!
It was fun working on the Sawmill, and just as we got that done our daughter came home (from Switzerland) for a visit, so, between that and all the overtime at work (teaching print-reading classes), it has been hard to get going again, but the fiddle has been patiently waiting on the dinig room table for me to get back to work.
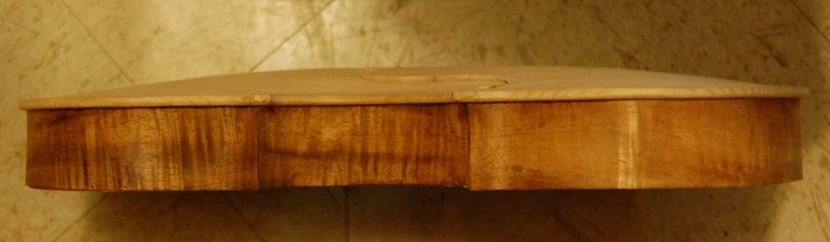
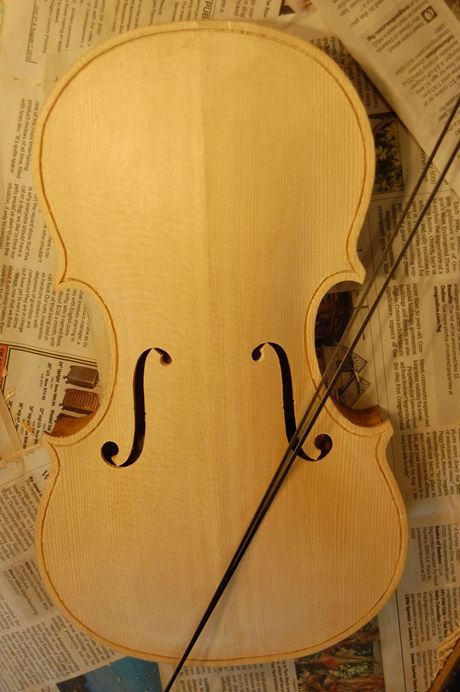
Installing the Front Plate
I levelled the garland by scrubbing it back and forth on a sanding board, then aligned the plate on the garland and clamped it with spool clamps. After heating up the glue, I removed a few clamps at a time and inserted the glue with a thin pallete-knife, and re-applied the clamps. In this way, I can work my way around the perimeter, accurately and easily gluing the plate in place without fear that the glue will gel before I can get the plate clamped in place.
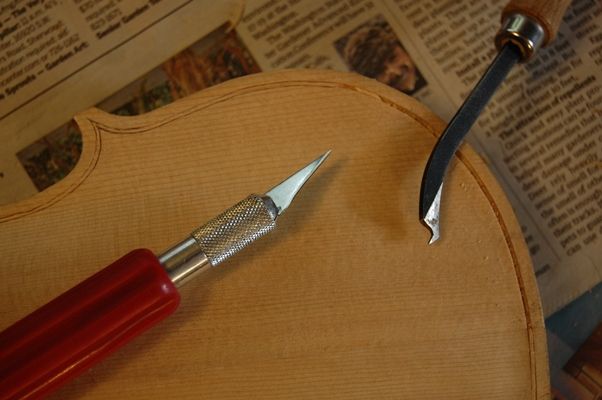
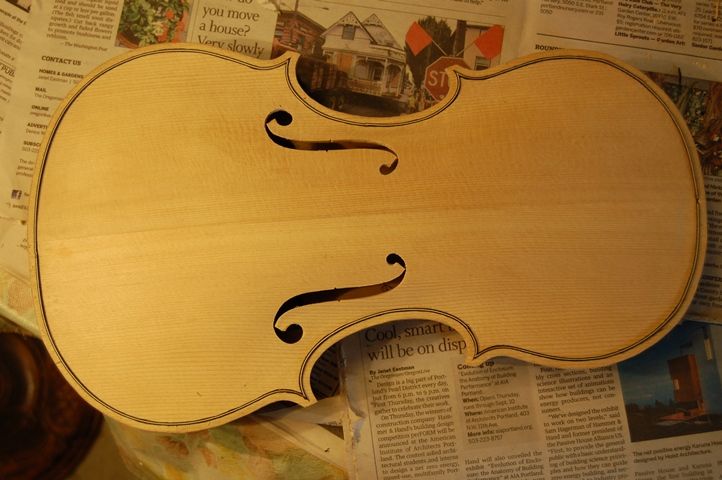
Ready to begin Purfling
The purfling is an inlay that is partially decorative, and to some degree a protection against cracks and splits– an edge reinforcement. There are some (usually very cheap) instruments that have the purfling simply painted on, so that it only looks good, but has no other function. They are usually seen as sub-standard, though, and I will not consider making an instrument that way…so, here is the beginning point: the purfling marker. Two blades set apart by the exact thickness of the purfling to be inlaid, and the distance from the edge set, as well.
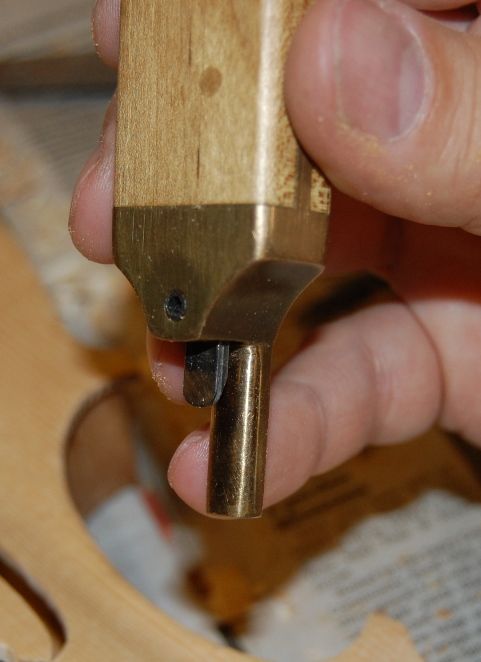
Some people call this a purfling cutter, but it really does not workwell if you try to use it to cut the slot. I mark the slot with this tool and then cut the slot with a sharp, thin knife. In use, the purfling marker should be held exactly perpendicular to the plate, and tightly against the plate edge.
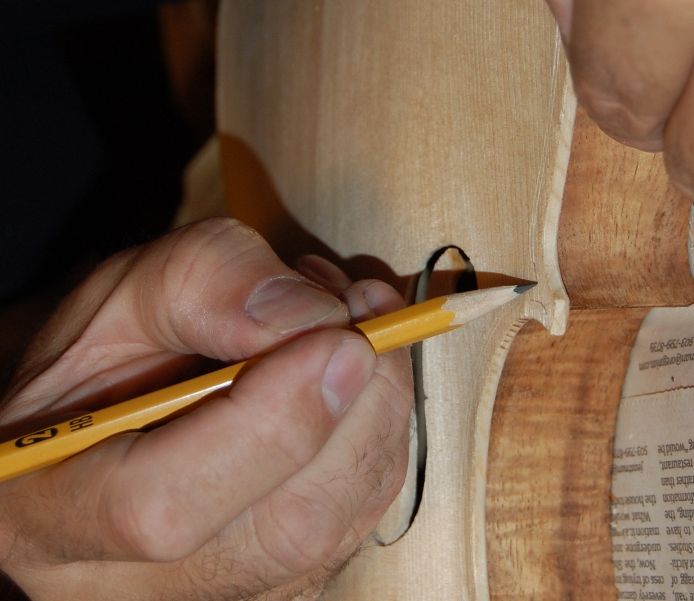
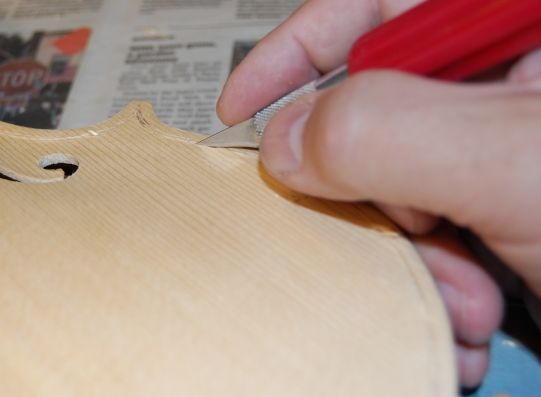
The purfling marker will not complete the corners, and they are fairly critical to the overall look, so I carefully sketch them in with a very sharp pencil.
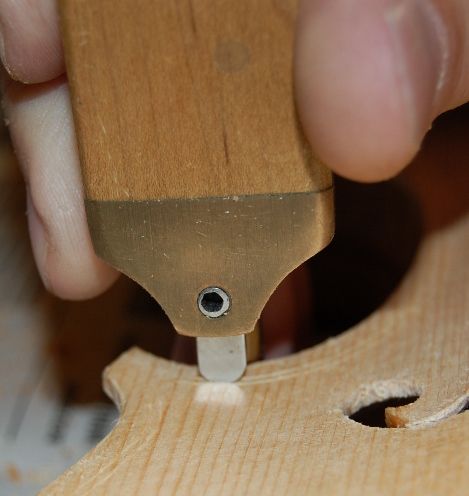
Cutting the Purfling Slot
I usually use an X-acto knife to cut the slot, and pick the center out with one of several tools made for that purpose.
The first trip around the plate it is important to go lightly but very accurately, so that I am barely deepening the marks left by the purfling marker: after that I can cut more deeply.
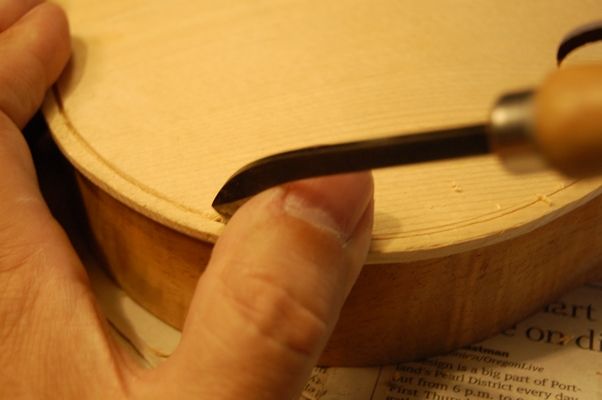
Cleaning the Purfling Slot
After I am satisfied that the cuts are the correct depth all the way around, I carefully pick out the center of the slot and clean the slot, using a purfling pick. I have some that I made myself, but this one was given to me by Jake Jelley, and it works very well.
Installing the Purfling
Some people make their own purfling…maybe I will try it someday, but for now, I buy mine in three-ply strips. The strips are too brittle to bend, so I use a bending iron to make them flexible and to bend them to the correct curvature for the tight corners.
I try to install the C-bout purfling first, then force the mitered ends of the upper and lower bout purfling against the mitered ends of the c-bout purfling. It takes practice to get good at this: I do not claim to have “arrived”. But it does seem to be getting easier. (I read the other day that someone asked Pablo Casals why, at 93 years of age, he was still practicing the cello for three hours a day. He said, “I think I am seeing some improvement!”) (Good one, Maestro!)

Then I install the rest of the purfling strips: I want the slots to fit snugly, but not so tight that I will struggle to install them once I apply the hide glue.
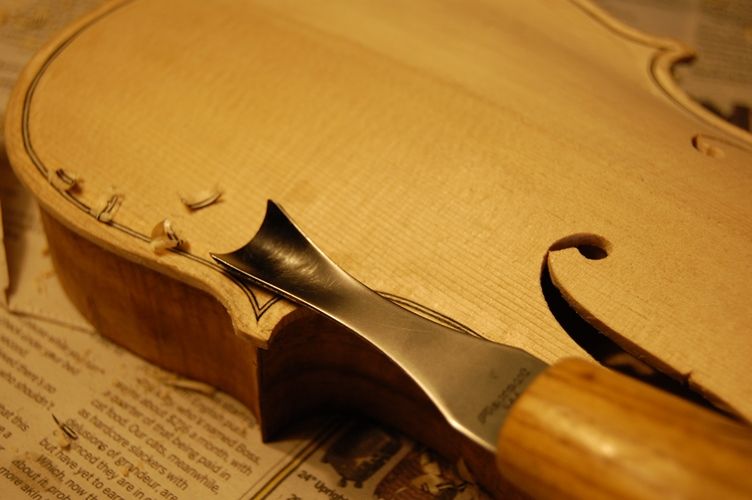
Gluing and Trimming the Purfling
I lift each section up out of the slot, one at a time (tilting them, so as to try to leave the mitered ends in their places), and use the palette knife to slip thin hide glue into the slot, then press the purfling back into the slot, all the way down. I use a roller made for installing the rubber trim around window screens to force the purfling all the way home. The glue squeezes its way into the mitered corners, and secured them. The plastic roller is easy to clean afterward with hot water.
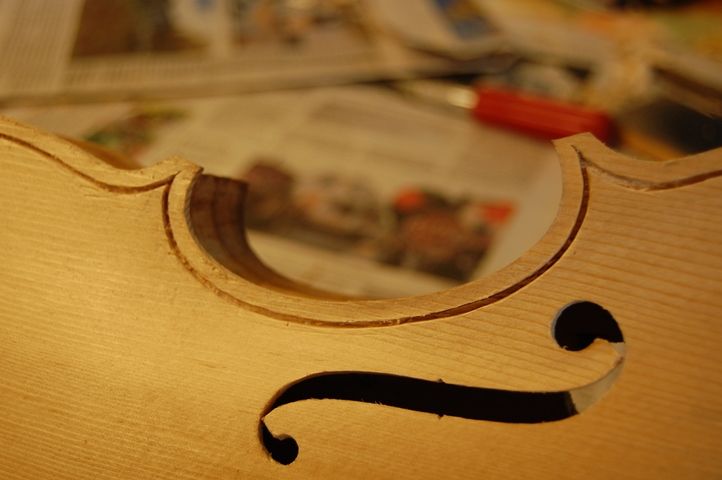
Once the purfling is glued in place, I mark a line around the margin of the plate, using a compass, with the pencil set to about 1.6mm (1/16″ or so), so that I have a guide to follow as I cut the “channel” (trimming the purfling below the surface into which it has been glued.) I want the wood surface and the purfling to make a smooth curve that begins near the edge of the plate, cycles down through the purfling, and sweeps back up to join the curve of the violin plate. I carve the channel with a gouge, then scrape to complete the curves. The faint pencil guide line can be barely seen in this photo.
And there is the finished work, ready for the next step.
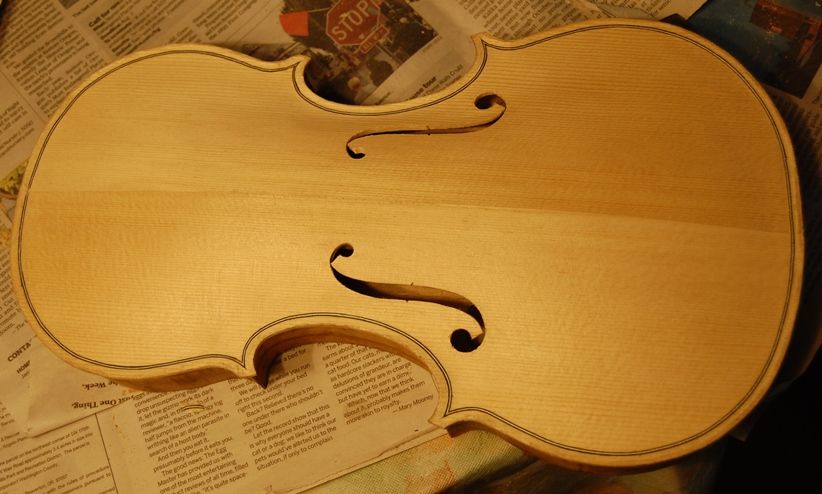
The outer edgework will be completed after I install the neck. I used to wait and install the neck last, but I eventually decided that I prefer to install the neck and fingerboard while the front plate and rib garland are still on the mold, then trim the heel of the neck to be in plane with the back of the rib garland so that the back plate can be installed last. But that is a subject for another post….
Chet, all your work on everything you do in you life is more than outstanding… Chis Hadfield
Well…Thanks, Chris, but that is far too kind to fit the reality. I do appreciate the vote of confidence, but the fact is, I have a lot of half-finished projects hanging over my head, and you are just seeing the things that actually get done. My life is anything but exemplary, I’m afraid. Going in too many directions to excel in any of them, probably.