Follow

Two Hand-carved Five String Fiddle Scrolls in Progress
First: Lay out the Side Profile
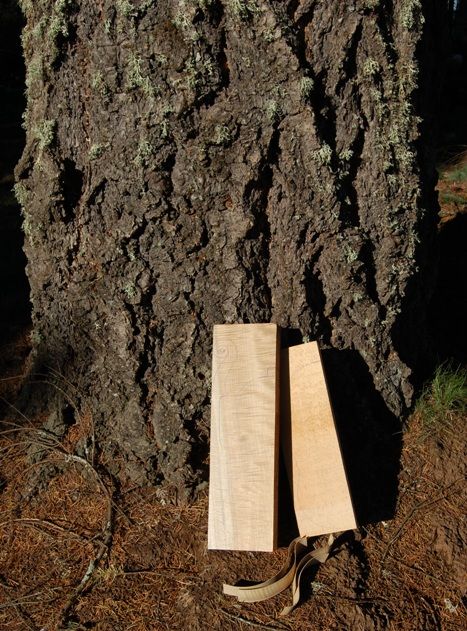
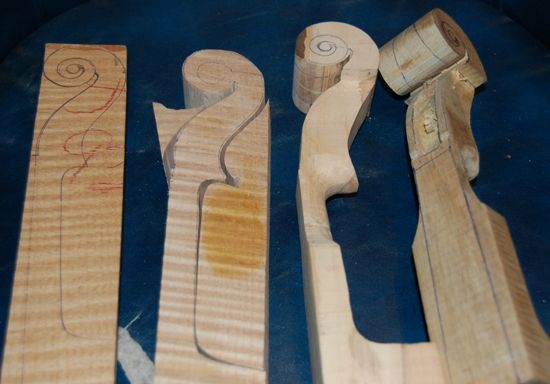
I created a template for a five-string fiddle neck and scroll when I made my first 5 string blue-grass fiddle. The template is fairly crude; just a cutout of thin plywood (door-skin material). I have other templates I have made of aluminum, and still others of plexiglass plastic. But that is the starting place, regardless of template materials. I know how thick the billet needs to be, and how long, so I simply place the template on the billet of curly maple, and trace around it with a ball-point pen. (I used to use a pencil, but the ink is easier to see against the wood.)
Next: Cut out the Profile
I use a band-saw to cut out the profile of plates and necks. I do have a bow-saw that I made for such work, and I can use it if need be. but I find the bandsaw so much easier to control and so much faster, and the results are so much better, that I quit using the bow-saw after about two instruments. It looks nice, hanging on the wall.
Power Tools vs. Hand Tools?
Some people are insistent that the “only right way” to make a hand-made instrument is to use nothing but hand-powered tools. I have built one instrument using only hand tools. I will probably never do so again. There is a reason that bandsaws, drill presses, etc were developed: they not only save wear and tear on your body, they do better work, as a rule. Can they cause damage? Absolutely. So can any tool.
I use a practiced eye and steady hand to guide the billets through a bandsaw. I complete all the carving of each hand-carved instrument using gouges, planes, chisels, and scrapers.
The vast majority of my work is done using hand tools, but there are certain tasks for which I use the appropriate power tool, and make no apology for doing so. (By the way, I live eight miles outside a small town, and when I go to town, I drive…I don’t have a horse, and my time is too valuable (and limited) to walk that far just to satisfy some atavistic “back in time” quirk. I use electric lamps, etc., too, unless we have a power outage.) (sigh… OK, rant over…)
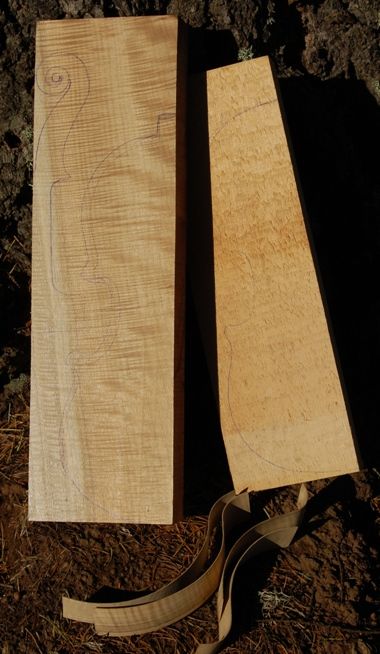
Lay out the Front and Back Shapes
I have a table of measurements I use, to lay out the front and back lines of the scroll and neck. The top of the neck is just over 24mm, the widest part of the pegbox front is 26mm, the distance from the leading edge of the nut to where the neck intersects the top plate is 130mm, and so forth.
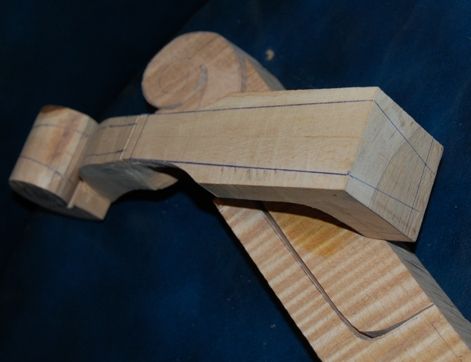
I lay these out using a metric rule, a compass, and a flexible straightedge. The main straightedge is just a stainless steel ruler with a cork backing that I bought from a fabric store. But I need a very flexible straightedge when I am laying out the curly portion of the scroll, so I cut a spiral strip out of a large soft-drink can (actually it was one of those oversized “energy drink” cans. Someone at work had it, and was going to throw it out, so I snagged it and made good use of the thin aluminum sides.) It is about 40mm wide, and long enough to wrap around the scroll, giving me a clean, smooth curve to scribe in with the pen. Aluminum flashing would work, too, but this was free. You can see the layout lines in the next step.
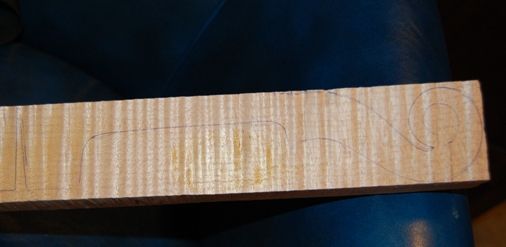
Cut off the Excess Wood from the Pegbox
I use the bandsaw, again, to trim all the waste wood from about two inches down the neck up to where the pegbox begins to disappear under the curve of the scroll. I leave the scroll and almost all of the neck full thickness, so that the billet will sit flat on the drill press table, and I can get the pilot holes for the pegs drilled parallel– perpendicular to the centerline of the neck.
Another nice thing about leaving the handle portion of the neck for last, is that it leaves me two parallel surfaces, so I can clamp the scroll in a vise, and use both hands to control the gouge, plane, saw, or other hand tool.
Layout and Drill the Peg Pilot Holes
Some people wait until the whole violin is completed, including varnishing, to drill the peg holes, but I find it too difficult to get them parallel with one another that way. If I can drill a 1/8″ pilot hole for each of them, using a drill press, so that they are exactly perpendicular to the center of the neck, I find it much easier to complete the neck later, than if I have to try to get them right with no flat surface from which to reference the perpendicularity of the holes. You’ll see these holes in the next blog post. So long as they get done before I cut the excess wood from the neck and scroll, I will be OK, because the neck will still sit squarely on the drill press table.
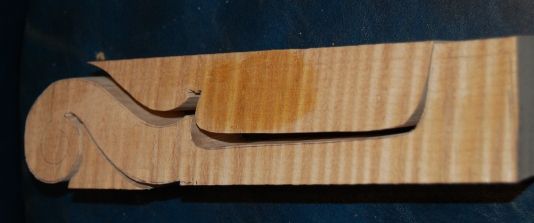
Carve the Pegbox
There are several ways to do this. A lot of makers use a drill to hog out the waste wood from the hole, and then use chisels and gouges to smooth and complete the work. I usually just use the chsels and gouges right from the beginning…one mistake with the drill, and the scroll becomes firewood.
I use a narrow, flat chisel to begin the work, and develop some depth, then use a wider, flat chisel to flatten the inside of the pegbox “cheeks,” and to deepen the box floor. I have to be careful to not go too deep. I have (once) cut so deep that, later, when I cut the fluting (volute) from the outside, I cut through into the interior of the pegbox. That is another good way to transform a nice scroll into firewood. Pretty sad when that happens.
I tend to begin by carving the outside of the pegbox heel… it makes me feel better about the scroll, if something about it is already starting to look like a finished scroll.
I will show photos of the succeeding steps in the next blog post. What you see above, though, is the beginning of all those nice violin, viola, cello, bass and five string fiddle scrolls you have enjoyed looking at.
Thanks for reading.